I am always amazed at how messy my desk becomes when I get going on a project and how often I’ve “lost” dies and stamps amongst the creative clutter! I created this stand-up storage tool on which to temporarily place the dies and stamps I need so I know where to find them while I work.
The black side is a magnet and can hold wafer thin dies (or other metal bits and bobs). The white side is a laminated surface and can hold clear or cling stamps. (You can also jot notes on it with a dry erase marker.)
It folds flat and fits in a regular A2 size envelope or card sleeve for storage. Because of this, I can keep it with my cutting plates and platform, and it is also great for travel when I craft away from home.
*
*
If you care to see how I made it, continue reading…
Easel cards look like you fussed a little more than a traditional, folded card, but they are actually SUPER easy to make! Simply create a folded card base as usual and then fold the front in half. Basic easel cards are folded in half parallel to the fold. For a twisted easel, fold the front in half on a diagonal instead of parallel to the fold. Then, add a focal panel to your decorated base. (More detailed instructions are included below.)
You can see the two (diagonal) halves of the card front in this photo:
The base is also the “inside” of the card.
And this is what it looks like when it comes out of the envelope (folded flat):
Here’s how I created my twisted easel card:
Create the base. (Decorate as desired.)
(click on image to enlarge)
Cut and decorate your focal panel and adhere to card base as shown. (DO NOT put adhesive on the entire back of the focal panel. While the panel will ultimately be centered on the card front, the adhesive should not cross the fold.)
(click on image to enlarge)
Use the diagonal score line to help you line up your focal image.
(click on image to enlarge)
With the closed card flat on the table, open the card and fold the front down (mountain fold). The attached focal panel stands up creating the easel effect.
*
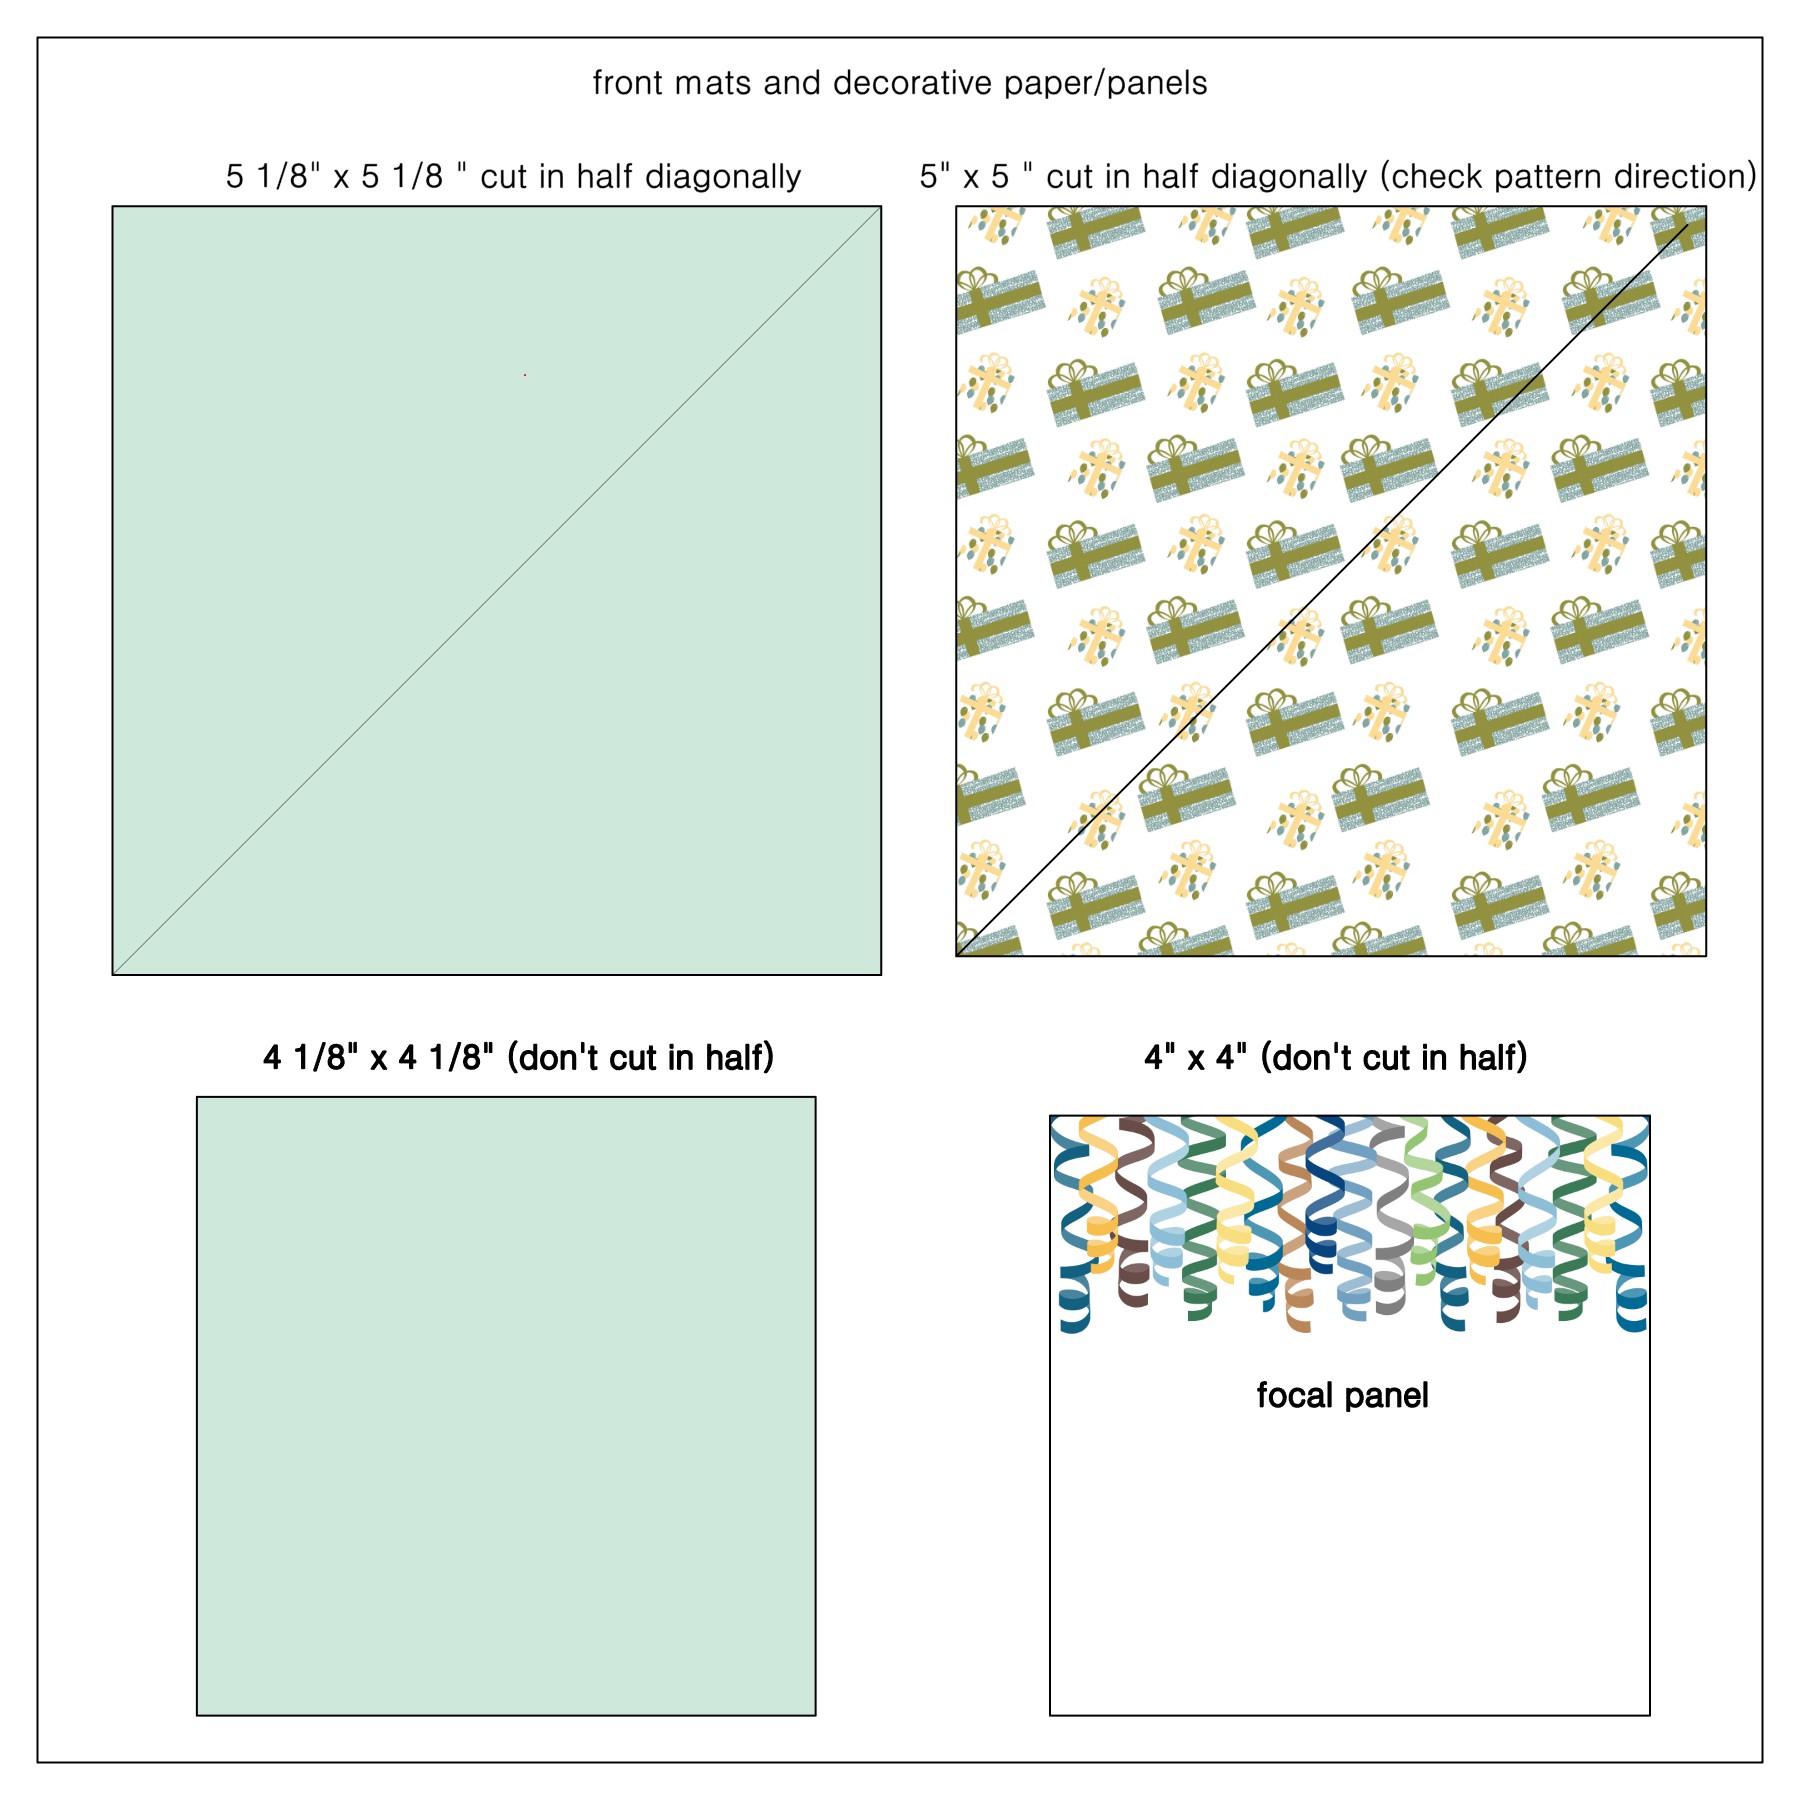
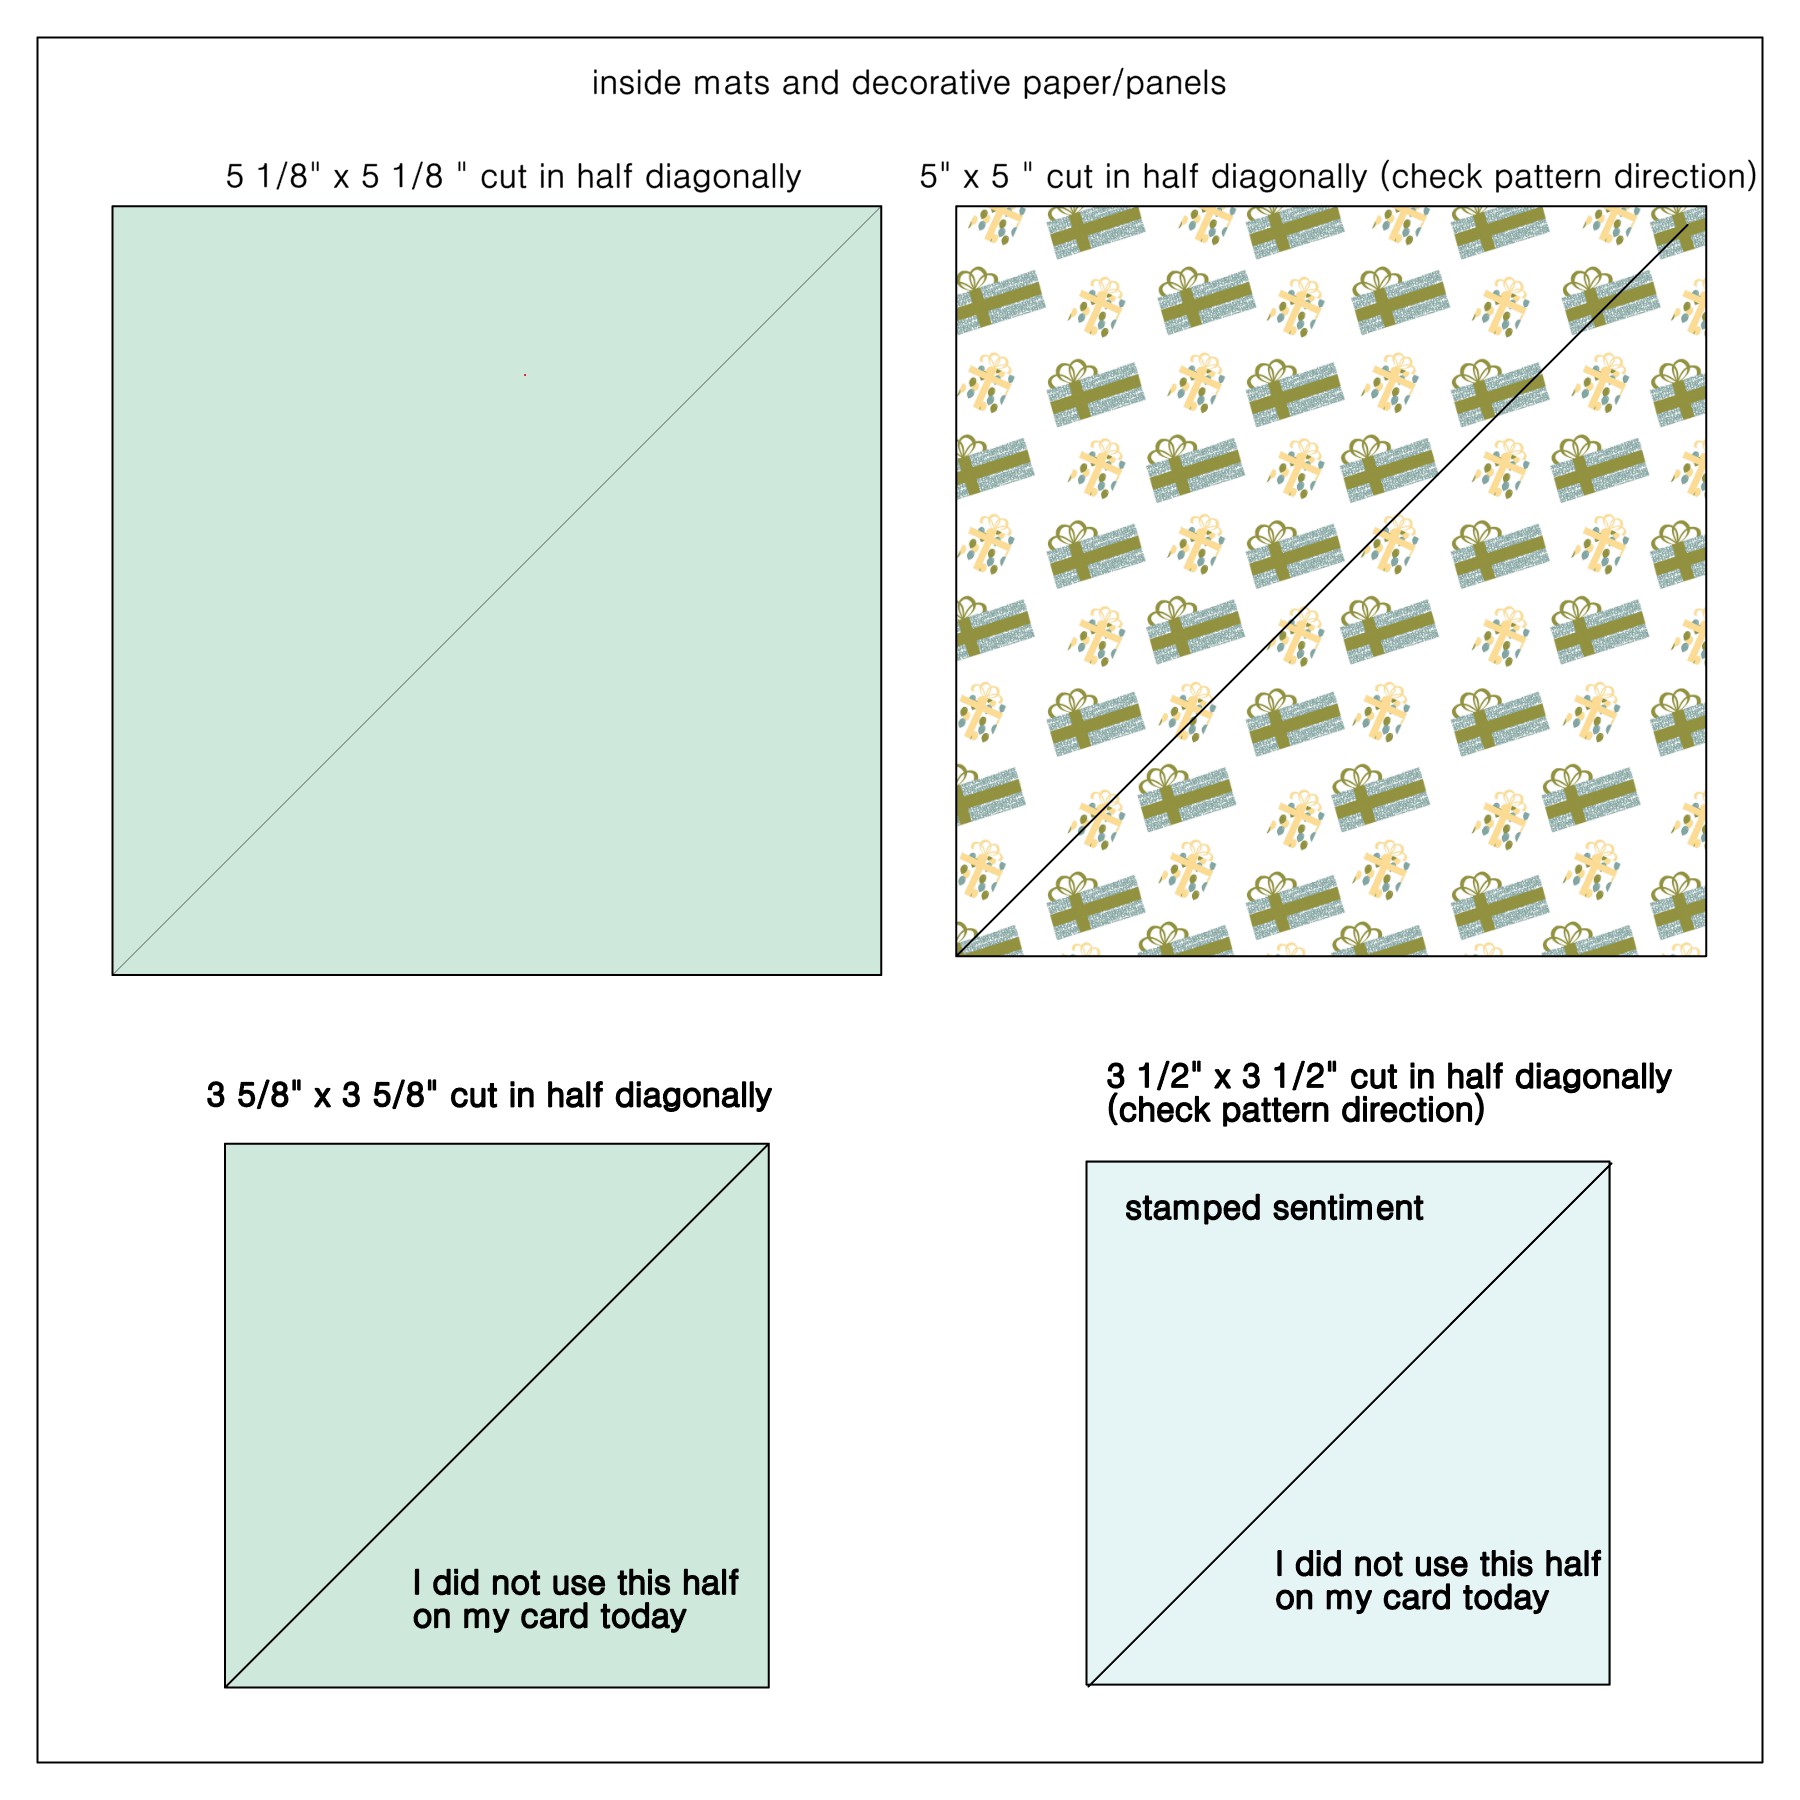
Here are my panel measurements:
For the front:
(click on image to enlarge)
For the inside:
(click on image to enlarge)
I used a square for my focal panel, but other shapes could also be used.
Originally, I had a square panel on the inside, and then I struggled with what to add as a “stopper” so the easel stayed up when opened. In the past, I’ve popped up a sentiment or die cut to sit in front of the opened easel. I had already made my sentiment panel and everything else I tried to add to the patterned paper interfered with the soft print. I ended up splitting the inside panel into triangles, and now the easel can sit in the center channel.
The paper I used is from the “Our Family Tree” 12 x 12 paper pad from The Paper Studio. I wanted to use silver card stock for the mats to add some elegance, but the paper is kind of vintage looking, so I made my borders super thin for just a touch of silver. My focal panel is pretty big to accommodate the large greeting die cut. Measurements can be adjusted if you want larger borders or a smaller focal panel.
The greeting was cut with the “Happy Mother’s Day Phrase” die by Cottage Cutz. The circles were made with my “Bubbles Border Punch” by Fiskars (no longer available?). The inside sentiment is from the “Fabulous Holiday Fillers” stamp set by Gina K Designs (no longer available).
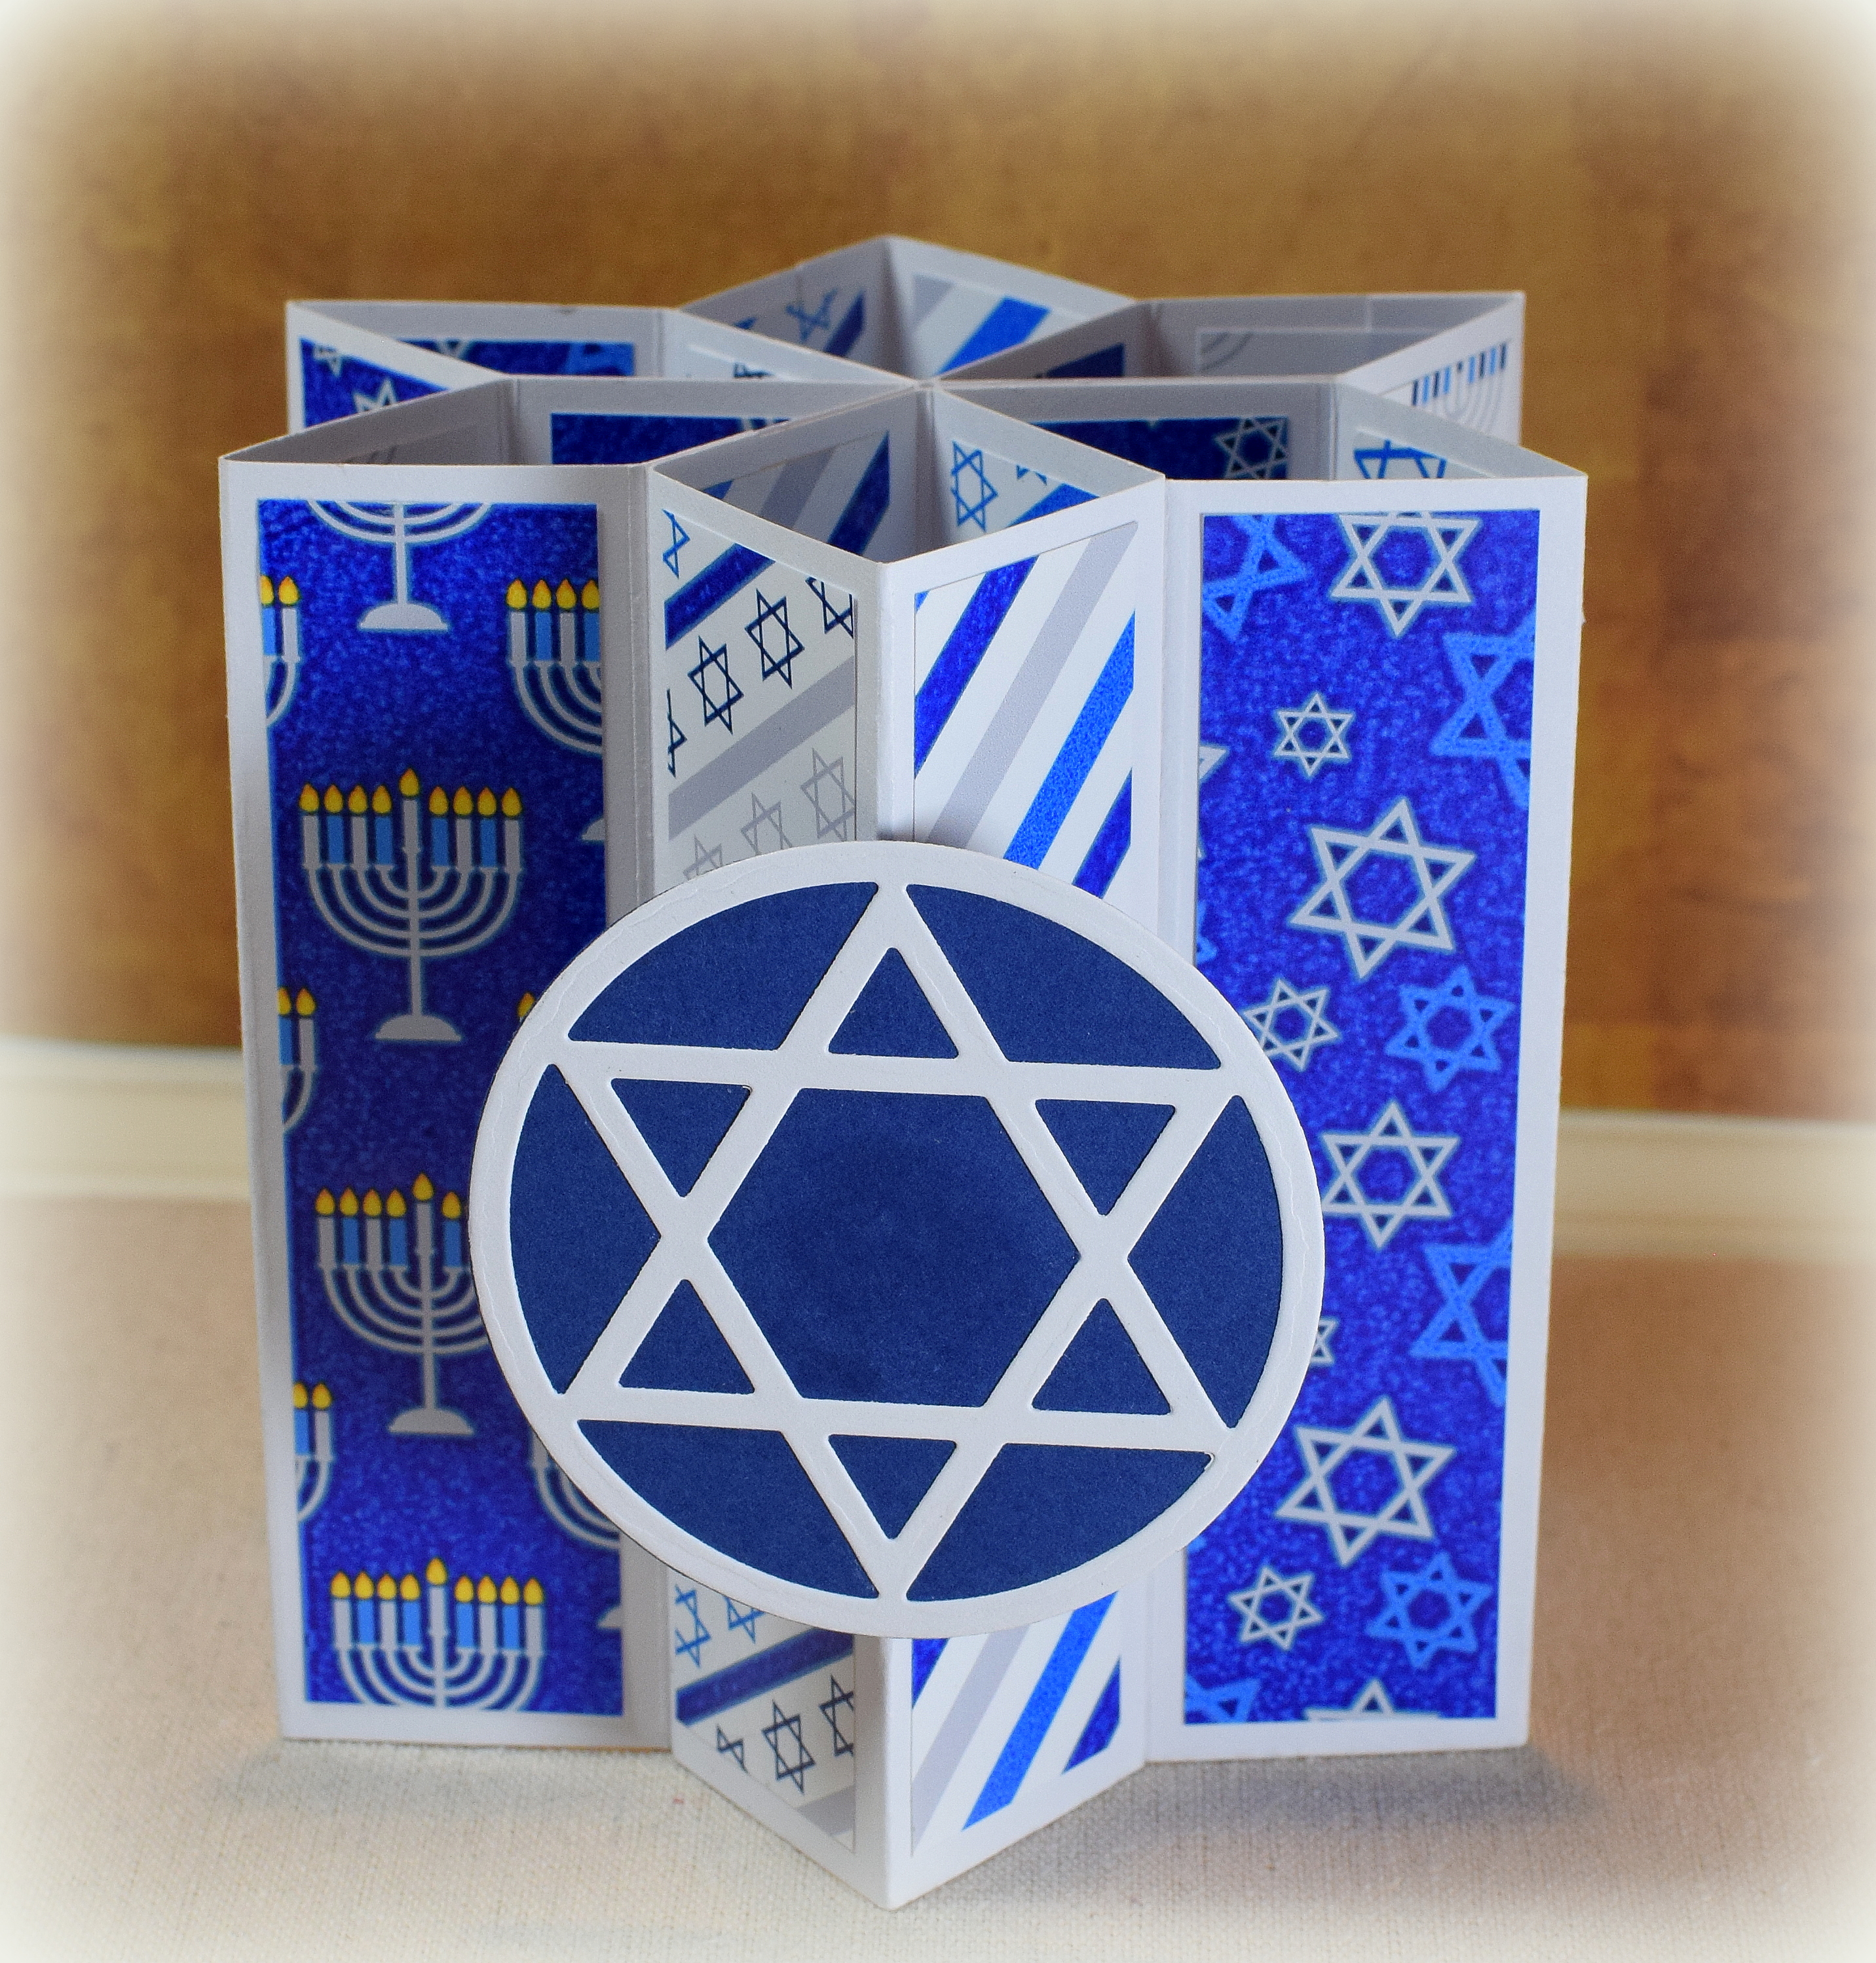
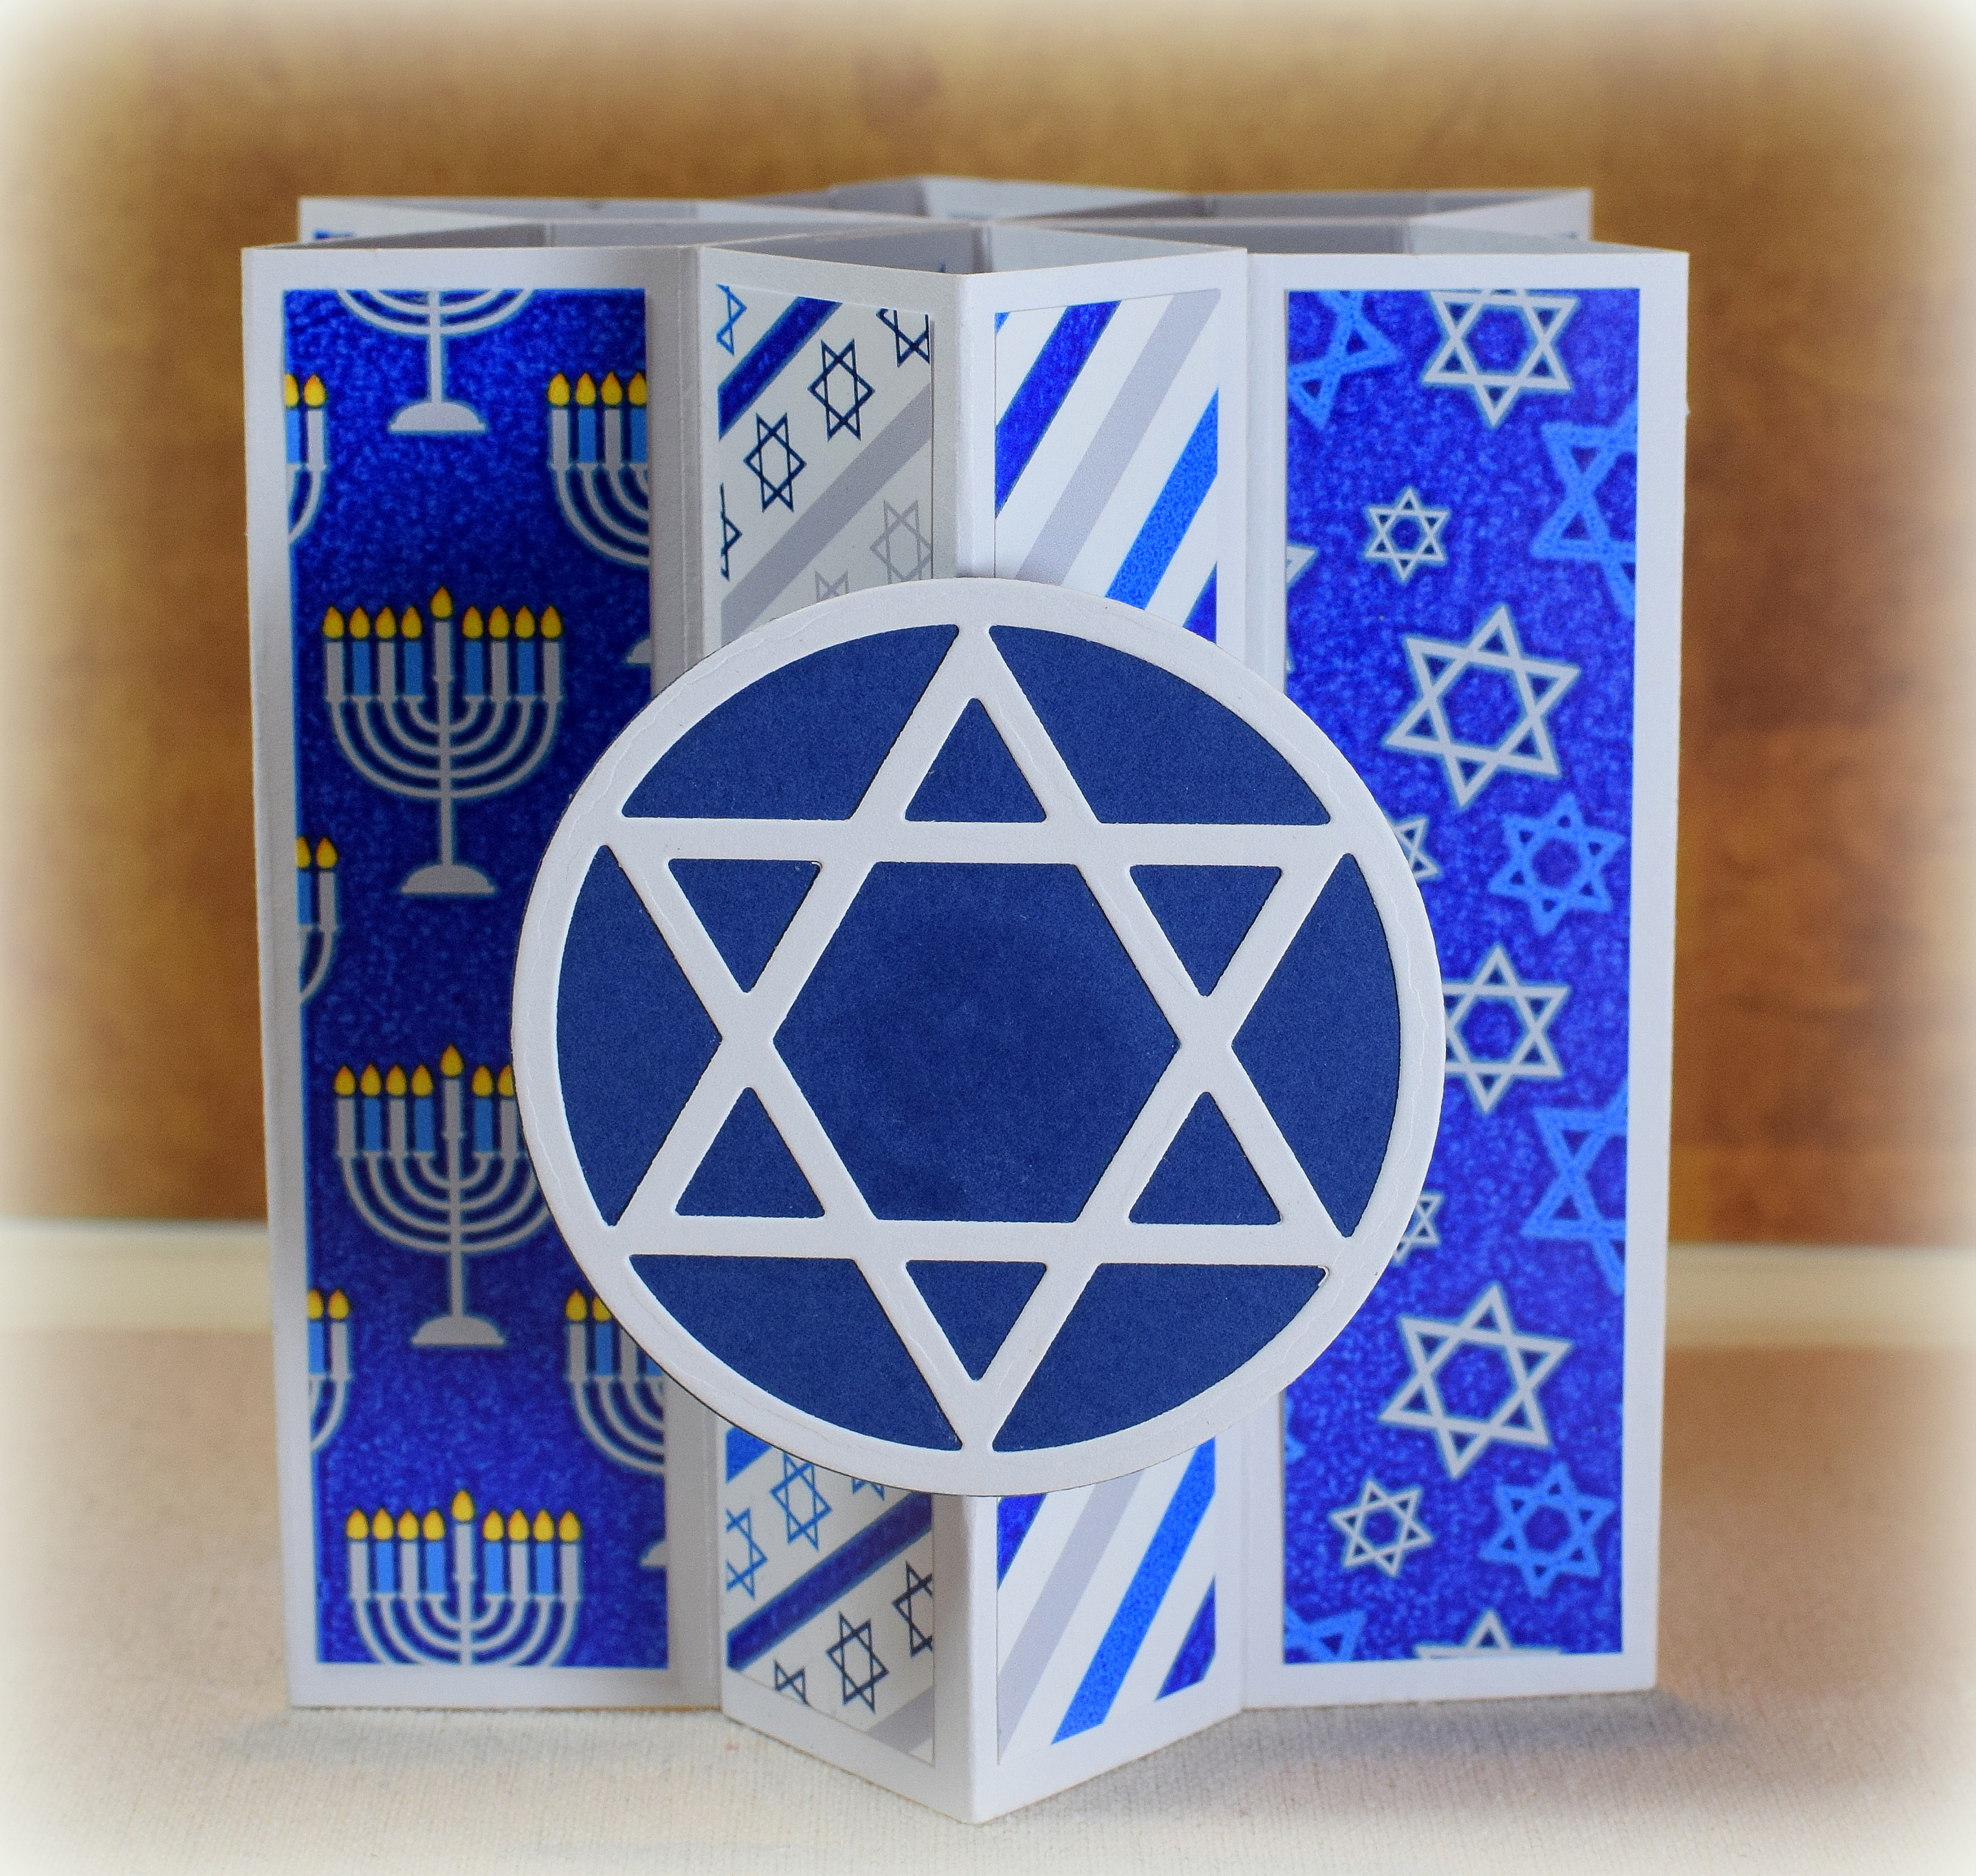
I saw this card base design online (I wish I could remember where) and went to work to figure out how to make it. (No instructions were given; I’ve included instructions below on how I made mine.) The sample I saw was also a Hanukkah card; I think it would work well for a snowflake themed card as well.
The patterned paper is from a digital pack called Silver and Blue Hanukkah Paper by KlouiseDigiArt that I purchased on Etsy. The focal star is from “Menorah Medley Die Collection” from Papertrey Ink (no longer available?). I added another circle panel to the back for my sentiment which is from the “Blessed Hanukkah” stamp set from Altenew.
This card folds flat for mailing and fits in an A2 sized envelope. (The flattened card measures 4 1/4″ x 5″.)
If you care to see how I made this card base, continue reading…
Previously, I used this fold to make a Christmas tree, but it can also be used to make a skirt or the bottom half of a wedding dress as I have done HERE.
Comments Not Showing Up on Blogger Sites (and how I fixed it)
I just wanted to mention that I have been having a problem leaving comments on blogspot sites I follow by email. I submit the comments, but they do not appear in the comment section with all the others. At first I thought that the comments just needed to be moderated, but now I am not sure what is going on. Anyway, I just want you all to know that I look at, and enjoy, all the posts I receive email notifications for even if I cannot tell you on your site. Hopefully this is only a temporary glitch.
Update: It appears it was a google+ issue (due to the recent shut down March 2019).
Comments: Support for Google+ Comments will be turned down, and all blogs using Google+ Comments will be reverted back to using Blogger comments on 4 February 2019. Unfortunately, comments posted as Google+ comments cannot be migrated to Blogger and will no longer appear on your blog.
Google+ Profile: In March 2019, Blogger will revert to only having Blogger profiles. Users that have selected a G+ profile in the past will appear as unknown authors until they next login to Blogger and supply a new display name and avatar.
I changed my blogger user profile setting to blogger (instead of google+ which is what it had been – I didn’t even know I had a blogger profile – lol!!), and now I am able to leave comments on blogger sites again. Hopefully this is the end of the issue. It’s frustrating that I’ve been leaving comments for days and they haven’t been posting. Sigh...
I found this tutorial HERE if you haven’t switched from a Google+ Profile to a Blogger Profile yet and need help. (This link jumps right to the part of the article where you change your user profile, but the rest of the article is helpful if you need to set up and configure your blogger profile.)