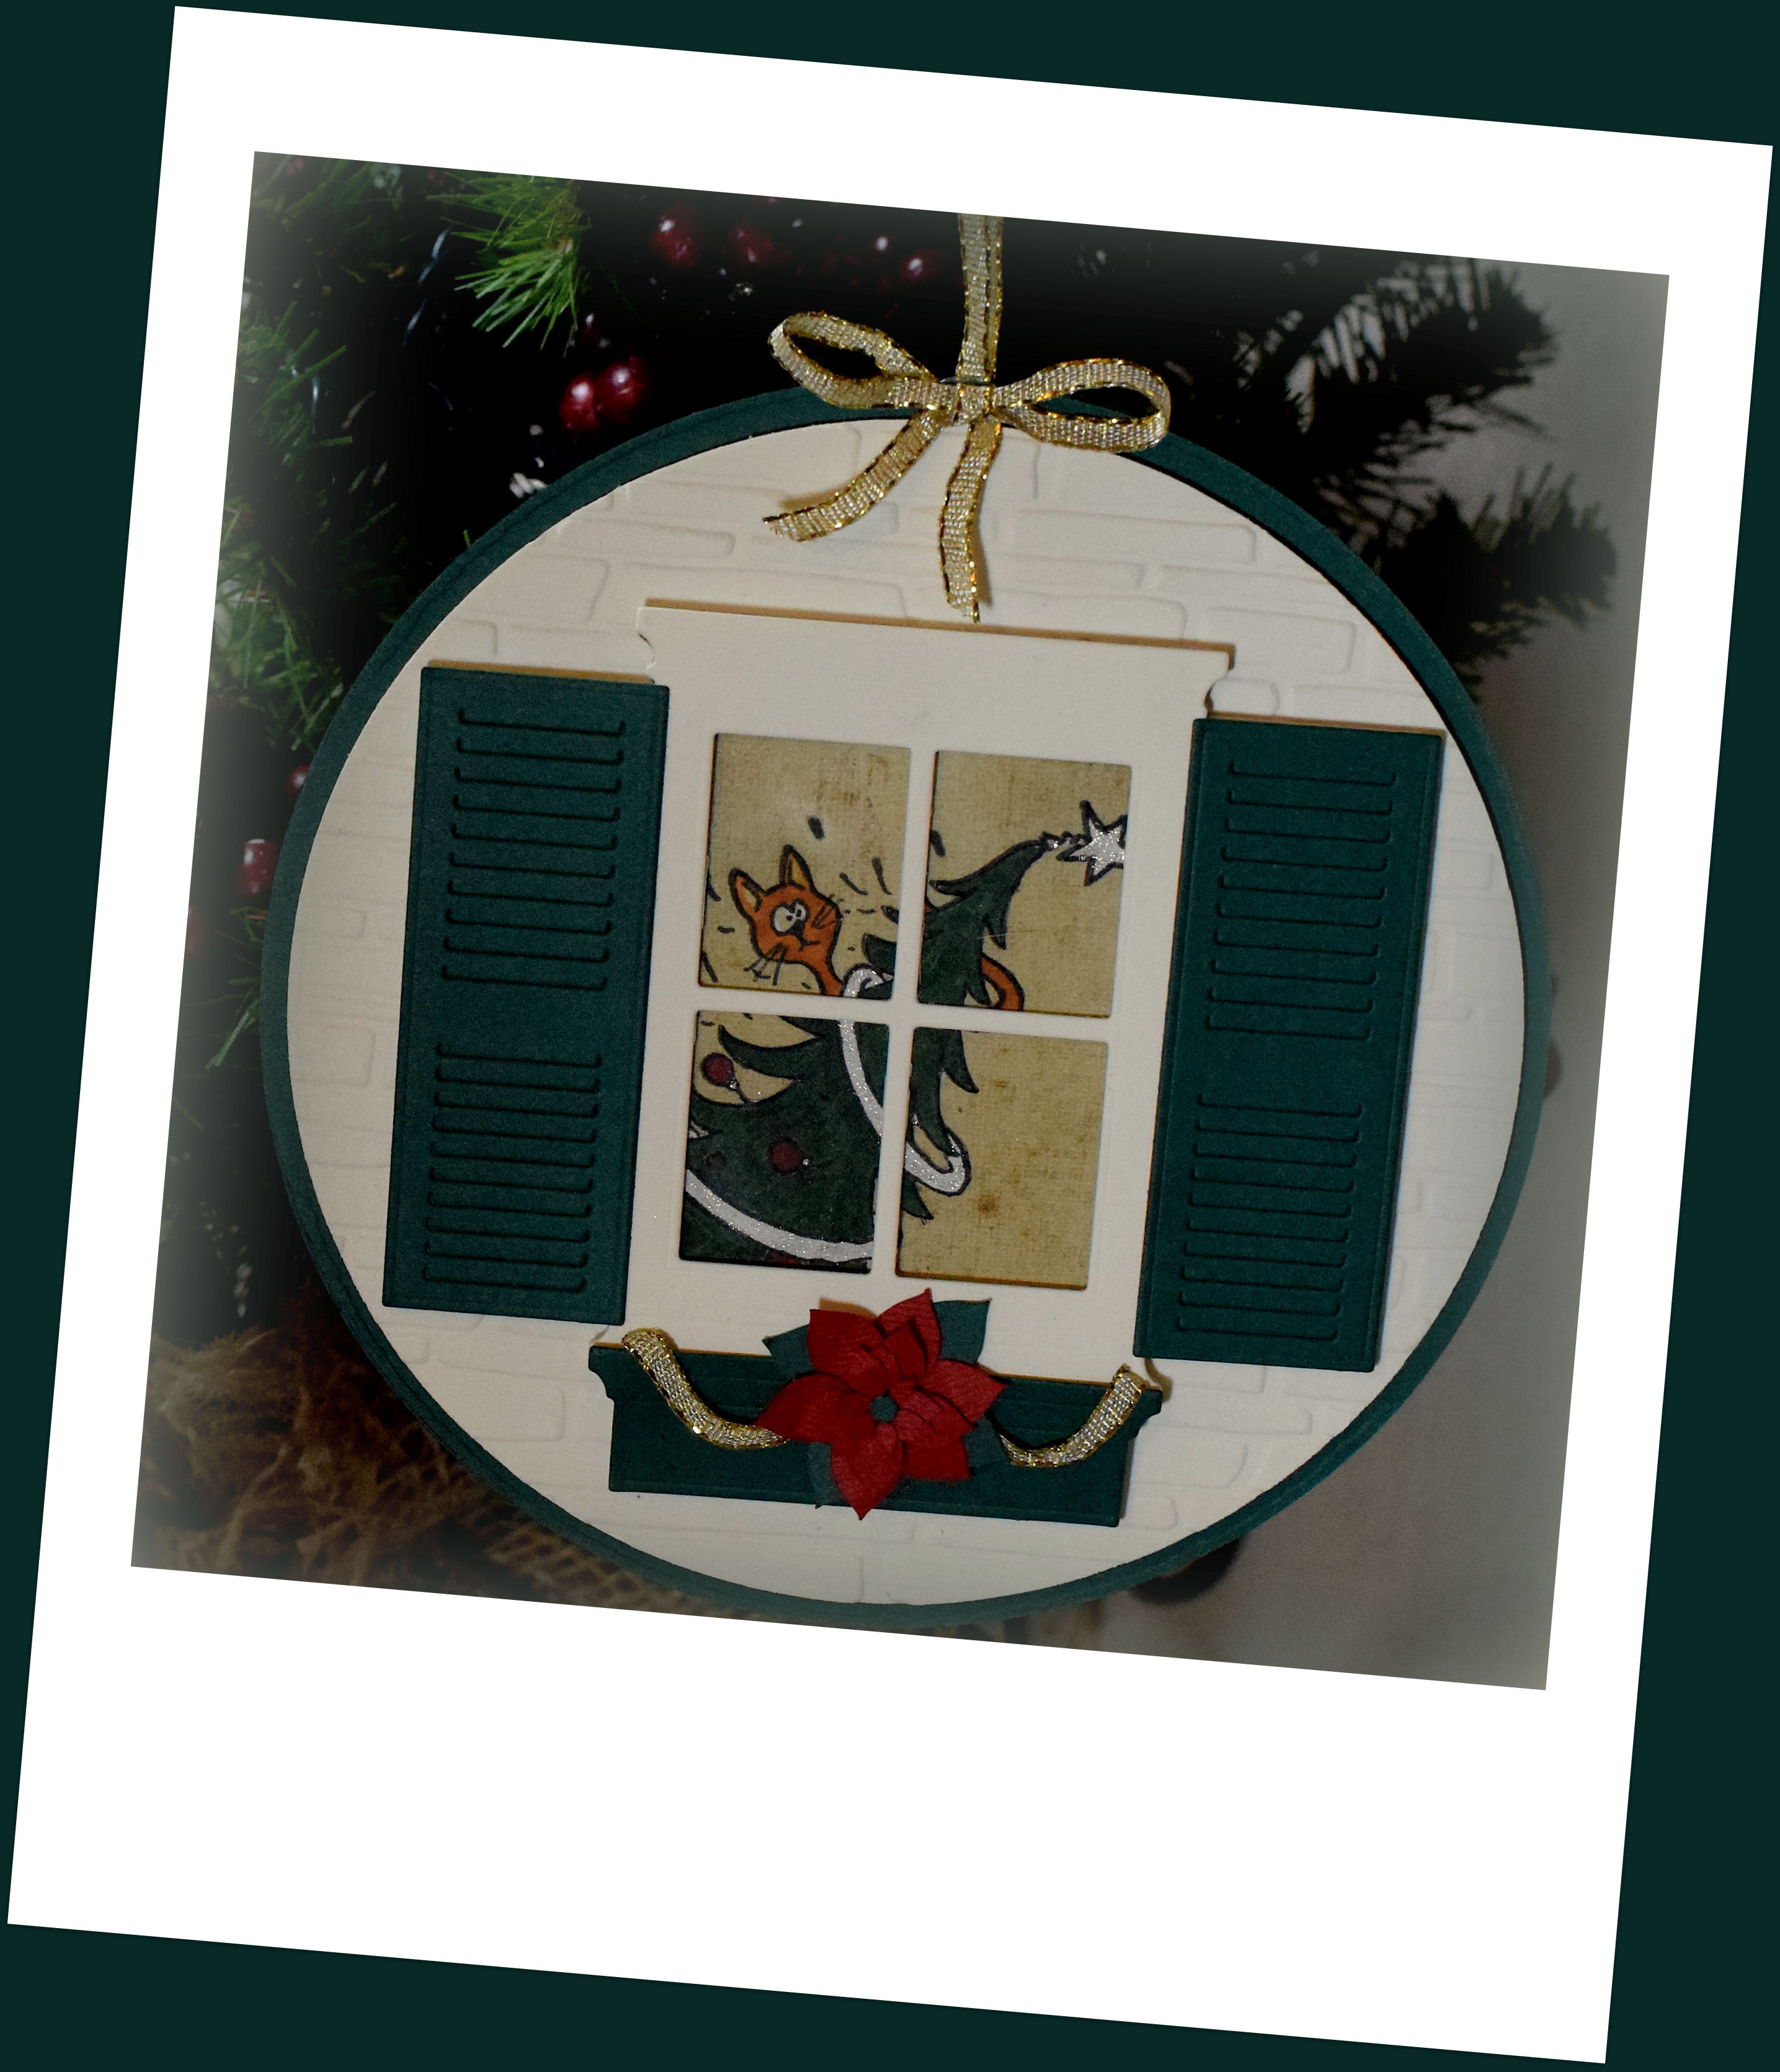
Window Scene Ornament
Here is another ornament for the “2016 RubberHedgehog Ornament Challenge” which is going on until November 30, 2016. (HERE is this year’s gallery, and HERE are the 2015 submissions and winners.) Pop on over and check it out!
Any stamps used on the ornaments for the challenge must be by RubberHedgehog, and the stamp I used for this project is “Christmas Tree Cat” (item: K-10204).
I created a die cut for this image with my Silhouette electronic die cutting machine. The image was stamped on the die cut (white card stock) with Memento Tuxedo Black ink and colored with Copic Markers (G28, R59, YR24, YR27, and E44) and a Sakura glitter pen. The colored die cut image was then adhered to a piece of patterned paper from the “Signature Christmas” 6×6 designer paper pad by My Minds Eye.
The window, shutters and flower box were created with dies by Poppystamps, Inc. (Small Madison Window, style no. 816; Small Madison Window Shutter, style no. 833; and Small Flower Box, style no. 823) and my Cuttlebug. A piece of acetate was adhered behind the window and all these pieces were popped up with Scotch foam mounting tape.
The circle panels were cut with two dies from the We R Memory Keepers Nesting Circles die set, and the smaller one was embossed with the Spellbinders M-Bossabilities Bricks and Bark (EL-015) embossing folder (discontinued?).
The Poinsettia was cut with my Silhouette using a file from the “3D Wintergreens” SVG Kit by SVGCuts.
Card stock used was Recollections heavy weight ivory, Gina K Designs Christmas Pine, and a scrap of red I believe came from a value pack from AC Moore. Gold “Celebrate It” wire edged ribbon (#18634) from Michaels was also used.

Thanks for checking out my ornament post!
This content uses referral links as described in the disclosure policy on my sidebar.