Decorating the Hut for the Holidays (Ornament)

The “2016 RubberHedgehog Ornament Challenge” is underway, and submissions will be accepted through November 30, 2016. (HERE is this year’s gallery, and HERE are the 2015 submissions and winners.) Pop on over and check it out!
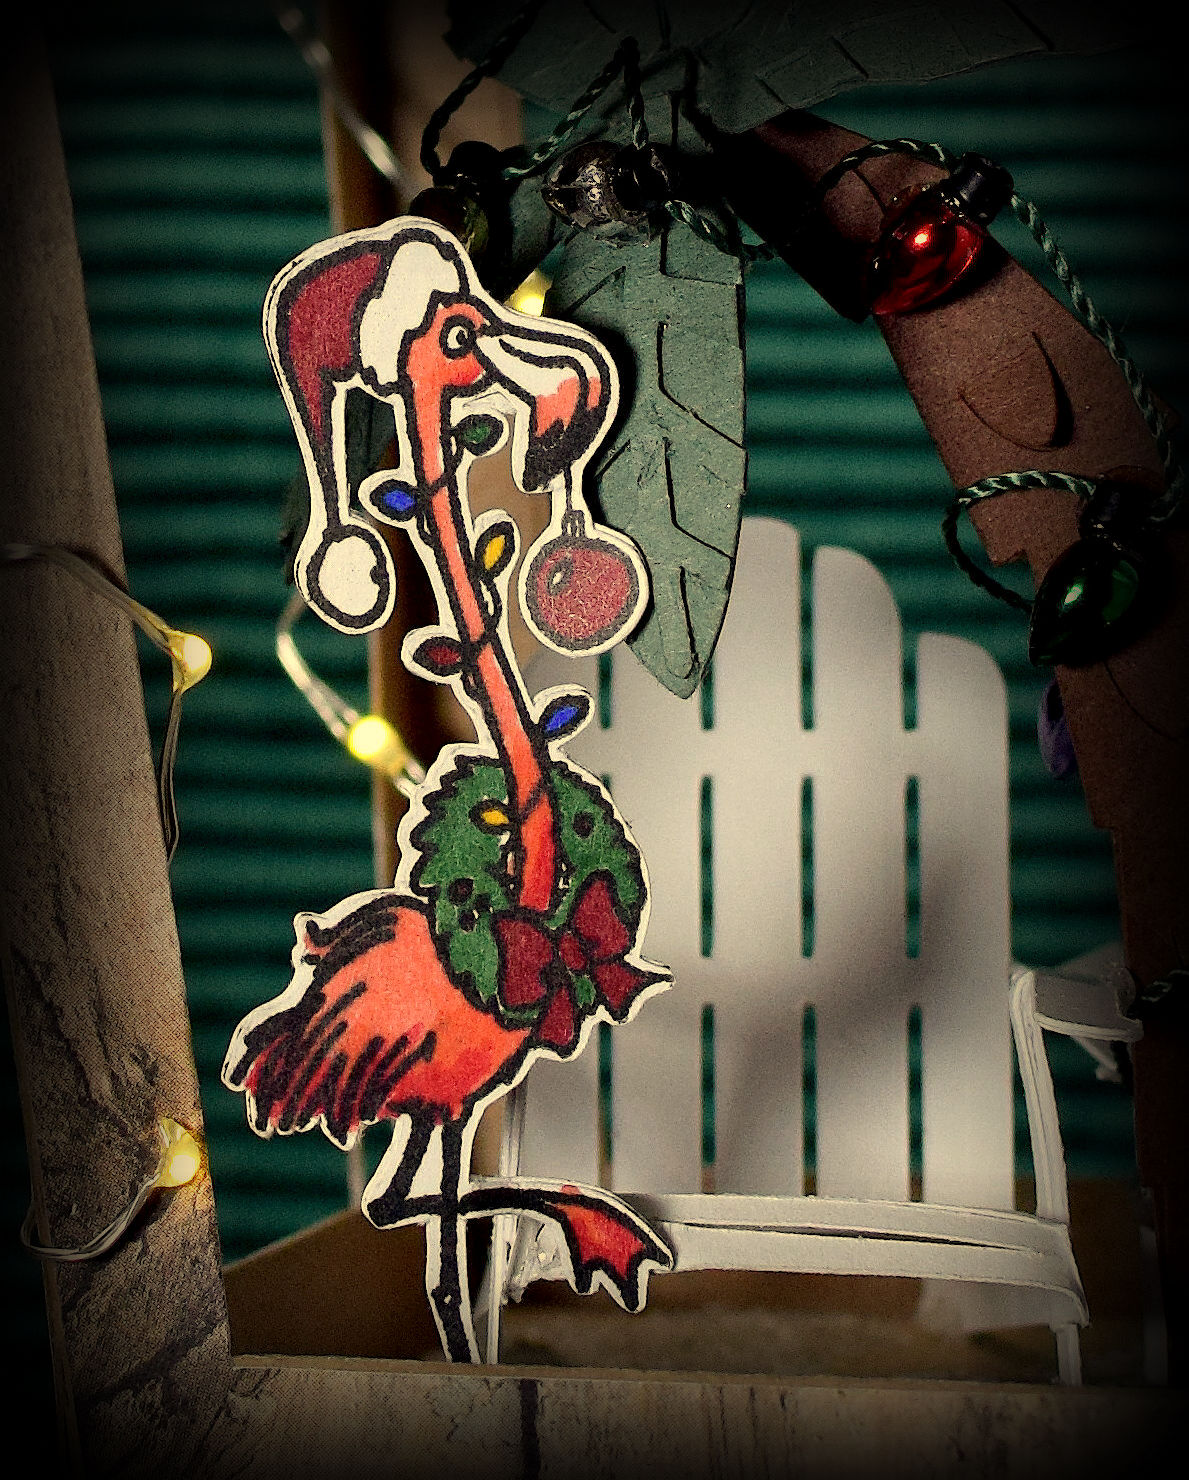
Any stamps used on the ornaments for the challenge must be by RubberHedgehog, and the stamp I used for this project is “Christmas Flamingo” (item: J-26311).
For this ornament, I started with the lantern svg file from the svg kit from svgcuts called Crisp Days of Fall. The kit contains the cut files to make a lantern with fall leaves, but also provided is a plain panel to which you can add your own design so it can be made for a variety of occasions. To make my beach hut, I used the plain panel file for three of the sides, adapted the back panel so it too was plain, and left the whole structure open.
My beach hut was cut from Recollections Kraft card stock with my Silhouette electronic die cutting machine. I created a cut file for decorative panels for the sides and used “Wooden Fence (#154484)” printed paper from The Paper Studio (Hobby Lobby) to make it look like wood. I used individual strands of raffia for the thatched roof, but if I were to do it again, I would make sure the raffia was natural and not rayon or some other synthetic, plastic material. With this particular raffia, I could not get the glue to hold the strands in place and ended up using lots of double sided scor tape.
I created a cut file of the flamingo with my Silhouette software and stamped the image with Versafine Onyx Black ink onto the die cut. Since the beach hut is open on all four sides, I wanted the back of the flamingo to also be stamped/finished so I did some mirror stamping on a second die cut. To do this, I stamped the image, from the original stamp, onto a plain piece of gasket rubber and then stamped that image onto the back of the second die cut. These two stamped images were colored with Copic Markers (R14, R29, G28, R59, Y17, B29, and E74) and a wink of stella pen (for the white) and glued together so the flamingo showed on the front and back.
The Adirondack chair and box of ornaments (hiding behind the tree) were both portions of svg files I purchased from 3DCuts. These were cut from white card stock with my Silhouette and assembled. Here is a better view of the box of ornaments:
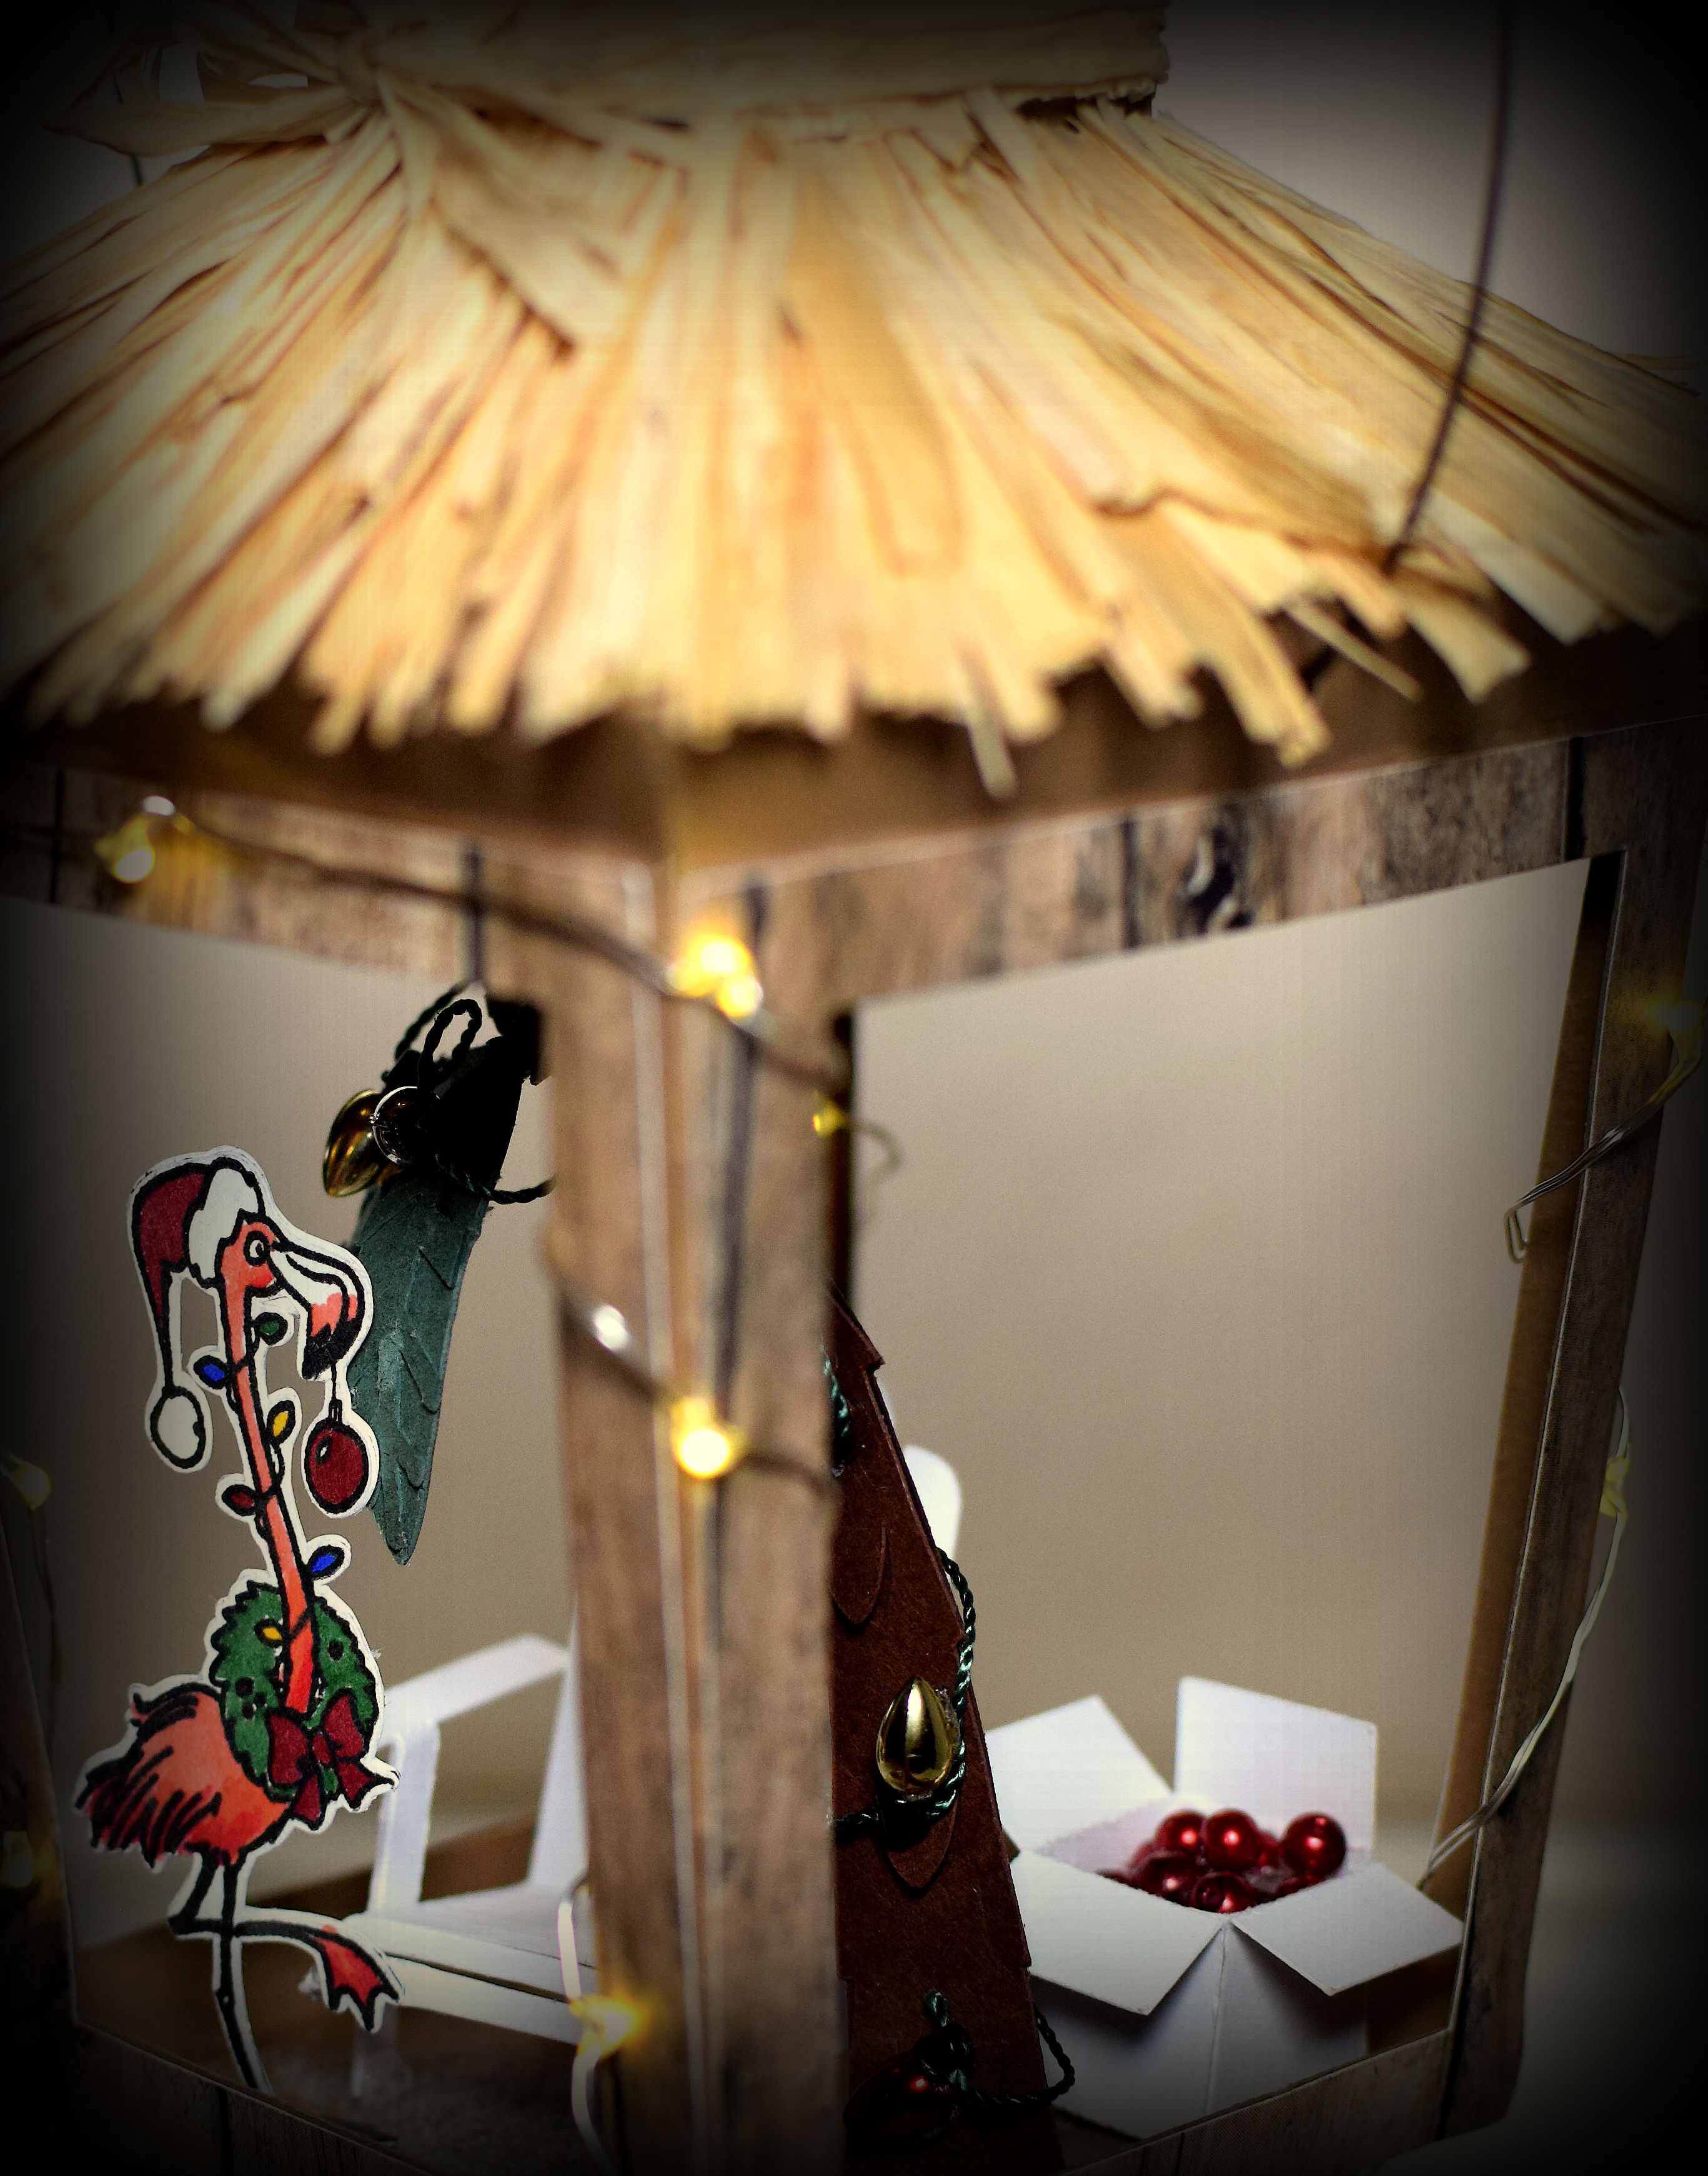
The palm tree was part of the “Palm Tree 3D Nut Cup Place Card (design #63447)” file by Snapdragon Snippets that I purchased from the Silhouette Store. I only used the palm tree, and resized it to fit in my ornament. For the tree, I used brown and green card stock (both unmarked) I had in my stash.
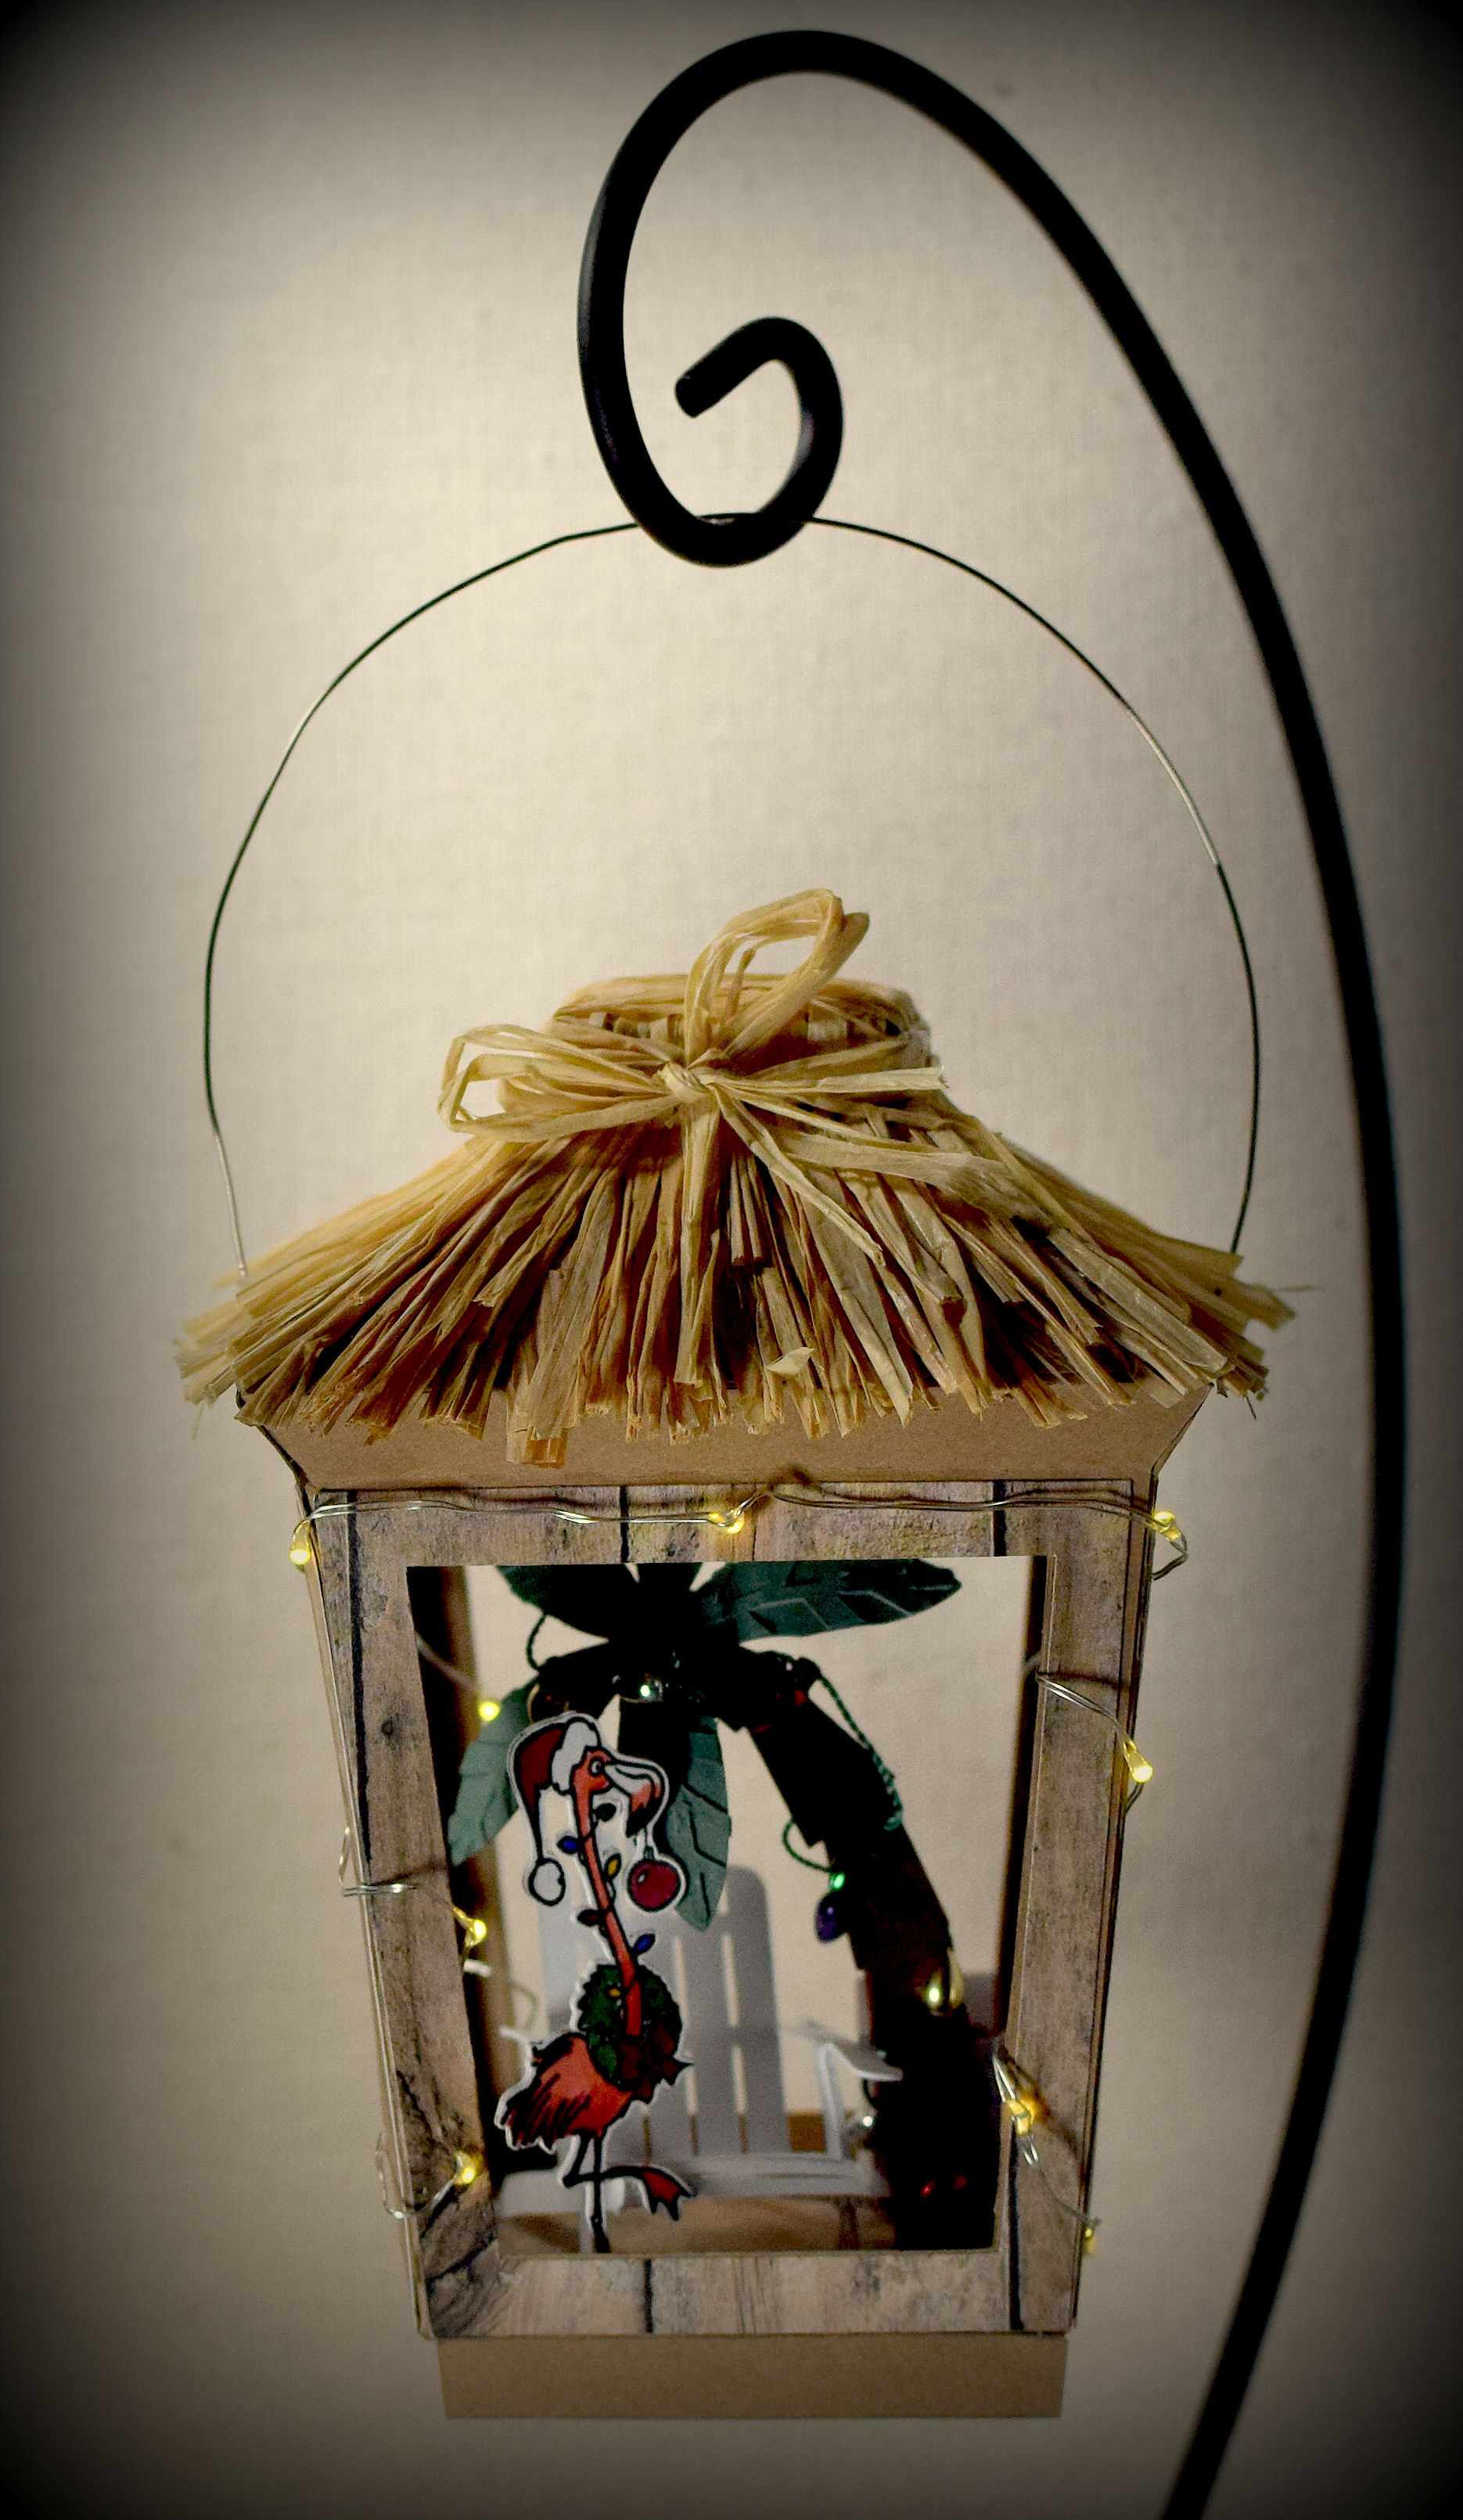
Additional embellishments for my ornament included Mini Tree Treasures “bulb garland” by Nicole (MTT437) that I found with the decorations for the mini Christmas trees at AC Moore (used on palm tree), small red beads by Designs by Me (ornaments in box), battery operated micro LED lights (on outside of hut), and a bit of Ocean City sand scattered and glued to the floor of the hut. 20 gauge “gun metal” wire by Bead Landing was used as the hanger.
Thanks for checking out my project post!
This content uses referral links as described in the disclosure policy on my sidebar.


Ha ha… what a cool, clever and funny idea! That’s just awesome Lisa!
Hugs
Doris
*DT* Die Sketchtanten
*DT* The Sketchy Challenges
Kleido’s BastelStüble
Blog-owner Do-Al(l) Kreatives
LikeLike
Love your hilarious theme for this ornament. I think it is a winner!
LikeLike
Pingback: A “2016 RubberHedgehog Ornament Challenge” Winner! | I Played With Paper Today!