Pop-Up Wedding Cake Card

Join us over at Perfectly Rustics for a new challenge. This fortnight, the challenge is to create a pop-up card. (http://perfectlyrustics.com/2015/05/18/prdc-no-48-pop-up/)
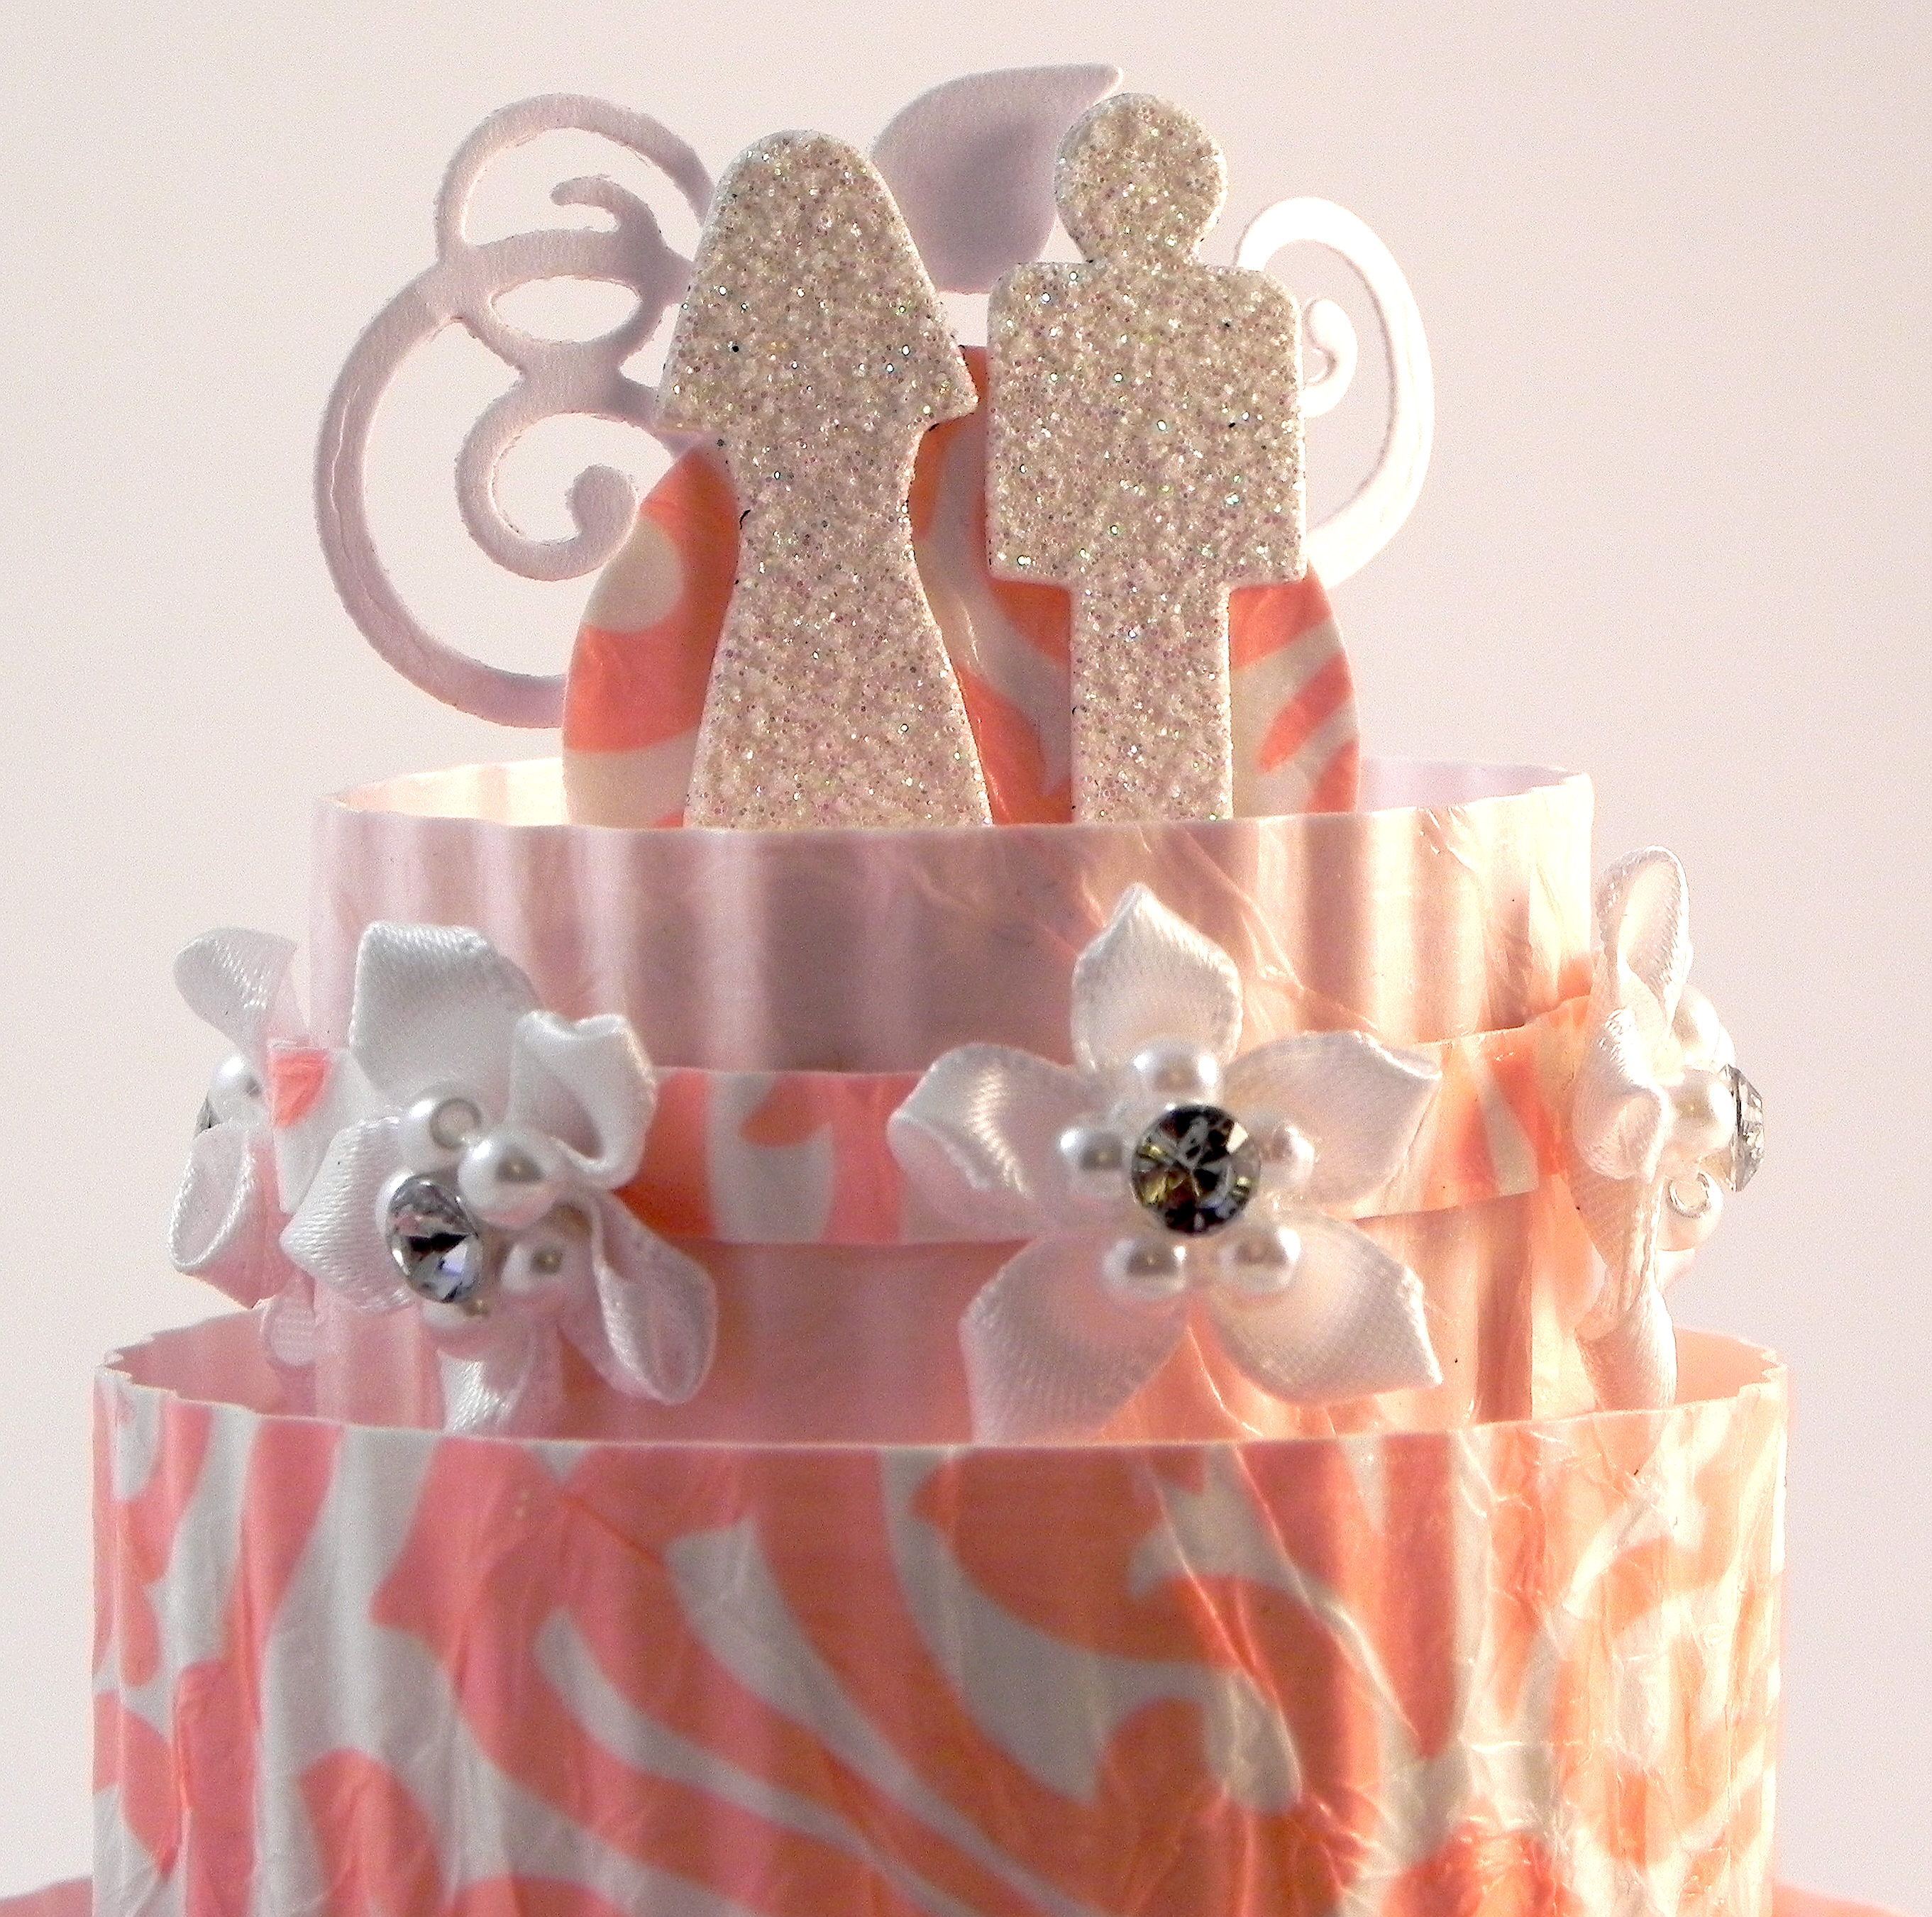
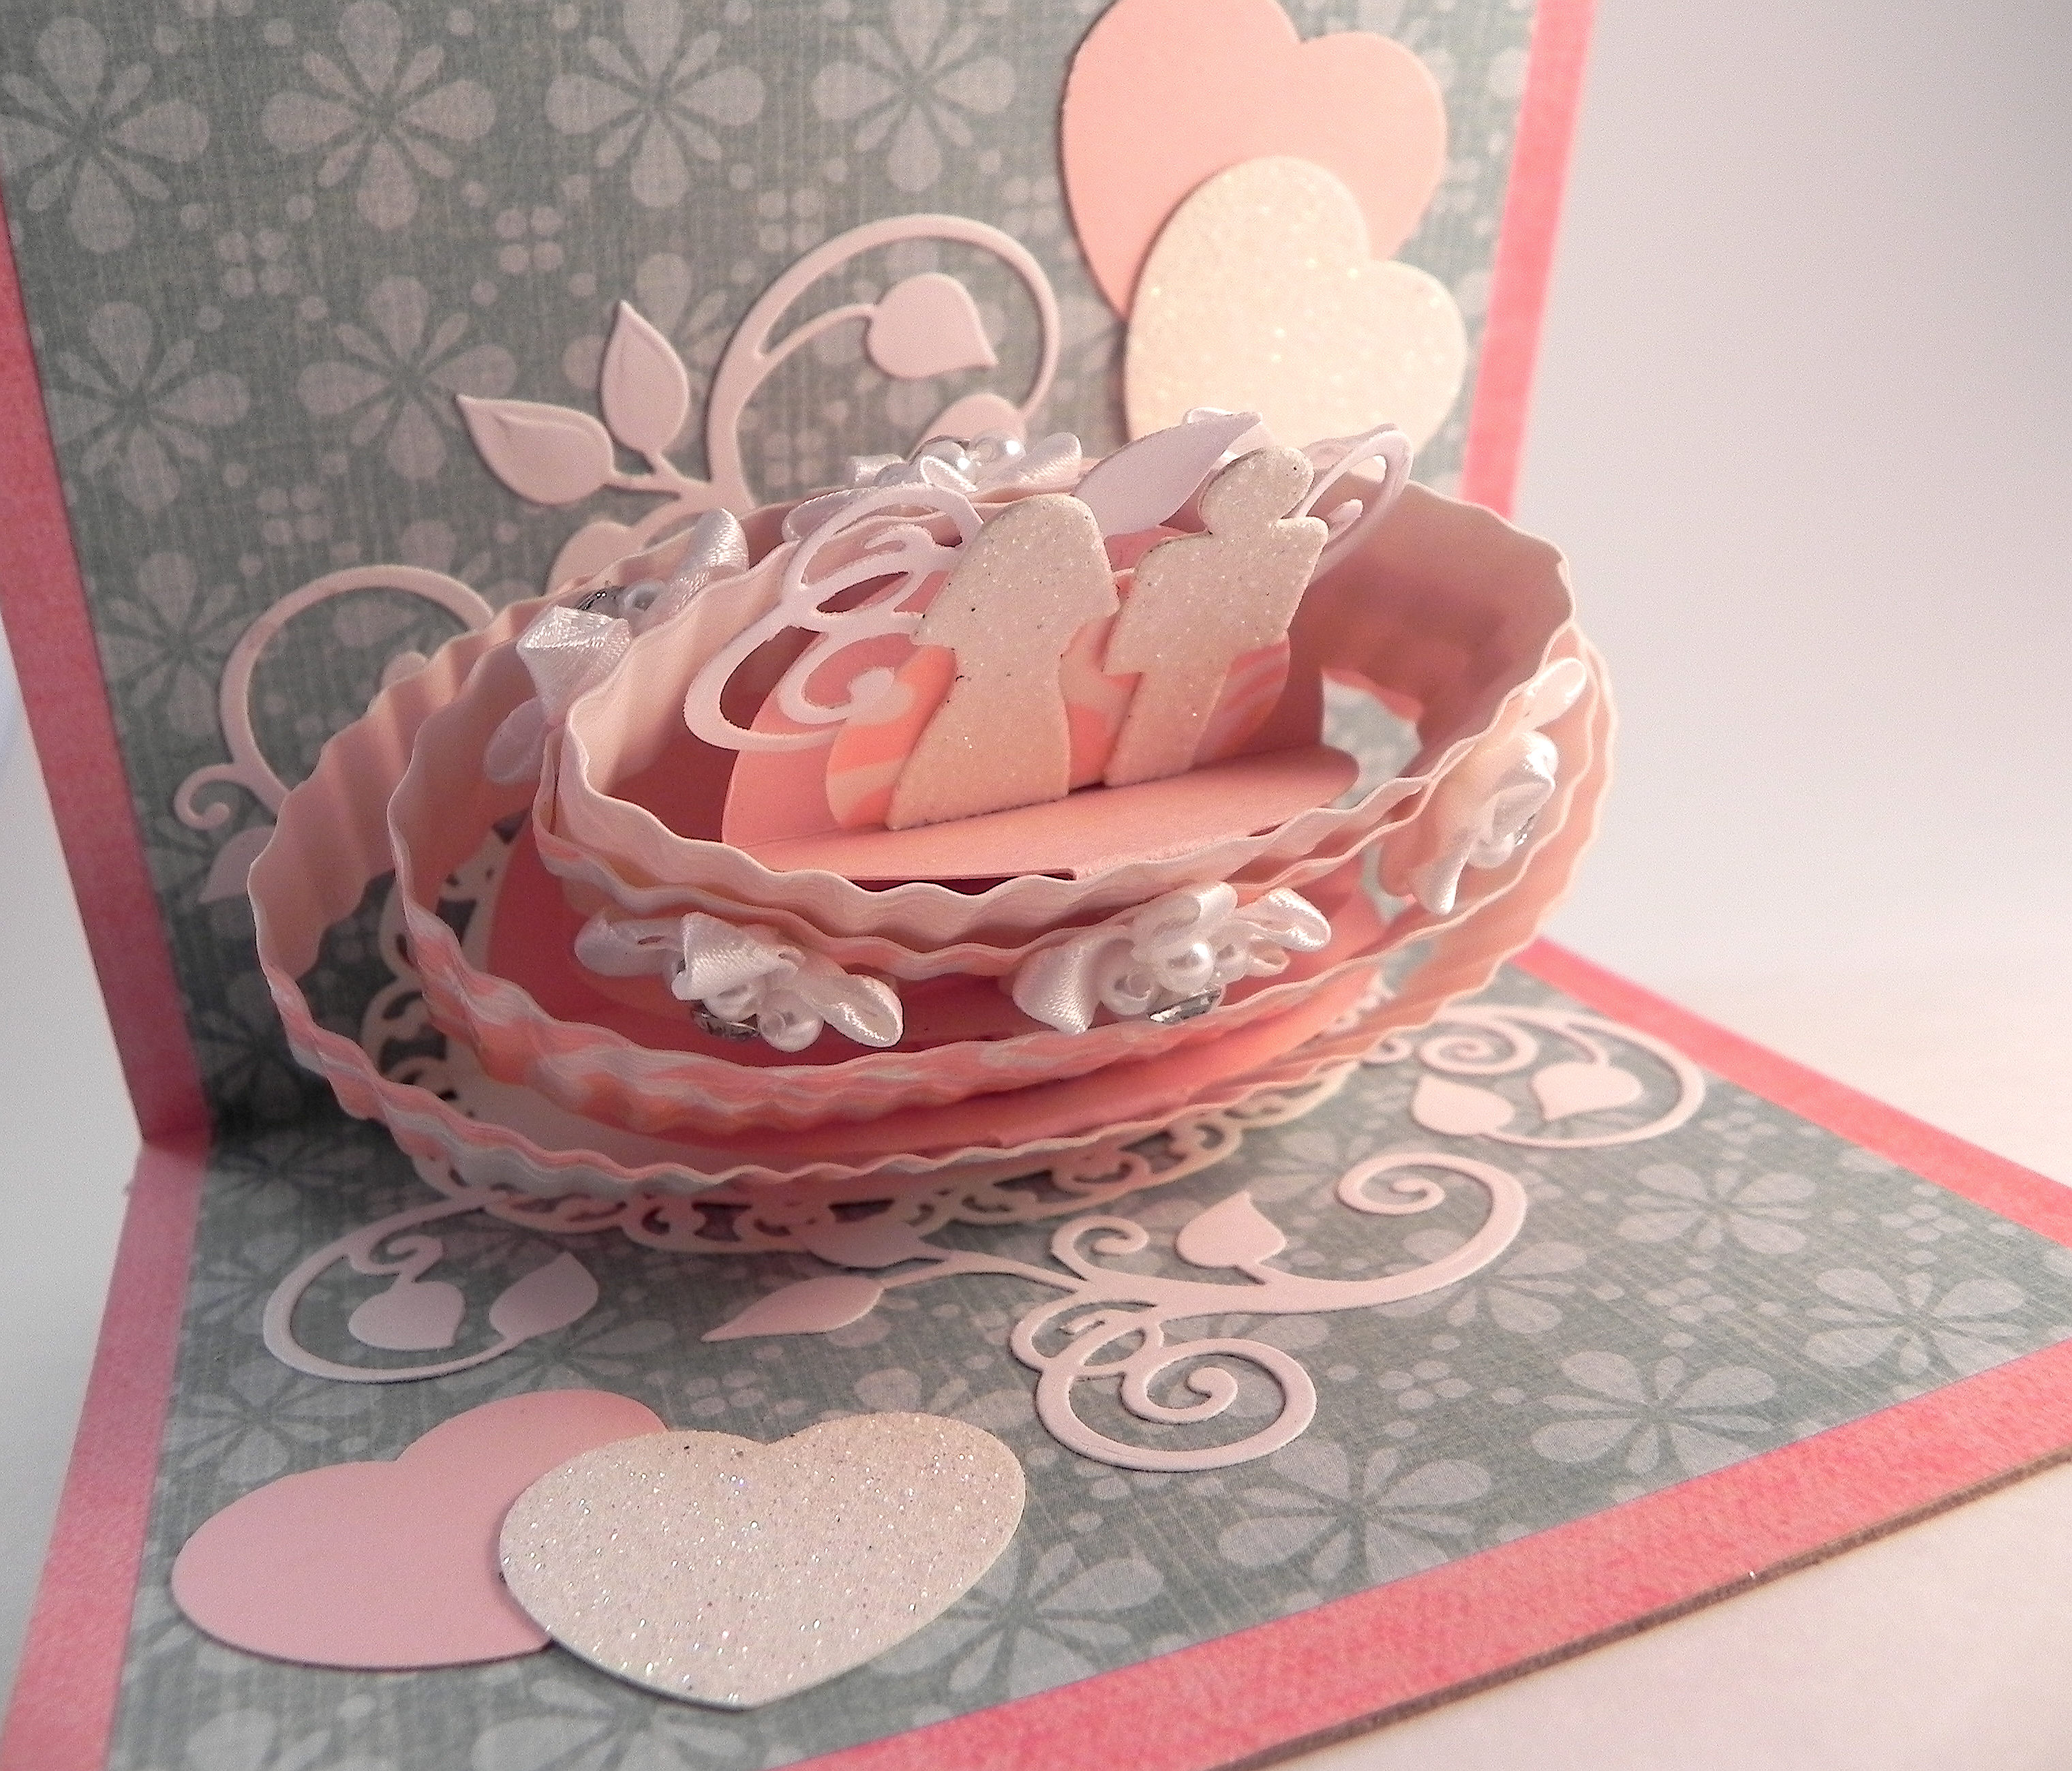
The pop-up portion of my card was created using the Sizzix “Cake, Three Tier, 3-D” Bigz Die and my Big Kick machine. The base pieces were cut from Gina K Innocent Pink heavy base weight card stock. The die provides the bases and supports for the three tiers, along with a bride and groom and a candle, as shown below. The sides are 1 inch strips (of whatever material you want the sides to be) cut with a trimmer.

It was suggested by the designer of the die (Karen Burniston) that the sides of the cake be cut from a material that is resistant to folding since these circular sides flatten somewhat when the card is closed, and you want these sides to become circular again once it is opened. Grunge paper and acetate are good choices. If you choose to use card stock, she suggests crimping the strips because it will hide any folds that may end up on these pieces when the card closes and opens.
With this in mind, I decided to go with crimped card stock, but I wanted them to be a little less likely to tear while still being flexible, so I covered my white card stock strips with crumpled tissue paper from Hallmark. (I had recently discovered the tissue paper technique and had posted a few projects using it HERE.) I covered my flat strips with decoupage, then placed the crumpled tissue paper on the strips, flattened them, trimmed off the excess tissue paper, and then sealed each of them with a top coat of the decoupage. Once the strips were dry, I ran each of them through my crimper.
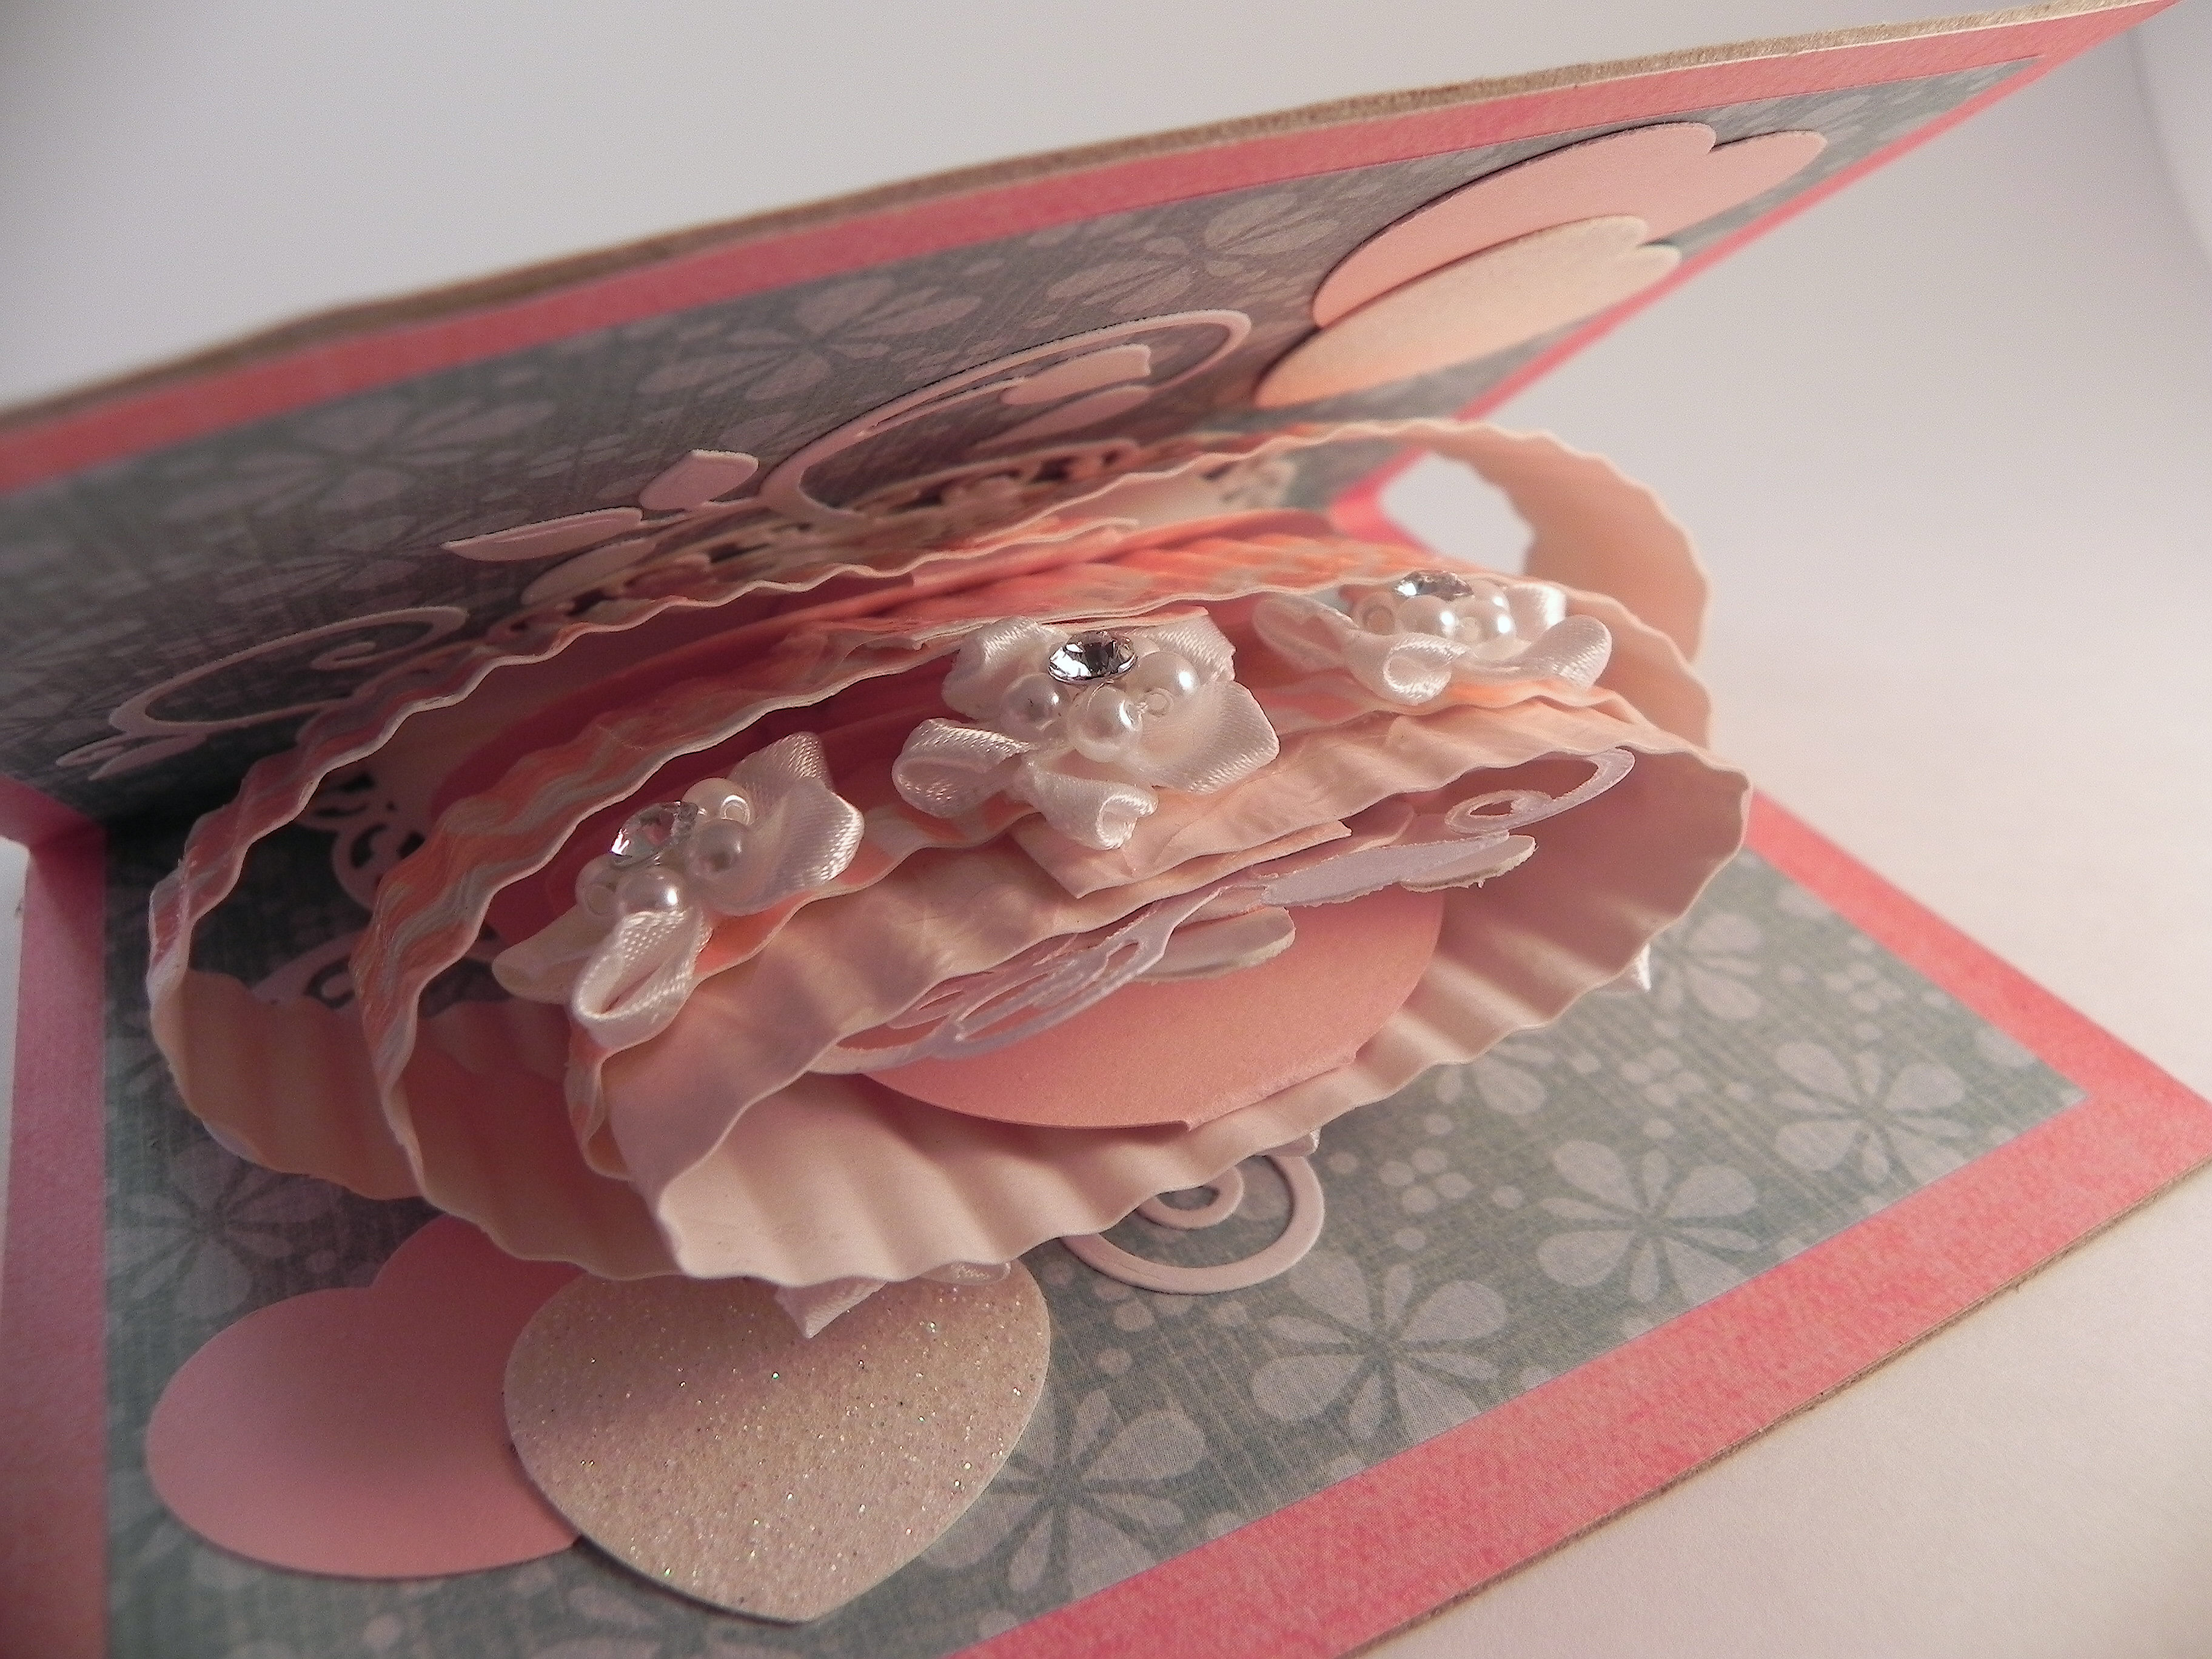
Also at Karen Burniston’s suggestion, I cut a “plate” using one of the dies from the Spellbinders Stately Circles set, and assembled my cake on this piece before adhering it to my card base.
The bride and groom on the top of the cake were cut from Recollections glitter paper. The flowers on the top tier are by Offray which I found in the DIY Wedding aisle at the craft store. The leafy flourishes were cut from a die from the Heartfelt Creations (Spellbinders) “Cut Mat Create 2A Die” set and cut into smaller pieces. The hearts were cut using a Creative Memories Two Heart Punch.
The card base is two pieces of heavy chipboard covered with papers from the My Mind’s Eye Simply Delightful 12×12 paper pad and attached in the center with Washi tape. I needed to use the Washi tape to keep the center of the card base somewhat flexible to allow the card to open and close once the cake was glued to the inside. I think that building the cake on the “plate” panel was easier perhaps than building it directly on the card base, but I also think that this “plate” makes closing the card VERY difficult! I am definitely going to have to play around with this some more to see if the plate could be done differently or eliminated or if there is another way to make the base to better accommodate the plate.
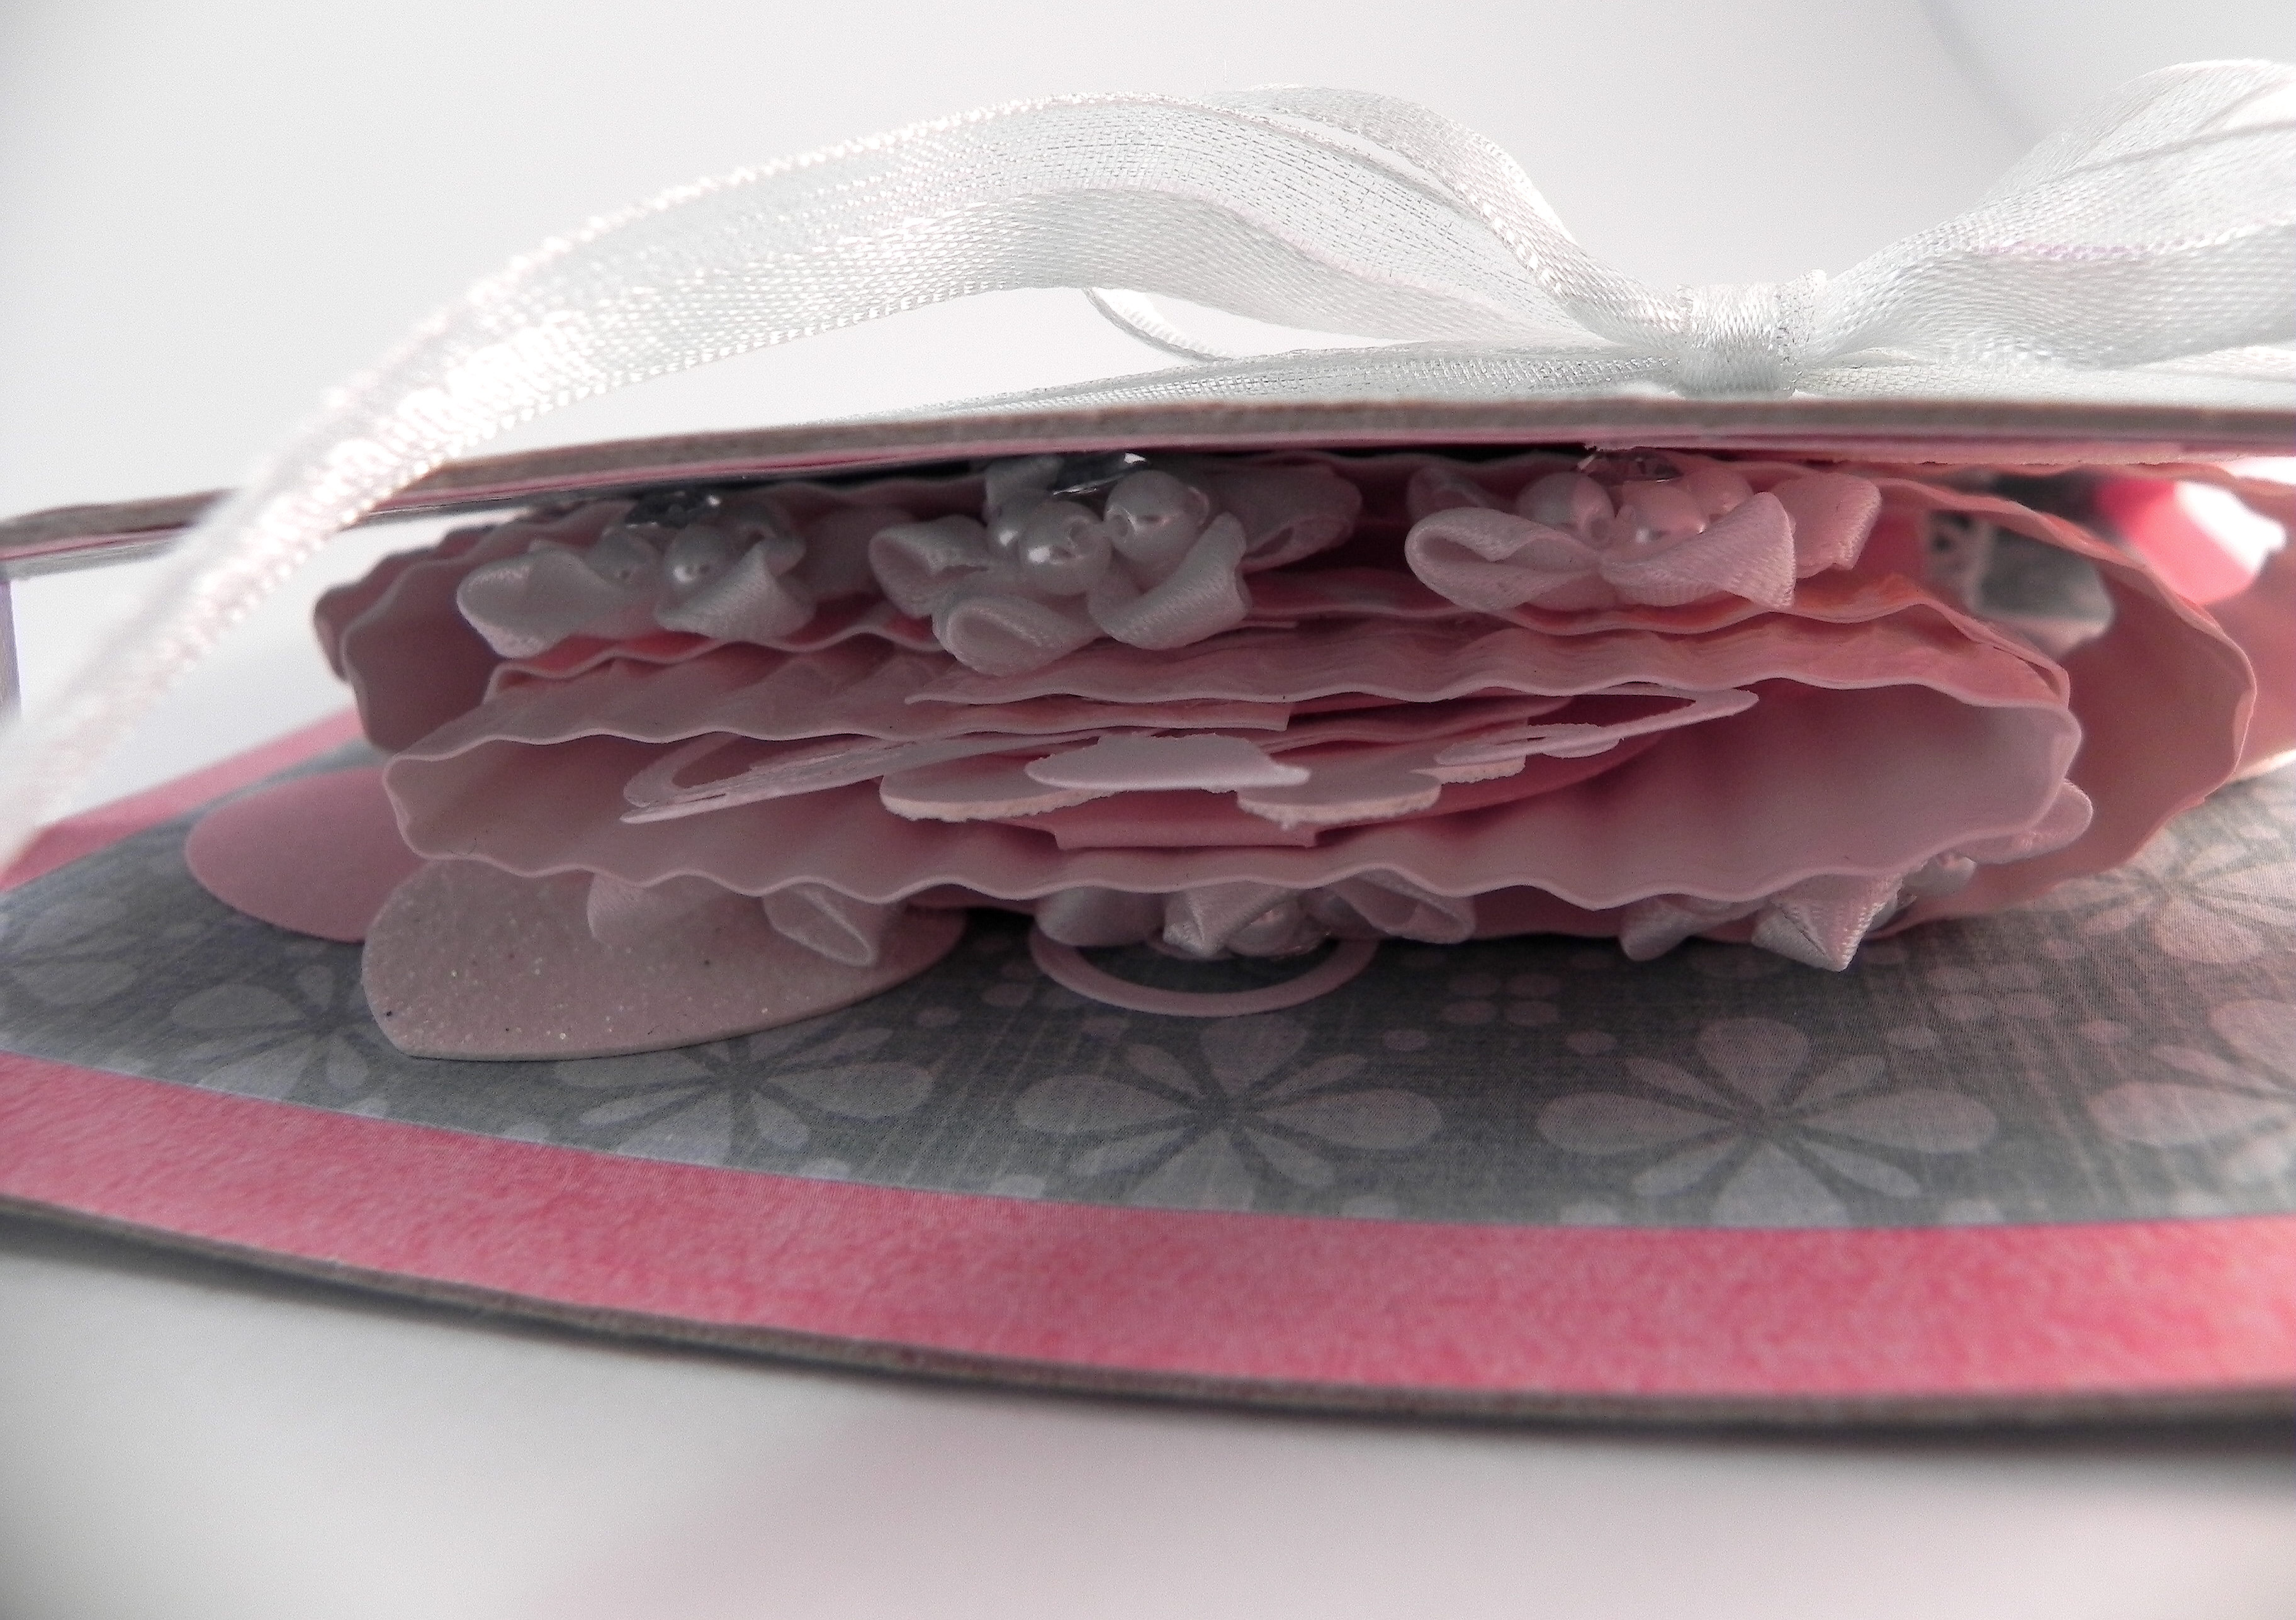
My card is meant to be displayed opened with the cake popped-up. My card front is very simple with some of the same paper I used on the inside along with a couple of hearts. To keep the card closed until the recipient is ready to open it, I loosely tied a piece of white ribbon around the whole card. I left off a sentiment because this card could be used for a wedding or an anniversary. I don’t think a sentiment is needed, but it could always be added later if desired in the form of a small banner or tag, for example. Even though I chose to make my card front very simple, you can see that it is possible to display the card “closed” as shown, so you can make your card front as elaborate as you want.


Here are a few views of the card as it opens. The circular tops of each tier are folded when the card is closed and open flat when card is completely opened. Notice how the sides of each tier kind of fold together when the card is closed. You don’t want to see a sharp fold on the sides of the cake when it is opened. This is why using a fold resistant material or a crimped piece of card stock is recommended.
Now it’s your turn. Create a Pop-Up card, and enter it in the challenge over at Perfectly Rustics. I’d love to see your project!
Thanks for checking out my card post!
This content uses referral links as described in the disclosure policy on my sidebar.


Wow! That is awesome. I cannot believe that you made such a beautiful work of art. Love the pop up and appreciate all the work involved to make it too.
LikeLike
OMGosh LIsa, This is so unusual and awesome. Looks like a lot of work too. I am sure that the recipient will love it and it will be a keepsake. I remember the box that you made that looked like a flip flop! Awesome too.
LikeLike
OMGosh, how FABULOUS! I have never seen anything so wonderful! This is fantastic! Such pretty colors and I love the crimping too! You don’t need a sentiment at all, this gorgeous creation speaks for itself! WOW!!!
LikeLike
This looks amazing Lisa – an absolute work of art..
LikeLike
Too spectacular for words. You rocked this one. Your design choices are so perfect. WOWZER.
LikeLike
Pingback: Lace Pop-Up Wedding Cake Card | I Played With Paper Today!
Pingback: More Pop-Up Cakes | I Played With Paper Today!