Scribble Tree Christmas Card

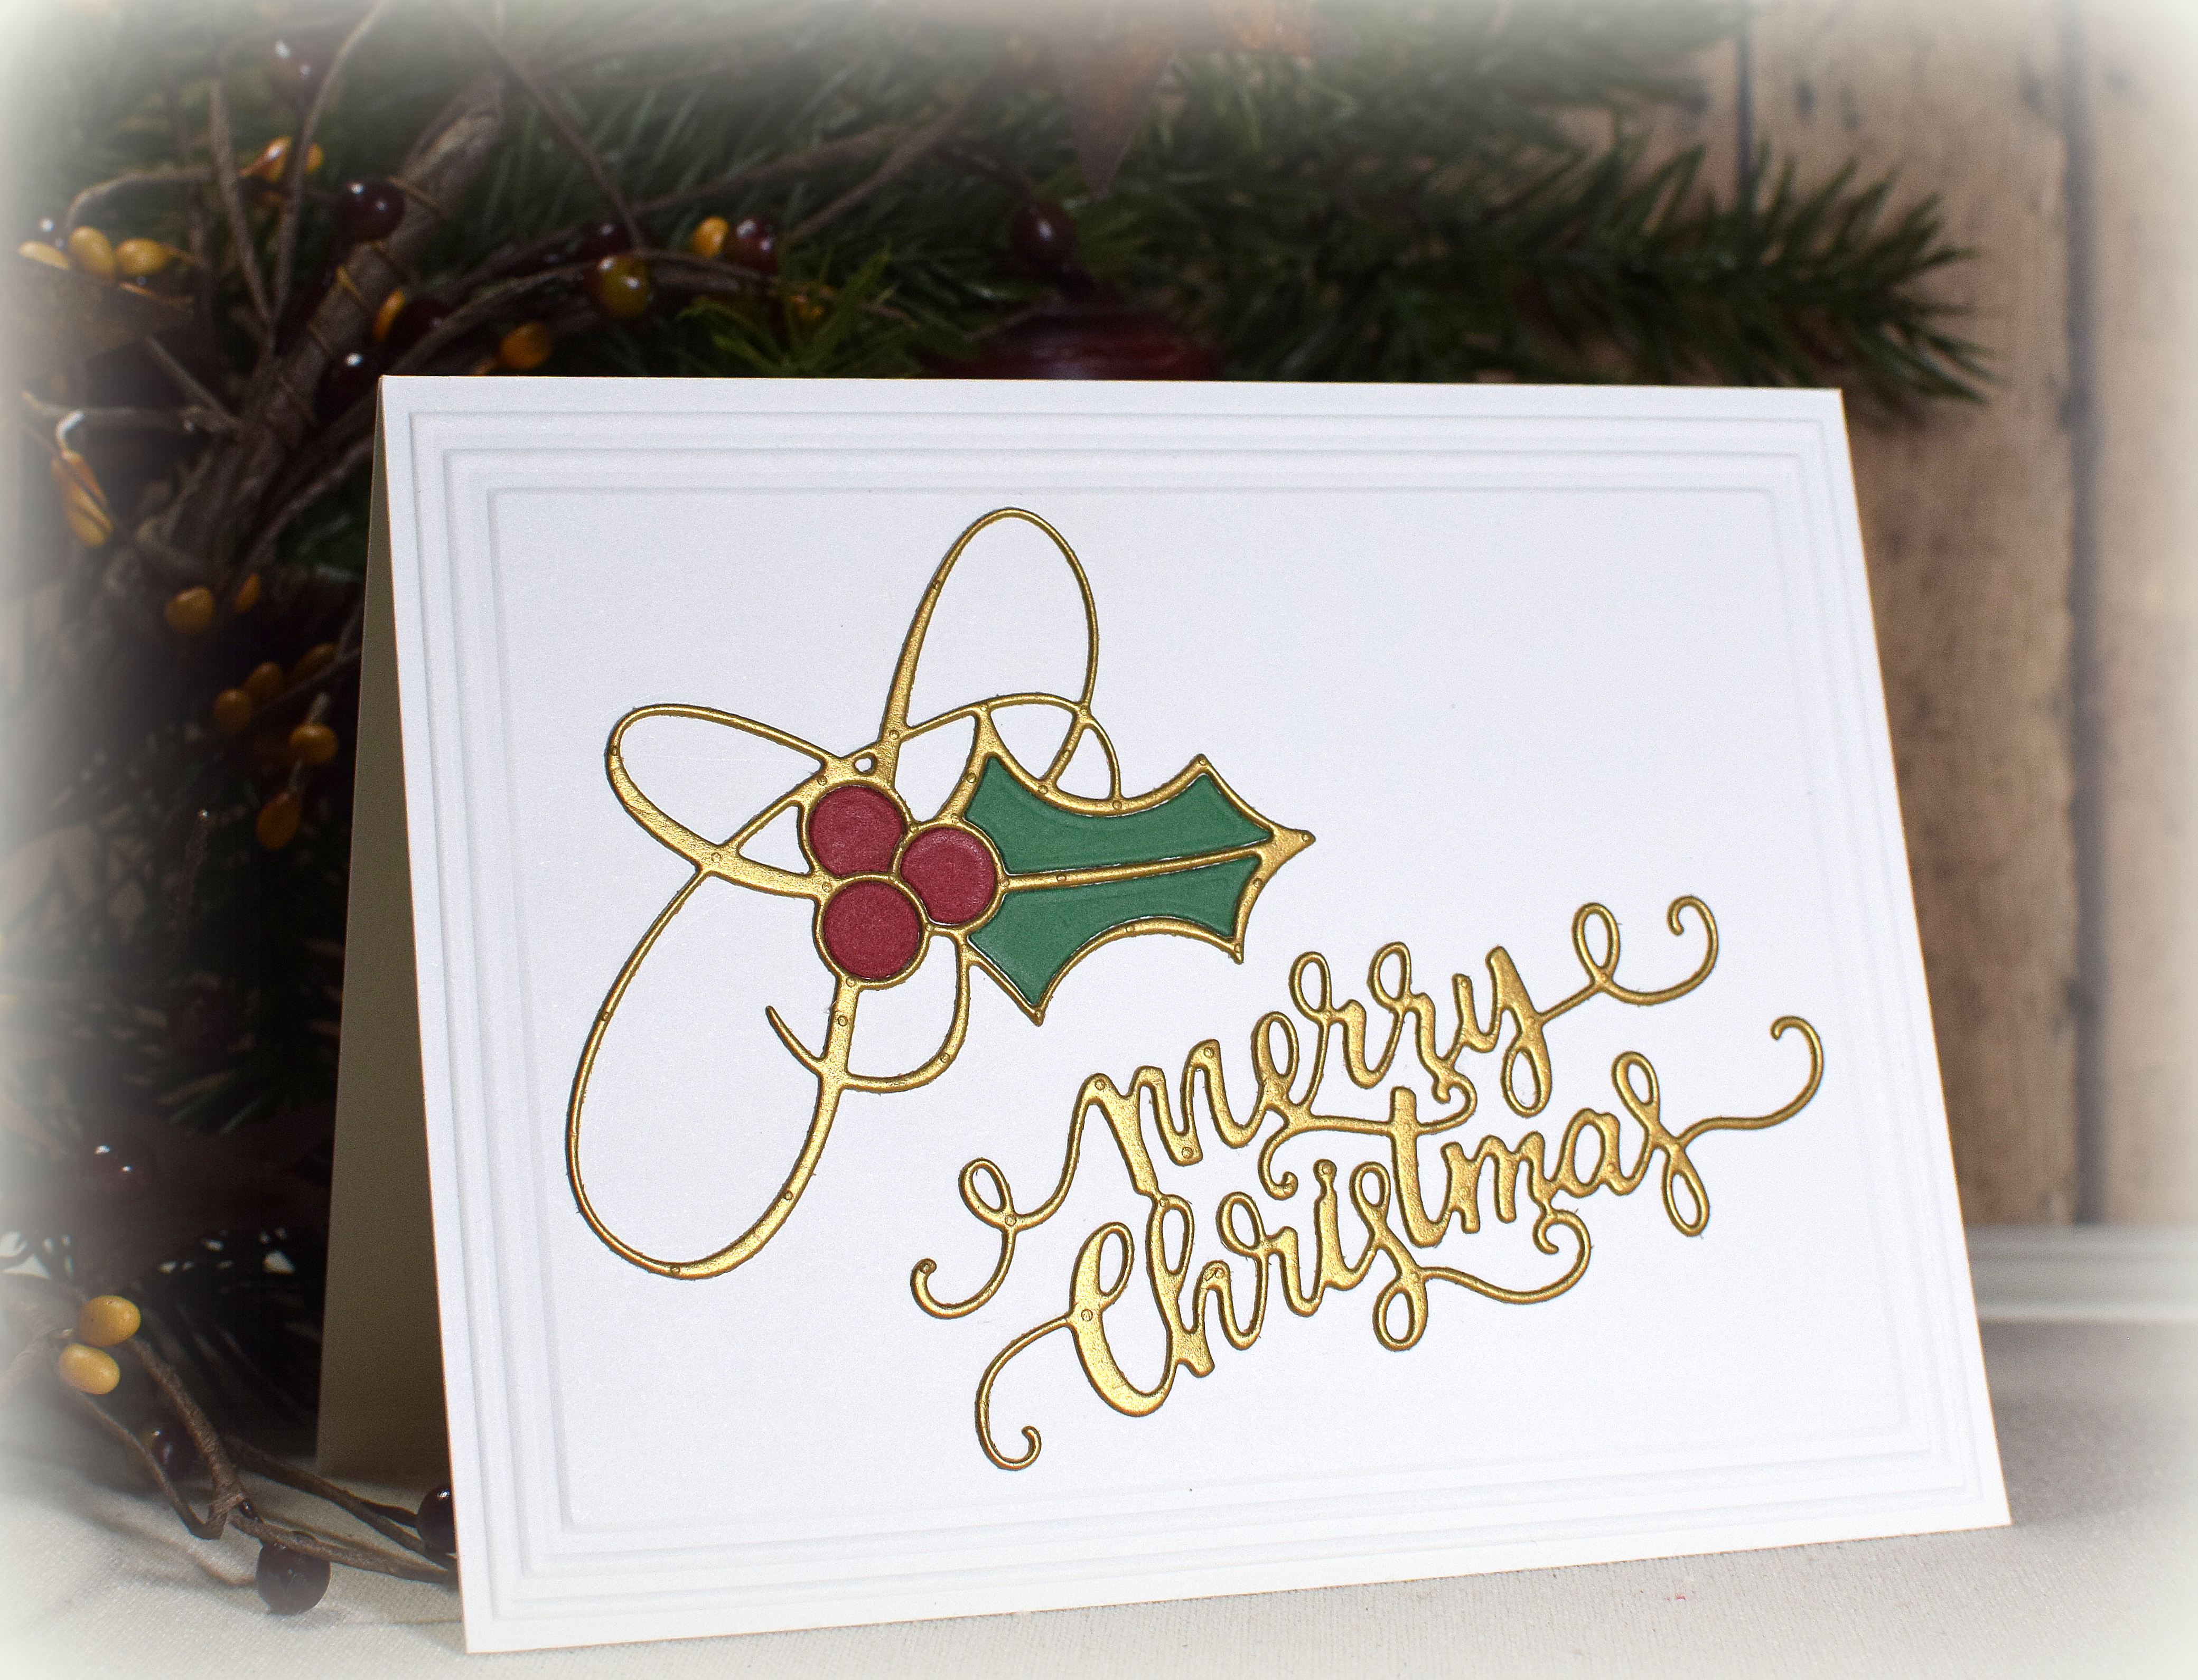
This simple card design features stamps from the “Solemn Stillness – Two Step Stamping” set from Stampin’ Up. It’s a retired, red rubber set from 2004, and as I struggled to line up the two layers – with my MISTI and a piece of acetate after remounting the stamps to make them cling stamps – I wondered how people did two step stamping with wood-mounted, red rubber stamps before the hinged stamp positioners. Yes, I used to use my stamp-a-ma-jig, but I’m wondering if there is a way to do it without a positioner…
For the “solid” portion of the tree, I inked up the stamp with Gina K Designs Christmas Pine ink, sprayed the inked stamp with water, and then stamped it on a piece of heavy weight white card stock. I re-spritzed the stamp (without re-inking) and stamped again. As I mentioned above, I used my MISTI for my stamping, and I found that I had less splatter and running if I left the inked stamp on the table and brought the paper to the stamp instead bringing the stamp to the paper as one normally would.
Once that was dry, I heat embossed the top layer with GKD Fine Detail Gold embossing powder and Versamark ink.
The greeting is from the “Merry Tree” mini set (retired?) from Gina K Designs. LOVE that font!!
Thanks for checking out my card project!
This content uses referral links as described in the disclosure policy on my sidebar.