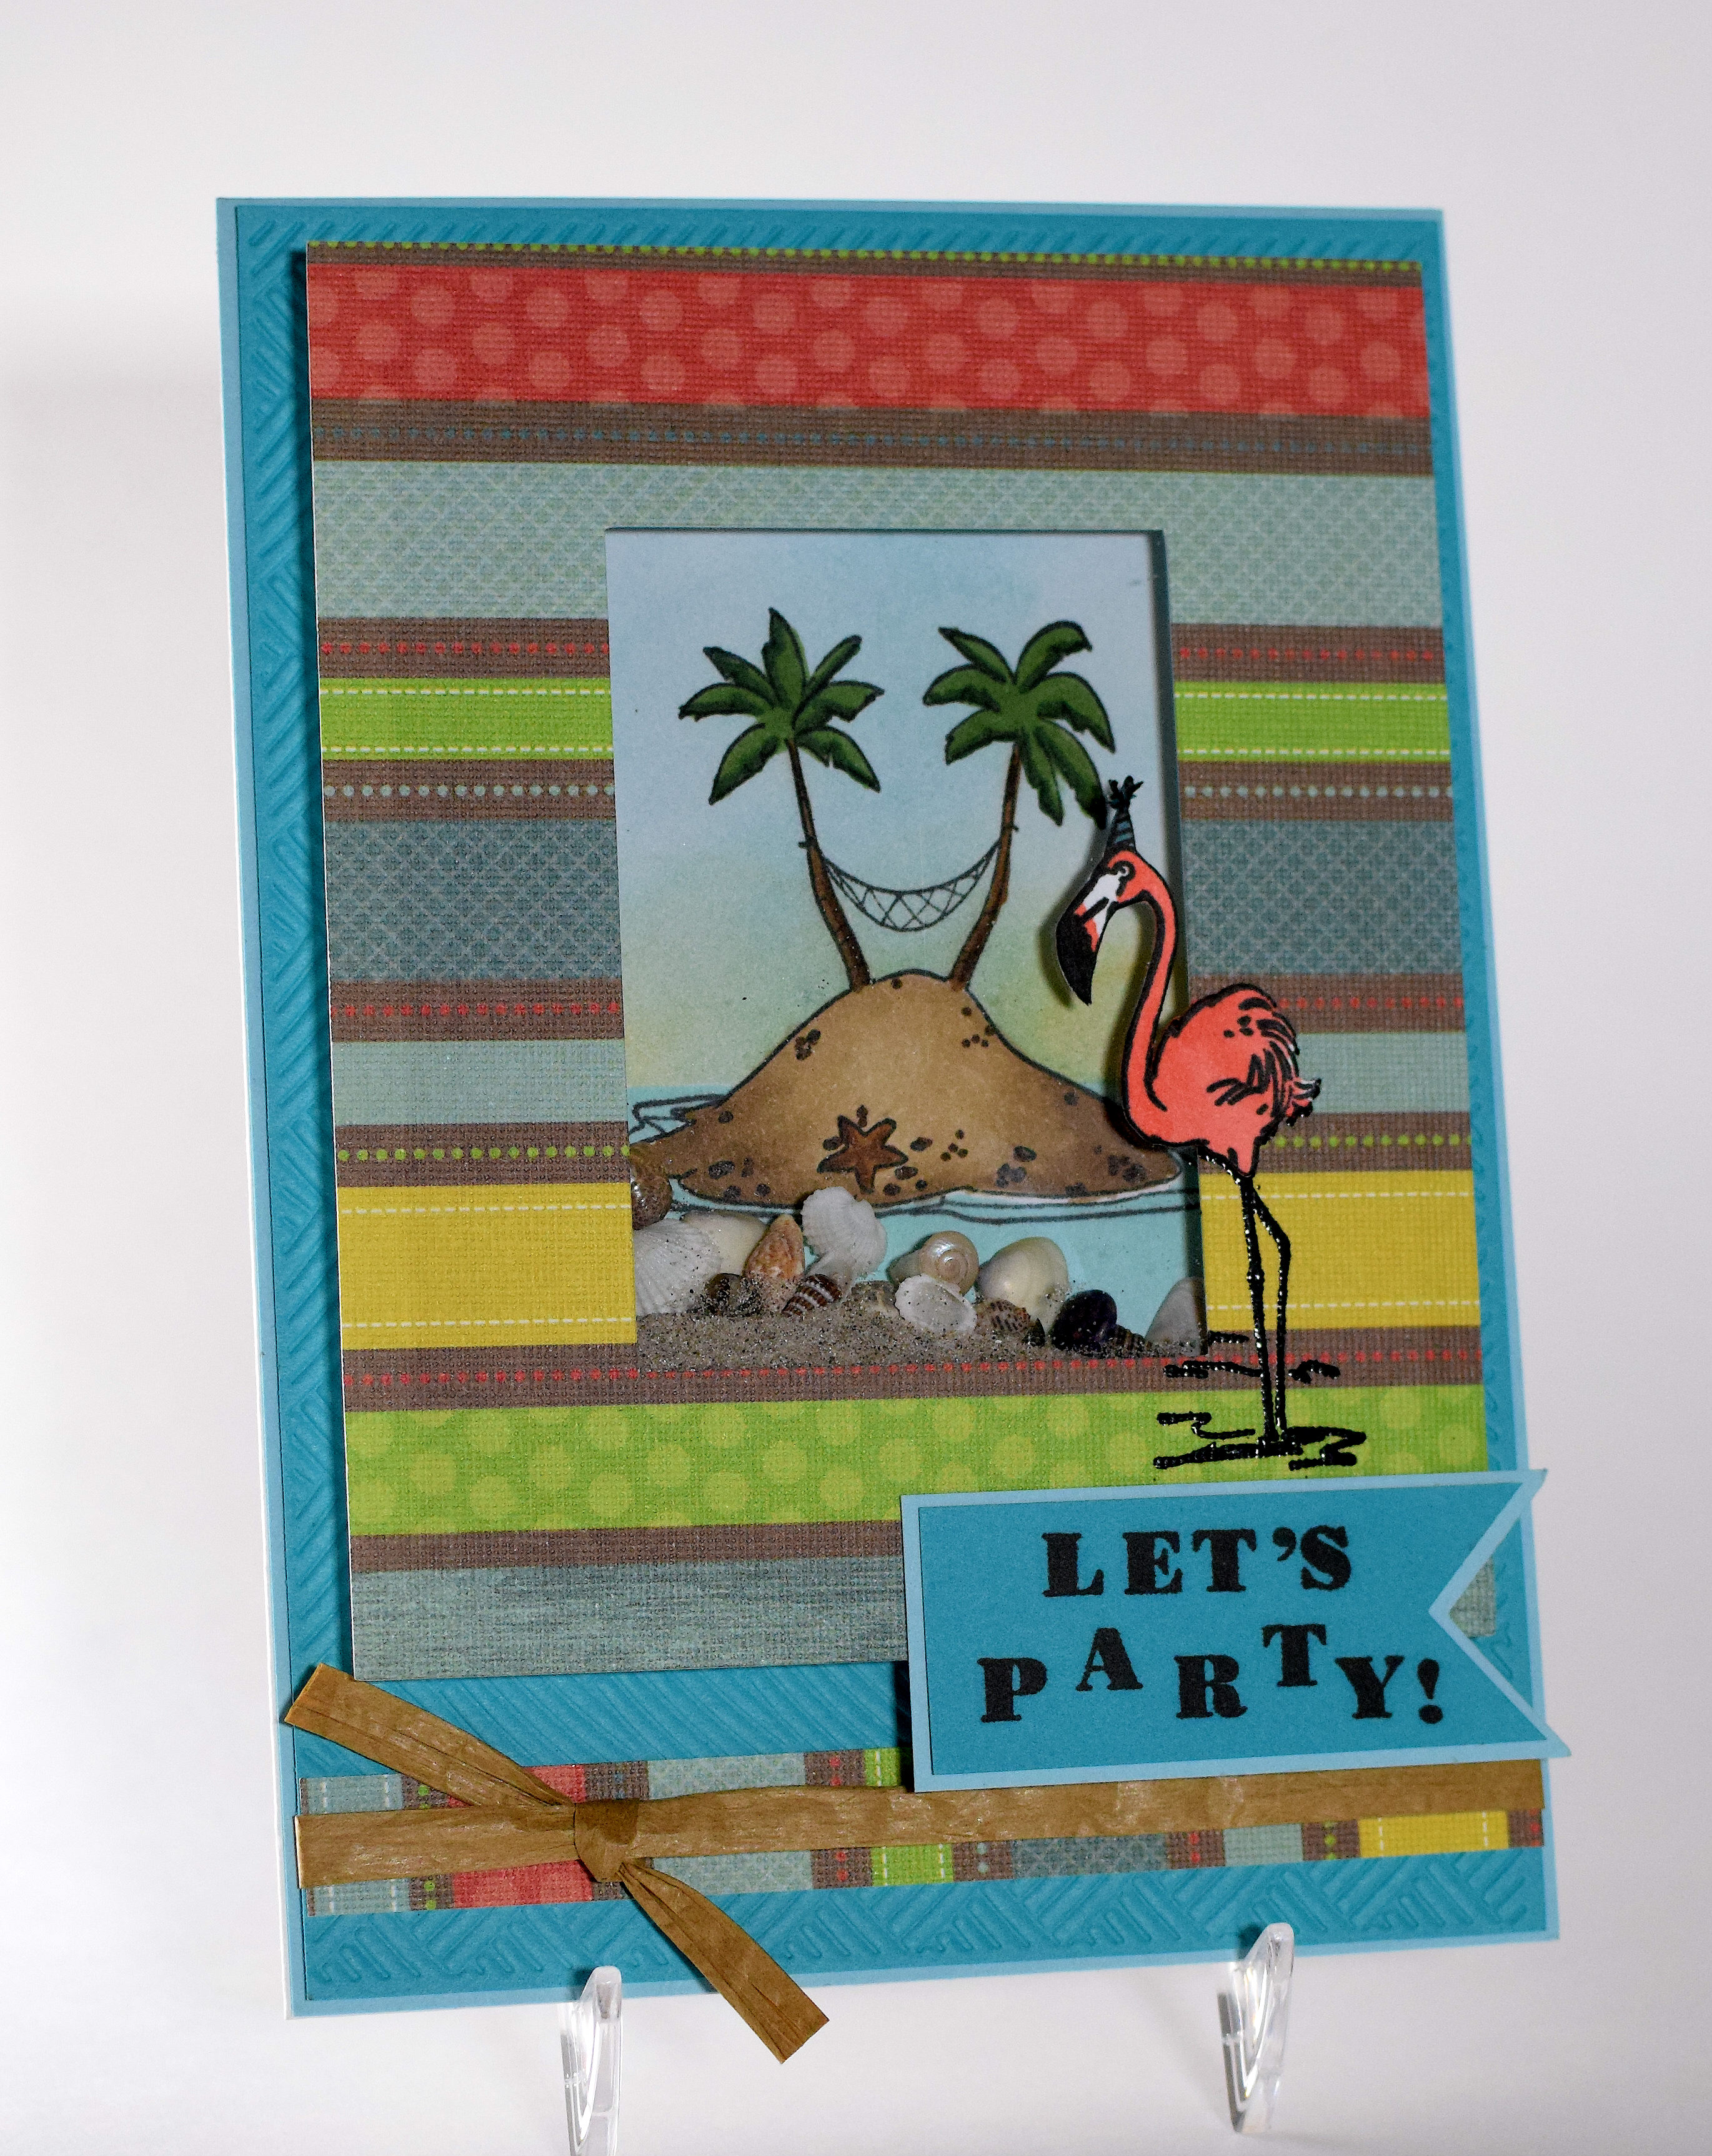
Tropical Birthday Shaker Card

Tropical Birthday Shaker Card

Tropical Birthday zDSC_0778

(Inside Text:  May your birthday be filled with sunshine, smiles, laughter, love and cheer!)

Wow, it’s been a while!  Great to finally have some time to get back in my craft room…

Our family has several men who celebrate summer birthdays, so I thought I’d design a card with a tropical theme.  I ordered the stamps for this card just before I went on vacation with my family to Ocean City, NJ.  While sitting on the beach, I thought about what I would do with these images when I got home and came up with the shaker card idea.  I brought the shells and sand from the beach home with me!

wwDSC_0769 cropped

The image stamps are called “Tropical Island (L-24219)” and “Birthday Flamingo (J-29905)” and are from RubberHedgehog Rubber Stamps.  The birthday stamp is from the “Happy Birthday To You” set, and the sentiment on the inside is from the “Happy Birthday Duo” set, both from Gina K Designs.

I made another version of this card with the “Let’s Party (G-9610)” stamp from RubberHedgehog Rubber Stamps.  I love this stamp for a party invitation as well as a birthday card.

zDSC_0780

The tropical island image was stamped with Memento Tuxedo Black ink on white card stock and was colored with Copic Markers (G24, G28, E55, E57, E59, E42, E43, and E44).  I masked the colored image and inked the background with Gina K Powder Blue, Sweet Mango, and Ocean Mist ink.

The flamingo was stamped on the frame with Versamark ink and embossed with Ranger black embossing powder.  (A portion of the image was lost when it was stamped  over the cut-out portion of the frame.)  I then created a cut file and die cut with my Silhouette Electronic Die Cutting Machine for the body of the flamingo so it could hang over the shaker window.  I stamped the body onto this die cut with Memento Tuxedo Black ink (click HERE to see how) and colored it with Copic Markers (R14, R29, and BG18).  Then, to make it bolder to match the embossed legs better, I stamped over the colored image with Versafine Black Onyx ink.  I was able to stamp over the image because I used my MISTI for all my stamping so it was easy to line up the image to stamp it a second time.  The colored die cut was lined up over the embossed image on the frame.

The greeting was also stamped with the Versafine Black Onyx ink.

The solid card stock is Gina K Blue Lagoon and Ocean Mist, and the patterned paper is DCWV Green Woodland Stripe.  The background panel was embossed with a Darice “Basketweave” embossing folder to add some texture.

I cut the printed frame with my Silhouette, and I used a sizzix die (38-0163 Frame Rectangle) to cut fun foam (3 layers glued together) that I used to raise the frame up to create the pocket for the shaker window.  This window needed to be pretty deep to accommodate the thickness of the shells.  (Here’s a video showing you how to create a shaker pocket with fun foam.)  I also used a small piece of thick acetate for the shaker window, and raffia ribbon to finish it off.

The Mod Squad Challenge this week is “Lazy Days of Summer” where we are encouraged to create a project that makes one think of the lazy days of summer.  Lying on a hammock on the beach…ahhhhh!  (Sadly, this site is no longer active.)

The “Let’s Party” card will be entered in the RubberHedgehog 2016 card contest.

Thanks for checking out my card post!

This content uses referral links as described in the disclosure policy on my sidebar.

It’s almost June?!

It’s almost June?!

calendar canstockphoto3701821

I have no idea what happened to the month of May!!  I have been a bit busy this month and haven’t had much time in my craft room or on my computer.  I hope things quiet down in June and that I can get back to stamping and to enjoying everyone’s latest projects soon!  I really miss it!!  (And I am soooo behind on cards I need to send!)

Calendar image  (csp3701821) purchased from Can Stock Photo (HERE)

Pleated Skirt Fold – Mother’s Day Card

Pleated Skirt Fold – Mother’s Day Card

Pleated Skirt Fold Mother's Day Card yyDSC_0352.jpg

I was asked to co-host the Mod Squad Challenge again this week with the very talented Peggy Timmerman.  The theme of the challenge is MOTHER’S DAY.  (Sadly, this site is no longer active.)

For this card sample, I used two stamps from the Newton’s Nook Designs – Versatile Vases stamp set along with a die from the Gina Marie Designs – Stitched Rectangle Dies set and the Happy Mother’s Day border die by Lawn Fawn. All of these items are available at Kat Scrappiness who is one of the Mod Squad Challenge sponsors this week .

Versatile Vases Stamp Set

Kat stocks the products that she loves and uses as well as what her customers request.  If you don’t see it in her store, feel free to contact her.  She is happy to do special orders for you!  And she offers a DISCOUNT CODE for The Mod Squad Challenge: MSC10!

I had recently seen a card made with the Pleated Skirt Fold technique and thought I’d give it a try. For this technique, a two-sided piece of patterned paper works best since you see both patterns once the pleats are created.  I started with a 5 1/2 x 12 inch panel and scored it at 1 then 1/2 inch intervals.  (I wanted a tall panel with narrow pleats.)  HERE is the tutorial I found and adapted for my measurements.  The two-sided patterned paper I used is called “Mail Poste Correo” from the “From Me to You” collection by Pebbles.  The “white” on this paper was not pure white so I created my own matching card stock by coloring a plain piece of white card stock with Copic W1 for the stamped panel and the die cut greeting.  (The greeting die cut was cut apart so it would fit in the space on the bottom corner of the card.)

I stamped the flowers and vase with Memento Tuxedo Black ink and colored it with Copic Markers (BG78, V000, and R14).

I also created a mat for my card front by coloring the edges of a plain white piece of card stock with Copic Marker (BG78) to match the vase.  This panel was adhered to a white card base.

Here is another sample with different paper and a different stamp:

Pleated Skirt Fold Mother's Day Card wwDSC_0353

For this one, I used the tulip stamp from the Lawn Fawn – Fairy Friends stamp set along with a die from the Gina Marie Designs – Stitched Square Dies set and the Happy Mother’s Day border die by Lawn Fawn.  All of these items are also available at Kat Scrappiness.

Lawn Fawn Fairies Stamp Set

The two-sided patterned paper is called “Garden Walk” from the Happy Day collection by Pebbles.  The tulip was stamped with Memento Tuxedo Black ink and colored with Copic Markers (YG03, YG93, and R14).  I placed a piece of vellum behind my stamped panel to “separate” it from the busy background.

Now it’s your turn!  Head on over to the Mod Squad Challenge Blog, and show us your Mother’s Day projects. I can’t wait to see what you create!

Thanks for checking out my card project!

Fun Floral Mother’s Day Card

Fun Floral Mother’s Day Card

Fun Floral Mother's Day Card xDSC_0333.jpg

The challenge this week over at the  Mod Squad Challenge is Mother’s Day.  I was asked to co-host with the very talented Peggy Timmerman.  (Sadly, this site is no longer active.)

For my card, I used the lily of the valley, coneflower, and tulip stamps from the Lawn Fawn – Fairy Friends stamp set along with dies from the Gina Marie Designs – Stitched Rectangle Dies set and the Happy Mother’s Day die by Lawn Fawn.  All of these items are available at Kat Scrappiness who is one of the Mod Squad Challenge sponsors this week .

Lawn Fawn Fairies Stamp Set

Kat stocks the products that she loves and uses as well as what her customers request.  If you don’t see it in her store, feel free to contact her.  She is happy to do special orders for you!  And she offers a DISCOUNT CODE for The Mod Squad Challenge: MSC10!

This was a fun challenge for me because I wanted to create a card using one of the stamp sets I had previously purchased from Kat Scrappiness while I waited for the arrival of a new set I ordered, but I didn’t have any that seemed Mother’s Day-ish…at first.  I liked the bold and chunky style of these flowers and was able to quickly color them with Copic Markers (YG03, YG93, R14, BV04, and V000) to create my bright, whimsical  card.  I chose the patterned paper called “Garden Walk” from the Happy Day collection by Pebbles to complement these images.  This patterned paper is two sided; the front is the floral pattern I used as my background, and the back is primarily peach/orange that I used for my greeting die cut.  I chose to use the black mats to complement the bold black outlines of the flowers.

Now it’s your turn!  Head on over to the Mod Squad Challenge Blog, and show us your Mother’s Day projects. I can’t wait to see what you create!

Thanks for checking out my card project!

How to Make Silhouette Die Cuts for Your Stamped Images – Part II, Borderless

How to Make Silhouette Die Cuts for Your Stamped Images – Part II (Borderless)
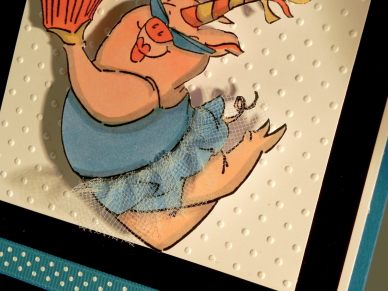
wwDSCN7785

In my last tutorial called How to Make Silhouette Die Cuts for Your Stamped Images, I explained how I make die cuts with small borders around my stamped images using my Silhouette electronic die cutting machine and the “trace” and “offset” features in the Silhouette software.  (I use the Designer Edition.) Sometimes, it is necessary/desirable to create a die cut where the lines of the stamped image go right to the edge of the die cut, with no border.  This is a follow-up tutorial explaining how I create this type of die cut.

The explanation below is a bit lengthy.  Before going into the step-by-step,  I’ll give you the quick summary:

  1. trace the image
  2. create a solid offset
  3. create an internal offset which goes back to the original size of the image
  4. clean up the file, if needed, to match the image more closely

If you want a more detailed explanation, keep reading!


Click on the photos that I included in the steps below if you wish to enlarge them.

(The first 4 steps are the same as in the last tutorial, so refer back to that if you need more details on these steps.)

  1.  Stamp your image.

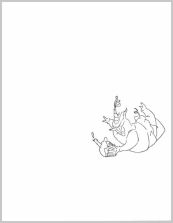
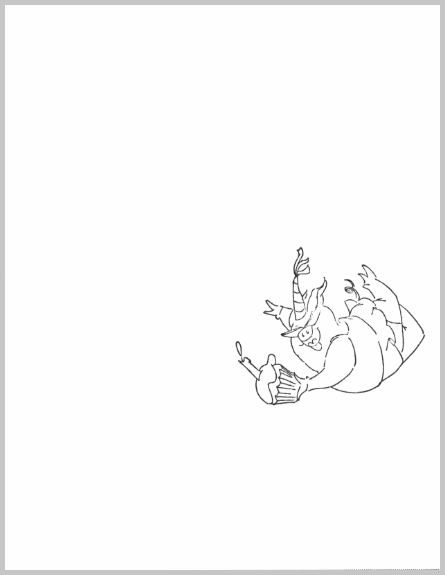
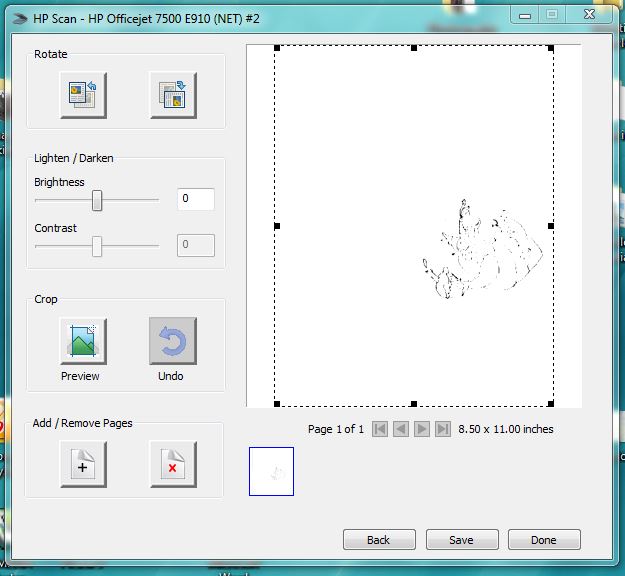
stamp and scan (stamped on 8 1/2 x 11 inch paper)


2.  Scan your image.
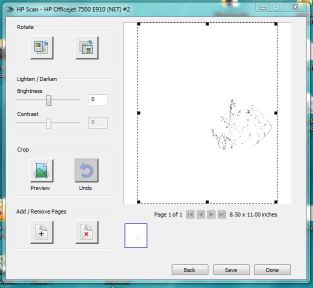
scan

(sorry for the bad photo; scanned as 8 1/2 x 11 inch document)


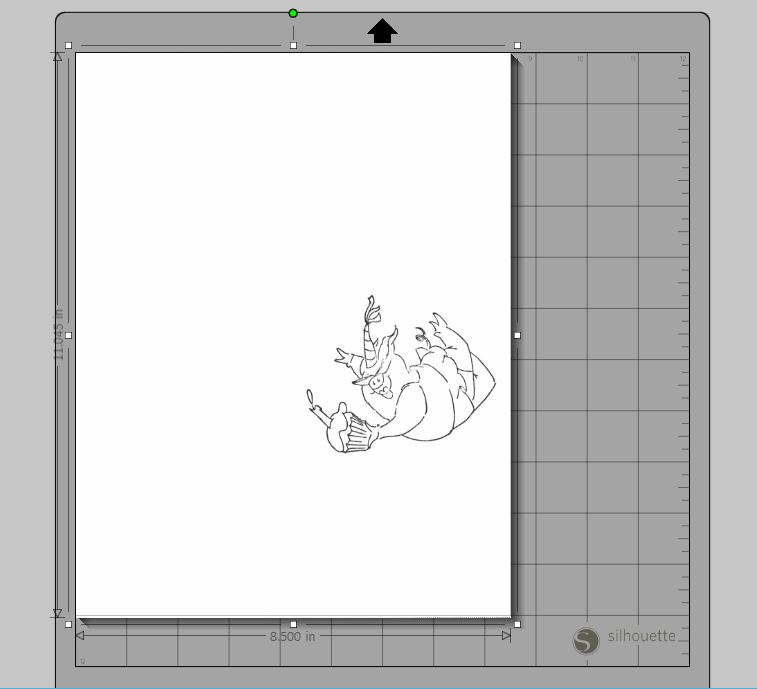
3.  Open jpeg file.
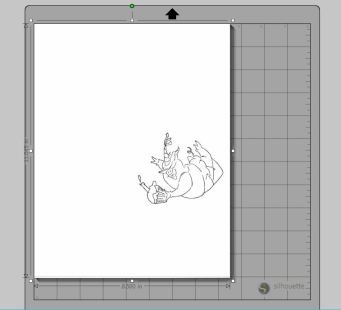
open jpeg


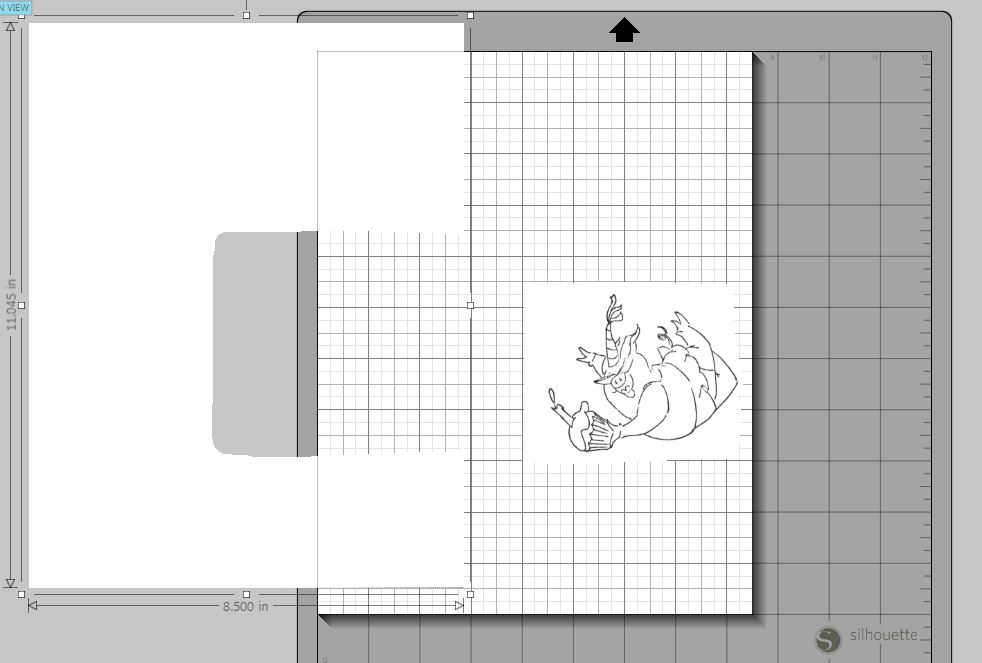
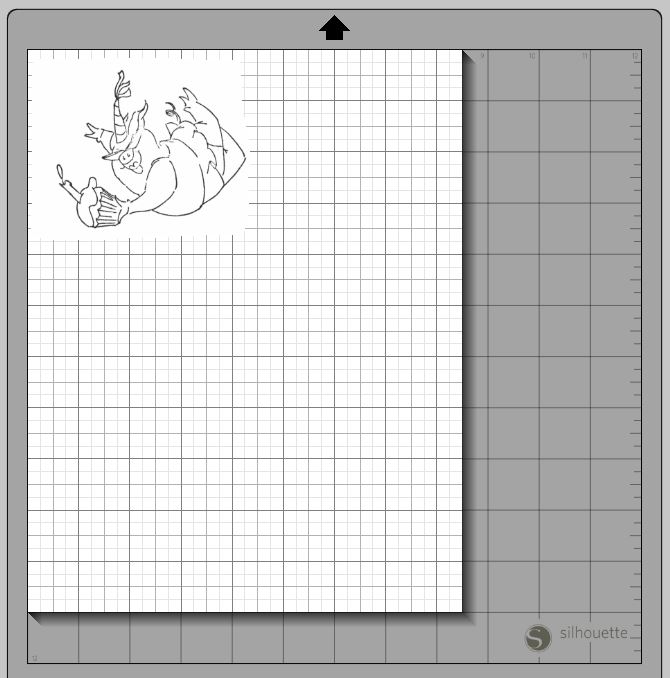
4.  Optional – erase to separate.

erase  erase 2


5.  Trace.

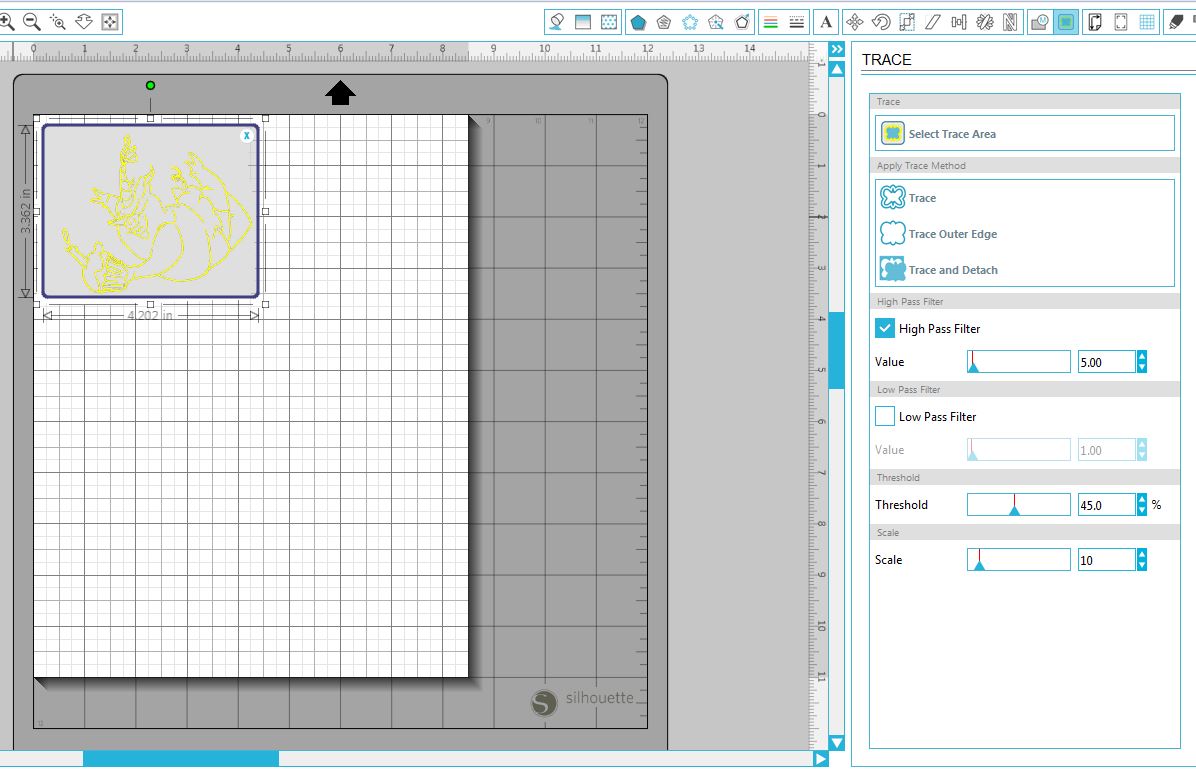
a.  Open “Trace” window, select “Select Trace Area,” and drag a box around the image you wish to trace.
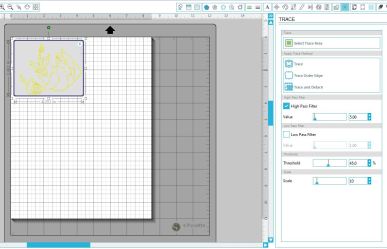
select trace area

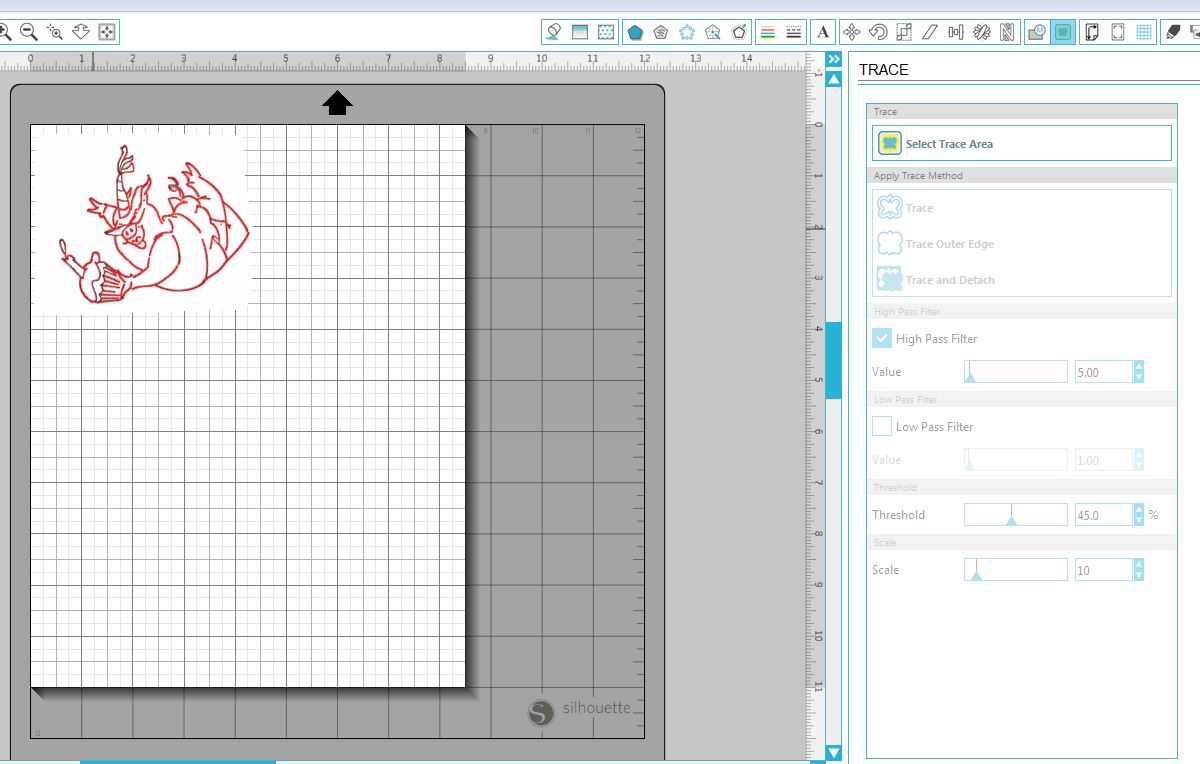
b.  Select “Trace Outer Edge.”  (If you need inner details cut, select “Trace.”)
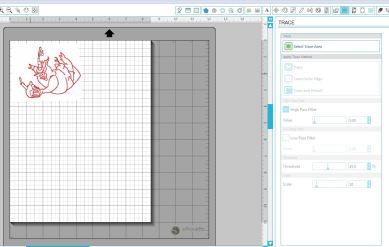
trace outer edge


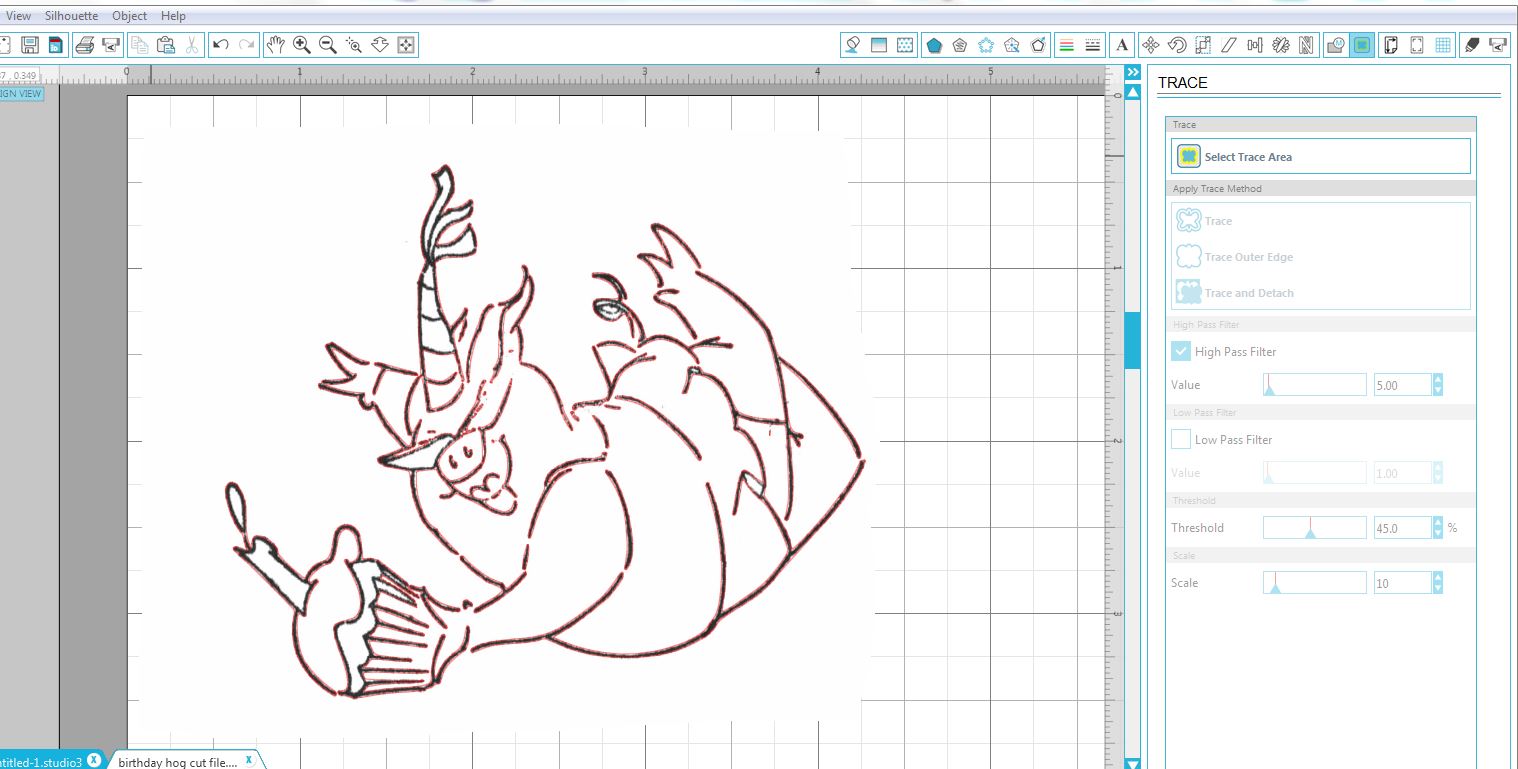
6.  At this point, it is helpful to enlarge your view to make it easier to see what you are doing.  (DO NOT re-size your scanned image or the trace. You need these measurements to stay true to size.)  Just change your view on your computer to make it larger.  Go to the “View” tab, then “Zoom” and then select your preference, or use the magnifier tool.
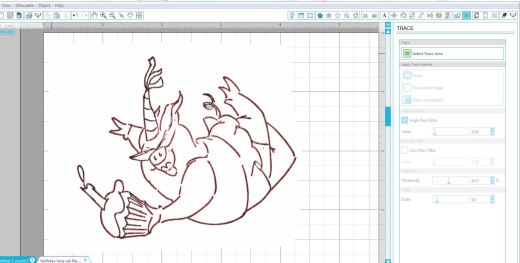
enlarge

Notice that the red cut lines are not perfectly lined up with the black stamped lines of the image.  In some cases, there are broken lines.  (Click on the photo to see what I mean.)  In order to get a die cut with a complete outline and that fits the stamped image perfectly, you need to clean this up a bit. There are a few ways to do this.  I referenced a series of video tutorials in my last post called Tracing Without Tears in Silhouette Studio which I found extremely detailed and helpful in understanding the “Trace” feature of the software.  (Videos 7 and 8 specifically talk about point editing.)  If you don’t want to get as involved in the design process, try this:


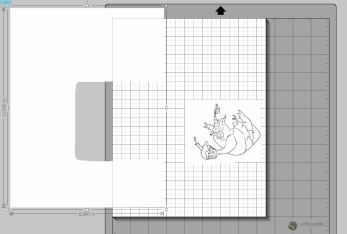
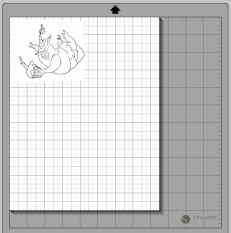
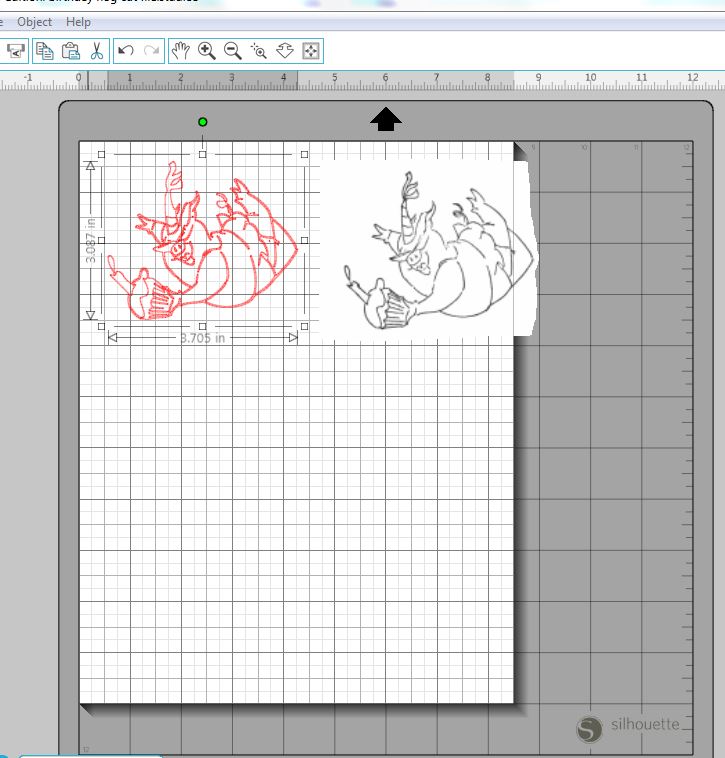
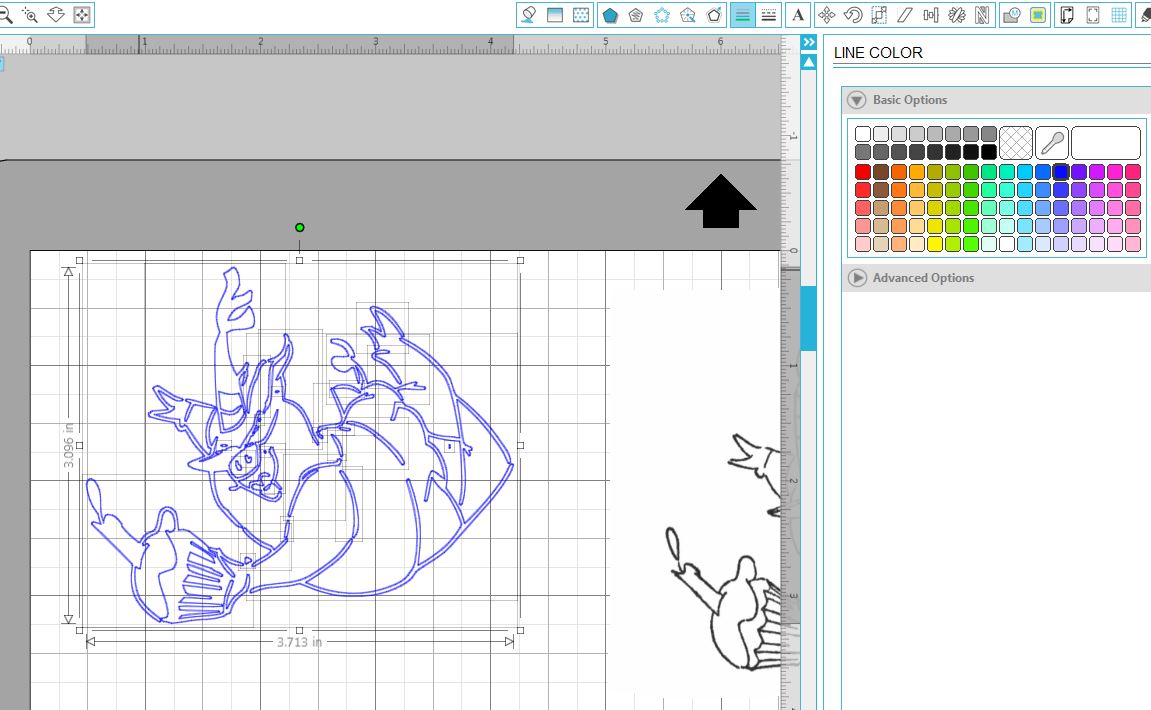
7.  Move the jpeg scanned image away from the trace.  Highlight the image.  Under the “Object” tab, select “Convert to Path” to keep all the pieces of the trace together.
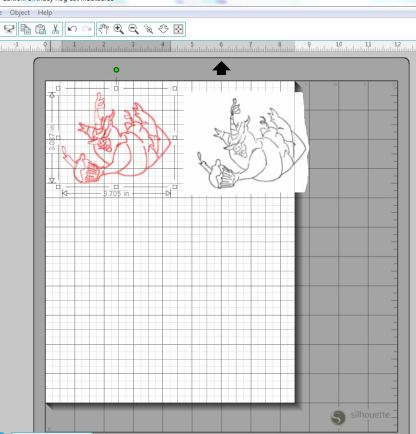
group trace

To make this easier to see in the next step, I changed the color of my trace to blue.
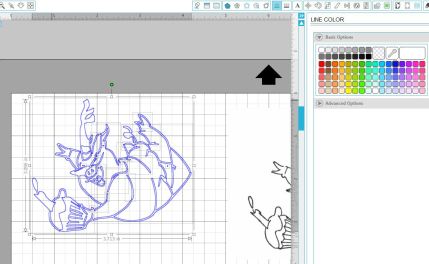
change trace color.JPG


8.  Open the “Offset” window, and click “Offset” which will give you a border at the default 0.125 inchs.
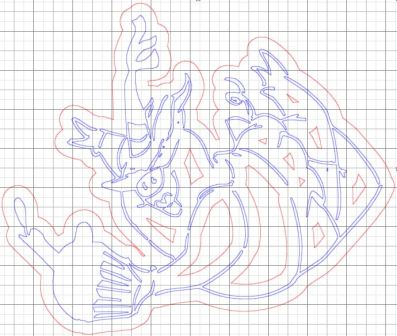
ofset .125


9.  Slide the distance slider all the way to the left to zero.  Then slowly slide it to the right (or use the “up” arrows) just until you have a solid shape around the outside with no gaps.  On this one, I went to 0.020 inches.  Make a note of the value you used.  You will need this later.
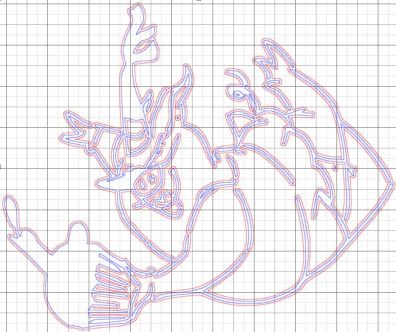
offset ,020


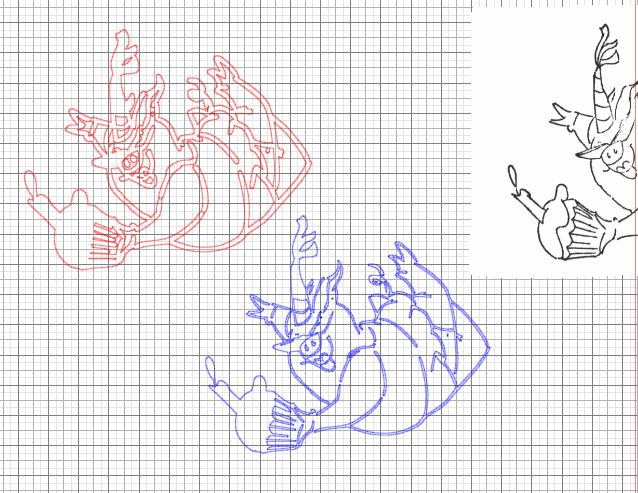
10.  Drag away the “trace” which is blue on this sample.
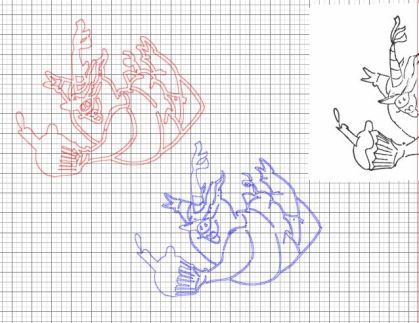
drag out trace


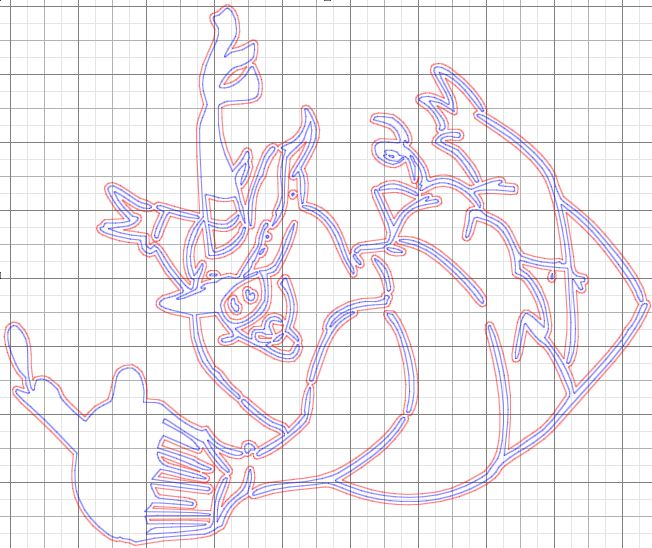
11.  Highlight the whole offset.  Click on the “Object” tab and click “Release Compound Path” to separate all the parts of the offset.  Then drag the outer piece (outline) away from the rest.
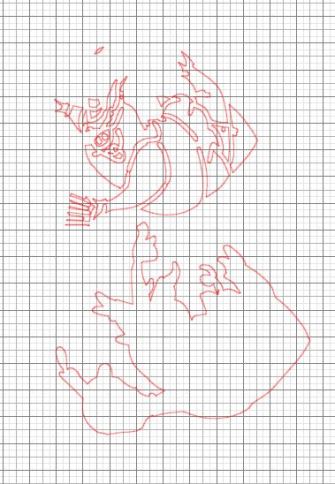
separate outer edge from offset


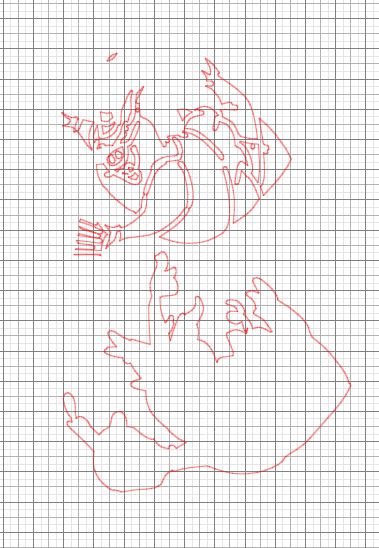
12.  Delete all the extra sections and just keep the outline.
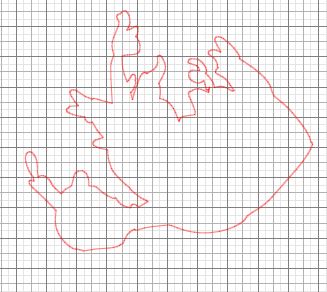
keep outline offset


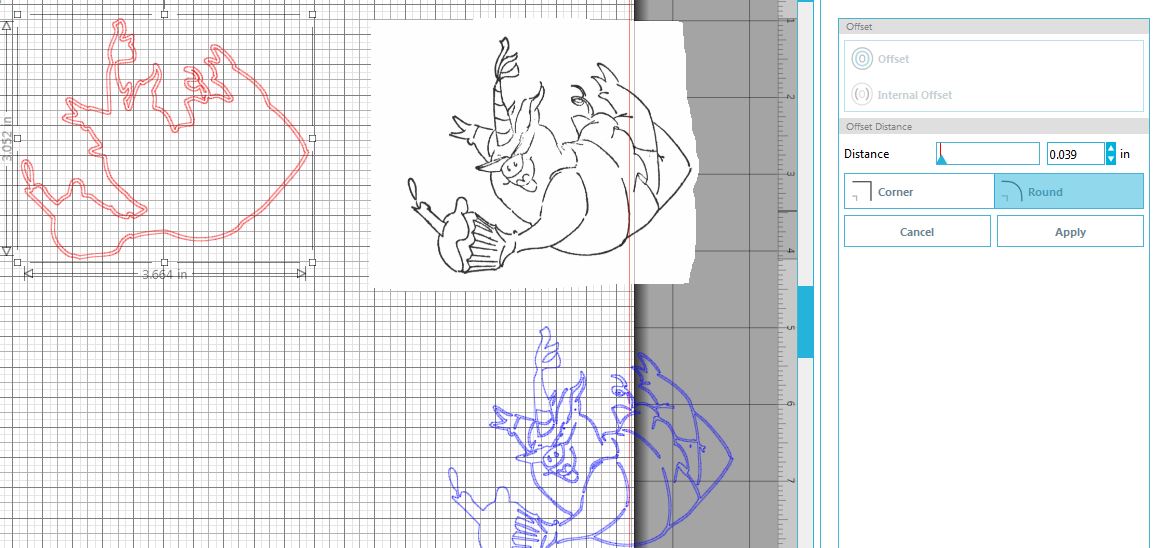
13.  Highlight your offset.  Open “Offset” window and select “Internal Offset” which will give you a slightly smaller shape inside your offset.  The default here is 0.039.
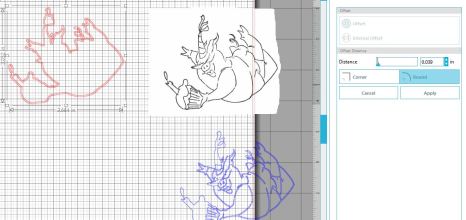
internal offset default

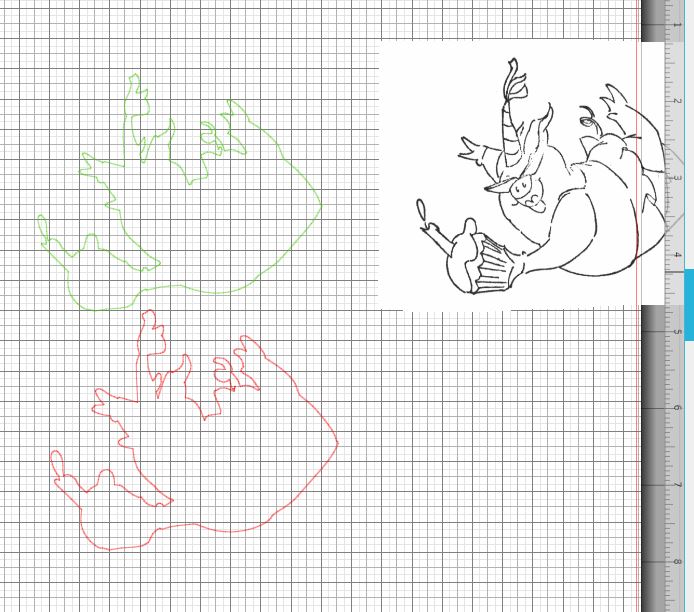
My internal offset is now green to make it easier to see here.  (You don’t need to change the color!)
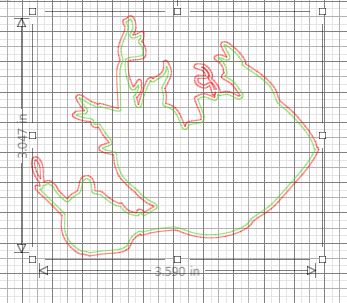
internal offset default in green


14.  Change the value of the internal offset to match the number you used to get your original offset.  Recall, mine was 0.020 from step 9 above.  (Highlight the offset and internal offset.  Click on the “Object” tab and click “Release Compound Path” to separate the two parts.  Then drag the outer piece (outline) away.
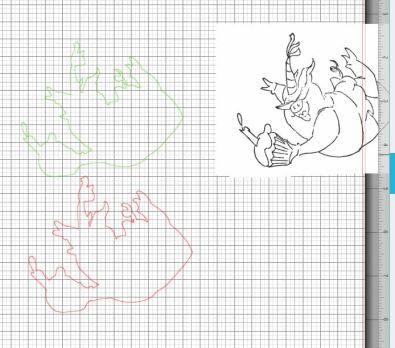
separate offset from internal offset


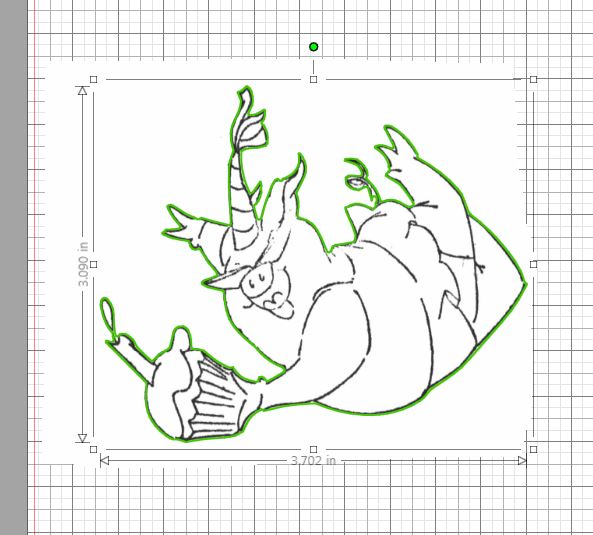
15.  The inside (internal offset) should be about the same size as your original scanned stamped image, without the gaps.  (I made my green lines a little thicker so you can see them easier here.)
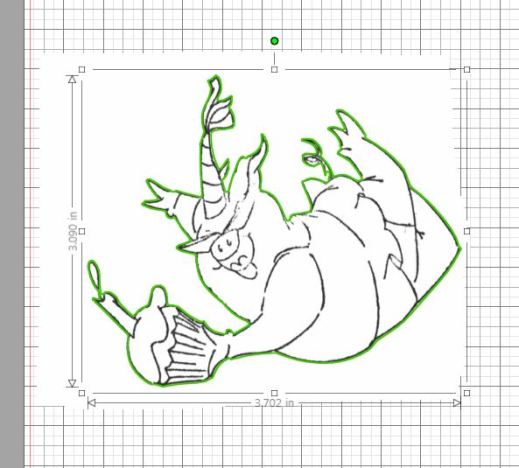
check size


16.  The above looks pretty close, but if you enlarge your view, by a lot, you will see where it is slightly off.
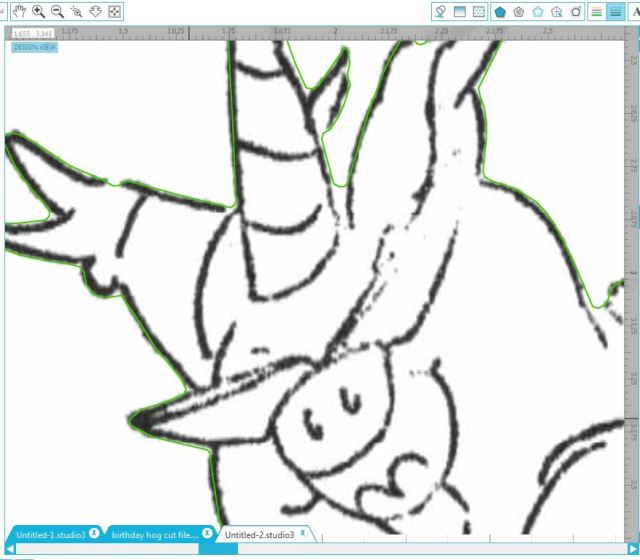
enlarged to see errors


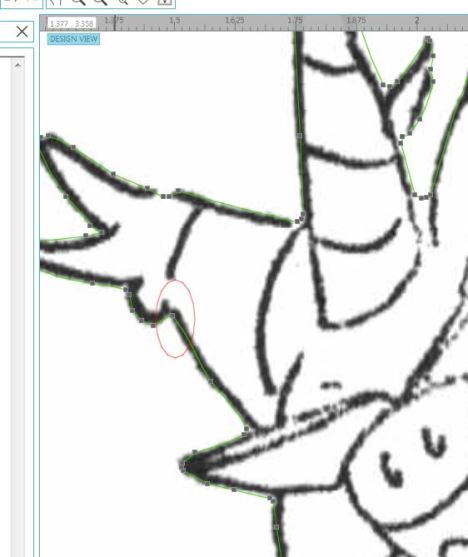
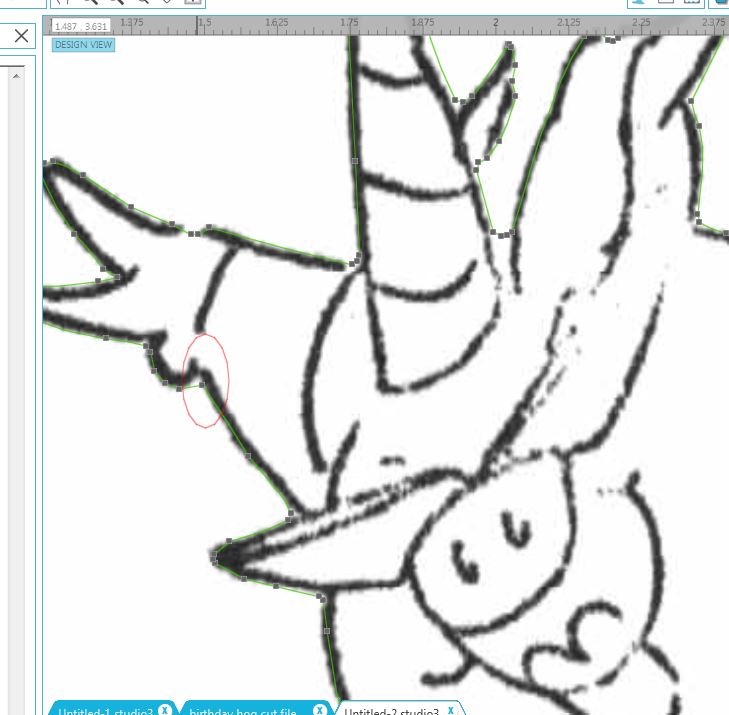
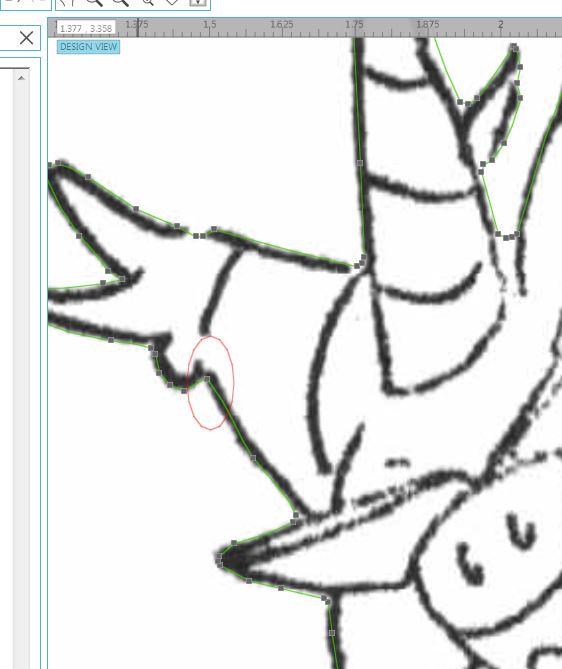
17.  To make this more exact you can move the nodes a bit.  Here’s how.  Double click on the green outline.  You will see the nodes (square “dots”) on this shape.

double click to show nodes

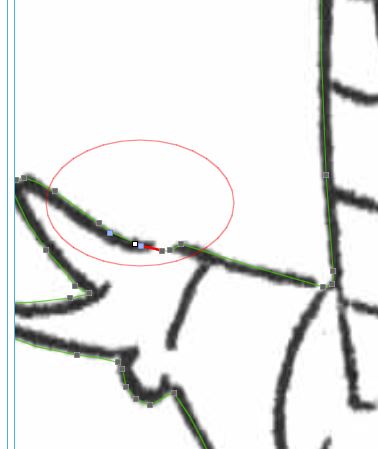
Put your cursor on a node.  While holding down the left side of your mouse, simple move the node so it is closer to the stamped shape.  Look at the node in the red oval below.  The first photo shows the original position of the node.  The second one shows where it is after I moved it.
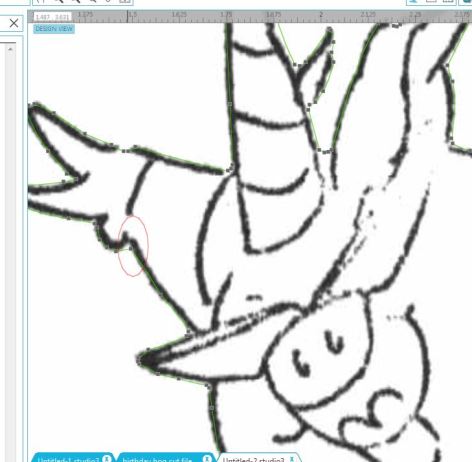
Before

(before)

After

(after)

You can add additional nodes to your shape by clicking on the line where there is no node.
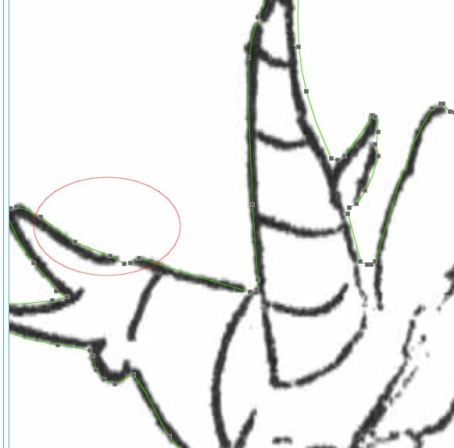
no node

(before)

add node

(after)

Be sure to save your work often while you work.

This is a very simplified explanation of how to clean up the cut file for your die cut.    As I mentioned above, you may want to check out the video series called Tracing Without Tearsin Silhouette Studio if you want a more detailed explanation of Point Editing.


When I need an exact cut, I enlarge my view and just work my way around the whole image, moving nodes into the exact position so they are on the edge of/slightly over the black line with no white gaps. This will give you a shape that matches the stamp so you will see no white when it is stamped.  Yes, it can be tedious depending on how messy your original trace was, but you will be pleased with the results if you are patient!

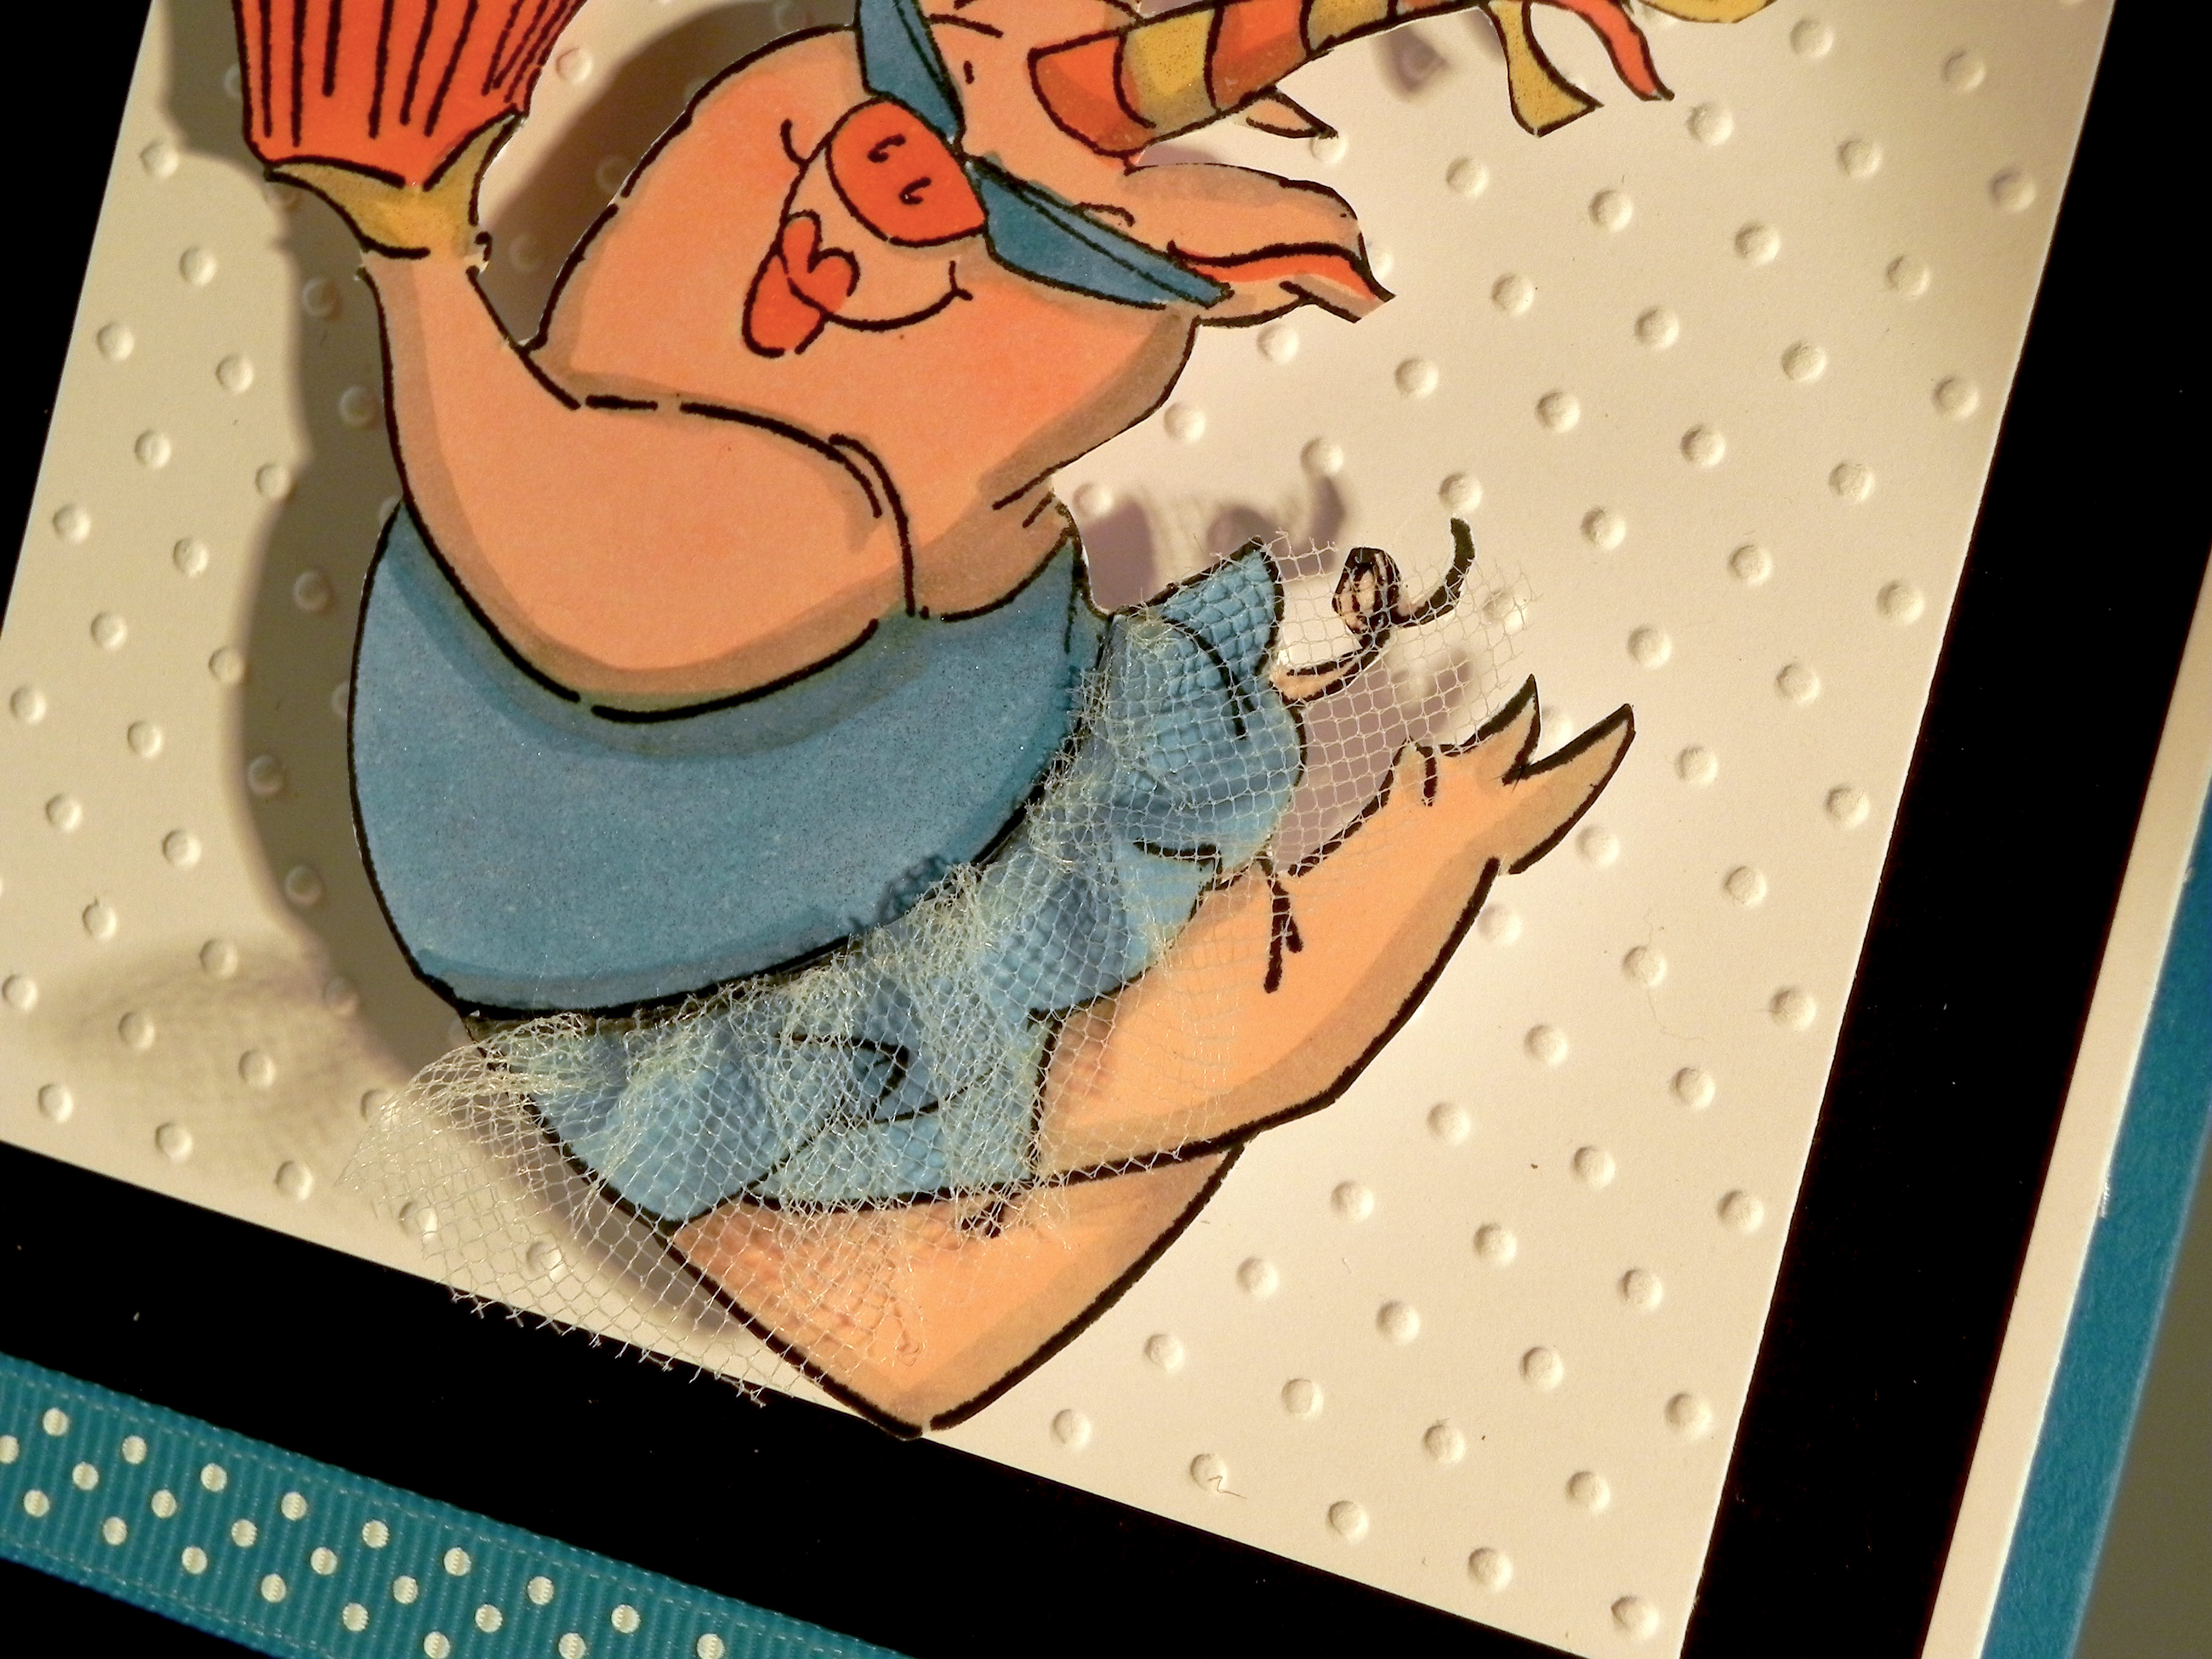
I know there are some who would be asking, “Why not just use scissors?”  That is certainly an option if you enjoy and are physically able to fussy cut your stamped images.  However, sometimes the images have lines that are difficult to cut with scissors.  And often, I create multiples of a card design, and it is so much easier to cut many die cuts with my Silhouette than to fussy cut each one.  This was the case with the card below.  I was making multiple copies of this card for a craft show, and I needed to cut the stamped crab image.  The claws were so thin and curvy that every time I tried to get around this portion of the image, the paper creased and/or tore.  I ended up making a cut file and was able to get a clean die cut and make lots of them.

Sandy CLaws zDSCN7072

(click HERE to see original post for this card)

Stamping on such precise die cuts can be tricky.  Check out my tutorial HERE to see how I use a positioning tool to get perfectly placed stamped images.


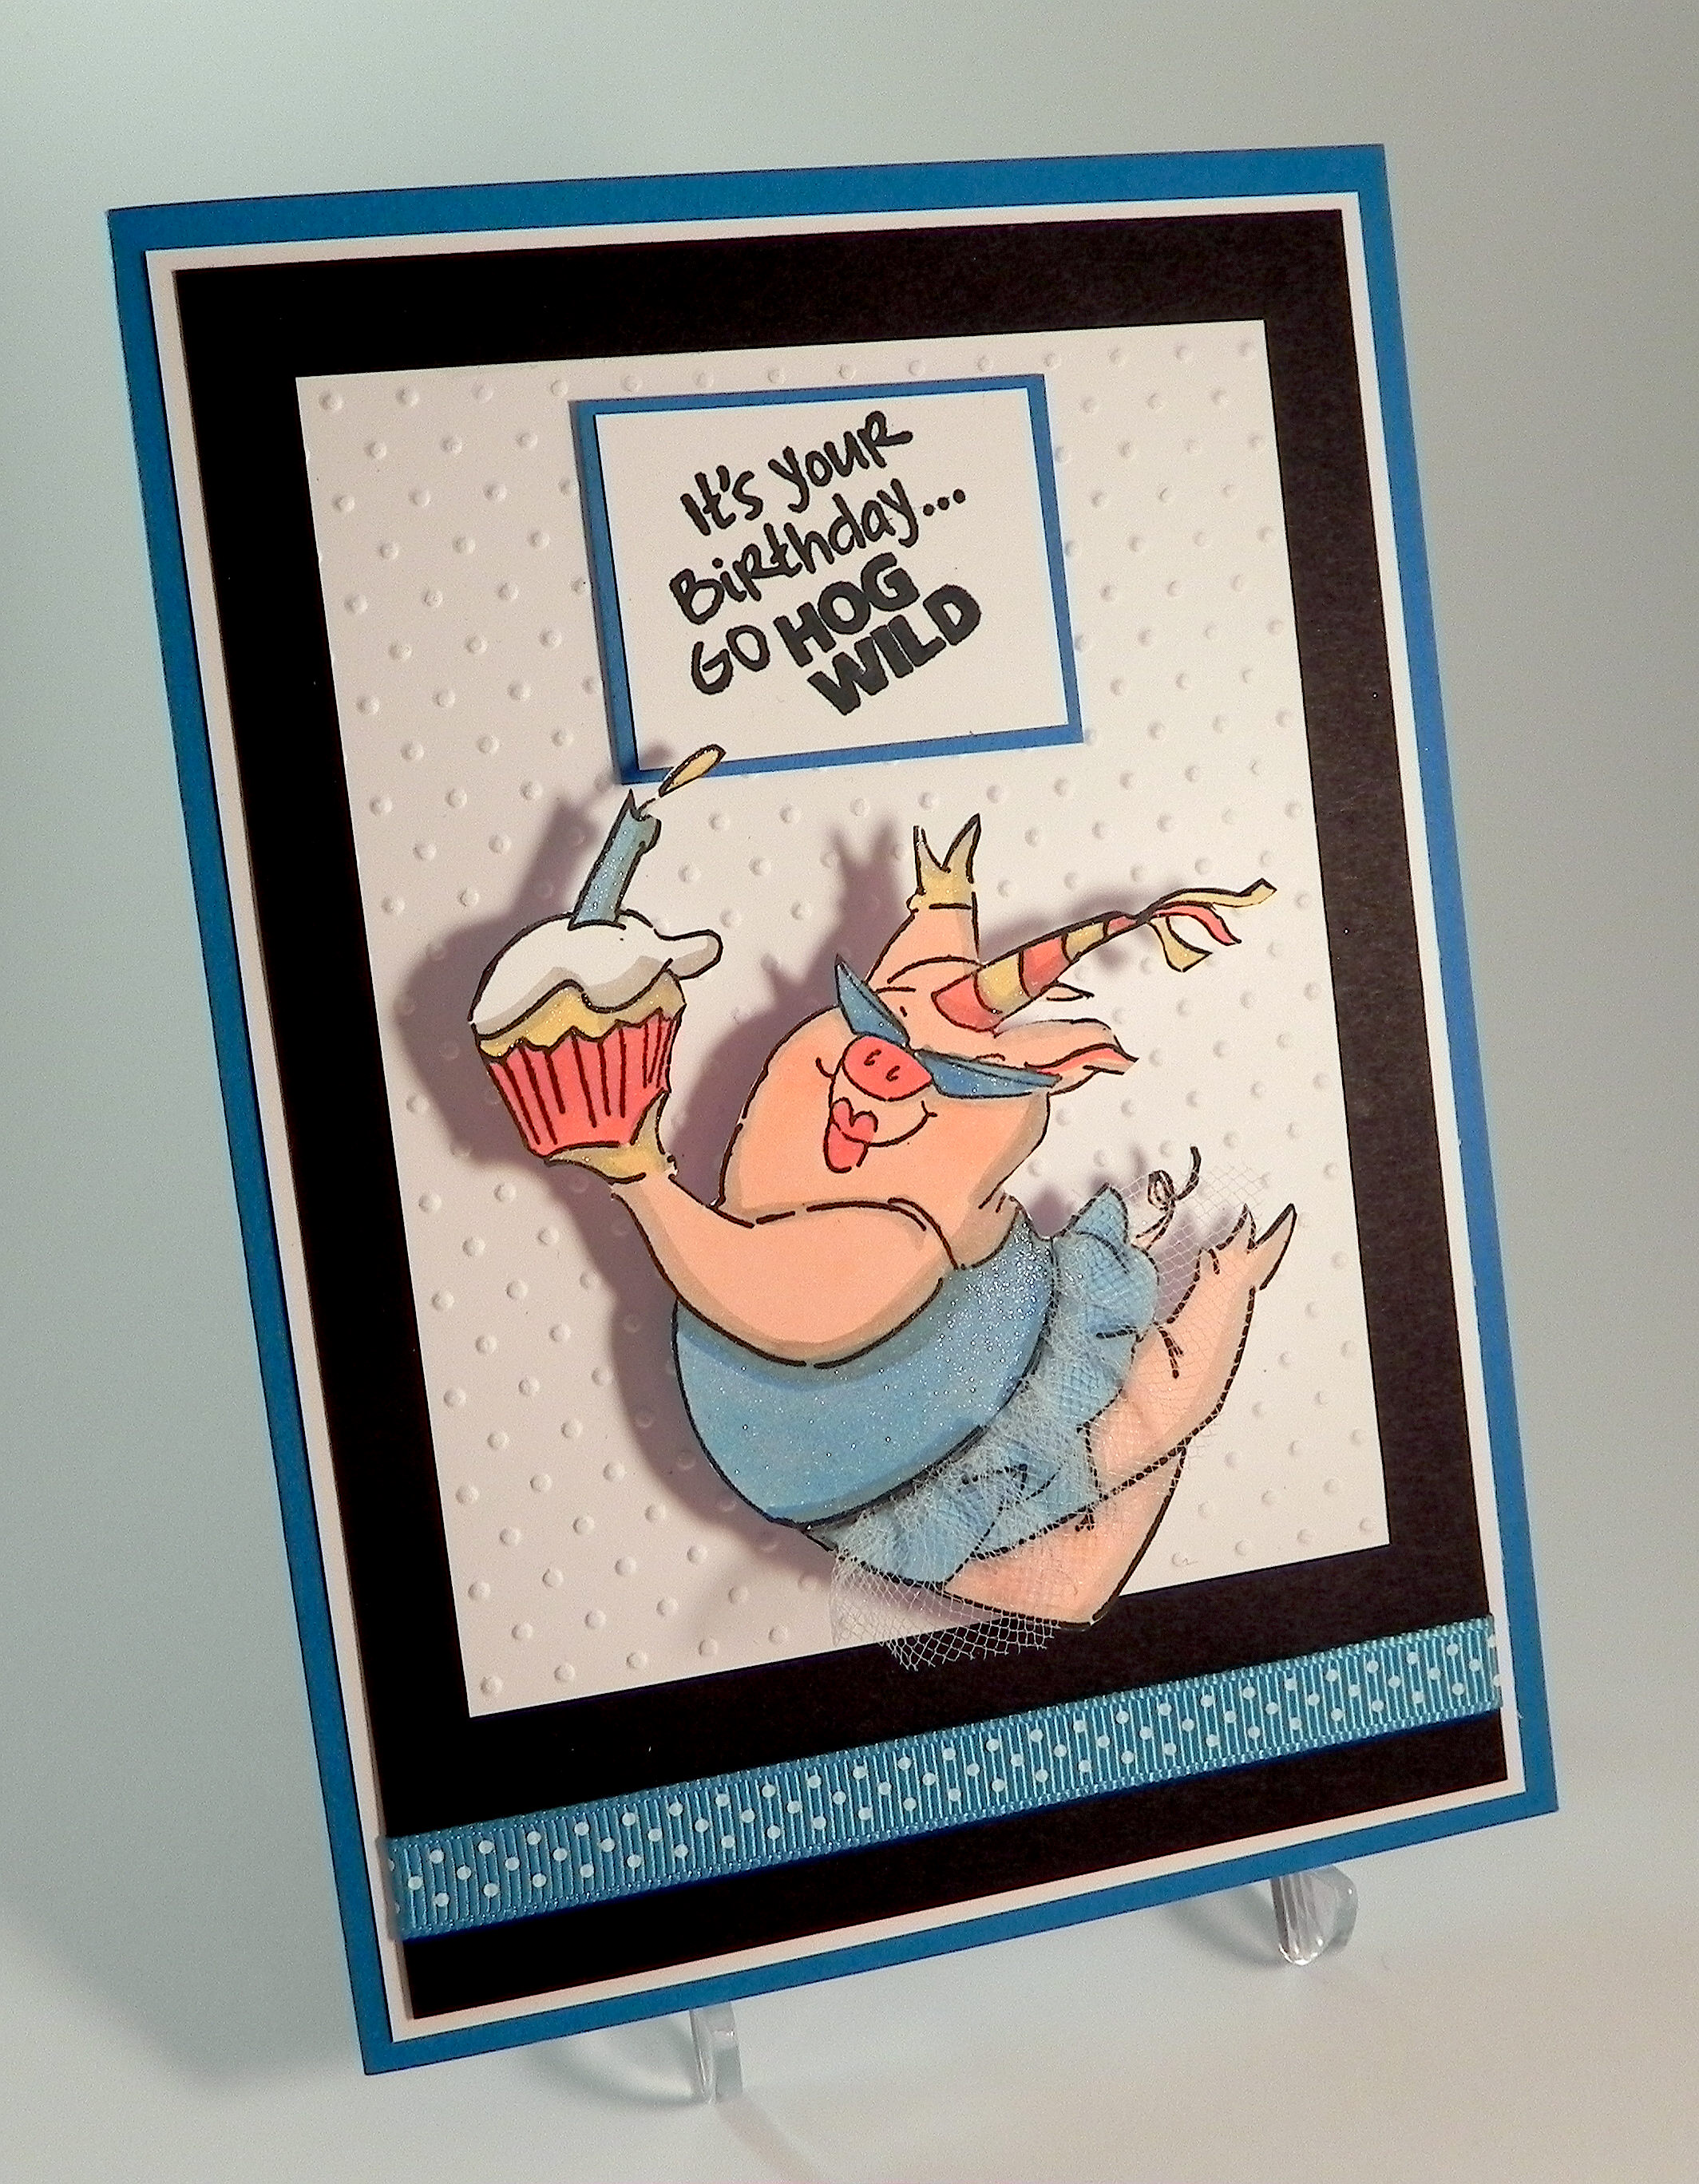
Finally, here is the card I made using the die cut I created above:
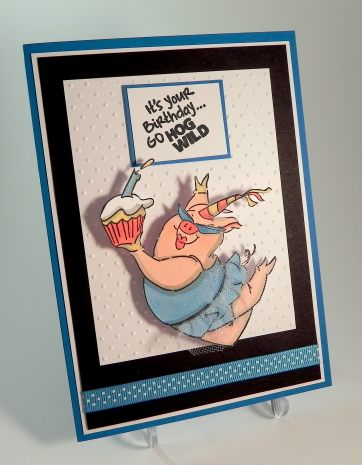
Hog Wild Birthday DSCN7819

(Click HERE for the original post for this card.)

Thanks for checking out my tutorial!

This content uses referral links as described in the disclosure policy on my sidebar.