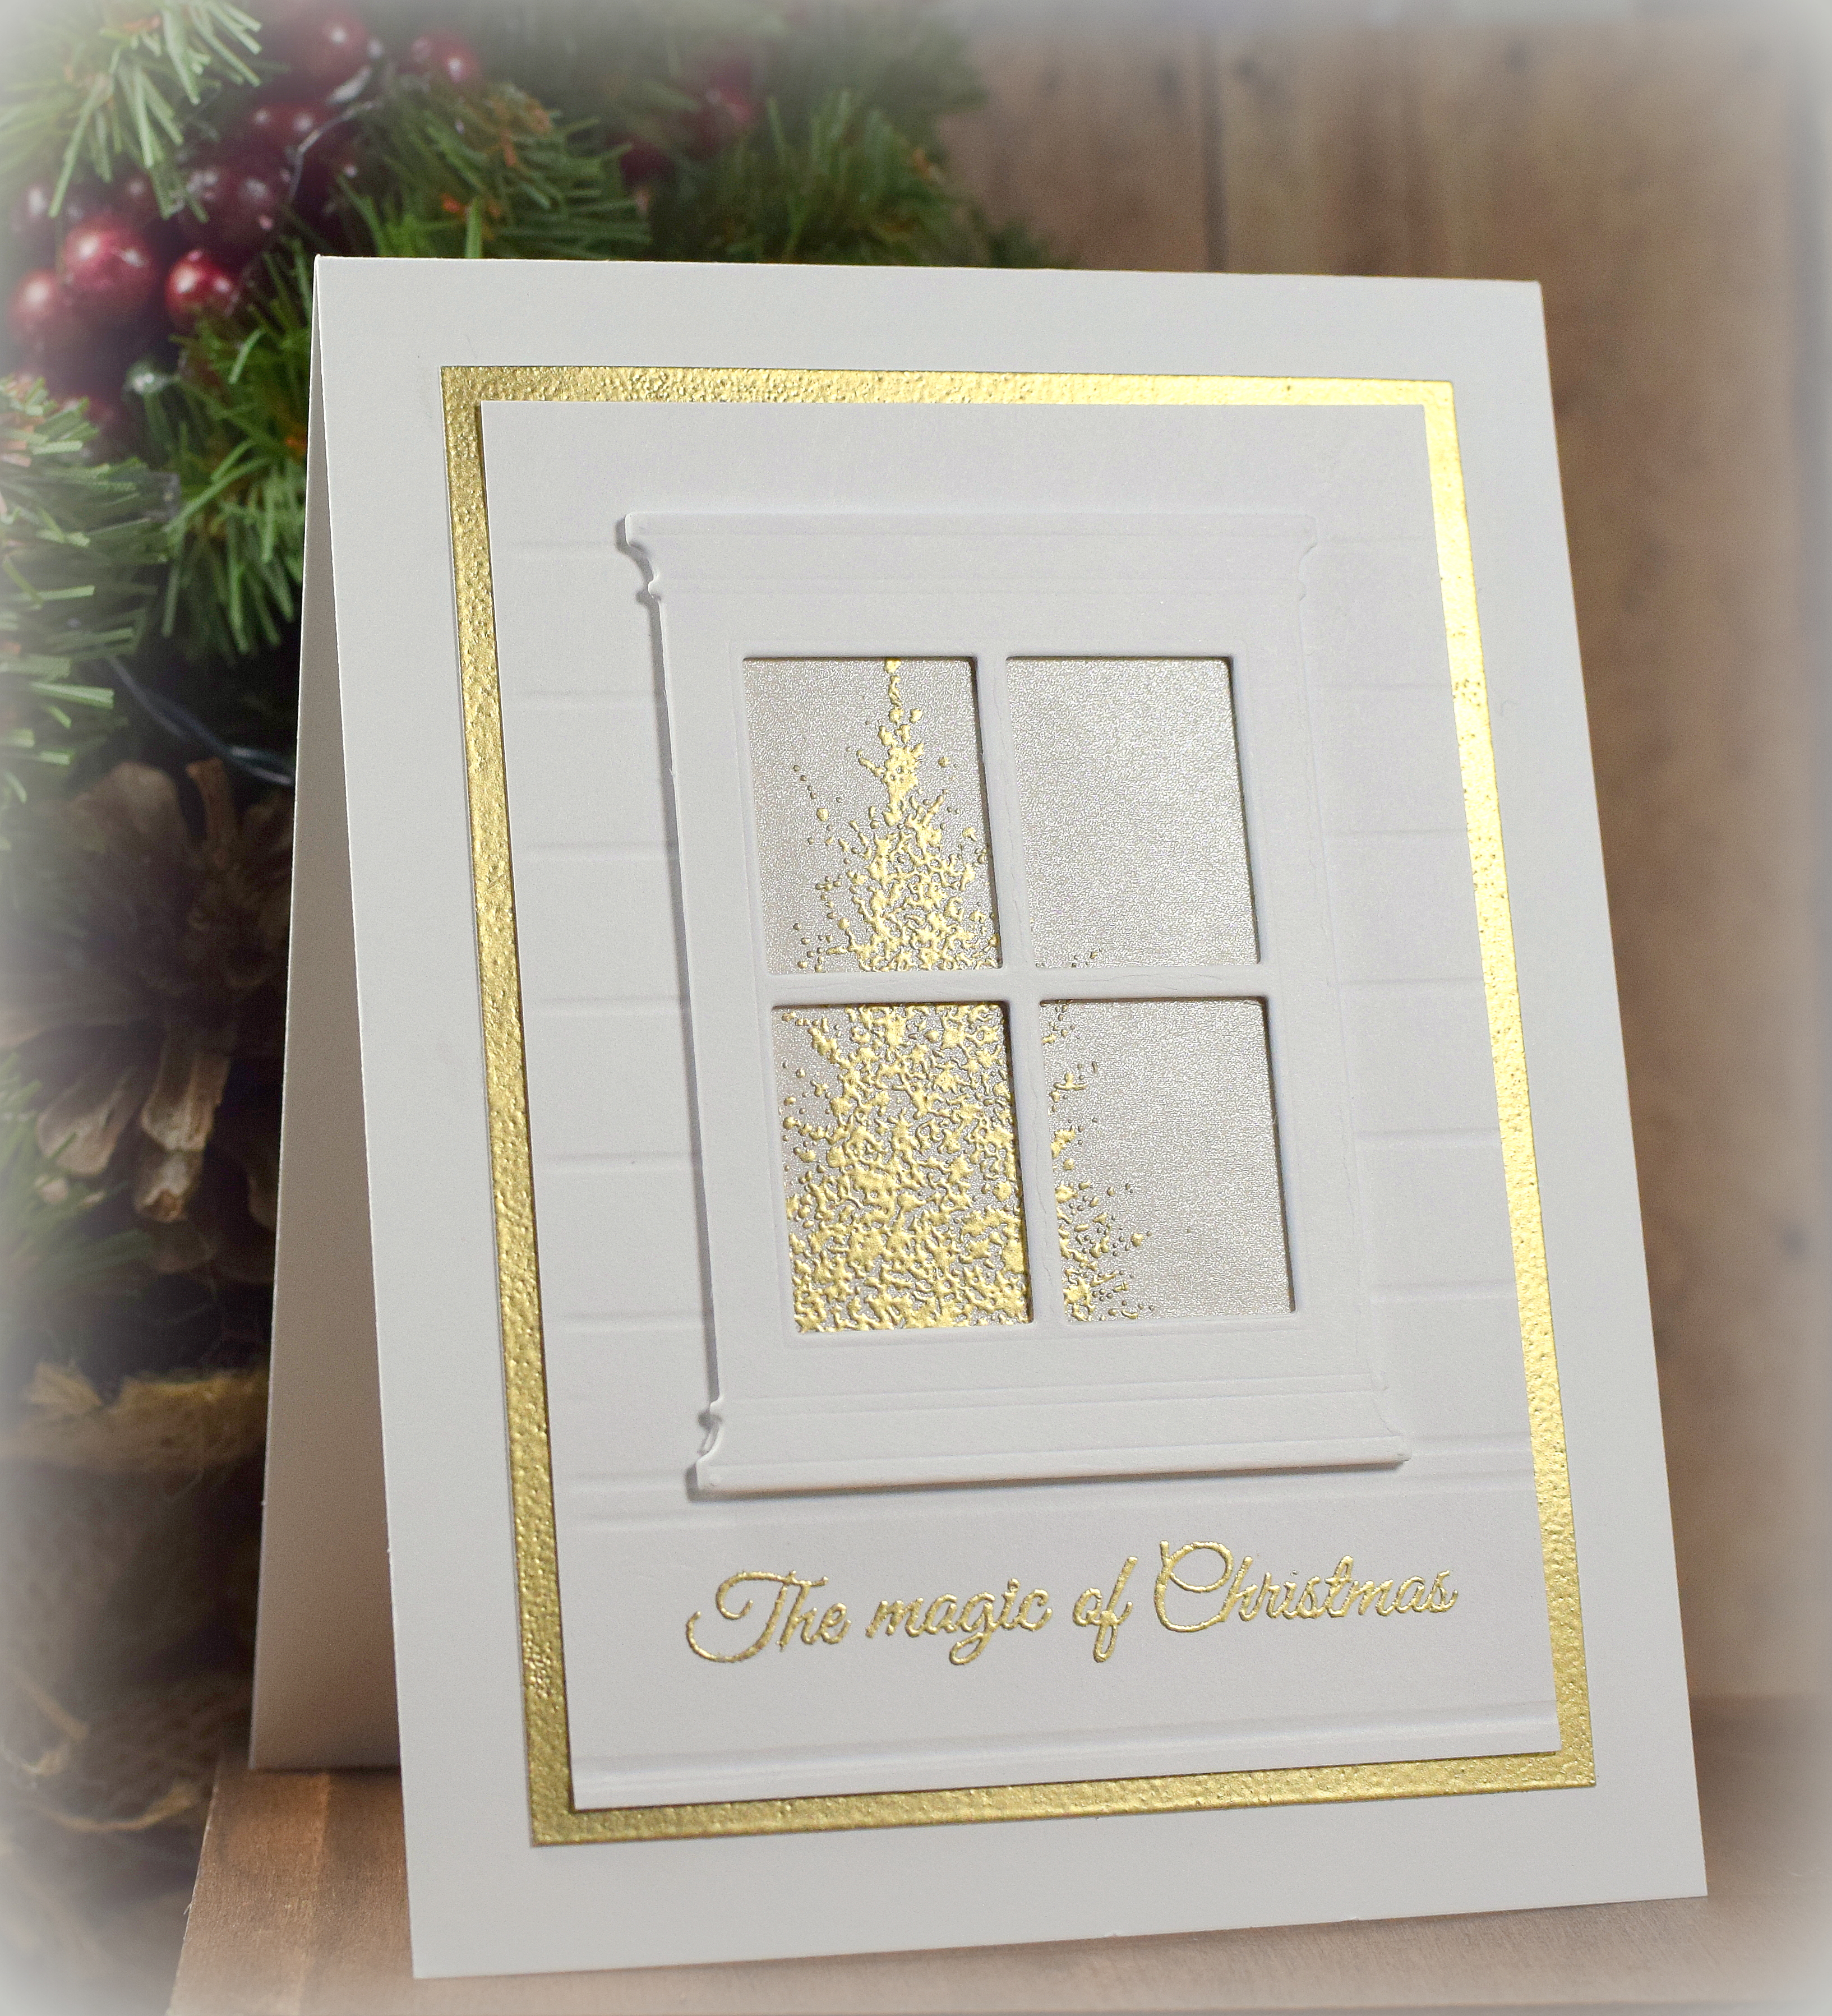
The Magic of Christmas

This gold and white card features the “Small Madison Window” die (style #816) by Poppystamps, inc. I cut and layered 4 of them to make the white window stand out against the white background.
I used my score board and a ball stylus to create the lines on the background panel. (The lines are a touch thicker when made with the stylus than with the bone folder.)
The tree in the window, the greeting, and the mat were all heat embossed with Gina K fine detail gold embossing powder. The tree is part of the Penny Black “Wonder Collection” stamp set that was a free gift with the Papercraft Essentials Magazine (issue 113) from September 2014. (The tree is called “A Splash of Winter” which is also available by itself.) I used the “direct to paper” technique with a varsamark ink pad and the embossing powder to make the visible edges of the mat panel gold. The tree was stamped/embossed on a piece of card stock from the Recollections Shimmer Silver and Champagne Card Stock pack from Michaels.
Here’s a view better showing the shine…
Thanks for checking out my card project!
This content uses referral links as described in the disclosure policy on my sidebar.