Safari Birthday Box Card with Tutorial
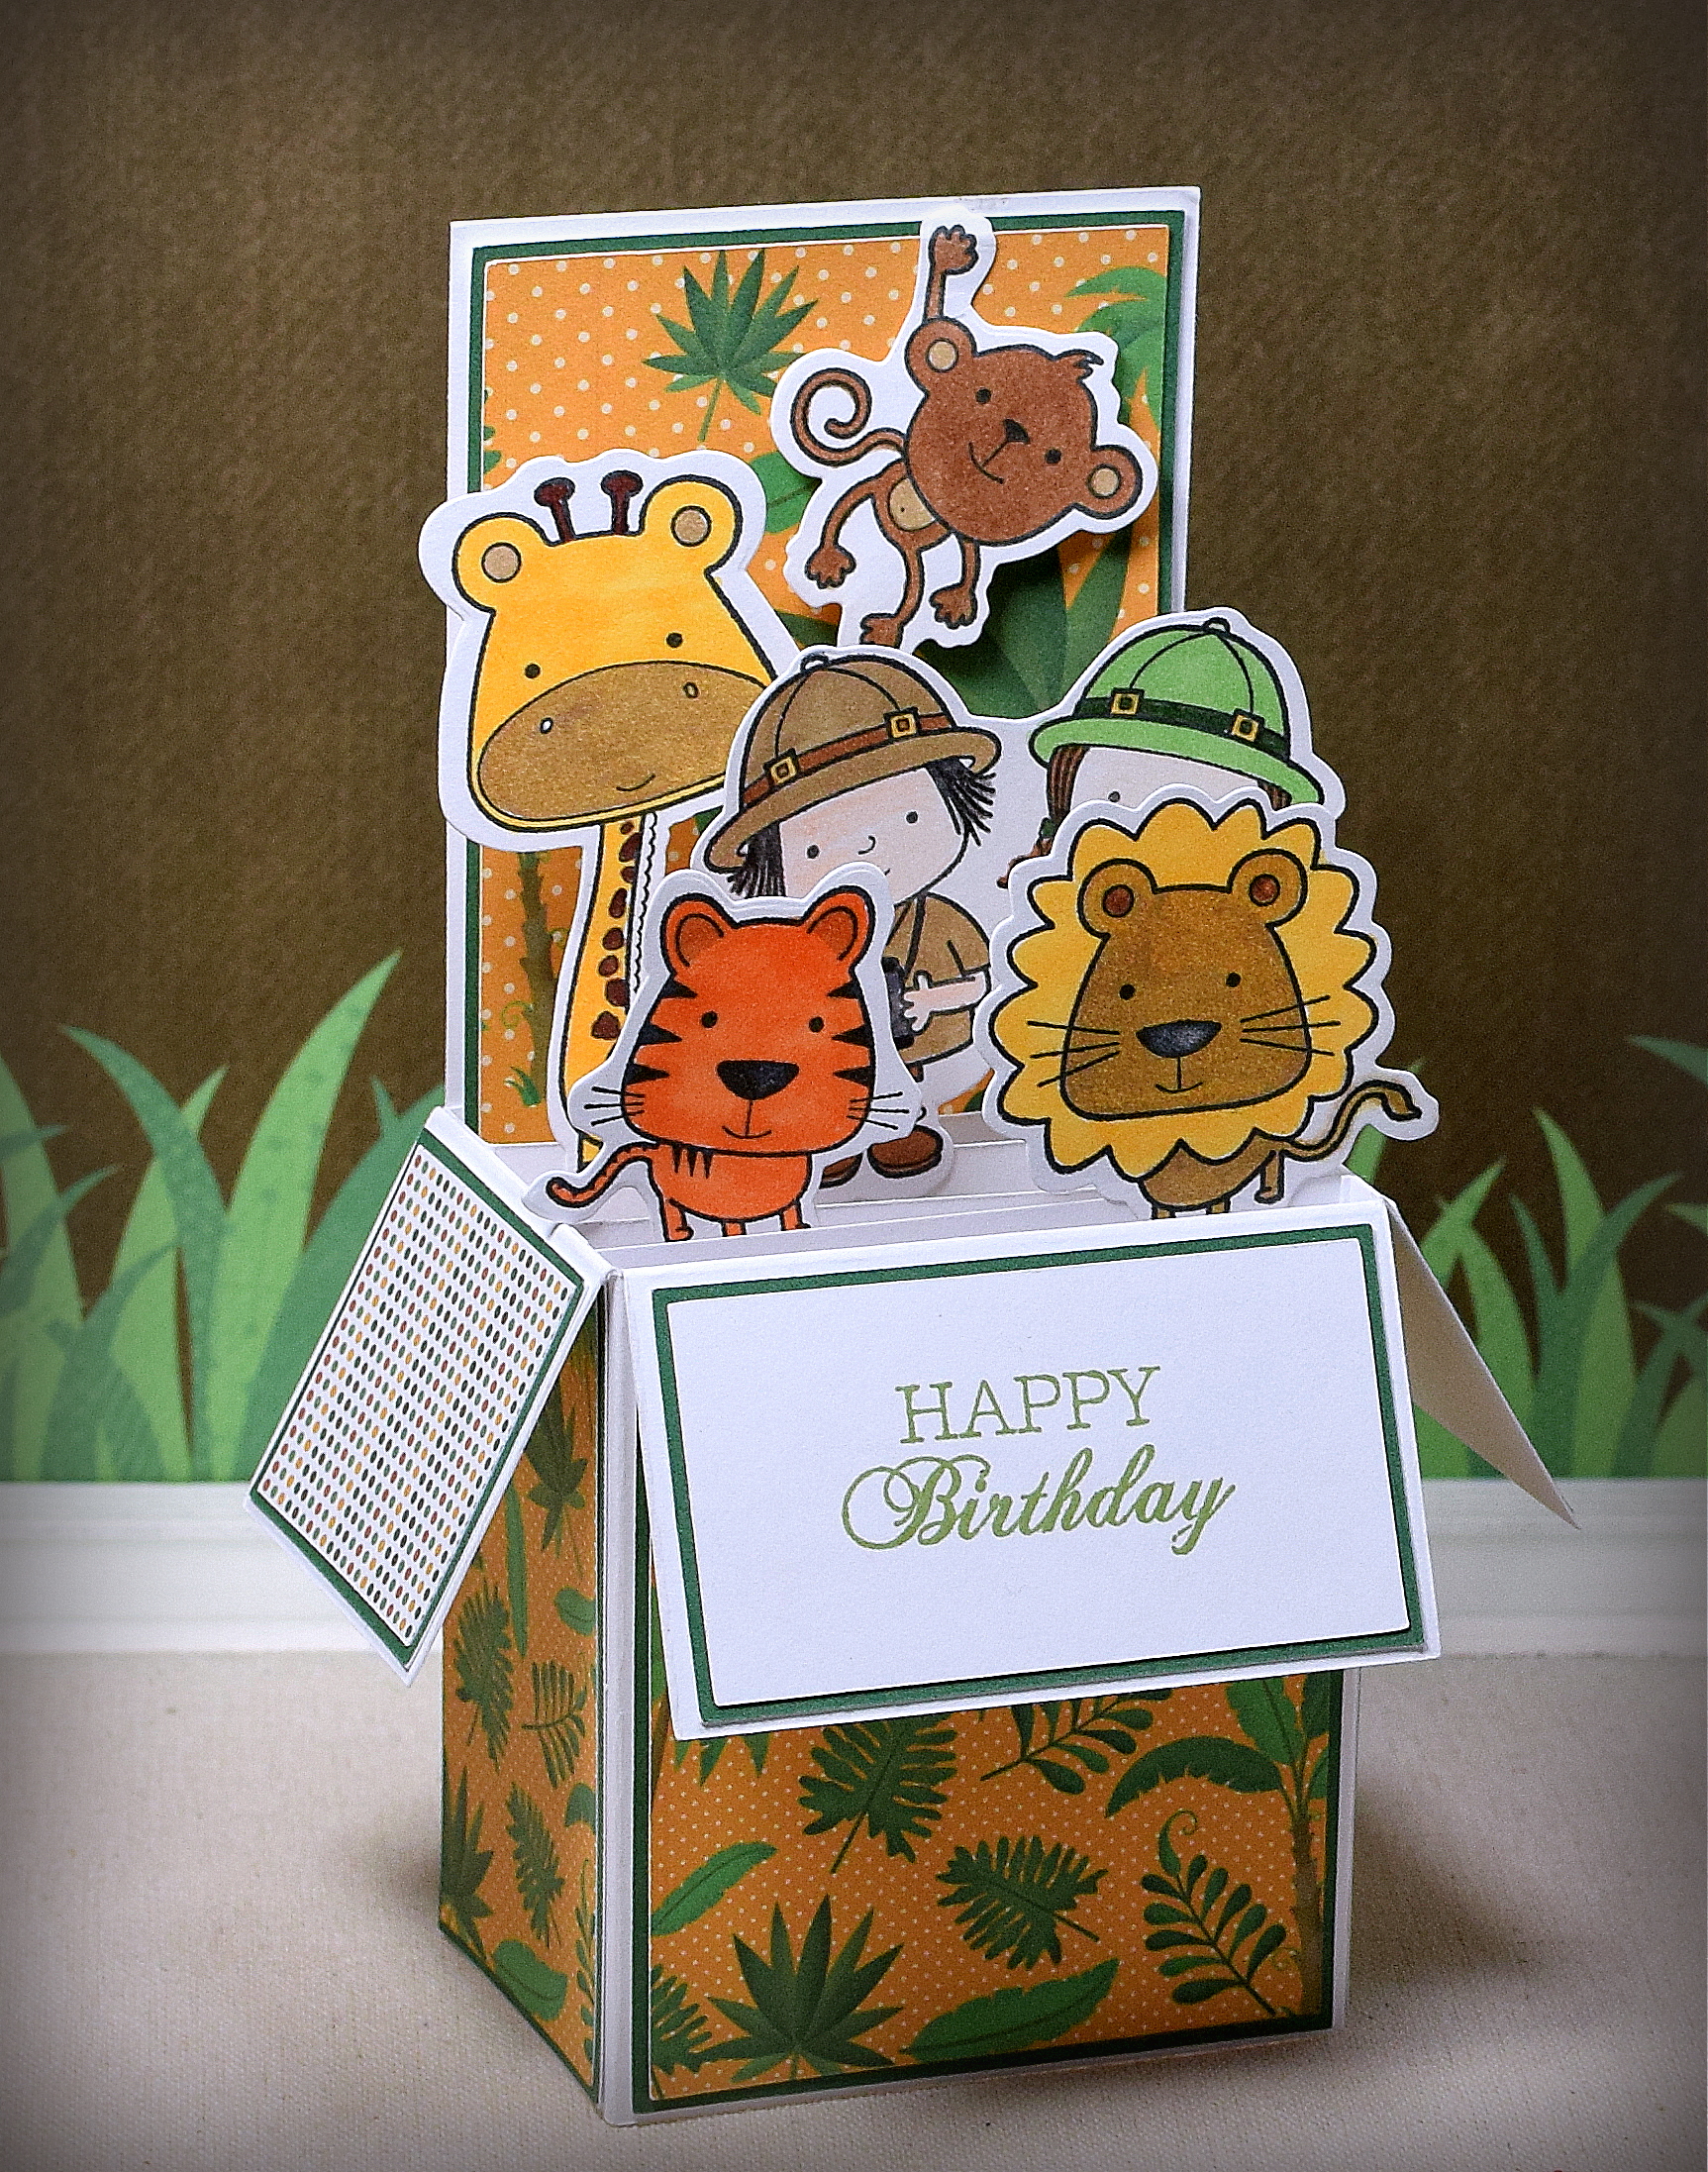
I really like box cards because they have so much dimension for displaying, but they fold flat for mailing. They are even better when you have adorable images to work with! (I’ve included a tutorial at the end of this post for creating the box card base.)
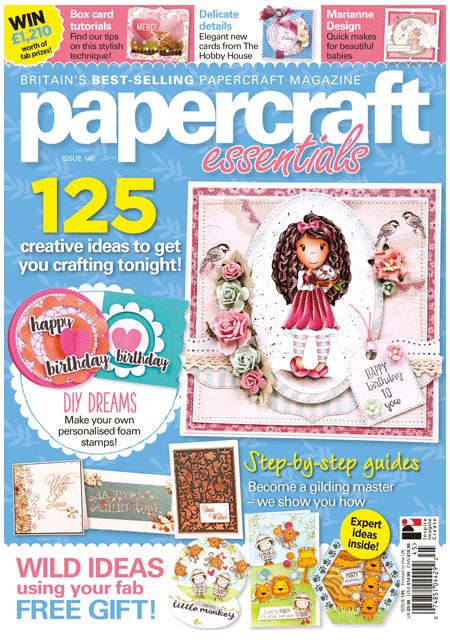
The stamp set is called “Safari Friends” and was included (a free gift) in the April 2017 issue of Papercraft Essentials magazine (issue 145). (I was lucky enough to find this set on ebay.)
I created cut files for the images with my Silhouette electronic die cutting machine, stamped them with Memento Tuxedo Black ink, and colored them with Bic Alcohol Markers. I also used a few colored pencils for the boy’s and girl’s skin.
The patterned paper I used to decorate the box is from a digital set called “Zoo Visit” by Scrapbook Gems and was purchased on Etsy. There is room on the back for a stamped or handwritten message.
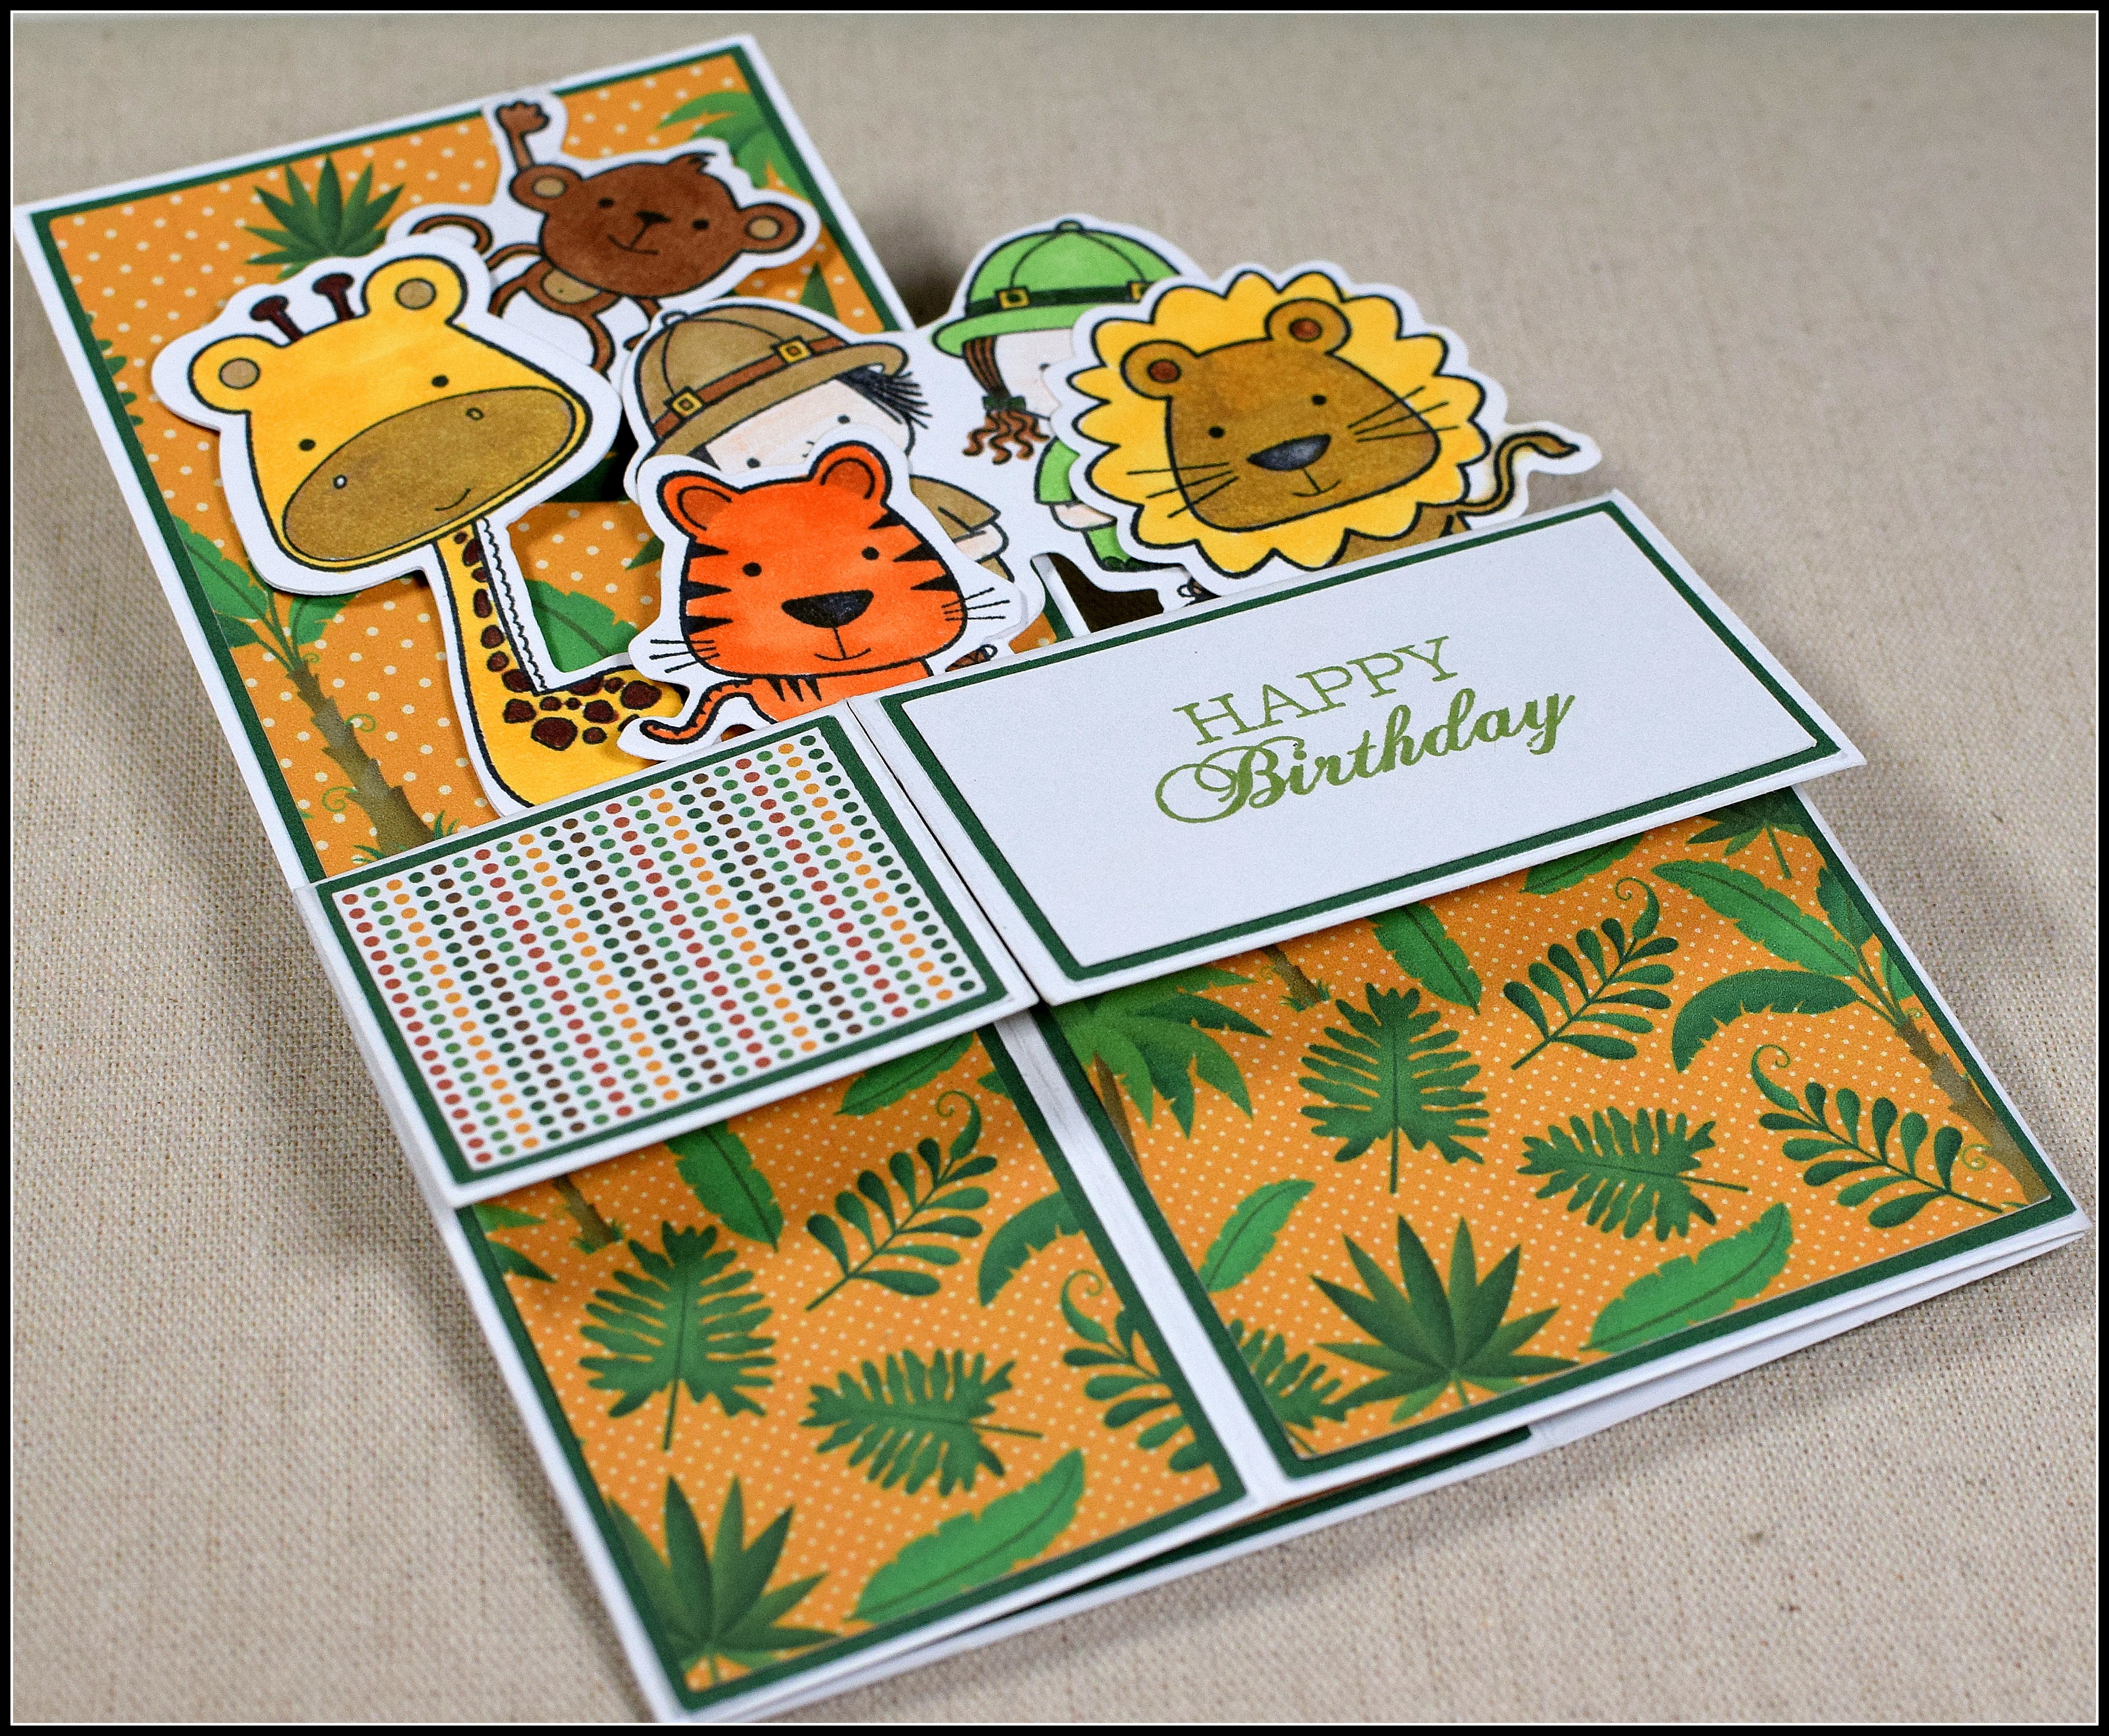
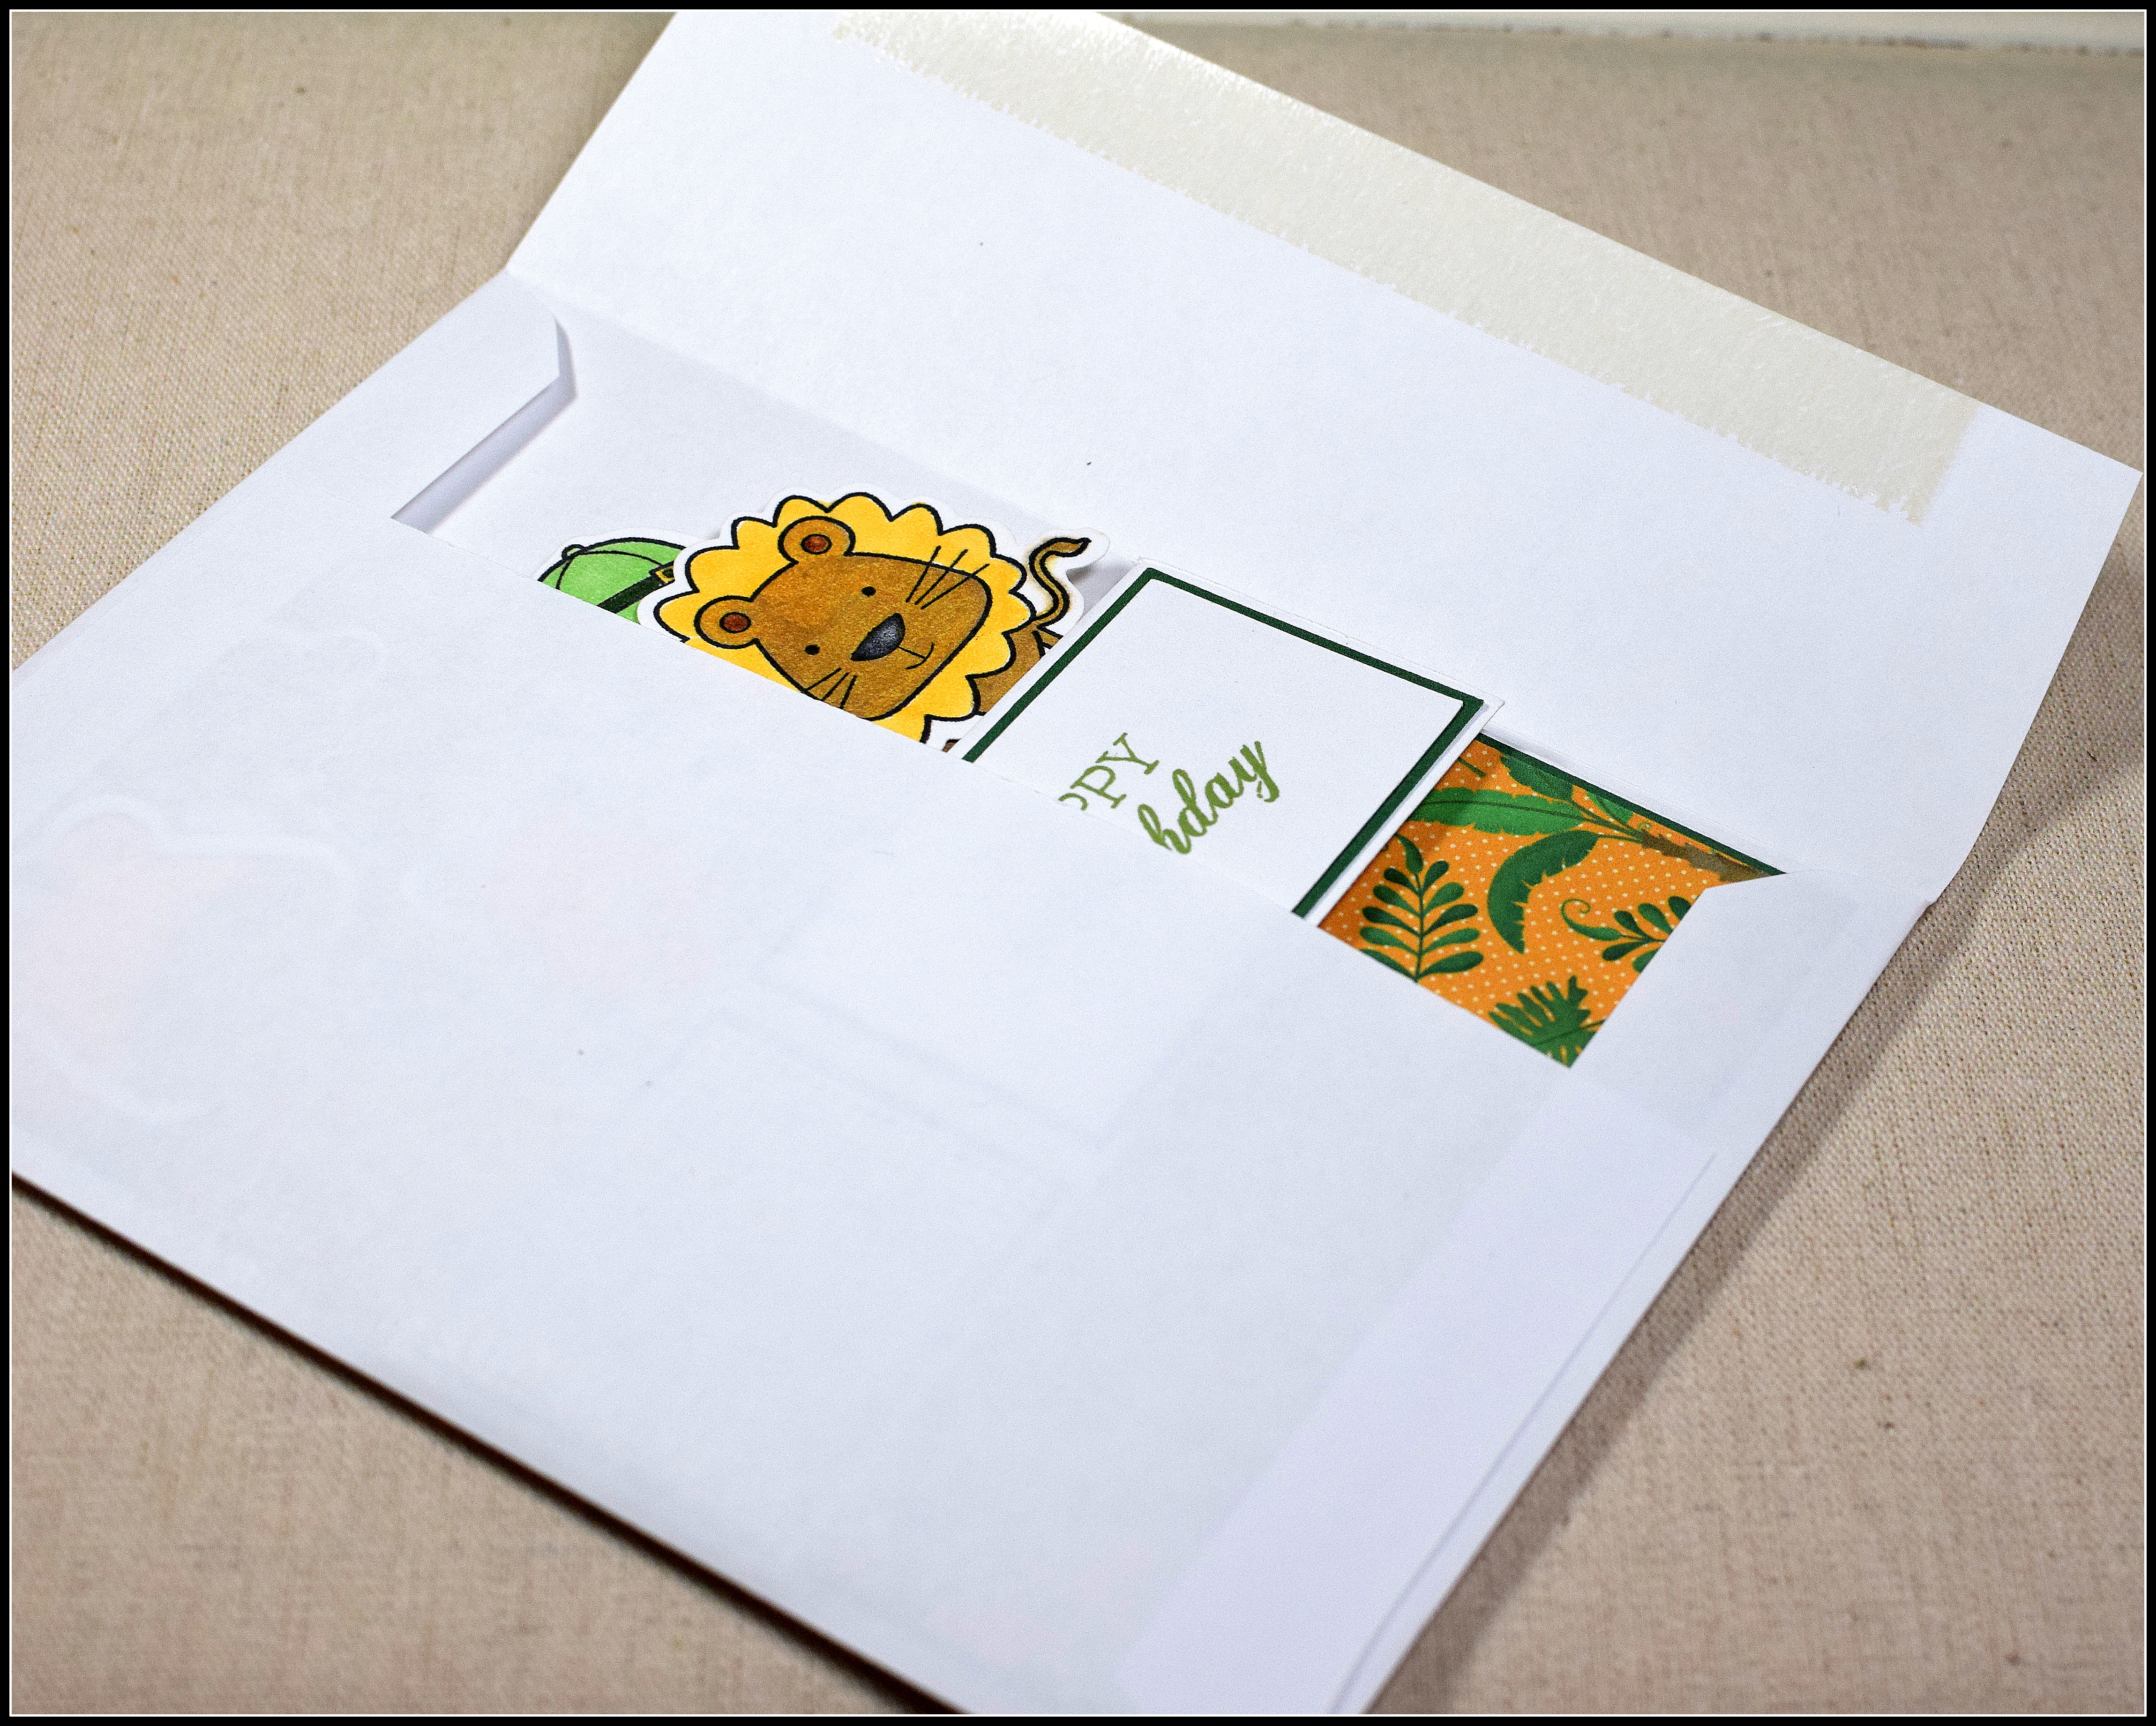
This card is 5 x 7 inches when folded flat and easily fits in a regular envelope for mailing.
This card was a lot of fun to make!
If interested in seeing how to make a box card…
*
Safari Birthday Box Card Template and Instructions
This template will make a box card from an 8 1/2 inch x 11 inch piece of card stock. The finished card will have a 2 inch x 3 inch “footprint” when opened and will be 5 inches x 7 inches when folded flat.
You can use a score board to score all the lines and then go over the portions that need to be cut with scissors, or you can use a trimmer to do all the cutting and scoring. (Instructions for both ways are shown below.)
TO MAKE A BOX CARD WITH A SCORE BOARD AND SCISSORS:
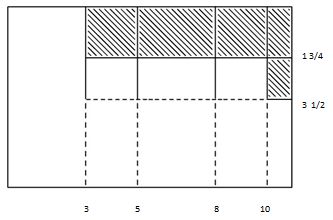
– – – score lines ___ cut lines remove shaded areas
- START BY TRIMMING CARD STOCK TO 11 INCHES X 7 INCHES.
- HOLD HORIZONTALLY (LANDSCAPE POSITION). SCORE AT 3, 5, 8, AND 10 INCHES. (If using a mini score board, score at 1, 3, and 6 inches. Then rotate 180 degrees and score at 3 inches.)
- ROTATE COUNTER CLOCKWISE AND HOLD VERTICALLY (PORTRAIT ORIENTATION – SKINNY “STRIP” SHOULD BE ON TOP.) SCORE FROM TOP DOWN TO LAST SCORE LINE AT 1 3/4 AND 3 1/2 INCHES.
- WITH SCISSORS, CUT OVER SCORE LINES WHERE SOLID LINES ARE ON DIAGRAM ABOVE. SHADED AREAS SHOULD BE REMOVED.
- FOLD ON ALL THE (DOTTED) SCORE LINES.
- GLUE SKINNY FLAP TO INSIDE OF BACK PANEL.
- CREATE CROSS BARS/STRIPS AND ADHERE TO INSIDE OF BOX (SEE BELOW).
- ADHERE ALL YOUR DECORATIVE PANELS TO THE CORRESPONDING BOX PANELS AND YOUR COLORED/DECORATED ELEMENTS TO THE CROSS BARS/STRIPS AS DESIRED.
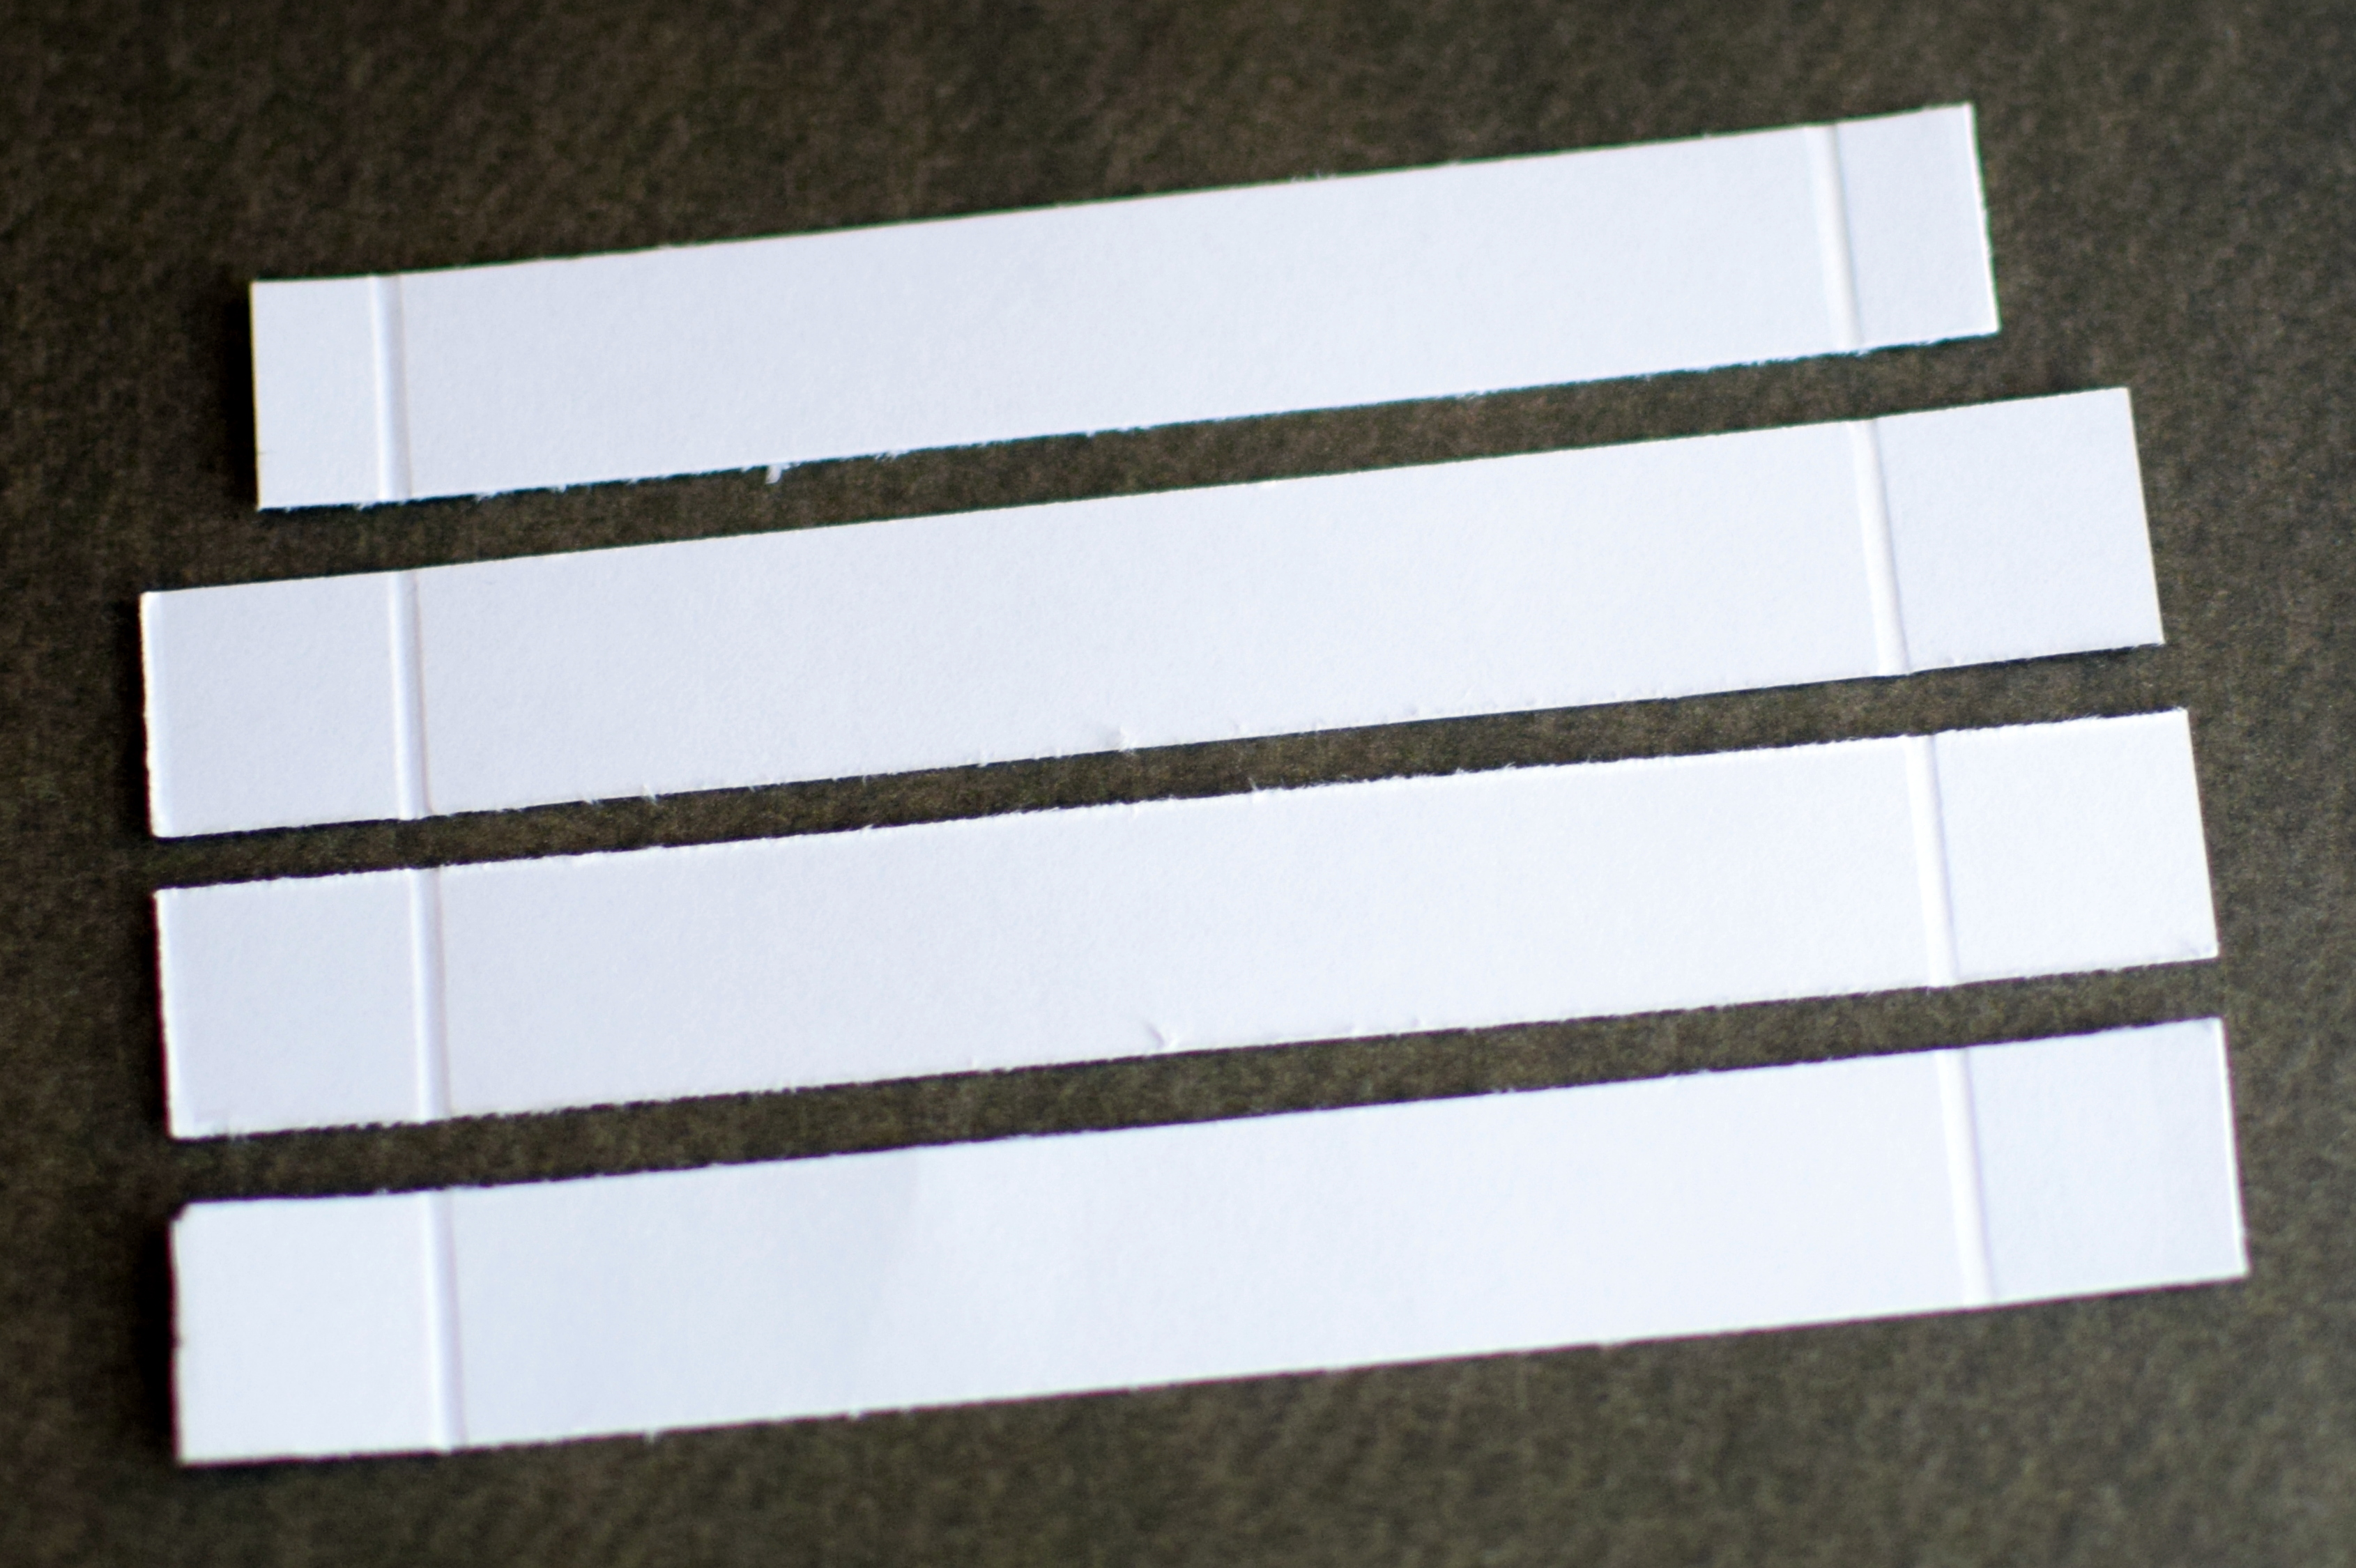
TO CREATE CROSS BARS/STRIPS…
- Cut three 4 inch x 1/2 inch strips, and cut one 3 1/2 inch x 1/2 inch strip.
- Score each of the longer strips at 1/2 inch and 3 1/2 inches. (In other words, make a 1/2 inch score line on each end.) Then, score the shorter strip at 1/4 inch and 3 1/4 inch. (In other words, make a 1/4 inch score line on each end.) THIS SHORTER ONE WILL BE THE FRONT BAR.
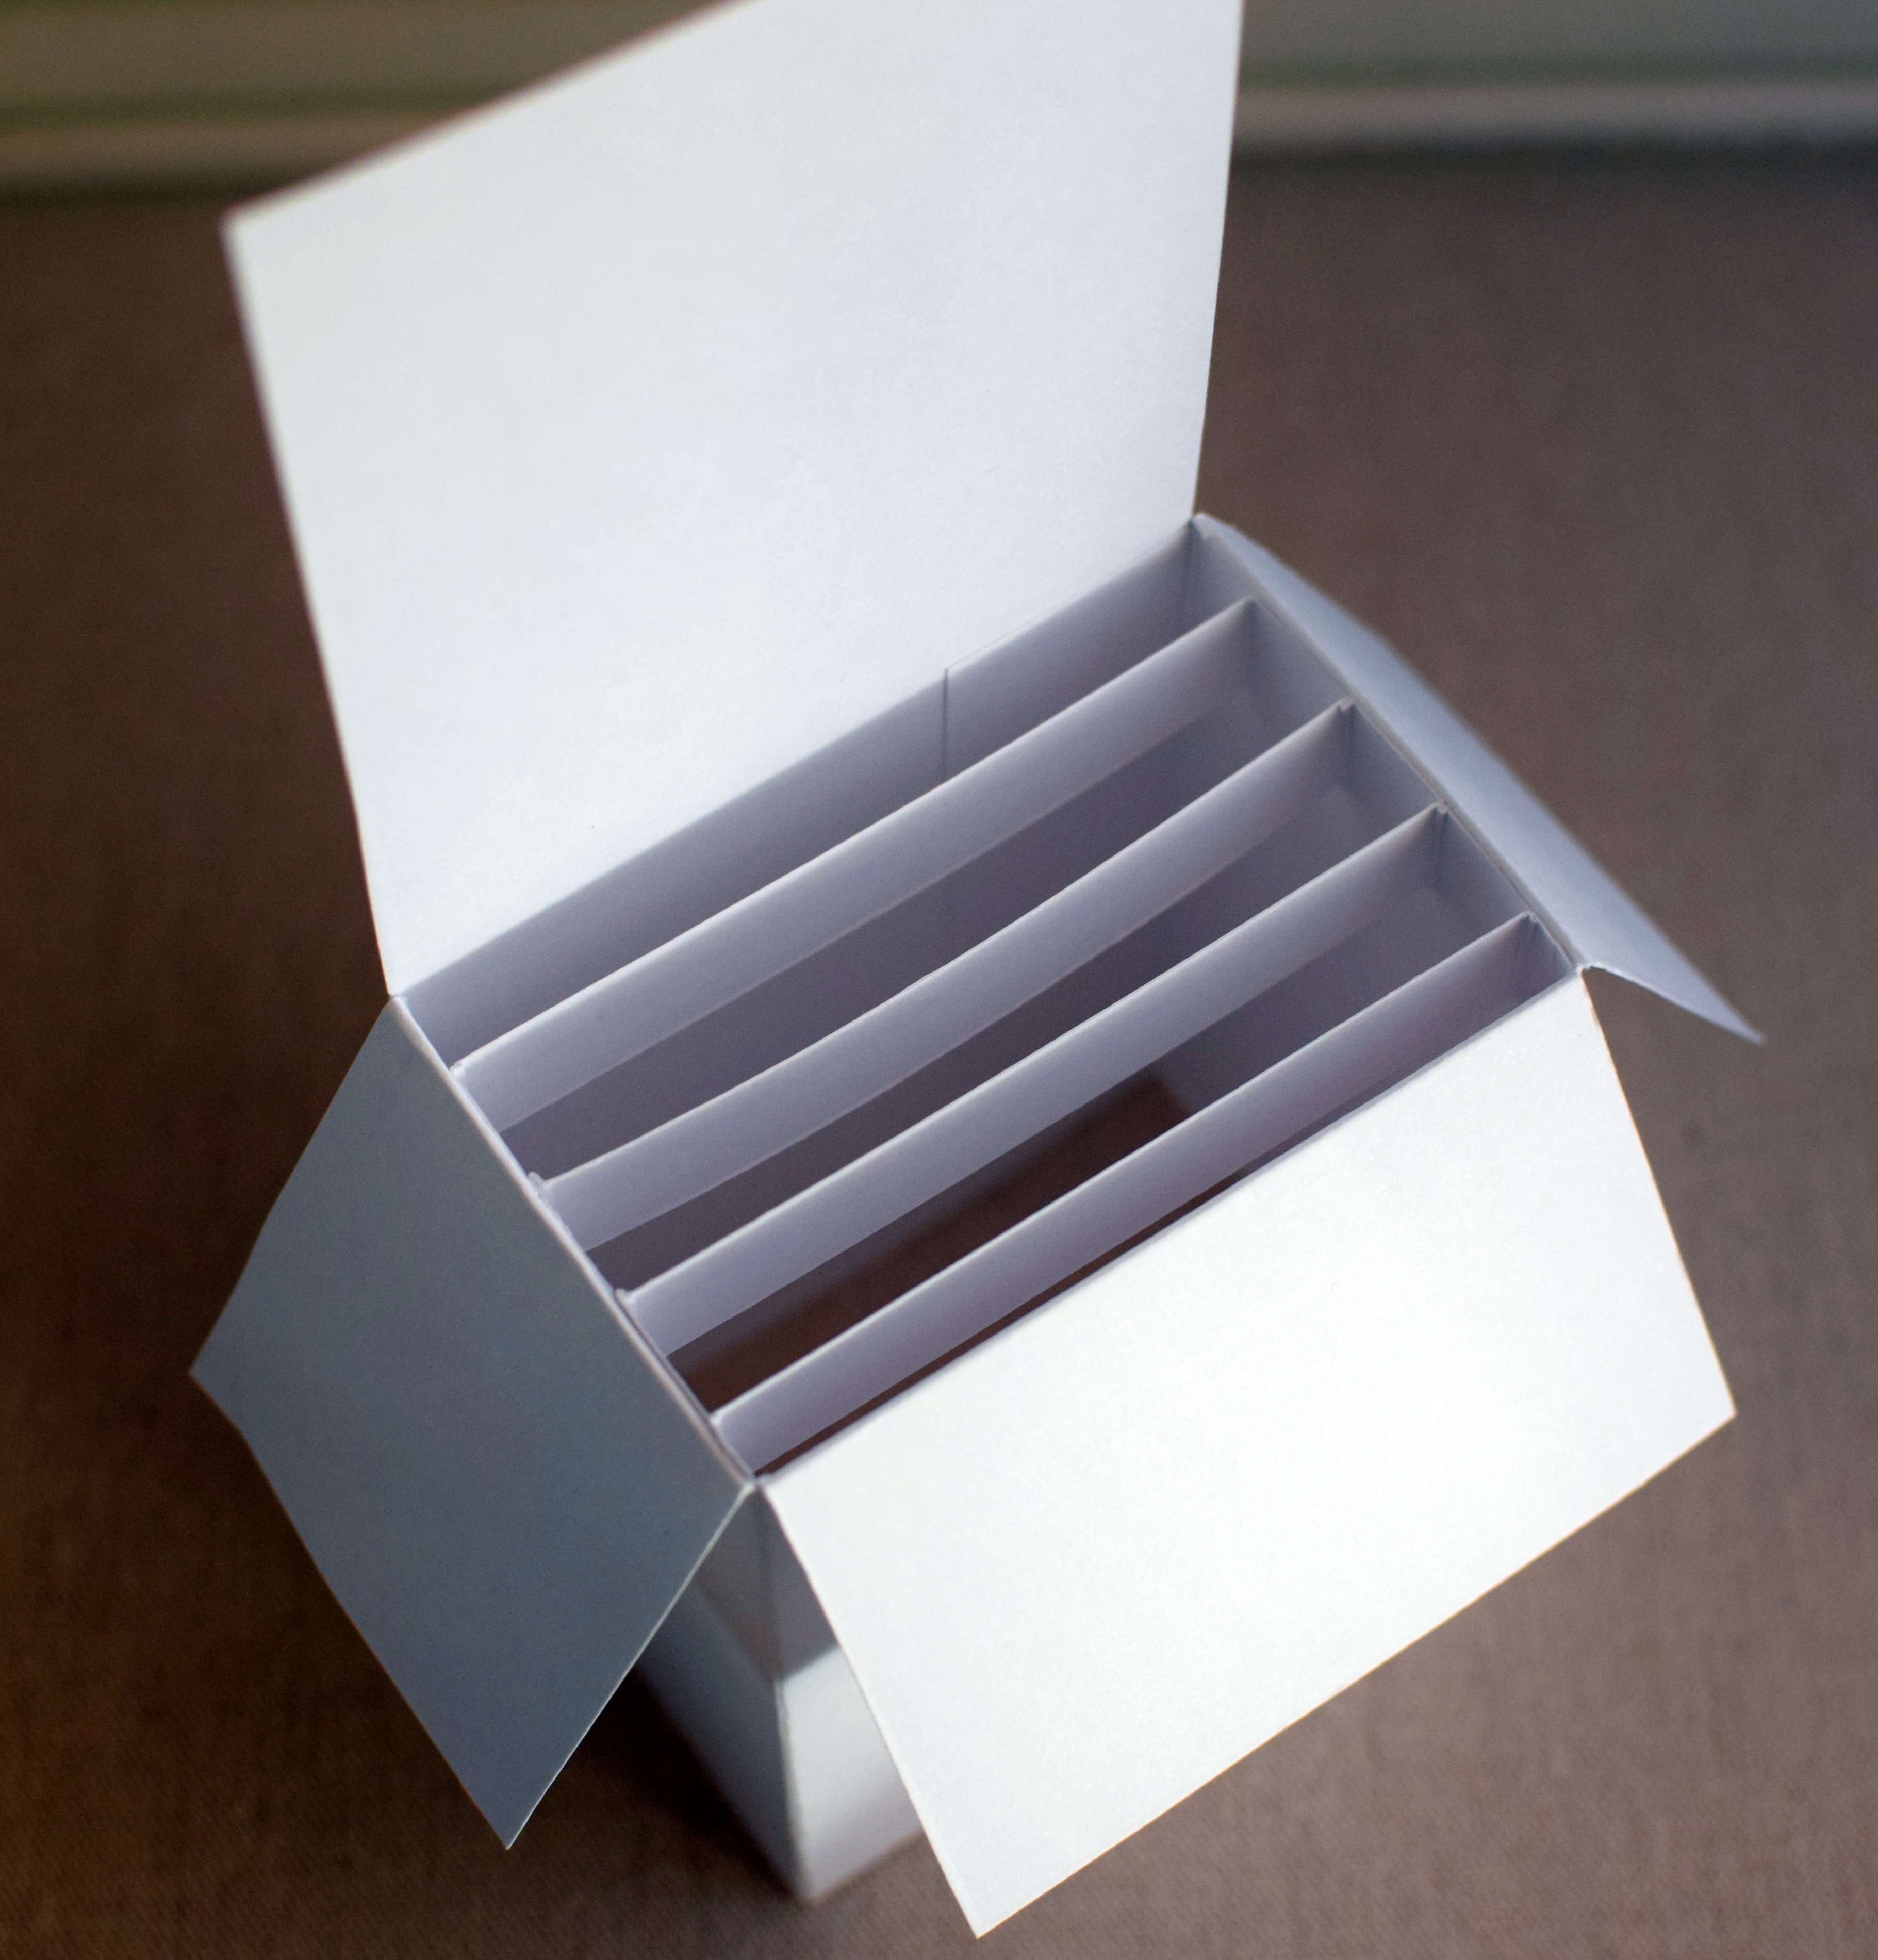
- Fold on the score lines.

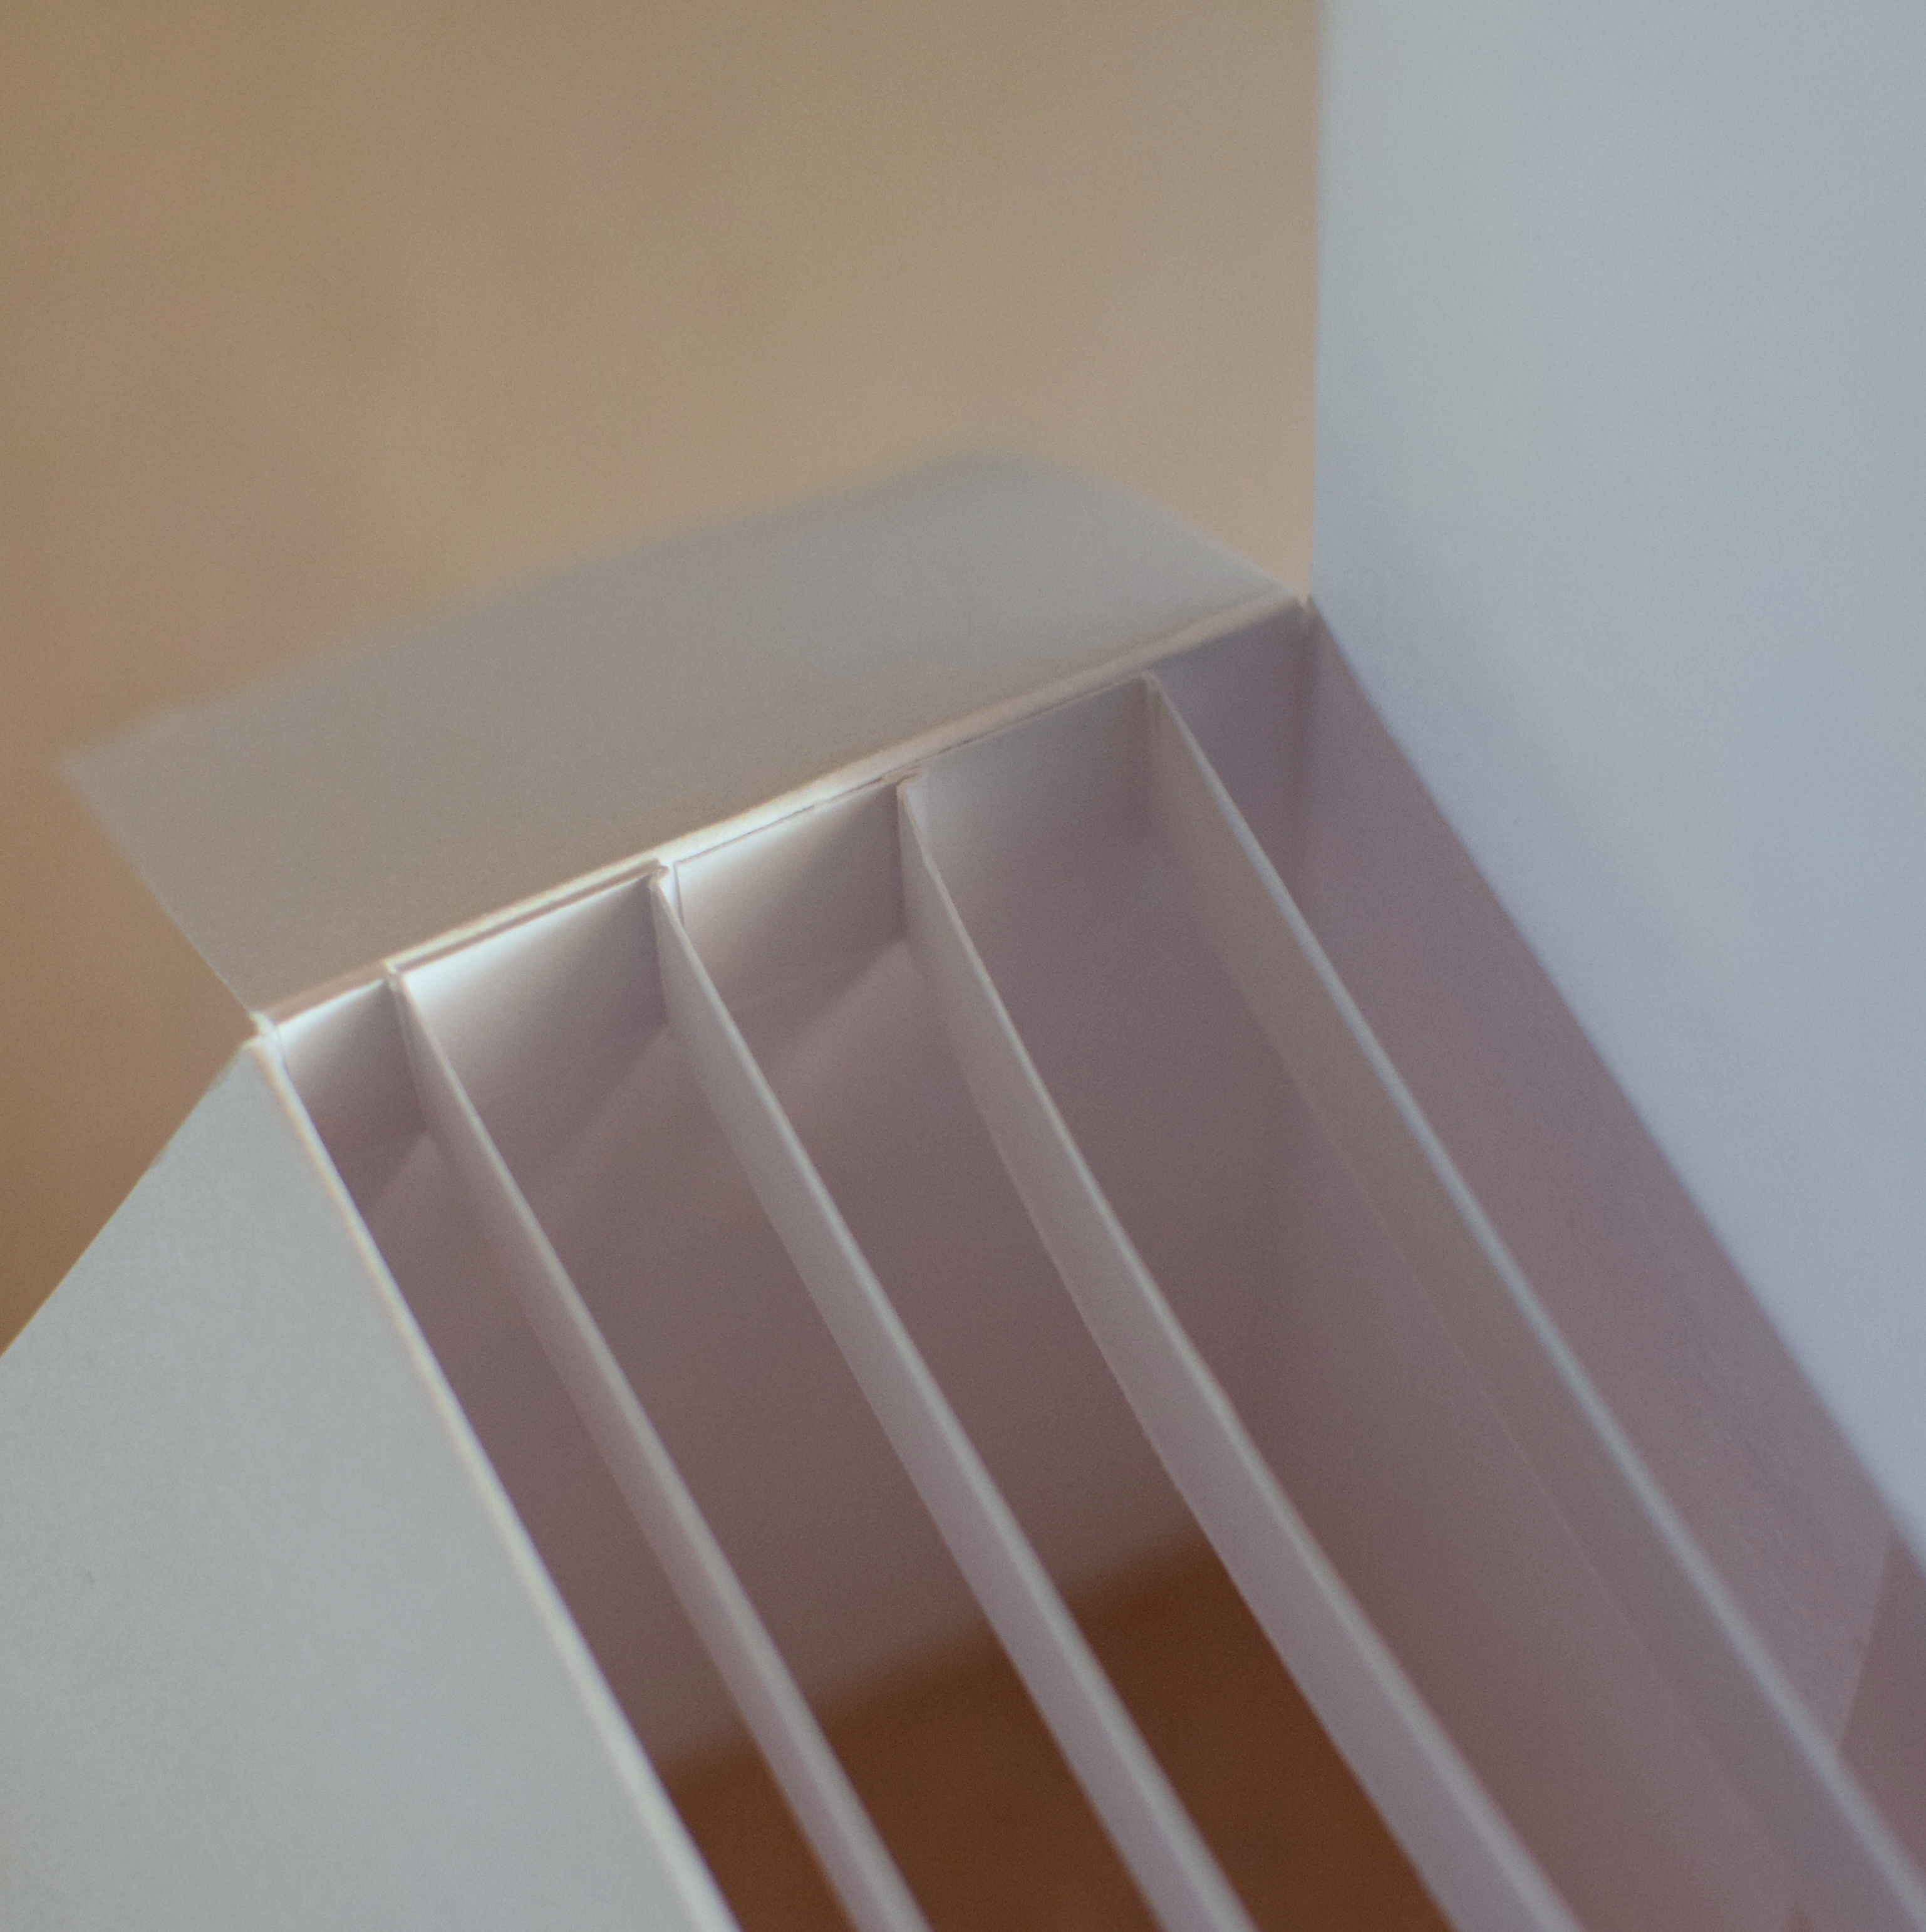
- Glue the flaps of these bars to the inside of the box, lining them up one in front of the other (as shown below). PUT THE BAR WITH THE SMALLER FLAPS IN FRONT. Make sure all the flaps are pointing forward (towards the front of the box) to insure they are all evenly spaced, and make sure they are all flush with the top edge of the inside of the box.
*
TO MAKE A BOX CARD WITH A TRIMMER AND BONE FOLDER/STYLUS:
Start with an 11 inch x 7 inch panel.
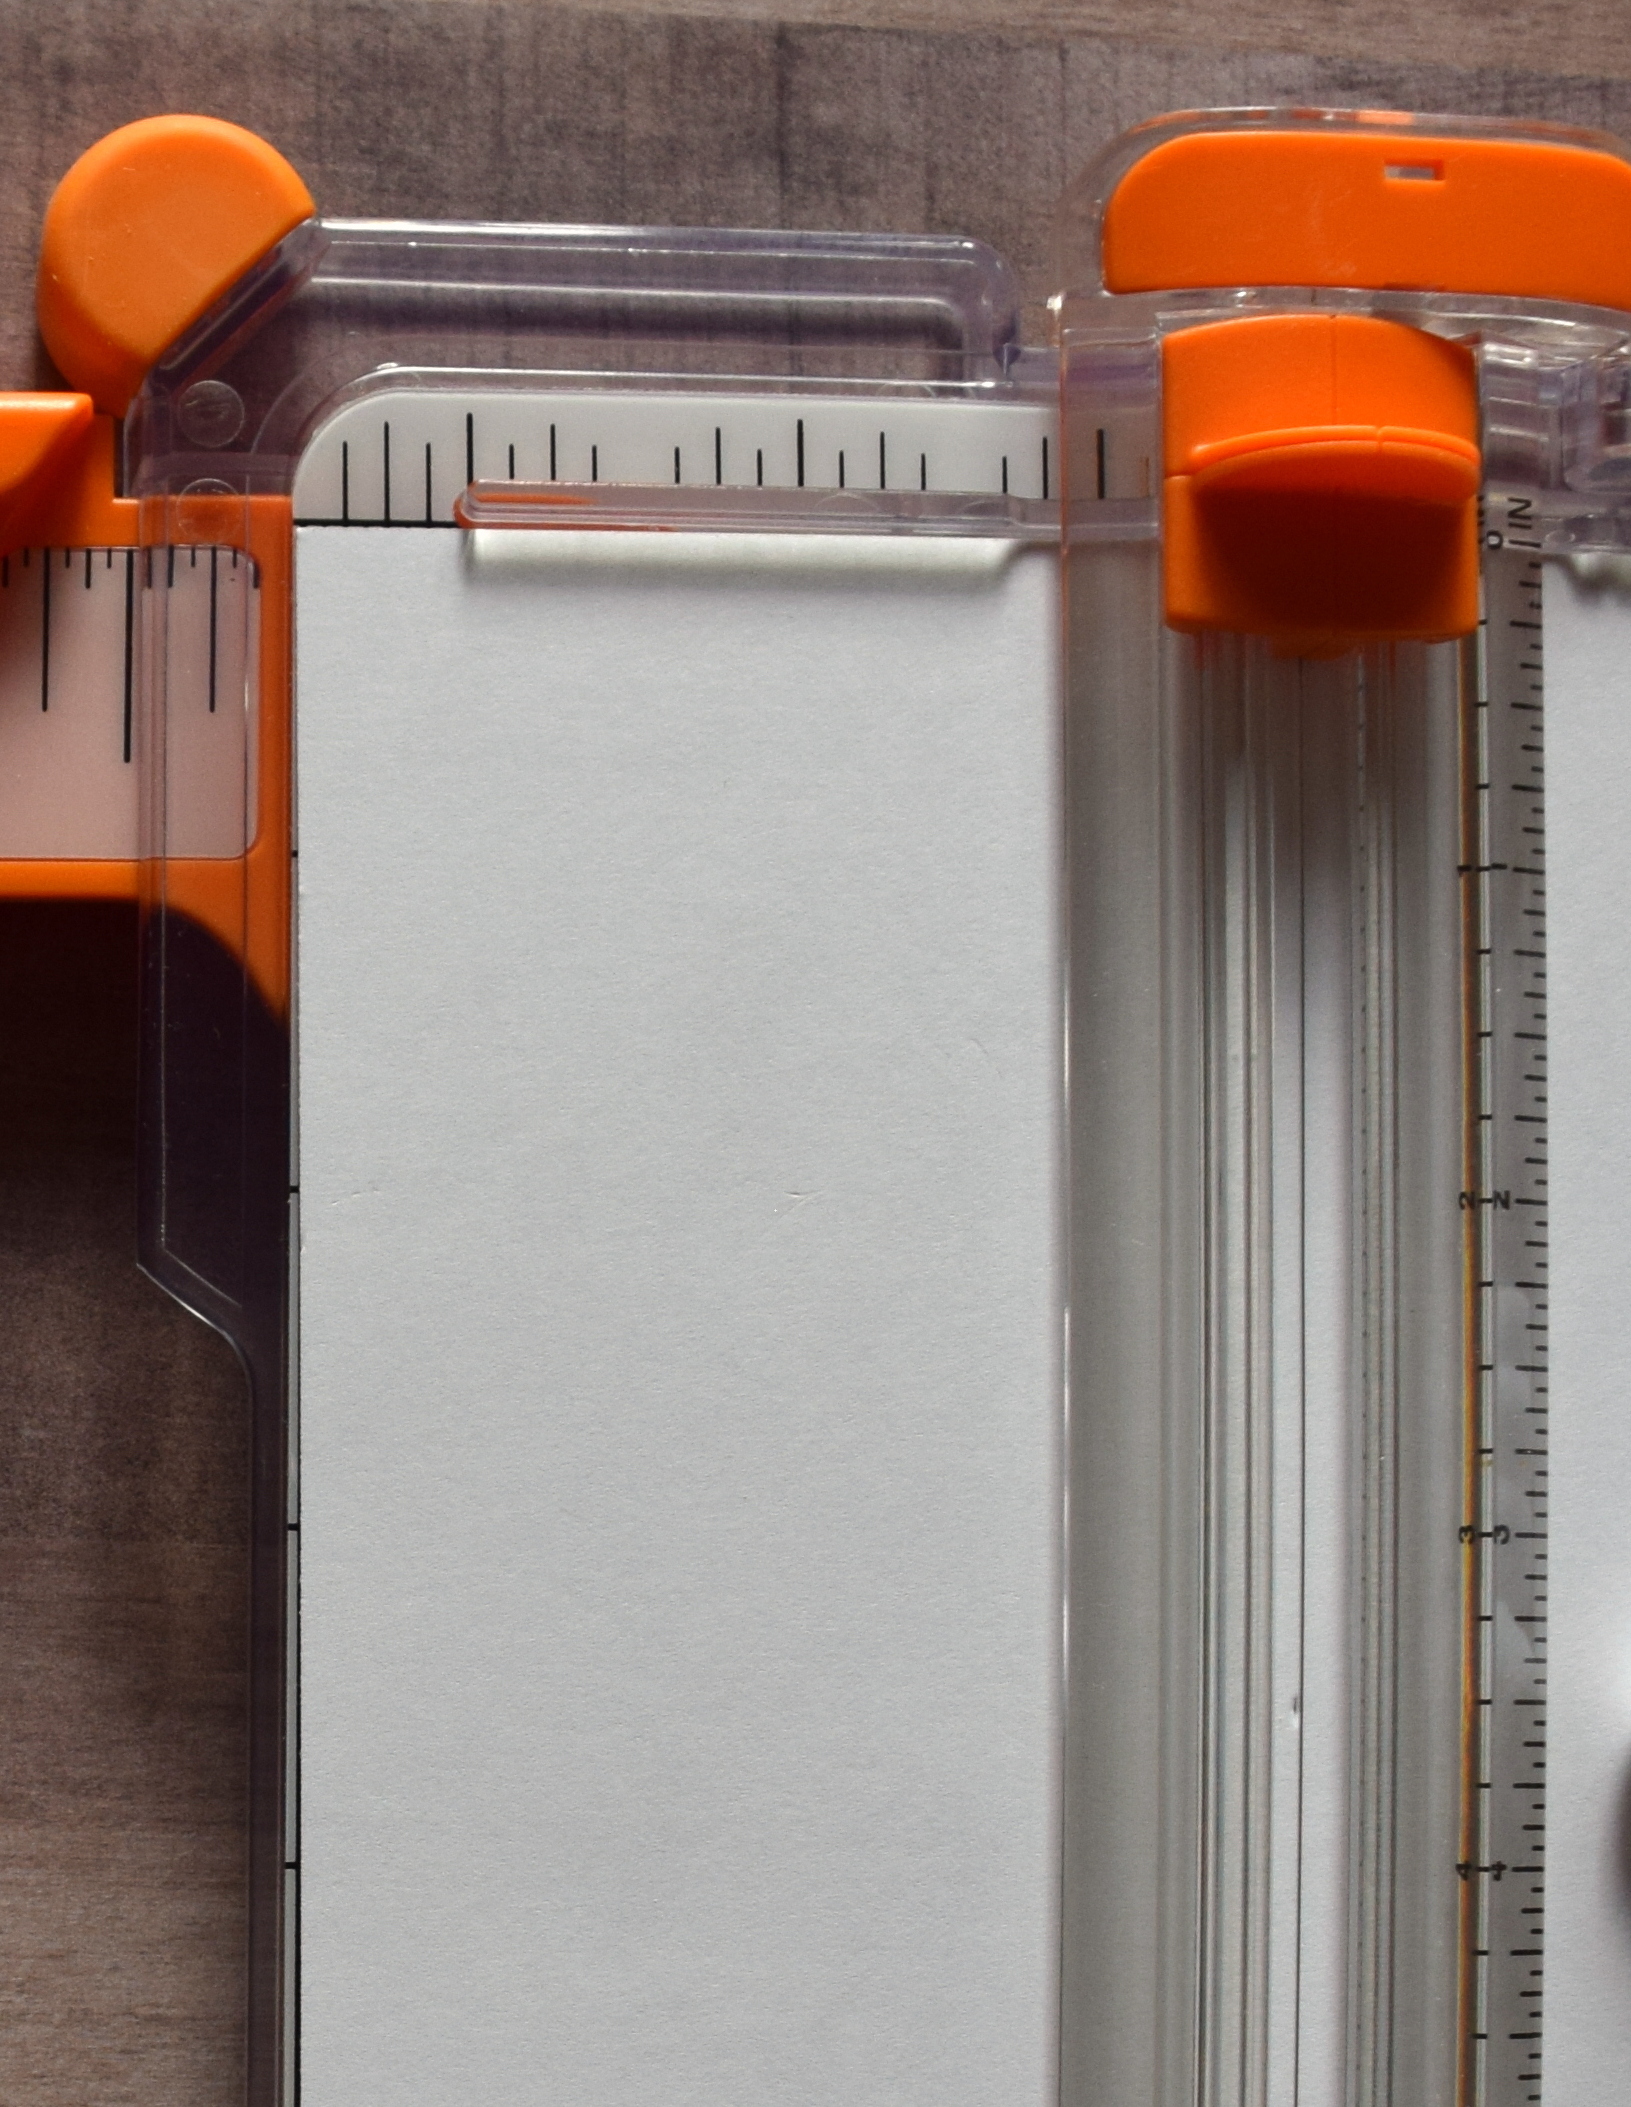
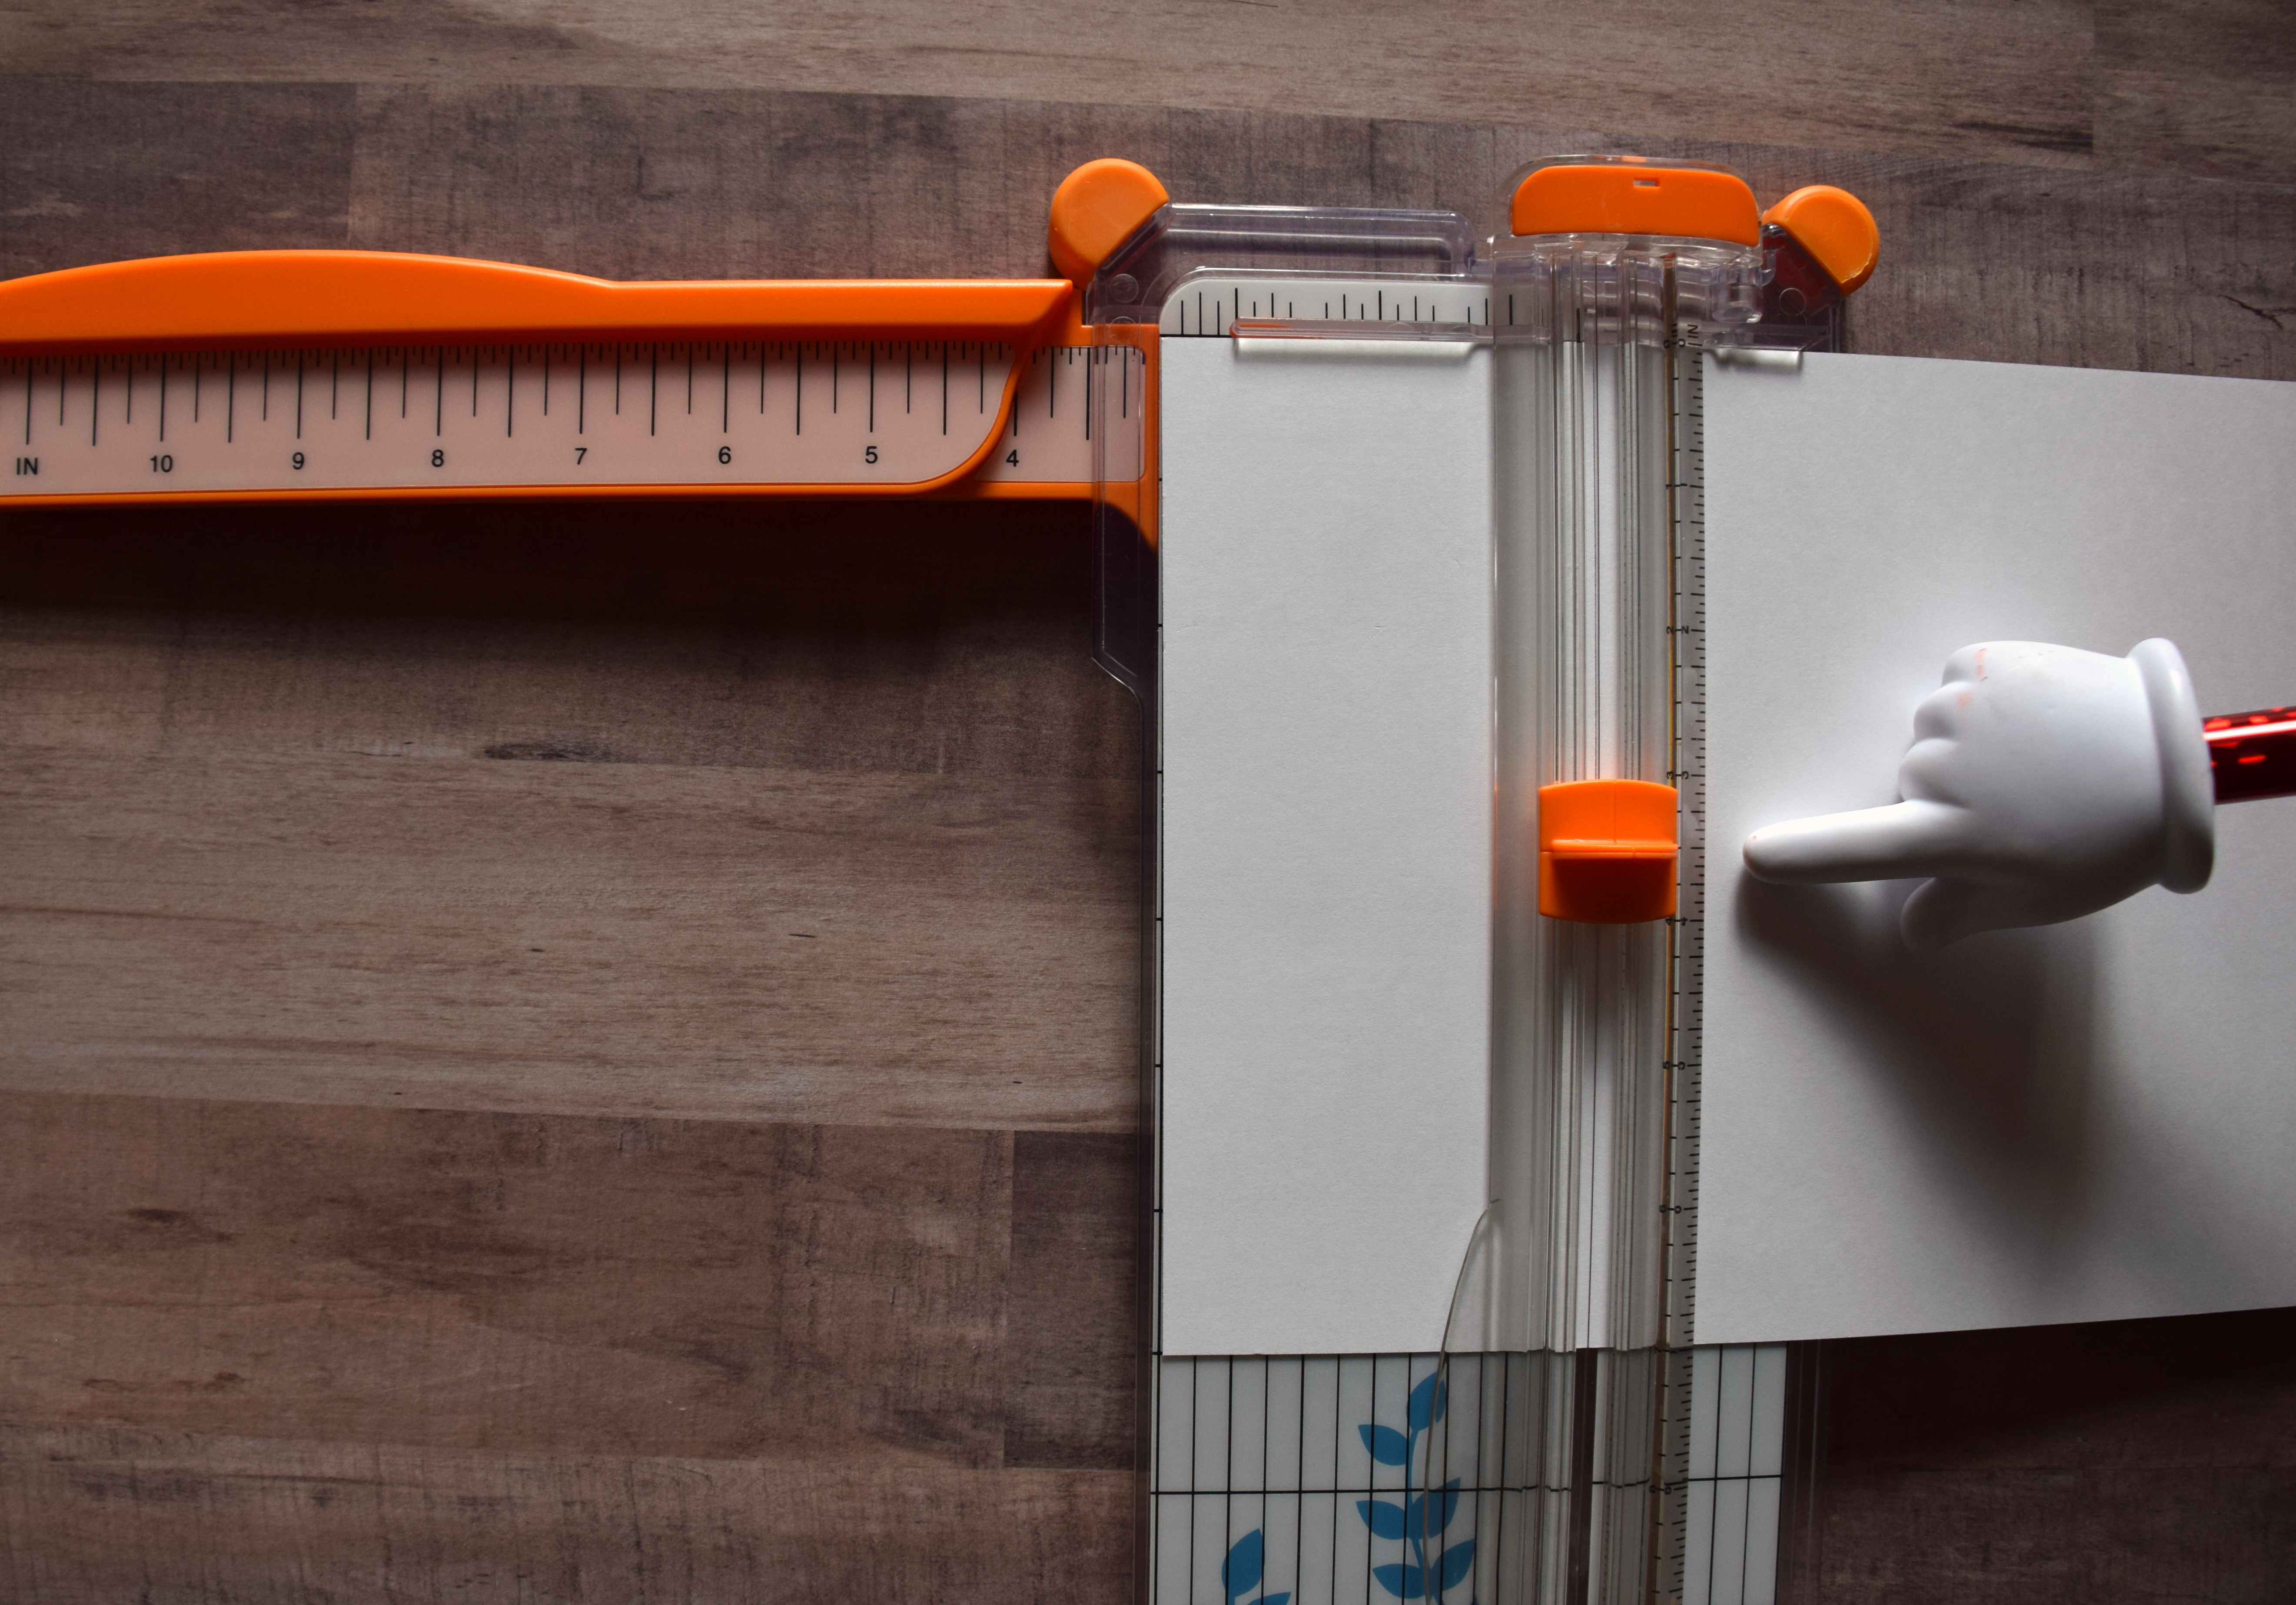
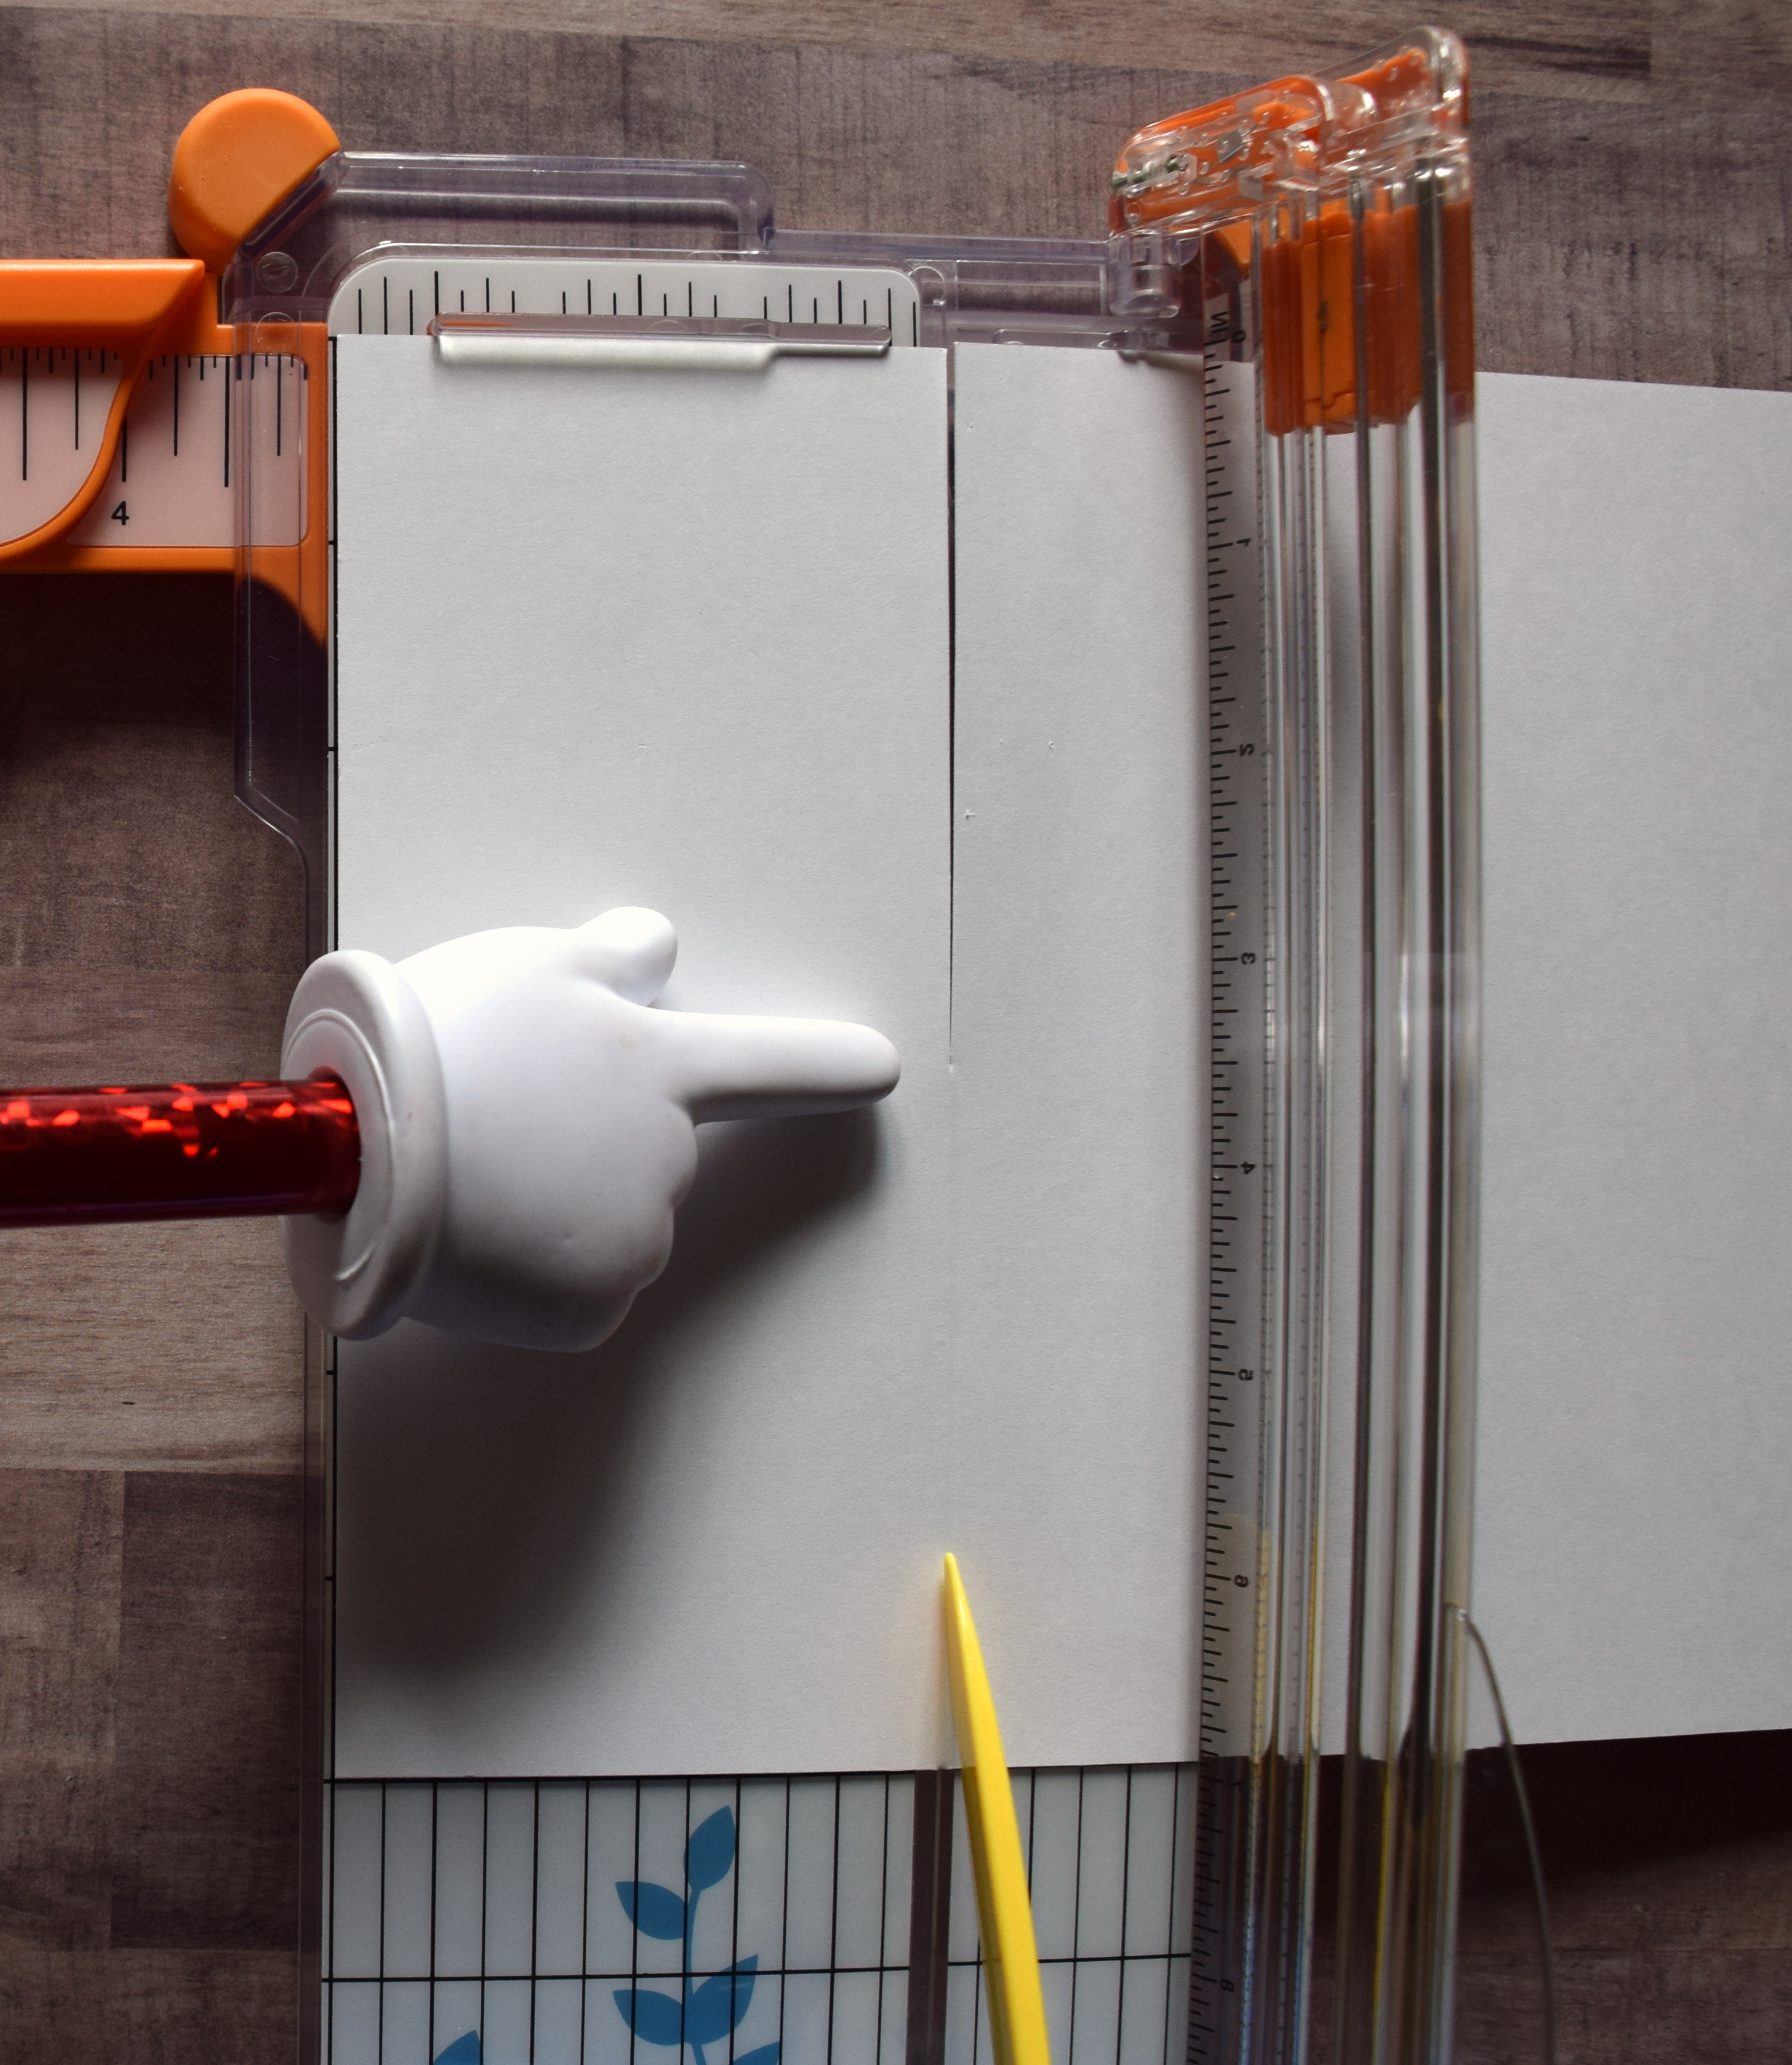
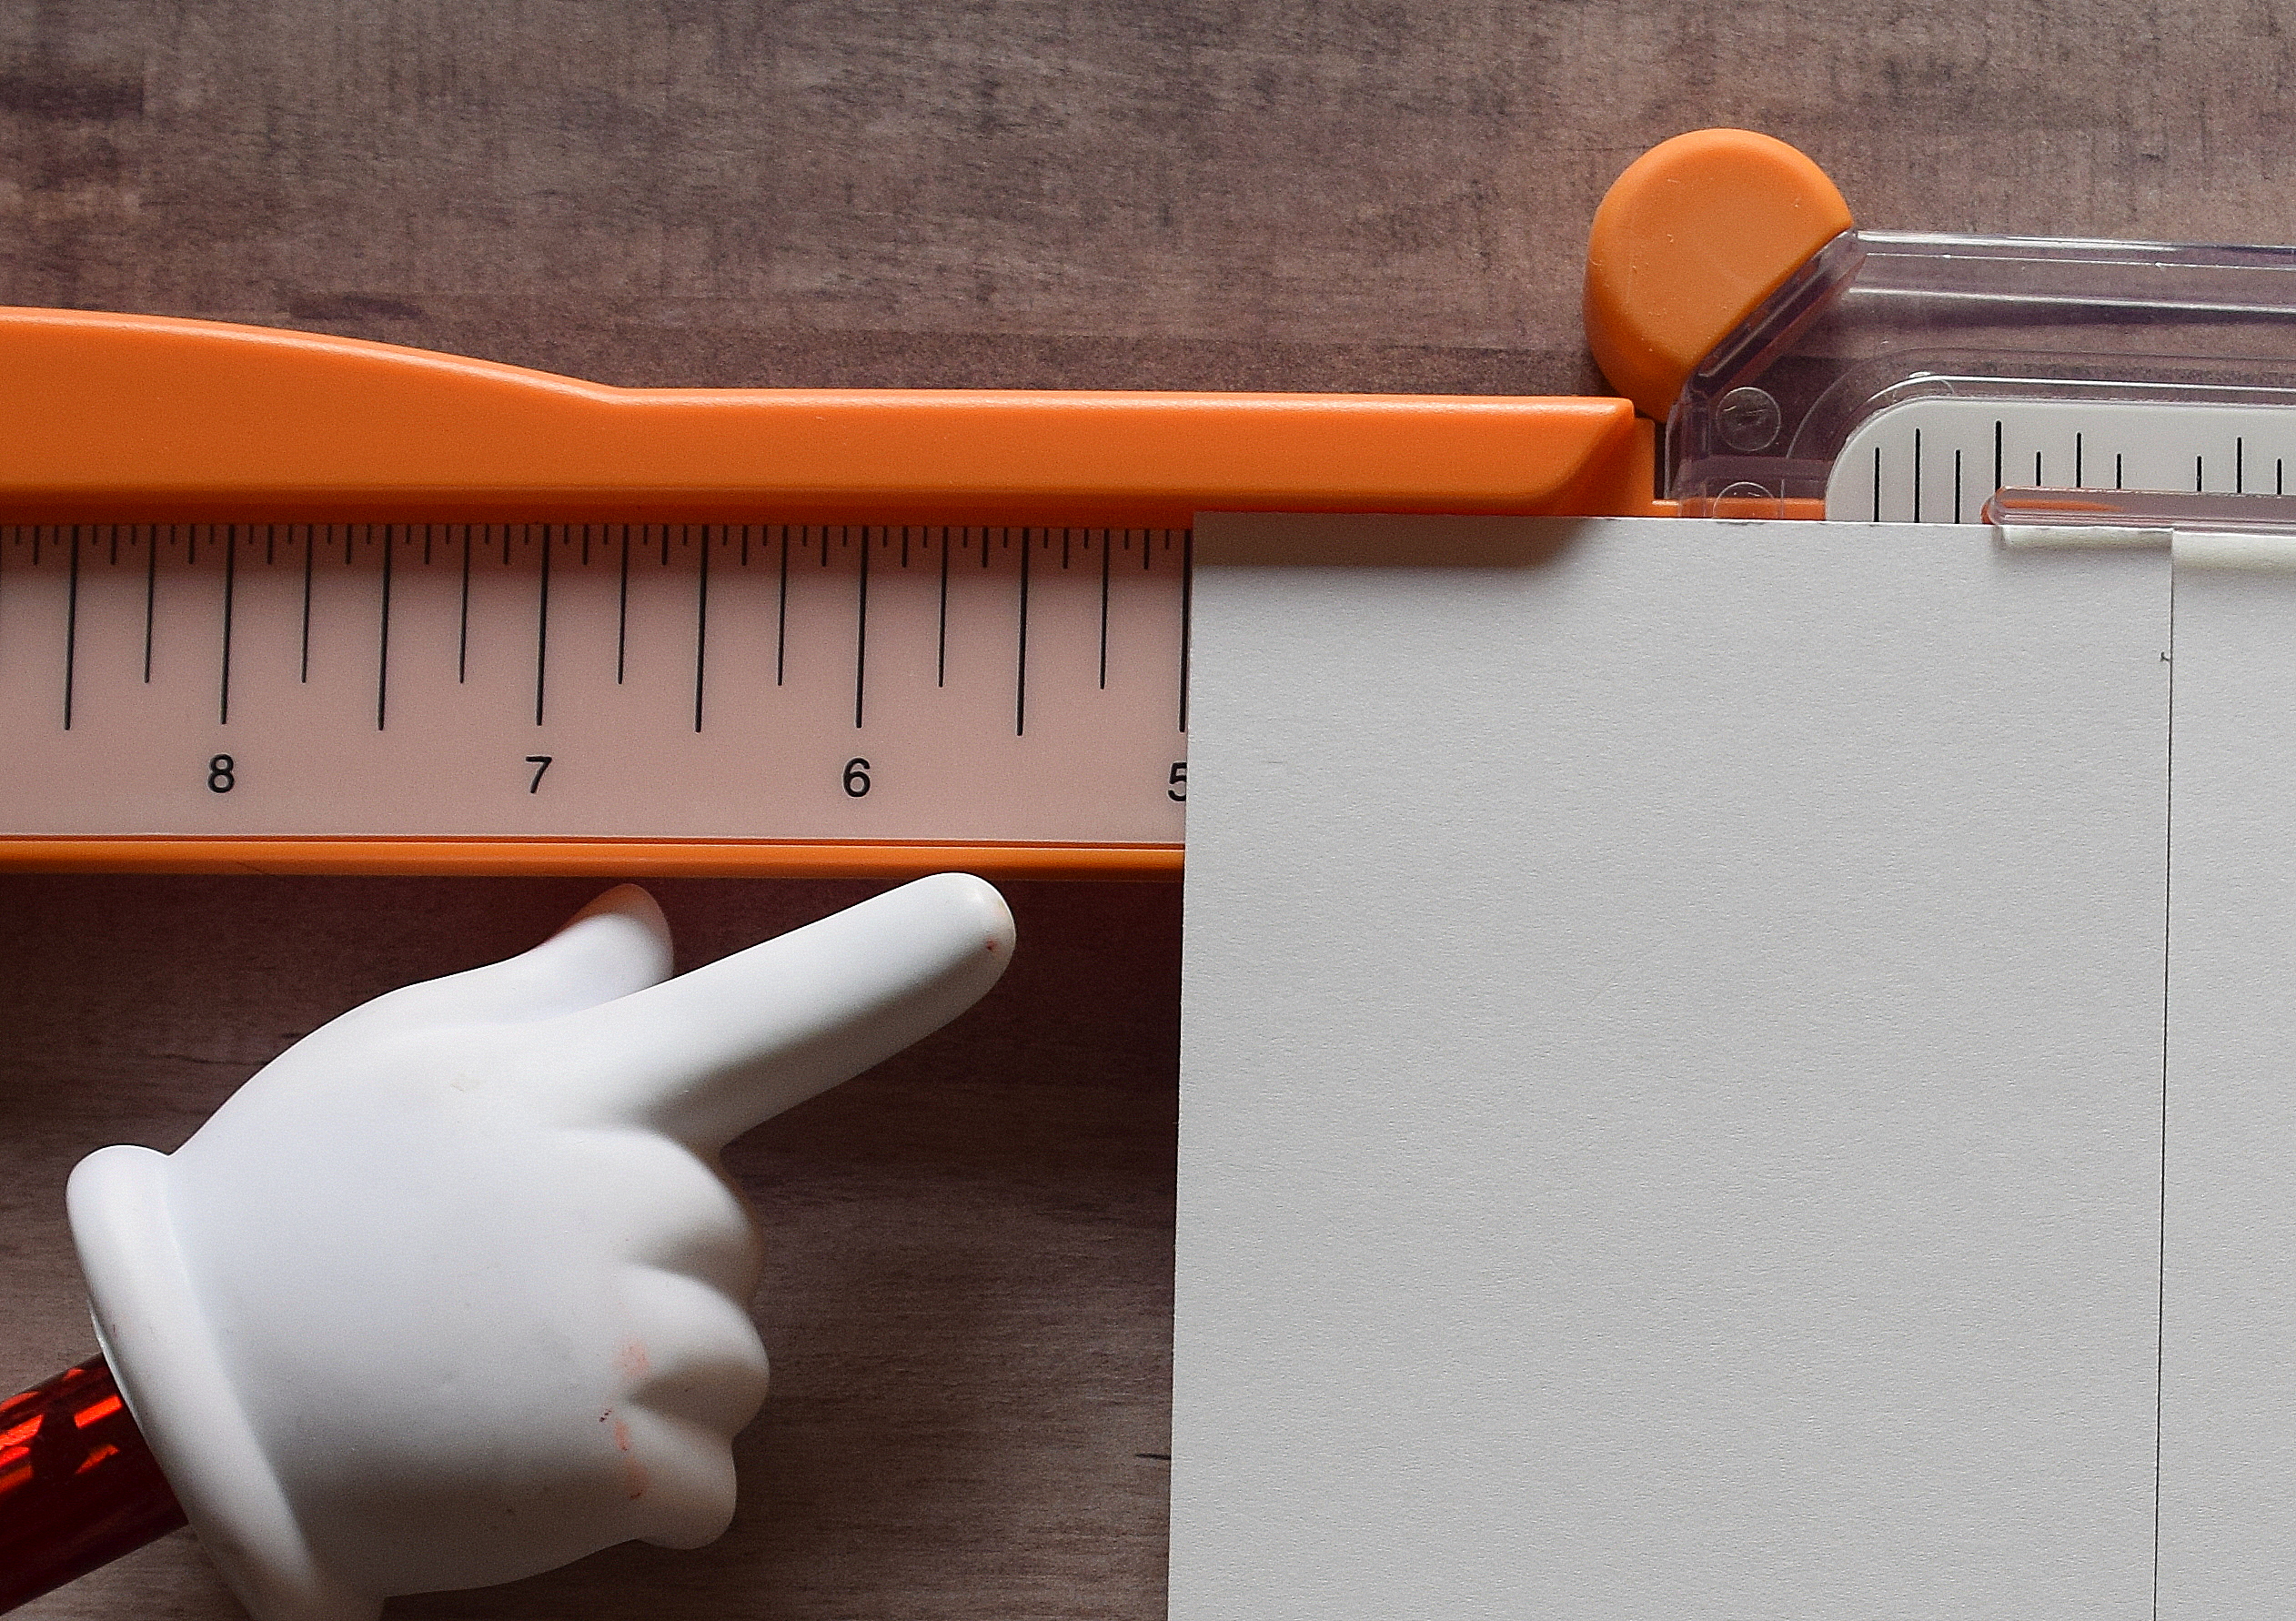
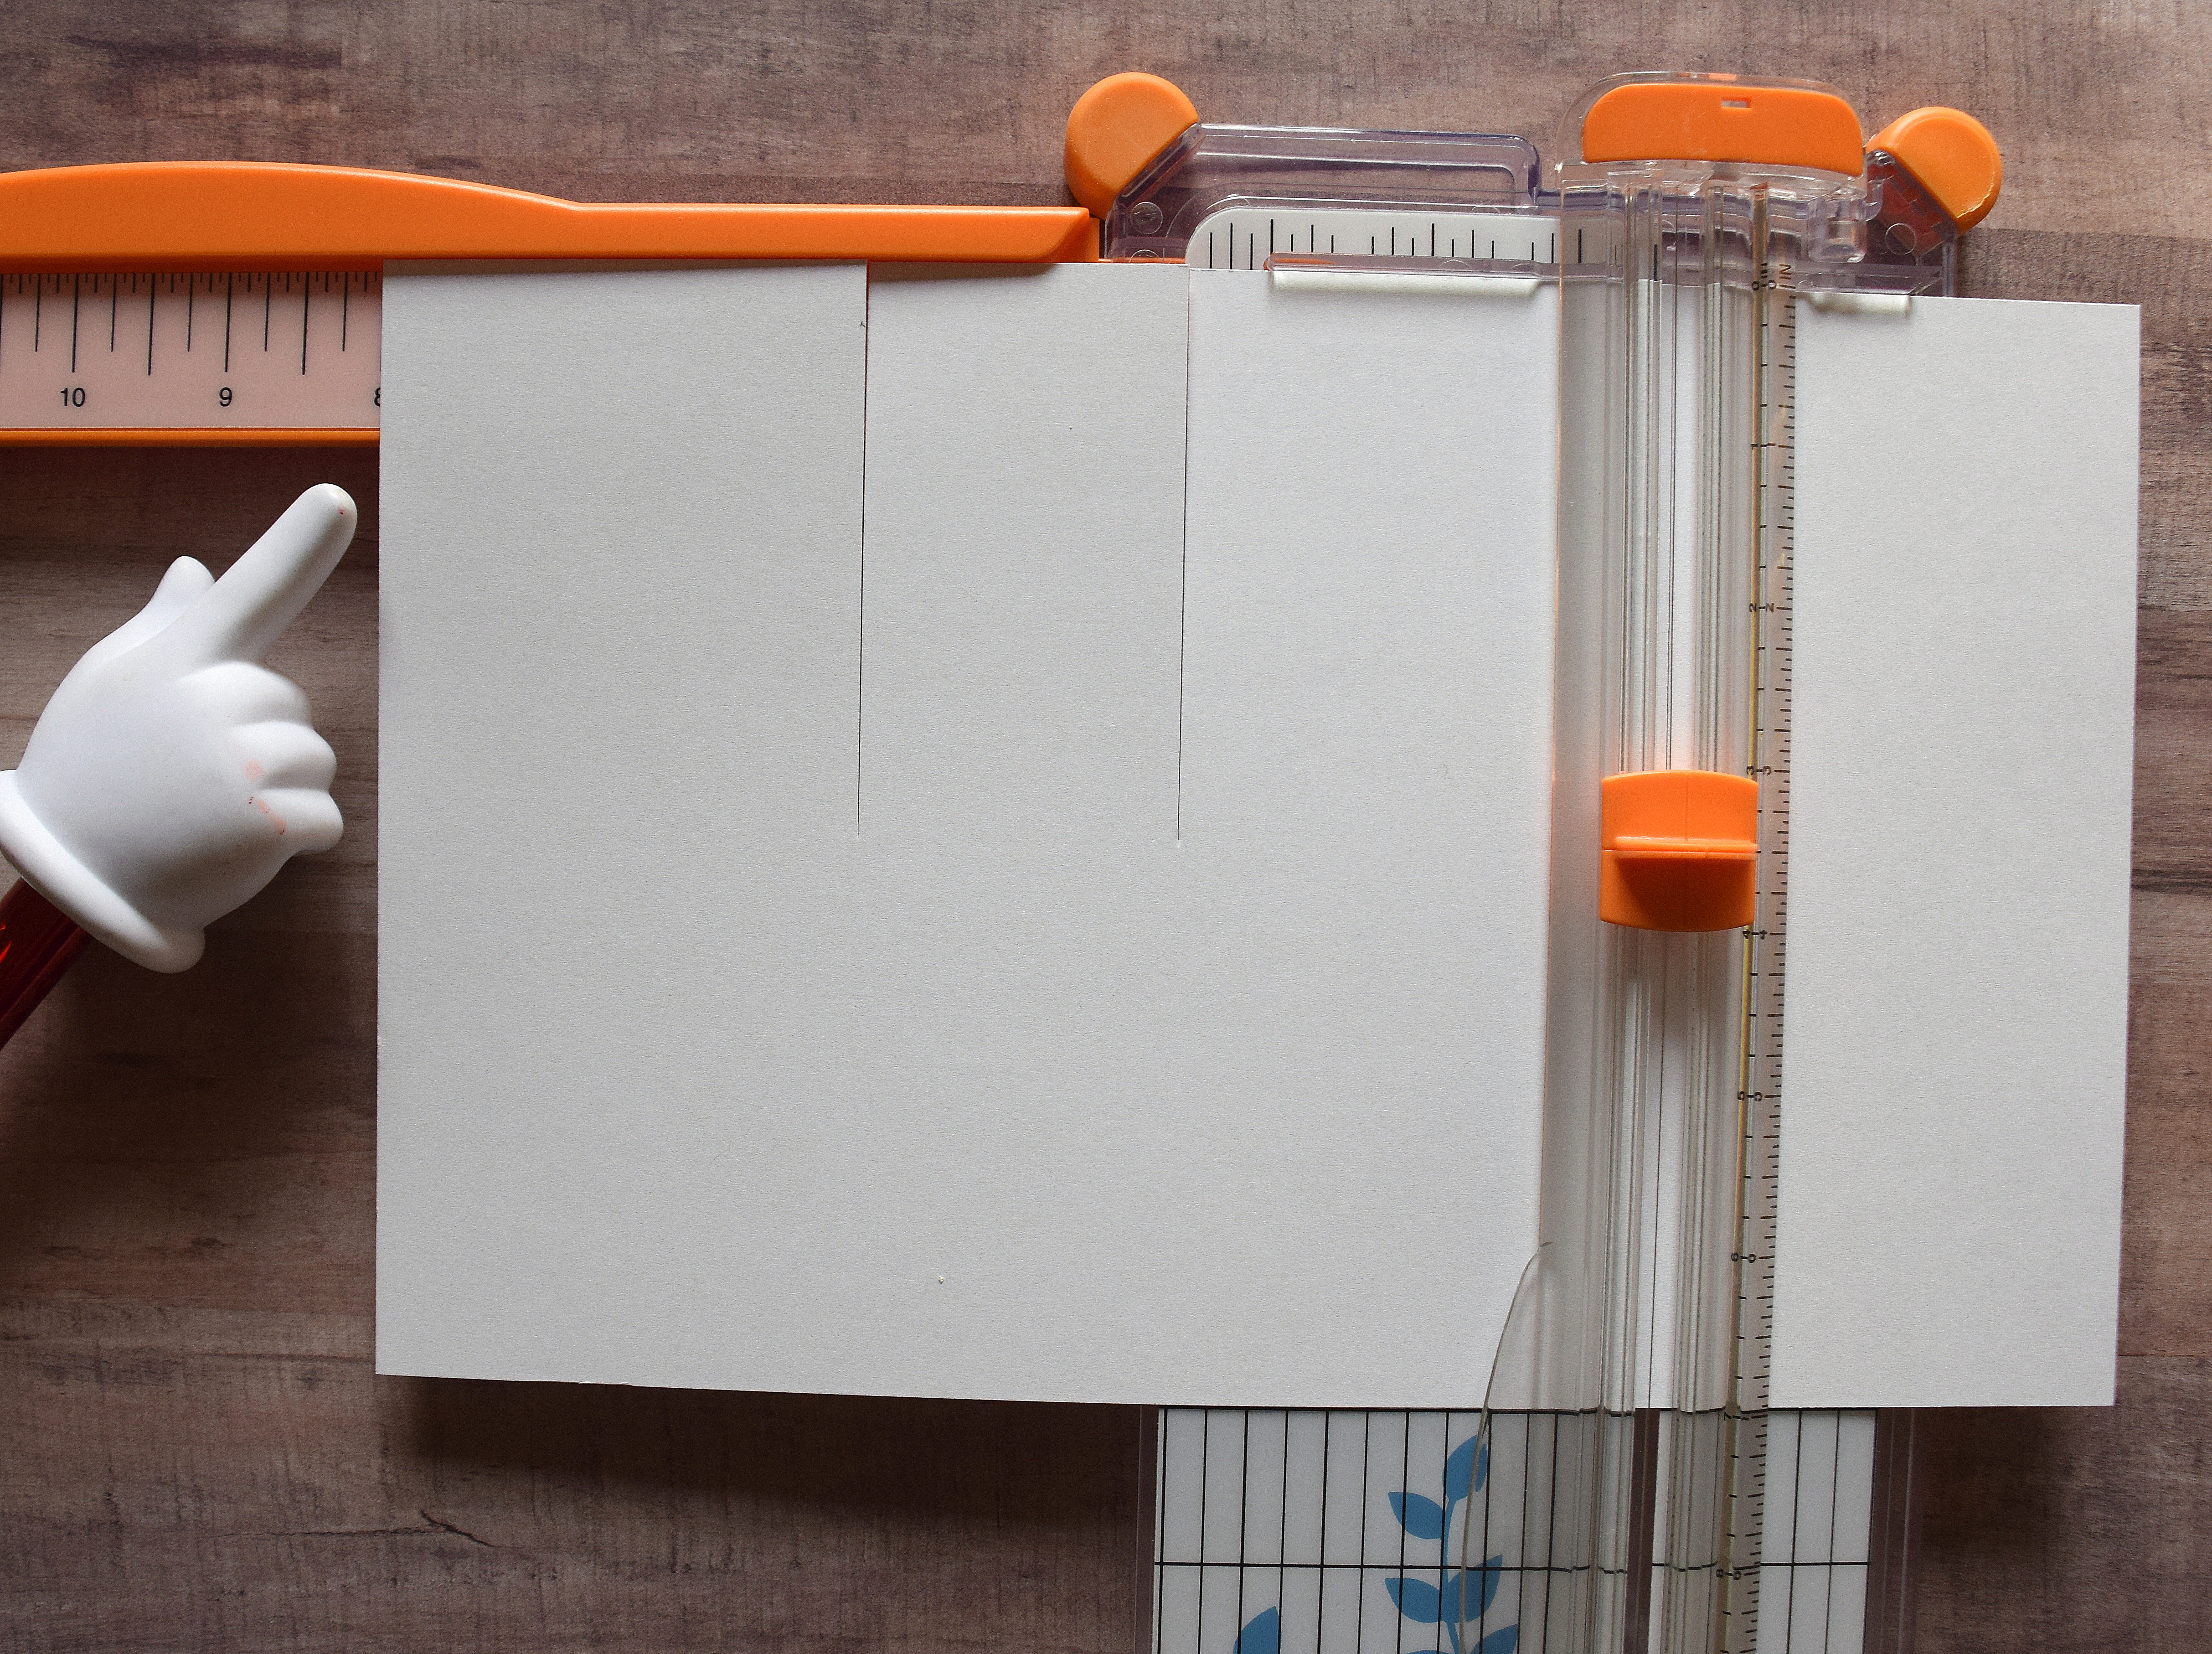
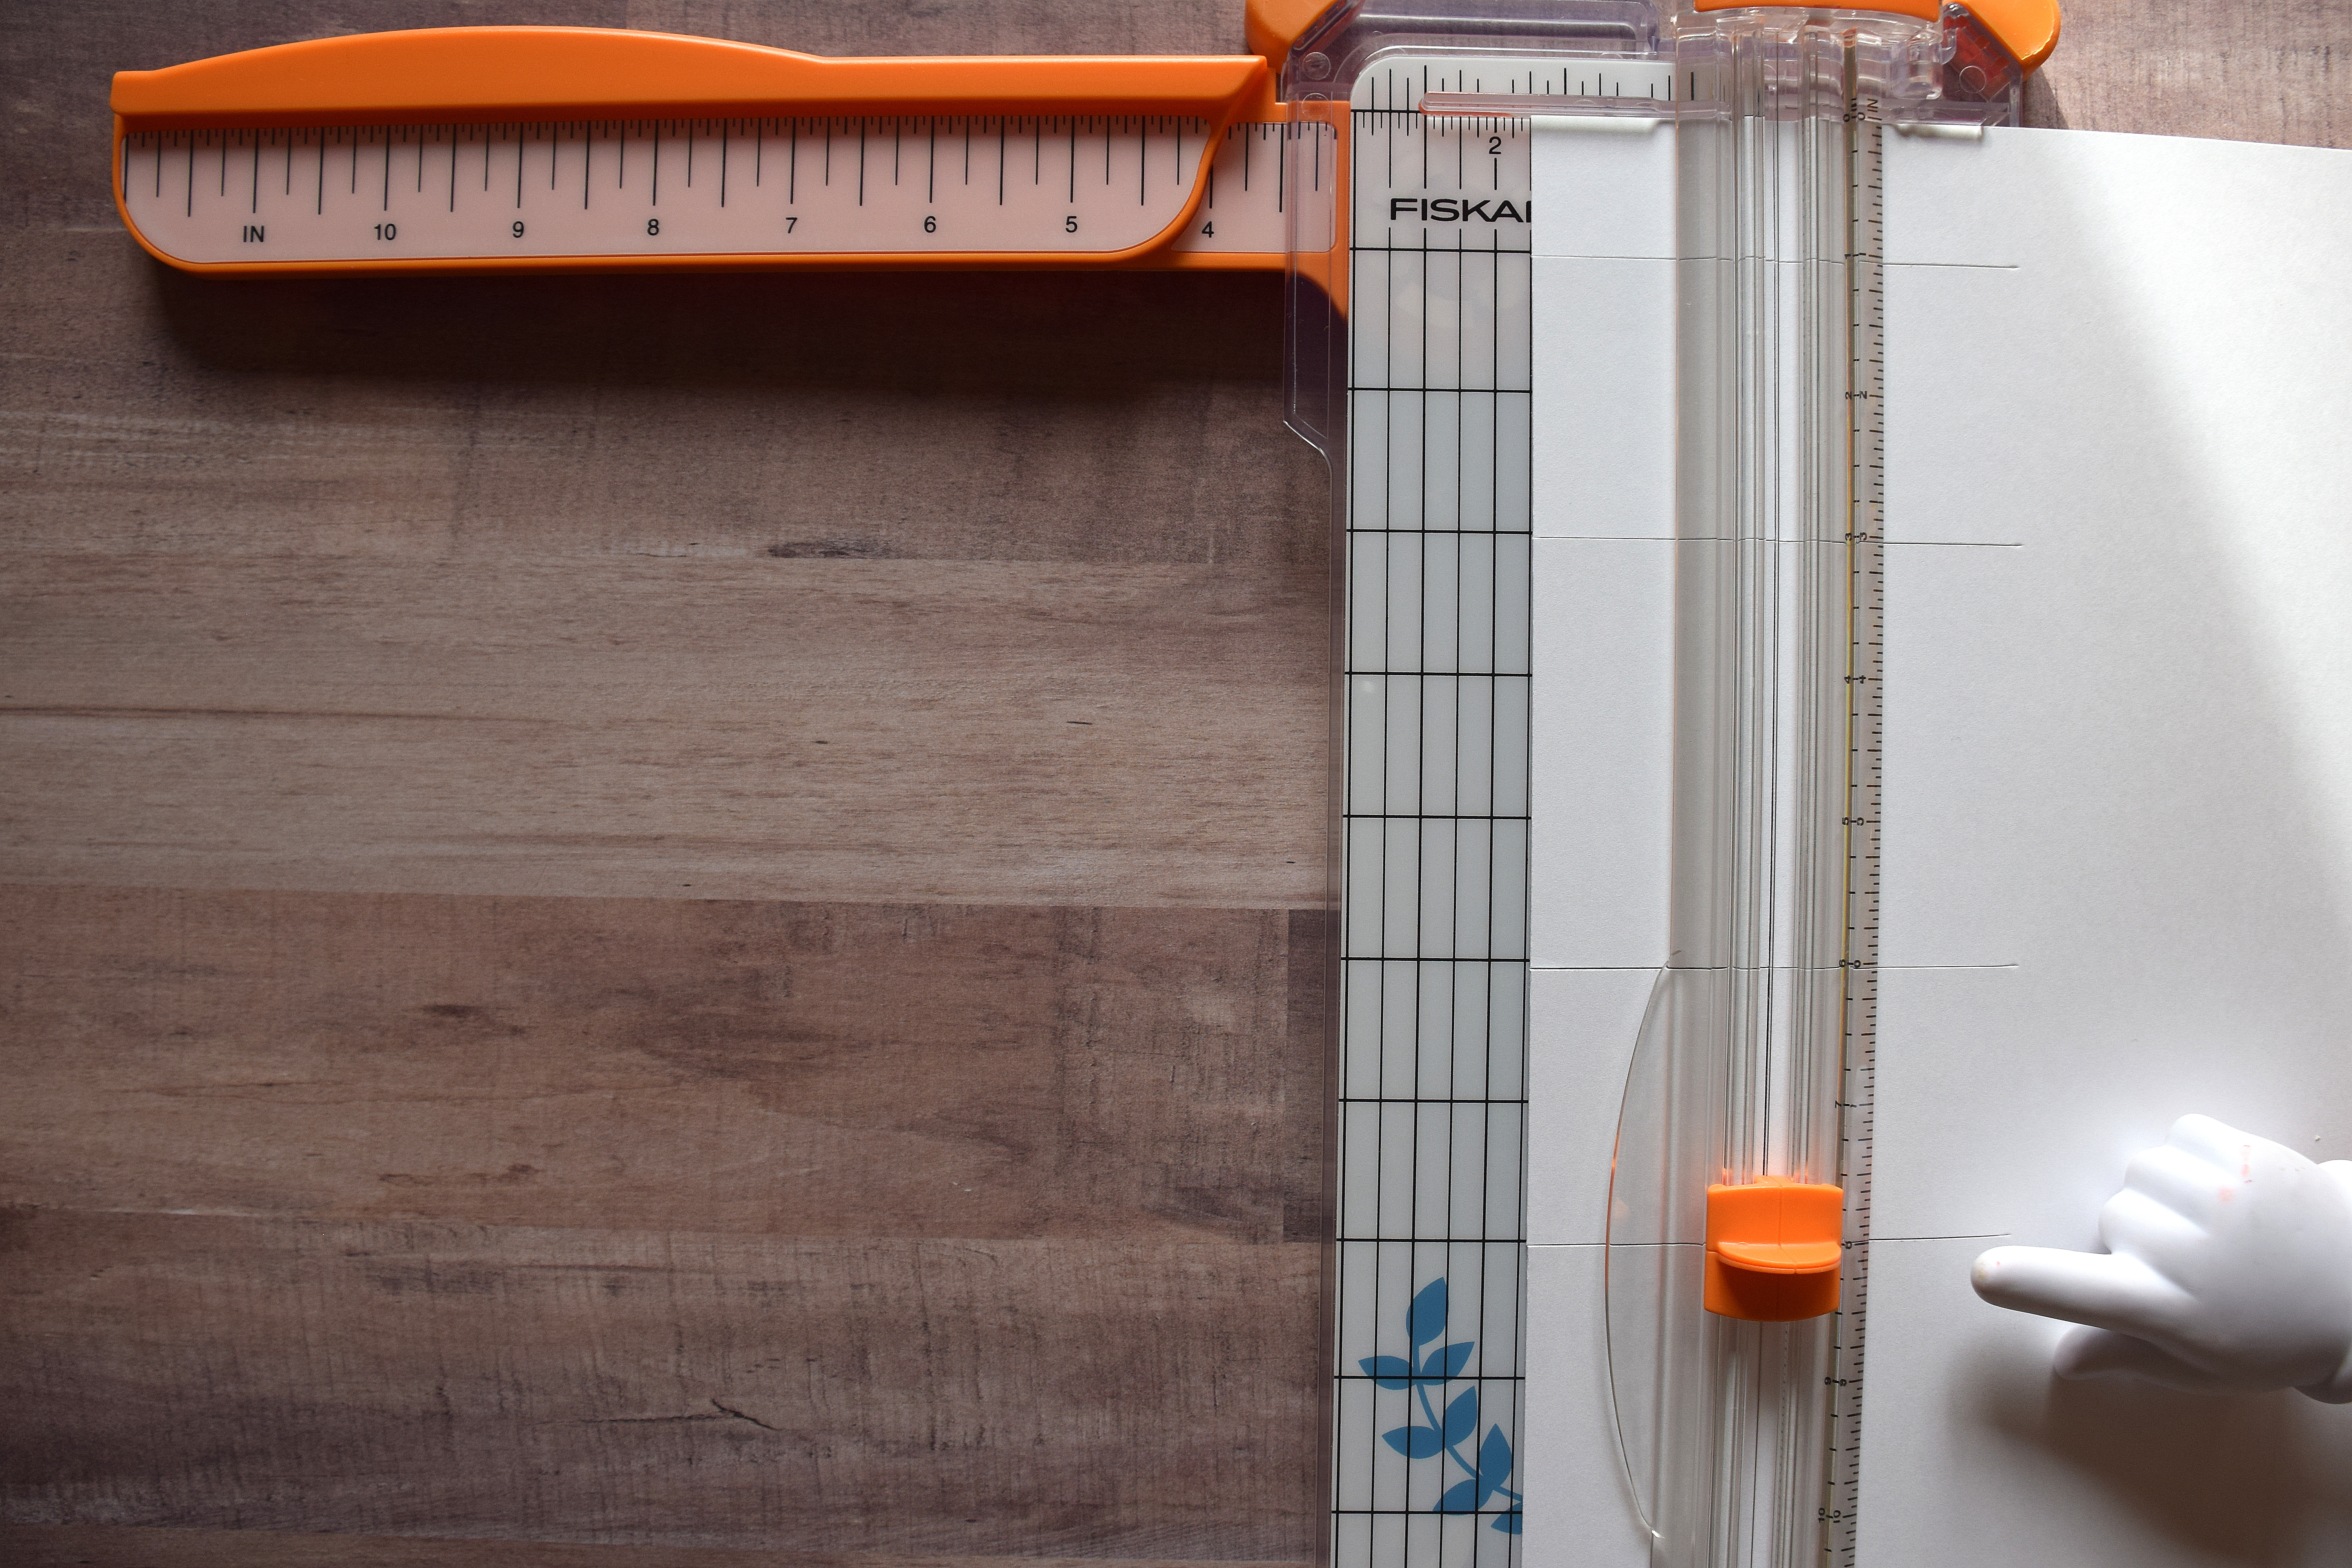
1. Place card stock in trimmer (horizontally/landscape orientation) making sure the top edge of the paper is pushed up against the top edge of the trimmer. Place left corner/edge of paper at 3 inches on top trimmer ruler. (Don’t worry about where the blade is yet.)
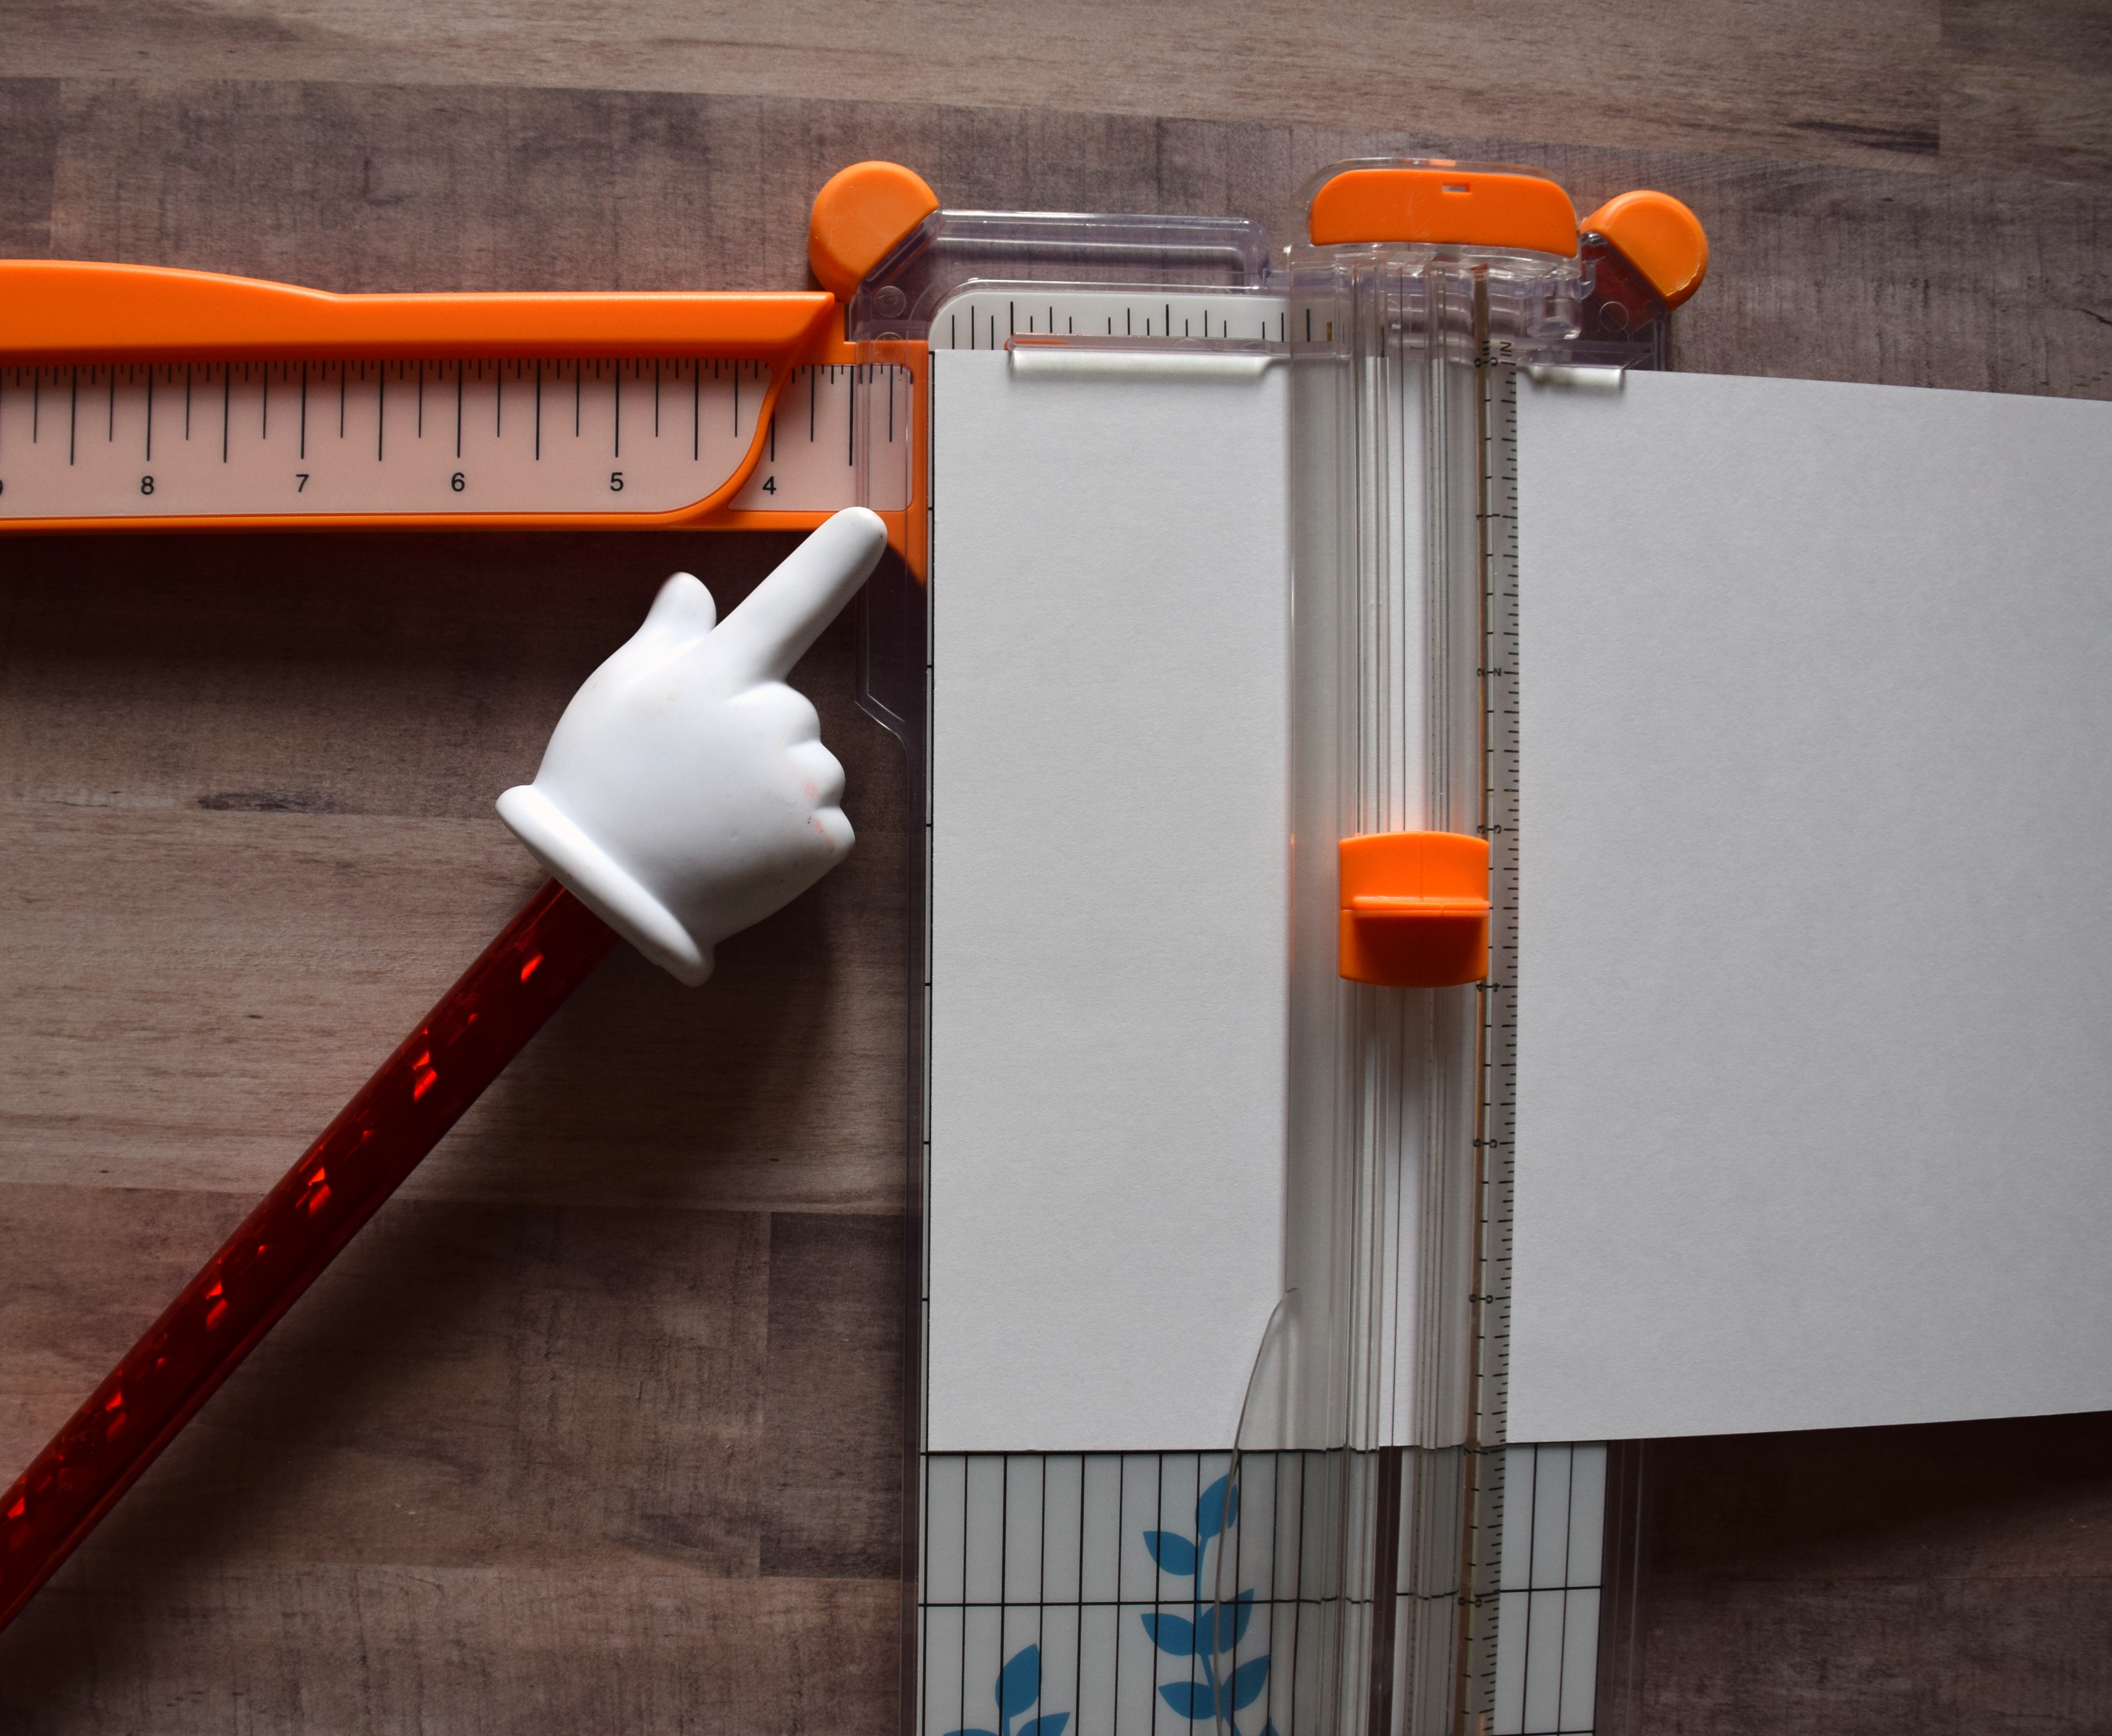
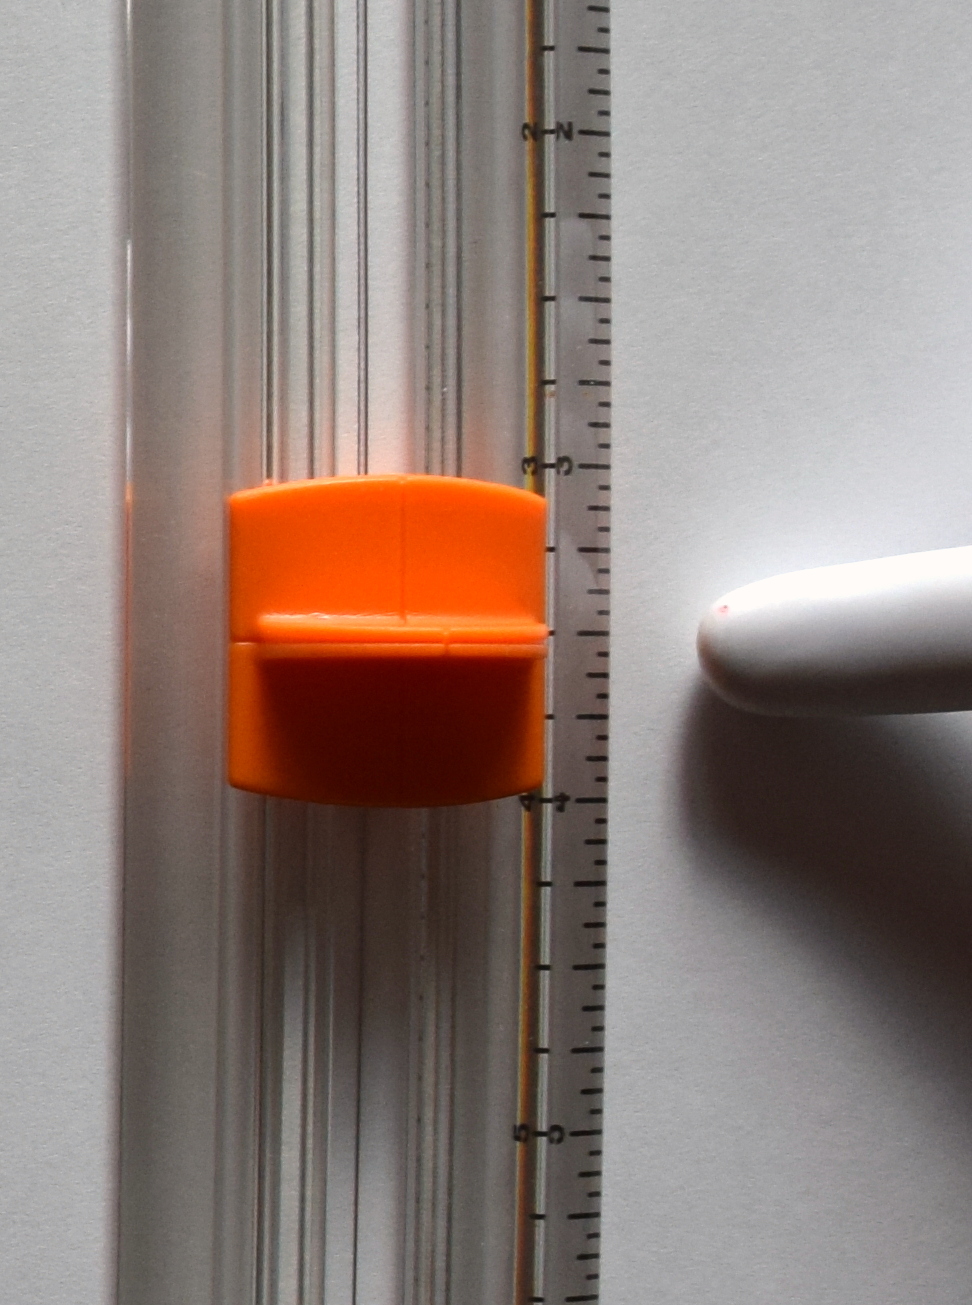
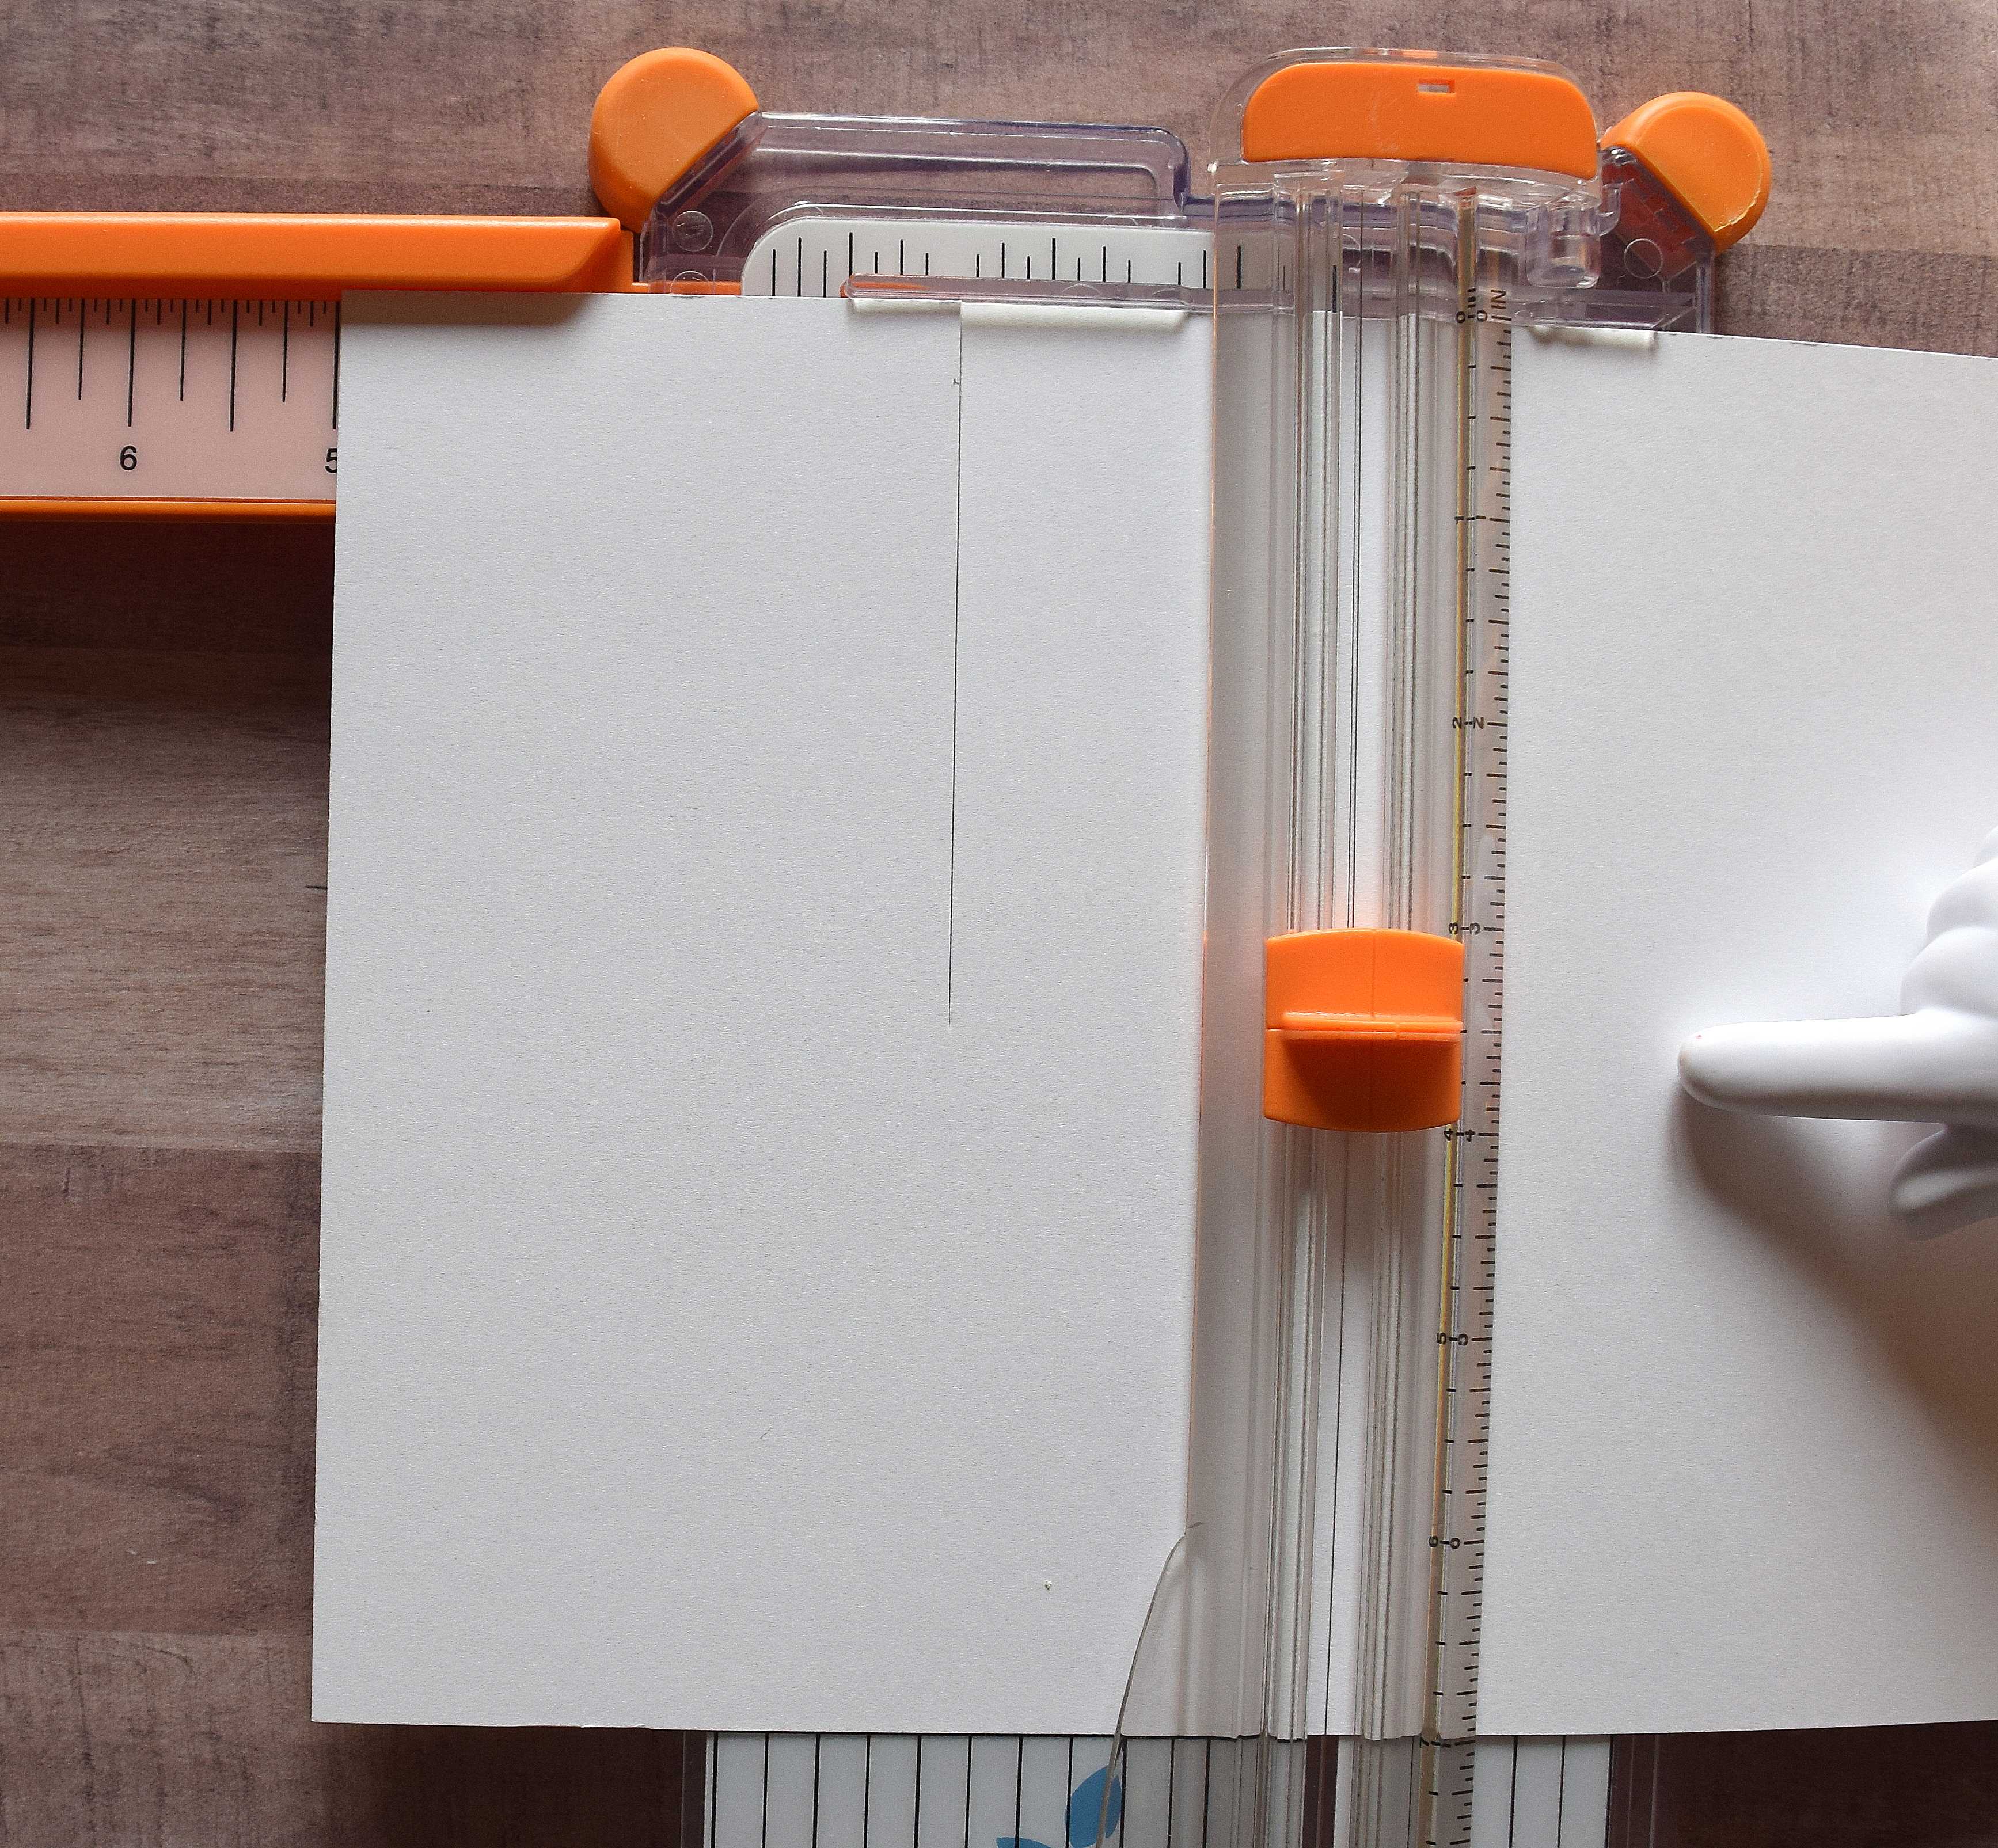
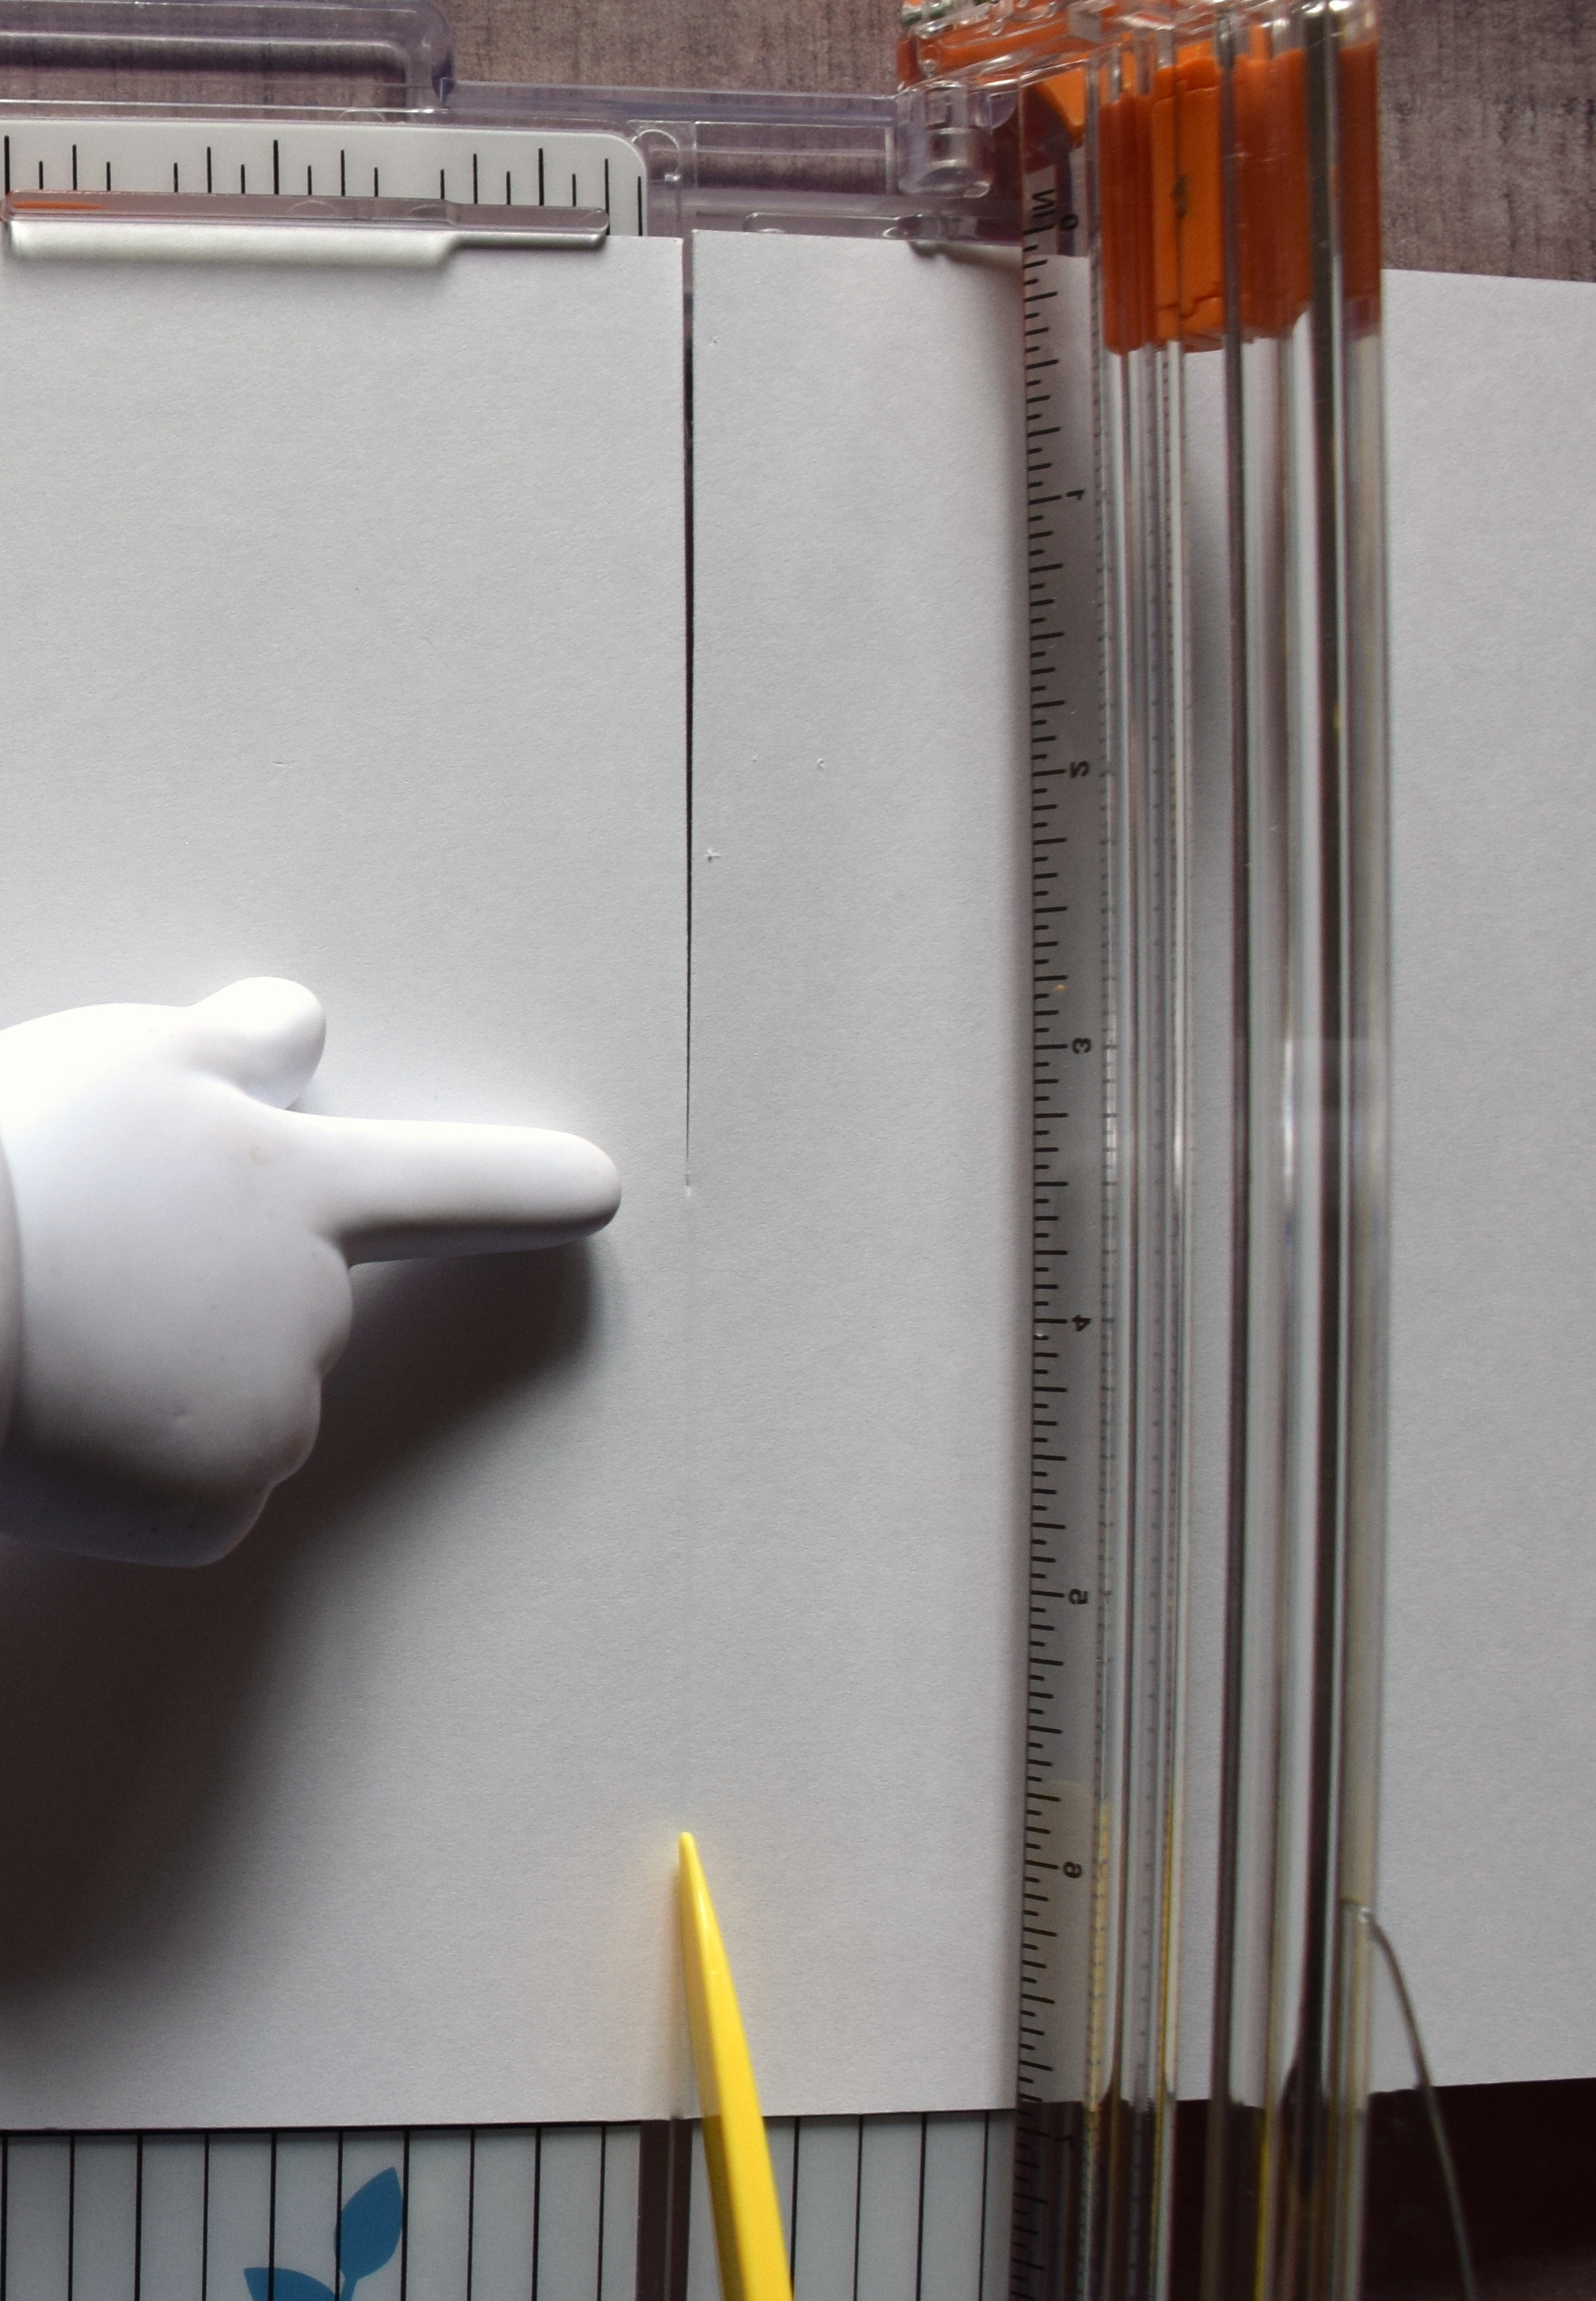
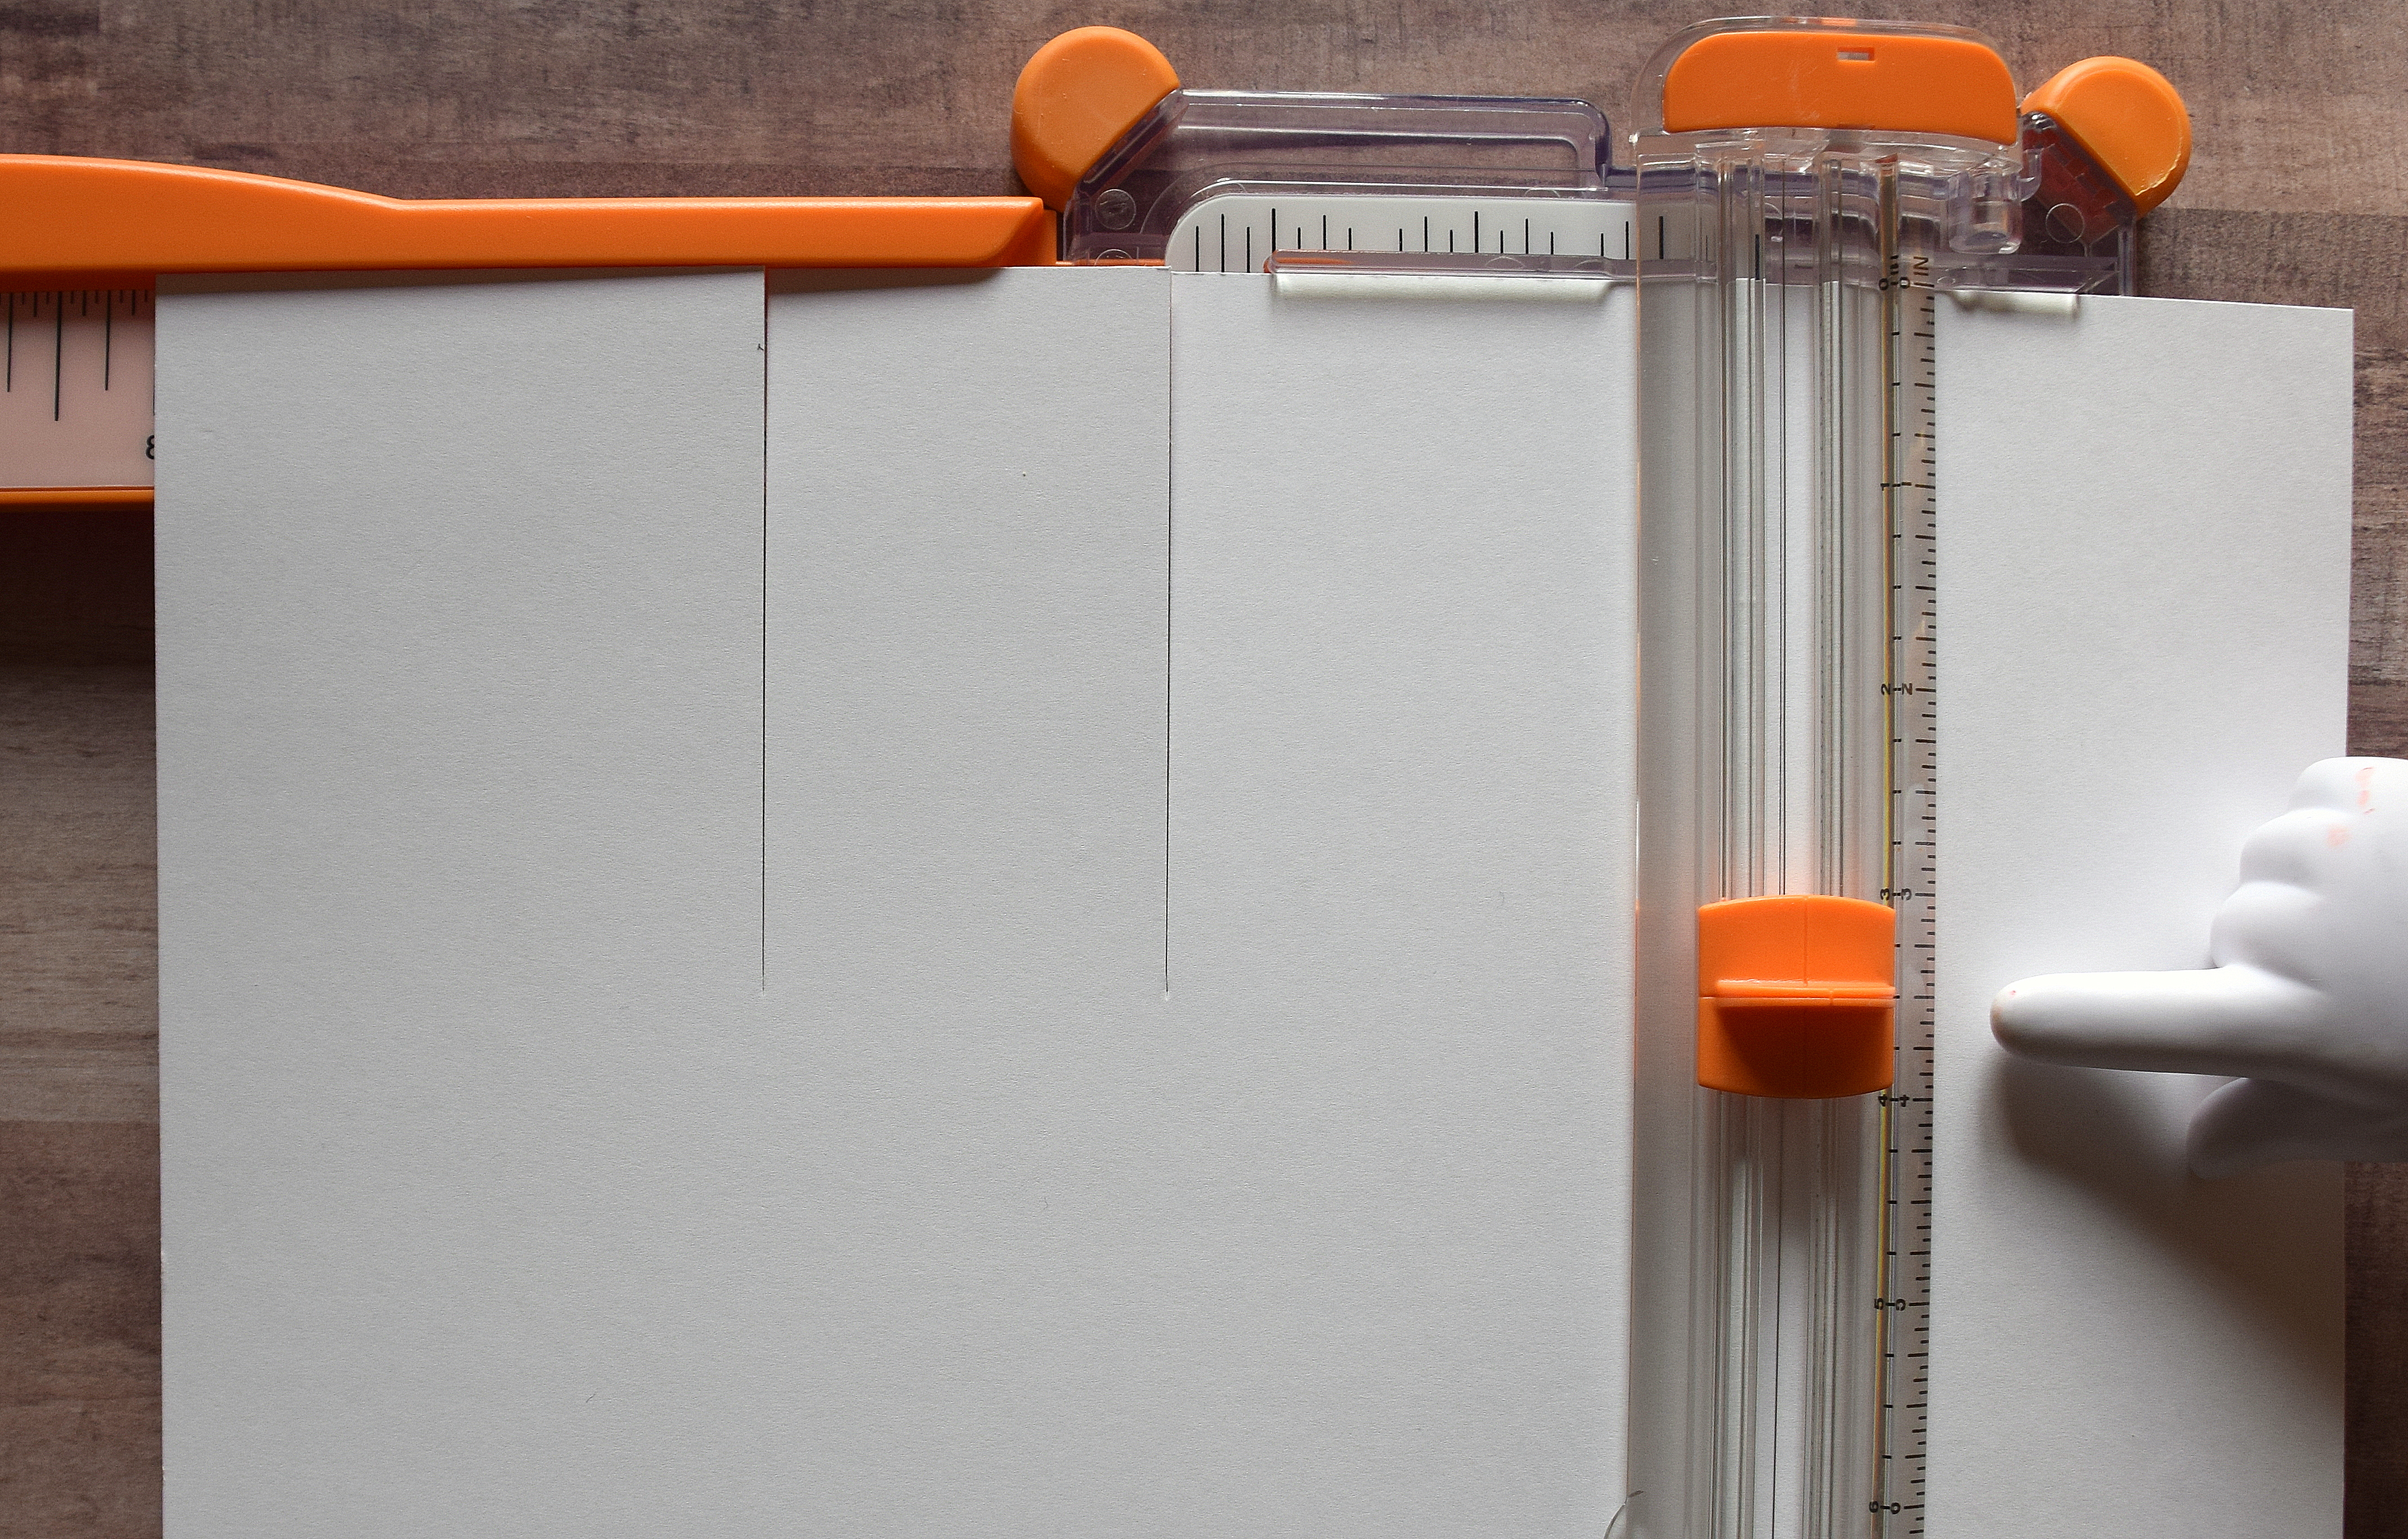
2. Drag blade from top down to the 3 1/2 inch mark on “blade guide” ruler. Use the horizontal lines on the orange blade holder and ruler on the guide to see when to stop.
To add a score line…
3. Lift “blade guide” ruler (making sure paper does not move). Run bone folder down cutting channel on trimmer (from cut to end of paper).
Continue cutting and scoring…
4. Slide paper to left, and line up left corner/edge at 5 inches.
Cut down to 3 1/2 inches. Score from end of cut to end.
5. Slide paper to left, and line up left corner/edge at 8 inches.
Cut down to 3 1/2 inches. Score from end of cut to end.
6. Slide paper to left, and line up left corner/edge at 10 inches.
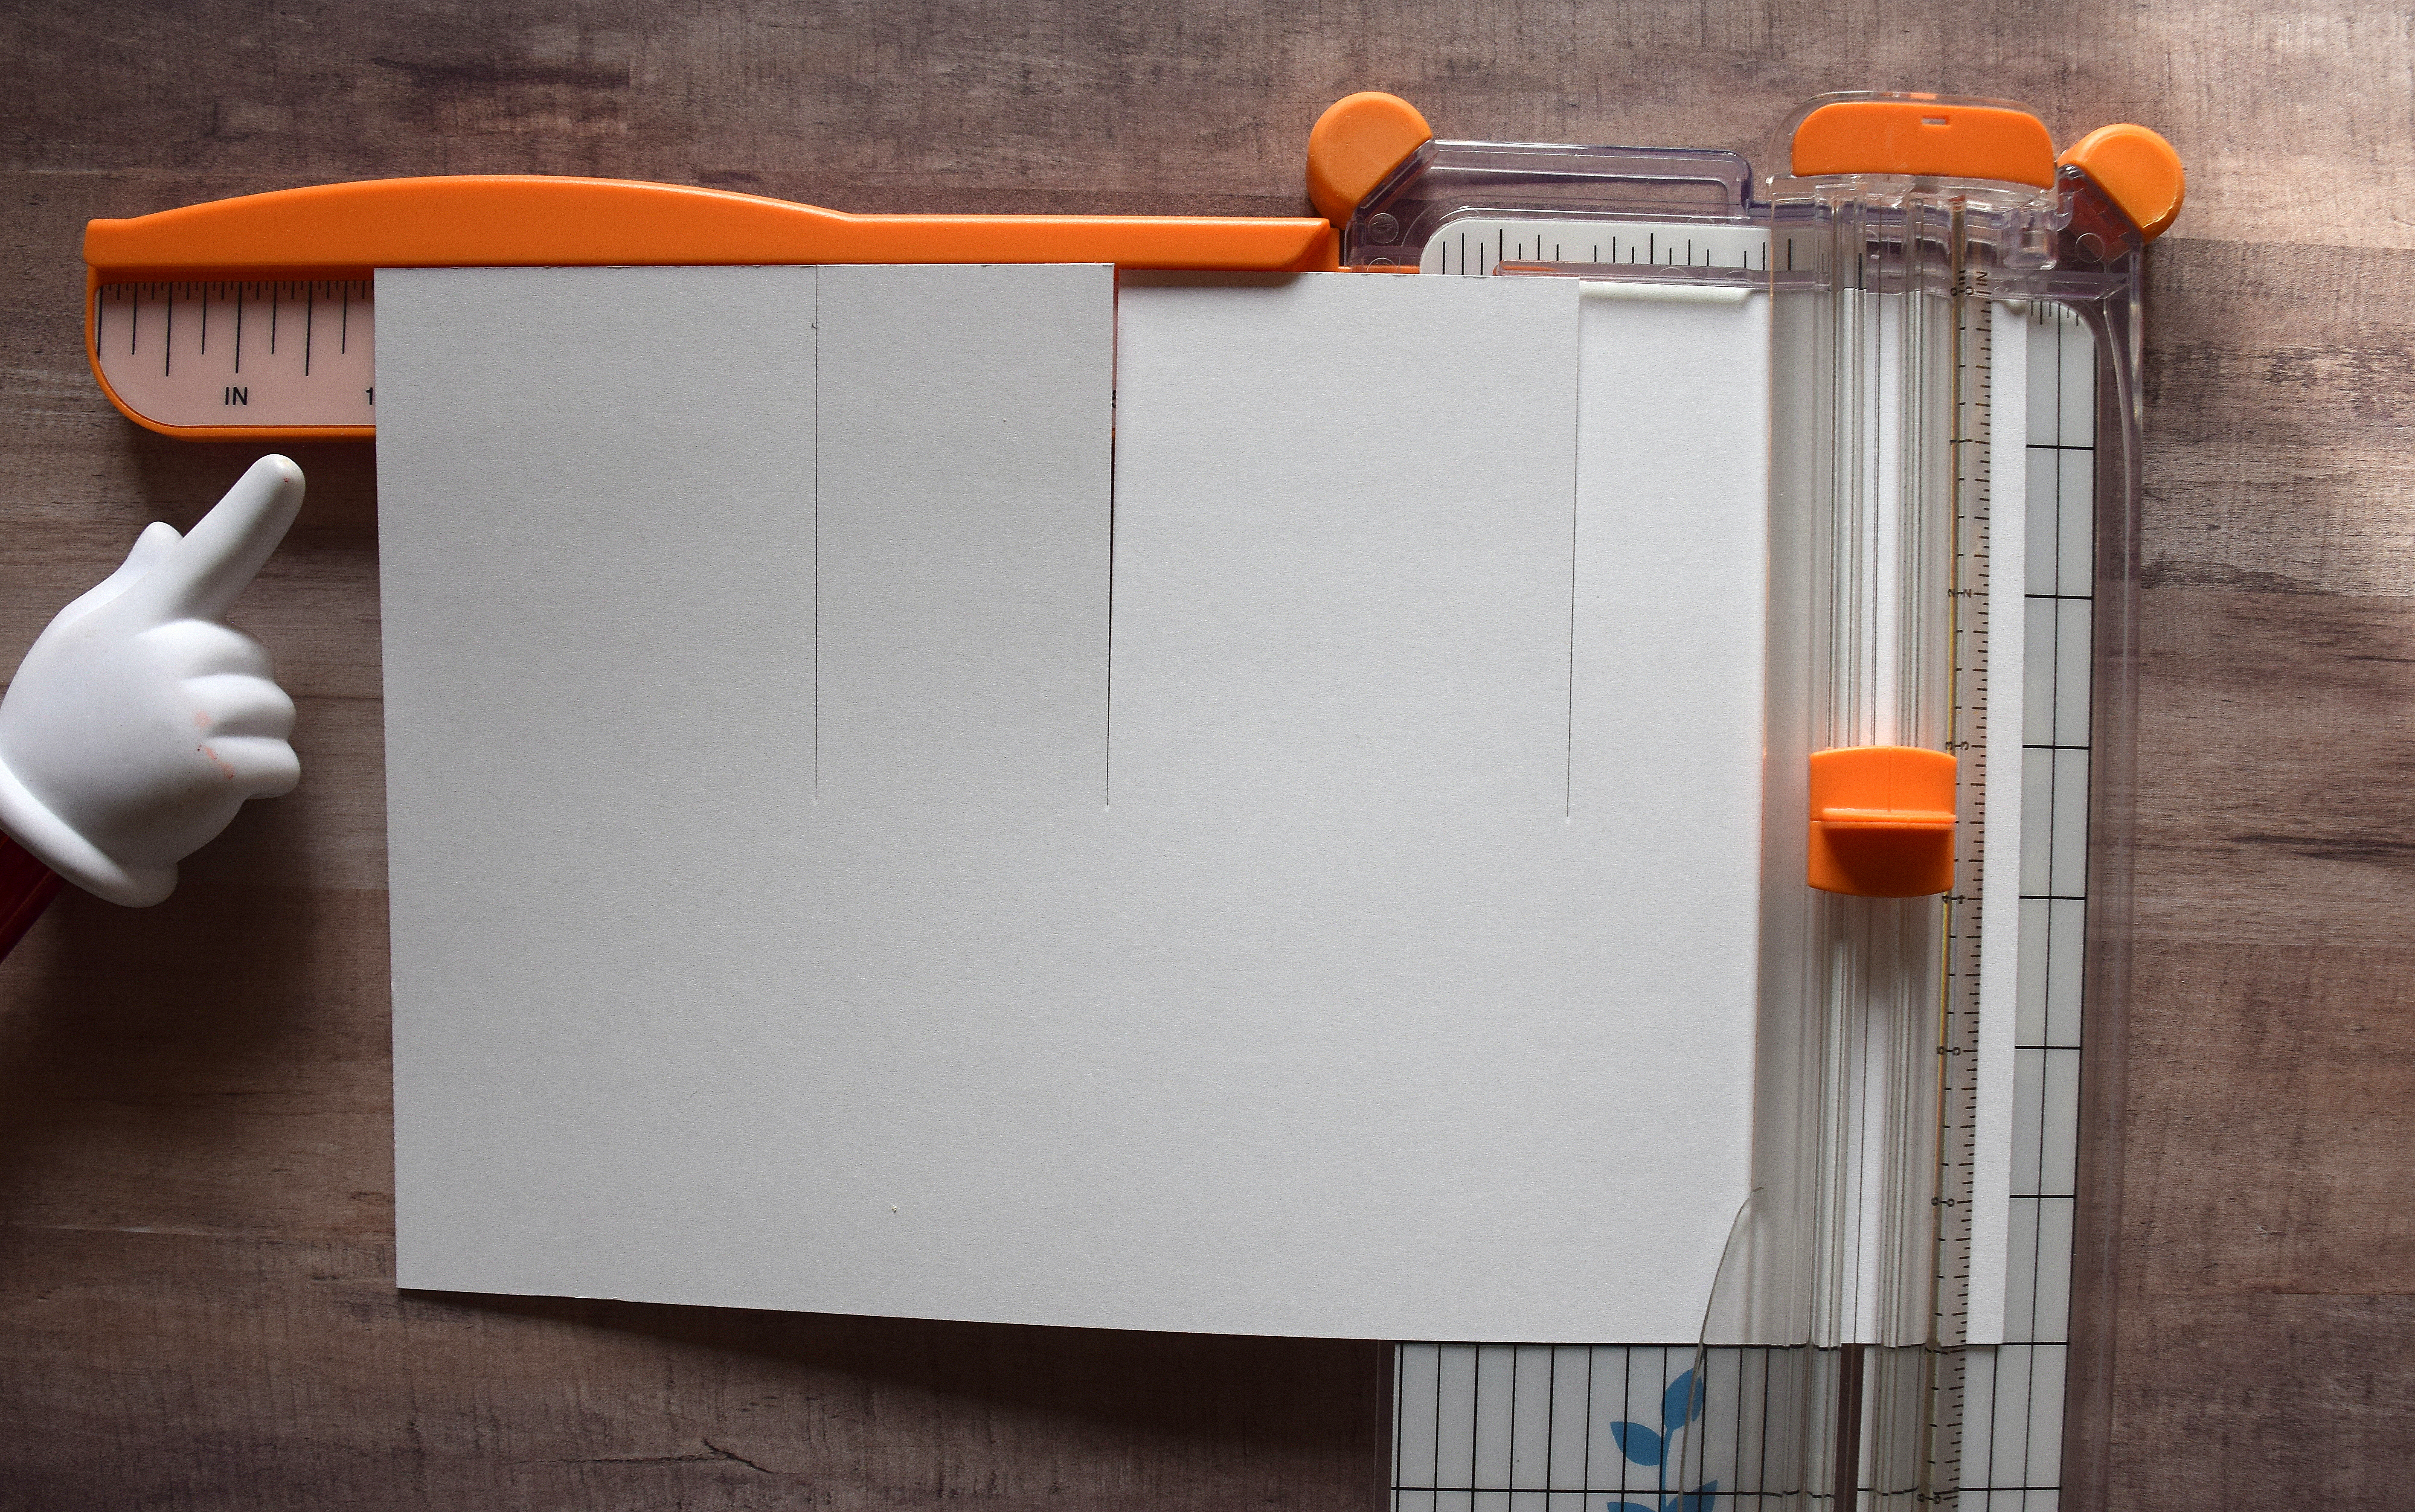
Cut down to 3 1/2 inches. Score from end of cut to end.

Two more cuts…
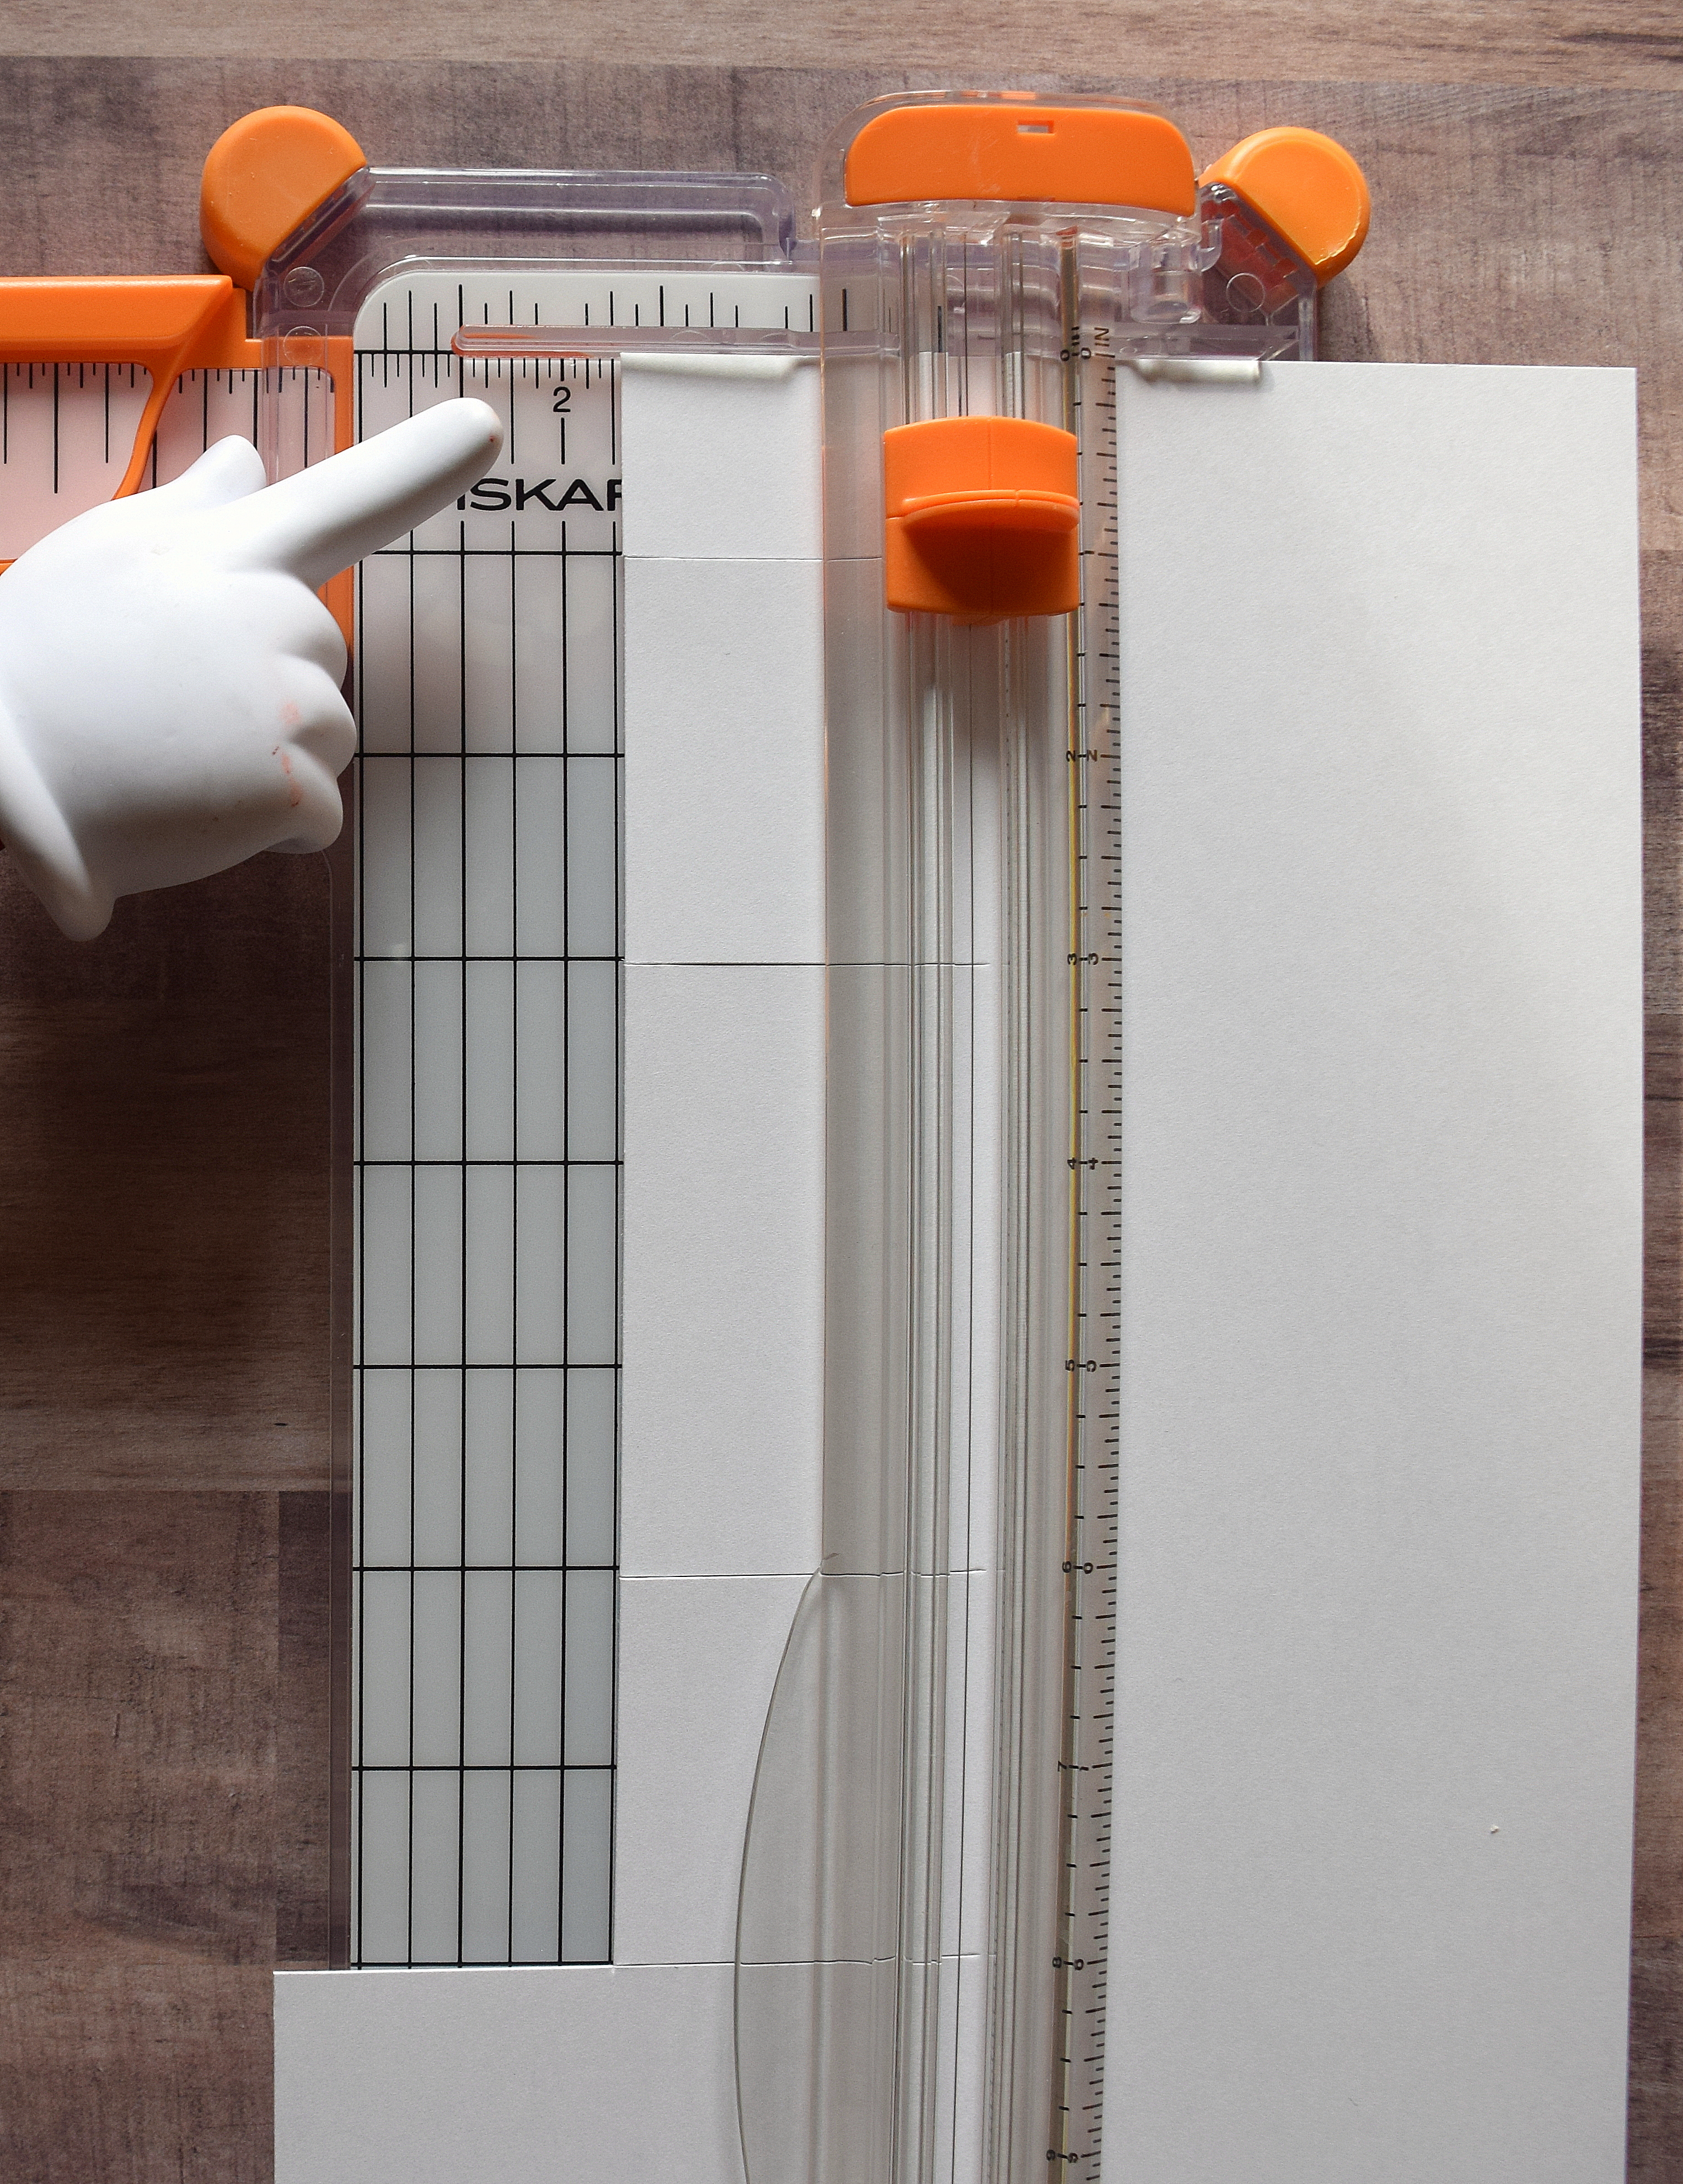
7. Rotate paper counterclockwise (portrait orientation) so 1 inch strip is on top and cuts are on left. Place left corner/edge of paper at 1 3/4 inches. (The score lines should be on the right; these are not pictured here.)
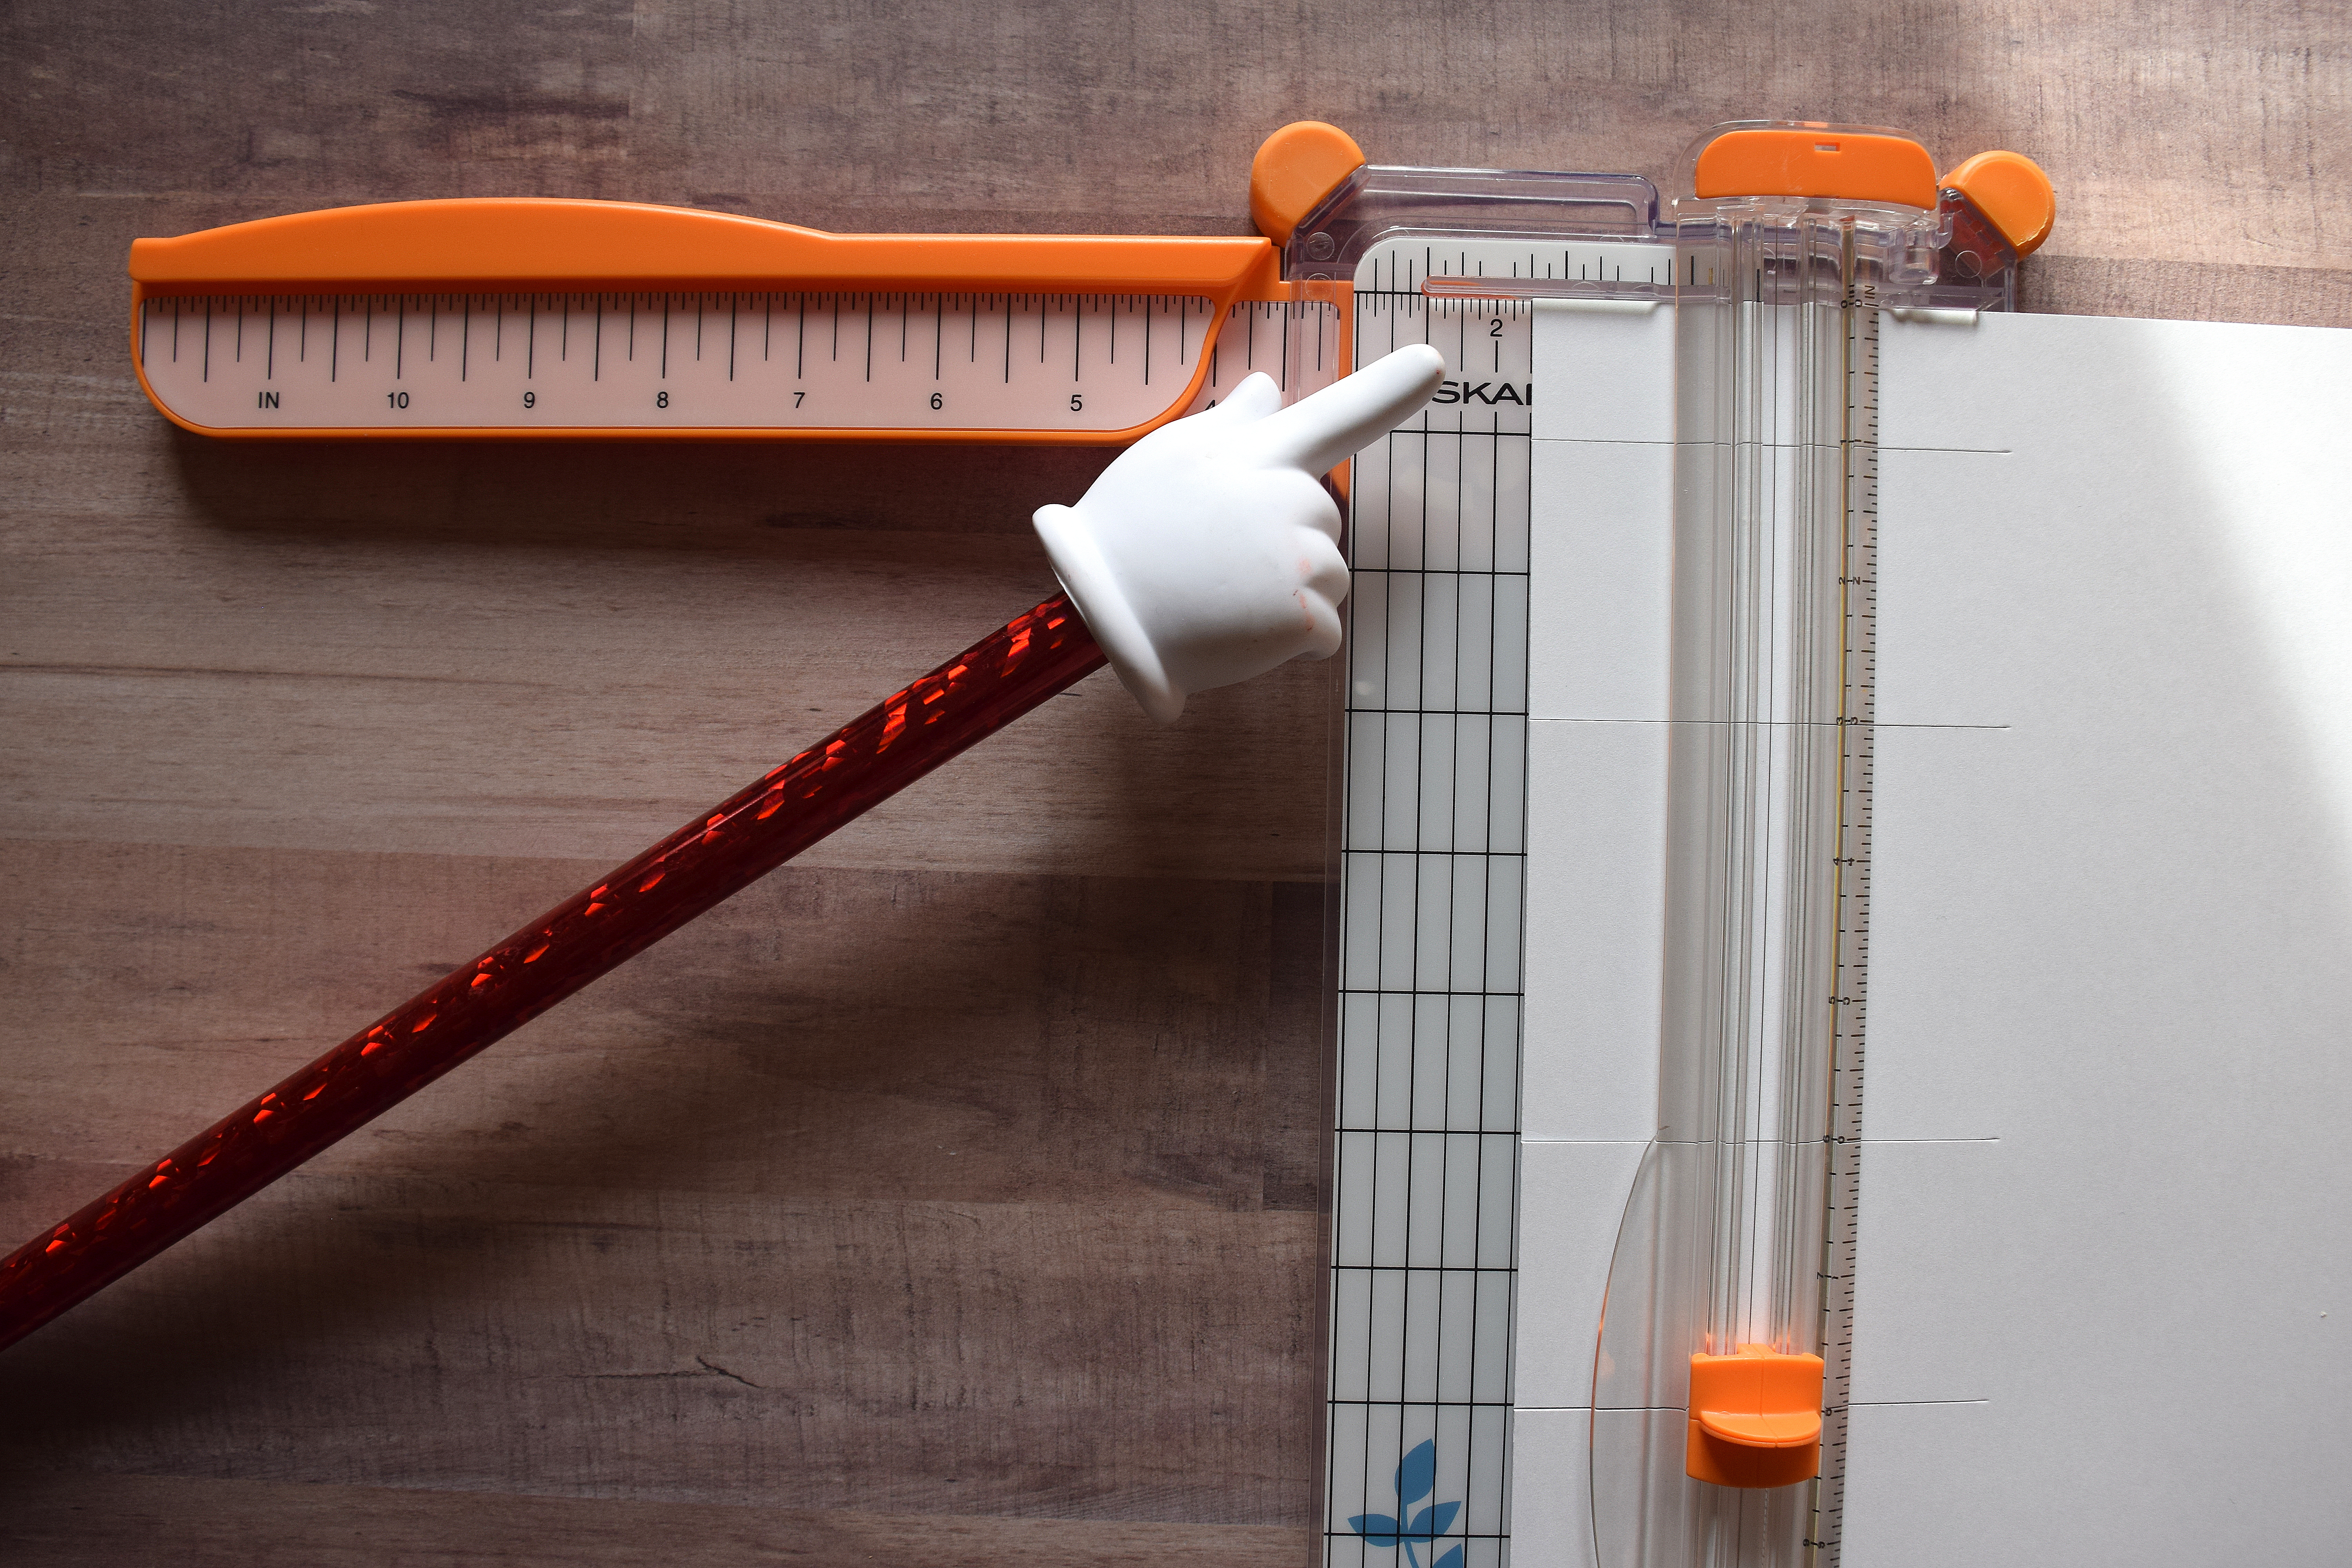
Cut down to 8 inches (to last cut/score line). DO NOT SCORE TO BOTTOM.
(The little pieces along edge should fall off.)
8. Slide paper to left, and line up left corner/edge at 1 3/4 inches.
Cut down to 1 inches (to FIRST cut/score line) The little piece along edge should fall off. Score from end of cut to last cut/score line.


9. Fold on all the score lines.
10. Glue skinny flap to inside of back panel.
11. TO MAKE CROSS STRIPS/BARS…
- Cut three 4 inch x 1/2 inch strips, and cut one 3 1/2 inch x 1/2 inch strip.
- Score each of the longer strips at 1/2 inch and 3 1/2 inches. In other words, make a 1/2 inch score line on each end, and score the shorter strip at 1/4 inch and 3 1/4 inch. In other words, make a 1/4 inch score line on each end. THIS SHORTER ONE WILL BE THE FRONT BAR.
- Fold on the score lines.
- Glue the flaps of these bars to the inside of the box, lining them up one in front of the other (as shown below). PUT THE BAR WITH THE SMALLER FLAPS IN FRONT. Make sure all the flaps are pointing forward (towards the front of the box) to insure they are all evenly spaced, and make sure they are all flush with the top edge of the inside of the box.

12. Adhere all your decorative panels to the mats, and adhere these to the box. Add colored/decorated elements to strips as desired.

Thanks for checking out my card project!
This content uses referral links as described in the disclosure policy on my sidebar.


That is such a wonderful card. Cute animals.
LikeLike
Beautiful craftsmanship! I LOVE your work (and your page is so informative and organized! Very helpful for instructional references!) I also love the way the pop up cards display… I love receiving them 😸…
Question: Is this card concept something you could somehow personalize? Like, have the wish coming from your actual family… using photos of real heads printed on a card stock and cut out? Or maybe cartoons of real people that were altered by a filter? Just wondering! 🐾🐾
LikeLike
Thanks for your nice comments. And yes, you can definitely personalize a box card. You just attach whatever you want to the “cross bars” in the card. I’ve made a few other box cards with different elements (search “box cards” here on my site to see them), and there are tons online.
LikeLike