Harry Potter Spinner Pop-Up – Birthday Challenge #6

Harry Potter Spinner Pop-Up – Birthday Challenge #6

Harry Potter Spinner Pop-Up 1
(inside: have a magical day!)

Kelly came up with the idea for my 6th “birthday challenge” card (and for her birthday card this year). Happy Birthday, Kelly!

Kelly loves Harry Potter and wanted him featured on a card. Specifically, she wanted a “cute” Harry Potter image and a card design where the design on the front continued to the inside. She also wanted something to move when the card was opened. Here’s what I came up with…

Harry Potter Quiddich GIF

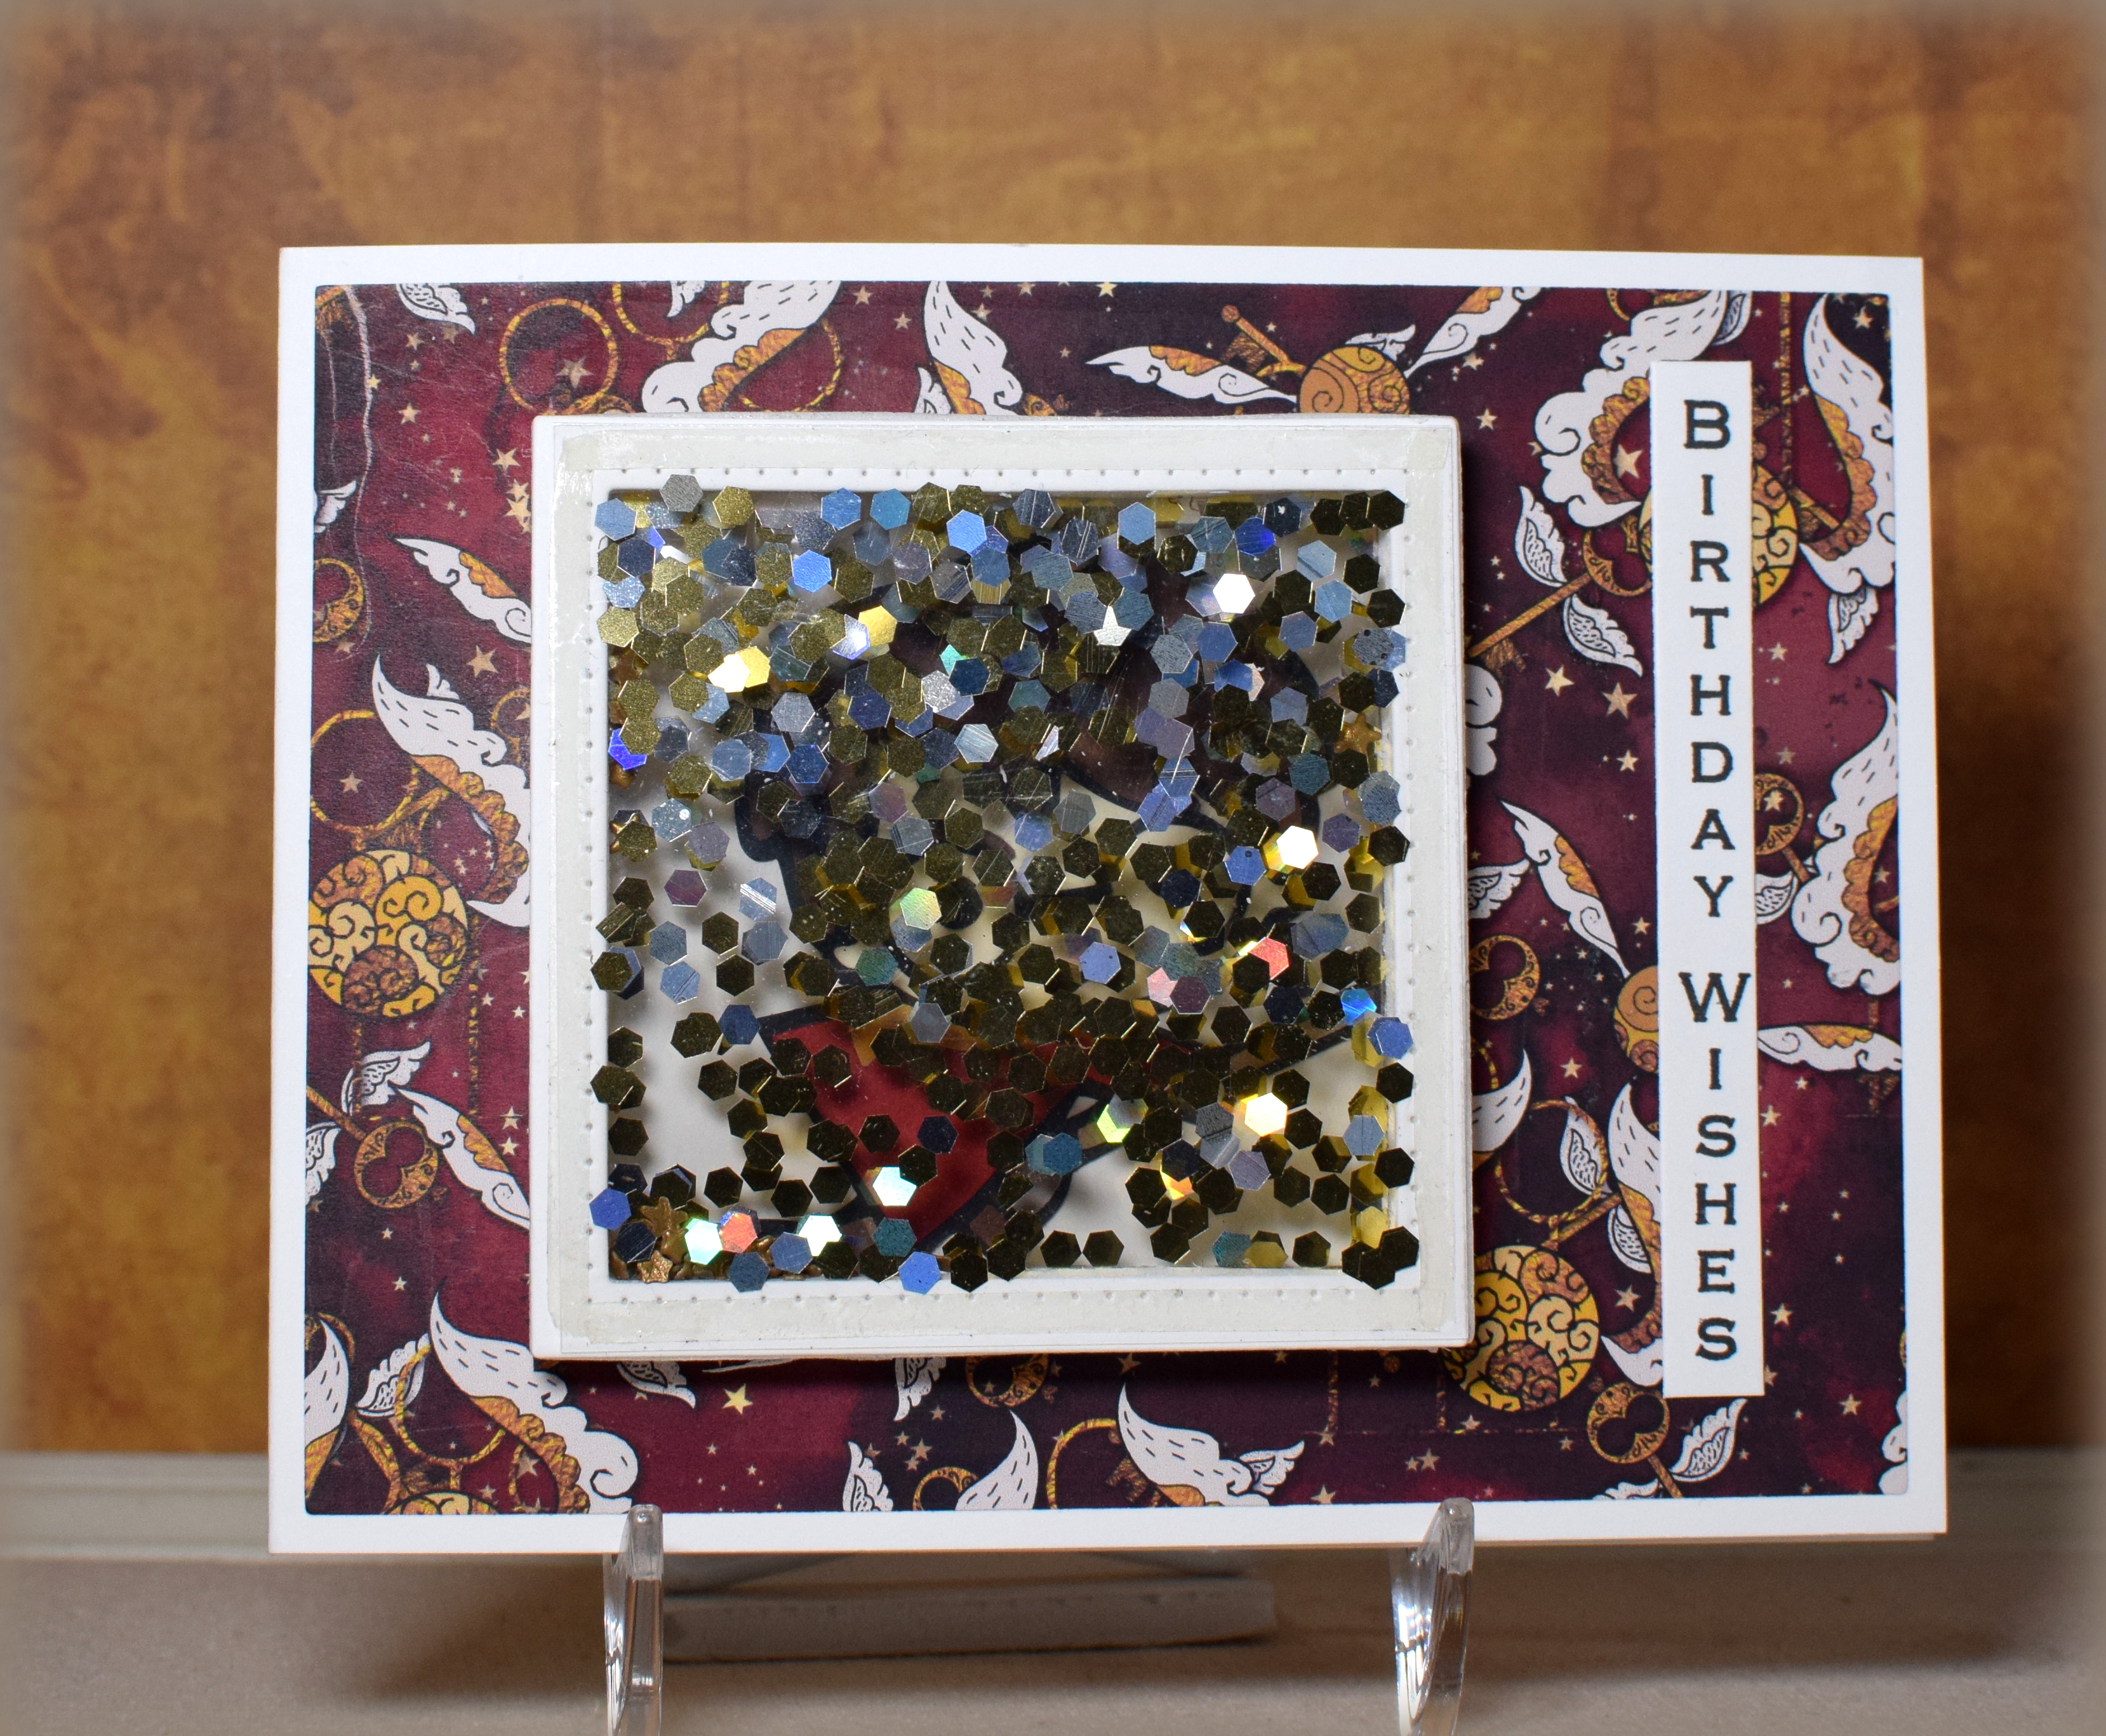
The moving element is the elusive golden snitch that Harry has to catch while playing quiddich for his school/house team. The pop-up mechanism is part of the “Spinner Square Pop-Up” die set by Karen Burniston. Check out her video tutorial to see how this type of card is made.

Harry Potter Spinner Pop-Pp 2

Harry was created with pieces from an svg file by JuicySVG that I purchased on etsy. I created a few extra pieces that were not part of the original design; he had no shoes and looked like he was wearing (black) dress robes which wouldn’t work while playing Quiddich -lol! Since he needed to be seen when the card was both closed and opened, I cut a window on the front and covered the opening with acetate.

Stamps were from the “Vertical Greetings” set (retired?) by Gina K Designs and “Fairy Friends” by Lawn Fawn.

I created a cut file from this google image for the golden snitch. The patterned paper on the front is from the “Wizard Paper Pack” from DigitalCollageCafe. Digital paper from the “Wizard School II” by cachivachedesign was used to create the cut file for the goal posts. Both of these shops can be found on Etsy.

At first, the goal posts were adhered directly to the inside of the card, but the snitch panel kept getting caught on the thick gold card stock so I cut the goal posts from an additional white panel and inlaid the gold pieces where the white ones had been. This made the goal posts flat and no longer interfered with the pop-up panel.

My original design included a clear, shaker panel for over the window opening to give the illusion of “magic” around Harry, but there was so much static between the two layers of acetate that the sequins stuck to the acetate and completely blocked Harry from view. Crazy, right?!

Harry Potter Shaker Fail

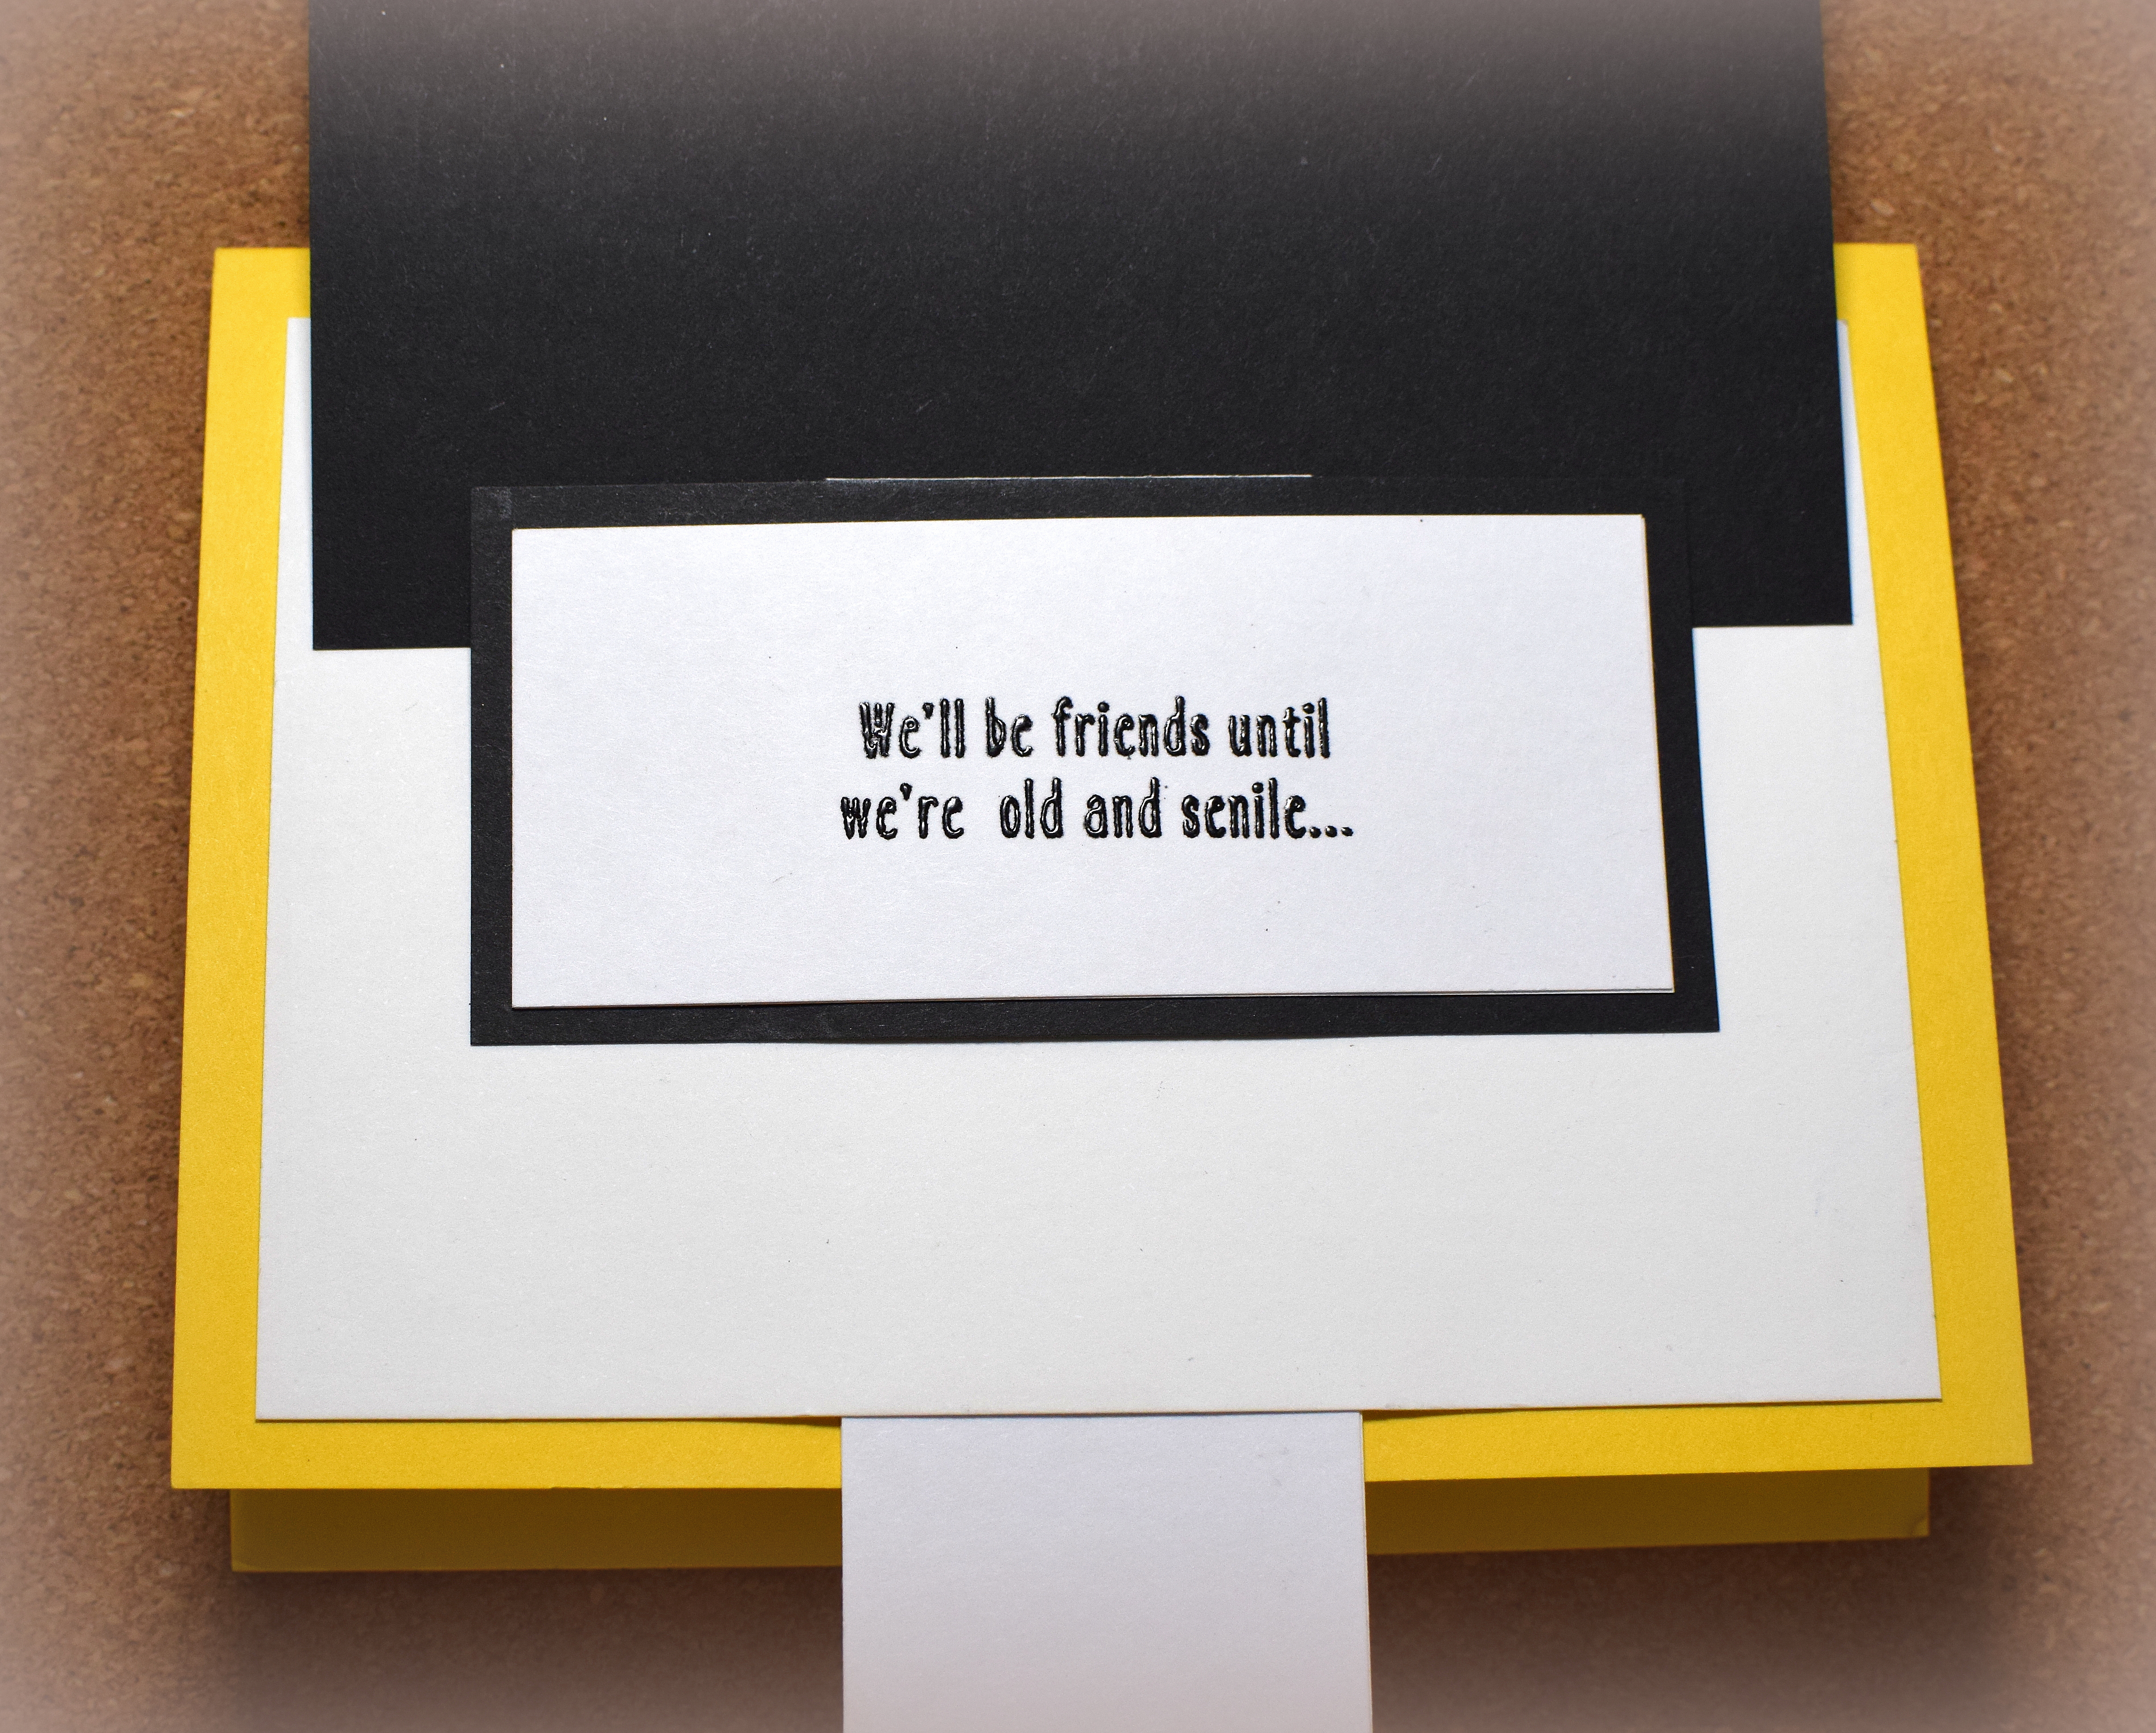
(The shaker panel in the photo is unfinished; I did not adhere the top frame to cover the tape since I ended up not keeping it on the card.)

I also originally wanted to decorate the inside to look like a quiddich pitch/stadium, but the acetate window made that difficult. Everything I tried clashed with the patterned paper on the front when the card was closed so I ultimately went with a CAS look for the inside. (With all the fails, this card took much longer to create than it should have – lol!)

Thanks for checking out my card project!

This content uses referral links as described in the disclosure policy on my sidebar.

Build a Snowman – Birthday Challenge #5

Build a Snowman – Birthday Challenge #5

Build a Snowman - front
(inside: Have a super cool birthday)

Kevin came up with the fifth of my “birthday challenge” card ideas, and it’s the card I made for him for his birthday this year. He had quite the list of requirements…

It had to have a cute boy wearing a hat. The boy had to be rolling a snowball to make a snowman. (Kevin wanted the snowball to get bigger as it was being rolled; I told him I didn’t think I could make it both roll and grow, and he chose for me to make the snowball roll.) And finally, the boy had to actually build the snowman. I think he’s trying to kill me – lol!!

The “cute” boy with a hat rolling the snowball is on the front of the card…

Build a Snowman - GIF 1

The “rolling snowball” was achieved by creating a “penny slider/spinner” element. HERE is a tutorial I previously posted for making a penny slider/spinner card.

I made the boy build the snowman on the inside.

Build a Snowman - GIF 2

For the “build the snowman” part of the challenge, I created a “slider card” element. HERE is a tutorial I previously posted for making a slider card. (I actually needed to use my own tutorial to remind me how to create this type of card!)

Build a Snowman - inside

The boy image was part of a digital stamp called “Boy Tickling Snowman” by kindacutebypatricia that I purchased on etsy. It was a line art image that I separated and “colored” with my Silhouette software. (My original thought was to die cut all the layers and paper piece the boy, but some of the pieces were too tiny for my Silhouette to cut cleanly so I created a “print and cut” file instead.) I did need to alter the position of his arm on the front so he could roll the snowball. The snowman is part of the same digital stamp.

The snowy sky was created with Stormy Sky Distress Ink, a blending brush, and a mask. Once inked, I spritzed the panel with water which reacted with the distress ink and created the white “snow” spots. I added a few hills with GKD Soft Stone ink and the mask.

The trees were cut from GKD Christmas Pine card stock with dies from the “Evergreen Die” set by Creek Bank Creations. I added a bit of snow with Chunky White Deep Impressions Embossing Enamel by Stampendous. (The powder wouldn’t stick with the tiny amounts of Versamark, so I used glue instead.)

I used several other Creek Bank Creations dies as well – the deer from the “Into the Woods Die” set, the greeting from the “Happy Birthday Chunky Sentiment Die” set, and a slit from the “Slit Die” set.

The sentiment on the inside of the card is a stamp from the “Snorkel Fun Penguin” set by Your Next Stamp, and the speech bubble was made with a die from the “Tag That!” set from Spellbinders.

Happy Birthday, Kevin!

Thanks for checking out my card project!

This content uses referral links as described in the disclosure policy on my sidebar.

Fish Tank – Birthday Challenge #4

Fish Tank – Birthday Challenge #4

(back: Birthdays are for celebrating! Have a great day!)

It has been a while since making/sharing the “birthday challenge” cards from my children.  Since my triplets’ birthday is coming up, I thought I’d use their challenge ideas to create their cards.

Keith came up with challenge #4.  When asked what his challenge idea was, he had just two words – “fish tank.”  When I asked if there was anything else I needed to incorporate into the design, he responded with, “fish tank.”  How about…  “Fish tank.”  But do you want…  “Fish tank.”  So I made a fish tank card – lol!  Happy Birthday, Keith!

The basic card design is a box card with several acetate panels inside which allows my fish to “swim” at various levels in the tank.  I used a die from the “Infinity Rectangle Dies” set by Hero Arts to create the opening on the front.

The stamps were from the “Best Fishes” and “Tropical Scenes” sets by Sunny Studio and from the “Critters in the Sea” set by Lawn Fawn.  (There are coordinating dies available for each of these stamp sets.)  All of the images were stamped with Memento Tuxedo Black ink and colored with Copic Markers.

The greeting is from the “Label Me Bold” set by Stampin’ up (retired?), and the sentiment on the back is from the “Ombre Sentiments:Birthday Stamp Set” from Papertrey Ink.

The background panel was smooshed with Color Burst (violet and ultramarine) and water.

I used Recollections “Vintage Blue” glass glitter for the gravel. (Not sure if blue is available anymore.) To make it stick, I applied wide, two sided tape to strips of card stock that were cut to shape. Then, I poured the gravel onto the sticky area, covered the pile with a scrap of card stock (it’s a bit pointy if not lying flat), pressed down, and poured off the excess. These strips were then adhered along the bottoms of the acetate panels and the back. I added a bit of the glitter (with liquid glue) to the stamped strip as well.

This box card folds flat for mailing.  When opened, the card is 4 1/4 x 5 1/2, but when folded, it measures 4 1/4 x 6 3/4 so I created a custom envelope with my We R Memory Keepers Envelope Punch Board.  (Start with a 9 inch square and punch/score at 3 5/8 inches.)

Thanks for checking out my card project!

This content uses referral links as described in the disclosure policy on my sidebar.

Sweater and Snowflakes Birthday Card

Sweater and Snowflakes Birthday Card

We got a bit of snow yesterday and are expecting more today. Perfect weather for cable knit sweaters and crafting indoors!

The “Dancing Snowflake Tile” die is from Poppy Stamps, and the “Happy Birthday Friendship Script” die is from Memory Box. These were cut twice and layered to make the die cuts thicker. I used Metallic Gold card stock from Gift Boutique and heavy weight cream card stock by Recollections.

The background was embossed with the Stampin’ Up Cable Knit Dynamic embossing folder (retired?).

I really struggled to get a good photo of this card. Capturing the shine of the mirror card stock without seeing reflections of me, my camera, or the lights in the photo and while still seeing the texture of the embossed background was quite a challenge! I think the “darkness” behind the snowflakes is my black shirt – lol! The shine on that panel (like the greeting) is quite pretty in real life.

This card is 5 1/2 x 5 5/8 inches and requires a custom envelope and trip to the post office to mail. I used my We R Memory Keepers envelope punch, started with a 9 1/8 inch square piece of paper, and punched/scores at 4 1/2 inches.

Here is an A2 sized sample I made with different card stock…

For this one, I used Gina K Designs Metallic Gold card stock (which has more of a matte finish). The greeting was made with the “Doodle Happy Birthday” die from Poppy Stamps. The off-white heavy weight card stock is “Butter Mints” by Bazzill.

Thanks for checking out my card projects!

This content uses referral links as described in the disclosure policy on my sidebar.

Happy Birthday, Friend – Flip Card

Happy Birthday, Friend – Flip Card

(inside: We’ll be friends until we’re old and senile… then we’ll be new friends! Happy Birthday)

This interactive flip card features a seemingly “normal” card front with a surprise panel hiding beneath it.

Jennifer McGuire calls it a Pop-Up Panel card and shows how to create it in this video. (This is similar to a waterfall card but with only one flipping panel.) For Jennifer’s sample, she creates a 4 x 5 1/2 inch card base to allow the 1/4 inch tab to hang over (and still fit in an A2 size envelope). I wanted my finished base to still be 4 1/4 x 5 1/2 inches so I started with an 8 1/4 inch panel (instead of 8 1/2) and scored it at 4 (instead of 4 1/4). The back is still the standard size, but the front is shorter to allow the tab to hang out.

The images on the front are from the “A Little Something” and “Happy Birthday to You” stamp sets which are both from Gina K Designs (both retired?). I heat embossed them with GKD Fine Detail Black embossing powder and colored the packages in with Copic Markers ((Y15 and R29).

front of card

front of card when tab is pulled
inside when card is opened

The message on the hidden panel and continuing on the inside is from the “Just Kidding” stamp set from Stampin’ Up (retired?), and these were also heat embossed.

The “pull here” stamp was from the “Push Here” set from Lawn Fawn. I tried to heat emboss that to keep it all consistent, but it kept getting blobbed/blurry so I just stamped that in black ink. (Not sure why I was having such trouble with that!)

The patterned paper was from the “Hello Sunshine” paper pack from Gina K Designs (thanks Diana!). I used Wild Dandelion for the base.

I used a die from the Sizzix “Card, Base Step-ups #4” (discontinued) to create the slot needed for the flip mechanism, but you could easily create a slot with any slot die or even a craft knife or scissors; it doesn’t need to be that perfect/exact since you don’t see it when the card is assembled.

Thanks for checking out my card project!

This content uses referral links as described in the disclosure policy on my sidebar.