Slider Card Tutorial
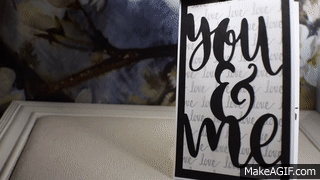
A slider card is an interactive card with a sliding element that moves from left to right when the card is opened. I recently created an anniversary card that has a cute couple that comes together for a kiss and hug and a birthday card with a football player running for a touchdown when the cards are opened .
Here’s how I made the sliding element (for a 5 x 7 inch card)…
1. You need an image that will do the sliding. This image will be moving to the right and probably shouldn’t be much more than 2 1/4″ wide if it will be by itself (and less than that if it will be “meeting” another image). Cut your image(s) out. (You can use dies, an electronic die cutting machine, or scissors.)
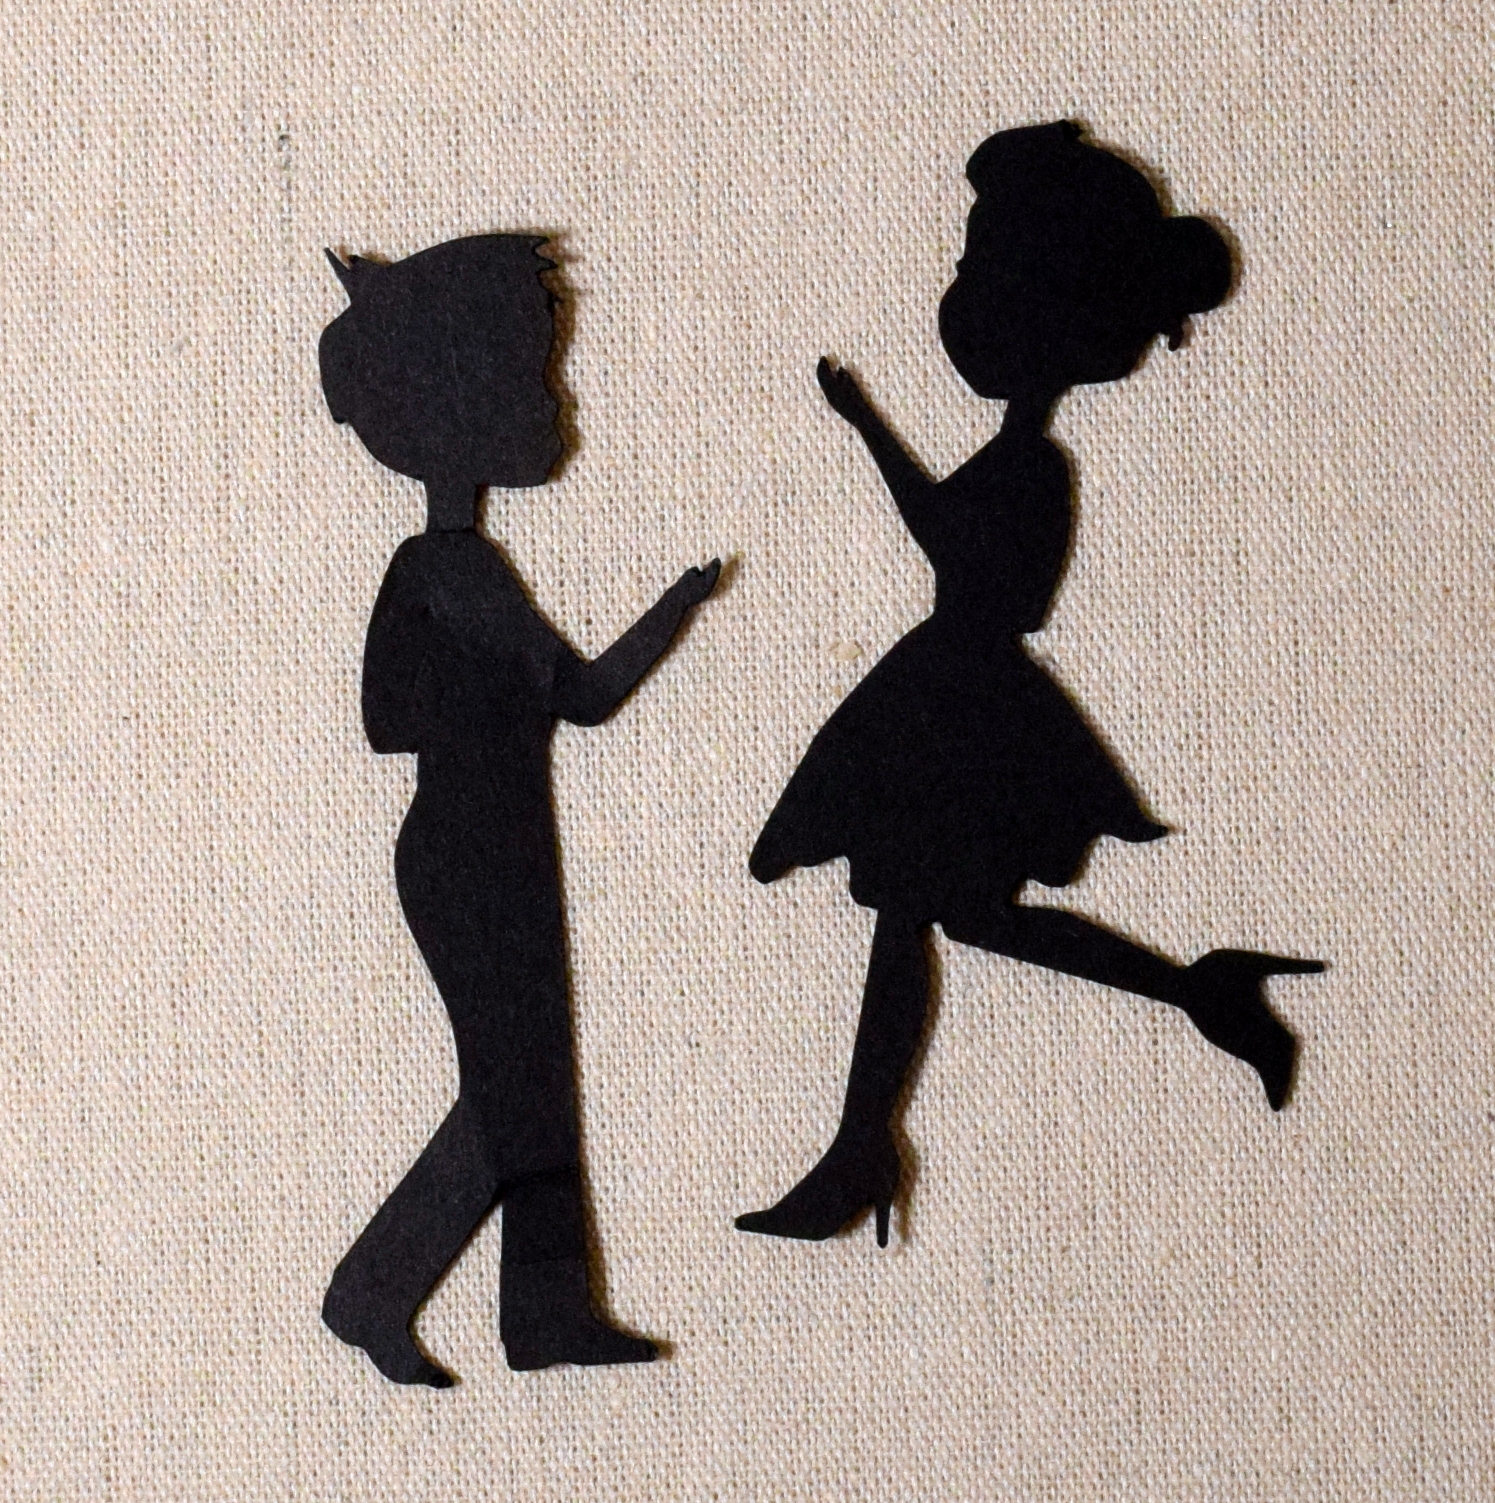
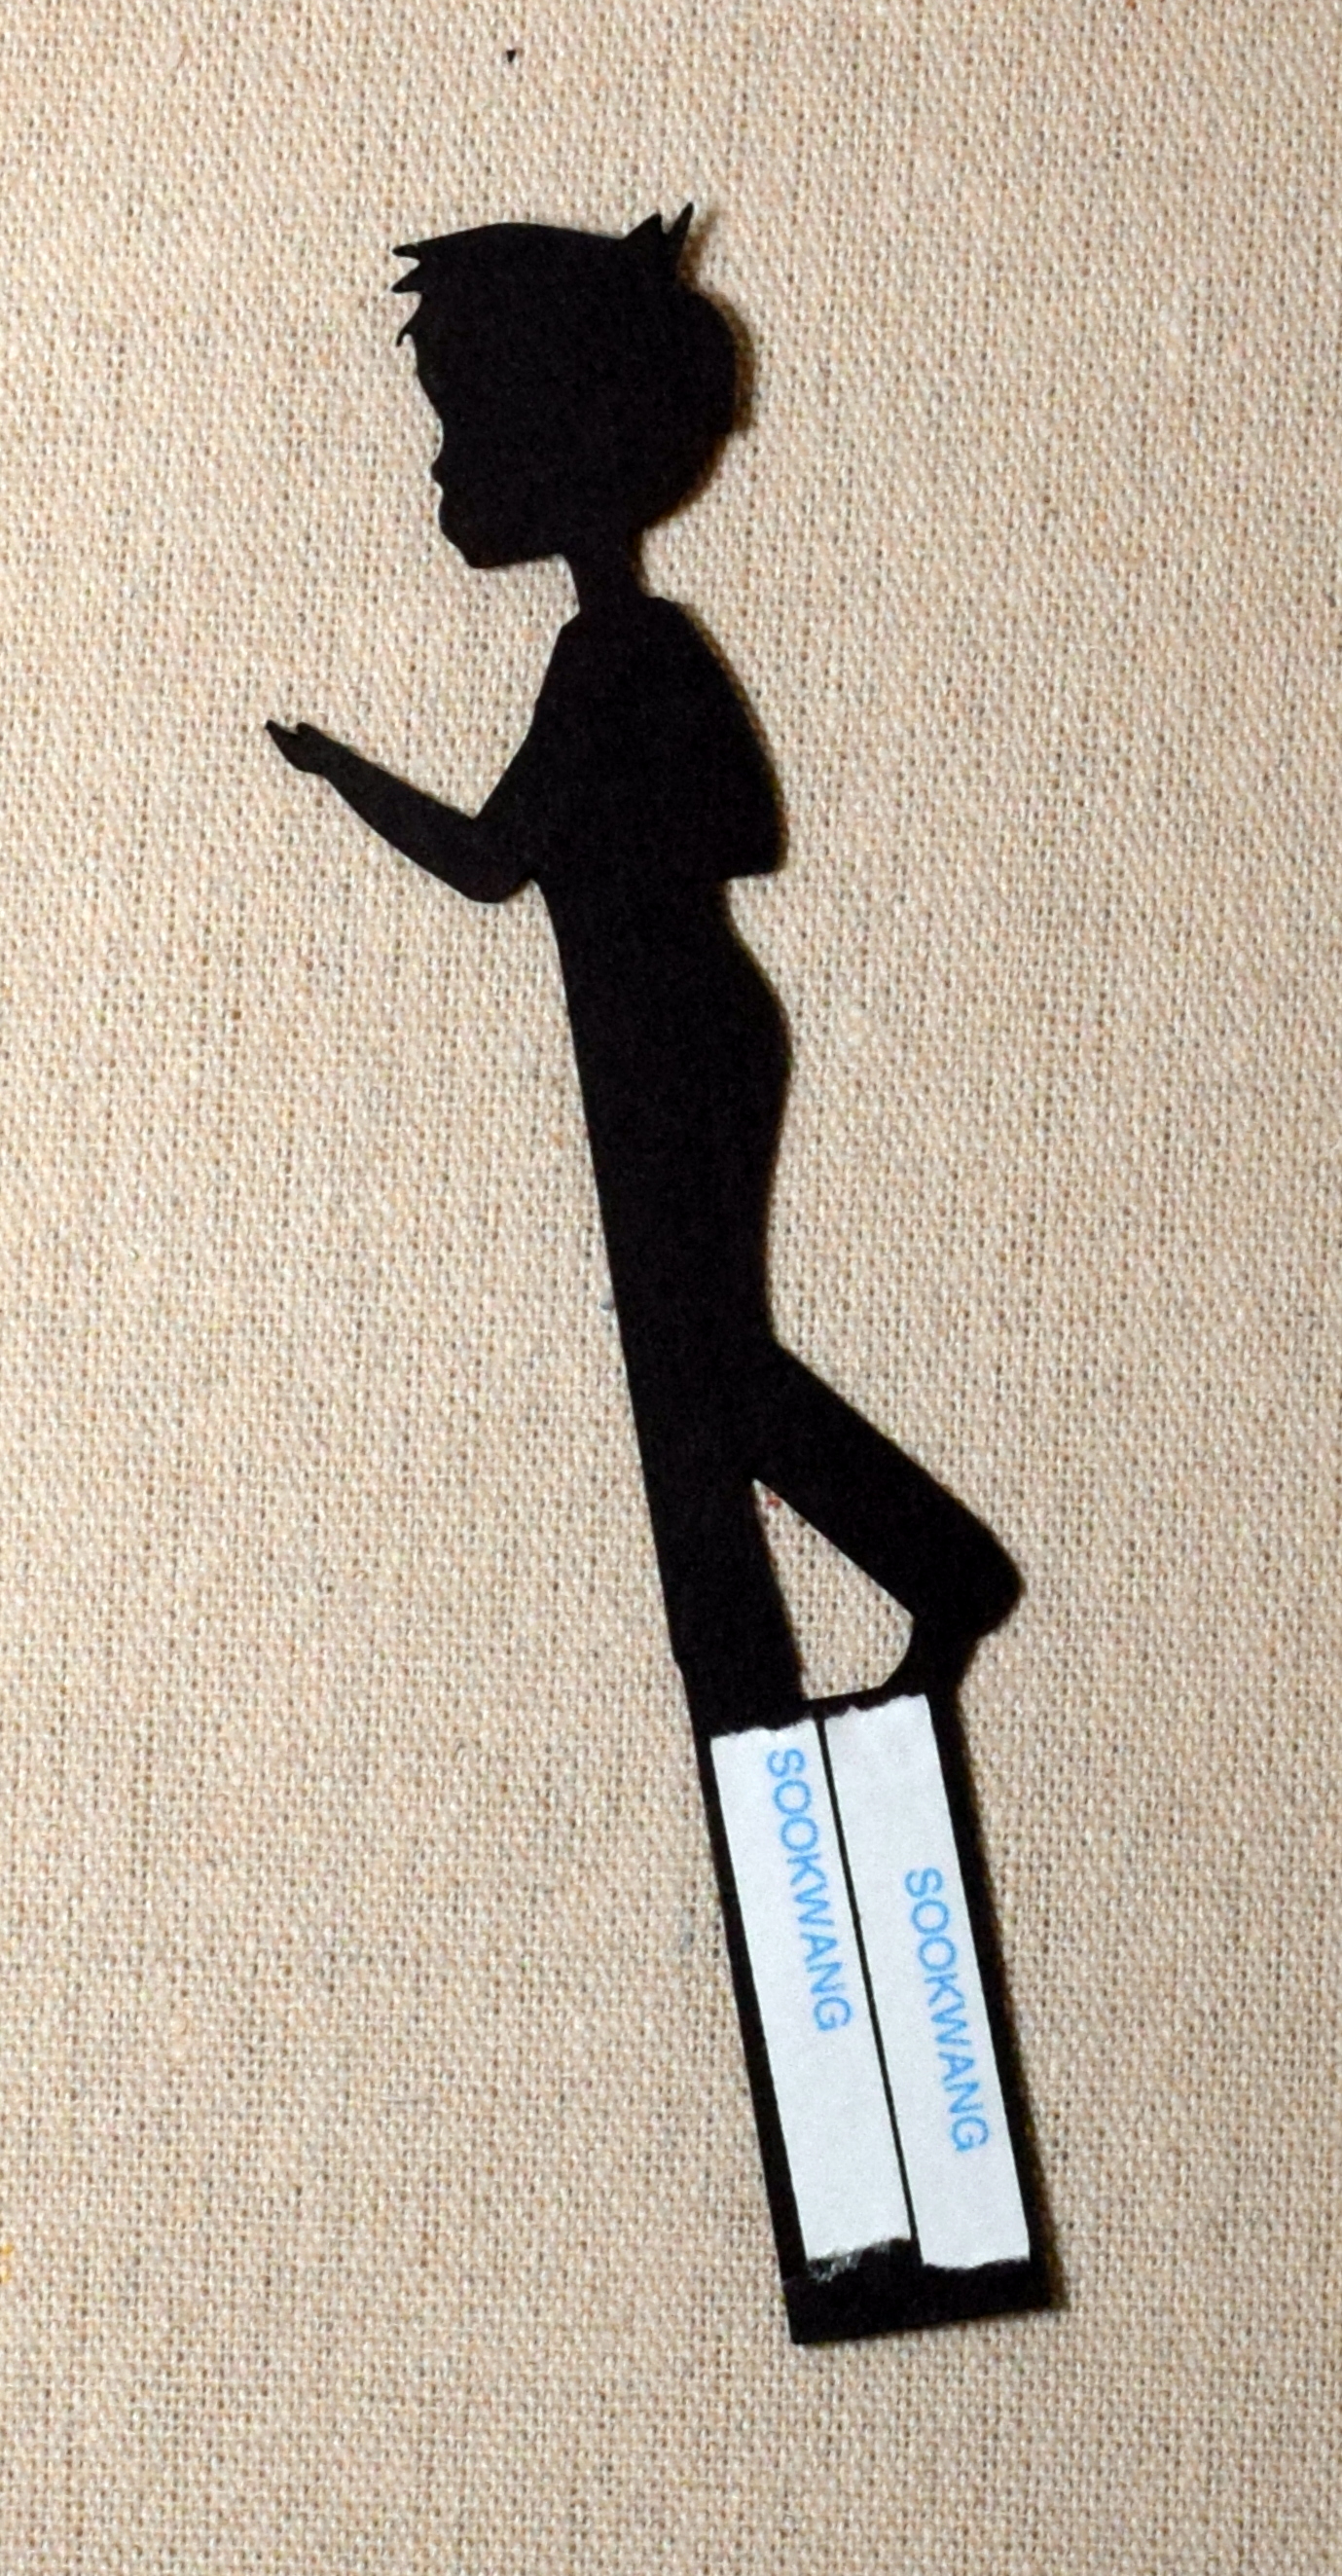
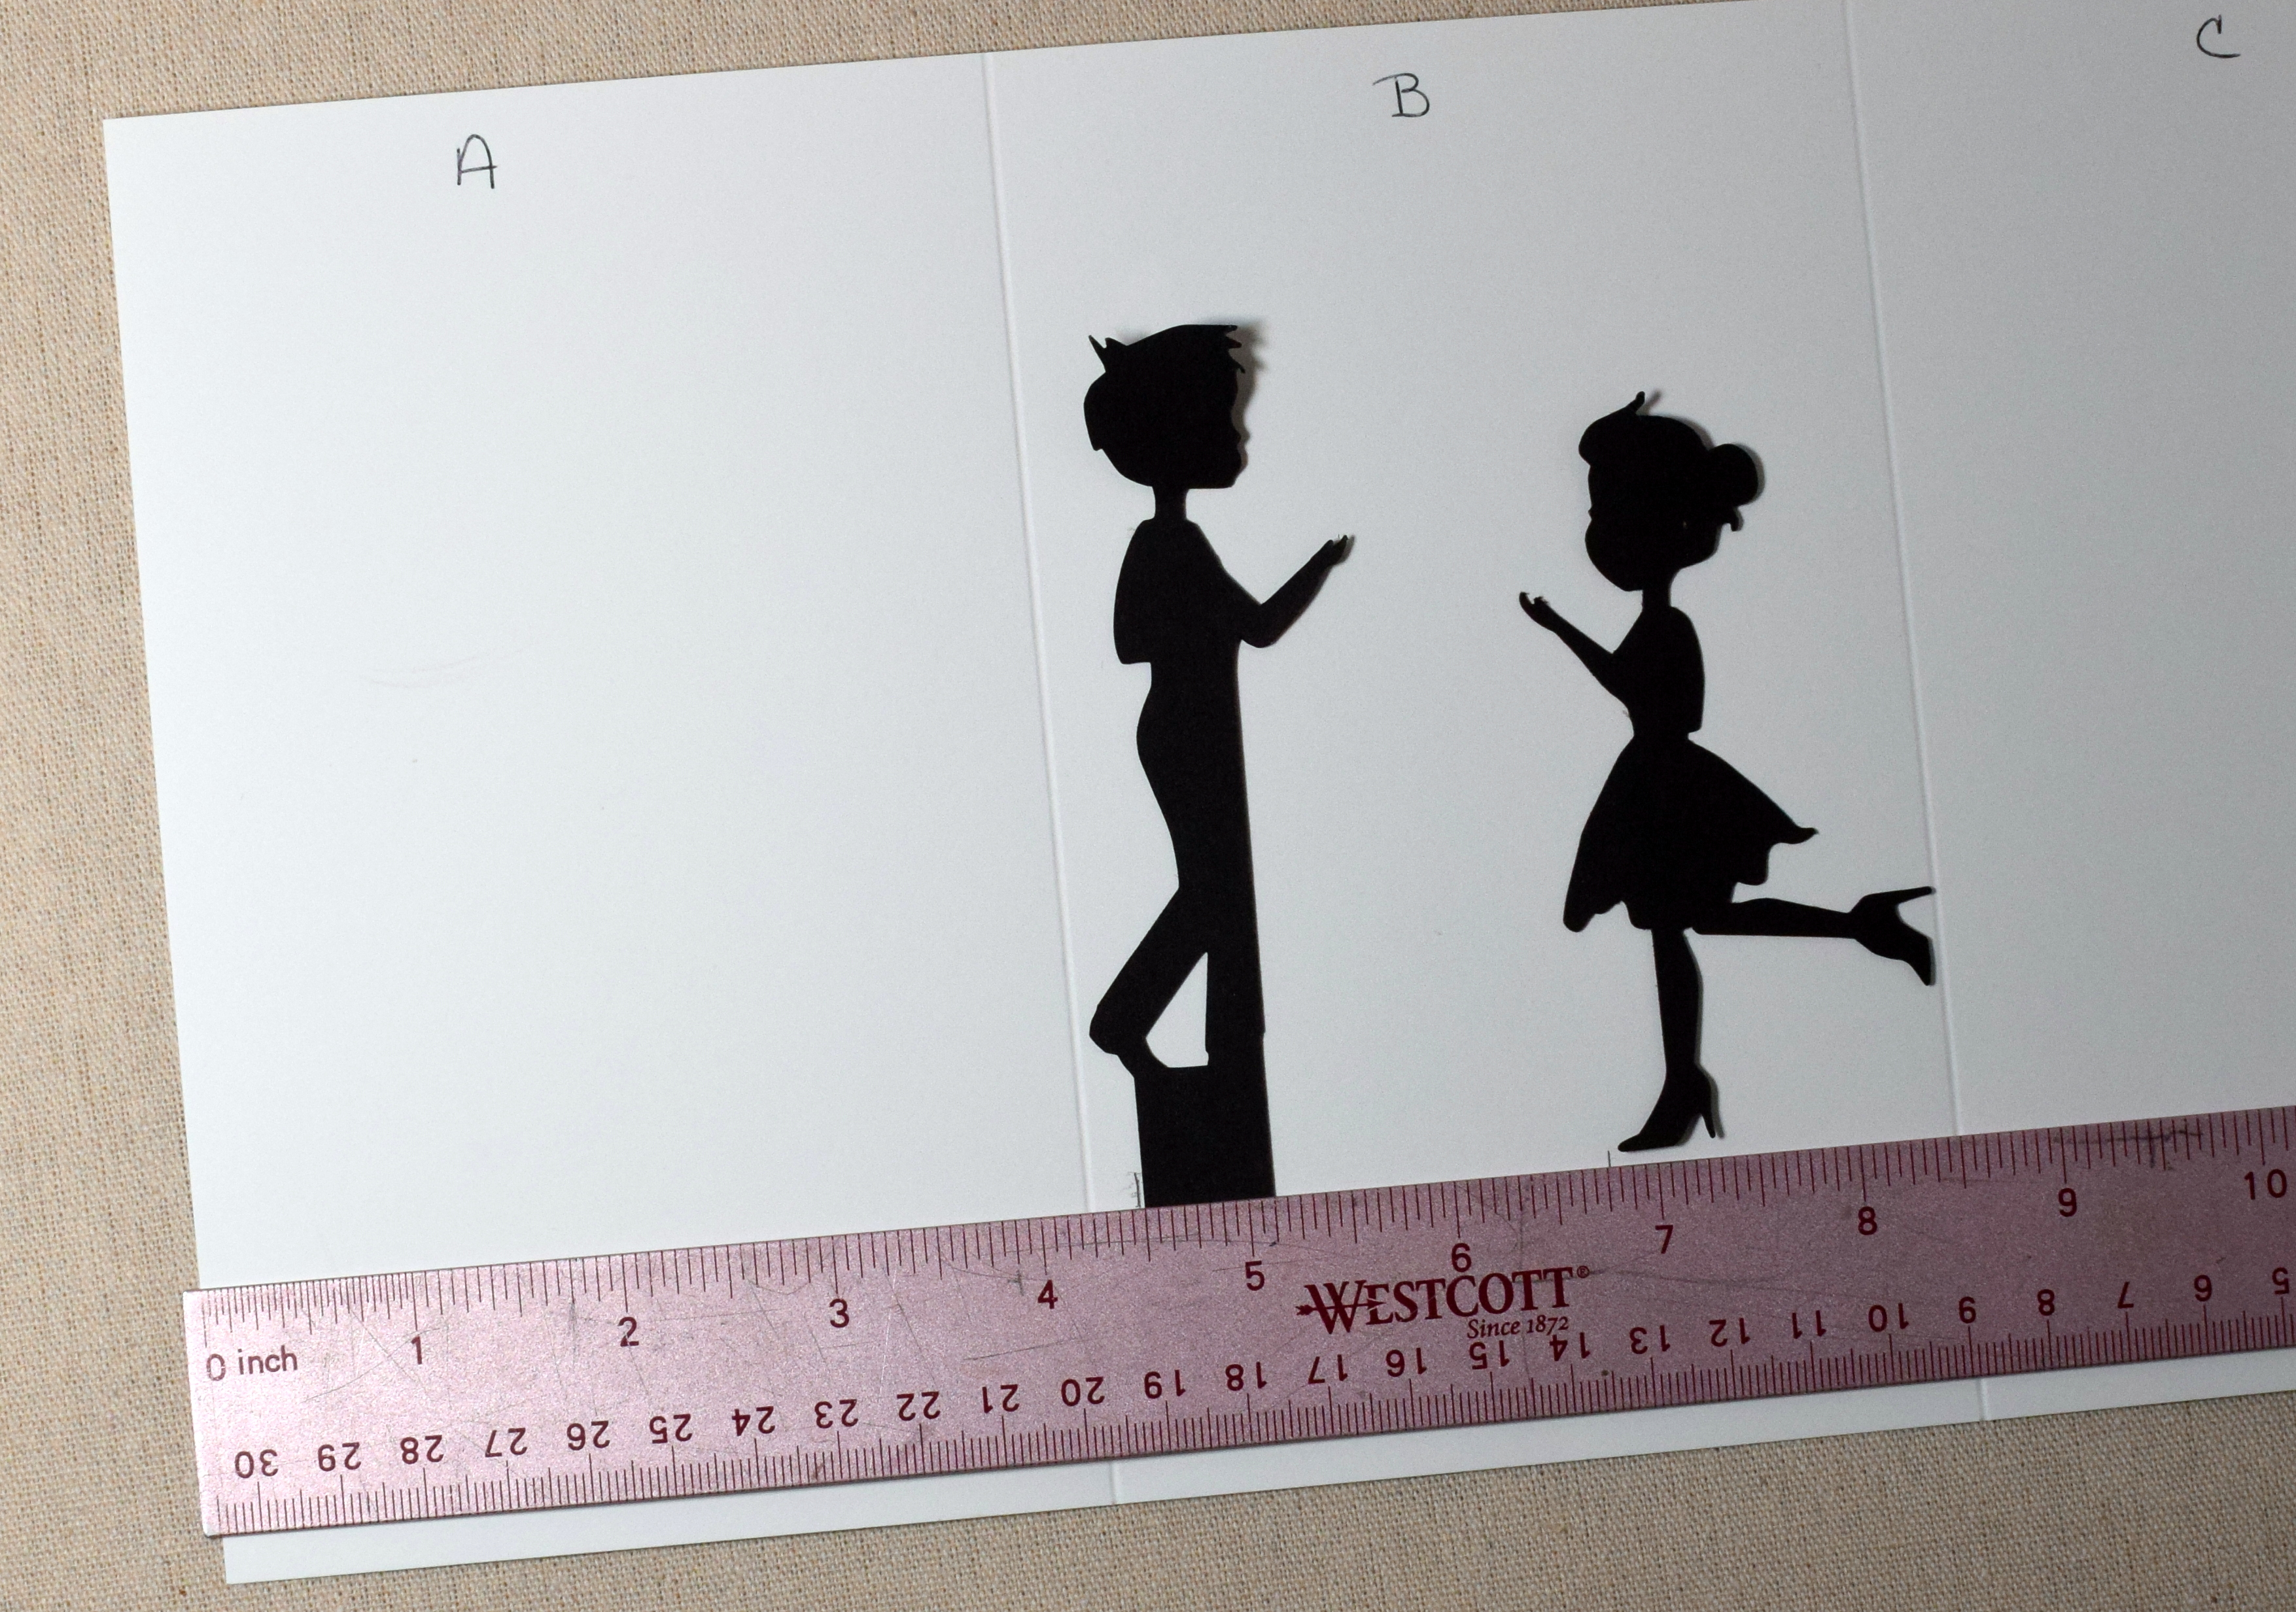
For my sample, I am using silhouette die cuts of a man and a woman. The man will do the sliding while the woman stays in one spot.
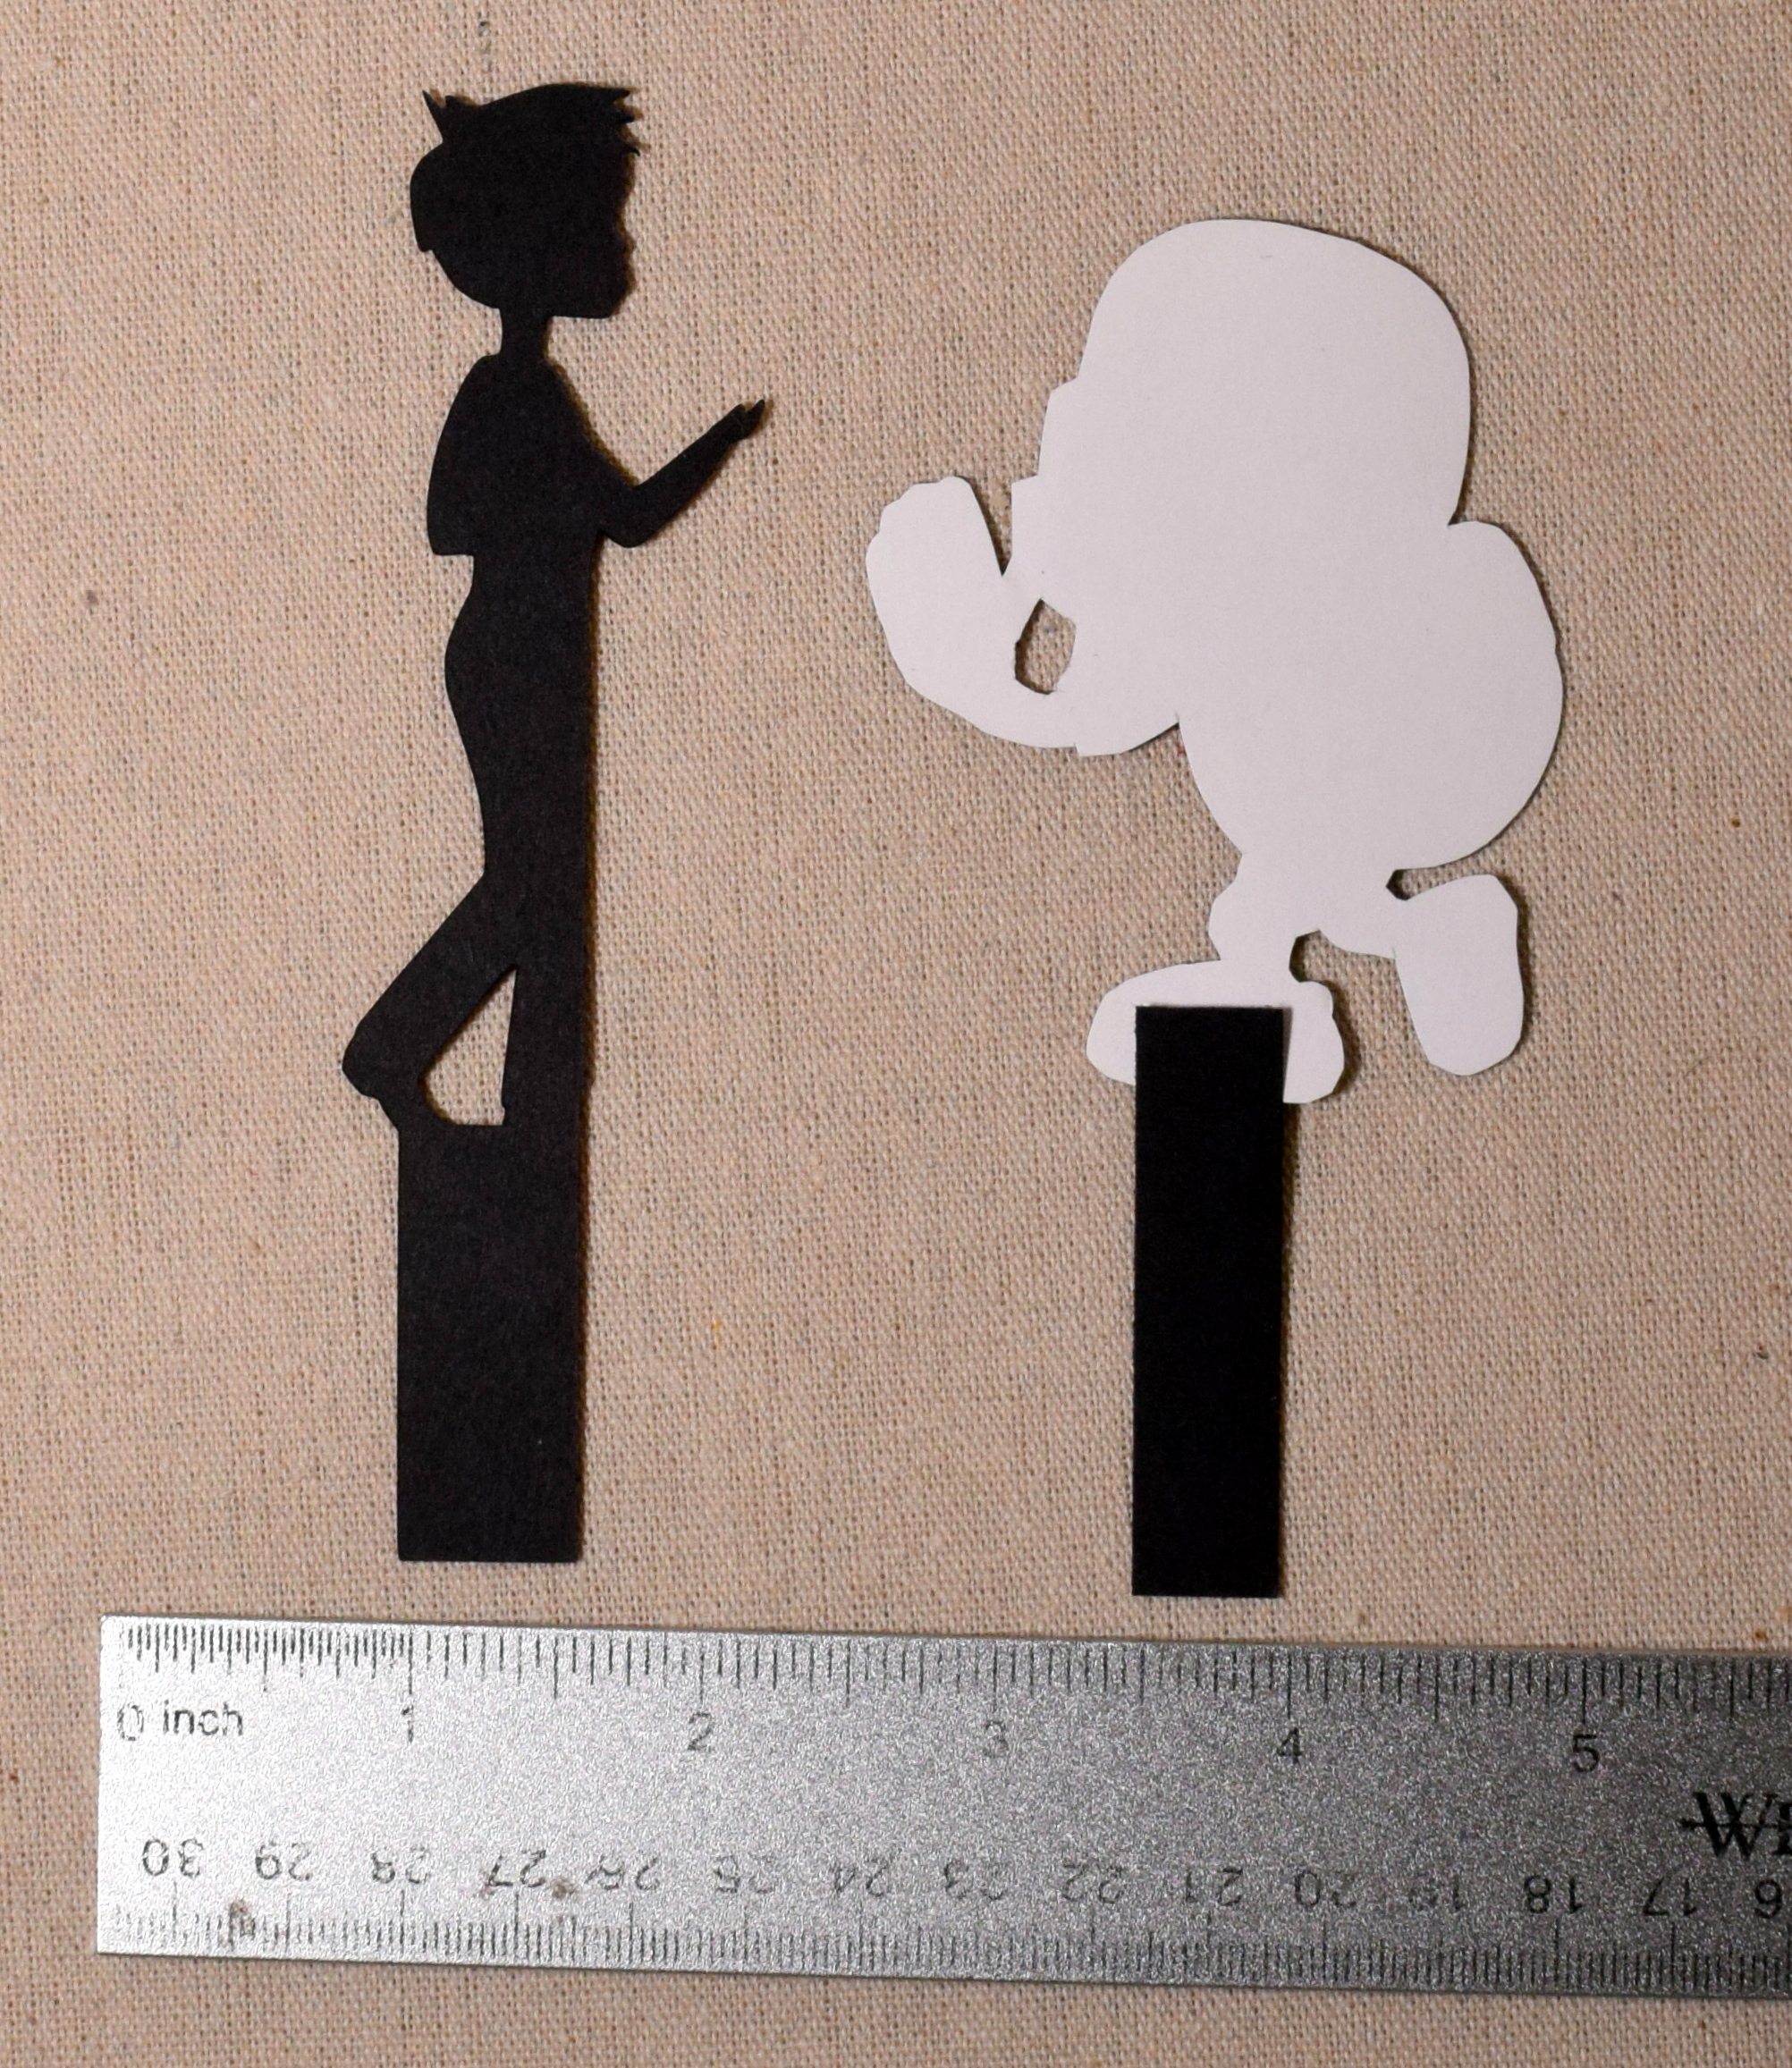
2. The moving piece will need a tab on the bottom that is 1/2 inch wide and about 1 1/2 inches long. (The length of the tab isn’t as important as the width.) You can glue a separate strip of heavy weight card stock to the back of your image with the tab hanging down (like the football player image on right), or you can make the tab and image as one piece (like the man image on left). For my man image, I created one with a tab and one without so I could layer them to make them thicker/stronger.
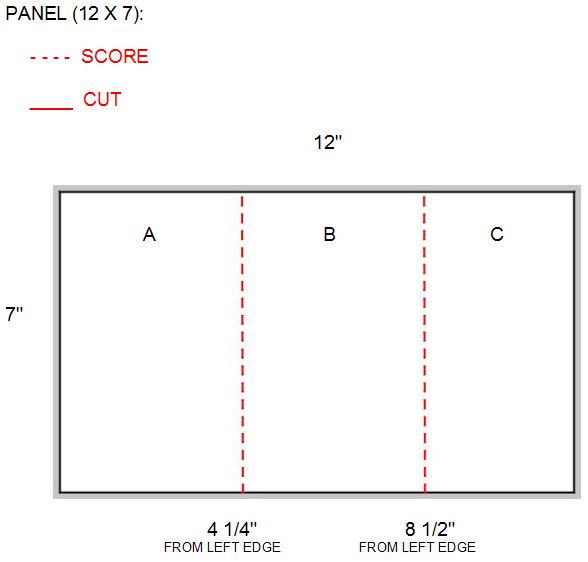
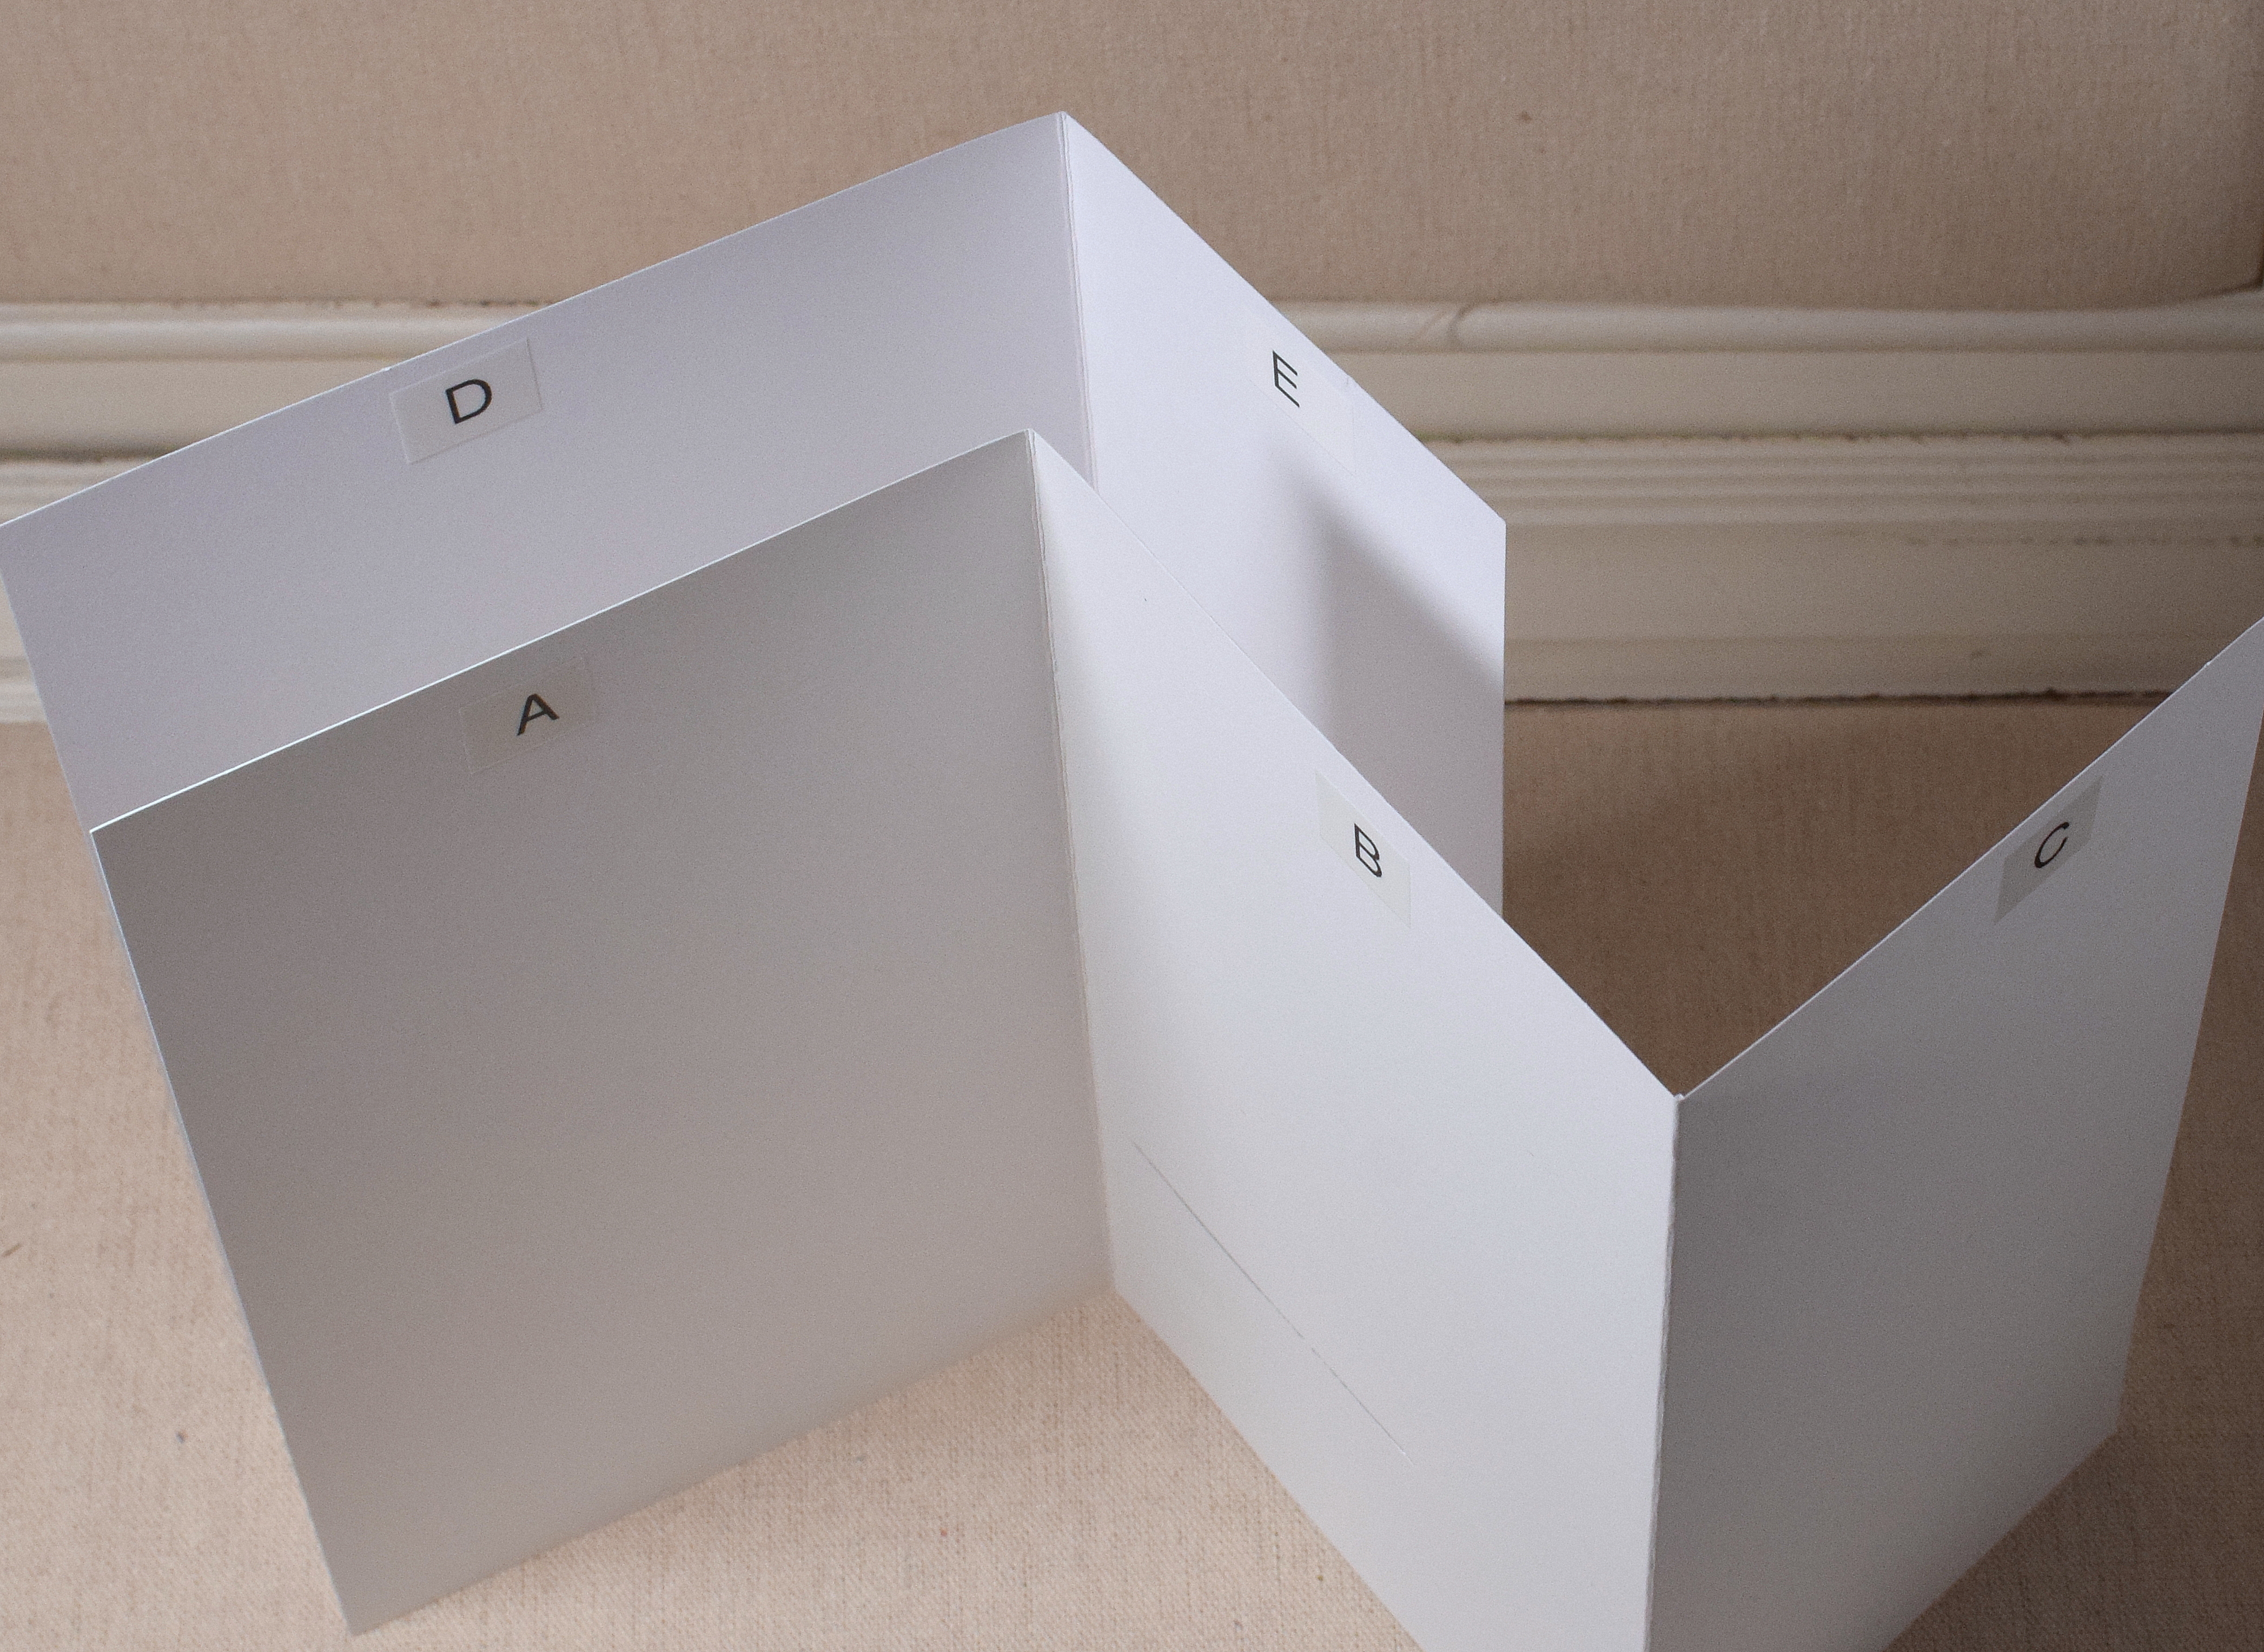
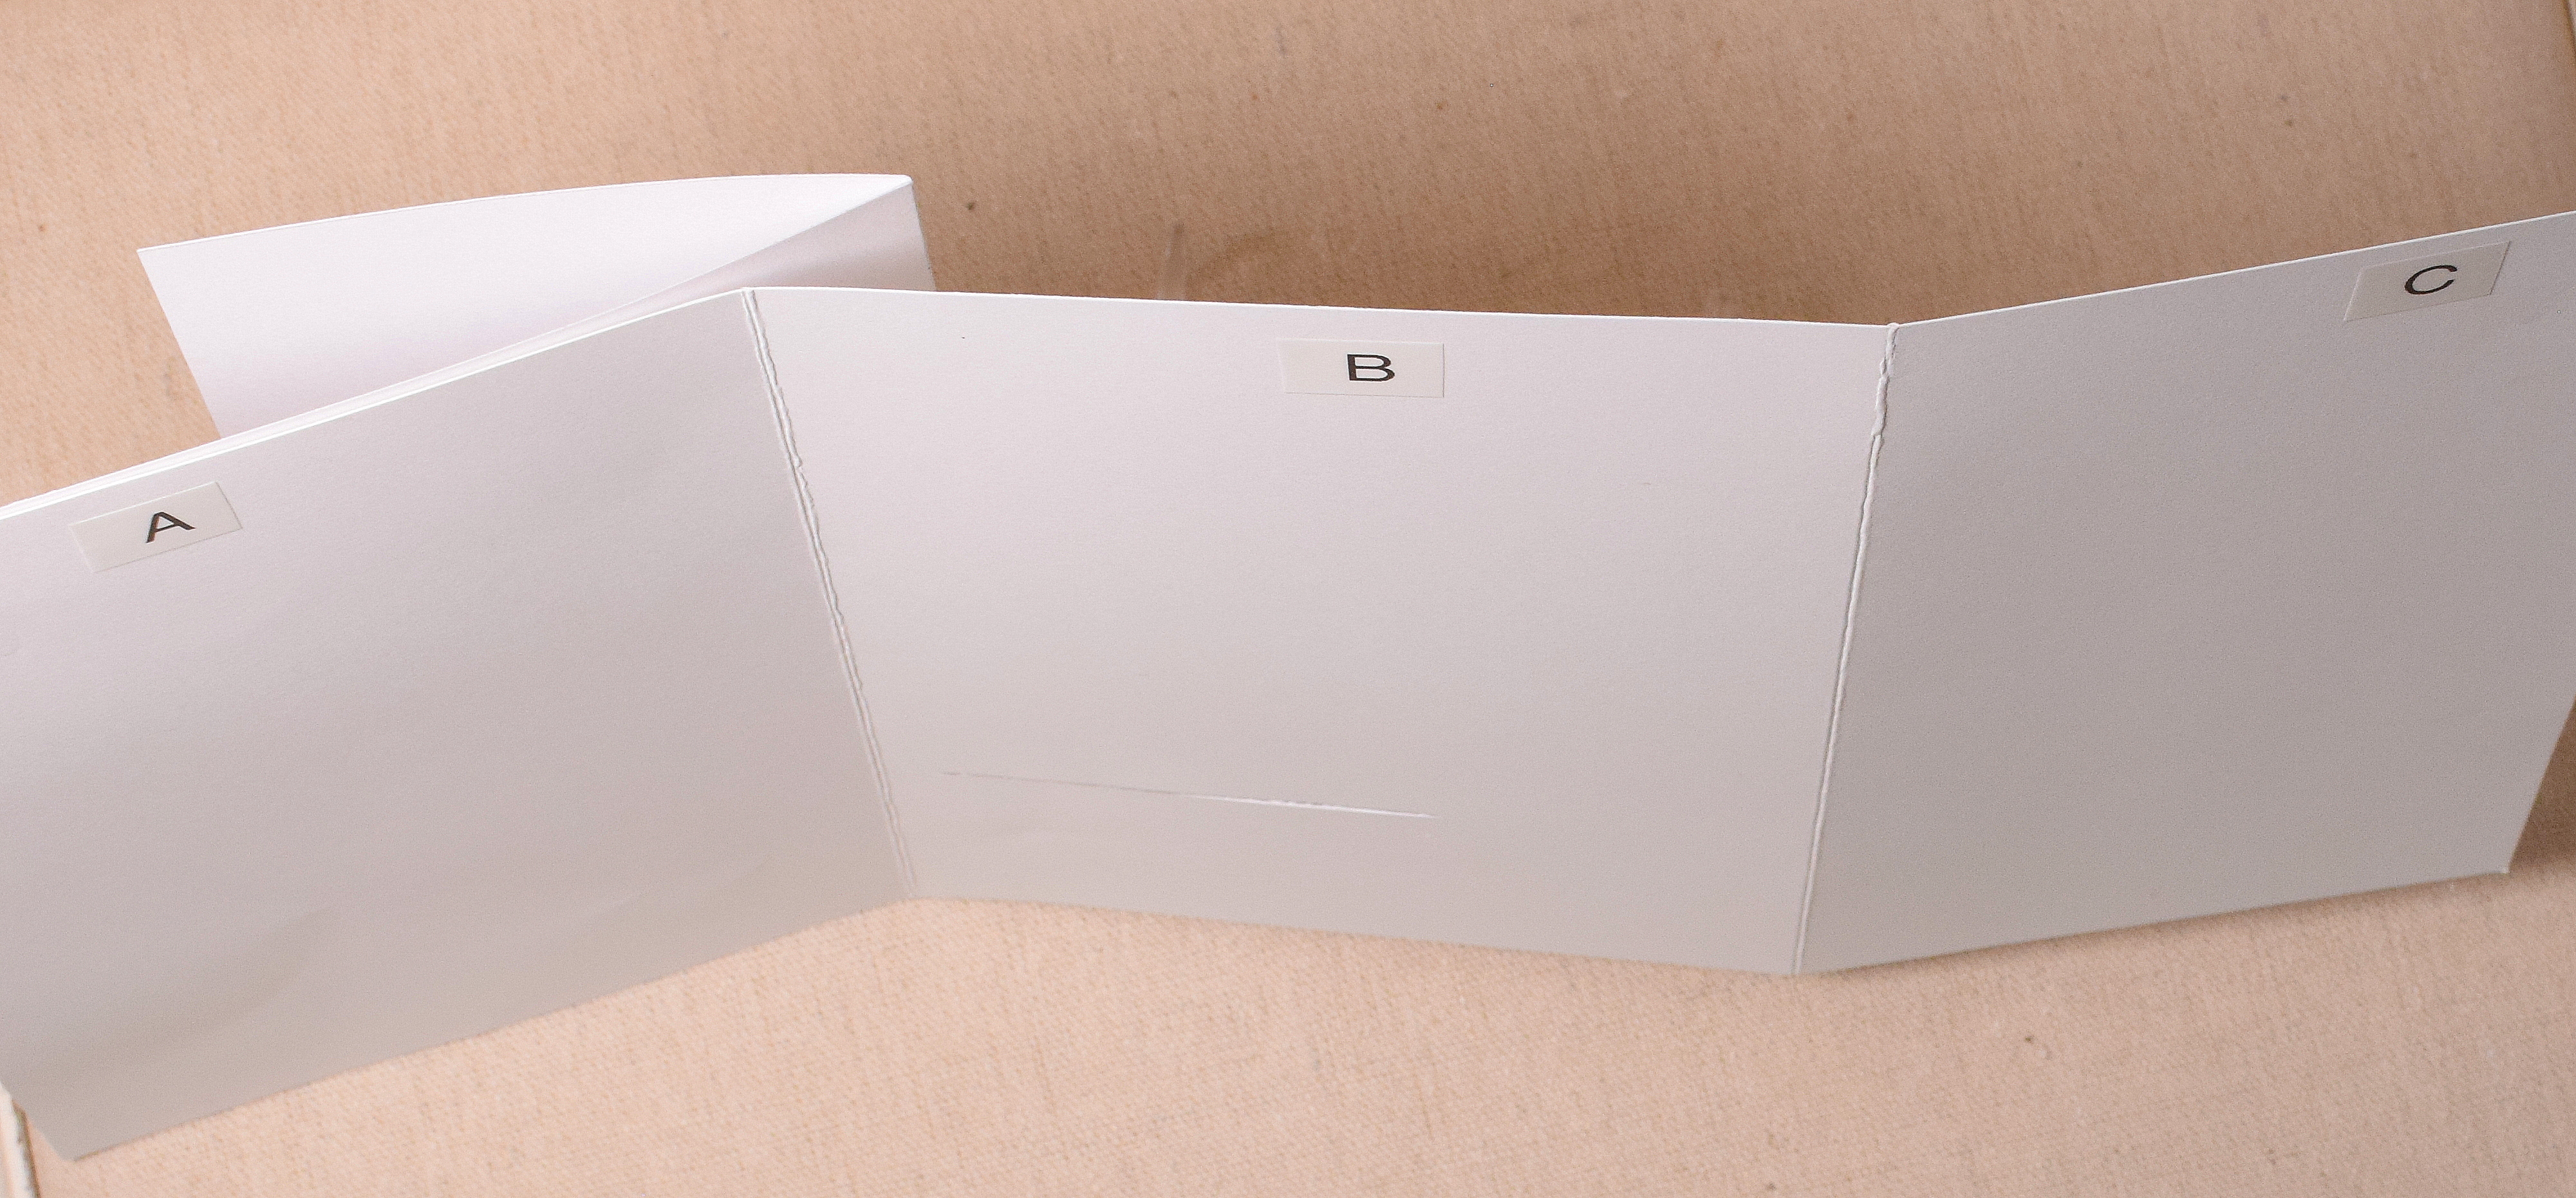
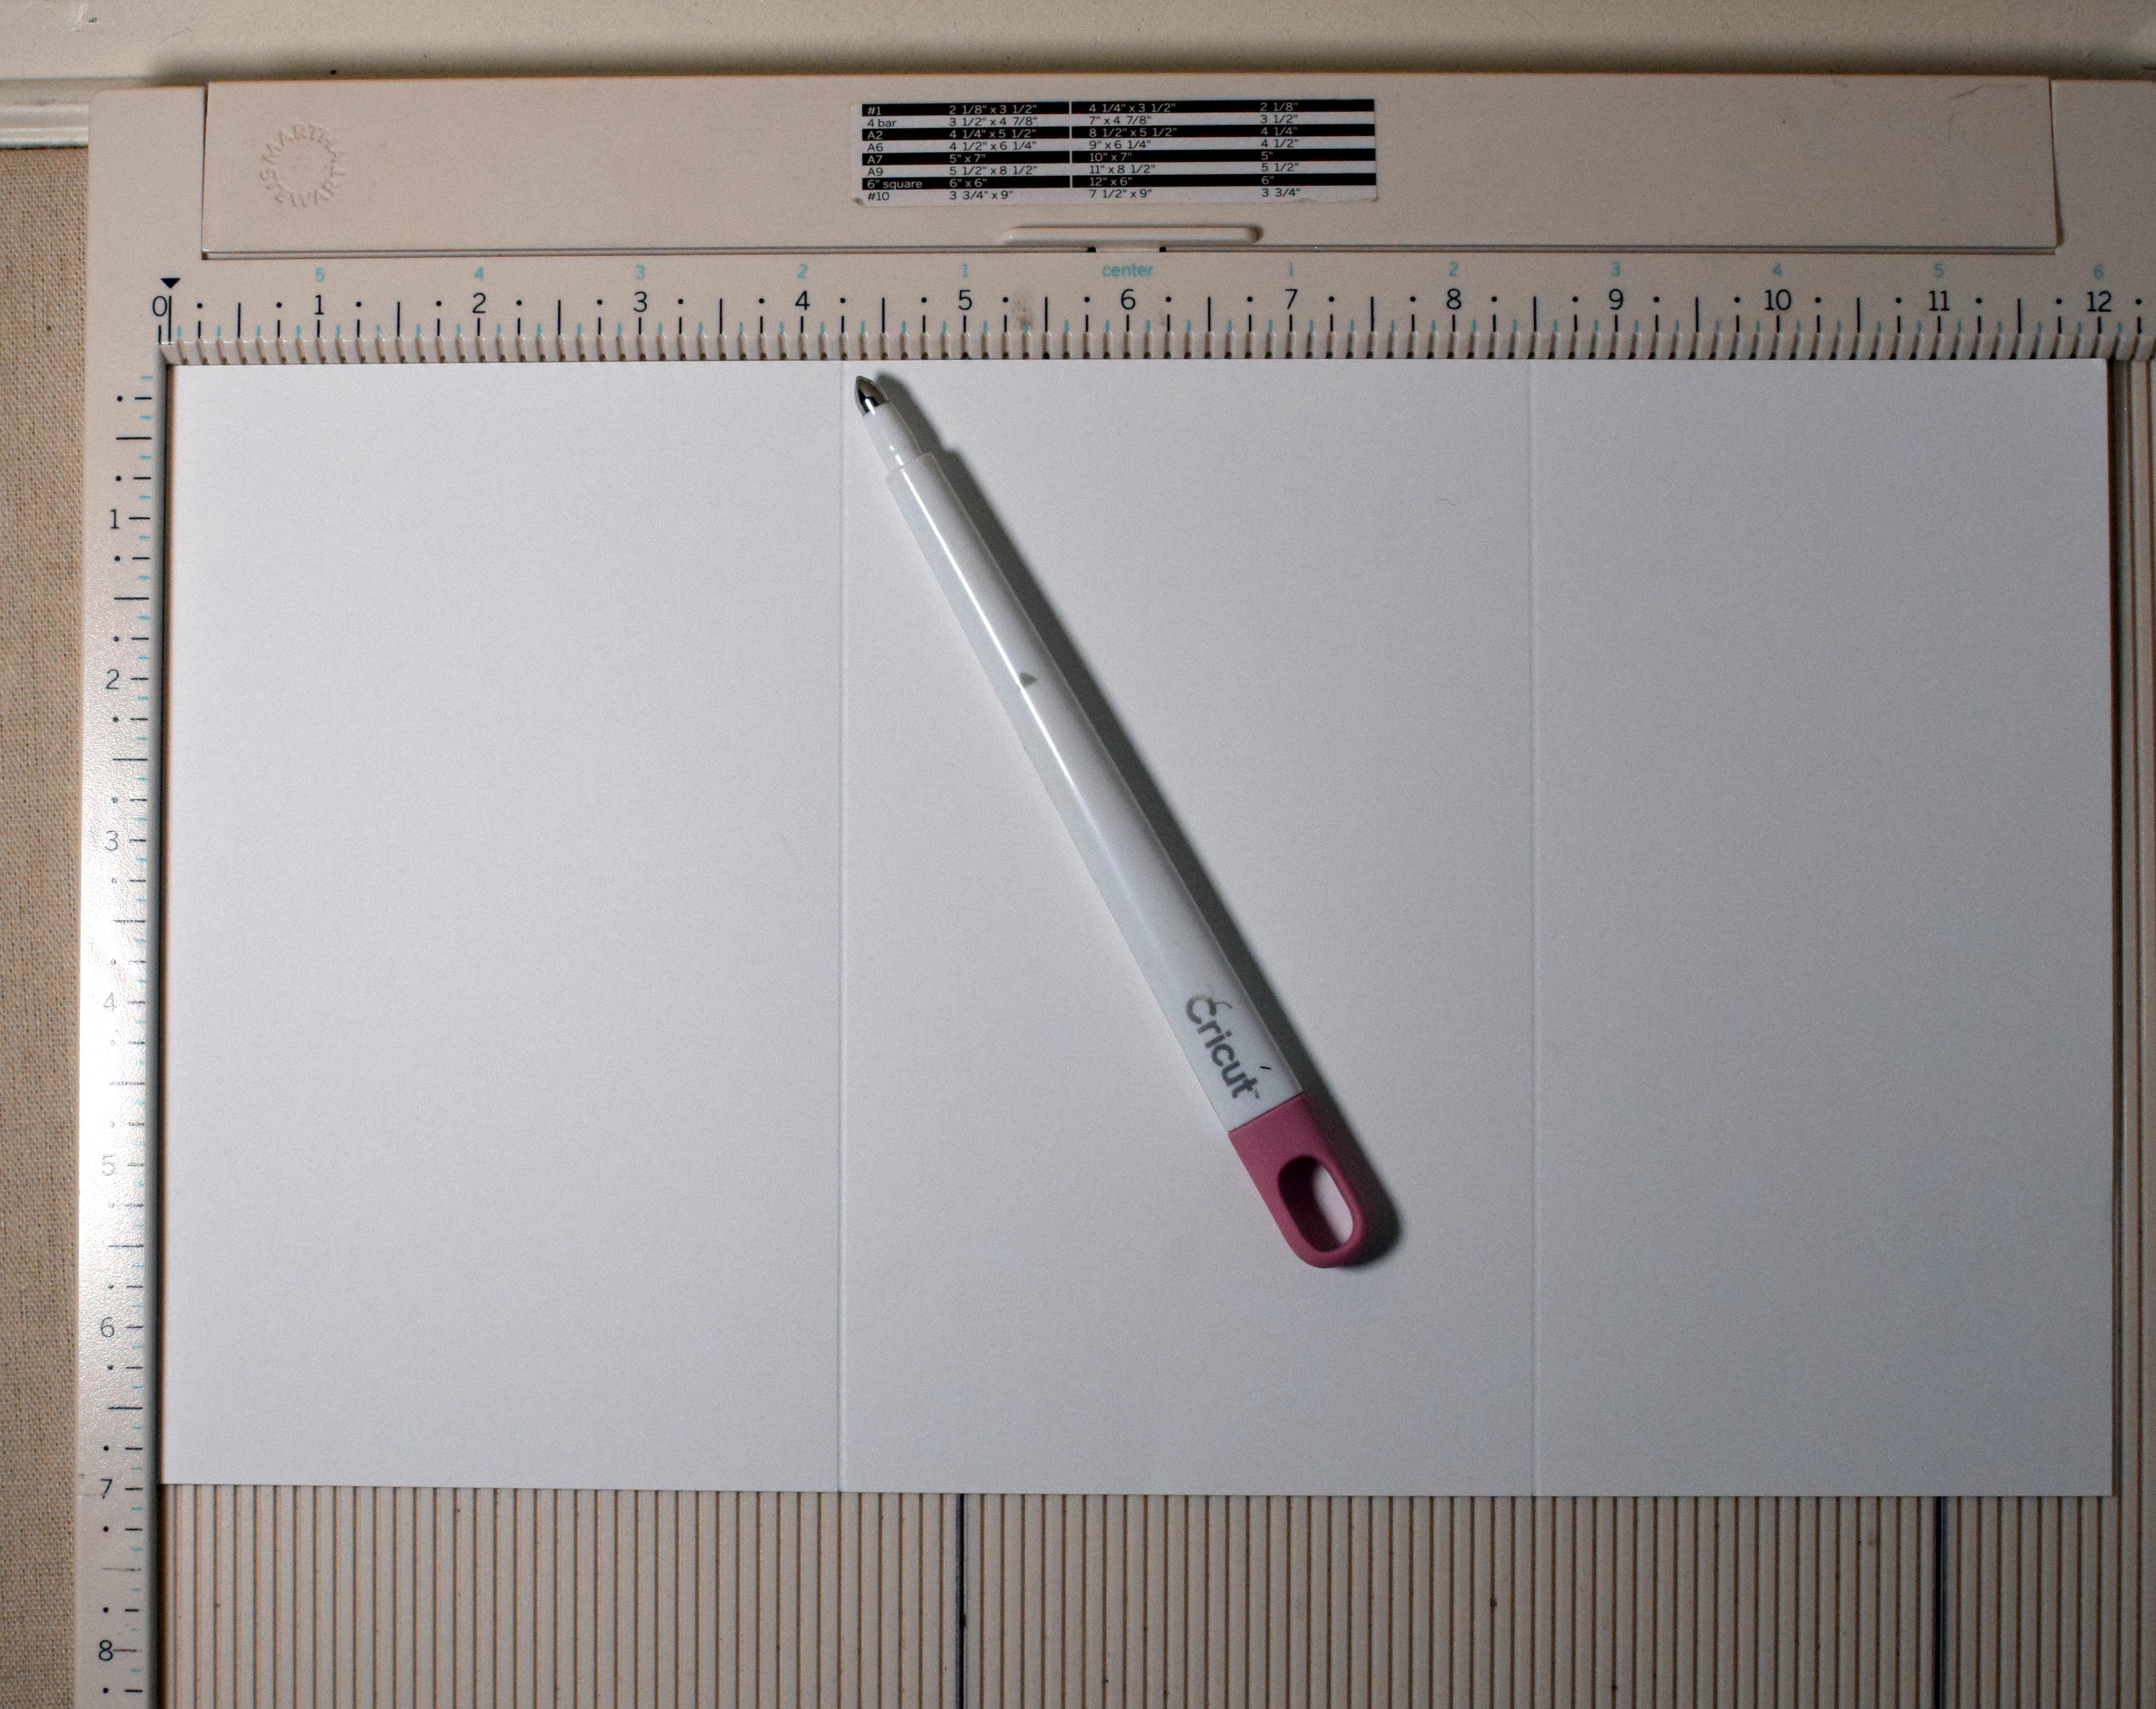
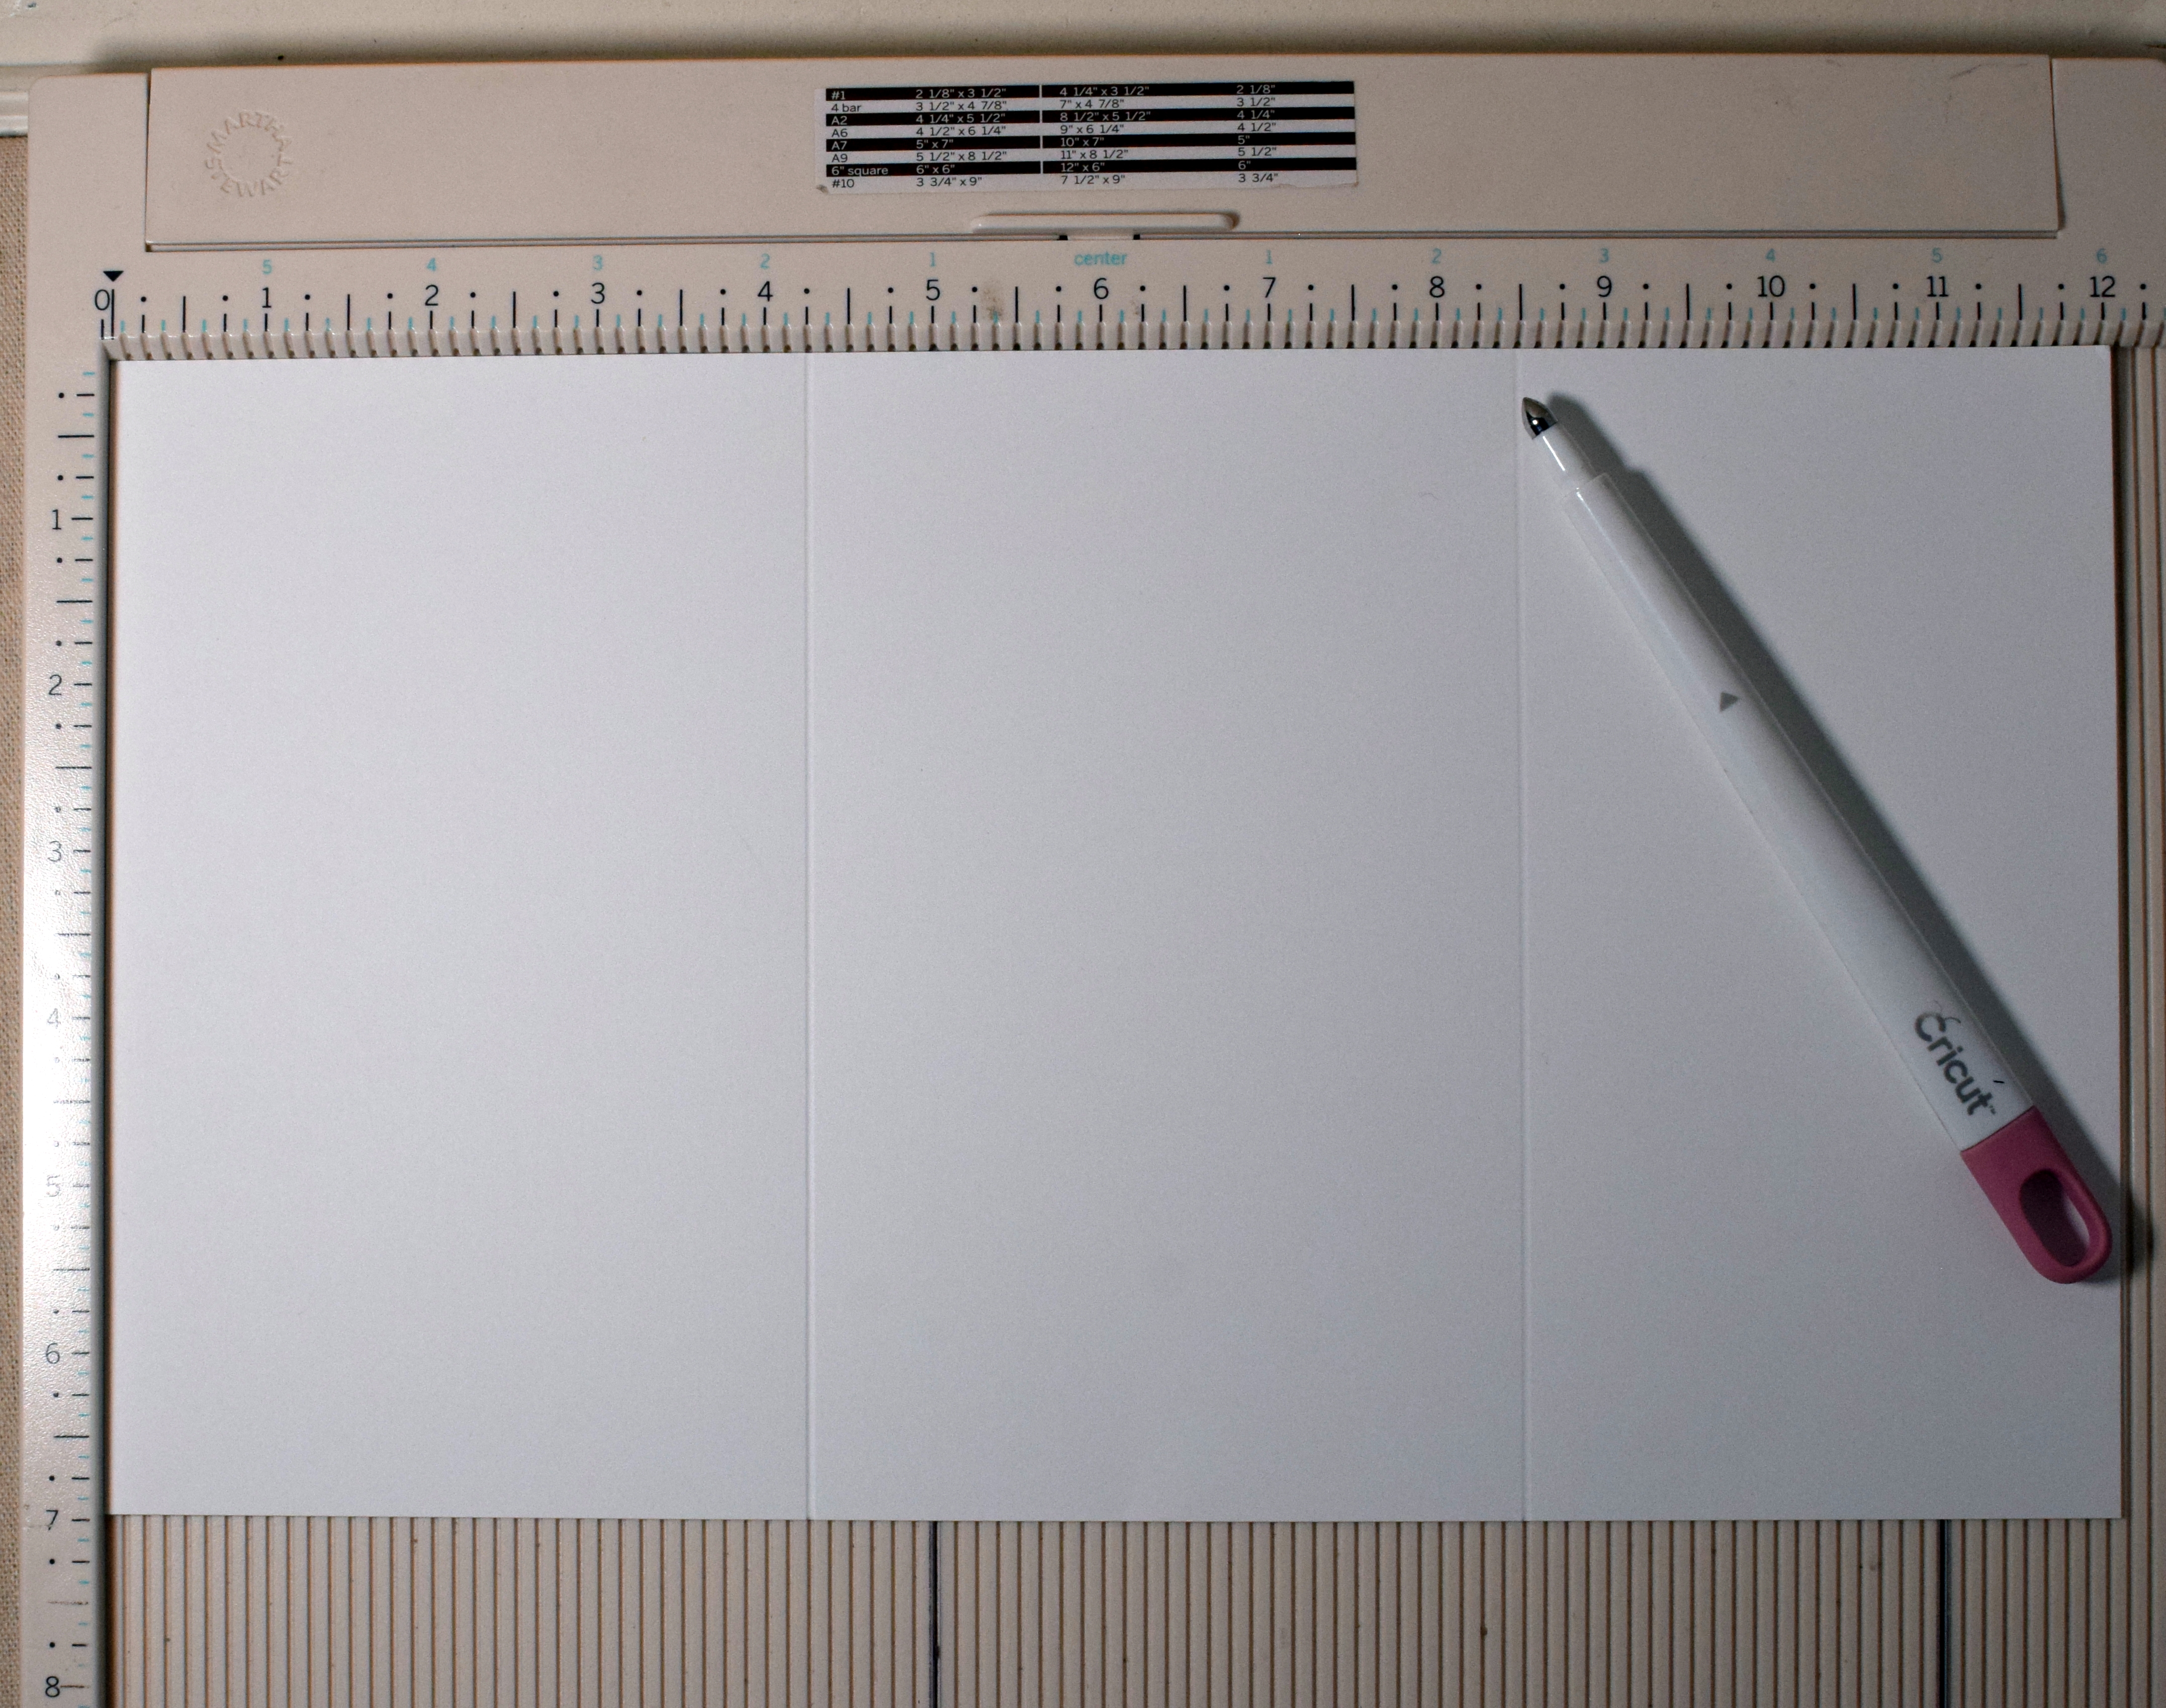
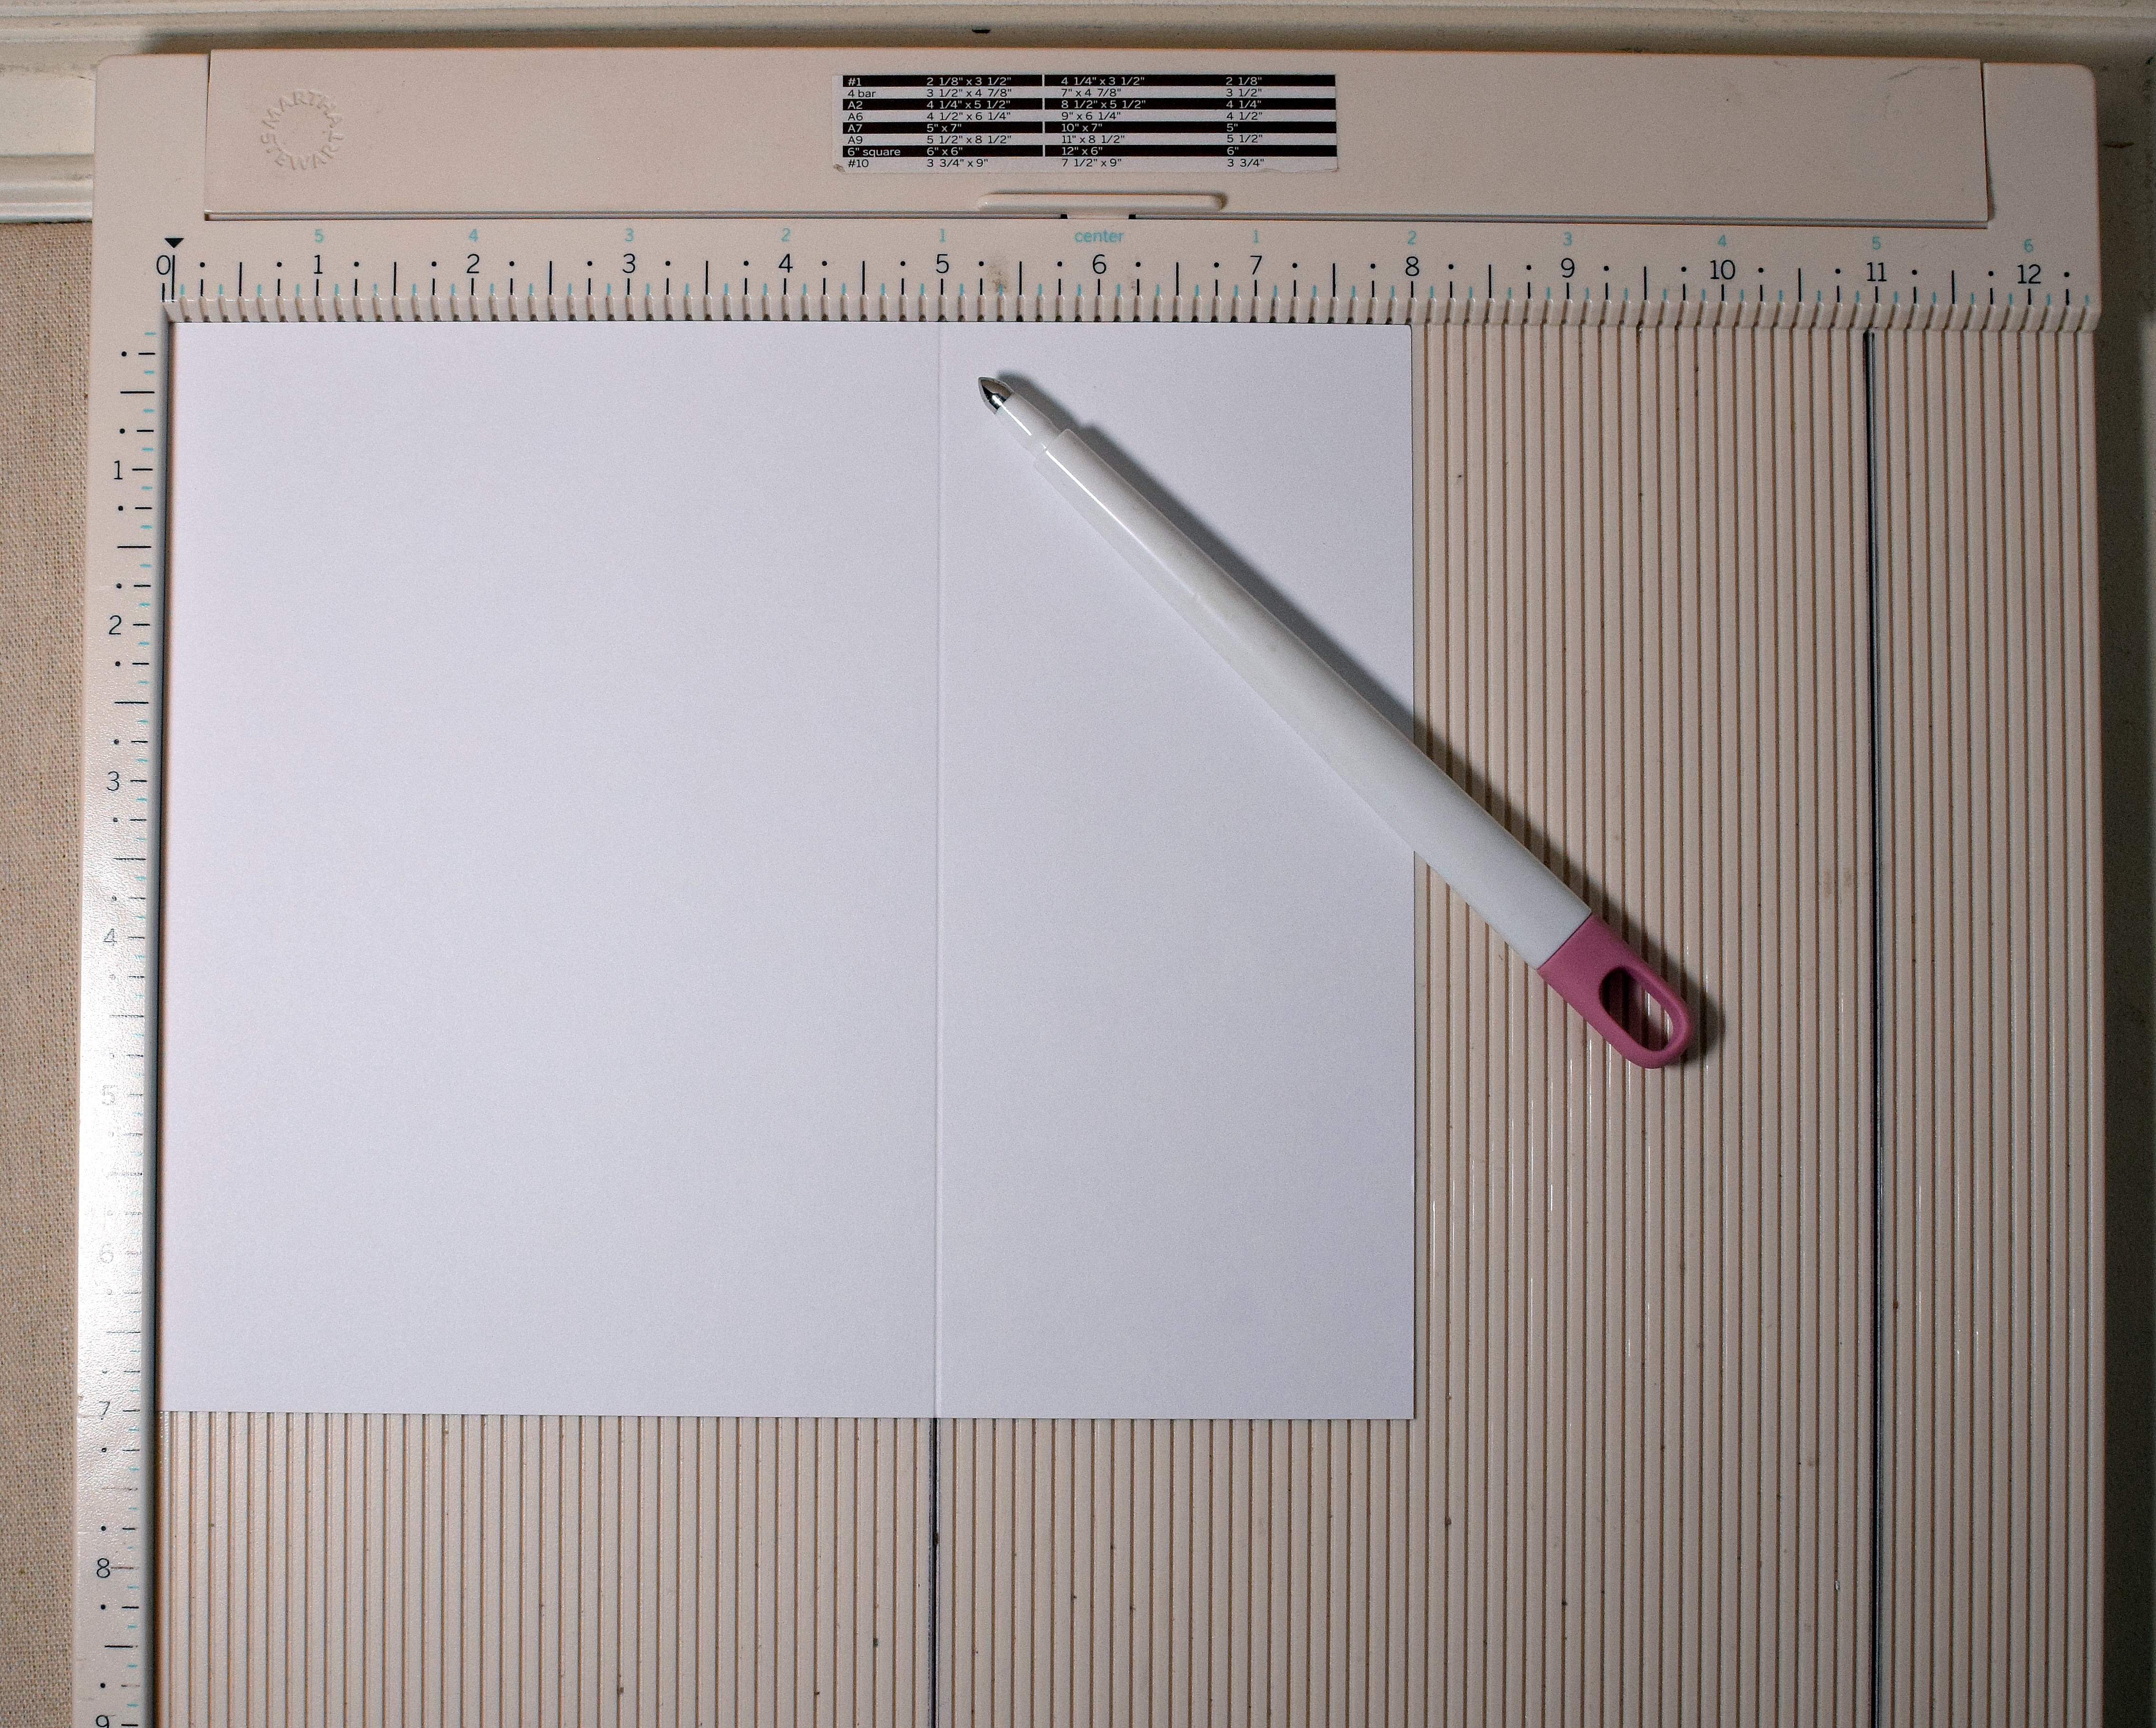
3. There are two panels that make up the card base. For these, you need a 12 x 12 inch piece of card stock and an 8 1/2 x 11 inch piece of (heavy weight) card stock. (Choose the color(s) that you want your card base to be. The smaller piece will be seen on the card front, and the larger piece will be seen on the inside. You will only see one side of each.)
Prepare each panel according to the templates below. If you want/need a more detailed explanation of how to create the score lines and cuts, please scroll down to the end of this post where I include a step-by-step explanation with photos.
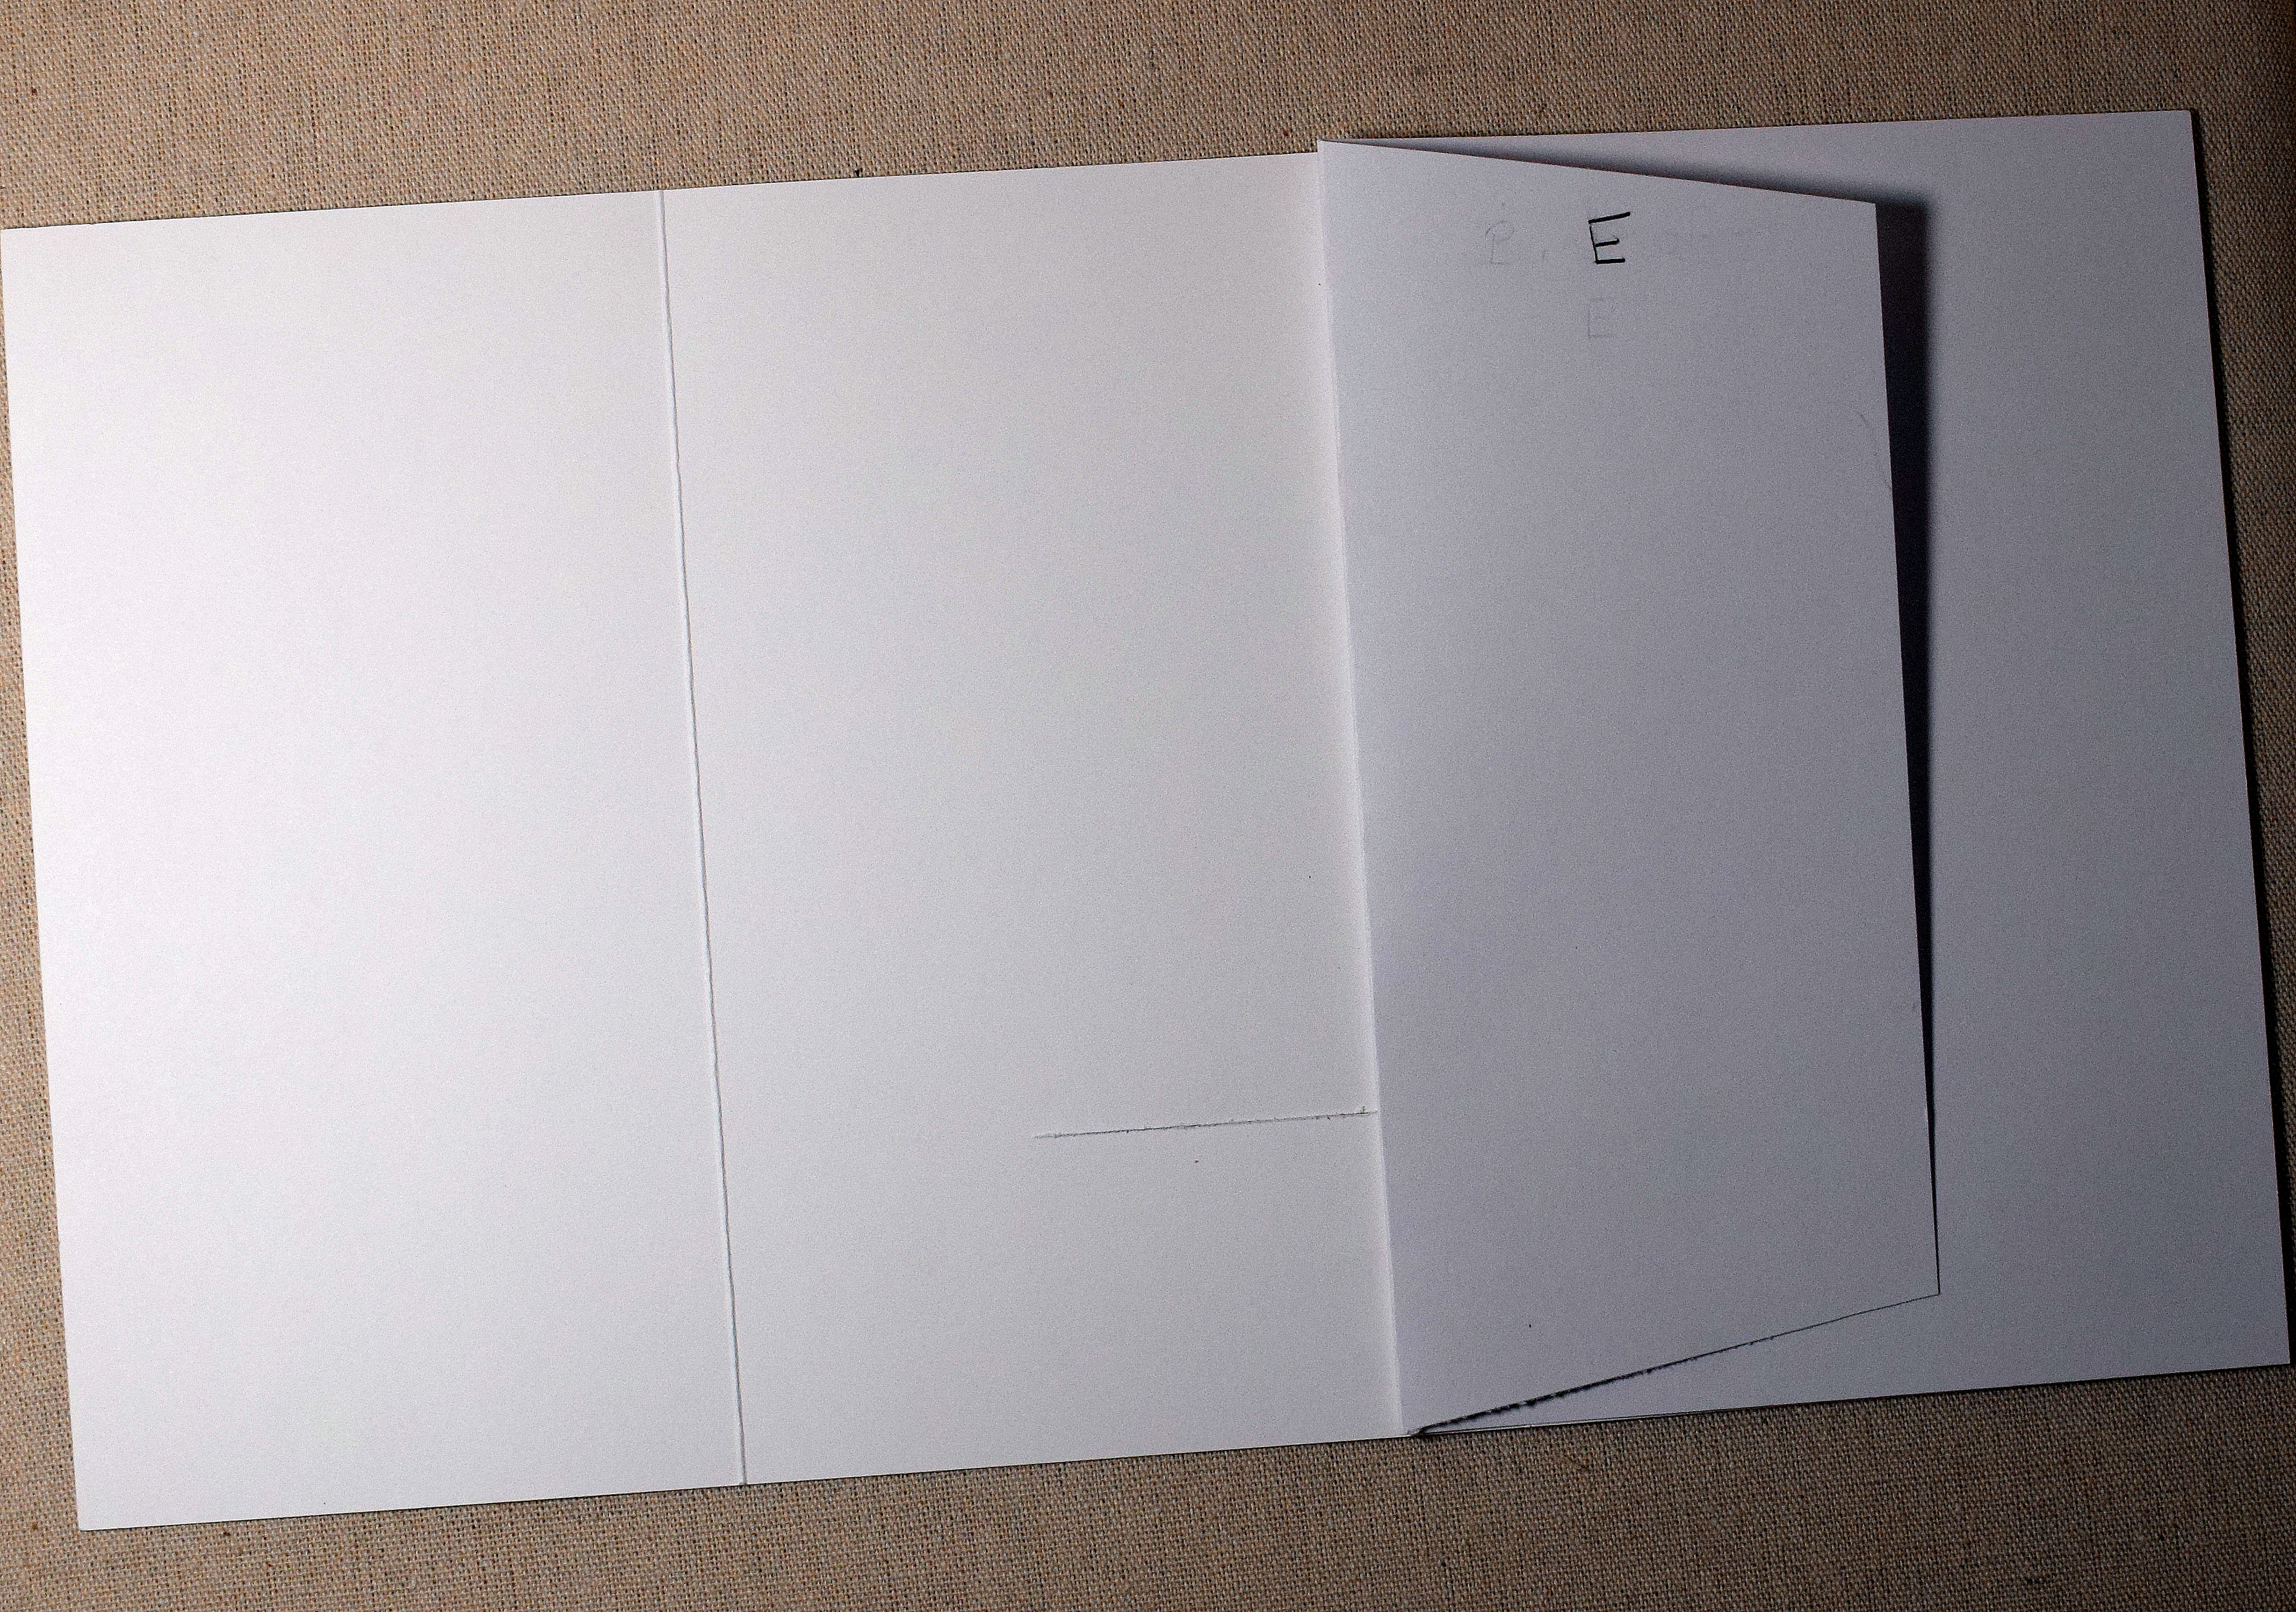
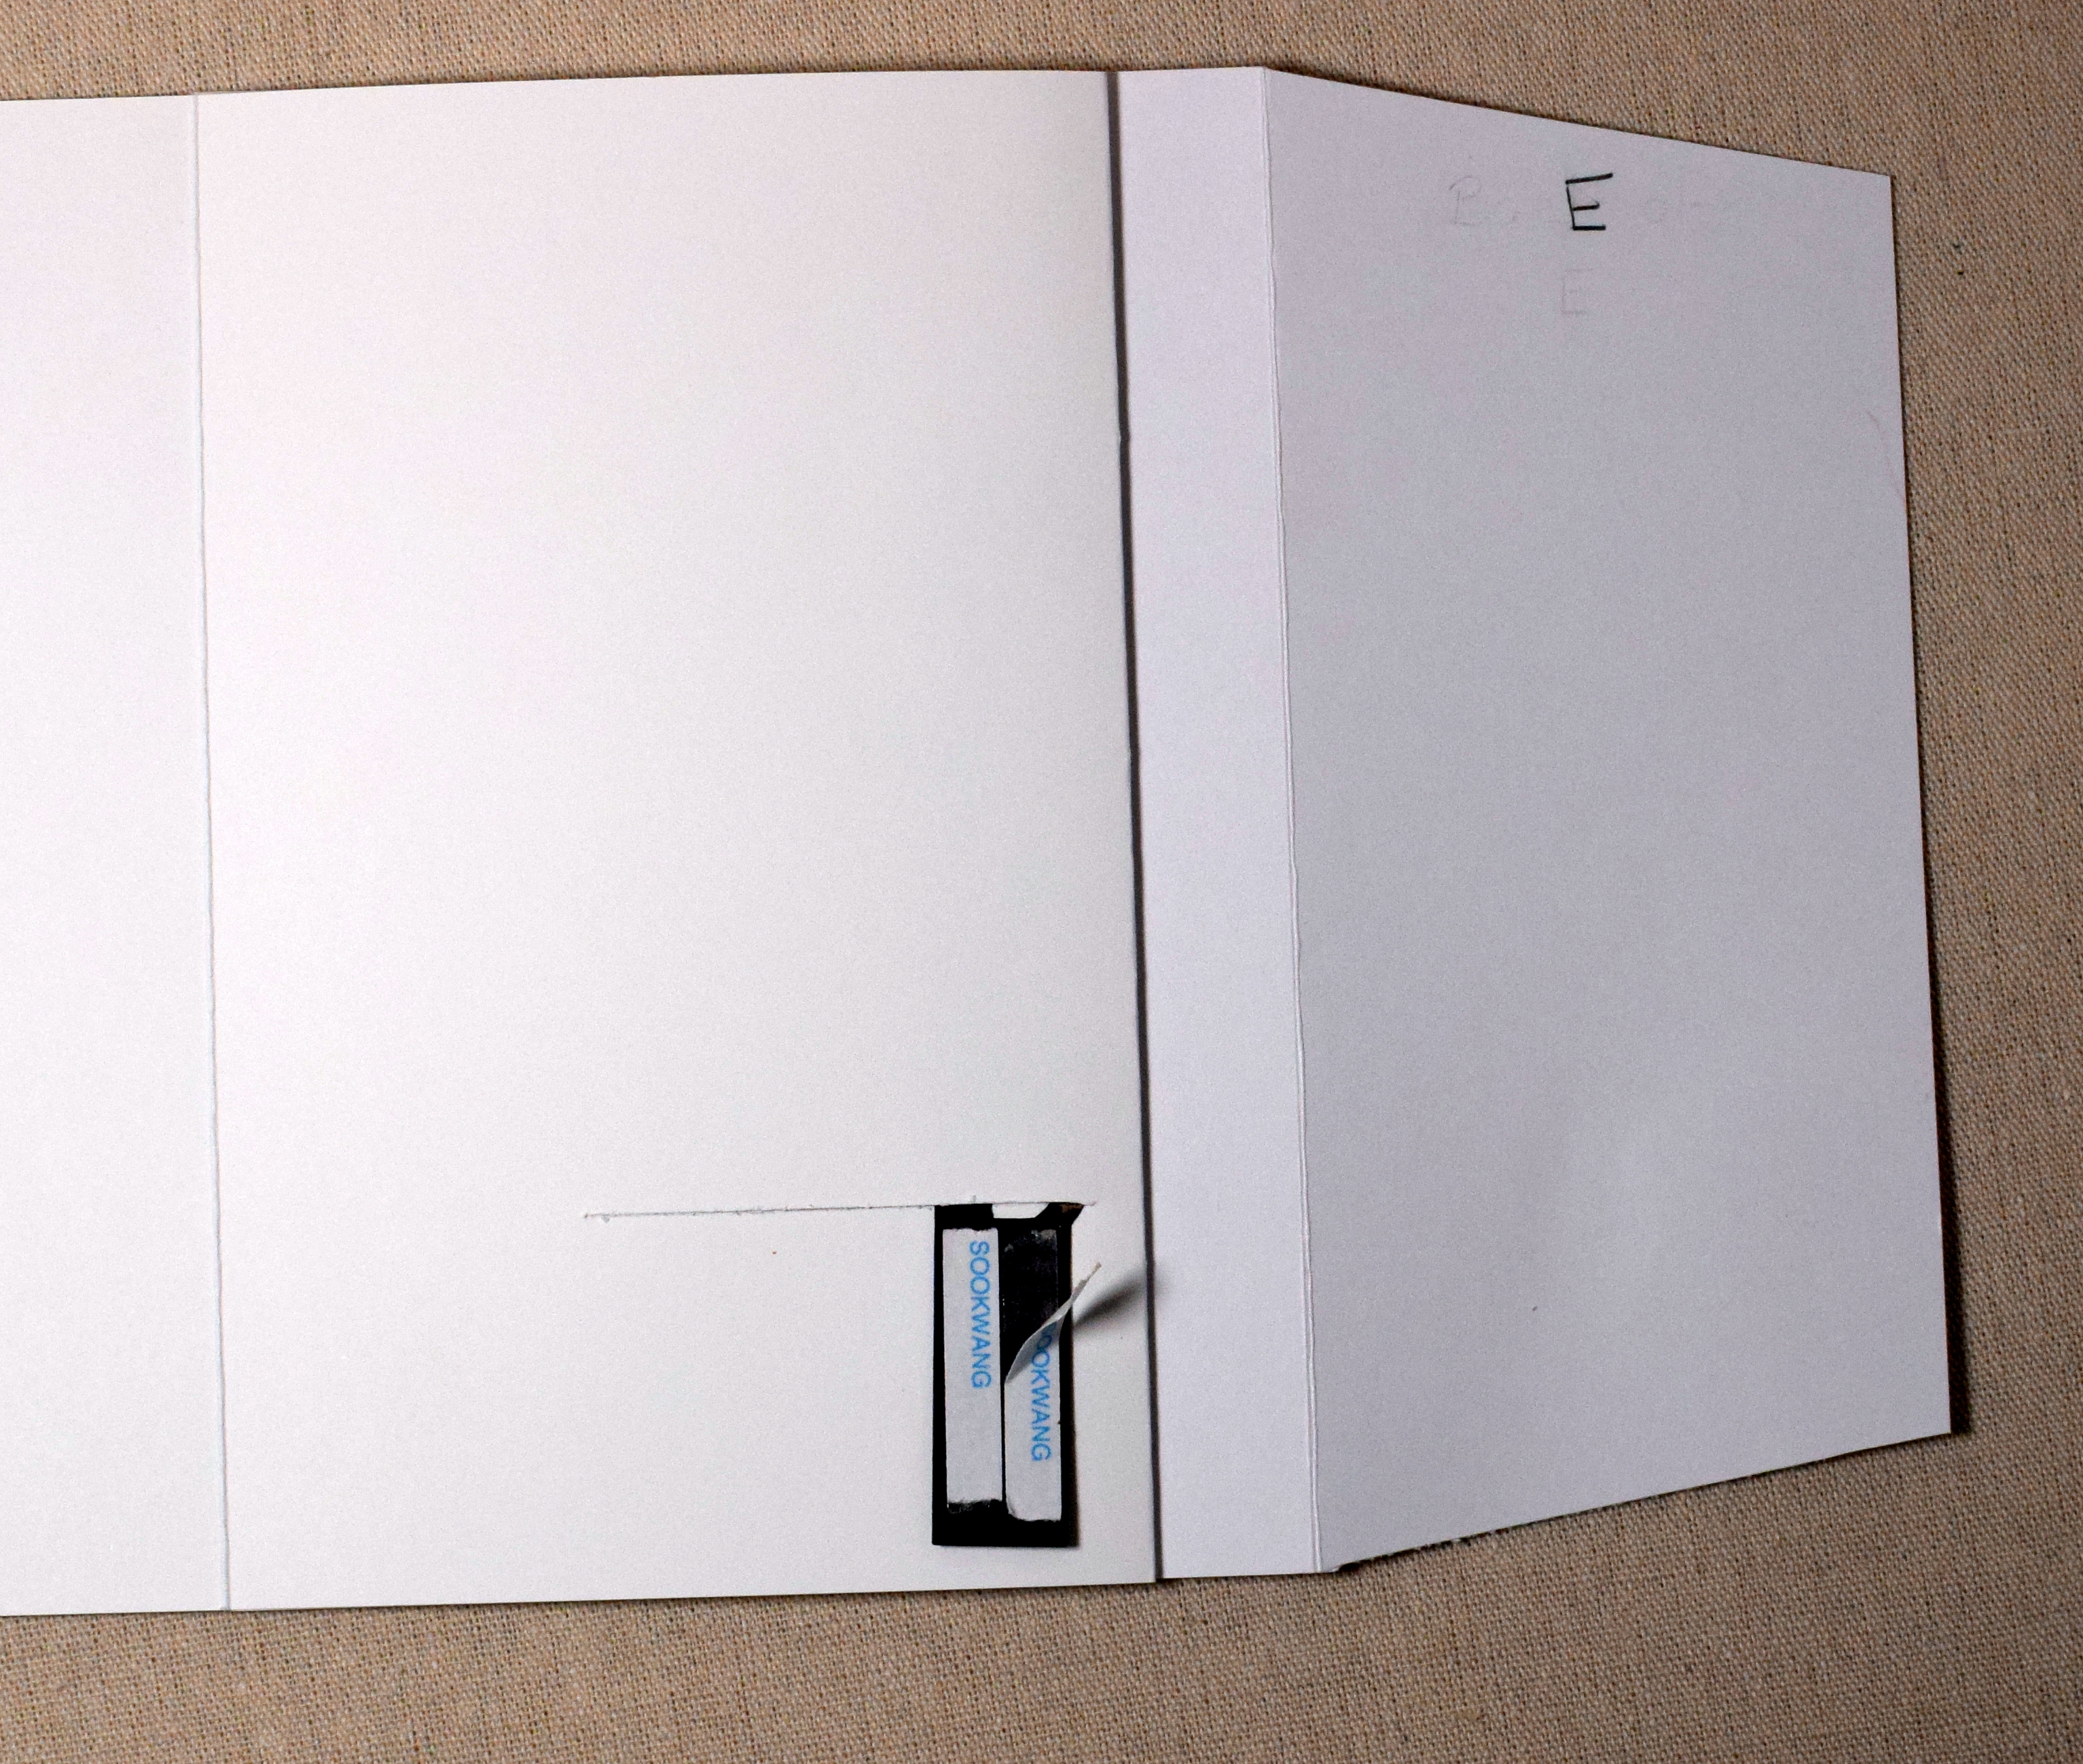
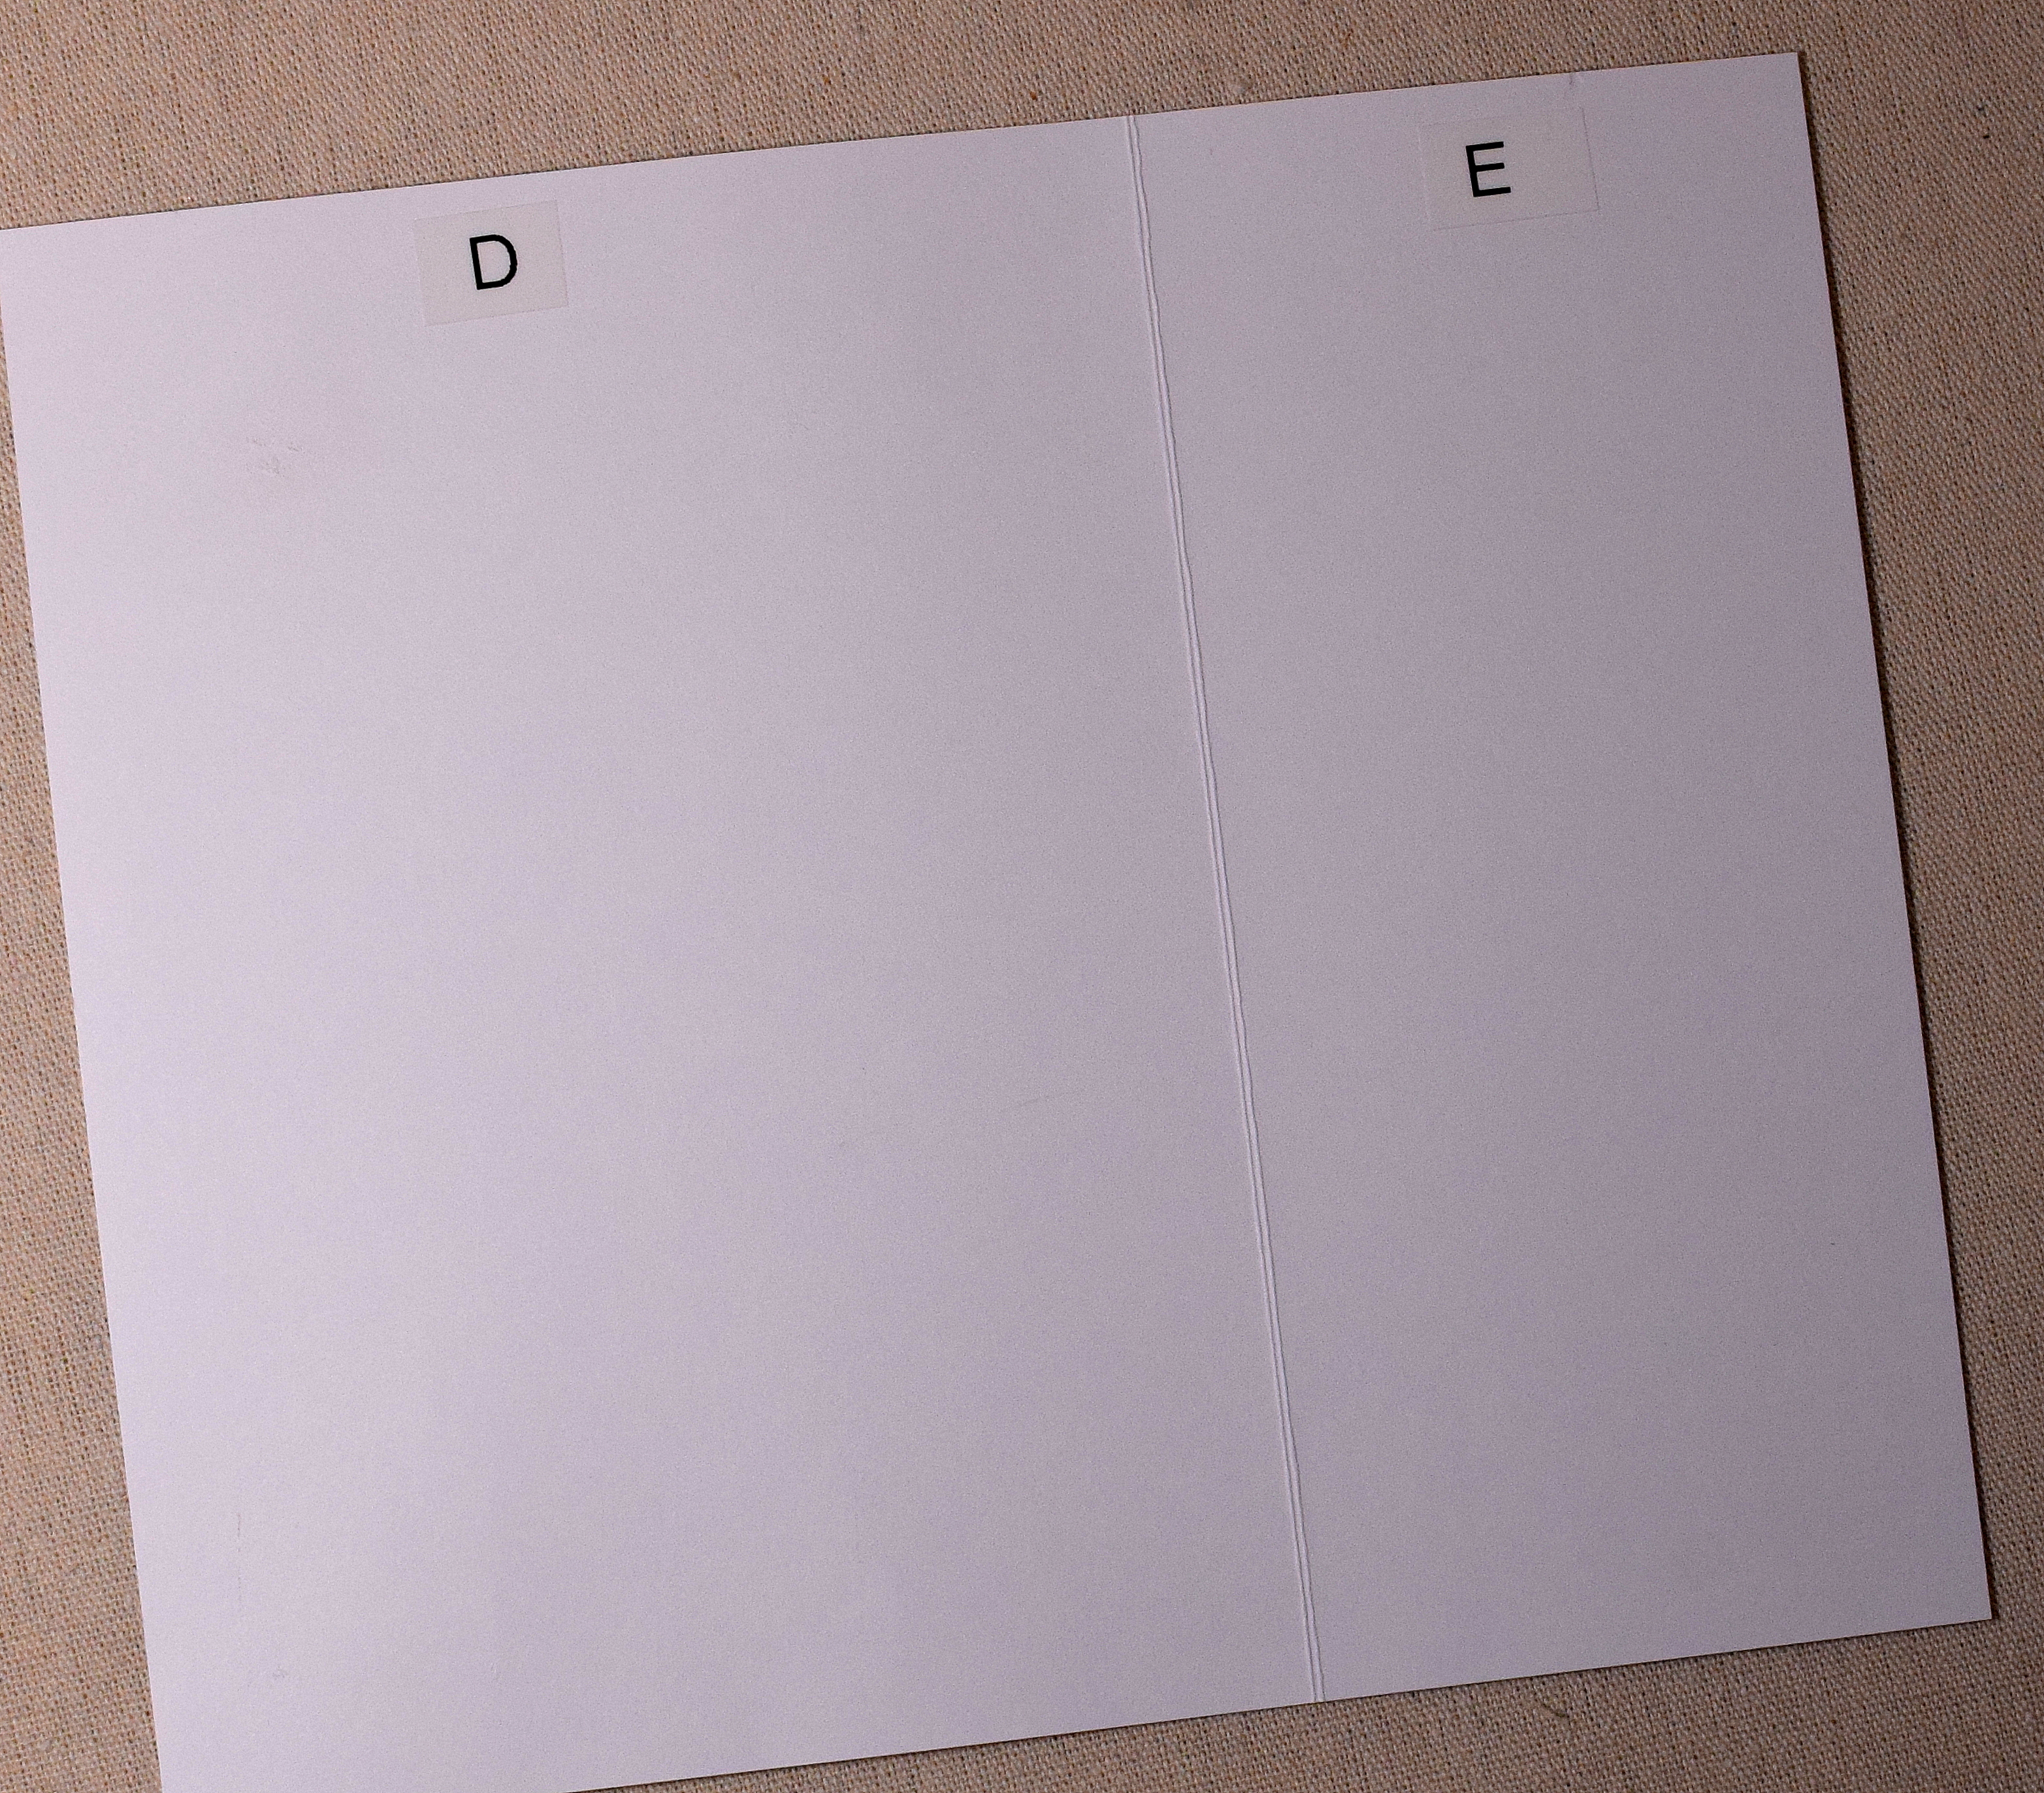
(I added letters to my panels so you can see which sections I am referring to throughout the tutorial; you DO NOT need the letters. If you wish to add them, use pencil (lightly) so they can be erased later.)

(While it’s easiest to make the diagonal cuts in section E now, it can also be done at any point before step 13 below. I forgot to do it here in my samples for the tutorial (oops!), and some of my photos below don’t show these cuts until then.)
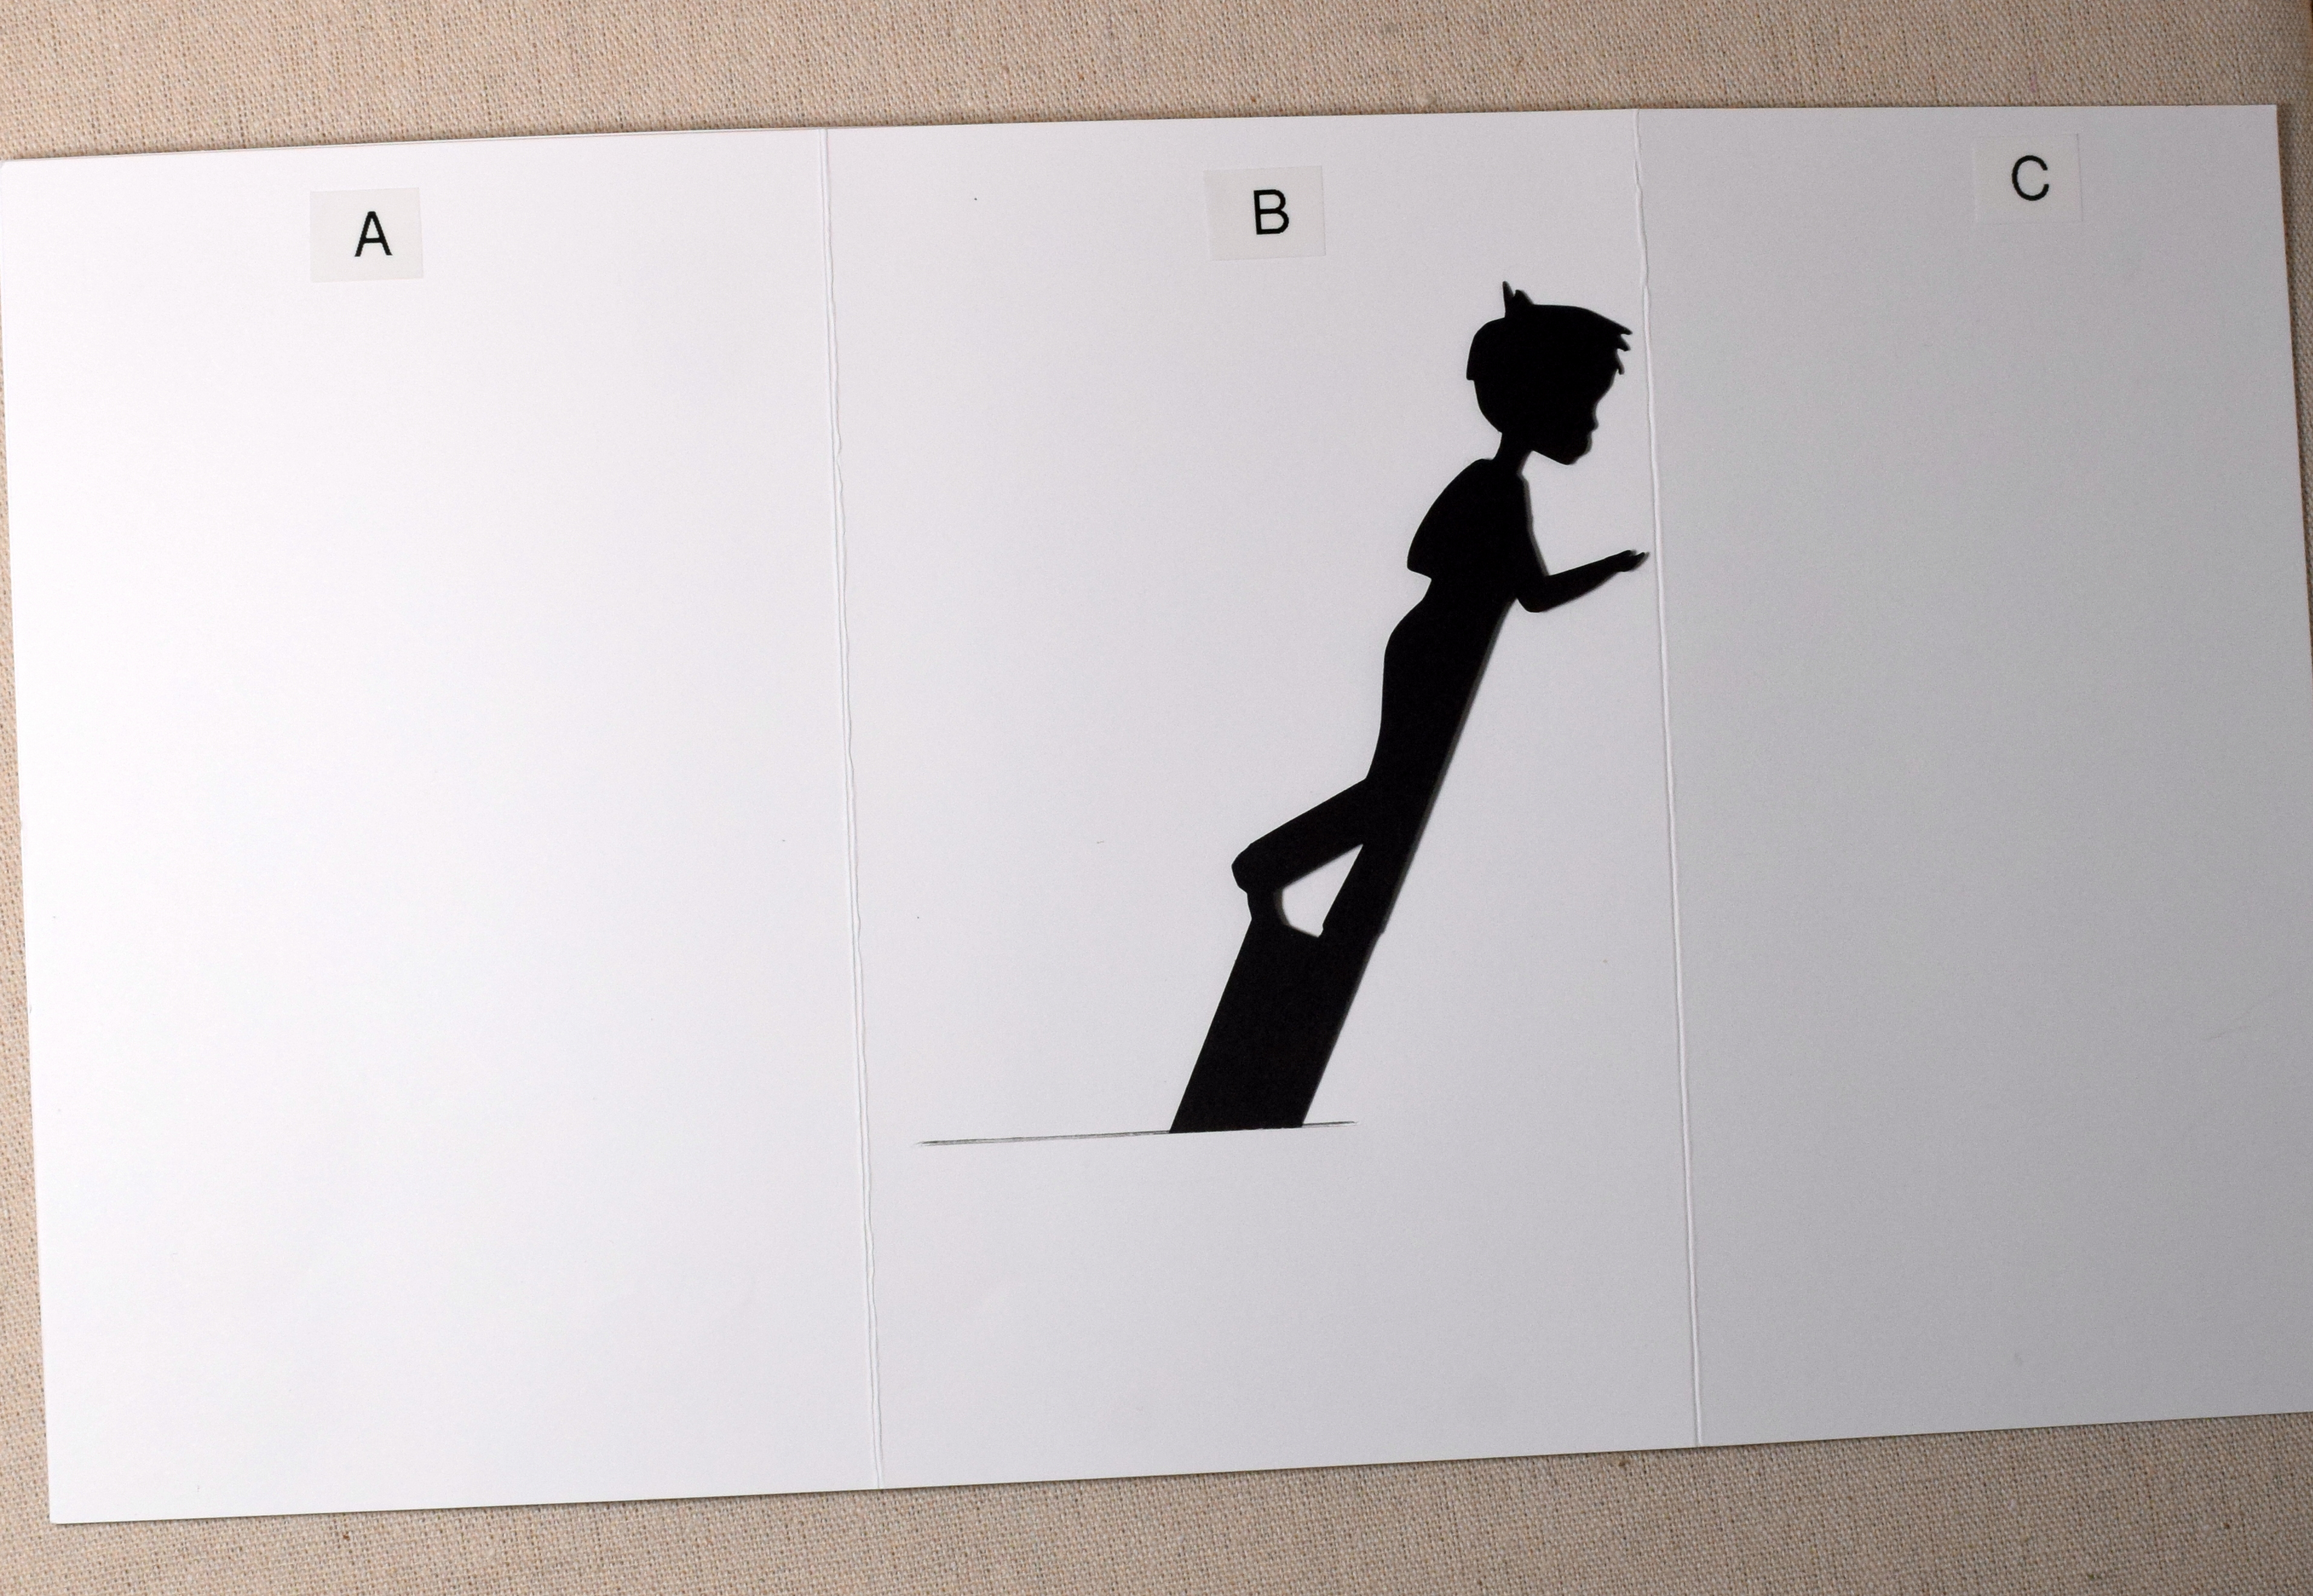
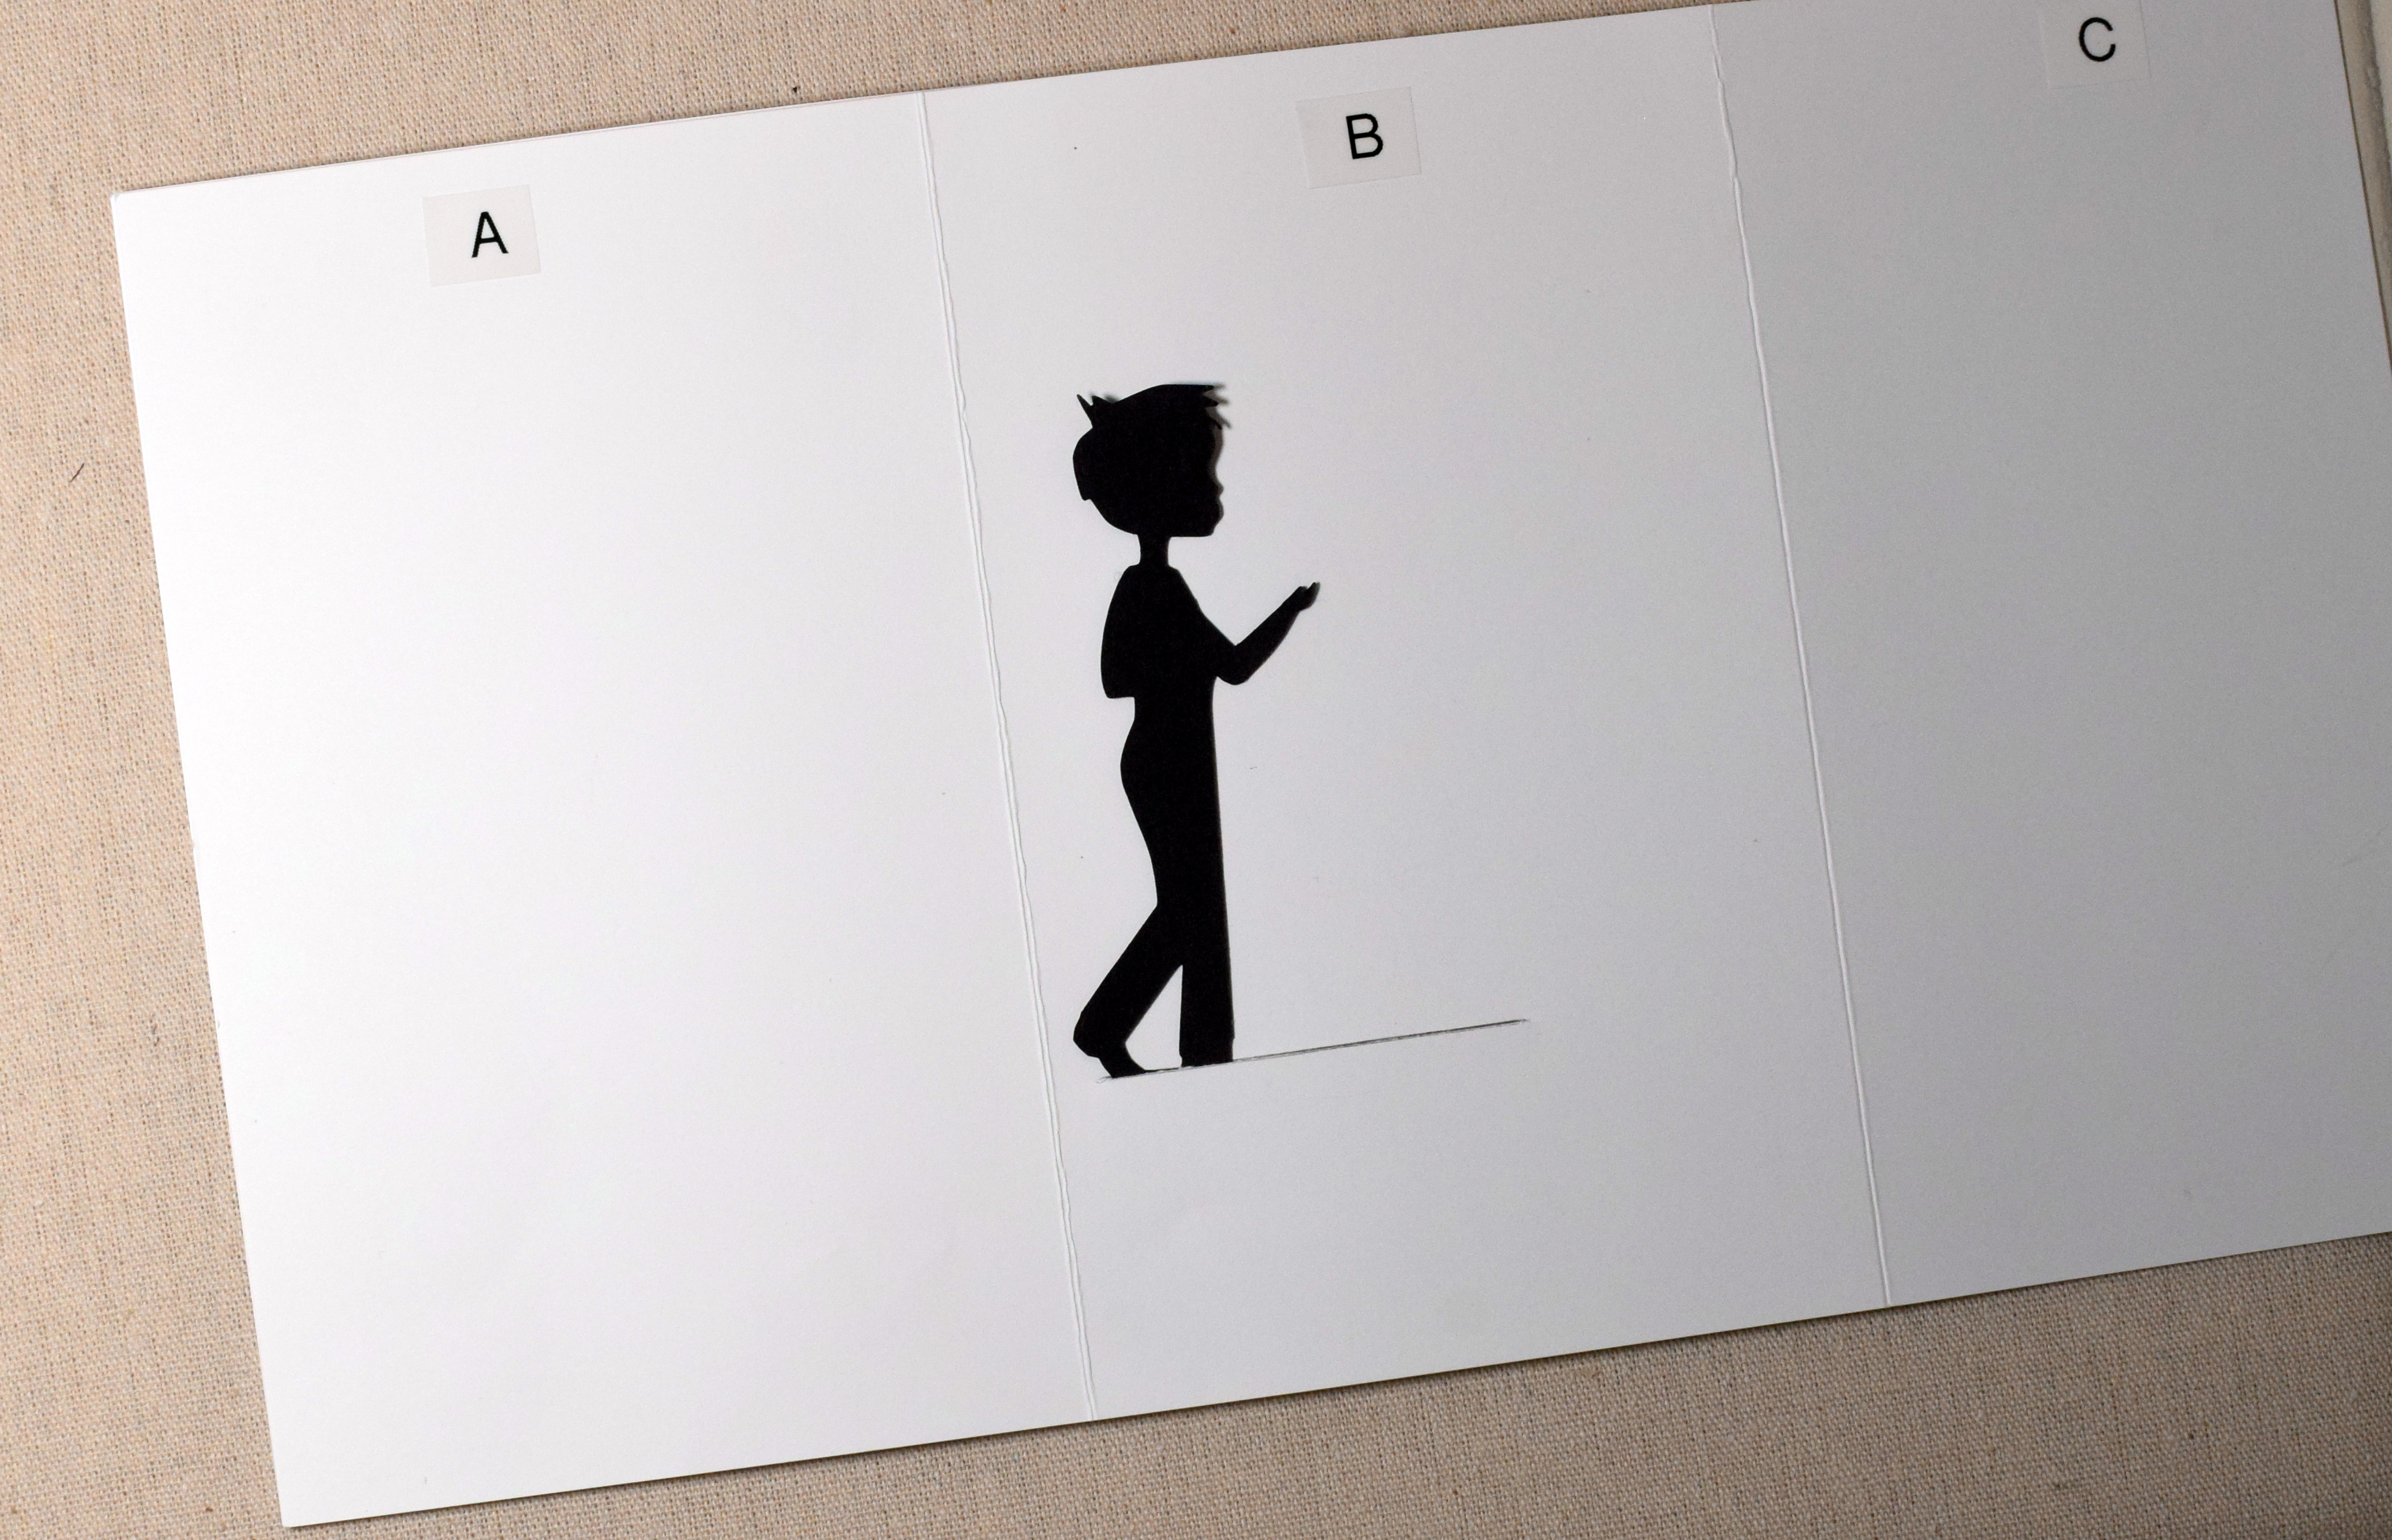
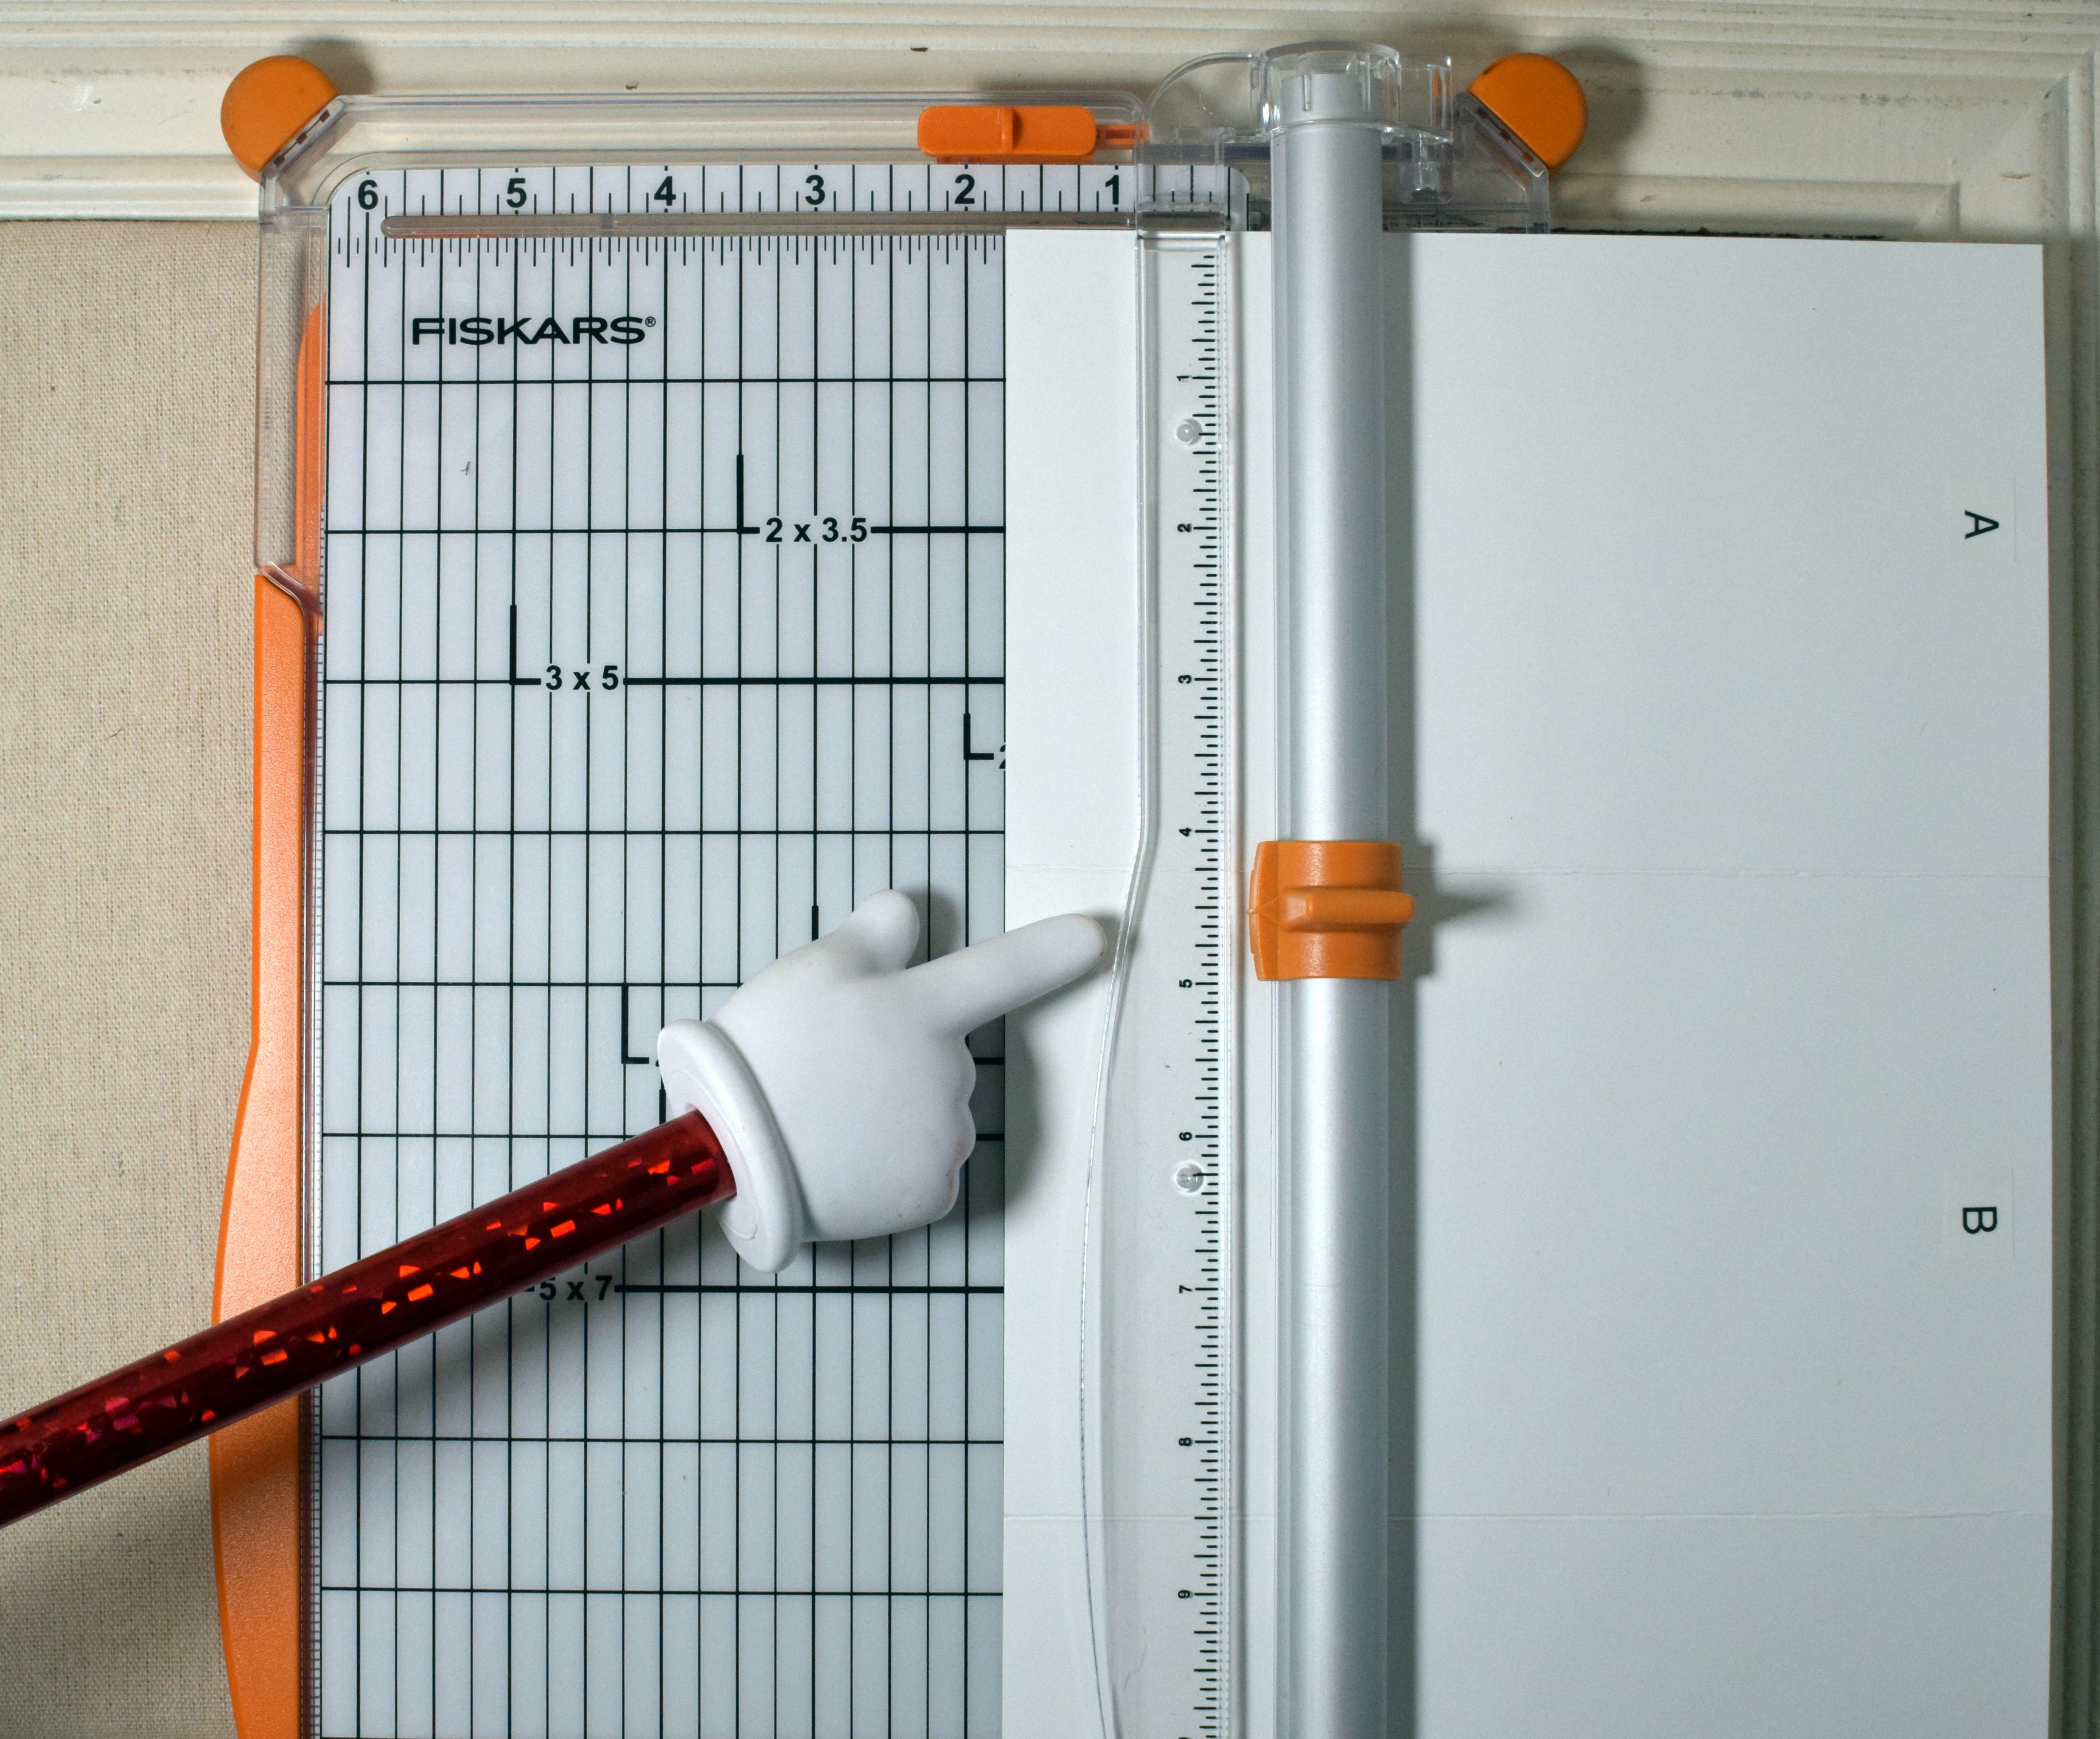
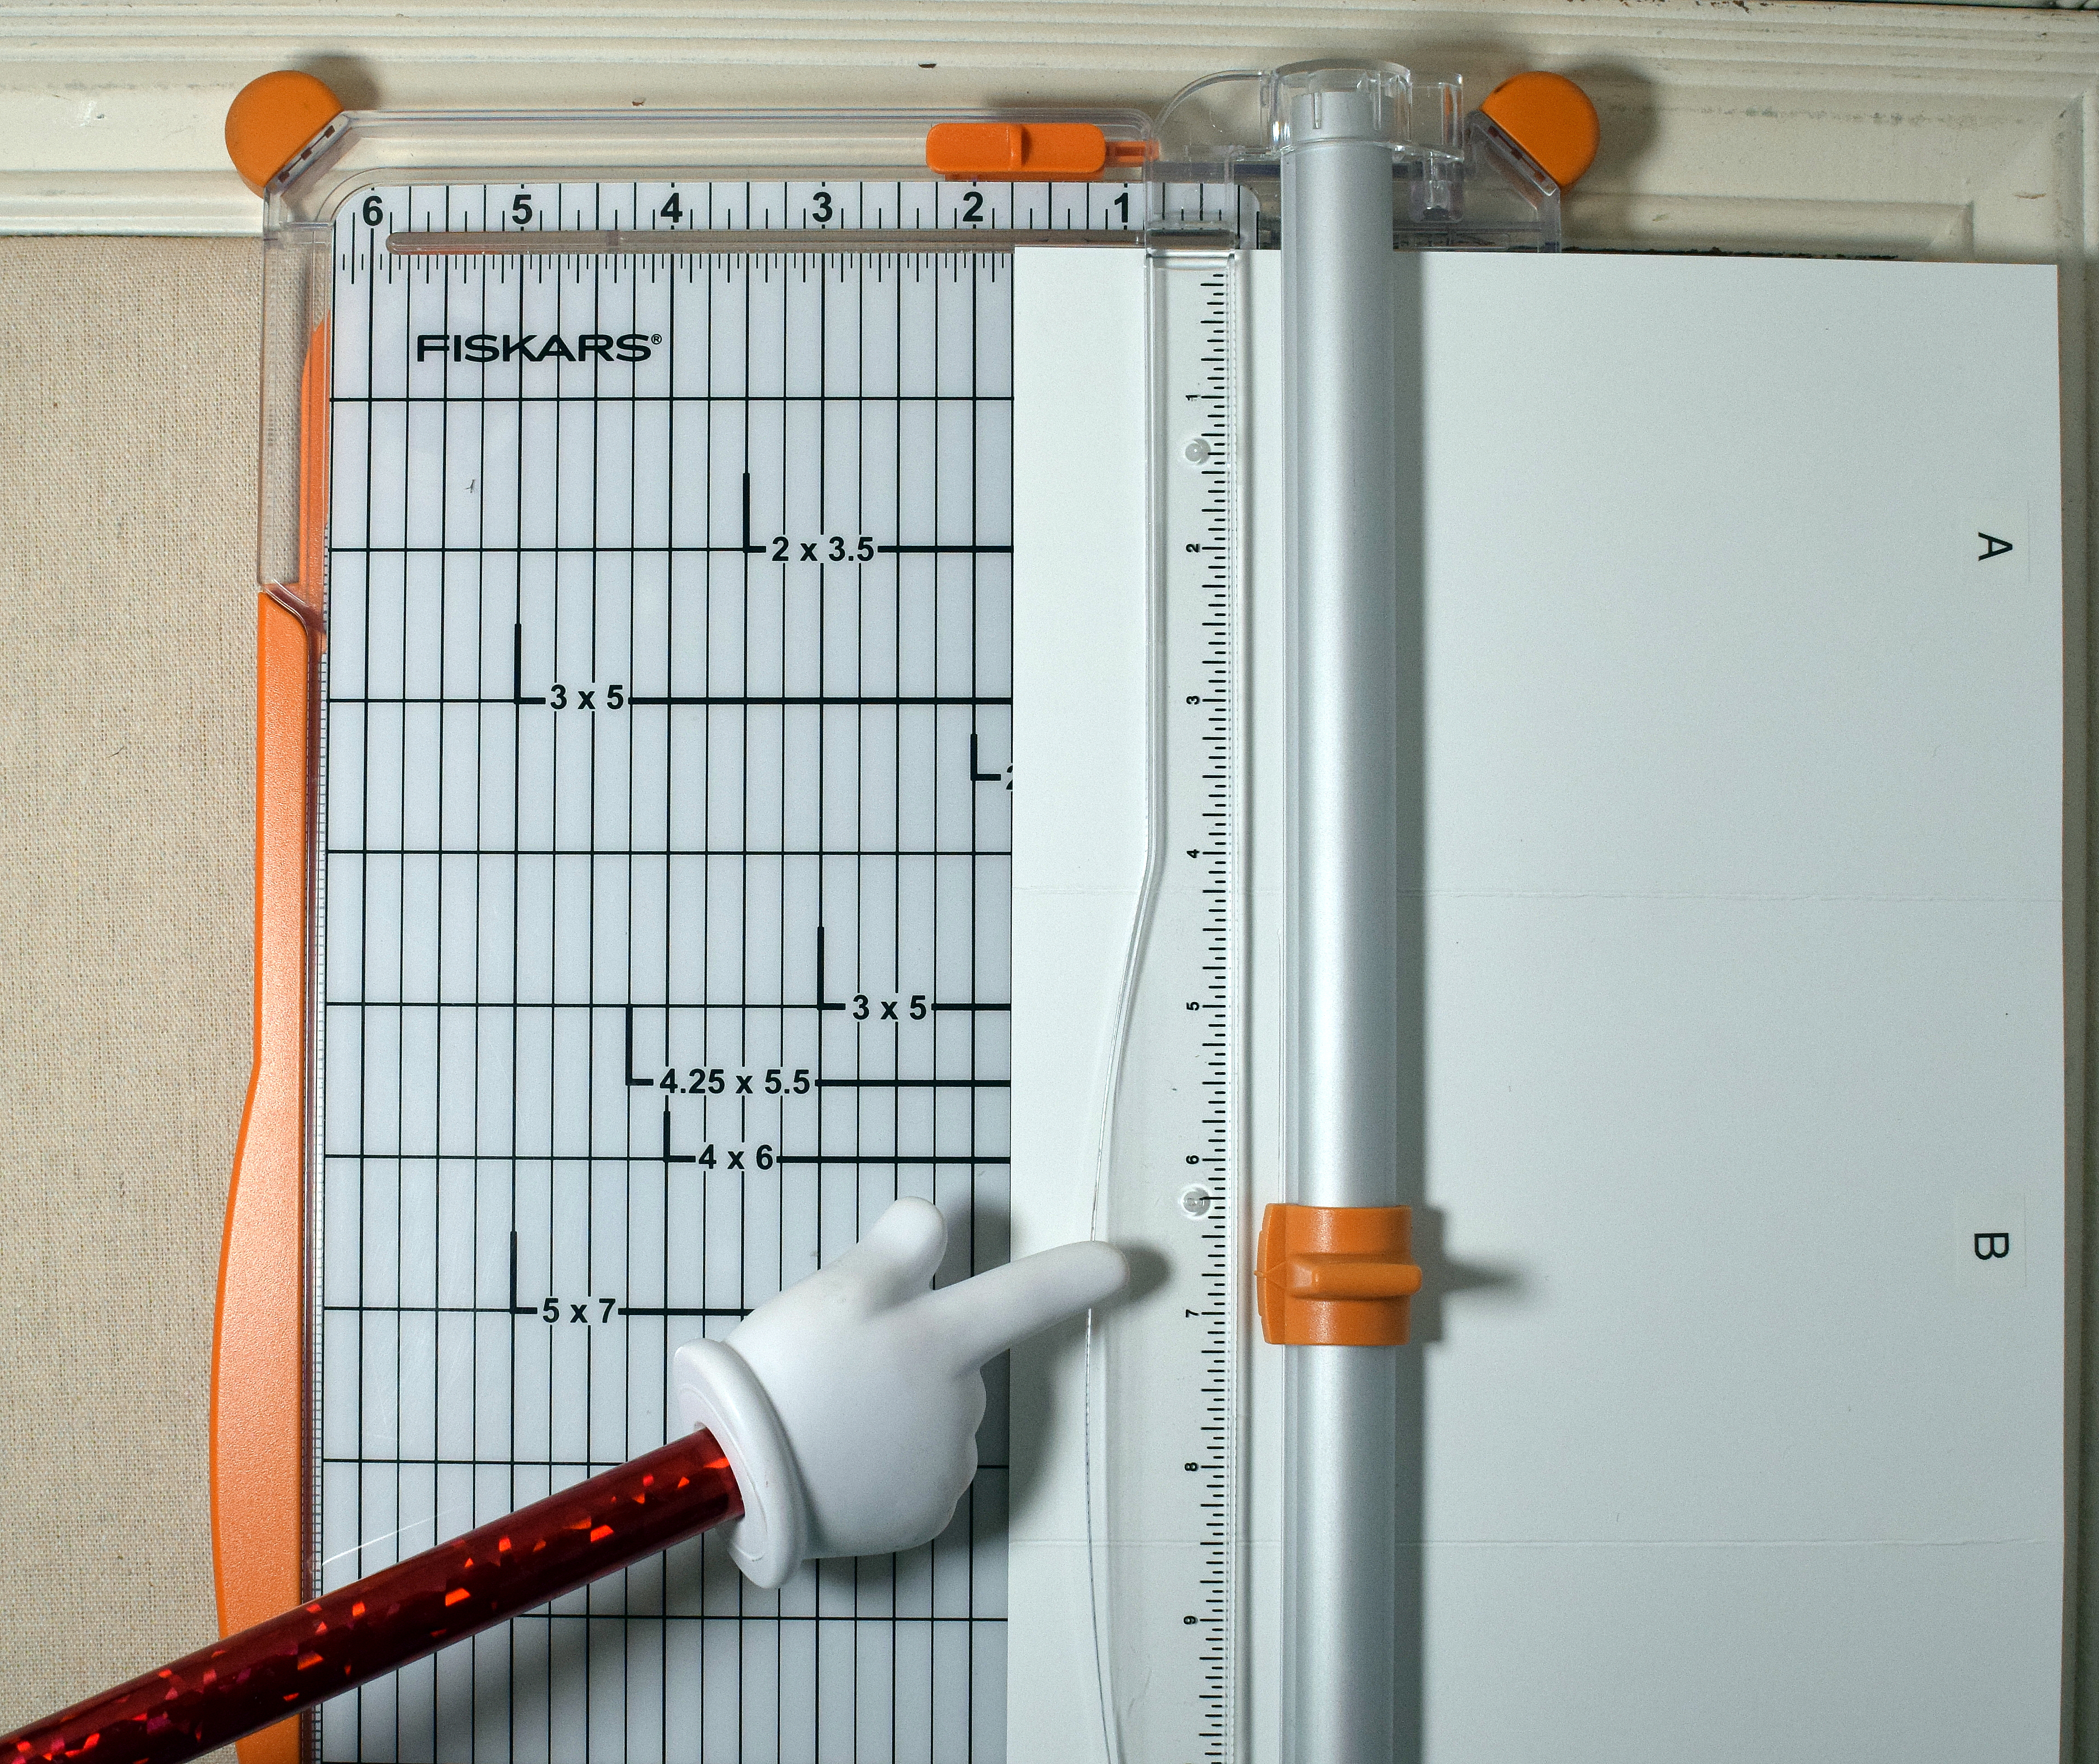
4. With a craft knife or trimmer, you will need to cut a 2 1/4 inch slit in the center section (B) of the larger panel. Where you place your slit depends on the size and position of your sliding element. Place your image on section B where you’d like it to be when the card is opened, which is toward the right side. (I have a second, stationary image that I need to temporarily place on the panel as well so I can see how far over my moving image can go. Your design may or may not have this second image.) Place a light pencil mark on the panel along the right side of the tab.
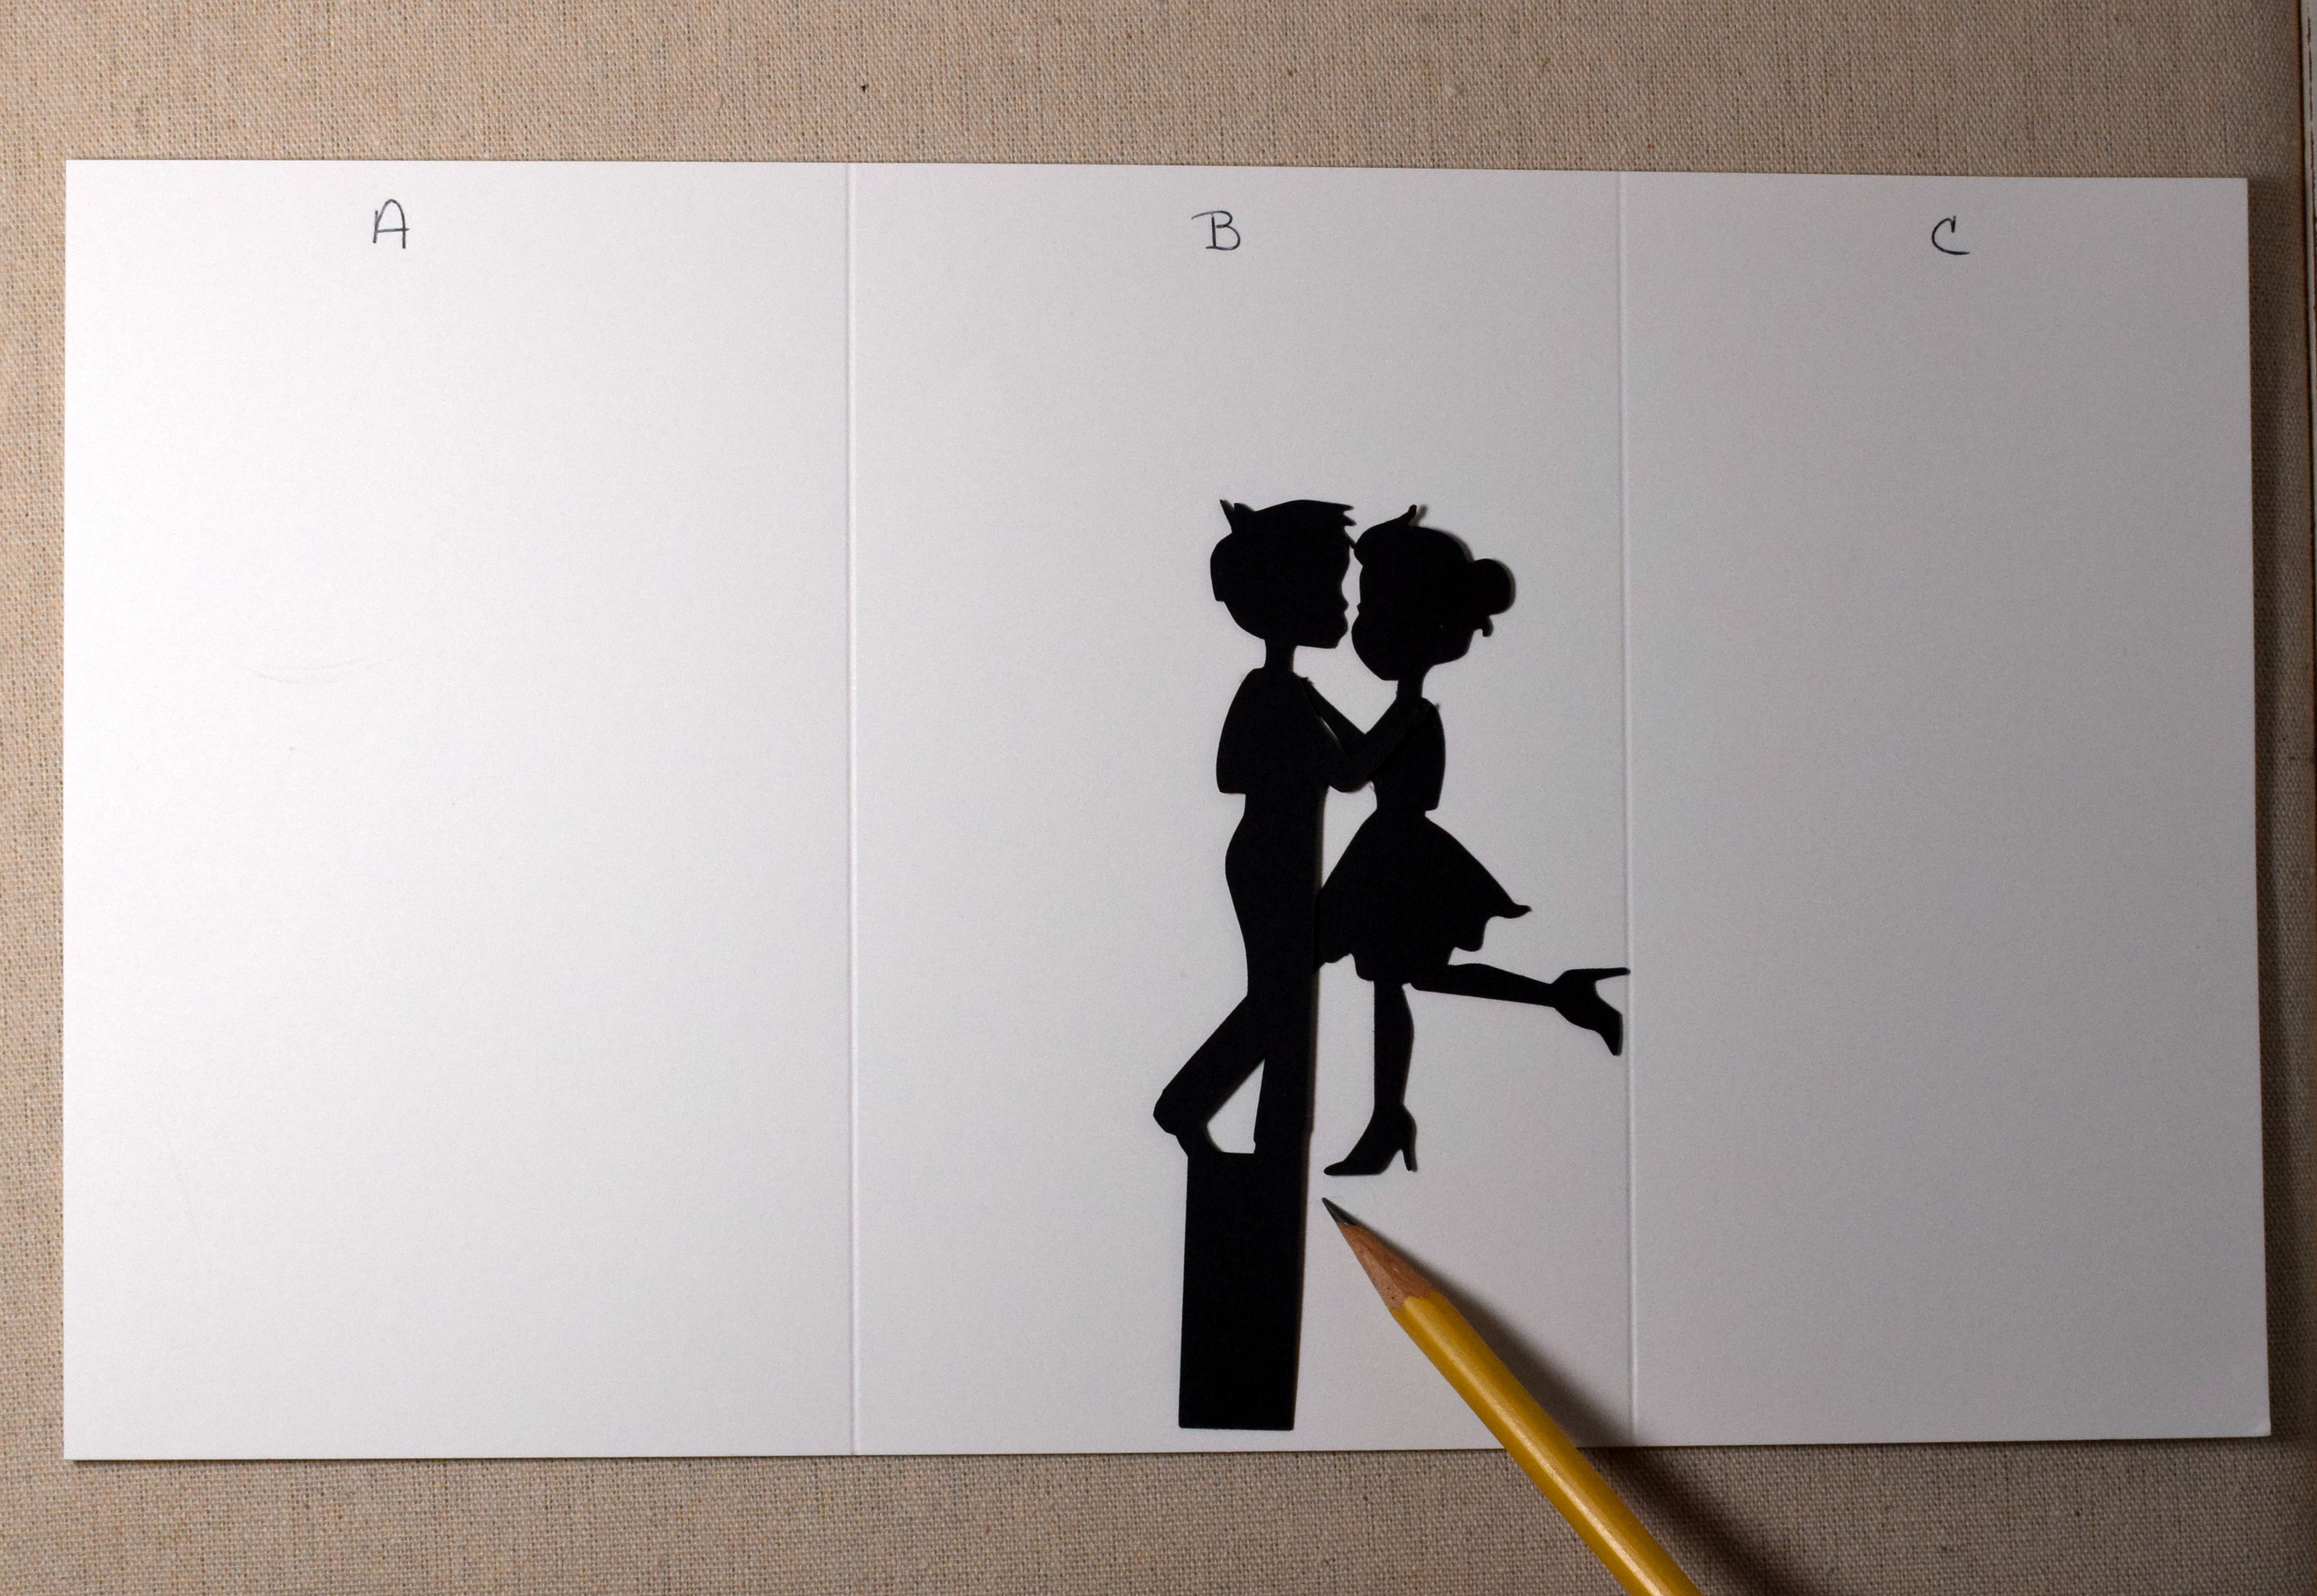
5. Measure 2 1/4 inches to the left from there, and mark this spot. This is where the left side of the tab will end up when the card is closed. Adjust if needed/desired so image does not go over the left fold (the card won’t close) or over the right fold (the image will hang out of the card when the card is closed).
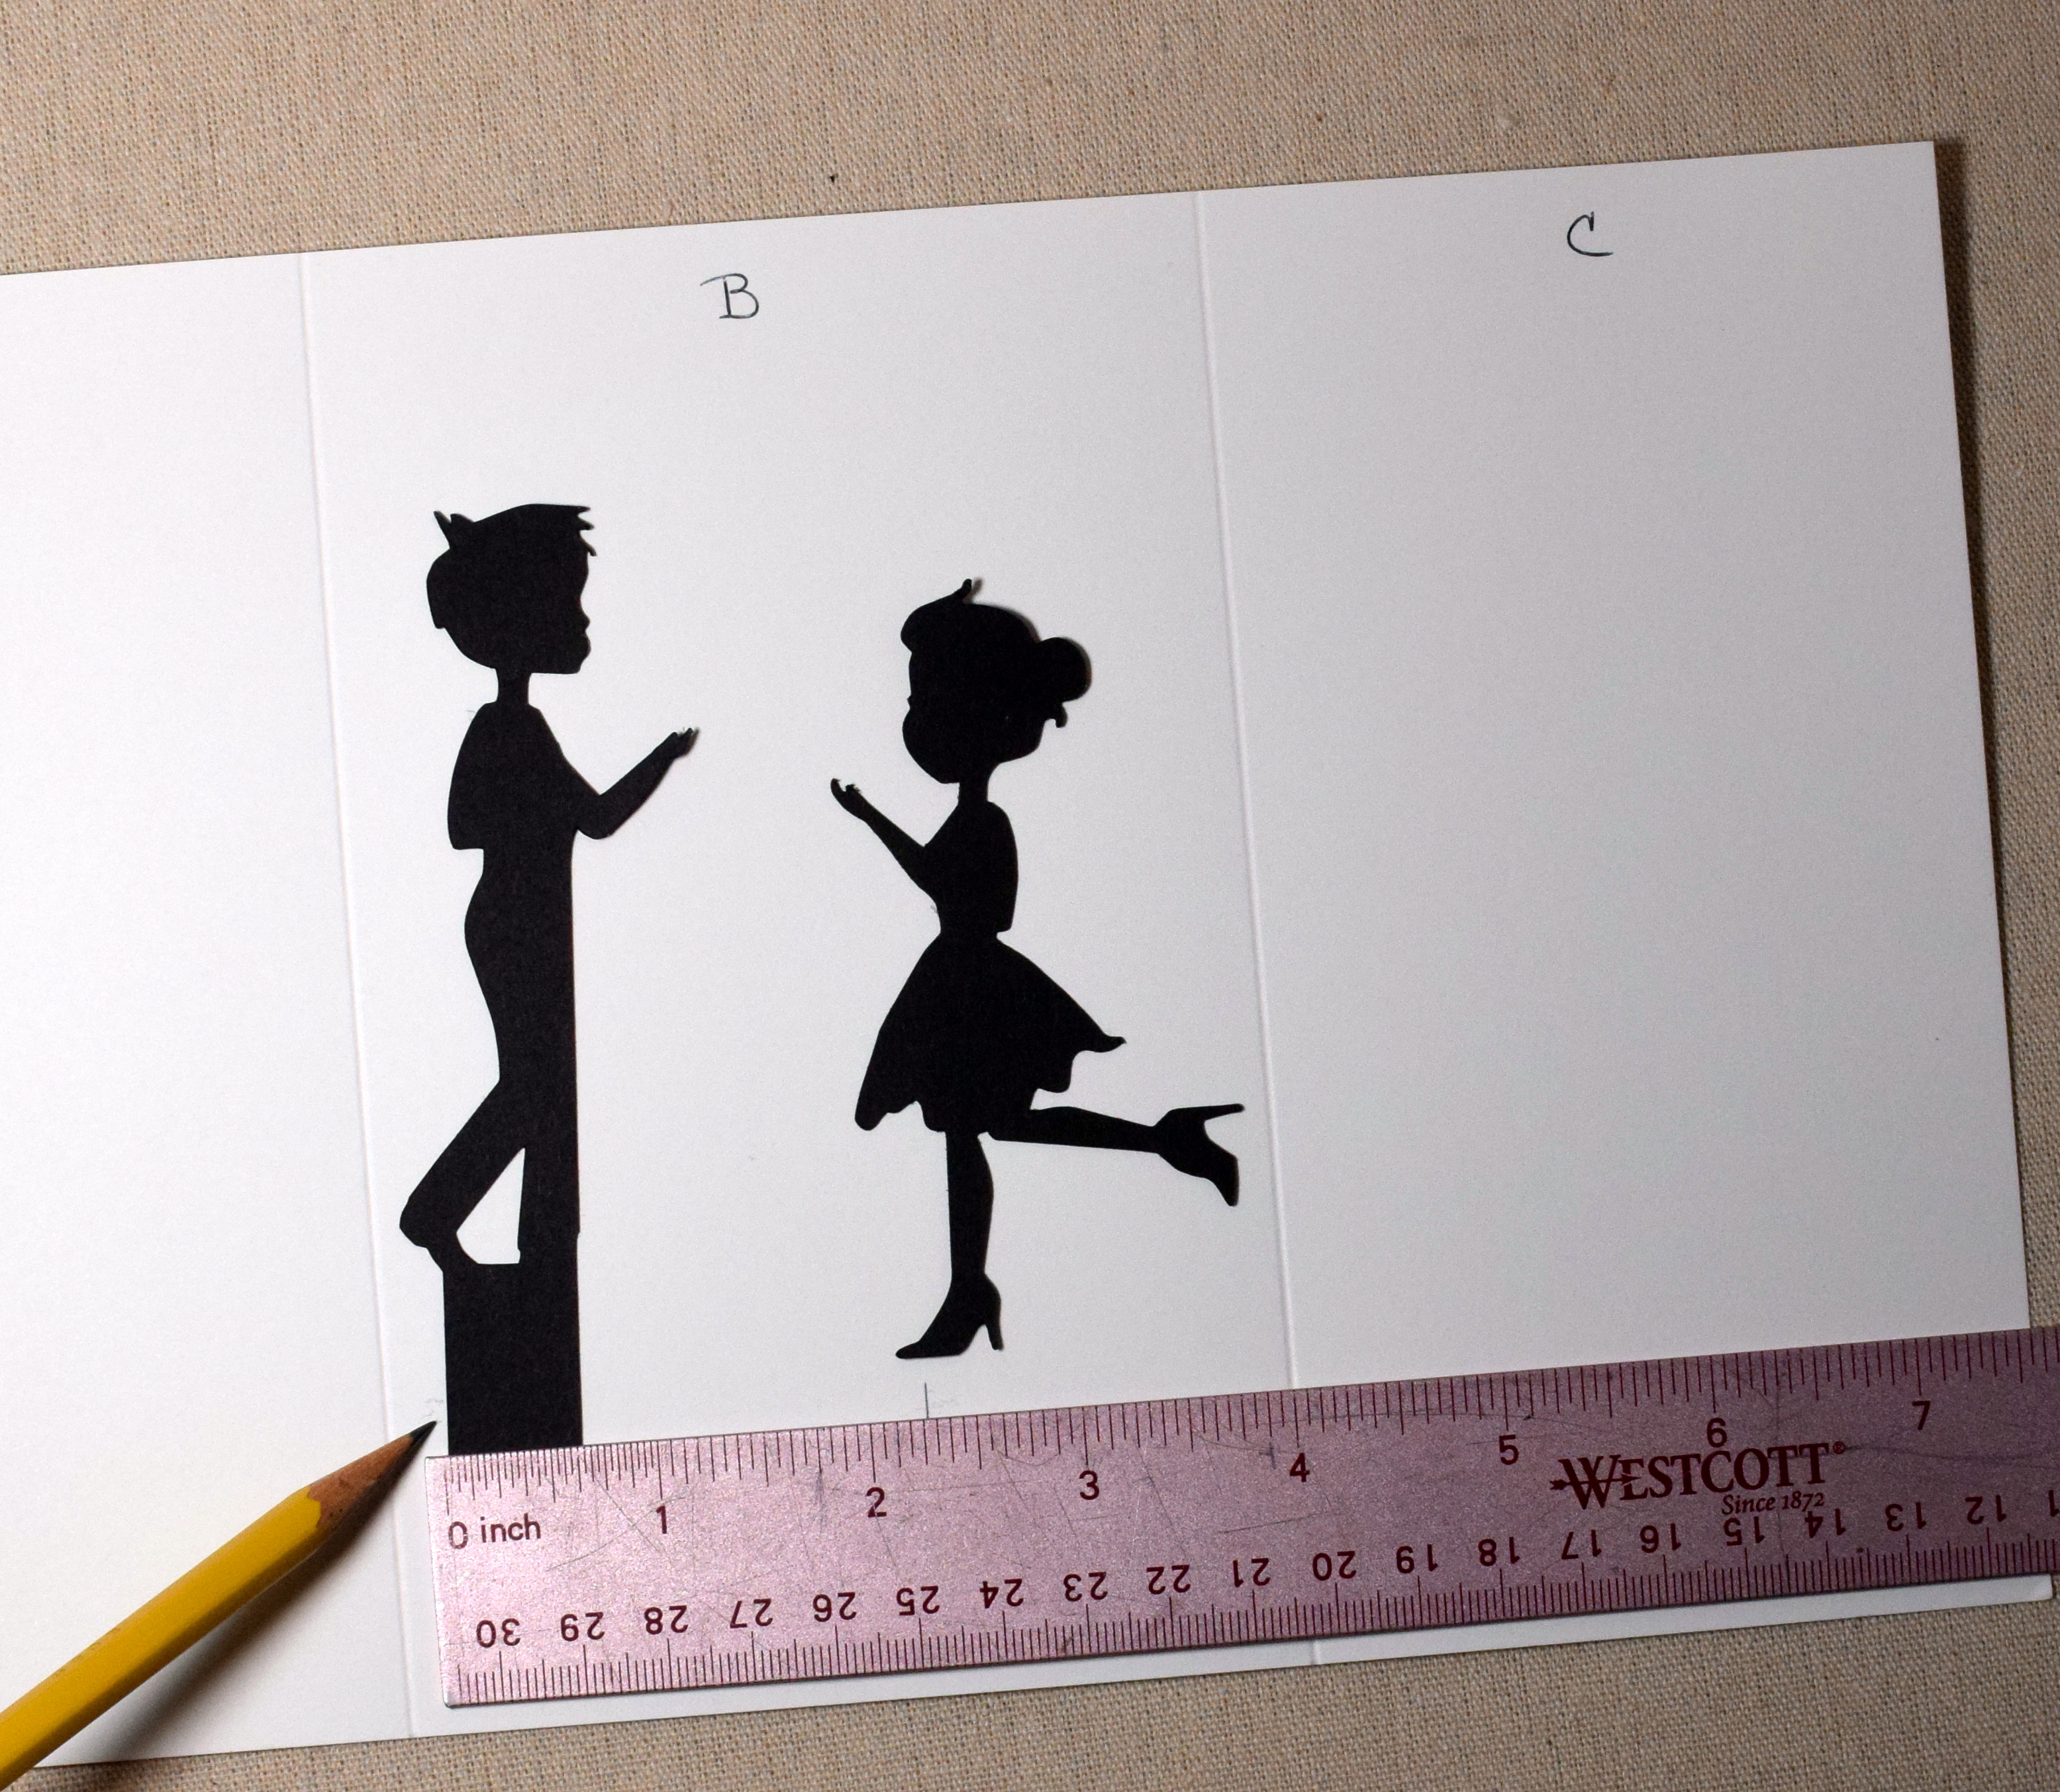
The slit you create will be where the bottom of your moving image (like his feet) stands/slides. For this card, I wanted my slit 1 3/4 inches from the bottom. (You decide where you want yours to be to accommodate your card design. You won’t see the tab when the card is assembled.)
You can use a trimmer to create the slit (or a ruler and a craft knife). If you want/need a more detailed explanation of how to create the slit, please scroll down to the end of this post where I include a step-by-step explanation with photos.

One more note – if your slit is too short, the card may not open or close all the way. It’s not a problem if the slit is too long so if you want to be on the safe side, or if your card doesn’t open and close properly when you are done, you can make the slit a touch longer on the right.
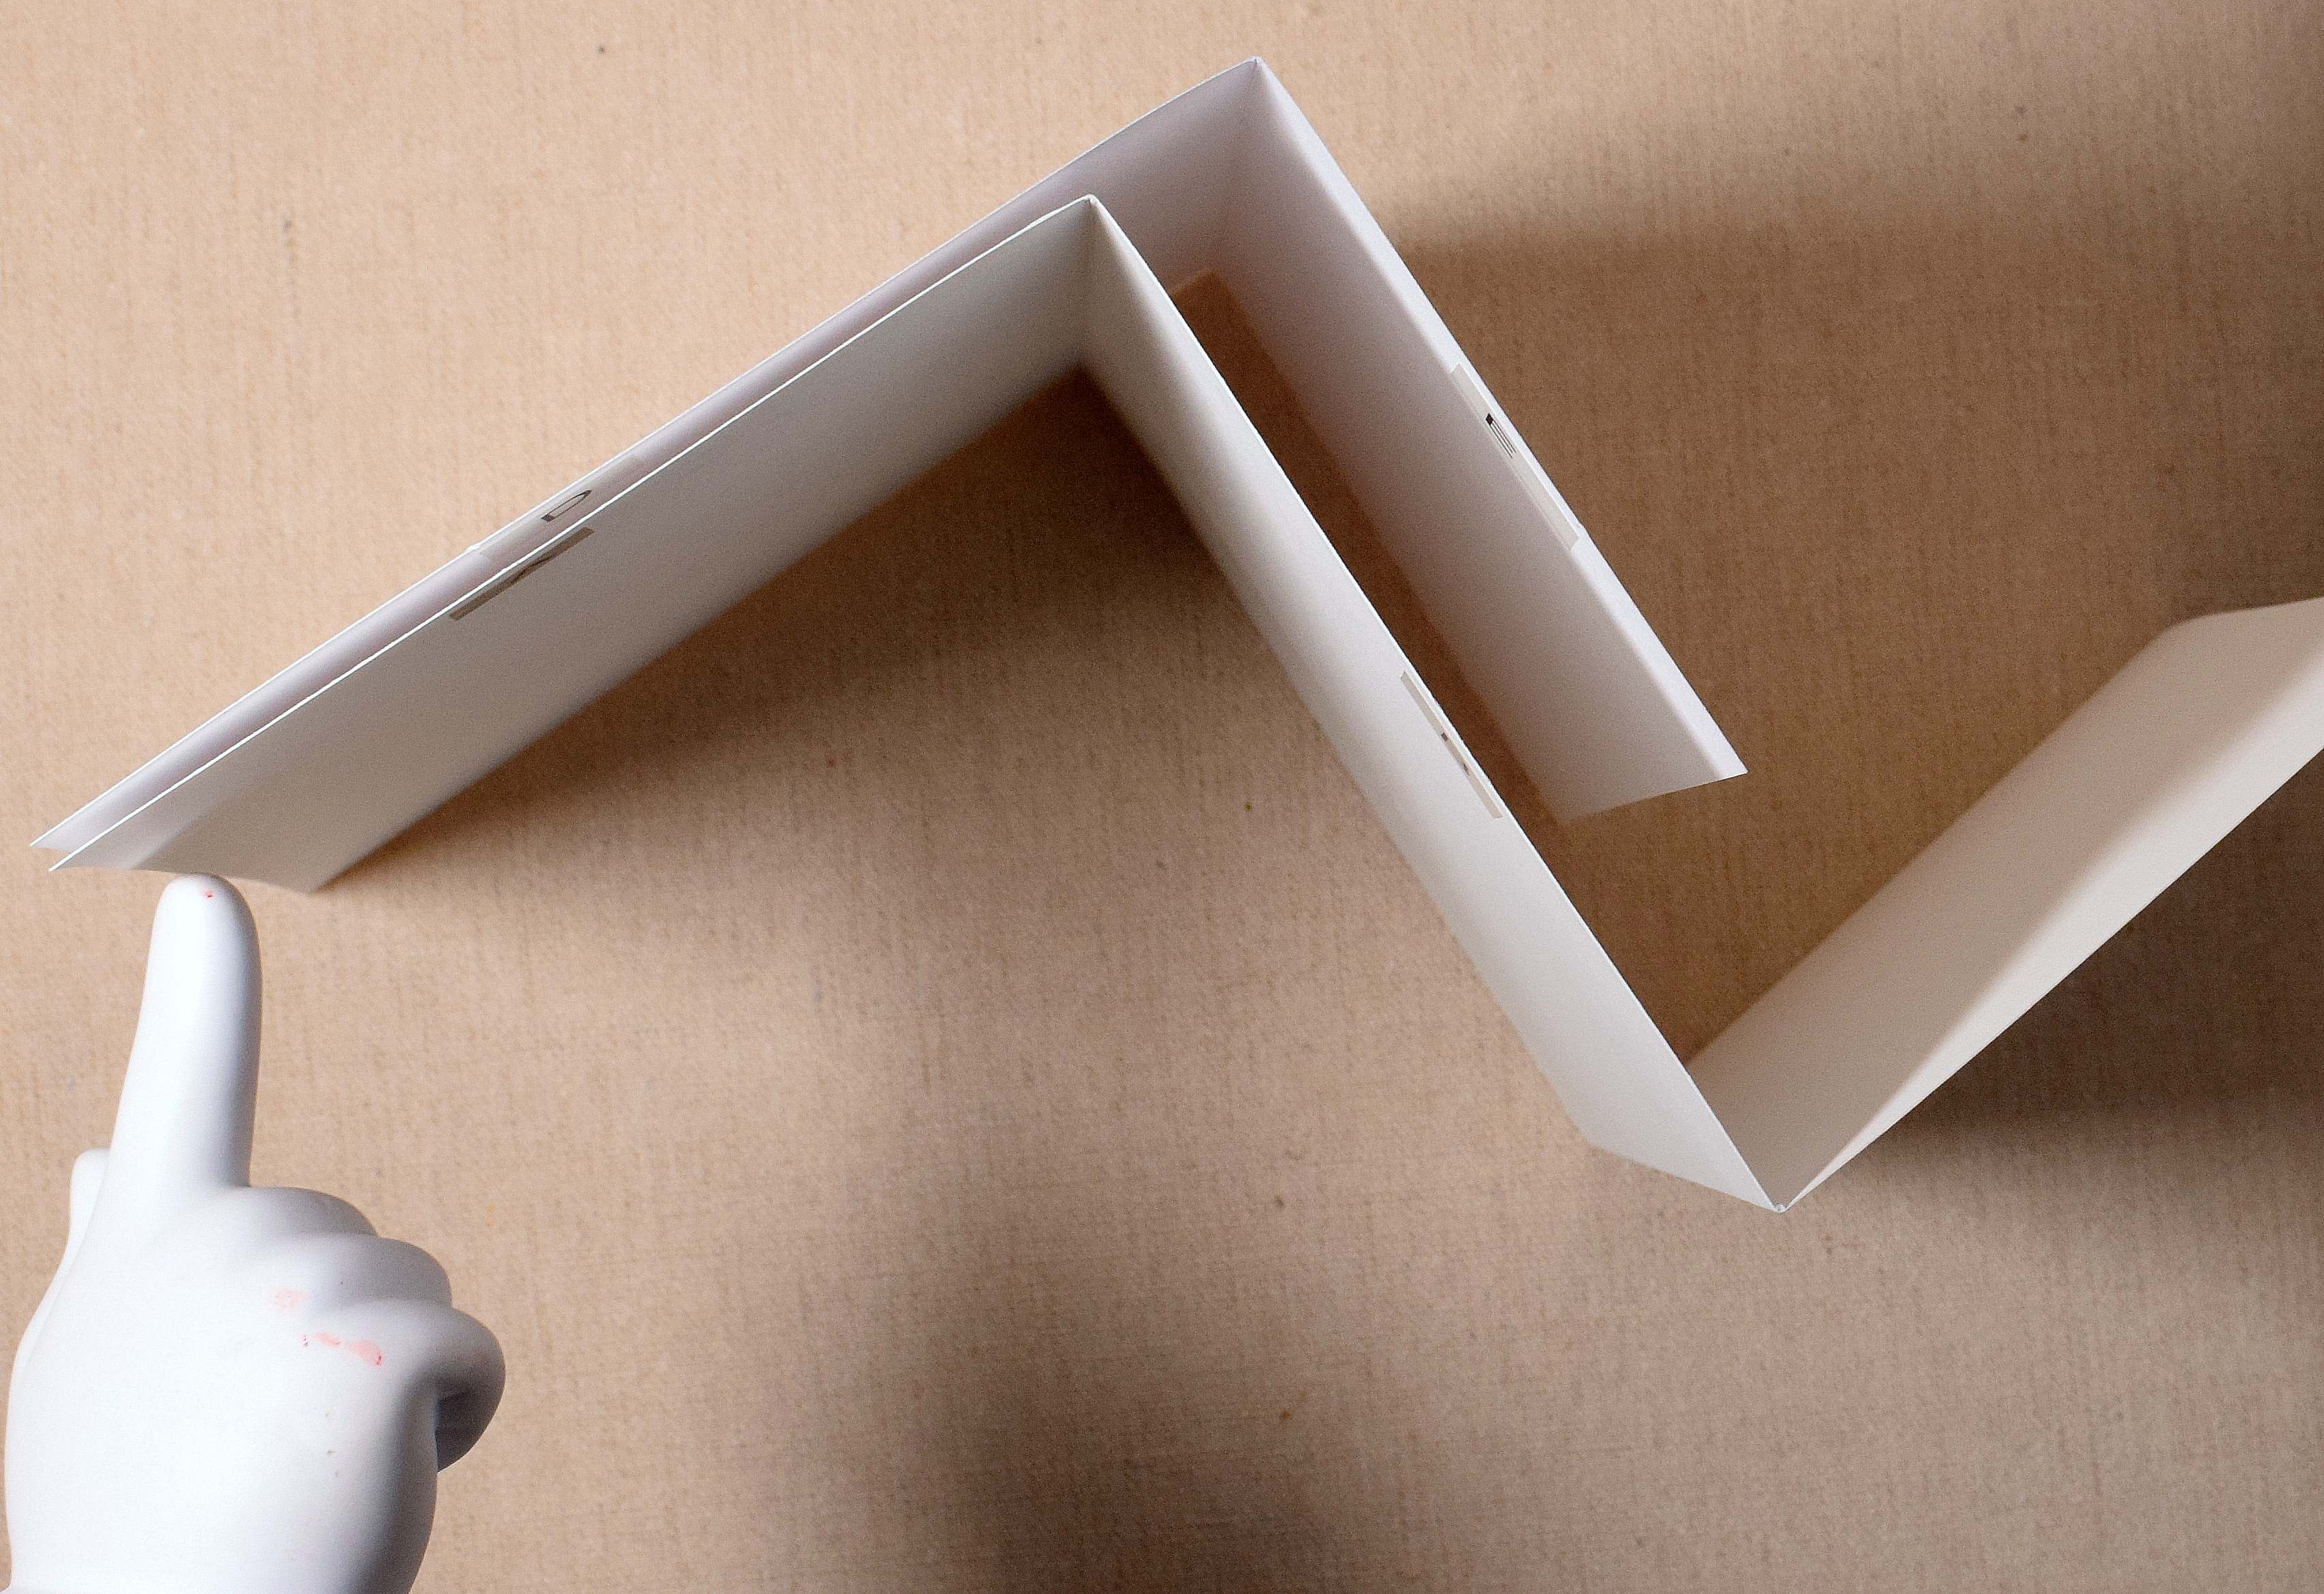
6. Fold and position your two panels as shown:
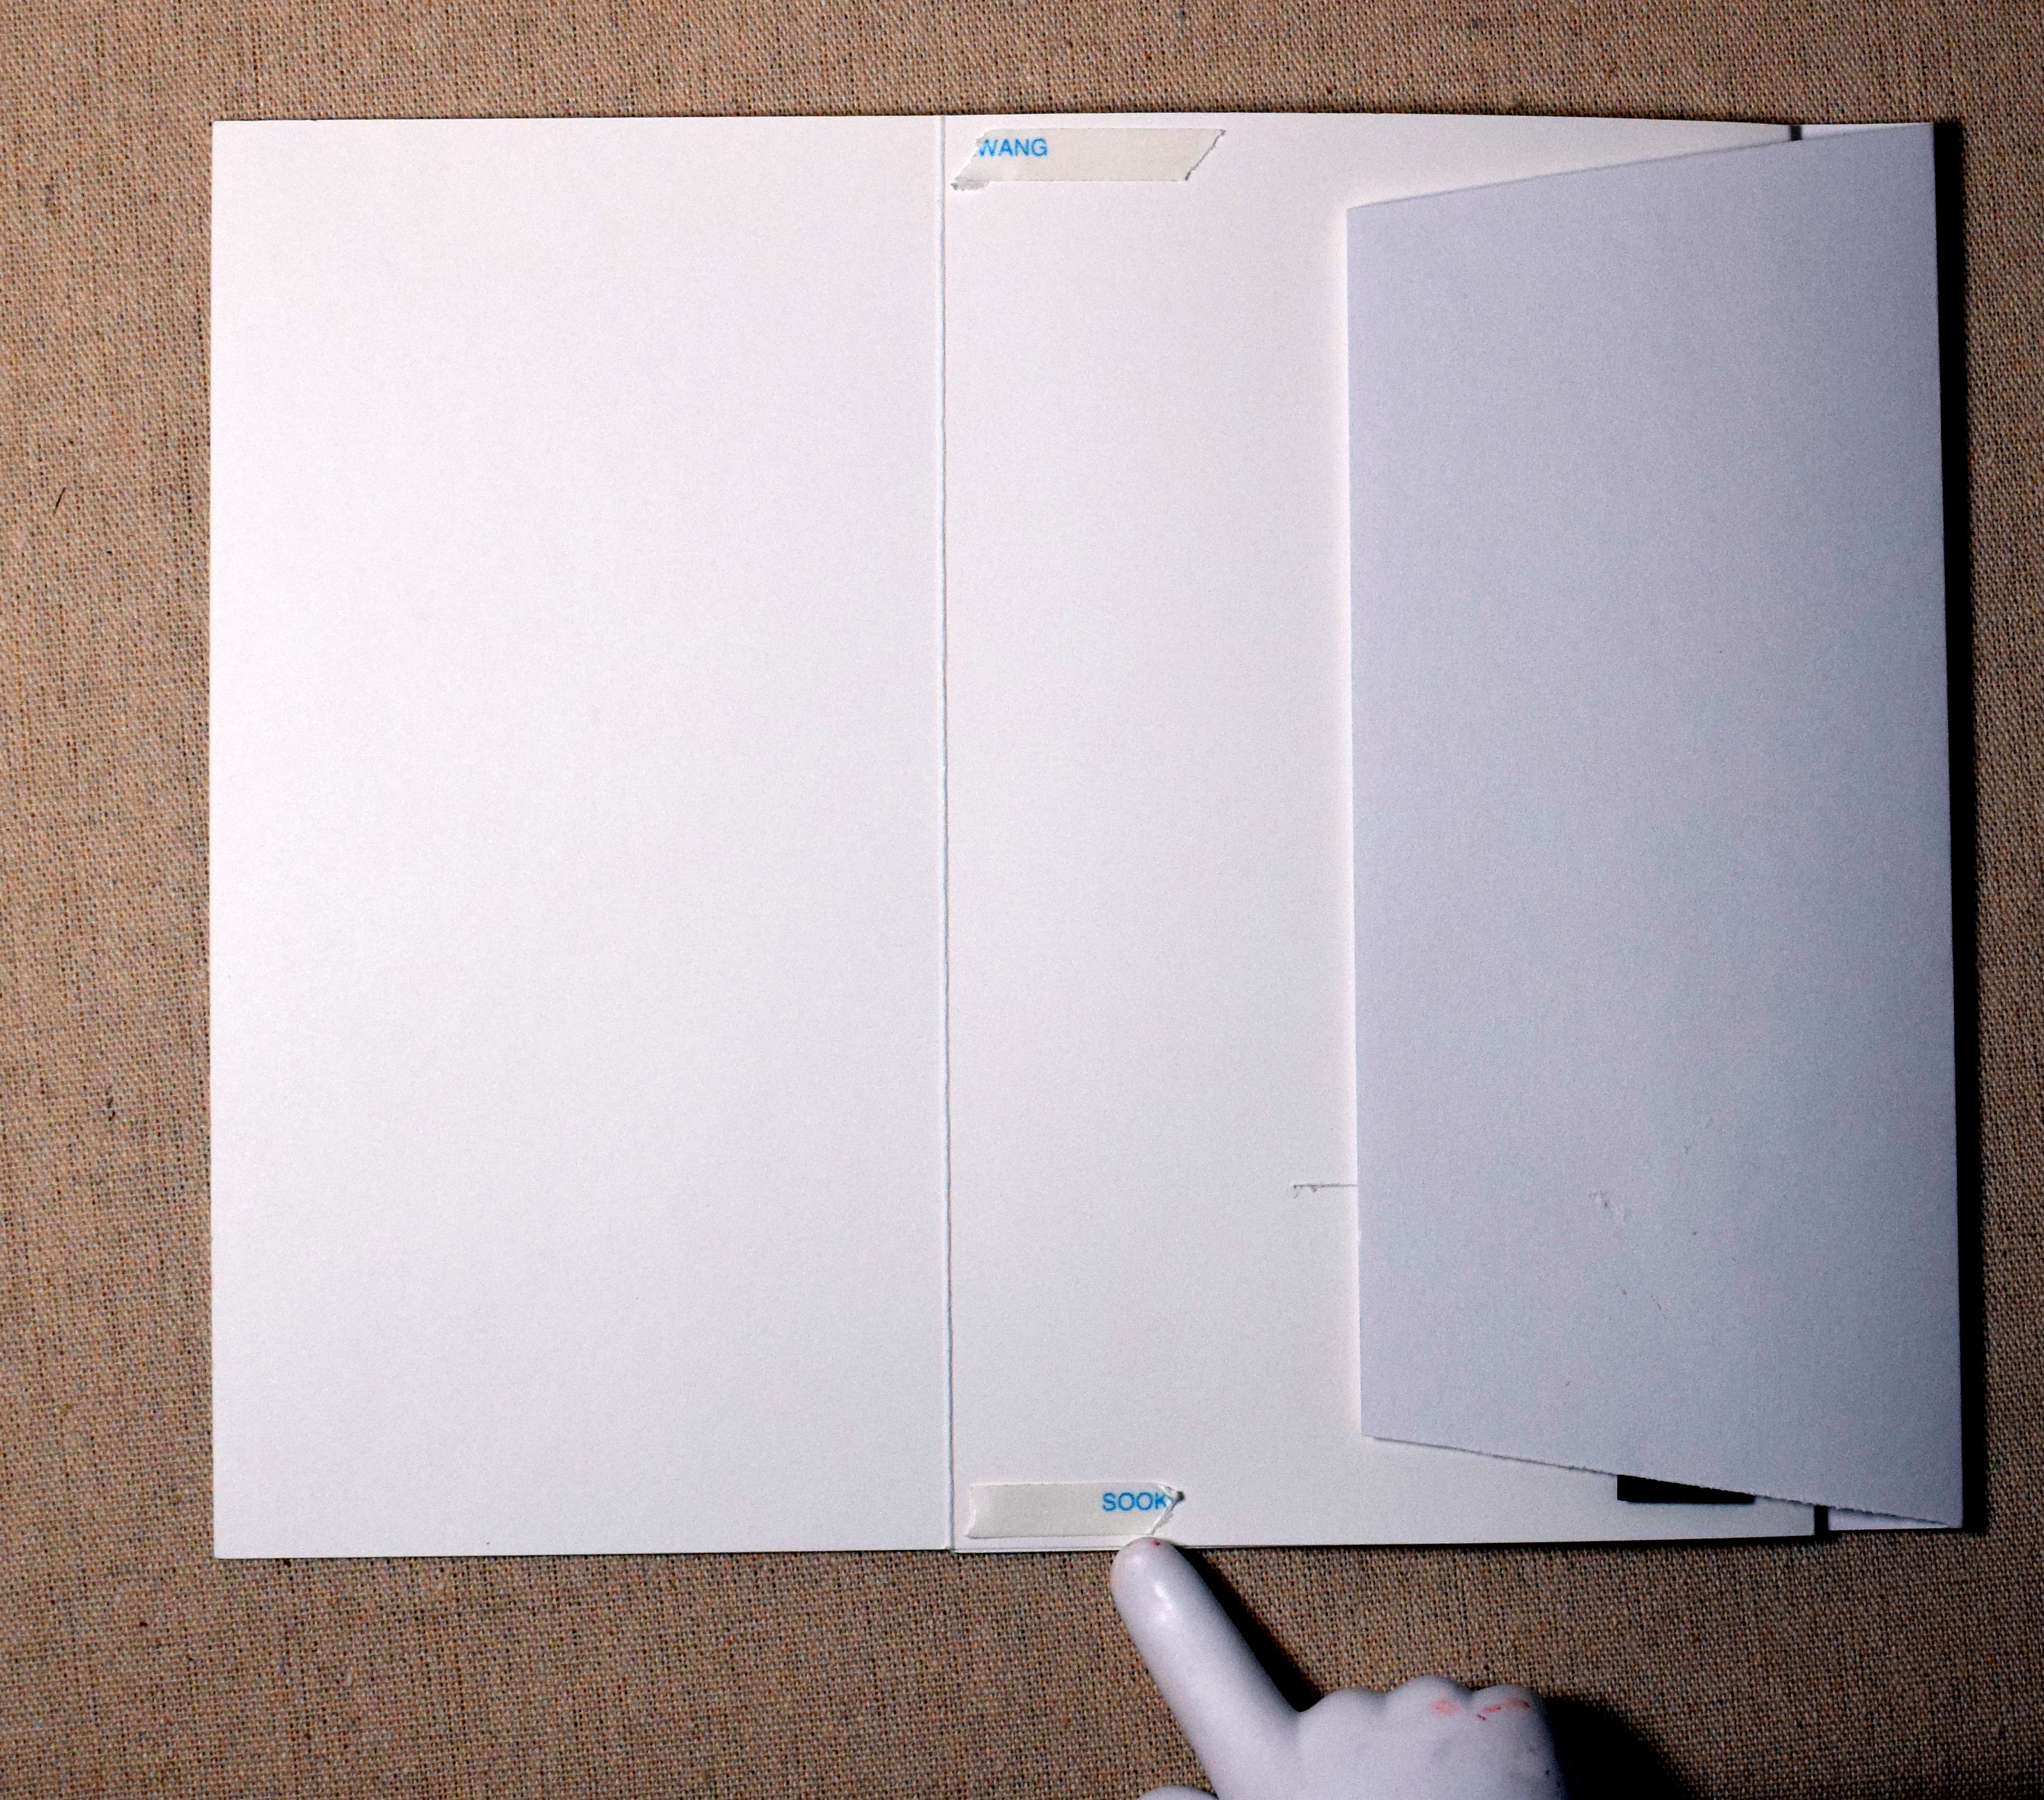
7. Put adhesive on the back of section A and adhere that to the front of section D. Line up the left sides along with the tops and bottoms. THE FOLDS WILL NOT MATCH UP.
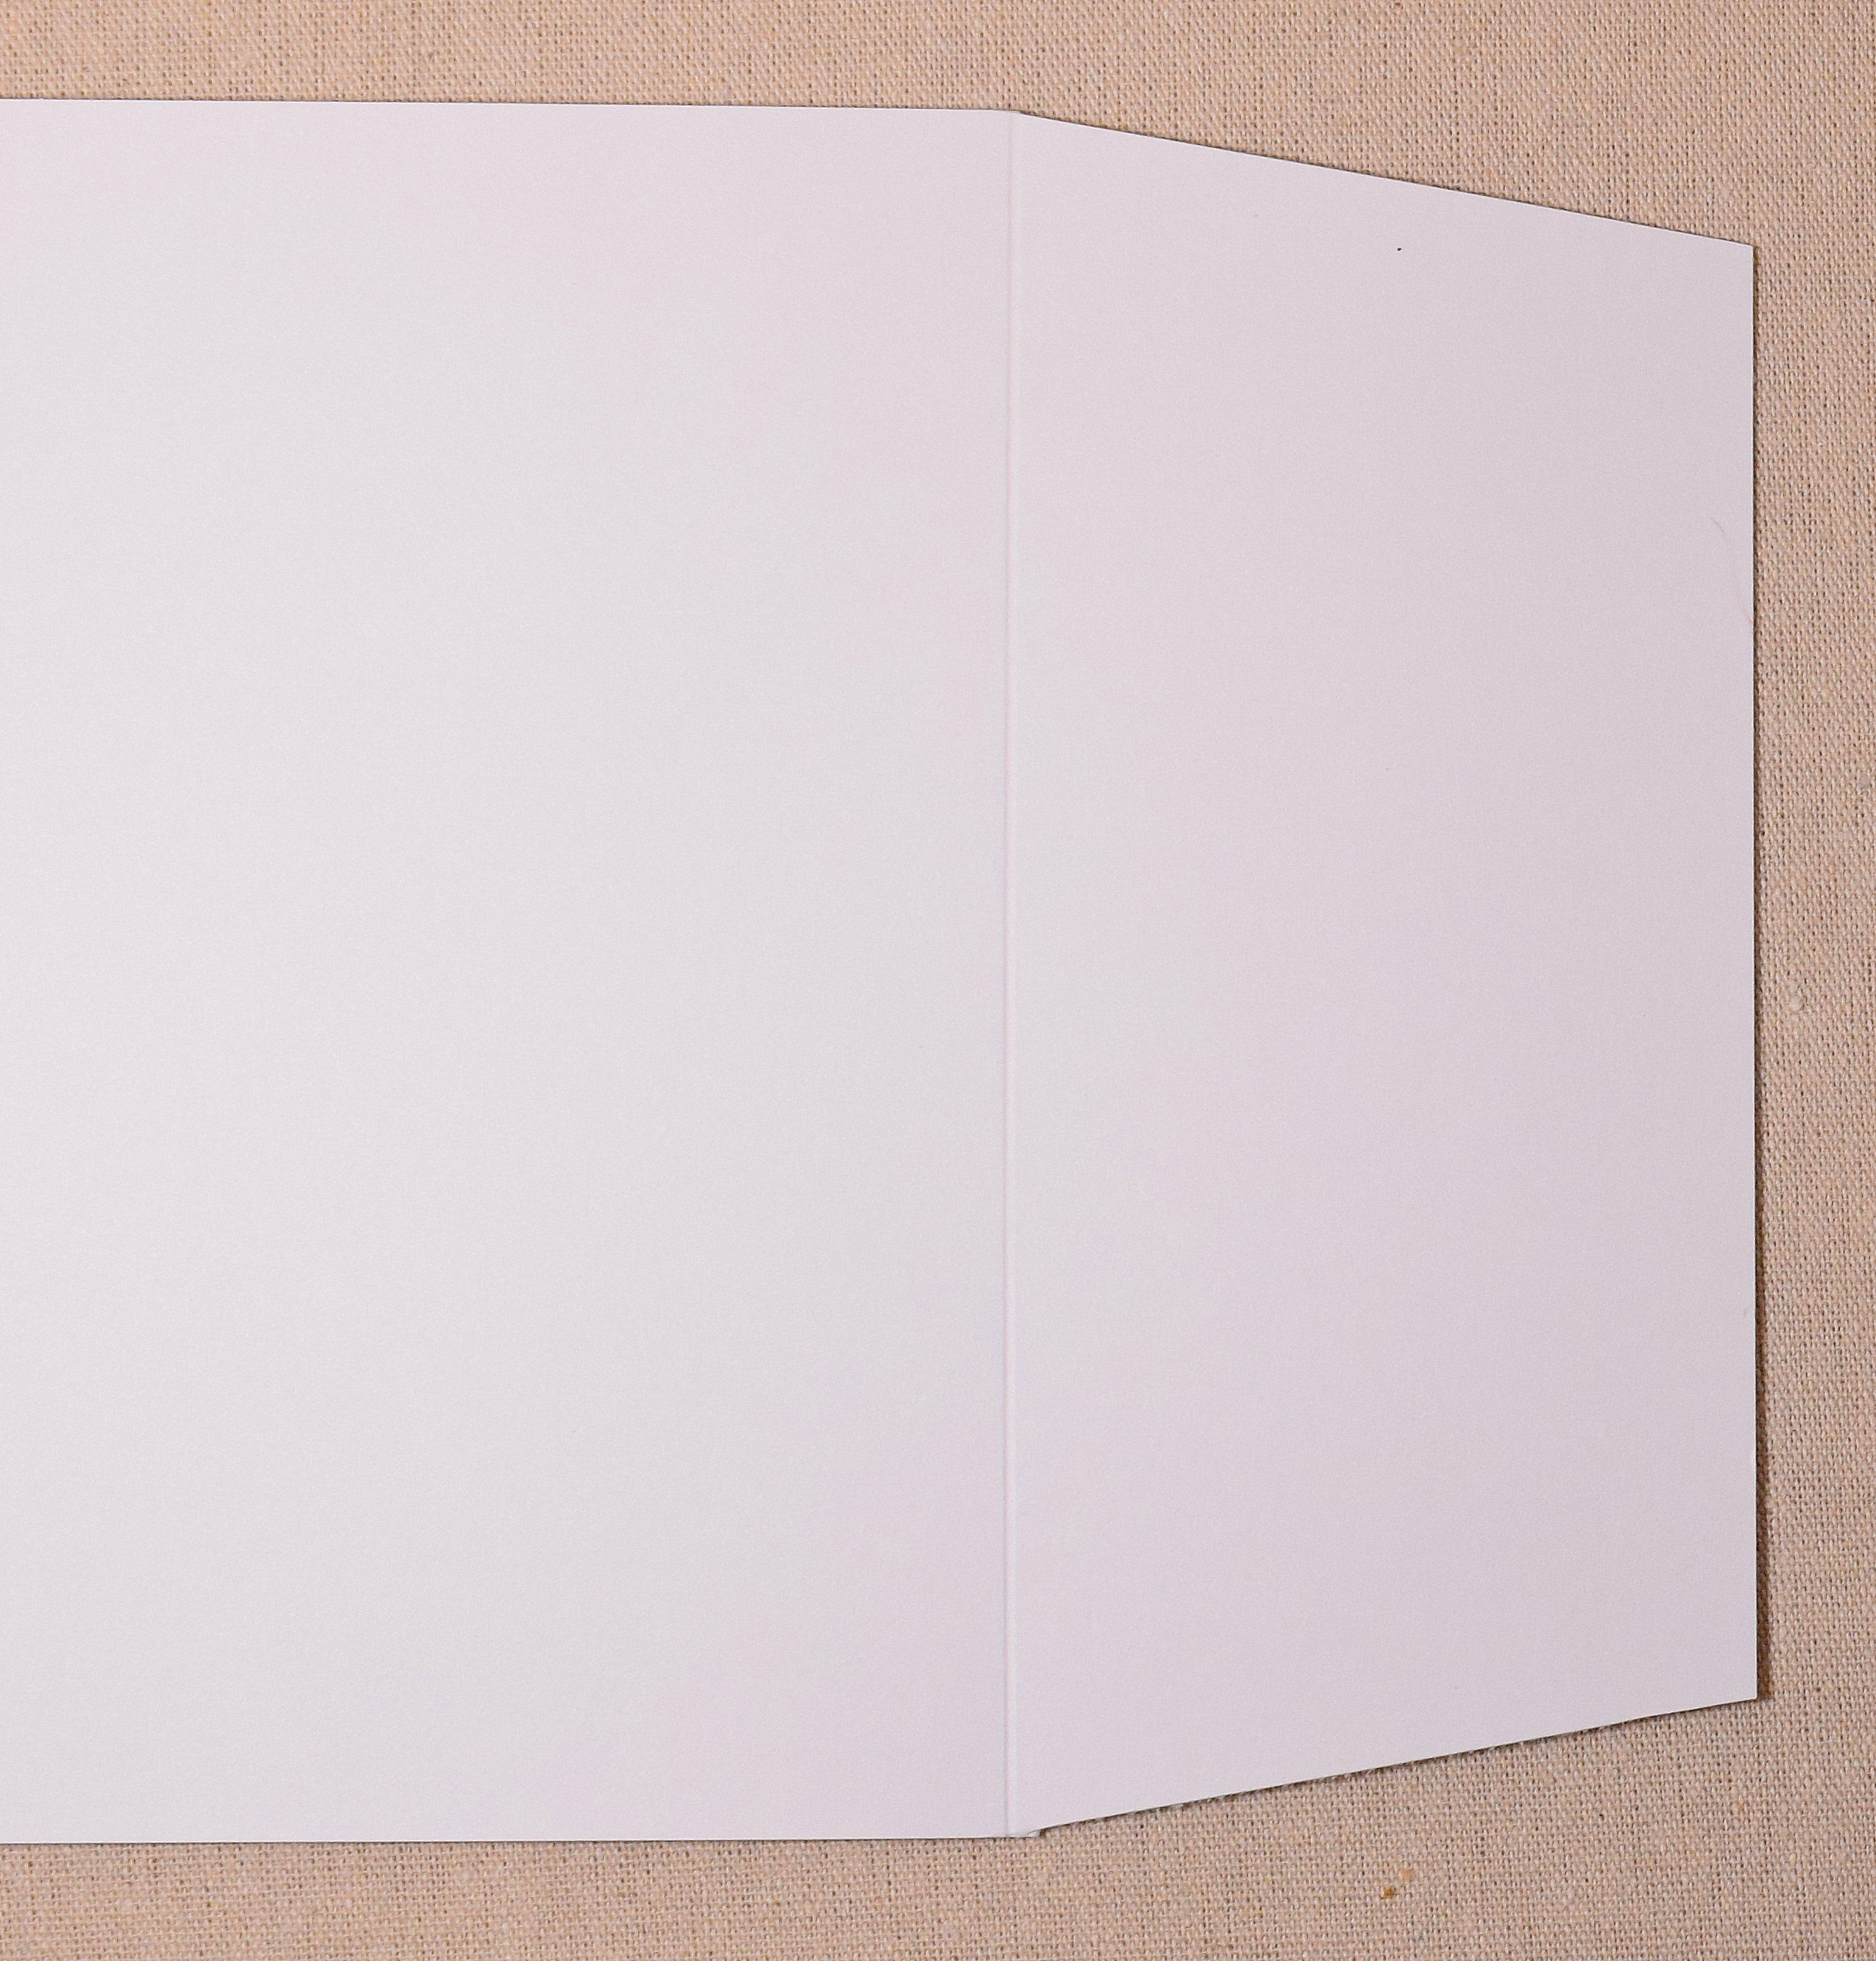
8. Open the card flat, and flip back section E (the other half of the card front). Here is a front view.
(Remember, I forgot to cut diagonals in the sample photos above. The section you flipped back should have the diagonal cuts at the top and bottom. You’ll see it in the next photo.)
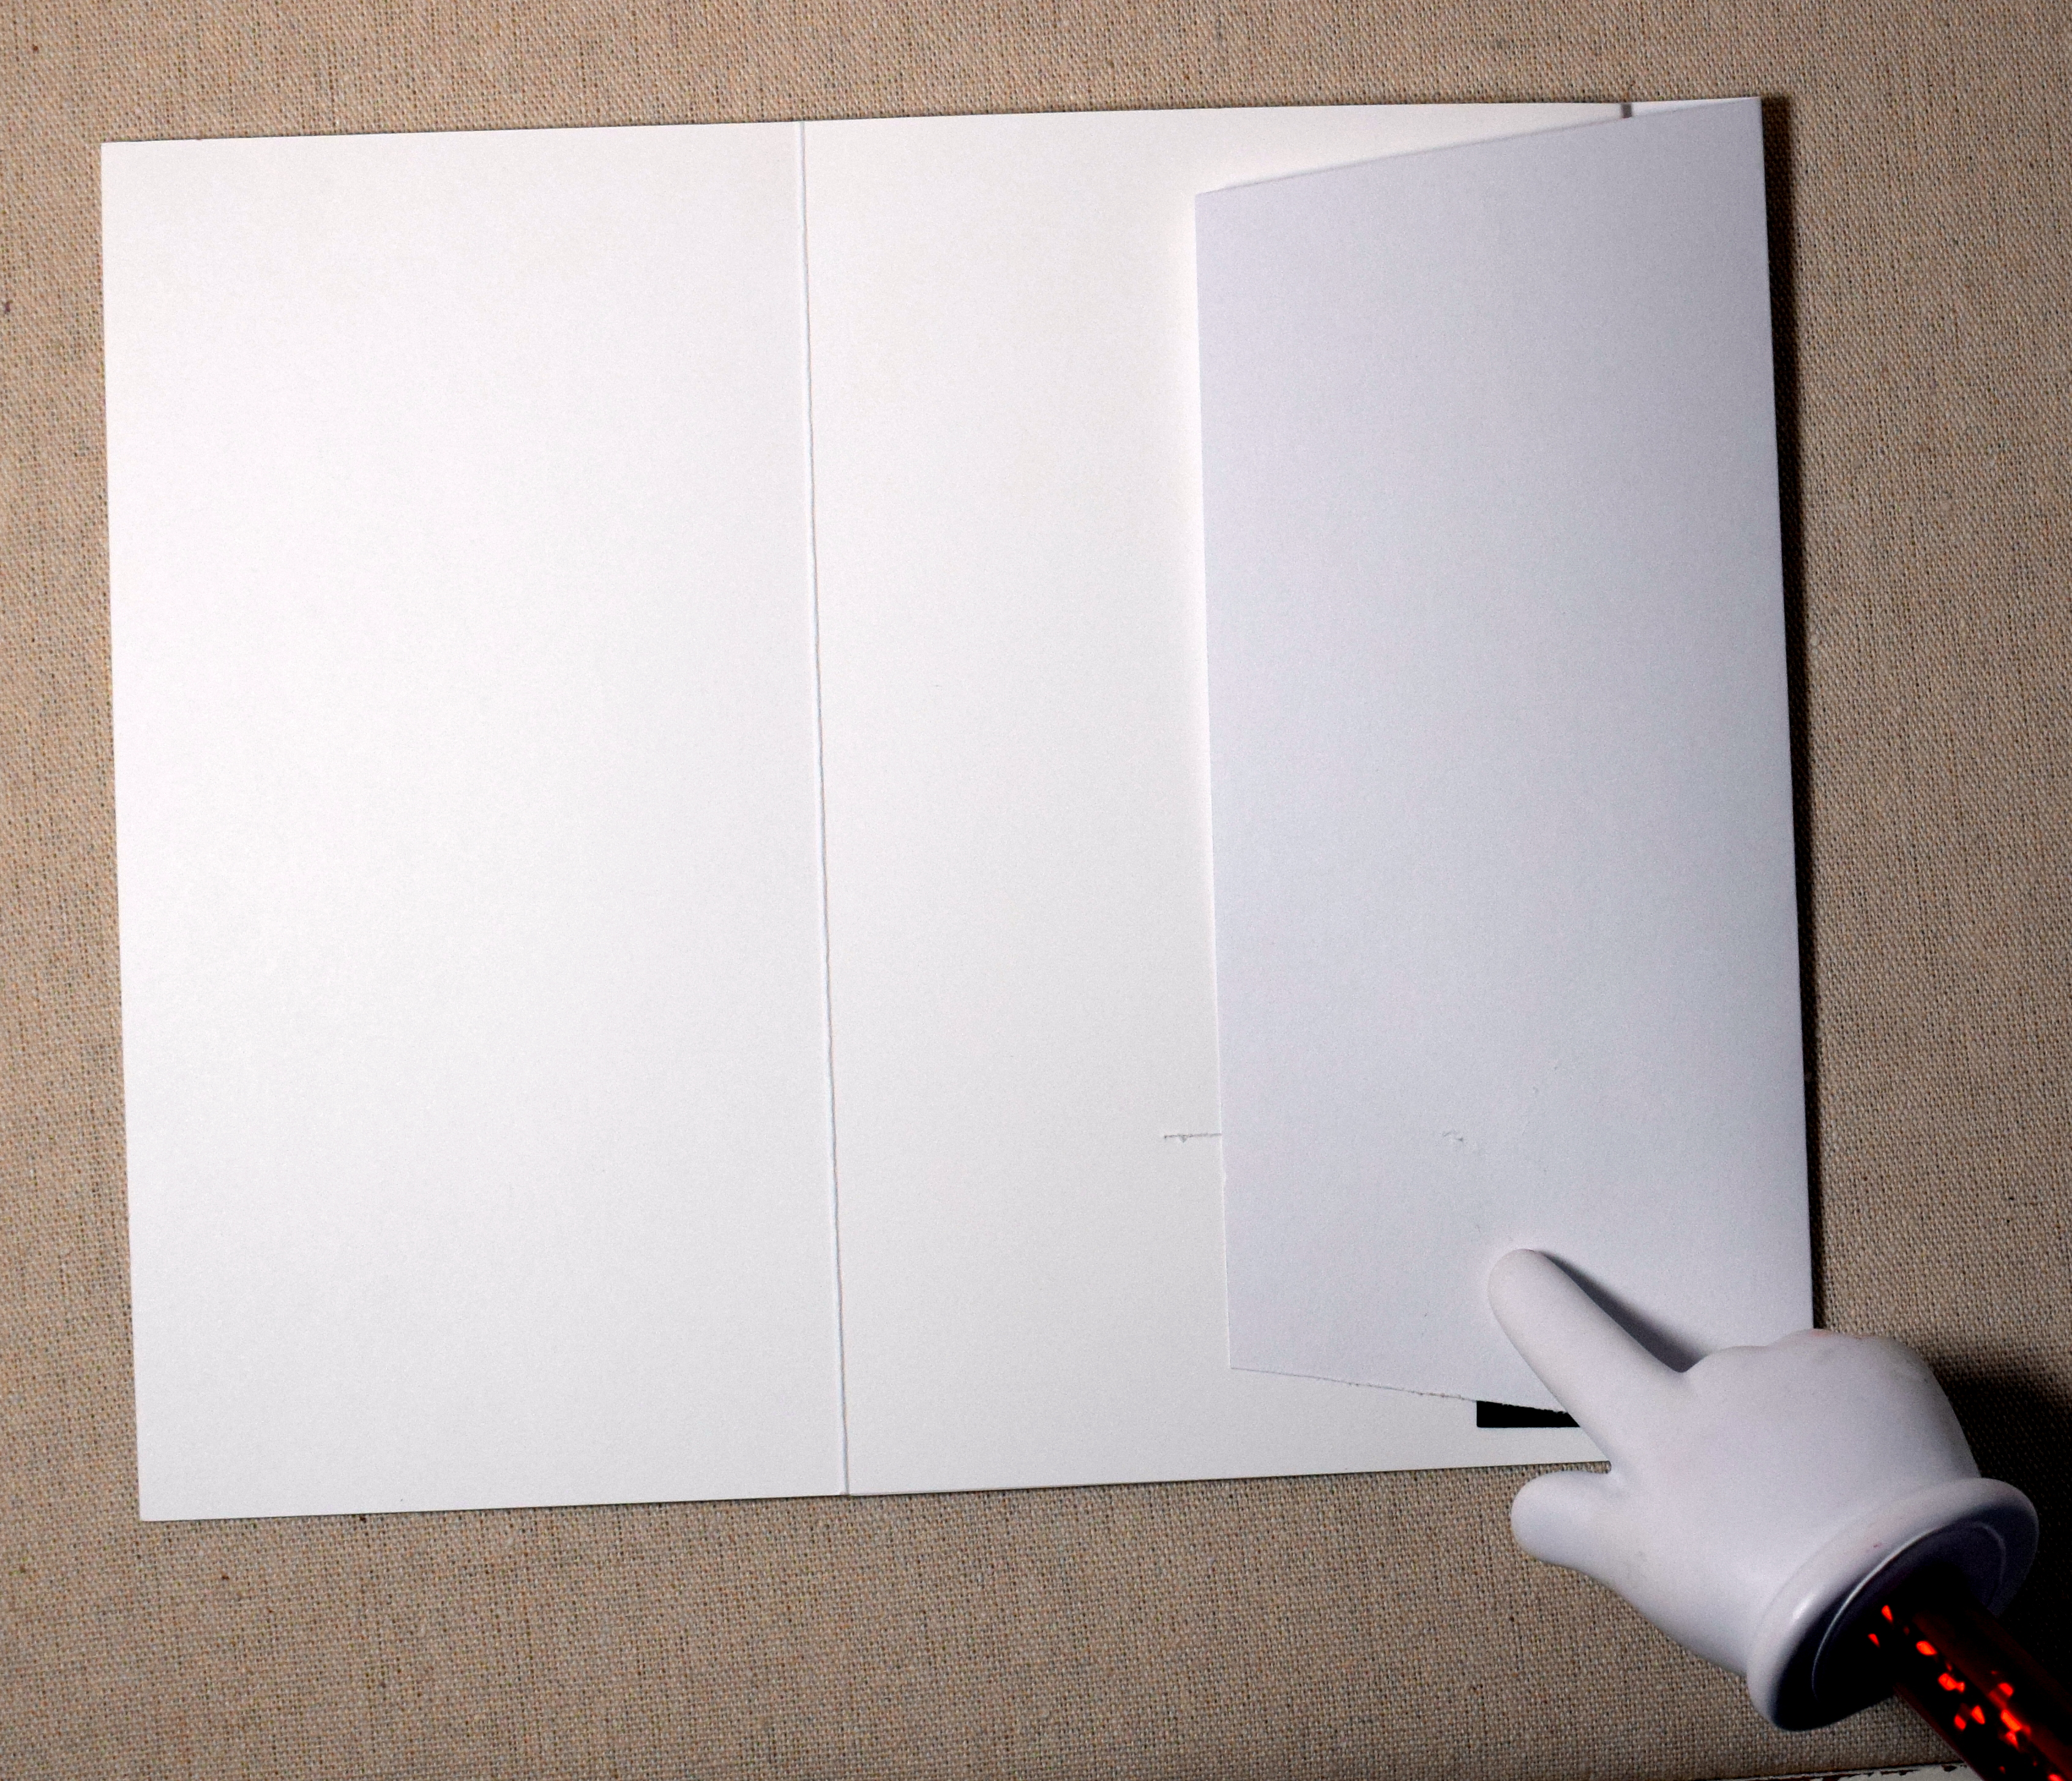
Here is the back view if you flip the card over. The idea is that you want to get panel E away from the slit for the moment.
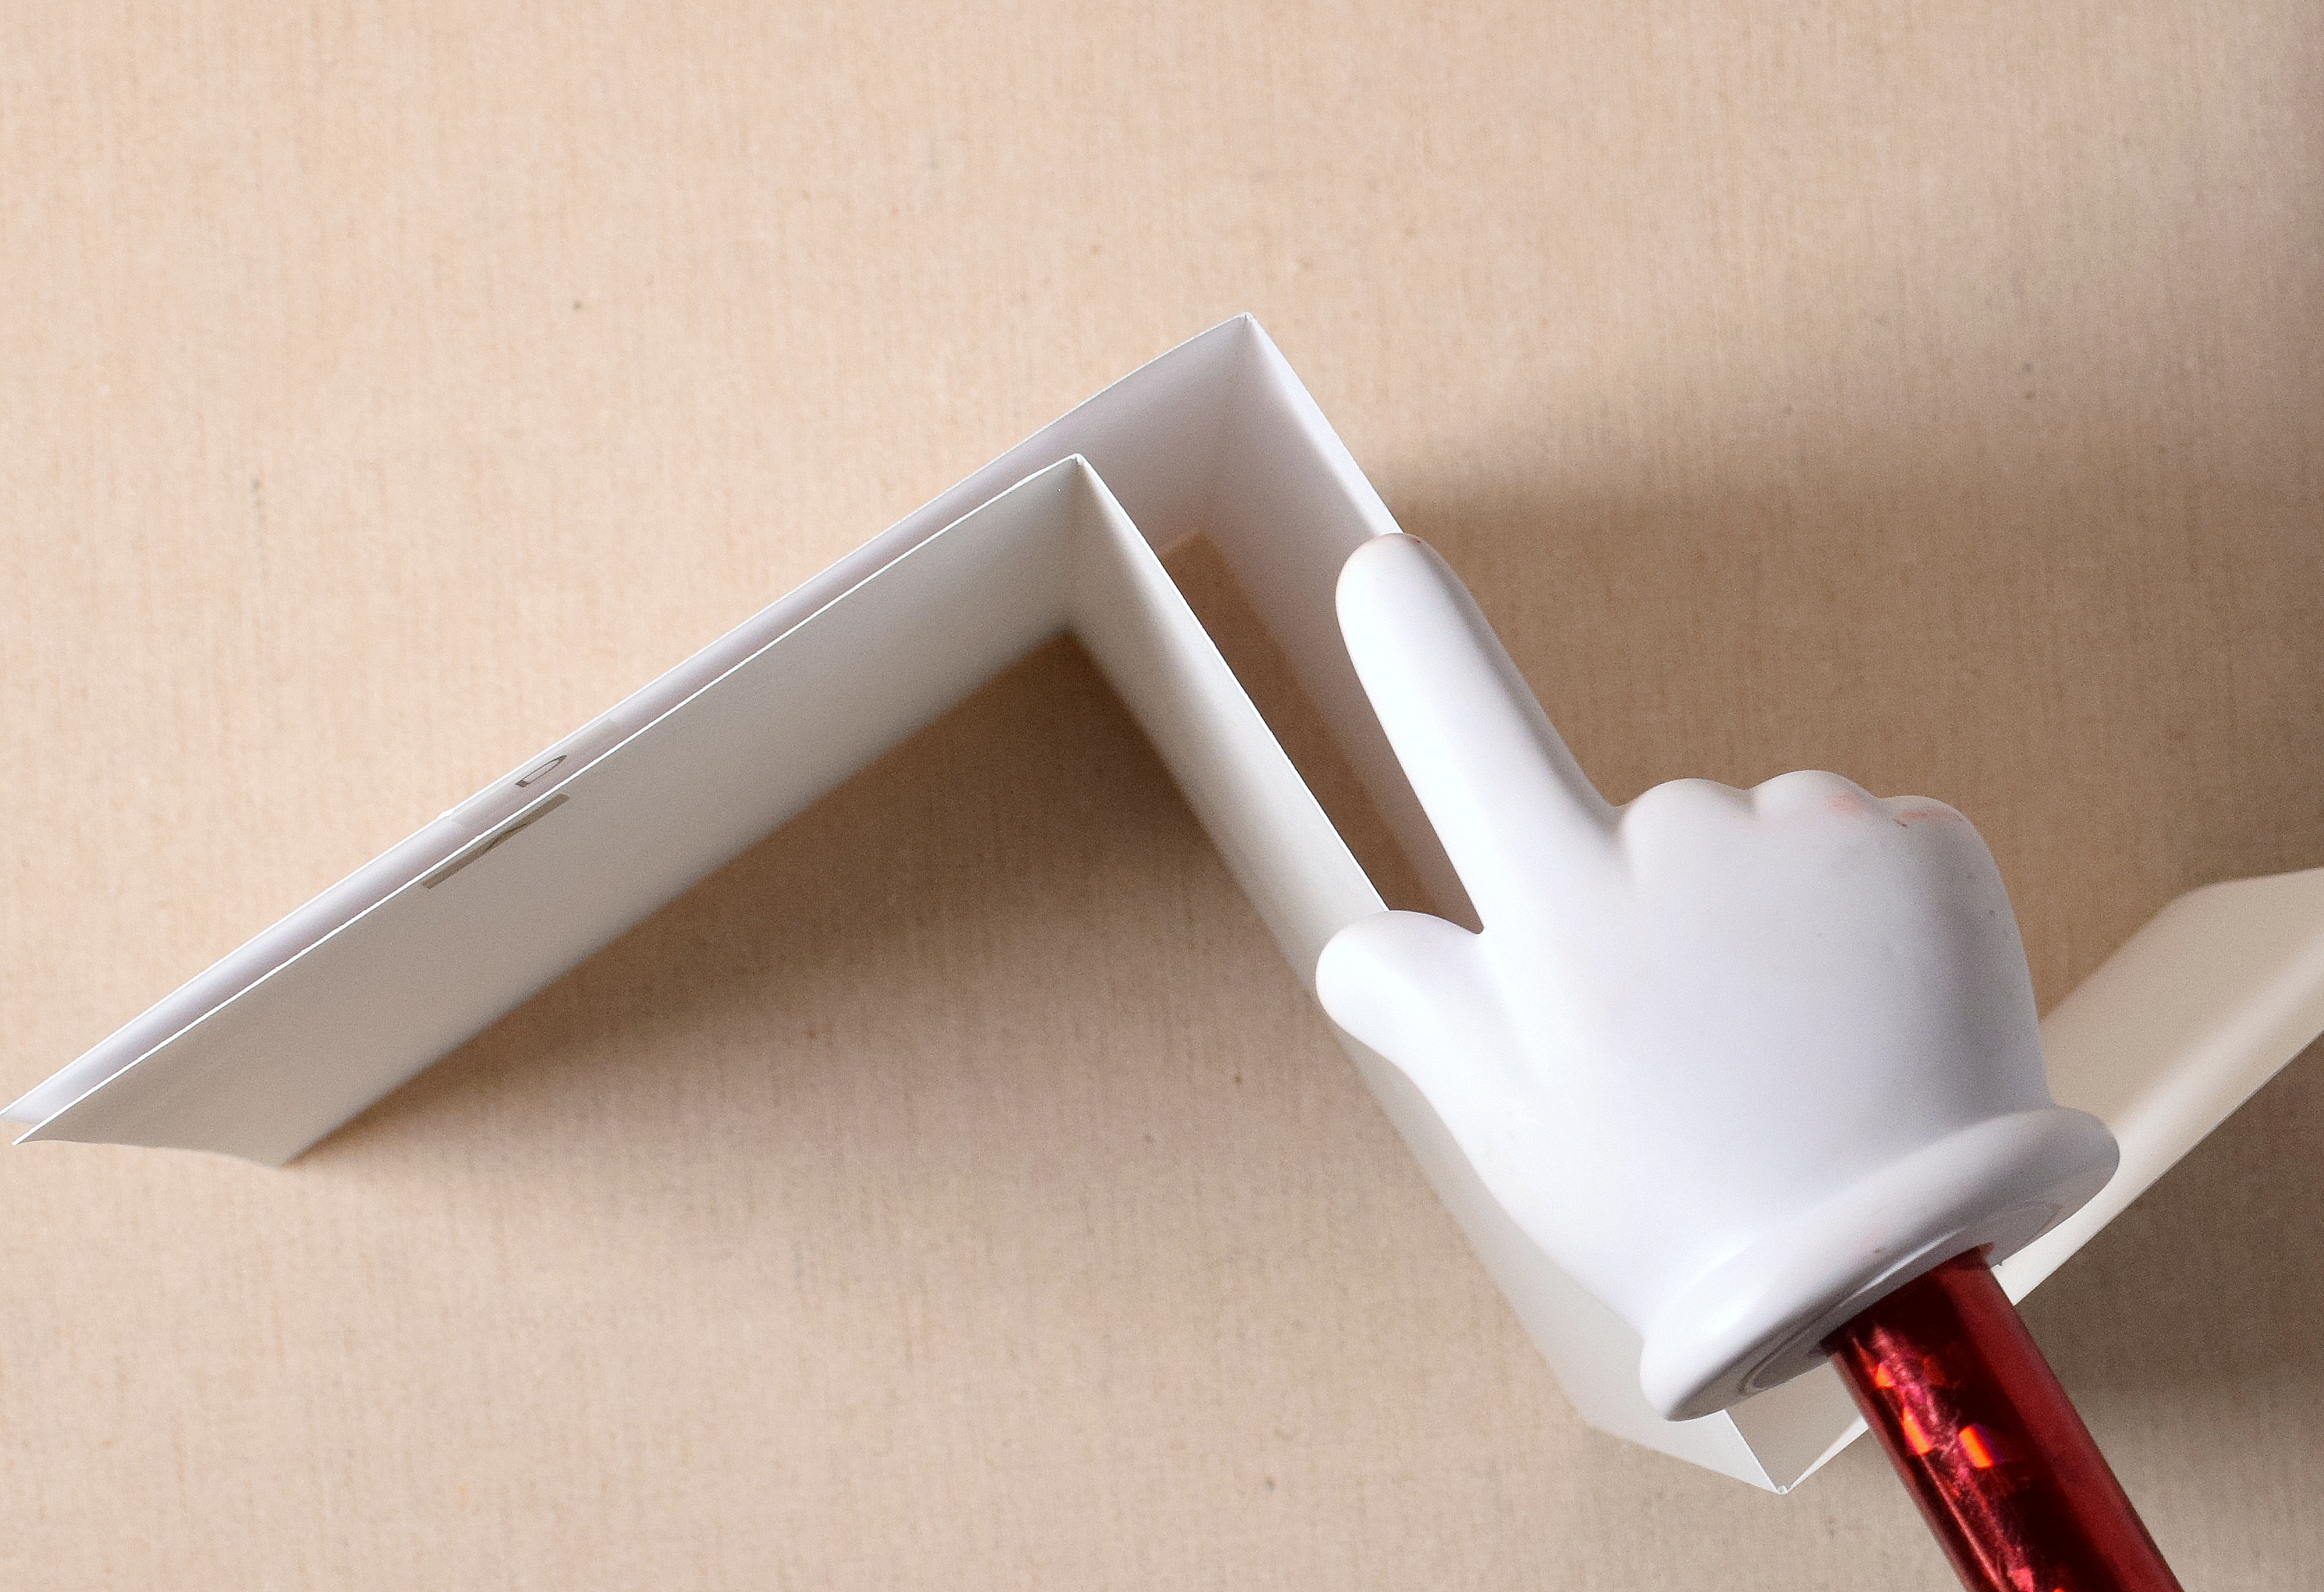
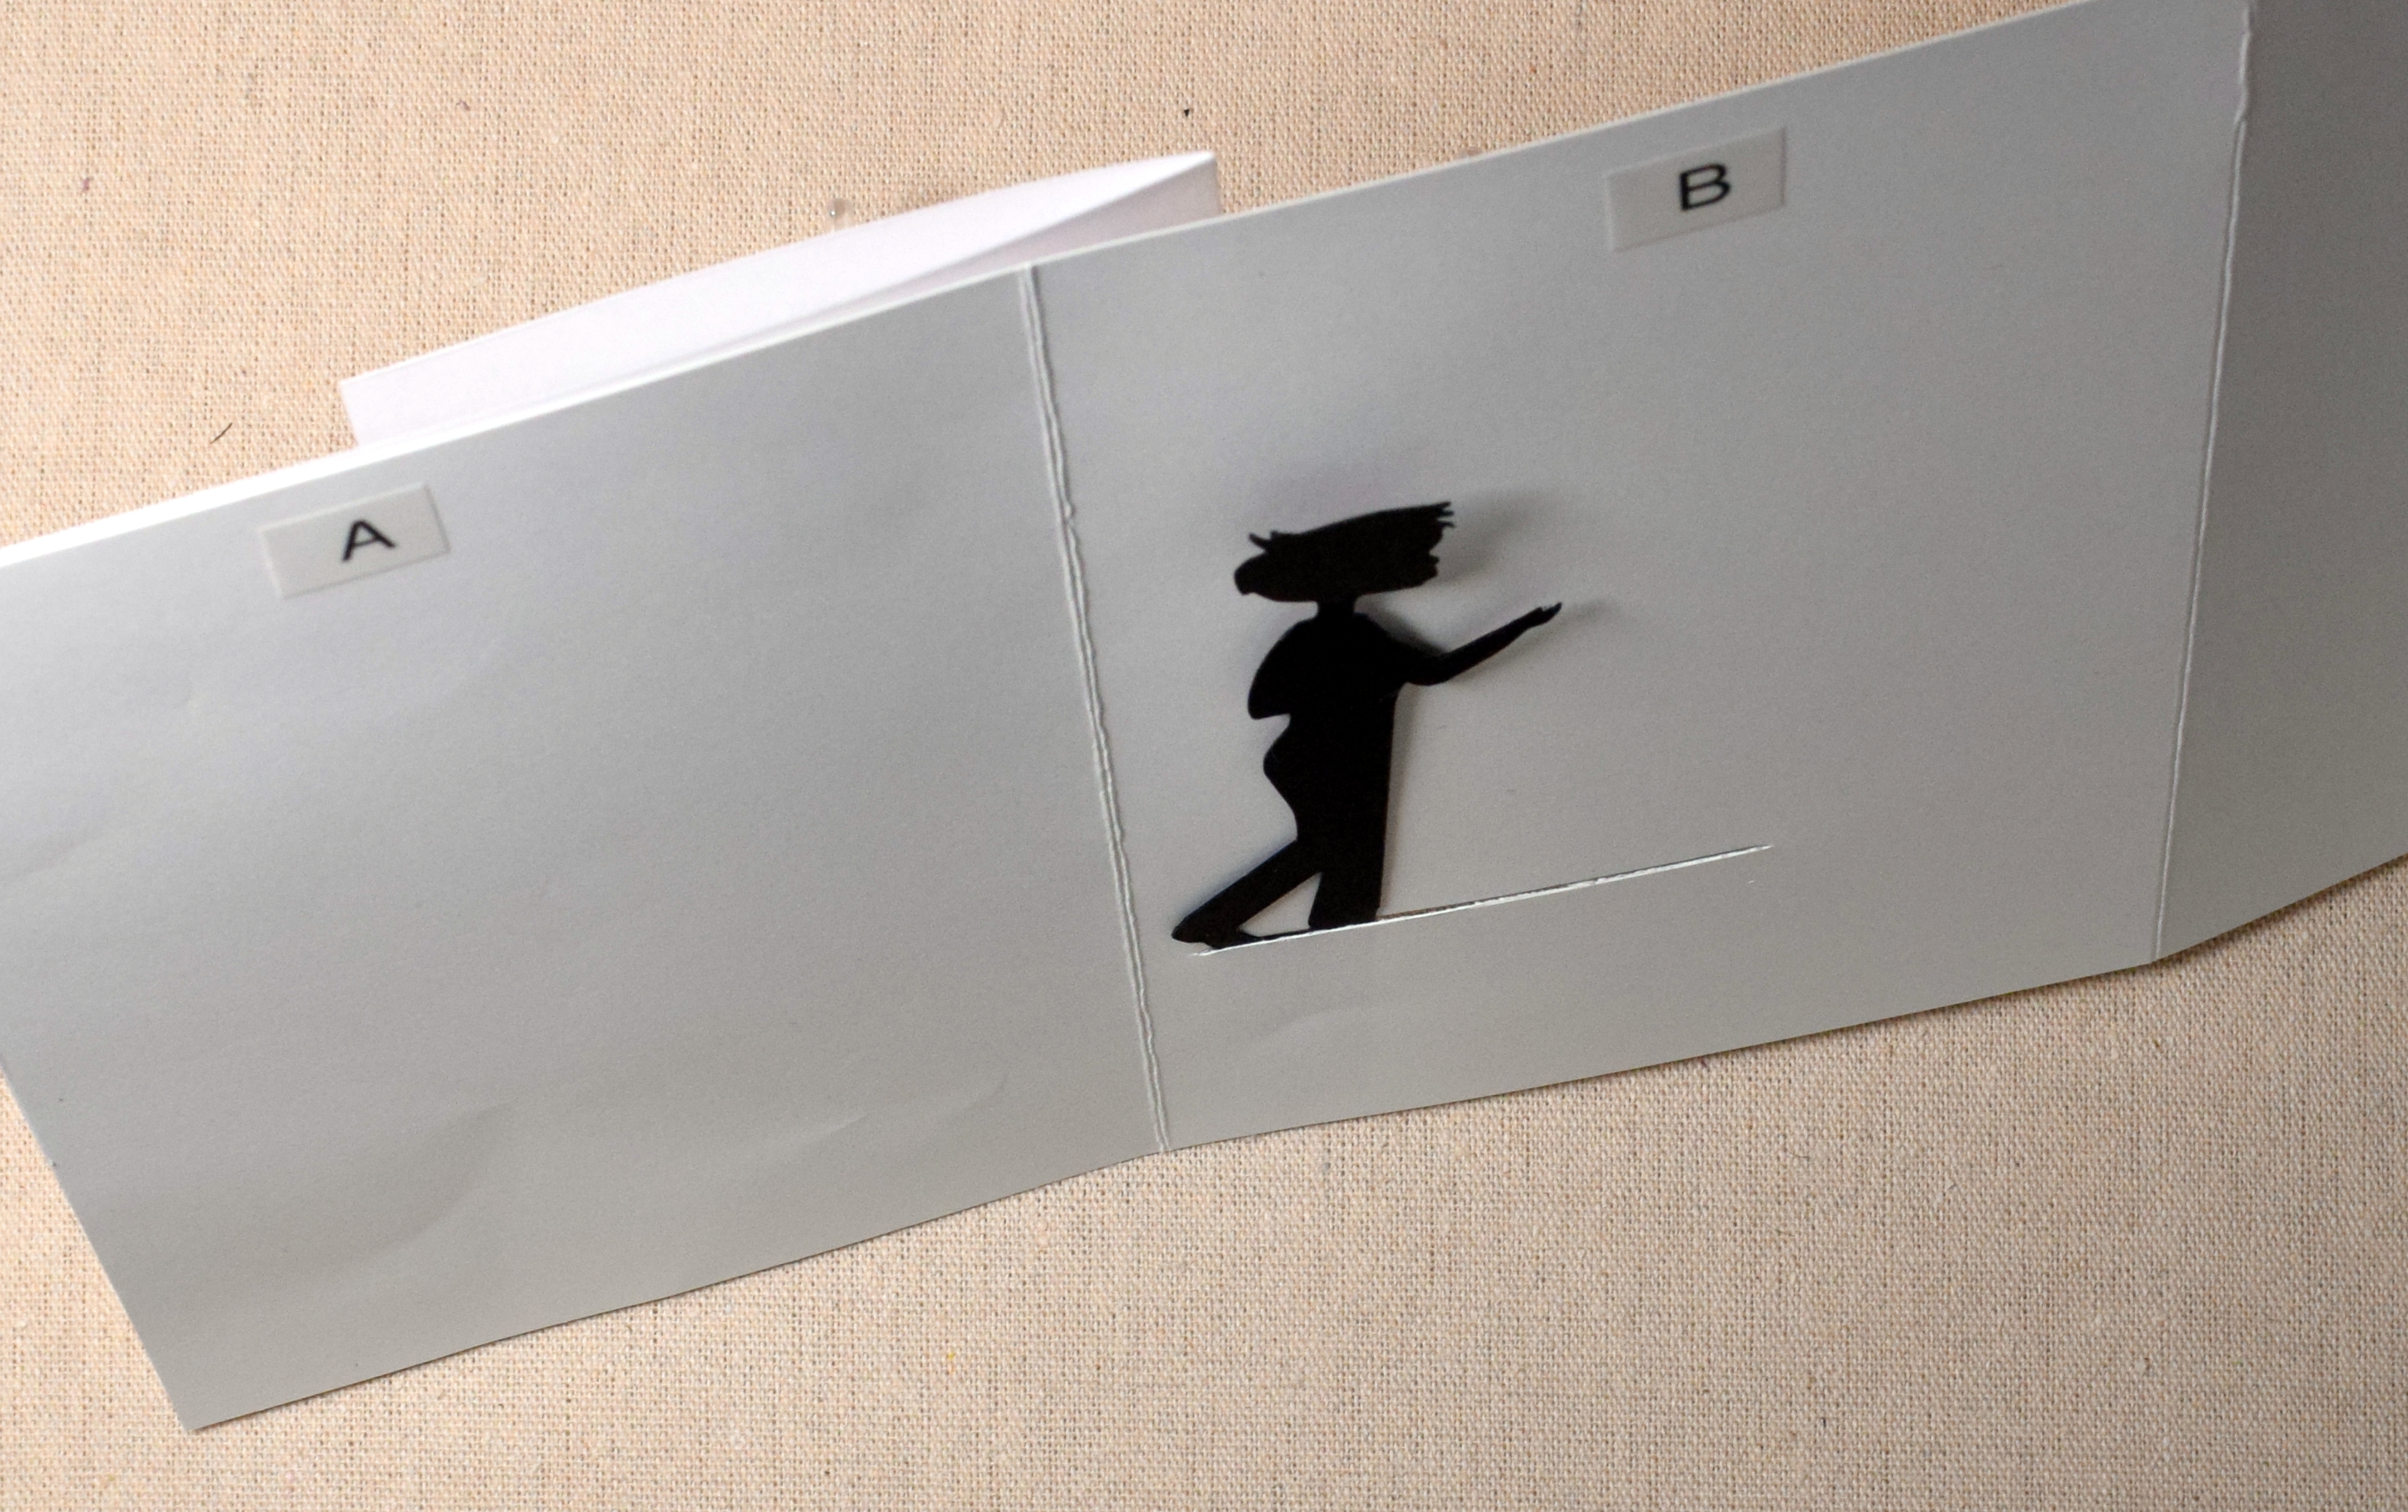
9. Put a permanent, strong, two-sided tape (like scor tape) to the BACK of the tab of your moving image. With the card facing forward (and E section still folded back and to the left), carefully slip the tab in the slit. If the tape has liner on the back, don’t remove it yet. If the sticky part is already exposed, be careful that it doesn’t stick to anything yet.
10. Position your image all the way to the left making sure it is not over the fold. It should be “standing” on the slit. (My guy looks like he is missing a foot. I did not adhere the actual die cut to the back with tab for this tutorial. He has a front foot in the actual card!)
Section E should still be flipped back and away from the slit.
11. While holding the image in place, close the card front (Section A). (View from above…)

View from flat on the table…
12. While holding the card closed to keep the image in position, turn card over and remove the backing from the adhesive on the tab.
13. With card still in position from step 12, flip panel E over to the left and push it down on the image/tab so the tab sticks to panel E.
At this point, the image should now slide to the right when you open the card and slide back to the left when you close the card.
14. Once you are sure the card and image opens/closes and moves easily, place card face down on the table and put two small strips of adhesive right by the fold on the top edge and bottom edge of the back of panel B (the one with the slit) as shown. Make sure the piece attached to the tab (with the diagonal cuts) does not touch the adhesive when the card opens.
15. Close panel C and press down on two spots where you put the adhesive strips to secure the back.
16. Decorate the front and inside of your card as desired.
x
*
Here are the detailed steps for scoring and cutting the slit (steps 3 – 5 above):
a. To create the card base, start with the 12 x 12 inch piece and cut it so you have a 12 x 7 inch panel. Hold it landscape and score at the 4 1/4 and 8 1/2 inch marks.
I added letters to my panels so you can see which sections I am referring to; you DO NOT need the letters. (If you wish to add them, use pencil (lightly) so they can be erased later.)

b. With a craft knife or trimmer, you will need to cut a 2 1/4 inch slit in the center section (B). Where you place your slit depends on the size and position of your sliding element. Place your image on section B where you’d like it to be when the card is opened, which is toward the right side. (I have a second, stationary image that I need to temporarily place on the panel as well so I can see how far over my moving image can go. Your design may or may not have this second image.) Place a light pencil mark on the panel along the right side of the tab (or note the measurement with a ruler).
c. Measure 2 1/4 inches to the left from there, and mark this spot. This is where the left side of the tab will end up when the card is closed. Adjust if needed/desired so image does not go over the left fold (the card won’t close) or over the right fold (the image will hang out of the card when the card is closed).
You can use a trimmer to create the slit (or a ruler and a craft knife).
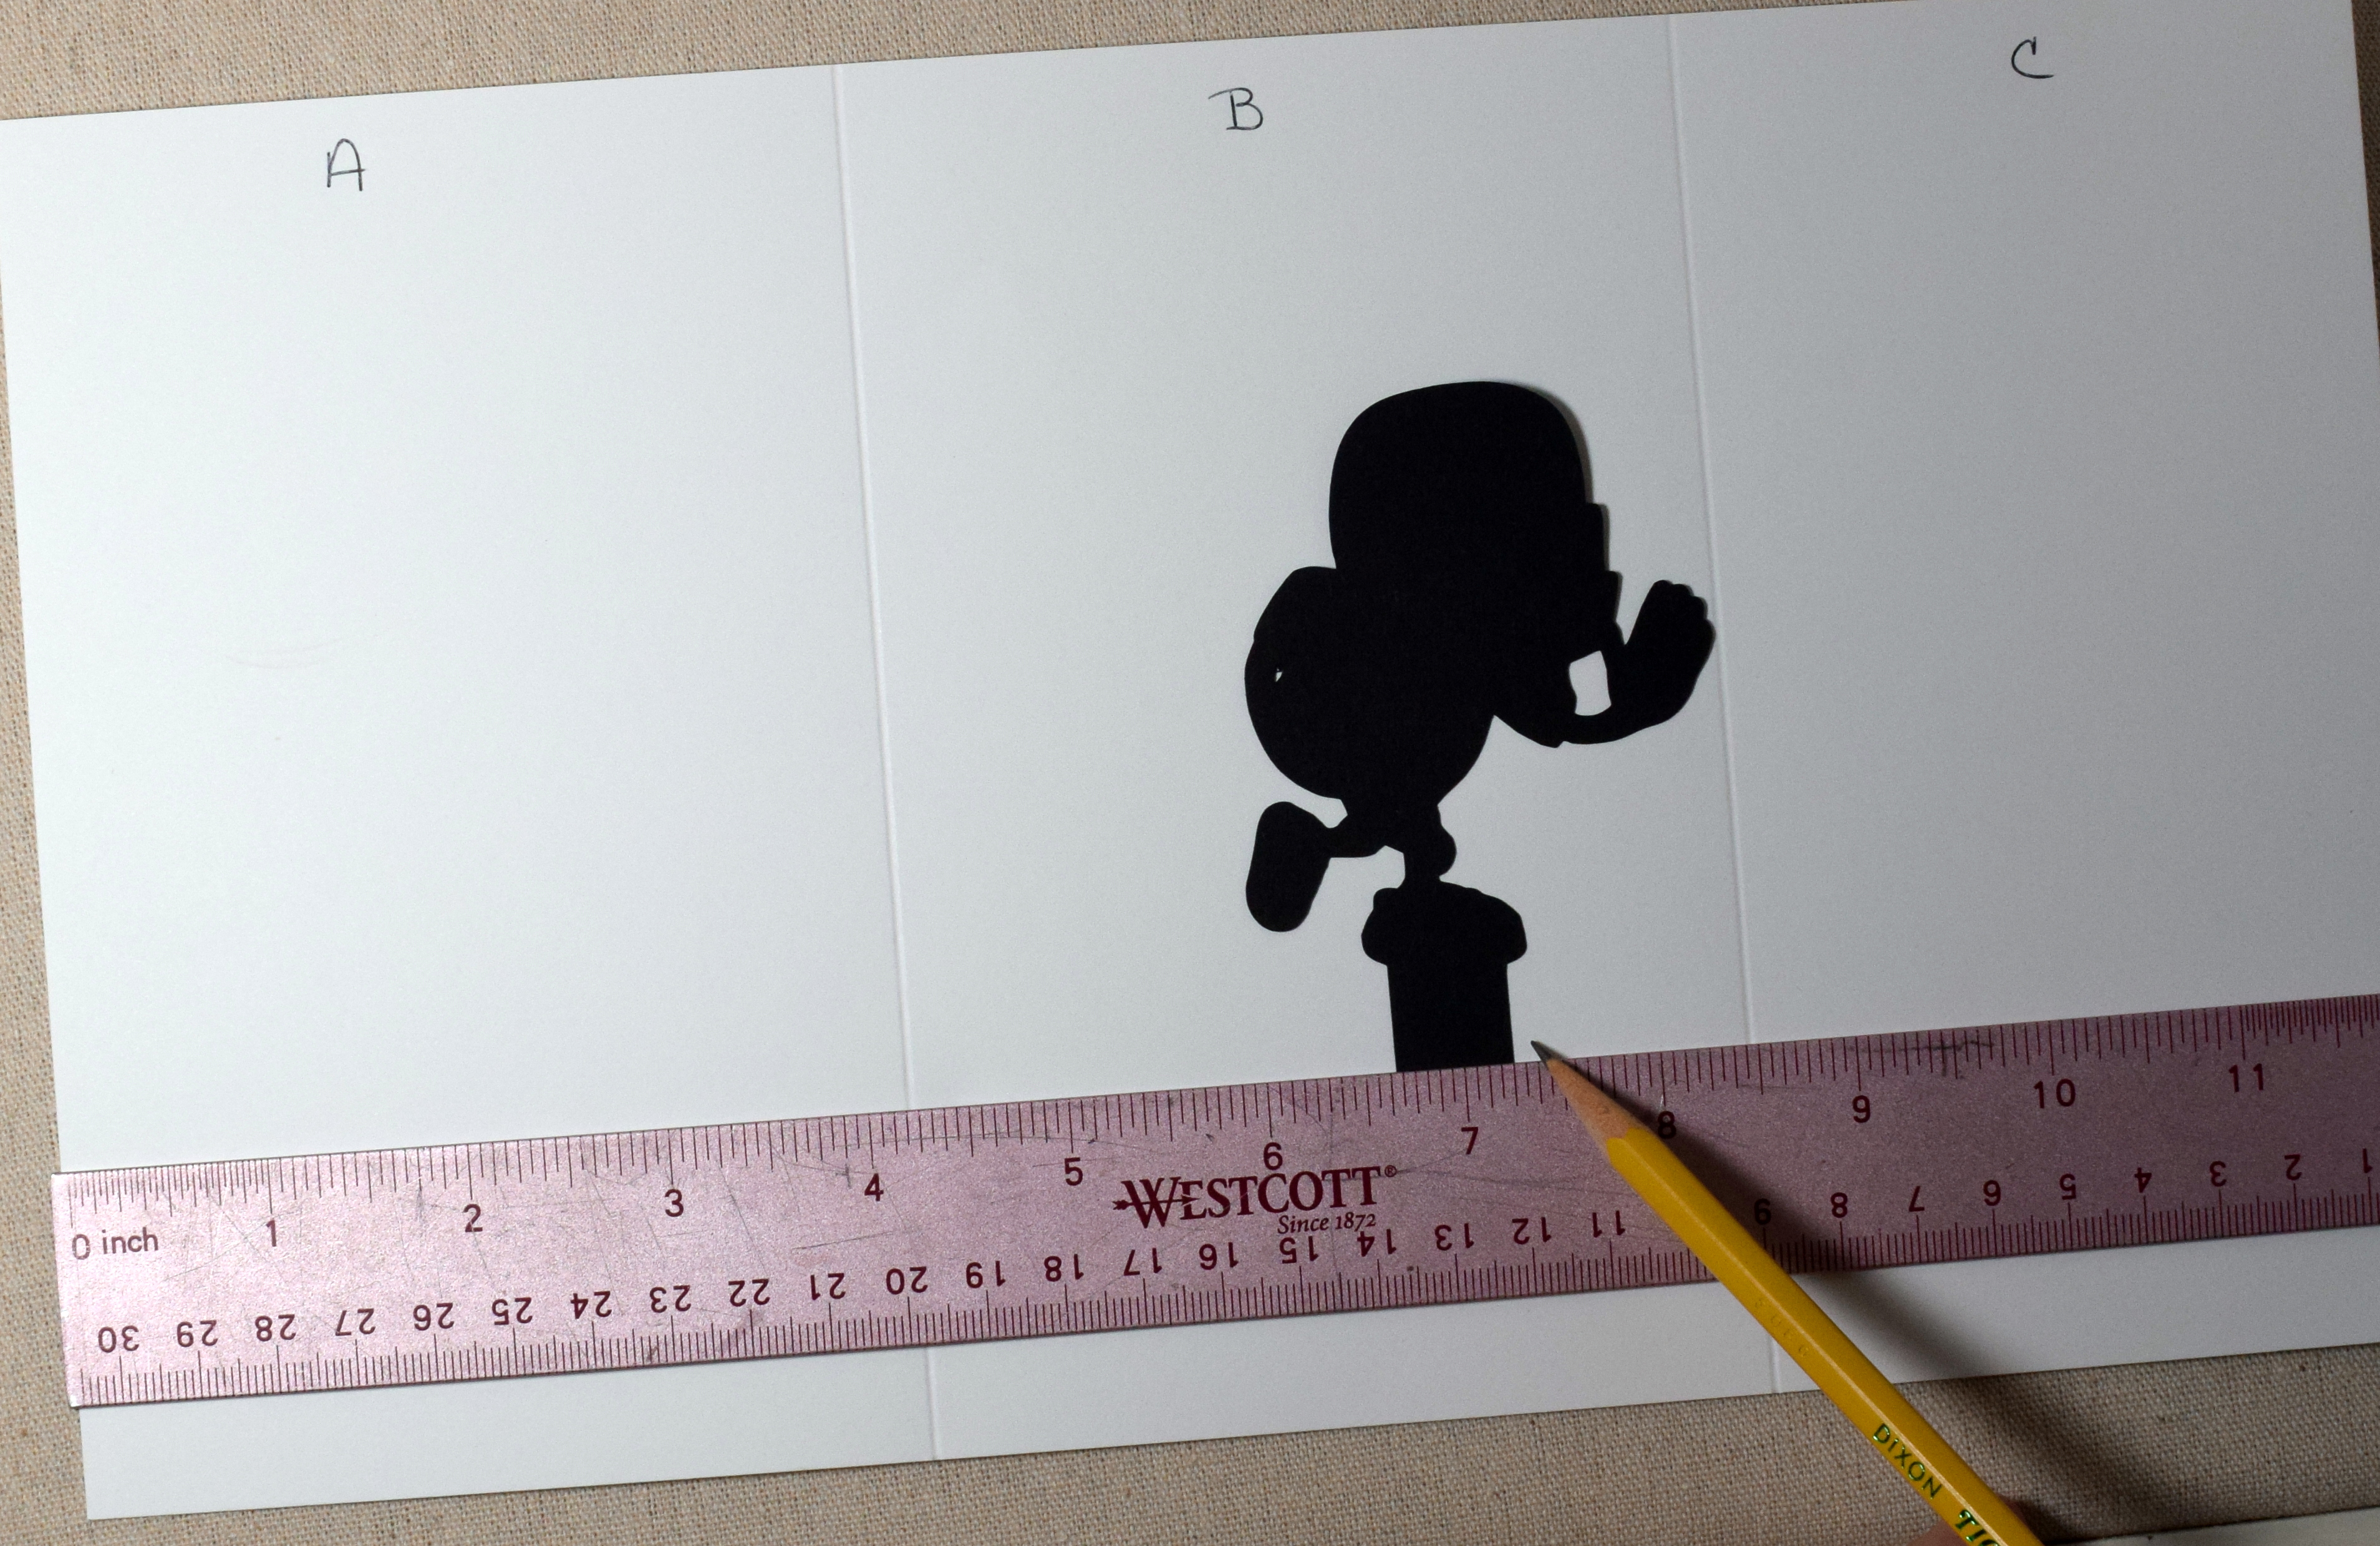
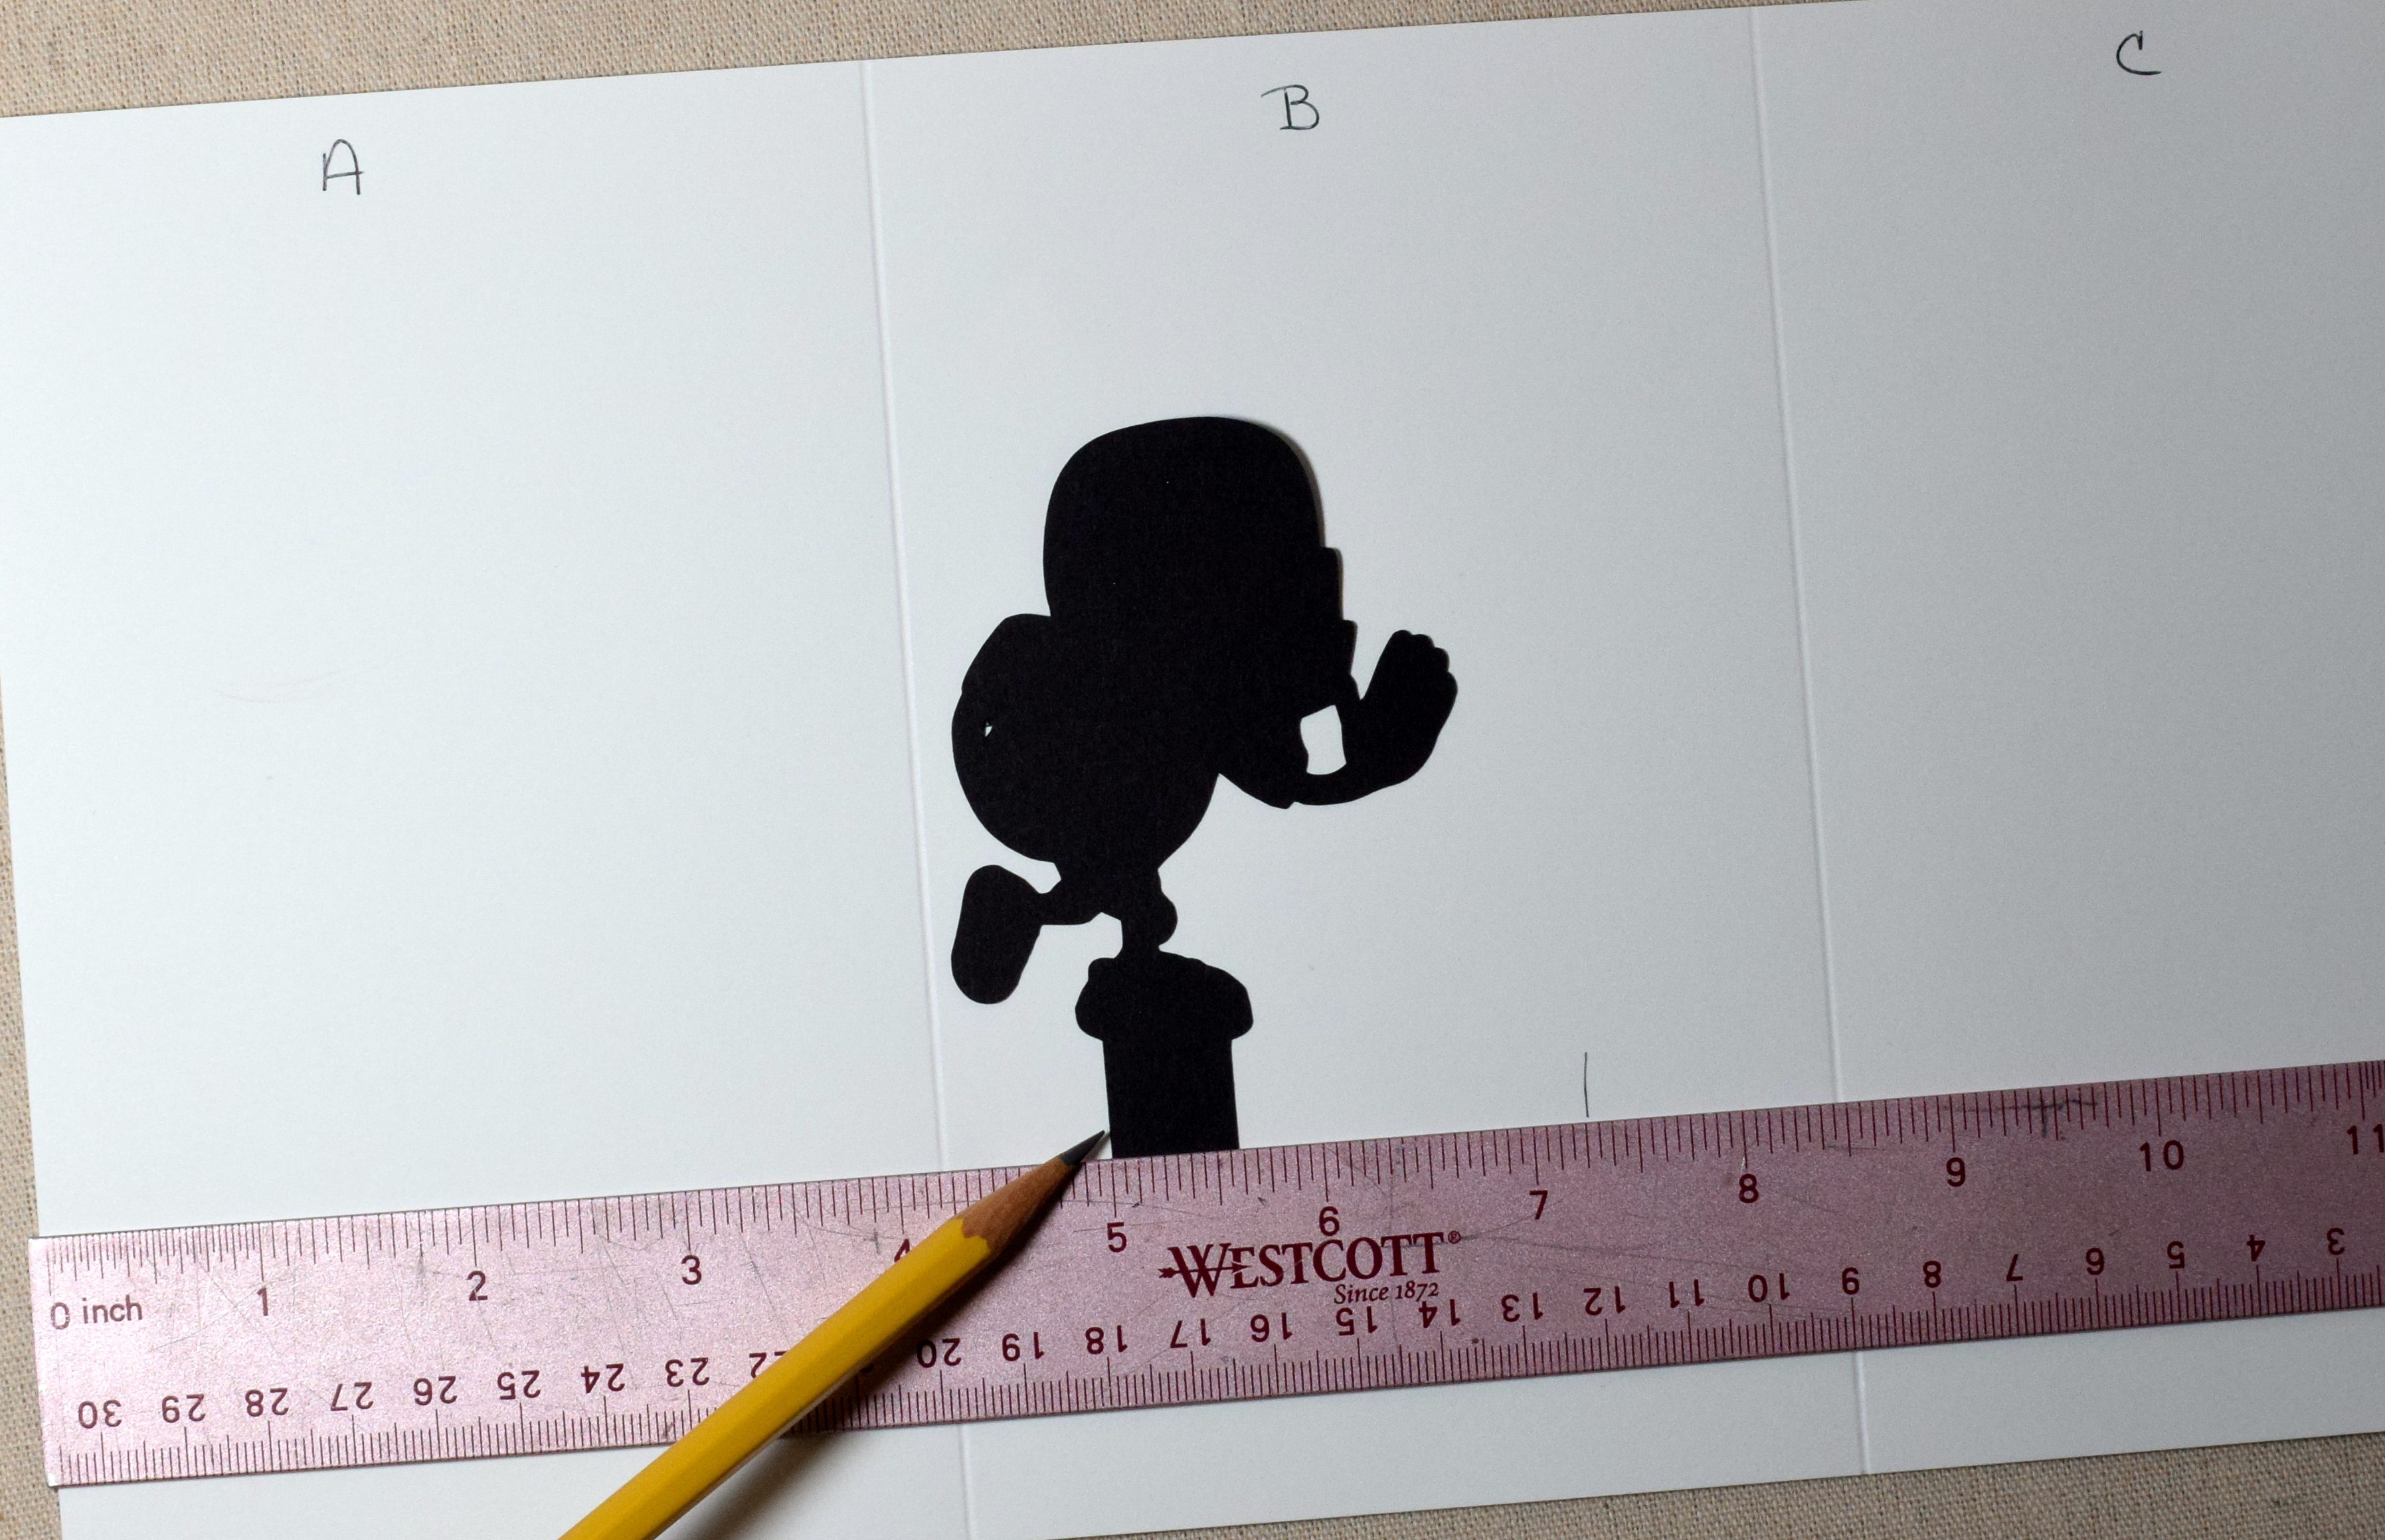
d. If you are using a trimmer, notice where your marks are from the left edge of the whole panel. My marks marks are at the 4 1/2 inch mark and the 6 3/4 inch mark.
e. The slit you create will be where the bottom of your moving image (like his feet) stands/slides. For this card, I wanted my slit 1 3/4 inches from the bottom. (You decide where you want yours to be to accommodate your card design. You won’t see the tab when the card is assembled.) Put the bottom of the card stock in your trimmer at the 1 3/4 inch mark (or wherever you decided yours would be).
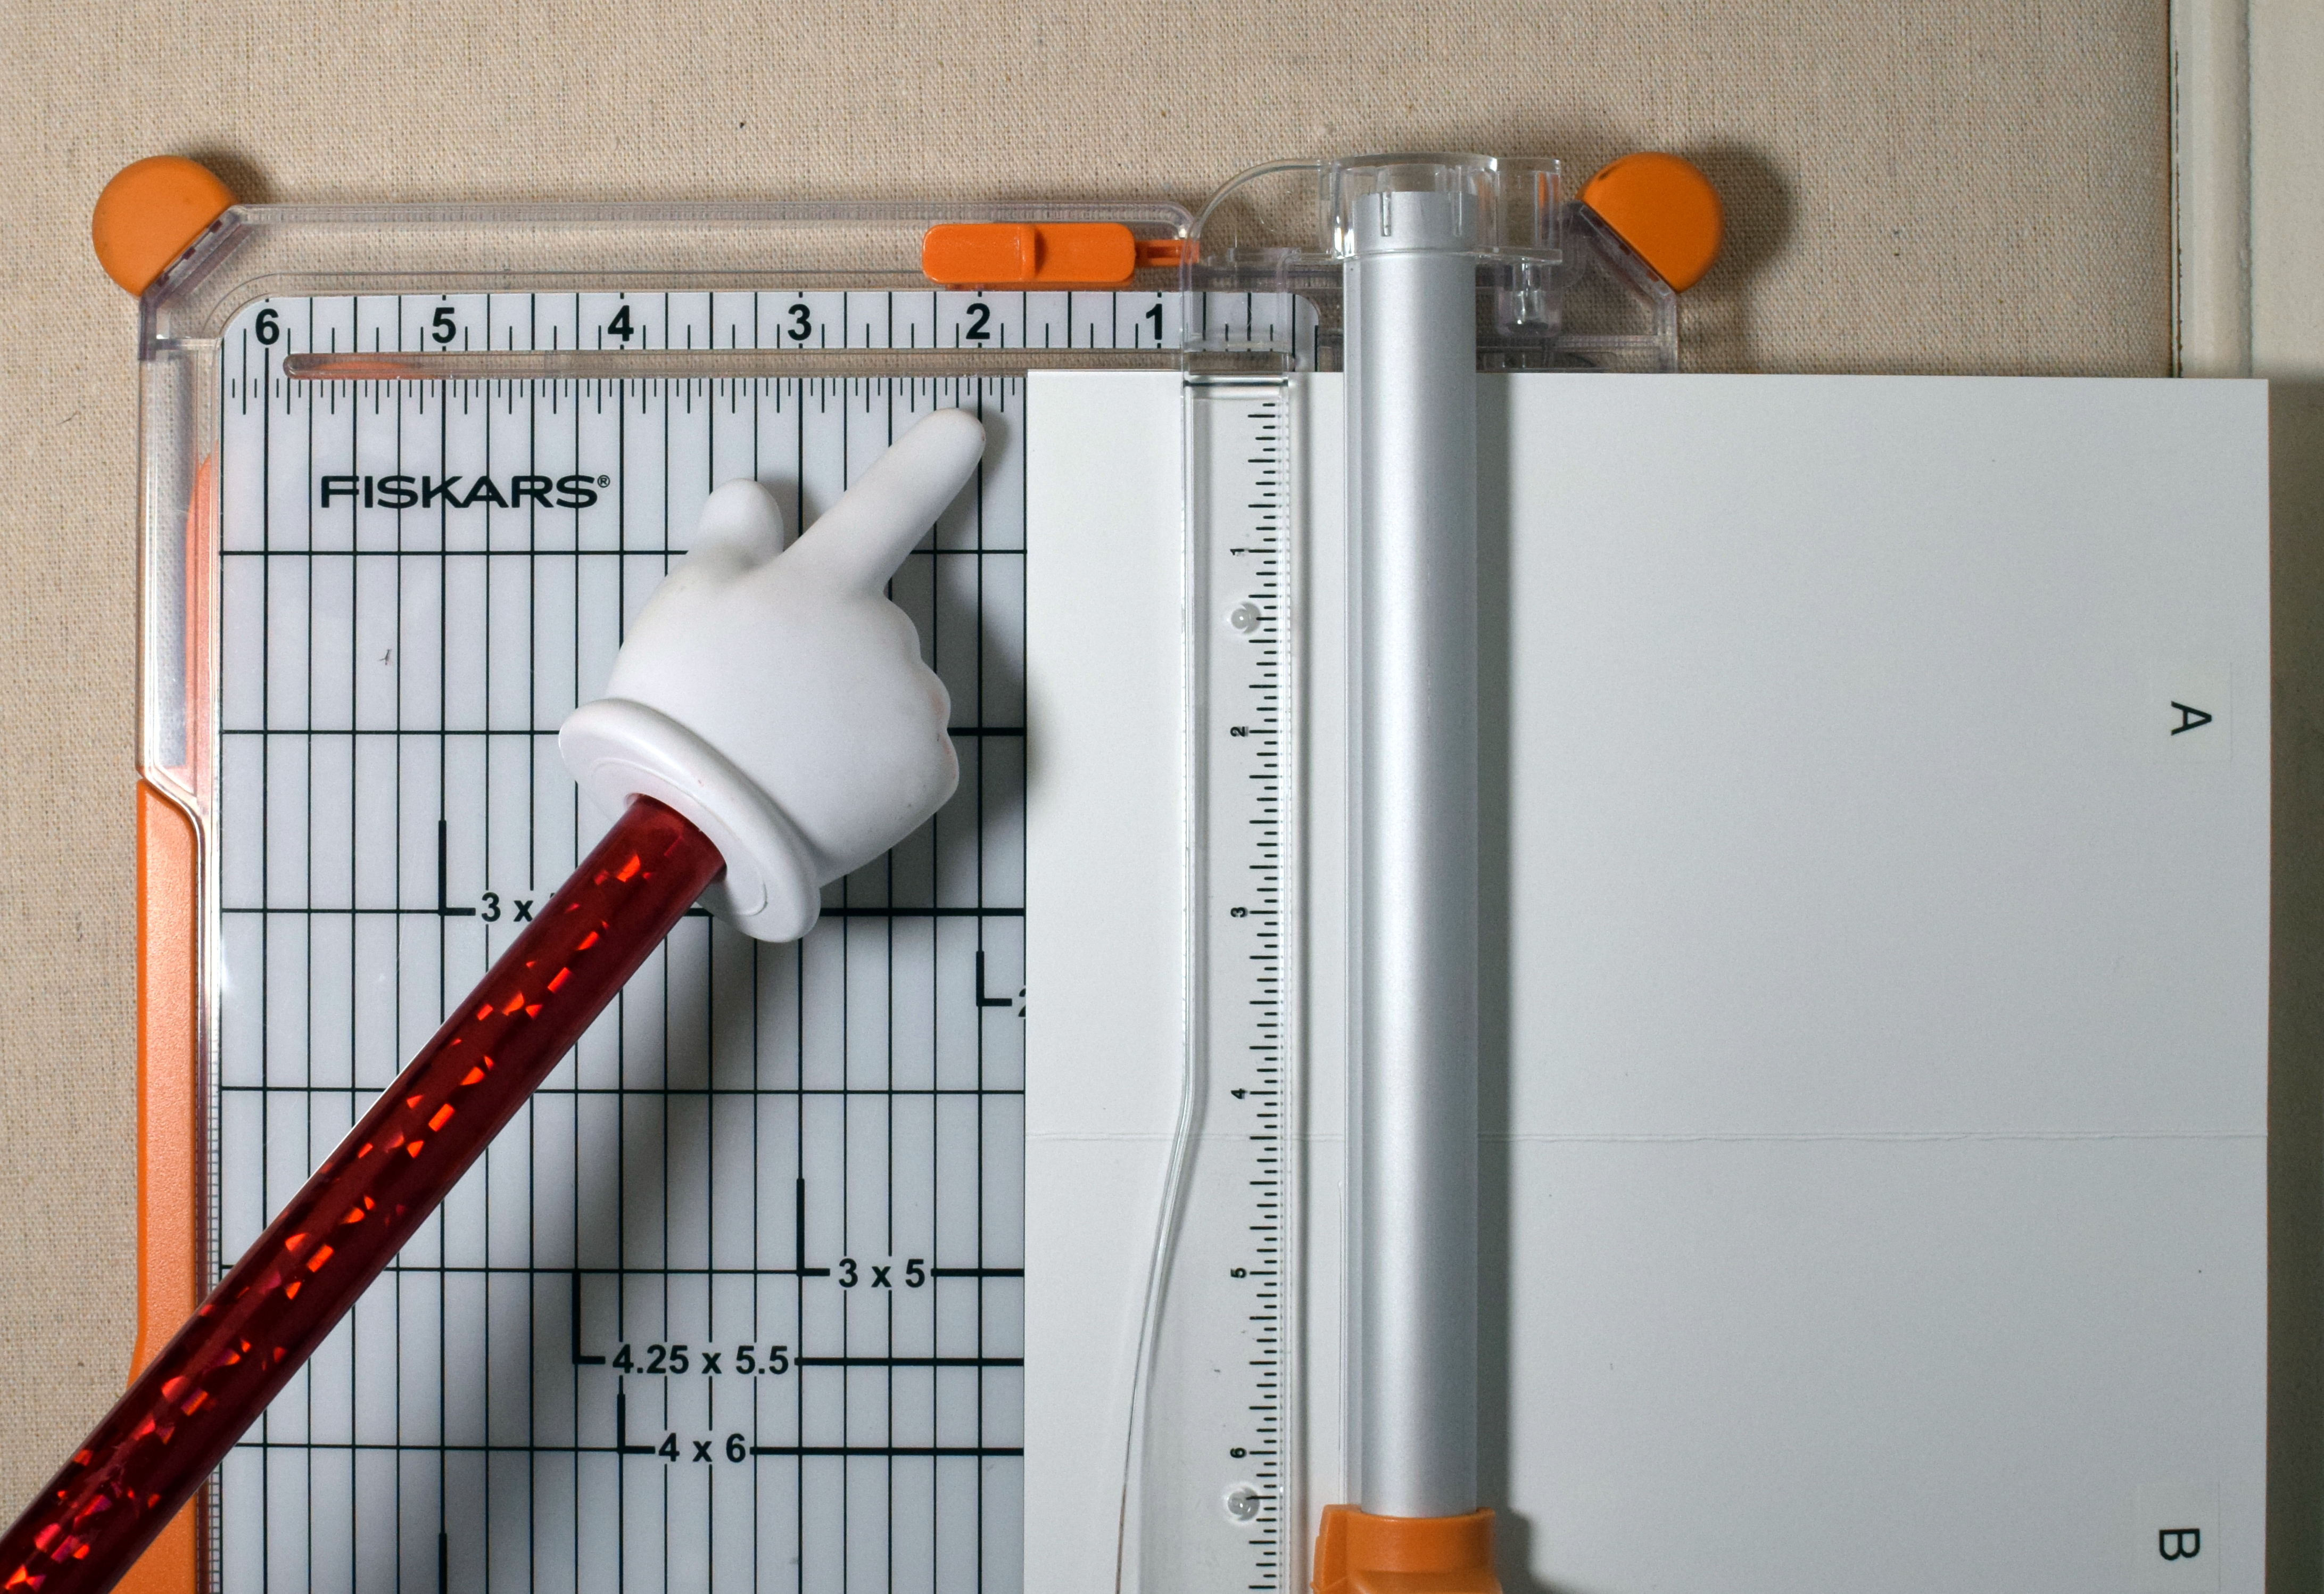
f. Lift up the blade and place it at the spot where you determined the slit will start. Mine starts at the 4 1/2 inch mark, so I placed my blade there. (My blade handle has a little arrow on the side to show where the blade is.)
g. You will drag the blade down 2 1/4 inches. My slit stops at the 6 3/4 inch mark so I will stop cutting when I get to this point.
h. Erase the pencil marks. This is what the panel should now look like. There should be a 2 1/4 inch slit in the center section of your 12 x 7 inch panel. Put your image(s) aside for later.
(The middle section is the inside of your card. If you are using a decorative piece of paper on the inside of your card that will cover the slit, attach it first and cut the slit through both layers together.)
I want to take a quick moment to show you one more example of where to place your slit using a different image. For my football player card, the image was much wider and the tab was further to the right, so my slit was in a slightly different position. When the image is placed as far right as he will be, the right side of the tab is at the 7 1/4 inch mark.
Measure 2 1/4 inches to the left, and this is where the left side of the tab will be.
You’d create the slit between these two points.
i. Take the 8 1/2 x 11 inch piece of card stock and cut it to 8 x 7 inches. Again, hold landscape and score at the 5 inch mark.
j. Trim the top and bottom of smaller section at a diagonal as shown. (Start on edge opposite the fold about 1/2 inch from the top and from the bottom; cut toward the fold and to the top or bottom edges ending at the fold). These cuts don’t have to be perfect; you can use scissors and cut it free-hand, or you can use your trimmer.

From here, you can go to step 6 above.
Thanks for checking out my tutorial!


That card is so amazing and I love that the couple draw close together to embrace or kiss. It sure looks like a lot of work to make though. I am not sure I would have the patience. My style is quick and easy so guess I am what you call a lazy card maker.
LikeLike
Pingback: Football Slider Birthday Card | I Played With Paper Today!
Pingback: Perfect Together Anniversary Slider Card | I Played With Paper Today!
Pingback: Graduation Slider Card | I Played With Paper Today!
Pingback: Build a Snowman – Birthday Challenge #5 | I Played With Paper Today!