Baseball Birthday Shutter Card

Baseball Birthday Shutter Card

wDSC_7260.jpg

My son has a fall birthday, and he’s really into baseball (he will be working for the Milwaukee Brewers’ after he graduates in May), so I made this card for him.  The Modsquad Challenge this week is “Fall Fest” where we are to create whatever comes to our minds when we think of fall.  I loved the rich, fall colors of these papers, and in my house, playoff baseball is definitely a fall thing!

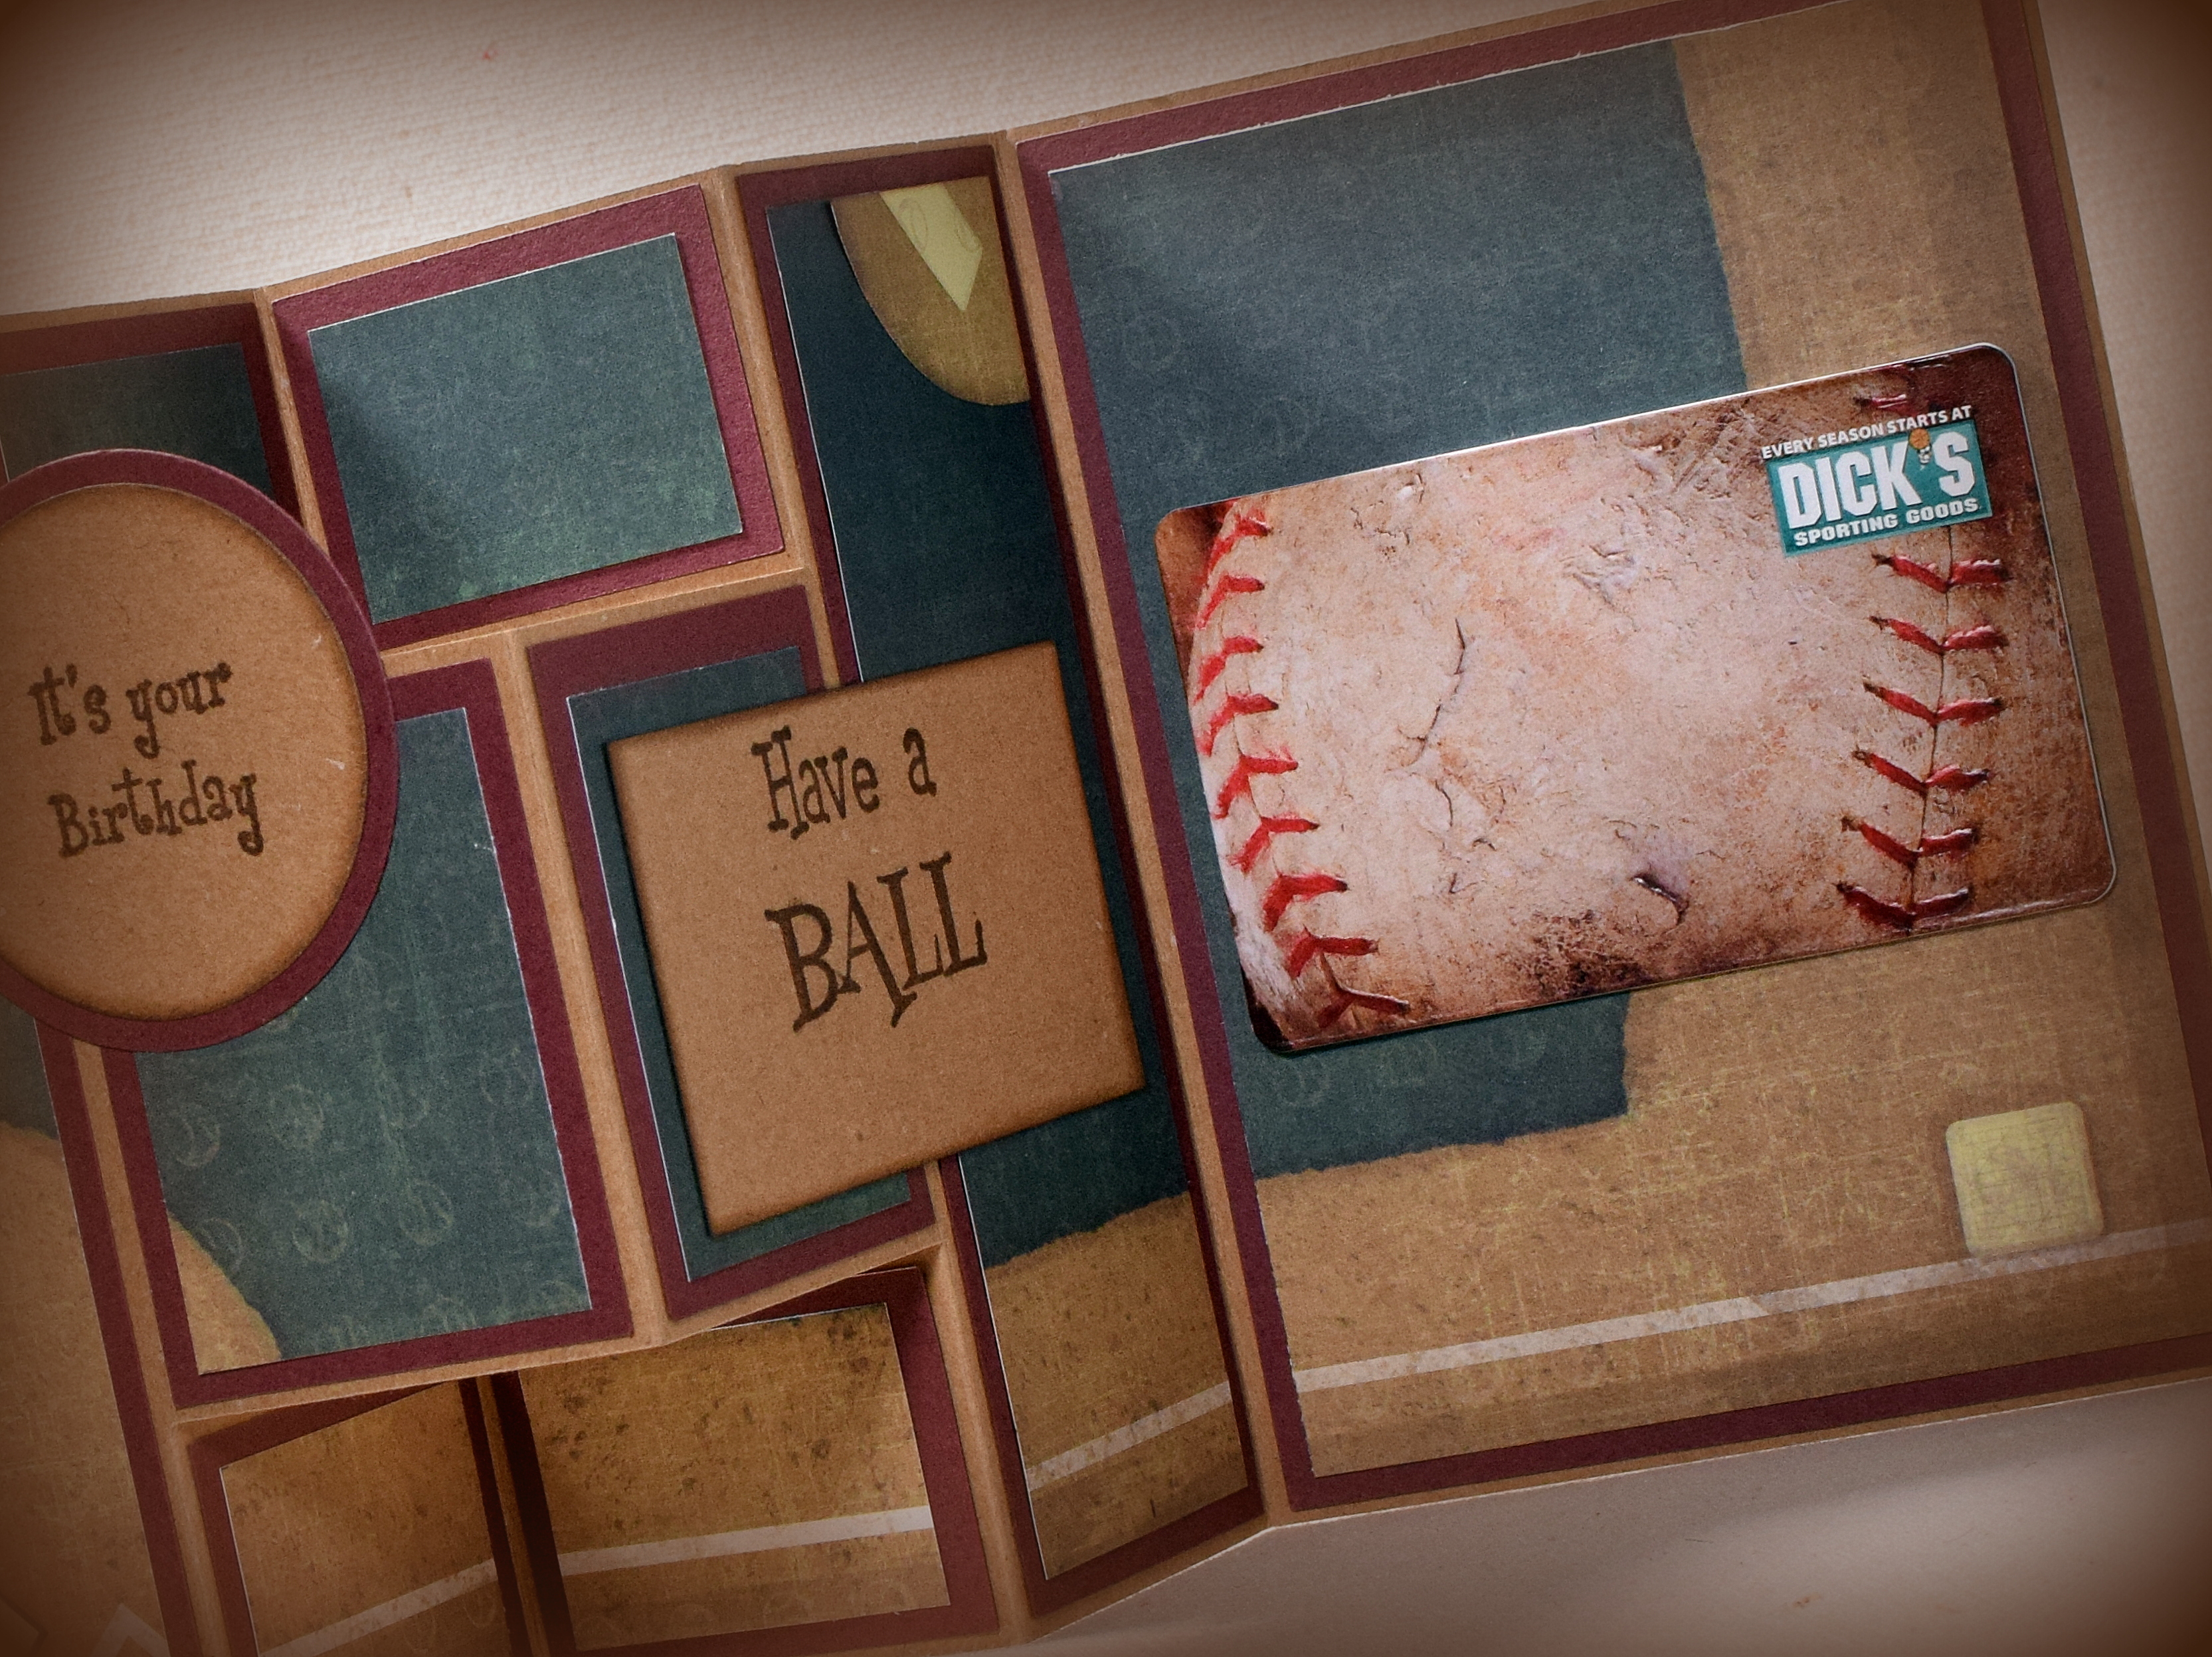
This shutter card features paper called “Baseball/Softball Diamond” from a kit called “Rookie of the Year” by Karen Foster.

karen foster baseball softball diamond paper darker

I matted each of the printed pieces with some open stock card stock called “Merlot” that I purchased at AC Moore.  (There is no brand name on the label.)  The card base is Recollections Kraft.

The circle pieces were cut with dies from the “Standard Circles Large and Small” sets from Spellbinders.  The stamps are from Crackerbox Palace (here and here) stamped with Tim Holtz Walnut Stain distress ink.  I inked the edges of the greeting and sentiment panels with this ink as well.

I left a little space under the “have a ball” stamp for a signature.  The space on the back panel that does not show when the card is closed is big enough to hide a gift card or monetary gift (attached with removable adhesive) if desired.

     wwDSC_7276 cropped

zzDSC_7273 sharper

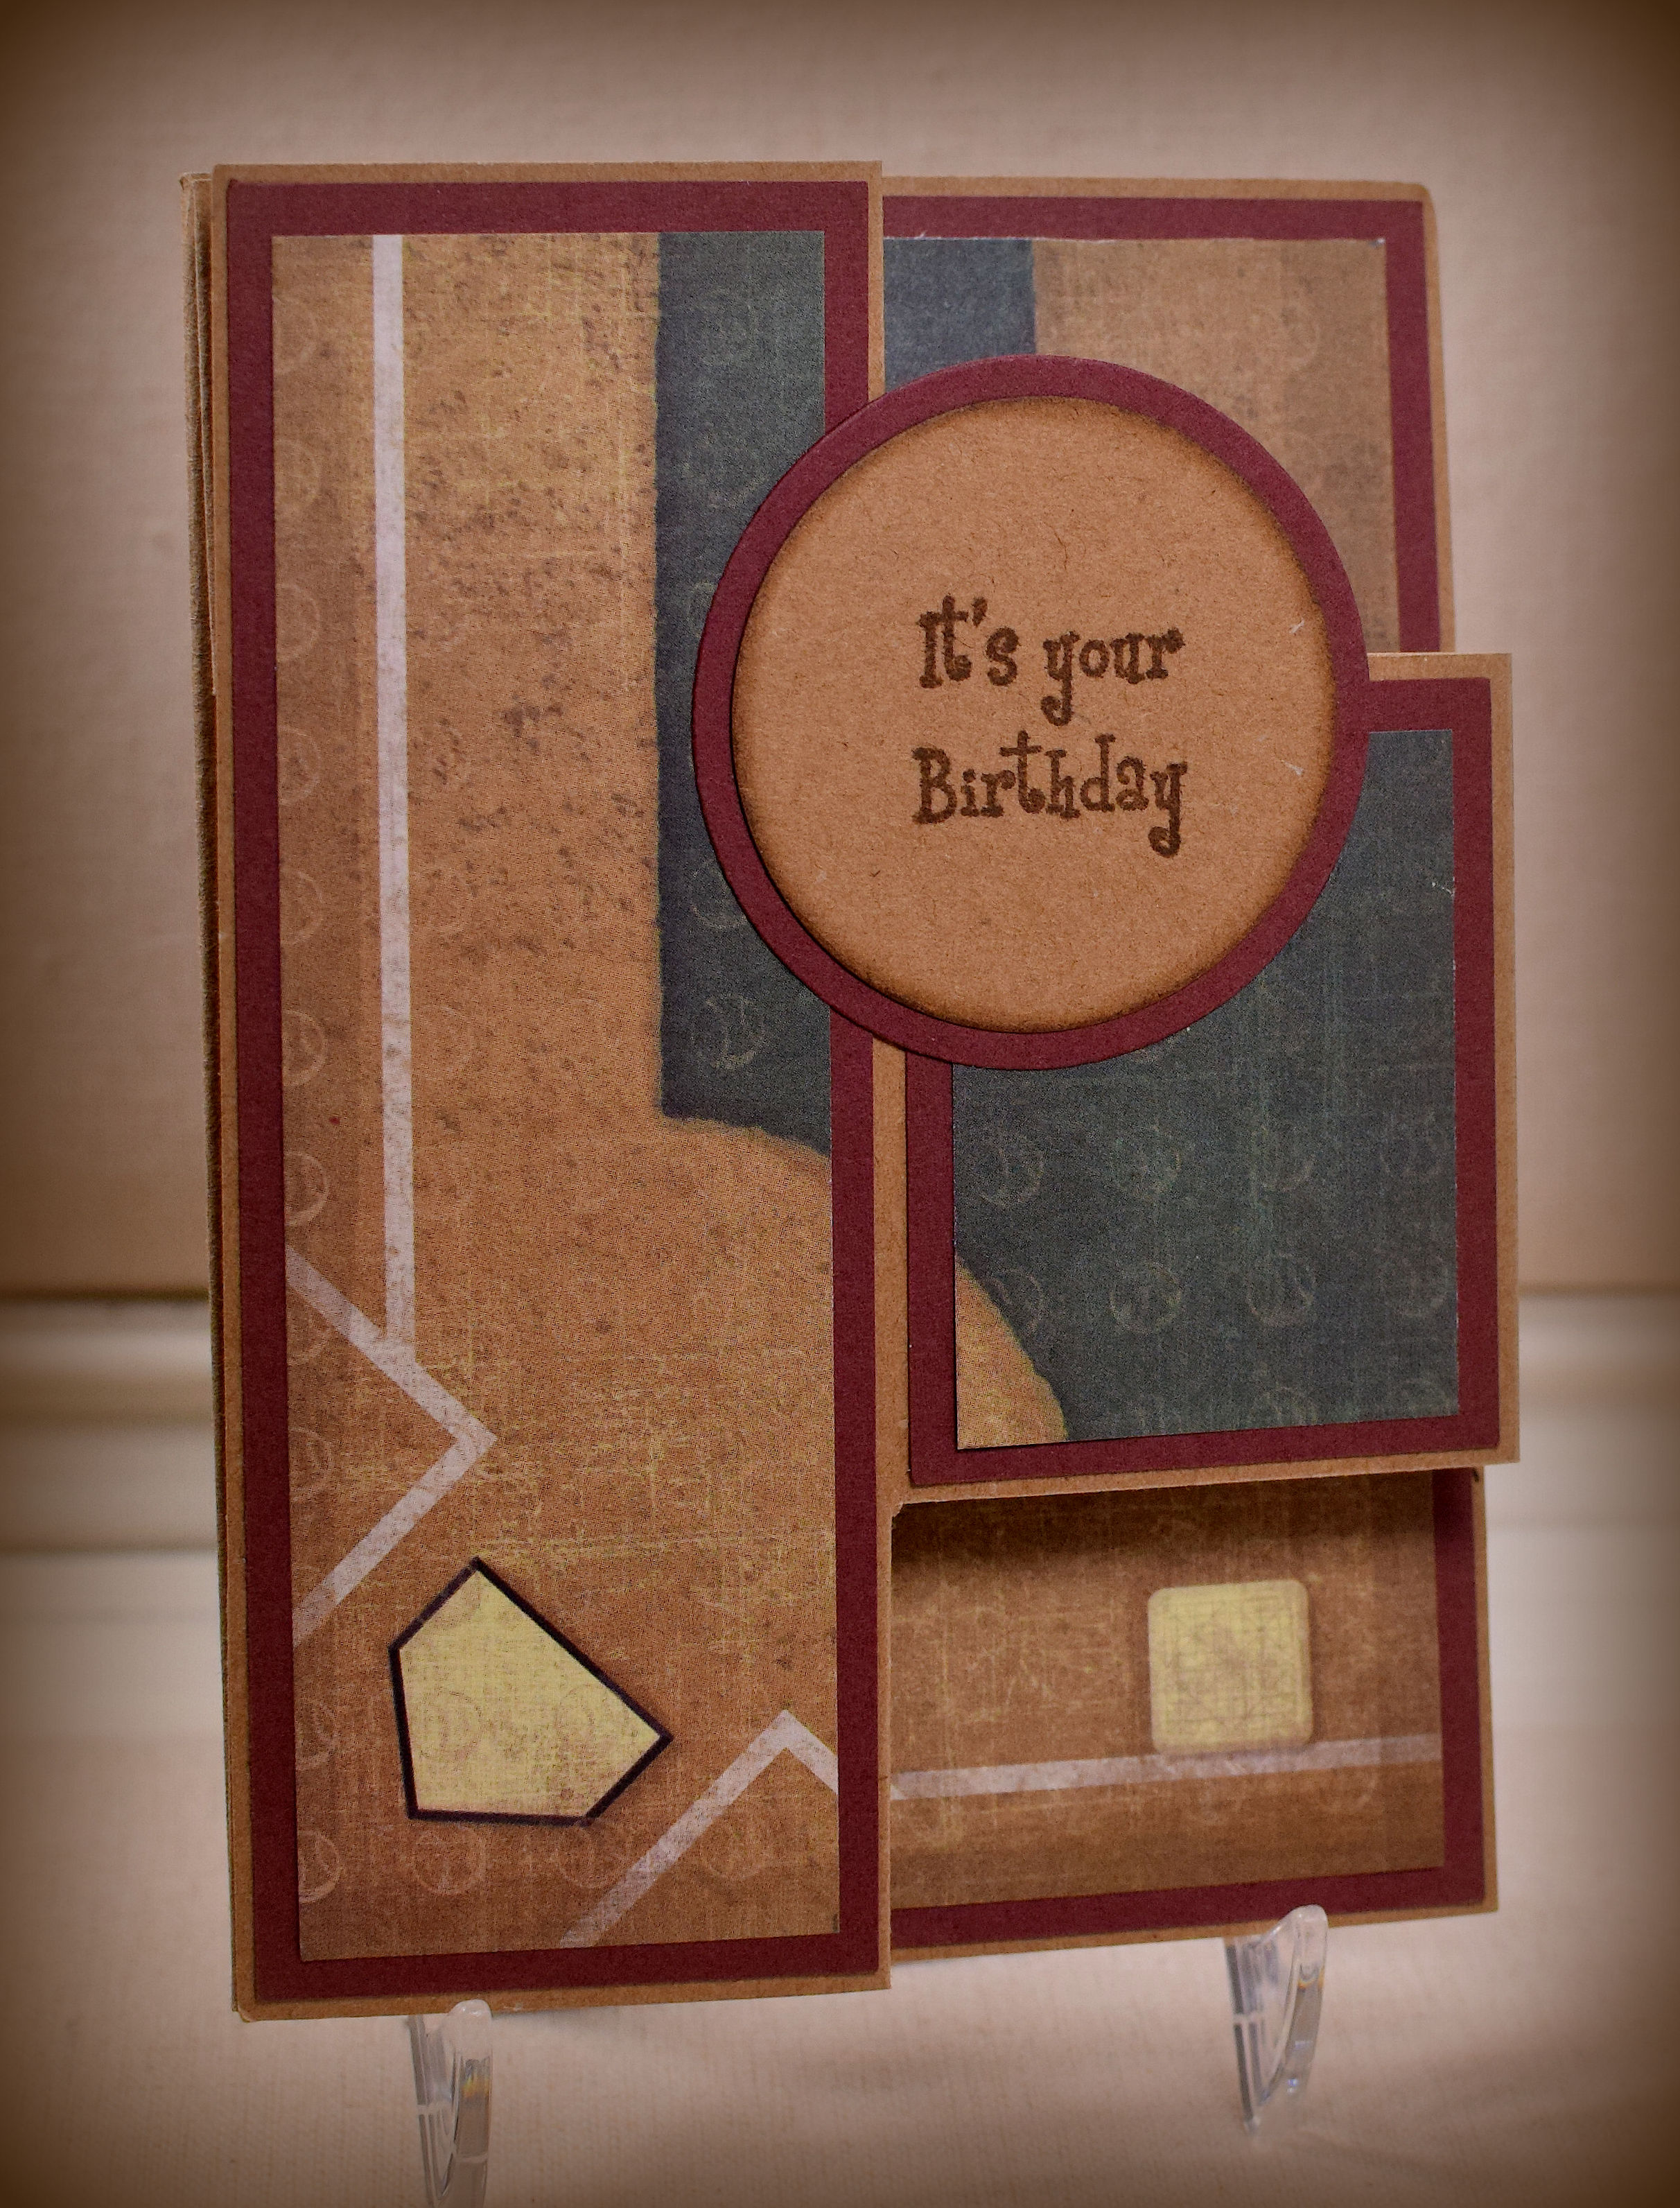
This card is 4 1/4 x 5 1/2 inches when folded.

Here is the template for making the card base:

Shutter Card Template

(HERE is a video tutorial on how to make this type of shutter card.)

Thanks for checking out my card project!

This content uses referral links as described in the disclosure policy on my sidebar.

Perfect Together Anniversary Slider Card

Perfect Together Anniversary Slider Card

wwDSC_6942.jpg


This interactive card has a cute couple inside that comes together for a kiss and hug when the card is opened  I made this card for my husband for our 30th wedding anniversary.

Perfect Together GIF

I had seen a card with a similar sliding element online a while ago and searched high and low for a video tutorial on how to make one.  I finally found one, but there seemed to be an error with the measurements because the pieces did not fit properly and the card would not open all the way.  (Maybe it was me!)  Anyway, I took the general concepts from the video and got to work trying to figure it out.  After going through quite a bit of paper, I came up with something that finally worked for me.  (HERE is a tutorial on how I made mine.)

The man and woman die cuts were adapted from an image I found online that I “traced” and cut with my Silhouette software and die cutting machine.  I cut several of each and layered them to make them thicker.

The black die cut frame on the card front was made with a silhouette file called “you and me” by Rhonna Farrer (design id #173722) that I purchased in the Silhouette store.  The file contains the words, and I sized and welded it to the frame I created.  The Love Word paper is by The Paper Studio.  I covered it with a piece of vellum so it wasn’t so dark and busy behind my die cut frame.  The “perfect together” on the inside was also created and cut with my silhouette.

The anniversary stamp was from the “Lacy Borders” set (retired?) from Gina K Designs.

wDSC_7077

Thanks for checking out my card project!

This content uses referral links as described in the disclosure policy on my sidebar.

Bundle of Boy Baby Card

Bundle of Boy Baby Card

wxDSC_6886

The cute stamps on this card are from the “Baby Talk” set (retired?) from Stampin’ Up.  I used Gina K In the Navy ink for all the images.  The greeting and carriage with the baseball were stamped first on the white card stock.  Then the carriage was stamped again on a piece of the printed paper.  Just the top and wheels were cut out, and these pieces were adhered to the white stamped panel adding the matching color/pattern to the image without needing to worry about cutting the thin lines.  I stamped the baseball on a scrap of white with Gina K Cherry Red ink and cut this out just inside the outer red edge so that only the stitching on a plain piece of white was left.  When it was adhered to the original stamped image on the main white panel, you could see the blue outline with the red stitching.

The printed paper was from the “Special Delivery” paper pad by Pebbles along with a piece of “Blue Stripe Paper” by Colorbok.  Gina K Blue Denim card stock was also used.

A die from the “Stitched Square Dies” set by Gina Marie Designs was used on the solid mat.

I needed two little boy cards and didn’t have enough of the printed paper used on the first card, so I made a second card with different paper.  I had used my MISTI for the stamping on the first card, so I was able to make the second card with the same stamp placement.

For this one, I used more paper from the “Special Delivery” paper pack and Gina K Powder Blue card stock and ink.  I felt like the red stitching on the baseball was too much with the softer colors on this card, so I left them powder blue.

wxDSC_6887

I love this stamp set, and paper piecing made all the elements match beautifully!

Thanks for checking out my card projects!

Surprise! Graduation Thank You Card

Surprise! Graduation Thank You Card

wDSC_7251

Here is the third of the three designs I came up with for graduation thank you notes for my kids.  For this one, the front is deceivingly simple, but when the card is opened, a decorated cube jumps right out of the card!

Surprise_Graduation_Thank_You_Card .5 speed GIF.gif

How fun is that?!

There is a panel inside for a handwritten message that is seen after the cube pops out.

wwDSC_7254

The greeting was downloaded and printed from a file called “Free Wedding Text Digital Stamps” I found online at Digital Doodling.  This same “thank you” was on the front and on two of the sides of the cube.  The “class of 2017” on the other two sides of the cube was a digital image I found at Geographics.com (although I am no longer seeing it there).  I found the same image on etsy (for 2018) HERE by createsvg4you.

Black and white card stock was used, along with a rubberband inside the cube that allows it to fold flat and pop open.

The cube is from a Silhouette cut file called “Insta-Cube Card Graduation” (design id #198862) which was designed by Lori Whitlock.  In addition to the cube base (and a box that holds the cube which I did not use here), the file contains graduation elements with which to decorate the cube, but I did not use them for this project.  I think the cube is meant to be the card, but I needed mine to have more space for writing, so I just put the cube inside another card.  Here is a video showing how to assemble the cube along with other themed sets that are available.

wDSC_7252

Thanks for checking out my card post!

Pop-Up Graduation Thank You Card

Pop-Up Graduation Thank You Card

xDSC_7229


Here is the second of the three designs I came up with for graduation thank you notes for my kids.  For this one, I used the Sizzix “Platform, Spinning 3-D” Bigz Die (#656029) designed by Karen Burniston which caused the hand-written message to pop out at the recipient when the card was opened.

wDSC_7218     wDSC_7216

Because my pop-up element was kind of big, my overall card needed to be big to accommodate it.  My card, when closed, is 5 1/2 x 5 inches.  (When the card is closed, the edges of the pop-up note line up pretty closely with the decorative panels on each side.)  If the pop-up element were smaller, the card could probably fit into an A2 sized envelope.  Instead of creating a custom envelope, I ended up using envelopes meant for cards measuring 5 x 7 which allowed room to the left to carefully position the tassel so it didn’t get all wonky when mailed.

Kraft card stock was used for the card base and tag.  This tag with the greeting was downloaded and printed from a file called “Printable Thank You Gift Tags” that I purchased from Concertina Press.

I purchased the tassels (ready-made) on amazon.  The black panel across the middle was debossed with a Darice Circle Background embossing folder.

The foiled background panel was from a file from the “Graduation Digital Paper Pack” by DeerCustomDesigns that I purchased on Etsy.  It was printed on laser printer paper with a laser printer  and foiled using  Gina K Red Velvet Fancy Foils and my mini Heidi Swapp MINC foiling machine.  (A laminator can also be used.)

wDSC_7233

The inside panels were matted on Gina K Red Velvet card stock.  The side panels are from a digital paper pack called “Thank You Papers” by AMB Illustrations that I also purchased on Etsy.

Thanks for checking out my card project!

This content uses referral links as described in the disclosure policy on my sidebar.