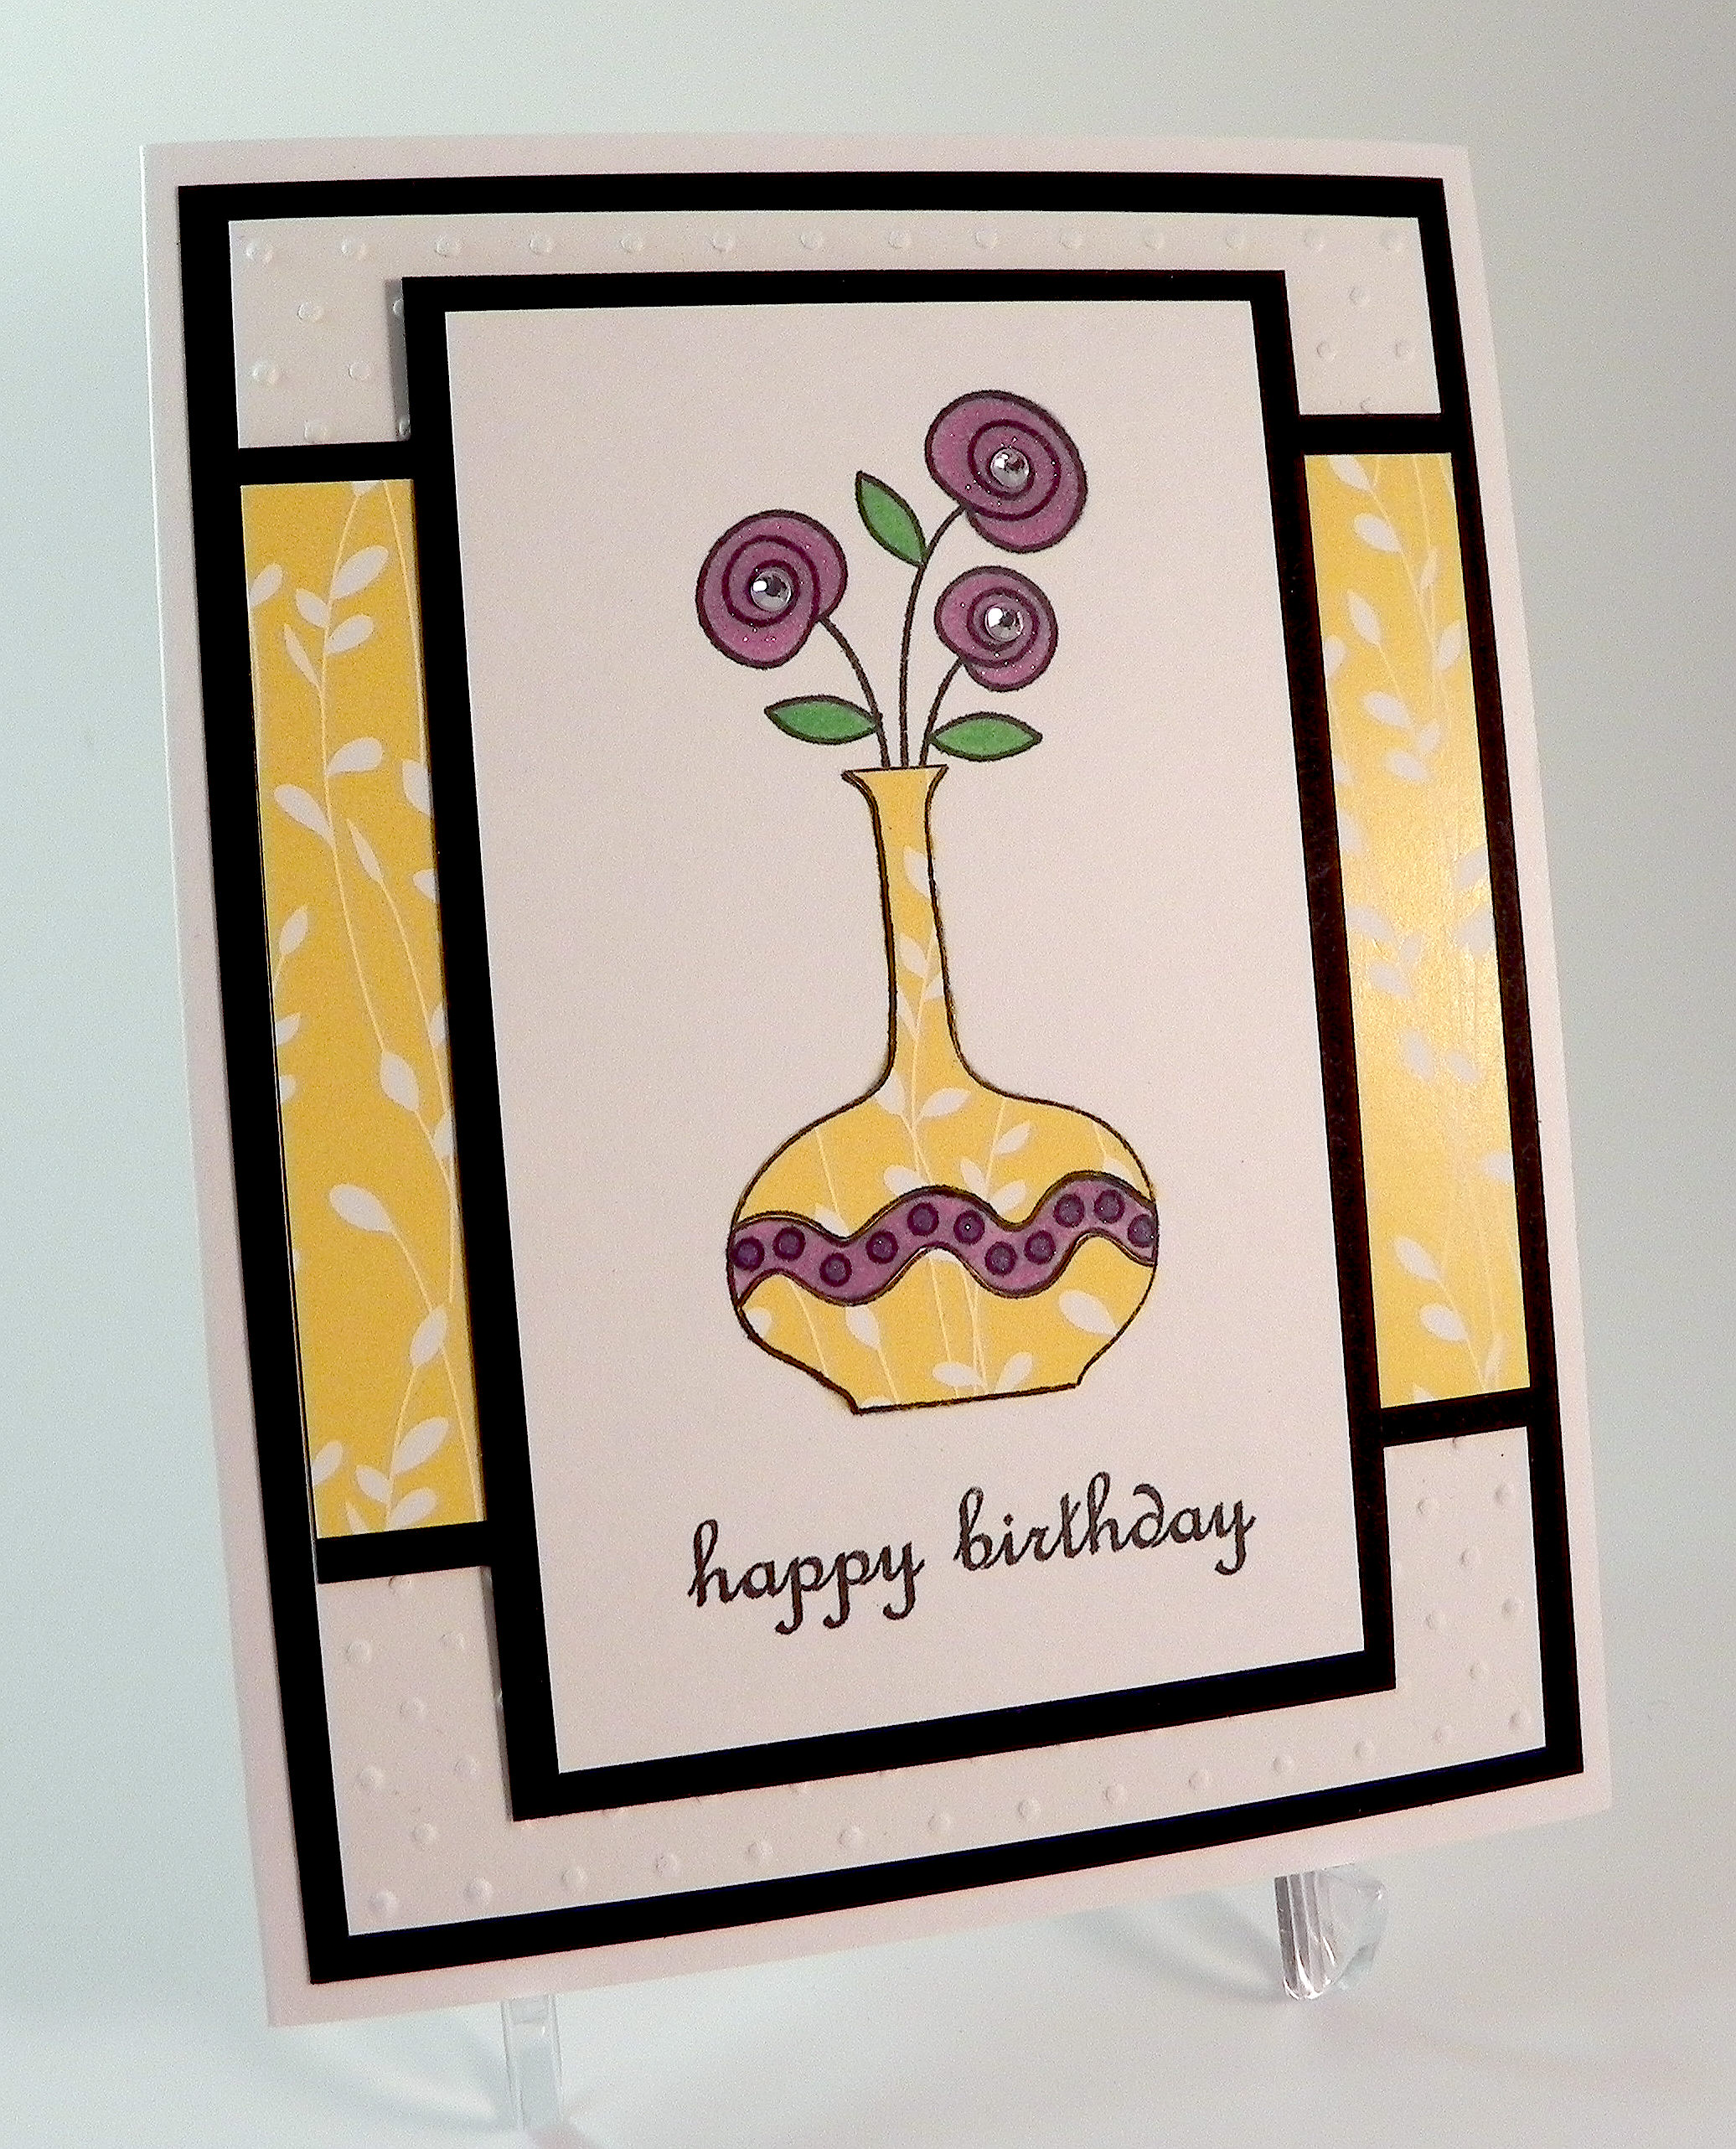
Potted Plant

Potted Plant

Potted Plant z DSCN8431.jpg

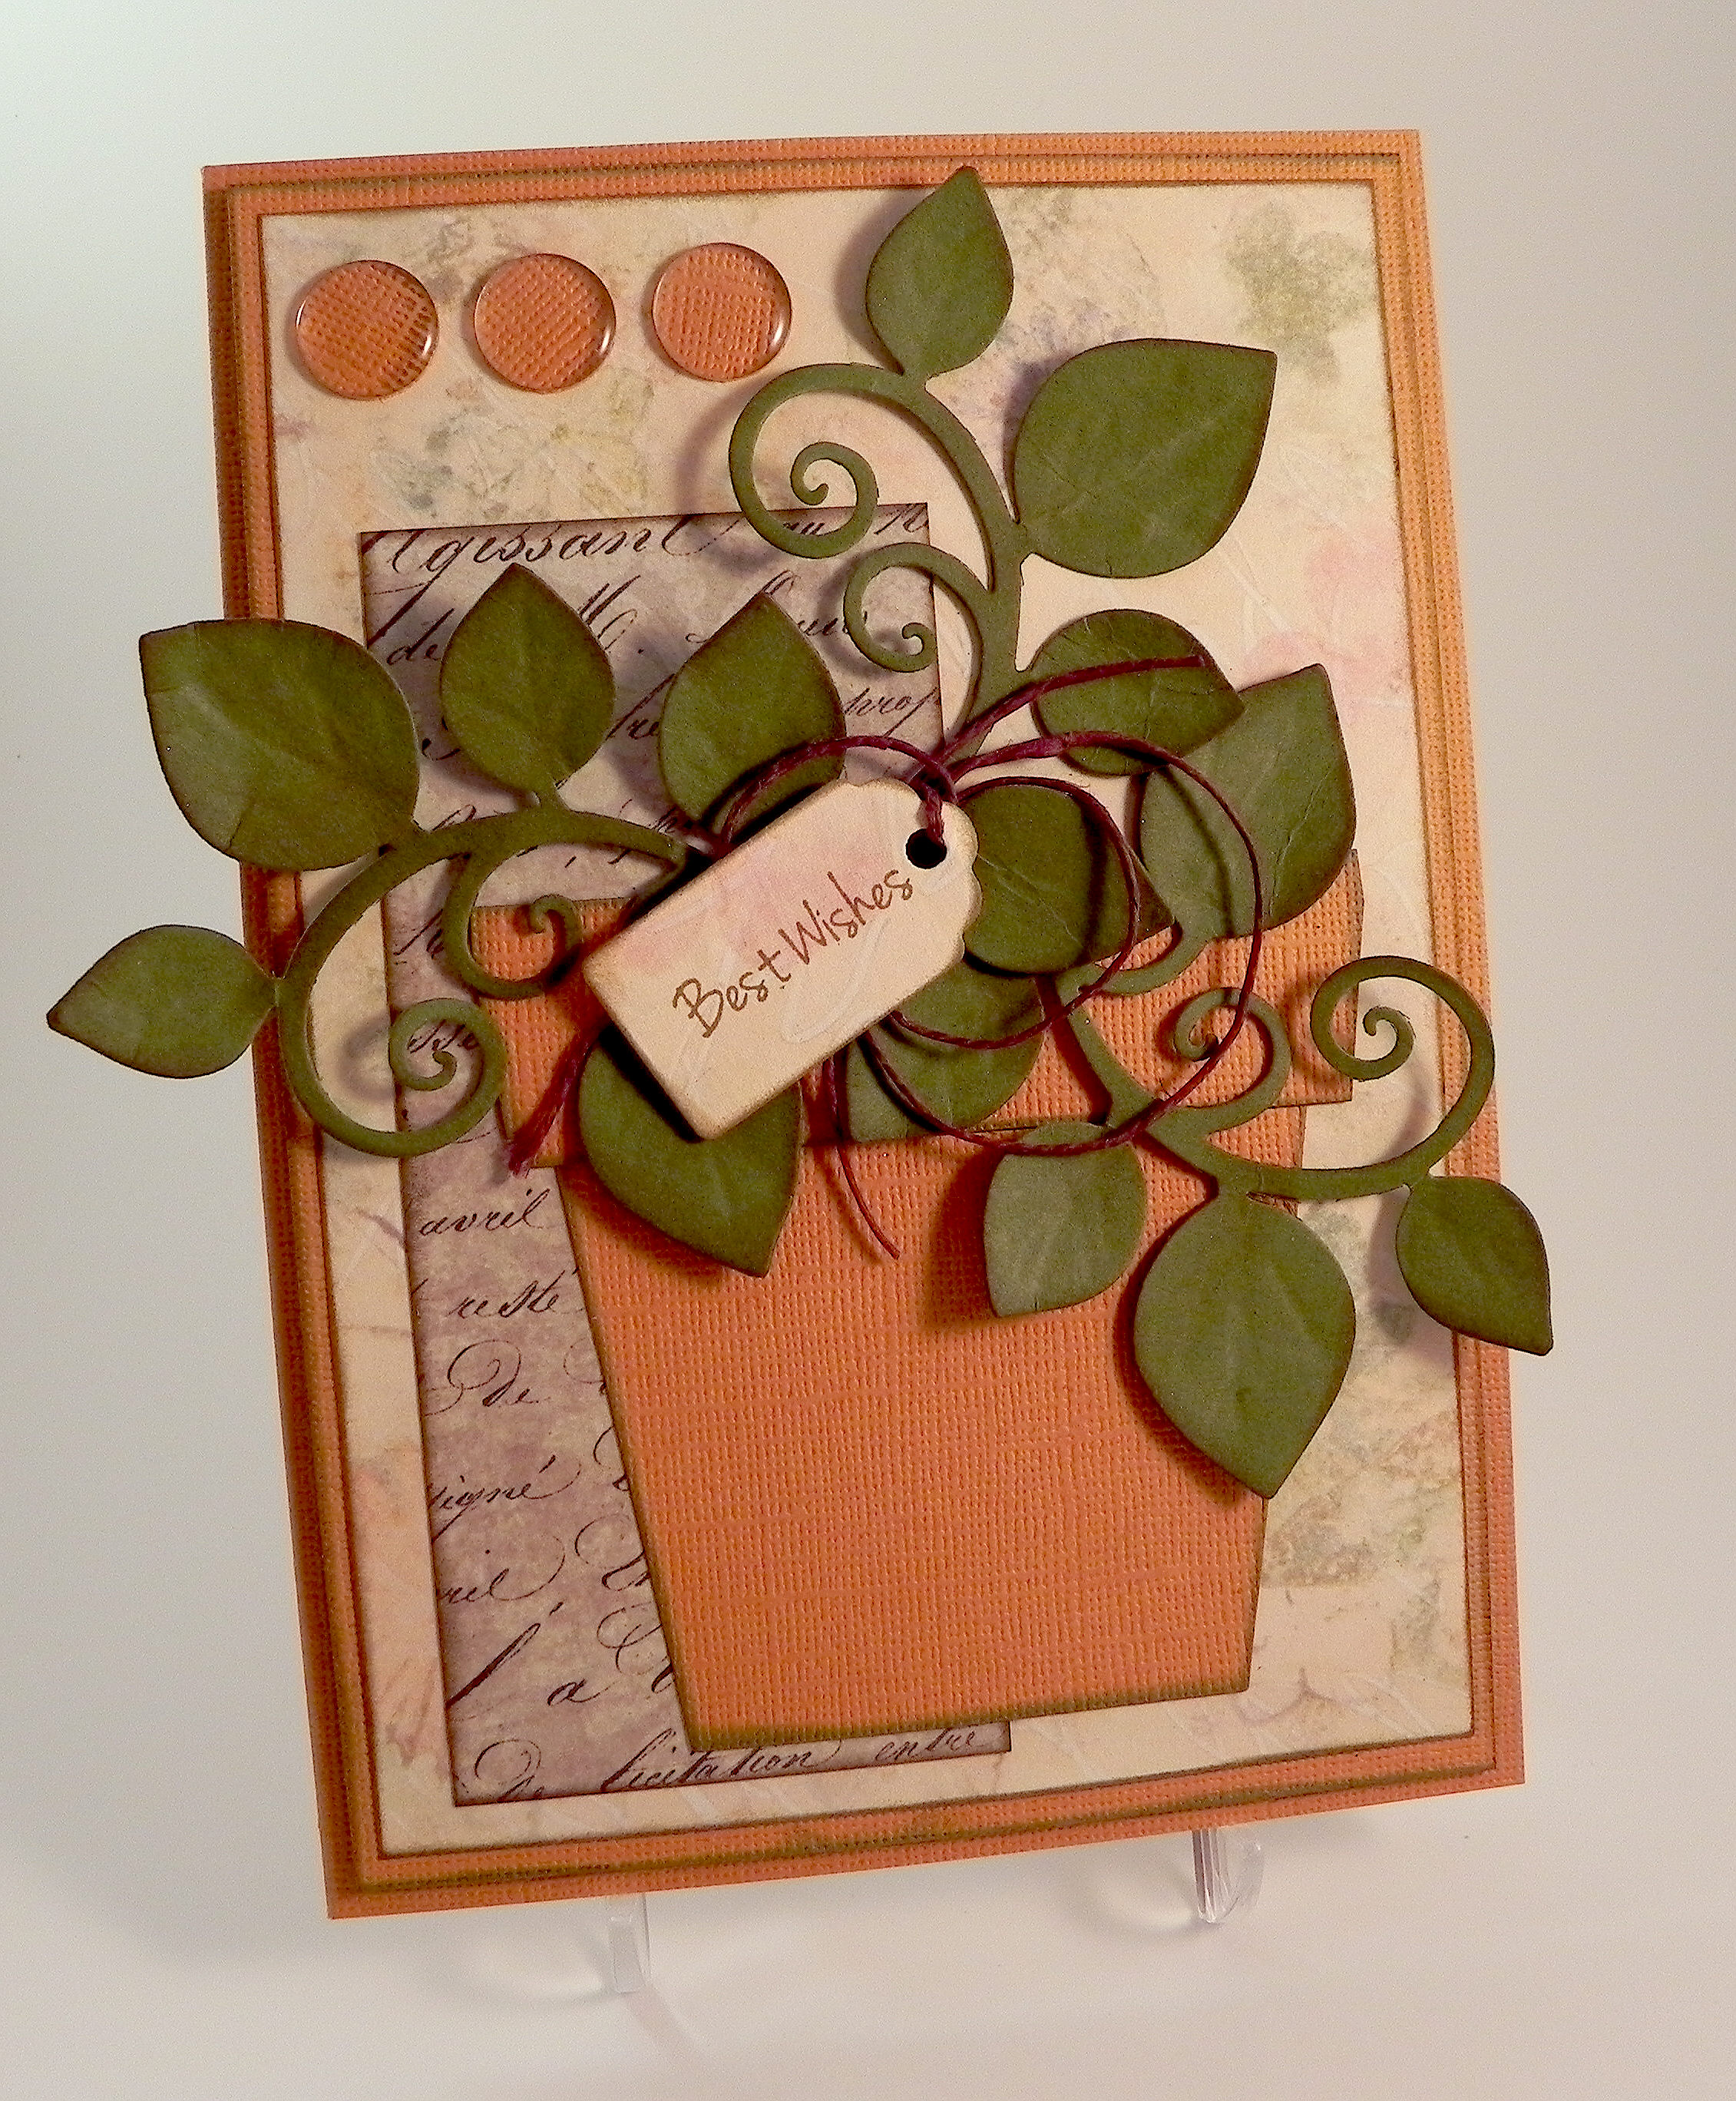
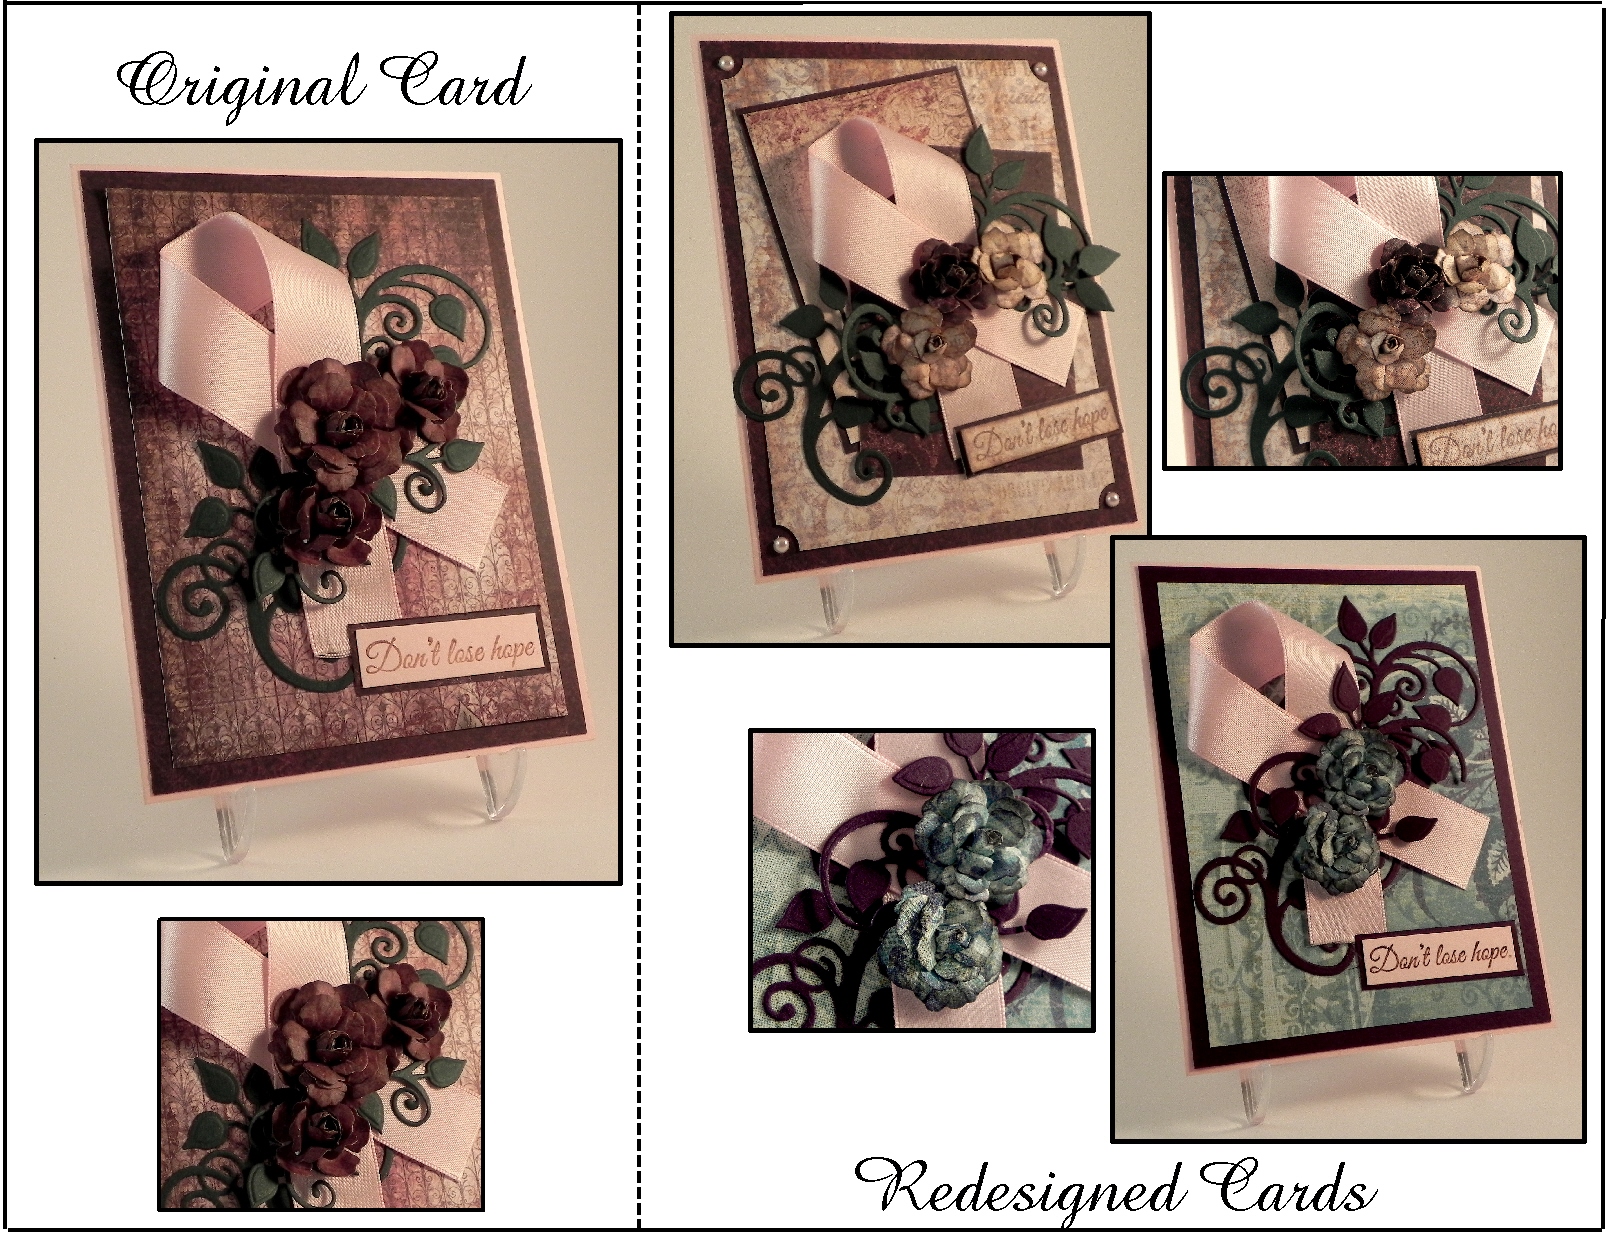
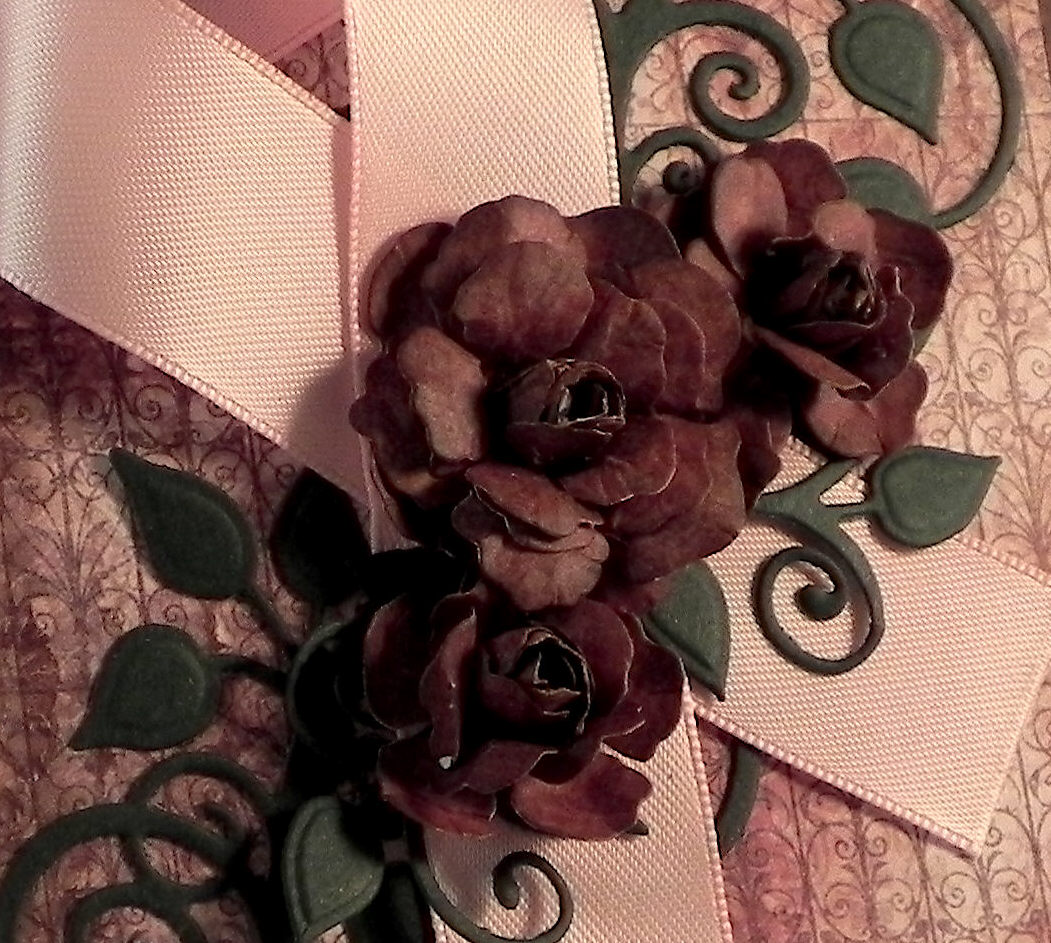
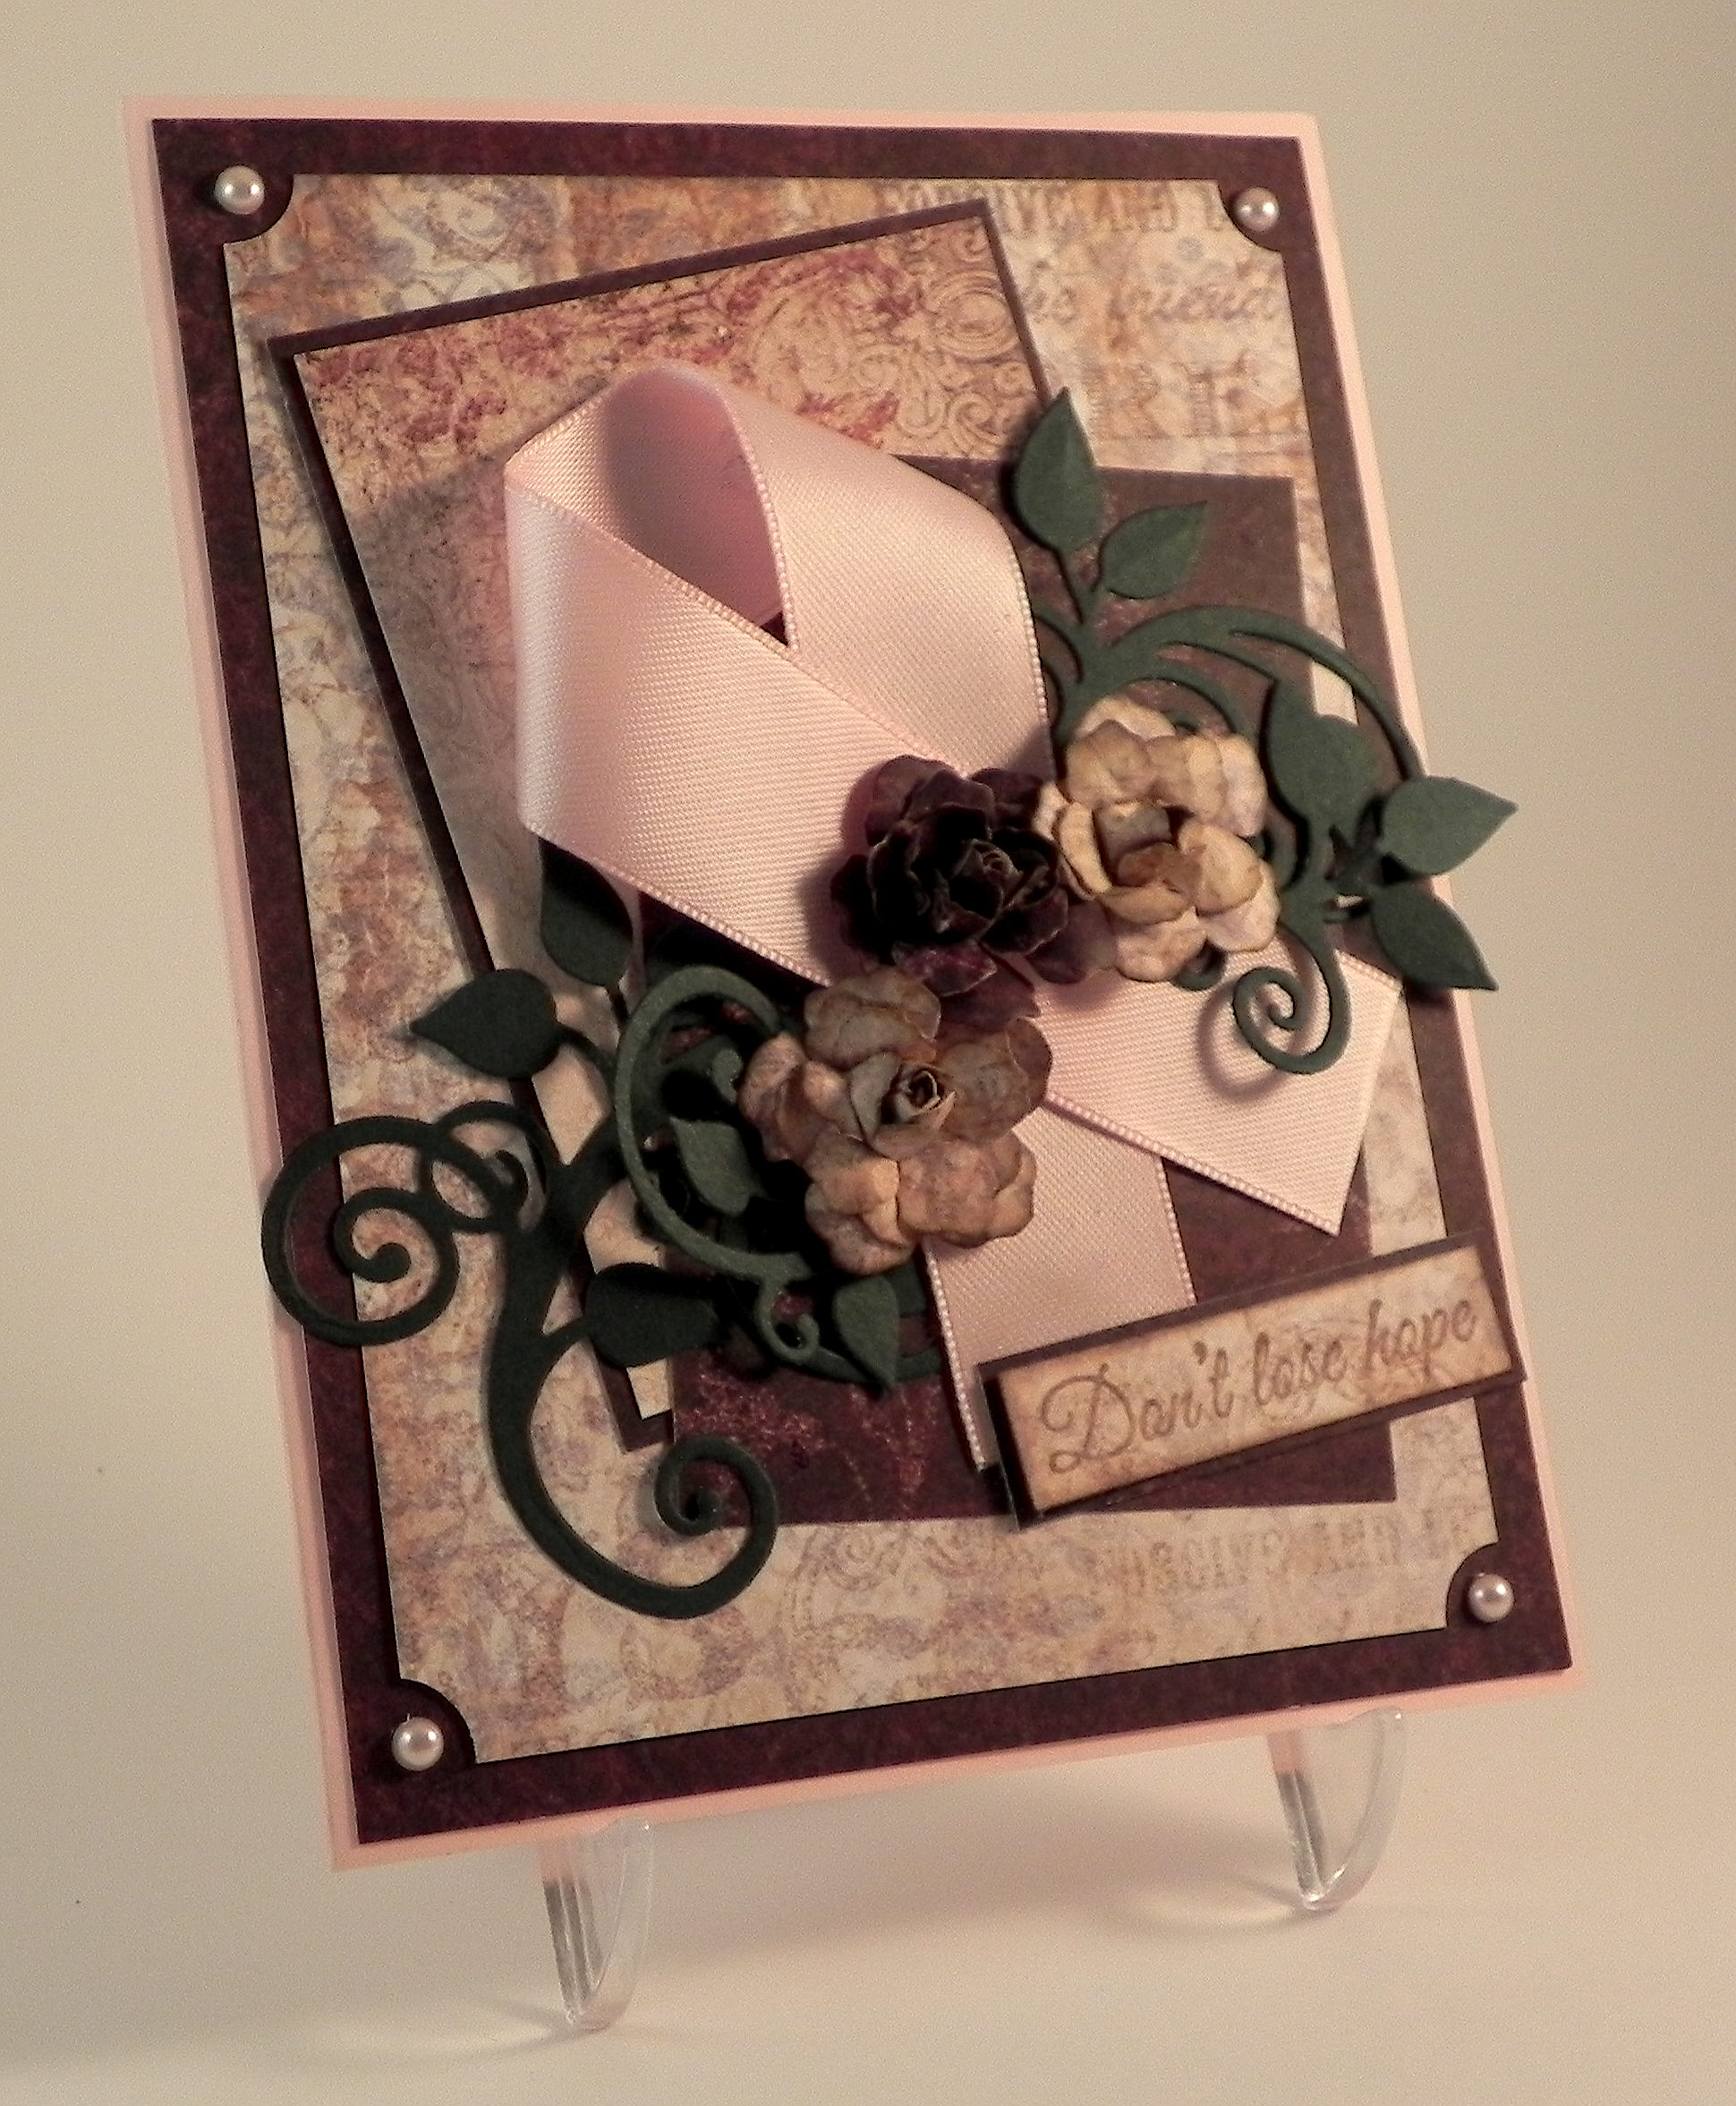
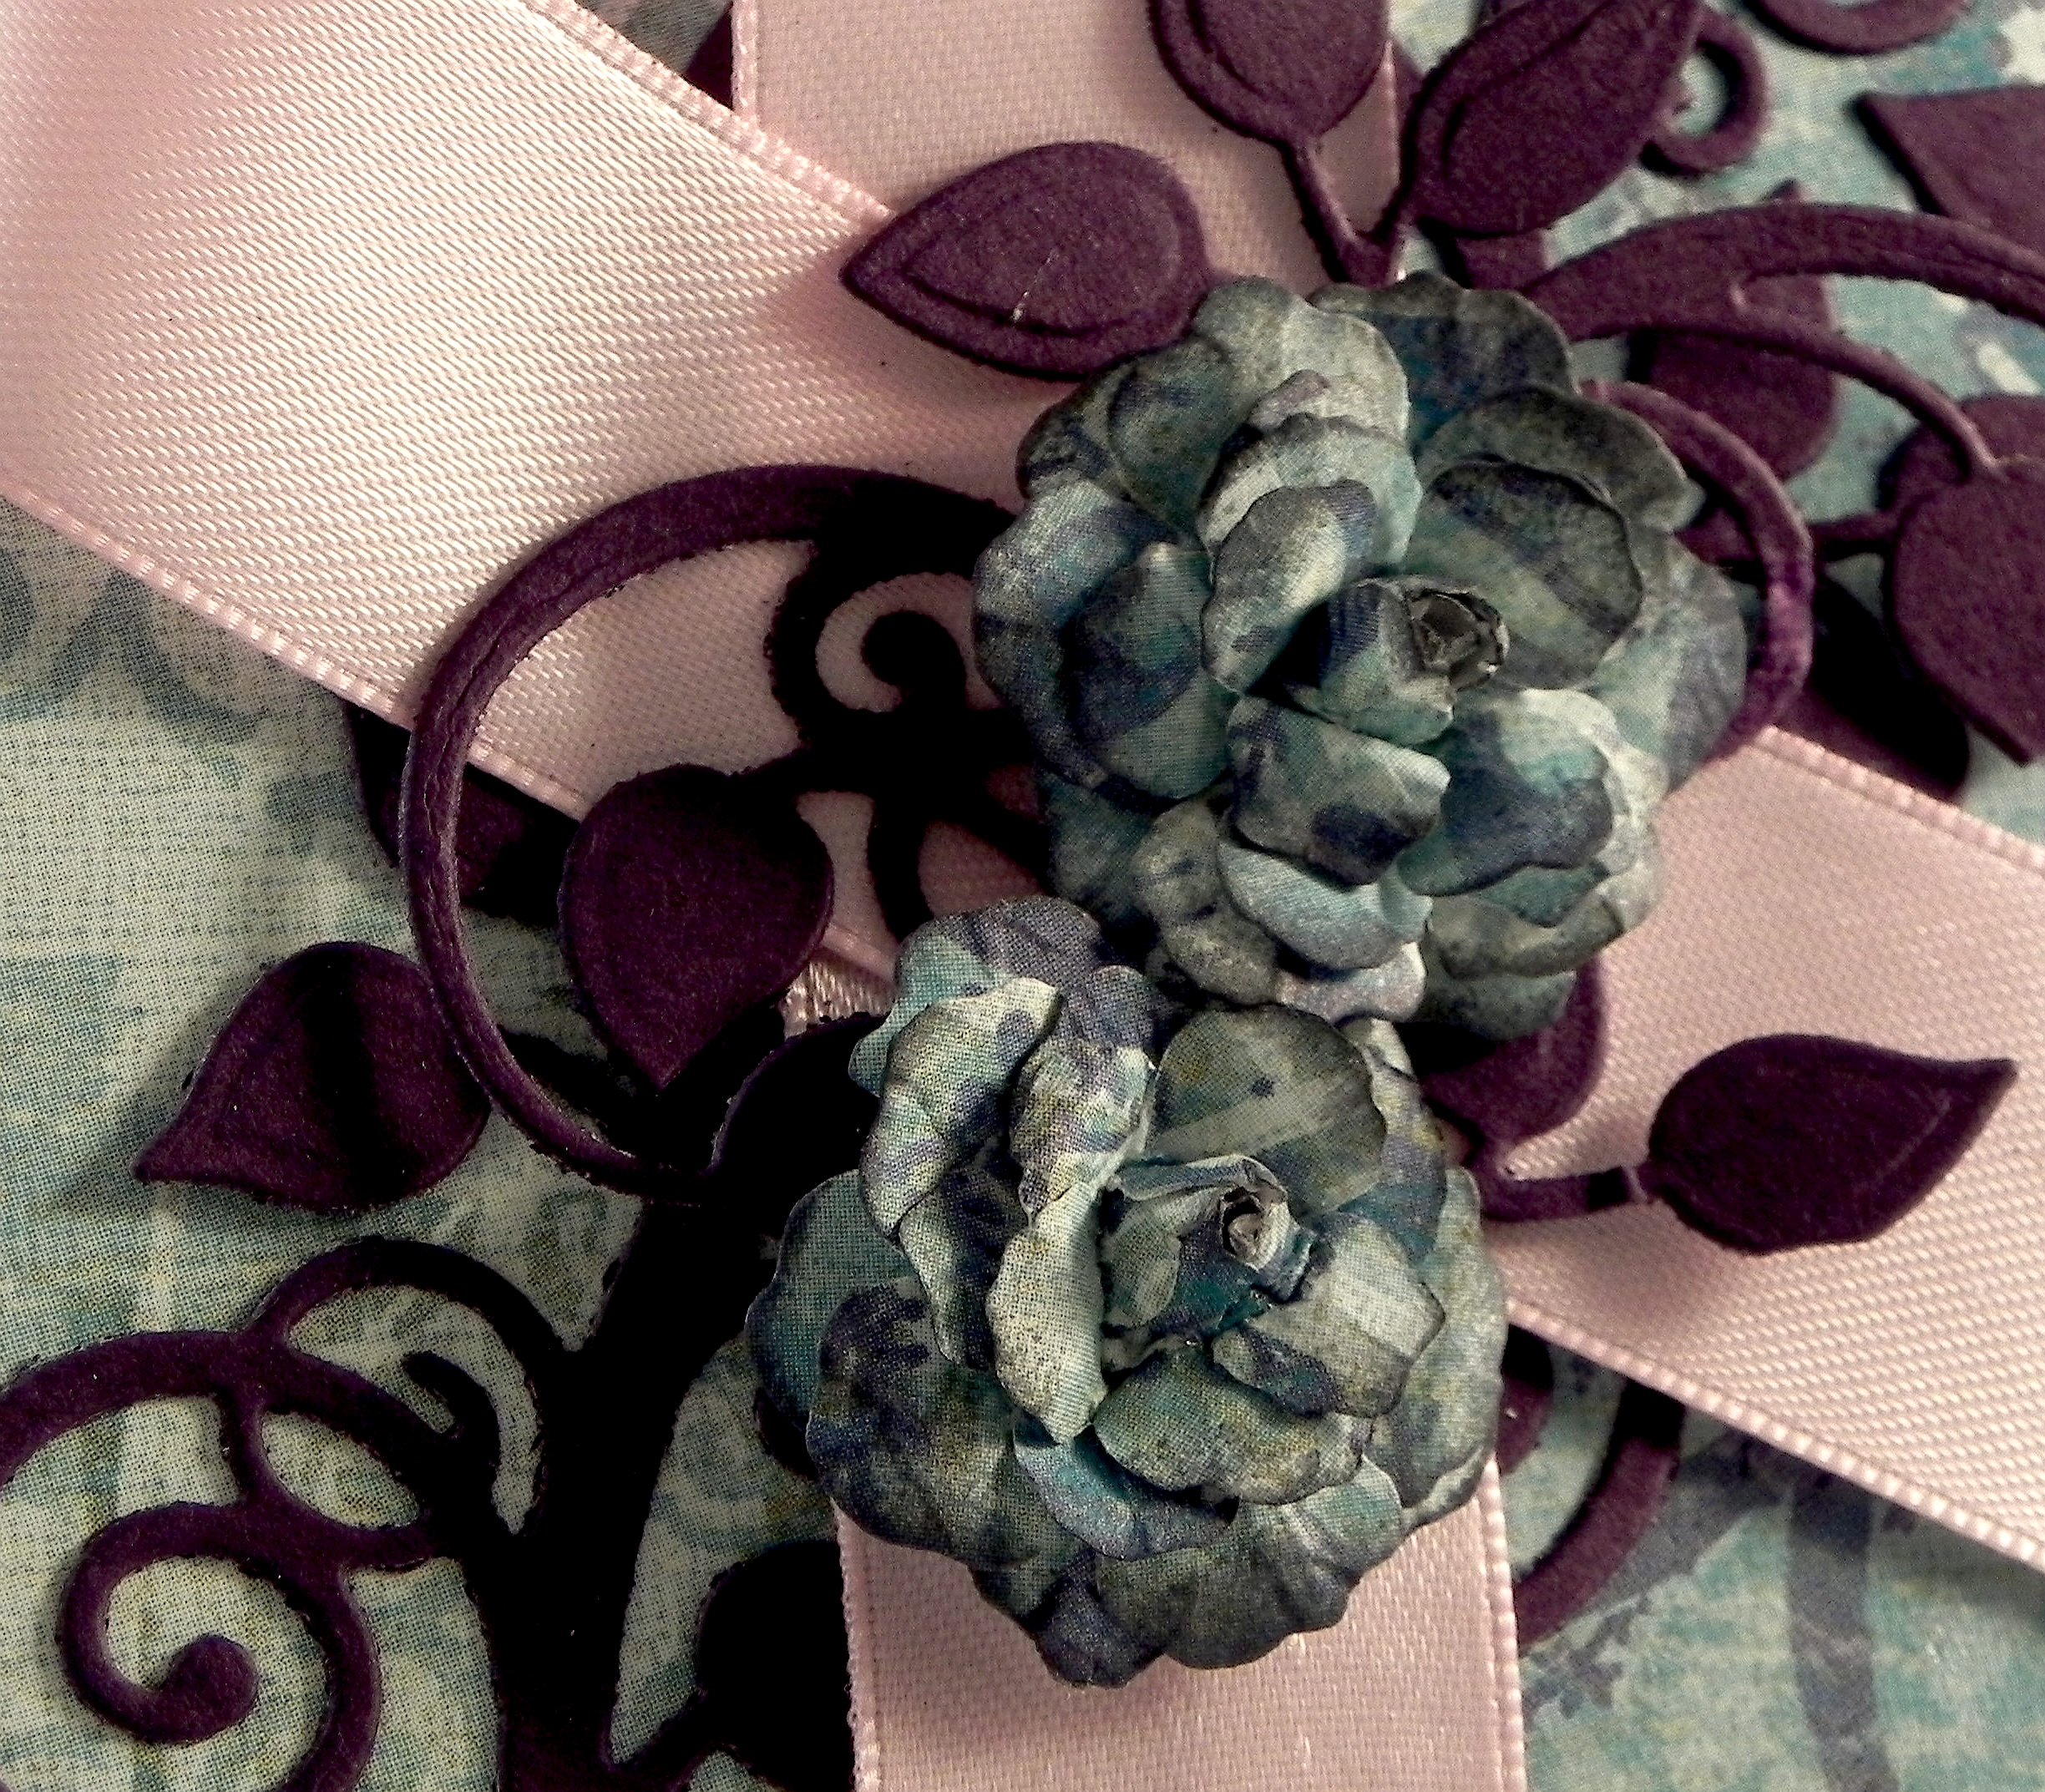
It’s amazing how some cards begin with an idea and you just need to execute the plan while other cards evolve so much throughout the process that they end up looking nothing like they were intended to look.  This card falls into the second group!  I originally envisioned this card with delicate flowers in a pot made with patterned paper.  The patterned pot was beautiful, but I couldn’t make the background work so I decided to use the patterned paper for the background instead.  I had a sentiment I intended to stamp on the pot, but it was too big.  I wanted to make flowers out of crepe paper, but I had trouble with that  so I redid them on paper and added 3D Stamp Paint that made them too bold and sparkly. Then I added the leafy flourishes, and when I moved the flowers to arrange the leaves, I liked the plain leaves better so I decided to go with a potted leafy plant instead.  My very feminine idea ended up being a card that is more gender neutral.  I’m still not sure if I like the solid colored pot and may try different patterned papers.  And I still may go back and re-try a version with flowers like I originally wanted, but I do like this evolved design as well!

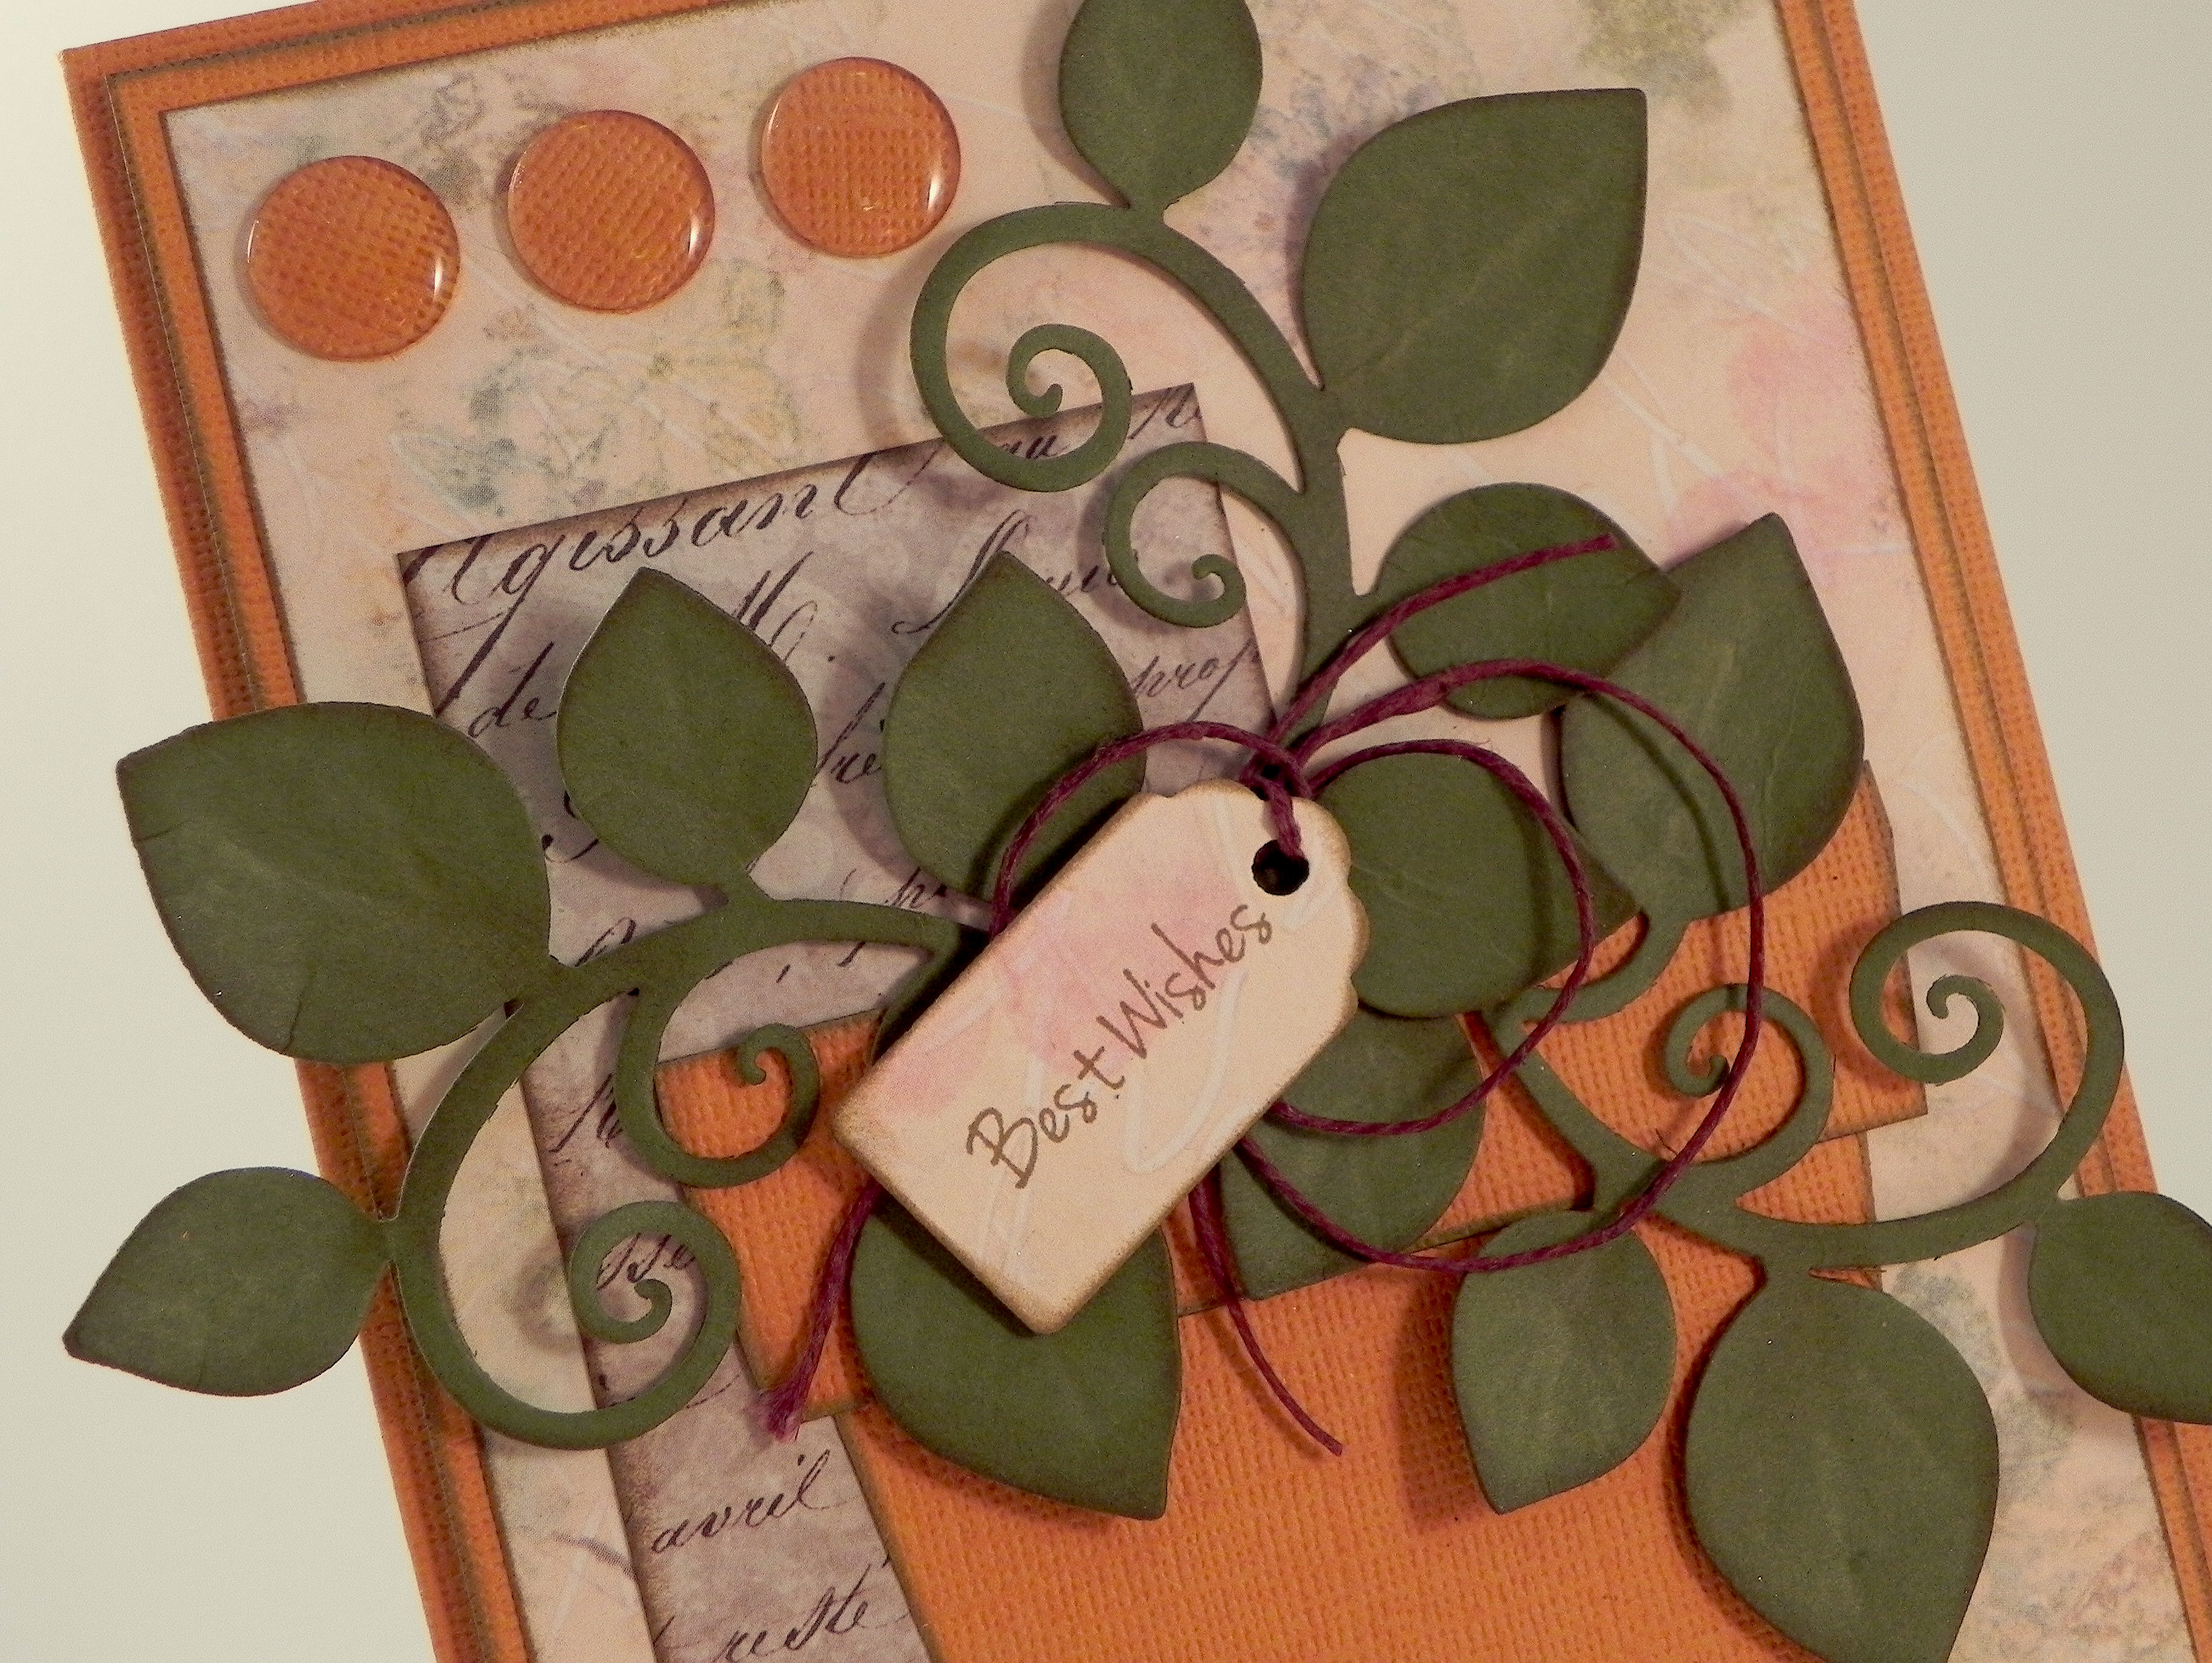
The pot, tag, and leafy flourishes were all cut with Heartfelt Creations (Spellbinders) dies from the “Flower Pot” set.  (I hand-made the top part of the pot as the set did not include a die for that part.)  The greeting on the tag is a Gina K Designs stamp from the “A Wish For You” mini stamp set (retired?) that I received in a grab bag.  Gina K Warm Cocoa ink was used to stamp the greeting and to sponge all the edges.  Paper and card stock used:  Gina K Fresh Asparagus, Core-dinations Valentia, Paper Pizazz Tan Floral Tapestry (printed background), and Melissa Frances First Class Mail (gray script).

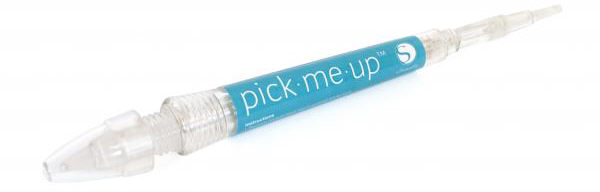
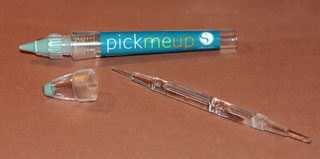
I used my Epiphany Crafts Shape Studio Bubble Cap maker and Clear Round (14) epoxy shapes to create the three orange embellishments in the upper left corner to match the flower pot.

zz DSCN8429

This tool is pretty cool because you can use whatever paper you want to create custom embellishments for your projects.  If I end up changing the paper for the flower pot, I will make new circles with matching paper.

EC Set

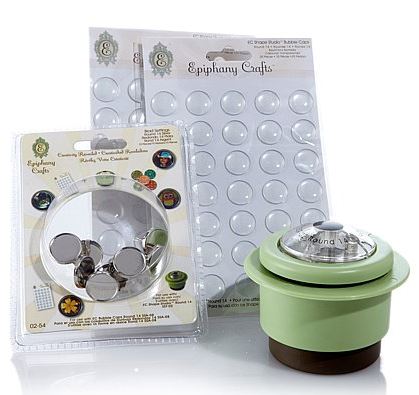
Just a note – this company makes tools to create embellishments in different shapes and sizes.  Each tool makes only one shape/size so you’d need to purchase multiple tools to create the different shapes.  (This is very much like a punch you might purchase.)  In addition to the tool itself, you need to purchase the corresponding epoxy shapes to create your embellishments.  These are consumable and need to be replenished when they are gone.  In addition to the epoxy shapes, they also have metal charms you can use to create your embellishments.  (The tool, epoxy shapes and charms are all sold separately.)

I previously made an anniversary card (called “Happy Anniversary” originally posted in my StampTV gallery which is no longer active.) where I used the square tool and a mini wedding photo to create a square shaped epoxy embellishment that fit inside a mini picture frame.

zzzz DSCN8591

Frame a DSCN8608

Thanks for checking out my card project!

This content uses referral links as described in the disclosure policy on my sidebar.

Don’t Lose Hope Card – “Make It Better”

Don’t Lose Hope Card – “Make It Better”

Don't Lose Hope Original and New 3

I am so excited to be sharing my first card project as a member of the Perfectly Rustics Design team! This fortnight, the challenge is called “Make It Better” (challenge no. 43) where we are to improve on a project that we have done in the past while making sure to keep some elements of the original project the same.  (See challenge post HERE.)  The card I chose to re-do is a card I did last October called “Don’t Lose Hope” which was a card of encouragement for someone battling breast cancer.  I like the layout of the original, but I was going for a vintage look, and I feel it ended up a bit dark.  Here is the original card:

uu DSCN7754

(click HERE to see original post)

In addition to the background being on the dark side, I felt the flowers were much too dark.  I thought the paper I used was burgundy, but it really seemed dark brown once it was on the card.

uu DSCN7754 cropped

For my first attempt at a re-do, I decided to try it in lighter shades while still keeping the layout and vintage style similar.  Here is the card I came up with:

Don't Lose Hope Redo 1 v20d DSCN7756


I changed the background paper, used a piece of the original, darker paper as an accent, added a smaller, light panel for added interest, and spruced up the corners with a ticket punch and pink pearls. I also made two of the three flowers lighter to match the new background.

w DSCN7726

Personally, I like these new, lighter shades better, but I know brown tones aren’t for everyone!  So, just for fun, I thought I’d try a completely different color scheme and changed the background and flowers to a bright greenish-blue.  The leafy flourish now matches the eggplant mat.

Don't Lose Hope Redo 2 w20zx DSCN7758

This version has only two flowers.

ww DSCN7727

The two re-done cards are definitely not as dark, and I am happy with the results.  I probably like the first attempt with the warm tones better, but that should not surprise anyone who knows me! (I do like my browns!!!)  It was really neat to see how changing a few aspects of the card really changed the whole look of it.

Now it’s your turn!  Choose a project you did but are not crazy about.  While keeping some of the elements the same, change some of them to “Make it Better!”  (You only need to make one new version.)  Link your new version for the challenge, but be sure to include the “before” photo somewhere in your blog post along with your new version.  I can’t wait to see what you create!  (This challenge will close at 11:59 pm Saturday 21st March 2015 (AEST) Australian Eastern Standard time.  Here is a Time Zone Converter to figure out when they end wherever you happen to live!)

Thanks for checking out my card project!

[The greeting stamp for these cards came from the Gina K Designs “Don’t Lose Hope” duo and was stamped with Tim Holtz walnut stain distress ink. (Clear embossing powder was used on the original and greenish-blue cards.)  The flowers were handmade using dies from the Heartfelt Creations (Spellbinders) Vintage Floret set. The leaves were made using dies from the Heartfelt Creations (Spellbinders) Cut Mat Create 2A Die set.  Cardstock used was a pink from a Recollections paper pack, Recollections Evergreen, and Gina K Edible Eggplant. The printed card stock came from two Heartfelt Creations Paper pads: Floral Key Collection and Antiquity Collection.  The greenish-blue paper is K & Company Addison Blue Garden Swirls.  The ticket corners were made with a Tonic Ticket Punch.]

This content uses referral links as described in the disclosure policy on my sidebar.

Birthday FLowers

Birthday Flowers

Birthday Flowers Yellow wwwwDSCN8252.jpg

This card is being entered in the StampTV MIUM Challenge “Combine & Color” where we are to:

  • Use a combination of two different Gina K Designs stamp sets. One for the focal image and one for the sentiment.
  • Have a focal image that can be colored. The image you choose can be colored with whatever you choose.

(Sadly, this site is no longer active.)

This card is also being entered in the Mod Squad Challenge “Spring Forward” where we are encouraged to use flowers, birds, butterflies, hummingbirds, etc. and bright, beautiful colors to make a Spring themed card.   (Sadly, this site is no longer active.)

For this card, I used stamps from the Gina K Designs “A Little Something” (the vase of flowers) and “Sweet Tweets” (the greeting).  The images were stamped with Memento Tuxedo Black ink.  I colored the image with Copic Markers (Y23, YG09, V15, and V17).  I also did a little paper piecing to add color to the vase.  In addition to black and white card stock, the patterned paper I used is from the Gina K Delicate Essentials 6×6 paper pack.  I also used the Cuttlebug Swiss Dots embossing folder, a clear Wink of Stella glitter brush pen (hard to see in photo), and a few self sticking rhinestones.

I ended up doing a second card as well by mixing up the colors a bit.  Here it is:

birthday flowers purple xxxxDSCN8237.jpg

I’m not sure which I like better!

Thanks for checking out my card projects!

This content uses referral links as described in the disclosure policy on my sidebar.

Quilled Iris

Quilled Iris

w Quilled Iris DSCN8105

It had been a while since I had done any quilling, so I thought I’d make a quilled card to enter in this week’s Mod Squad Challenge called “Spring Forward” where we are encouraged to use flowers, birds, butterflies, hummingbirds, etc. and bright, beautiful colors to make a Spring themed card.  (Sadly, this site is no longer active.)

I sponged Gina K Wild Lilac ink on white card stock and glued my quilled iris and decorative swirls on this panel.  Then, I created a recessed frame with thick fun foam and Spellbinders oval dies.

zDSCN8176

The printed paper is from a digital set I bought from a store on Etsy called The Pixel Posy. The set is called “Vintage William Morris digital paper designs//Art Nouveau background paper pack//Blue and purple flower digital paper.”   HERE is the link.

This card used a number of quilled shapes:  teardrops, half circles, marquises and wheatears (leaves).  I used instructions by “Quilled Creations” to create the iris.


I had made a few other quilled cards in the past that I had posted in my StampTV Gallery.  (Sadly, this site is no longer active.)  I’m including them here as well.

Quilled Sympathy Card DSCN5557

This sympathy card was the first one I did back in May 2013.  I used a basic marquise shape for the flowers and leaves.  The sentiment was from the Gina K Designs “All Occasion Tags” Stamp set.  The tag was cut with a die from the Spellbinders Grommet Tag set, and the embossing folder is Darice Corner Scroll.

I used the same embossing folder and marquise shapes to create two more – a wedding card and a confirmation card.

Quilled Wedding Card DSCN5602.jpg

DSCN5609

The sentiment on the wedding card is from the Gina K Designs “Always and Forever” duo stamp set.  I purchased the stamp for the confirmation card on Ebay, and it is unmarked so I have no idea what company made it.

The next card I made was for a bridal shower.  I used teardrops to make the umbrella.

Quilled Bridal Shower Card DSCN5666.jpg

The bride and groom stamp is called “Happy Couple” by Stampendous!  The greeting was done on the computer.  I used the Darice Stripe embossing folder on this card.


Quilled Creations makes a great tool called “Circle Template Board” that makes it easy to create consistent and perfectly proportioned quilled shapes. I also use their slotted quilling tool to roll the circles; the slot makes it easy to get the paper rolls started.

circle template board  slotted tool

I forgot how much I LOVE quilled designs; I will definitely need to do this more often!!

Thanks for checking out my card projects!

This content uses referral links as described in the disclosure policy on my sidebar.

Pop-Up Hearts

Pop-Up Hearts

POP UP HEARTS 2

This card is being entered in the Mod Squad Challenge “Pop-Up Card” where we are to make a pop-up card of any kind.   (Sadly, this site is no longer active.)

I made this as a Valentine’s Day Card, although with no greeting on the front, it could also be used for an anniversary, a wedding, or a “just because” card for someone special.

The inside pop-up element was made with the Sizzix “Hearts-a-Plenty 3D (Pop-Up)” die.  Card stock used on the inside was Gina K heavy base weight white and cherry red along with Recollections silver glitter paper.  The stamp is from the Gina K Designs “Bundle of Love” stamp set and was stamped with Memento tuxedo black ink.  In addition to the sizzix die, a Creative Memories double heart punch was used as well.  I used score tape to make sure the pop-up element was adhered well to the base.  I didn’t have any “Happy Valentine’s Day” stamps that fit in the white space or on the white heart; I need to fix that!!!  The card pictured is my sample; on the cards I actually sent, I hand-wrote that along with a short message in the upper left and lower right corners (before adhering my pop-up element – learned that the hard way!!!).

Here are a few close-up shots of the inside of the card:

qDSCN7576

qDSCN7572    qDSCN7559

qDSCN7589    qDSCN7585

Here is the front of the card:

qDSCN7547

For the front, I used patterned paper from the Gina K Fight Like A Girl paper pack.  Gina K cherry red, black, and white card stock was used along with Recollections silver glitter paper.  The embossing folders I used were Darice Heart, Darice Stripe, and Cuttlebug Swiss Dots.  The giant crystal heart-shaped gem sticker is by Mark Richards.  Spellbinders classic circle dies (large and small) were used for the focal panel, and a piece of ribbon was tucked behind.

qqDSCN7544

This card, with the pop-up center and the big gem sticker on the front was so thick, it needed to be sent as a package!  Ugh!!!

This card is a variation of a card I made for the StampTV MIUM “Put Your Heart Into It!” Challenge where we are to use a heart somewhere on our project, but it cannot be a Valentine’s Day card.   (Sadly, this site is no longer active.)  While my card pictured above could be used for a variety of occasions, I decided to change up the front so it was clearly NOT a Valentine’s Day Card!  Here is the variation I entered instead:

uuDSCN7505

Again, the patterned paper is from the Gina K Fight Like A Girl paper pack. Gina K cherry red and white was also used. The Stamp is from the GKD Sweet Tweets stamp set and was stamped in Memento tuxedo black and colored with Copic Marker R46 and a clear Wink of Stella glitter pen. A few silver heart spangles were added to the frosting. The greeting is a Momenta metal sticker. The embossing folder is Darice Heart.  Spellbinders classic circle dies (large and small) were used for the focal panel. You can see the shine a little better in this close-up.

tDSCN7508

I used two tools to place and adhere those tiny heart spangles to my project.  The first is the glue. Since I needed such a small amount for each heart, I used my Zig 2 Way Glue pen.  It looks like a pen and has a fine ball point.  You can squeeze or roll just the right amount of glue that you need with perfect placement.  This glue can be used two ways. Use it when it’s blue and wet for a permanent bond or let it dry clear for a few moments to get a temporary bond.

azig 2 way glue pen

The second tool I used is the Silhouette Pick-Me-Up tool.  One end has a tacky substance on it that allows you to pick things up.  The other end has a removable tool that has two ends that allows you to push the item off the tacky end and onto the adhesive on your project or to push the item in place.  I found a “review” with instructions on how to use this tool online HERE that you may find helpful.

aSilhouette Pick Me Up Tool 1    Silhouette Pick Me Up Tool 2

Thanks for checking out my card projects!

This content uses referral links as described in the disclosure policy on my sidebar.