Distressed Christmas Tree (and a few variations)

Distressed Christmas Tree (and a few variations)

wwDSC_0378

I had shared a few distressed card samples I made a little bit ago and thought I’d play around with the same layout and techniques using some holiday images.

The tree is part of the Penny Black “Wonder Collection” stamp set that was a free gift with the Papercraft Essentials Magazine (issue 113) from September 2014.  (The tree is called “A Splash of Winter” which is available by itself.

Here are a few more variations:

zDSC_0375    wwwDSC_0377  wDSC_0384

The nativity stamp used on the left is by PSX D-209 (no title).  (The greeting on this one is from the Penny Black set above.)  The “Swirly Christmas Tree”  in the center is by Rubber Soul.  The snowflake on the right is from Stampin’ Up; I purchased it by itself on ebay and am not sure what set it originally came from.

French Script” from Stampin’ Up (retired) was used behind the “smooshed” background.  The splatters are from the SU “Timeless Textures” set.  I used Memento Rich Cocoa and Desert Sand or Summer Sky and Blue Danube for these samples.

Thanks for checking out my card projects!

This content uses referral links as described in the disclosure policy on my sidebar.

Joy Peace Love Hanukkah Card

Joy Peace Love Hanukkah Card

wwDSC_0433.jpg

This card features an untitled Craft Smart stamp (#84168-2013-07) on a “smooshed” background.   The “splatters” are from the SU “Timeless Textures” set.  The greeting is part of the Penny Black “Wonder Collection” stamp set that was a free gift with the Papercraft Essentials Magazine (issue 113) from September 2014.

wonder collection by penny black

Memento Summer Sky and Blue Danube ink was used on white card stock.  The “smooshed” color added behind the menorah image was done by adding the Summer Sky ink directly to my craft mat and spritzing it with water.  The card stock was then dipped in/dragged through the ink/water droplets.  The edges were sponged with the Blue Danube ink and a foam blending tool.

Thanks for checking out my card project!

This content uses referral links as described in the disclosure policy on my sidebar.

CAS Silver Embossed Hanukkah Card

CAS Silver Embossed Hanukkah Card

wwDSC_0296.jpg

This clean and simple (cas) card features stamps from the “Seasonal Sentiments” set by Gina K Designs and the “Festival of Lights” mini set by Papertrey Ink.  Both were stamped with versamark ink and heat embossed with Gina K Silver fine detail embossing powder.  The star was stamped/embossed on a separate scrap of card stock and fussy cut since I was having trouble centering it perfectly when I tried to stamp it directly onto the card front. (User error I’m sure!)  The card stock was Gina K In the Navy and white.

Thanks for checking out my card project!

This content uses referral links as described in the disclosure policy on my sidebar.

The Magic of Christmas

The Magic of Christmas

wDSC_0391.jpg

This gold and white card features the “Small Madison Window” die (style #816) by Poppystamps, inc.  I cut and layered 4 of them to make the white window stand out against the white background.

I used my score board and a ball stylus to create the lines on the background panel.  (The lines are a touch thicker when made with the stylus than with the bone folder.)

The tree in the window, the greeting, and the mat were all heat embossed with Gina K fine detail gold embossing powder.  The tree is part of the Penny Black “Wonder Collection” stamp set that was a free gift with the Papercraft Essentials Magazine (issue 113) from September 2014.  (The tree is called “A Splash of Winter” which is also available by itself.)  I used the “direct to paper” technique with a varsamark ink pad and the embossing powder to make the visible edges of the mat panel gold.  The tree was stamped/embossed on a piece of card stock from the Recollections Shimmer Silver and Champagne Card Stock pack from Michaels.

Here’s a view better showing the shine…

zDSC_0392

Thanks for checking out my card project!

This content uses referral links as described in the disclosure policy on my sidebar.


Goose Scene with Multi-Layer Stamping

Goose Scene with Multi-Layer Stamping

wDSC_0128.jpg

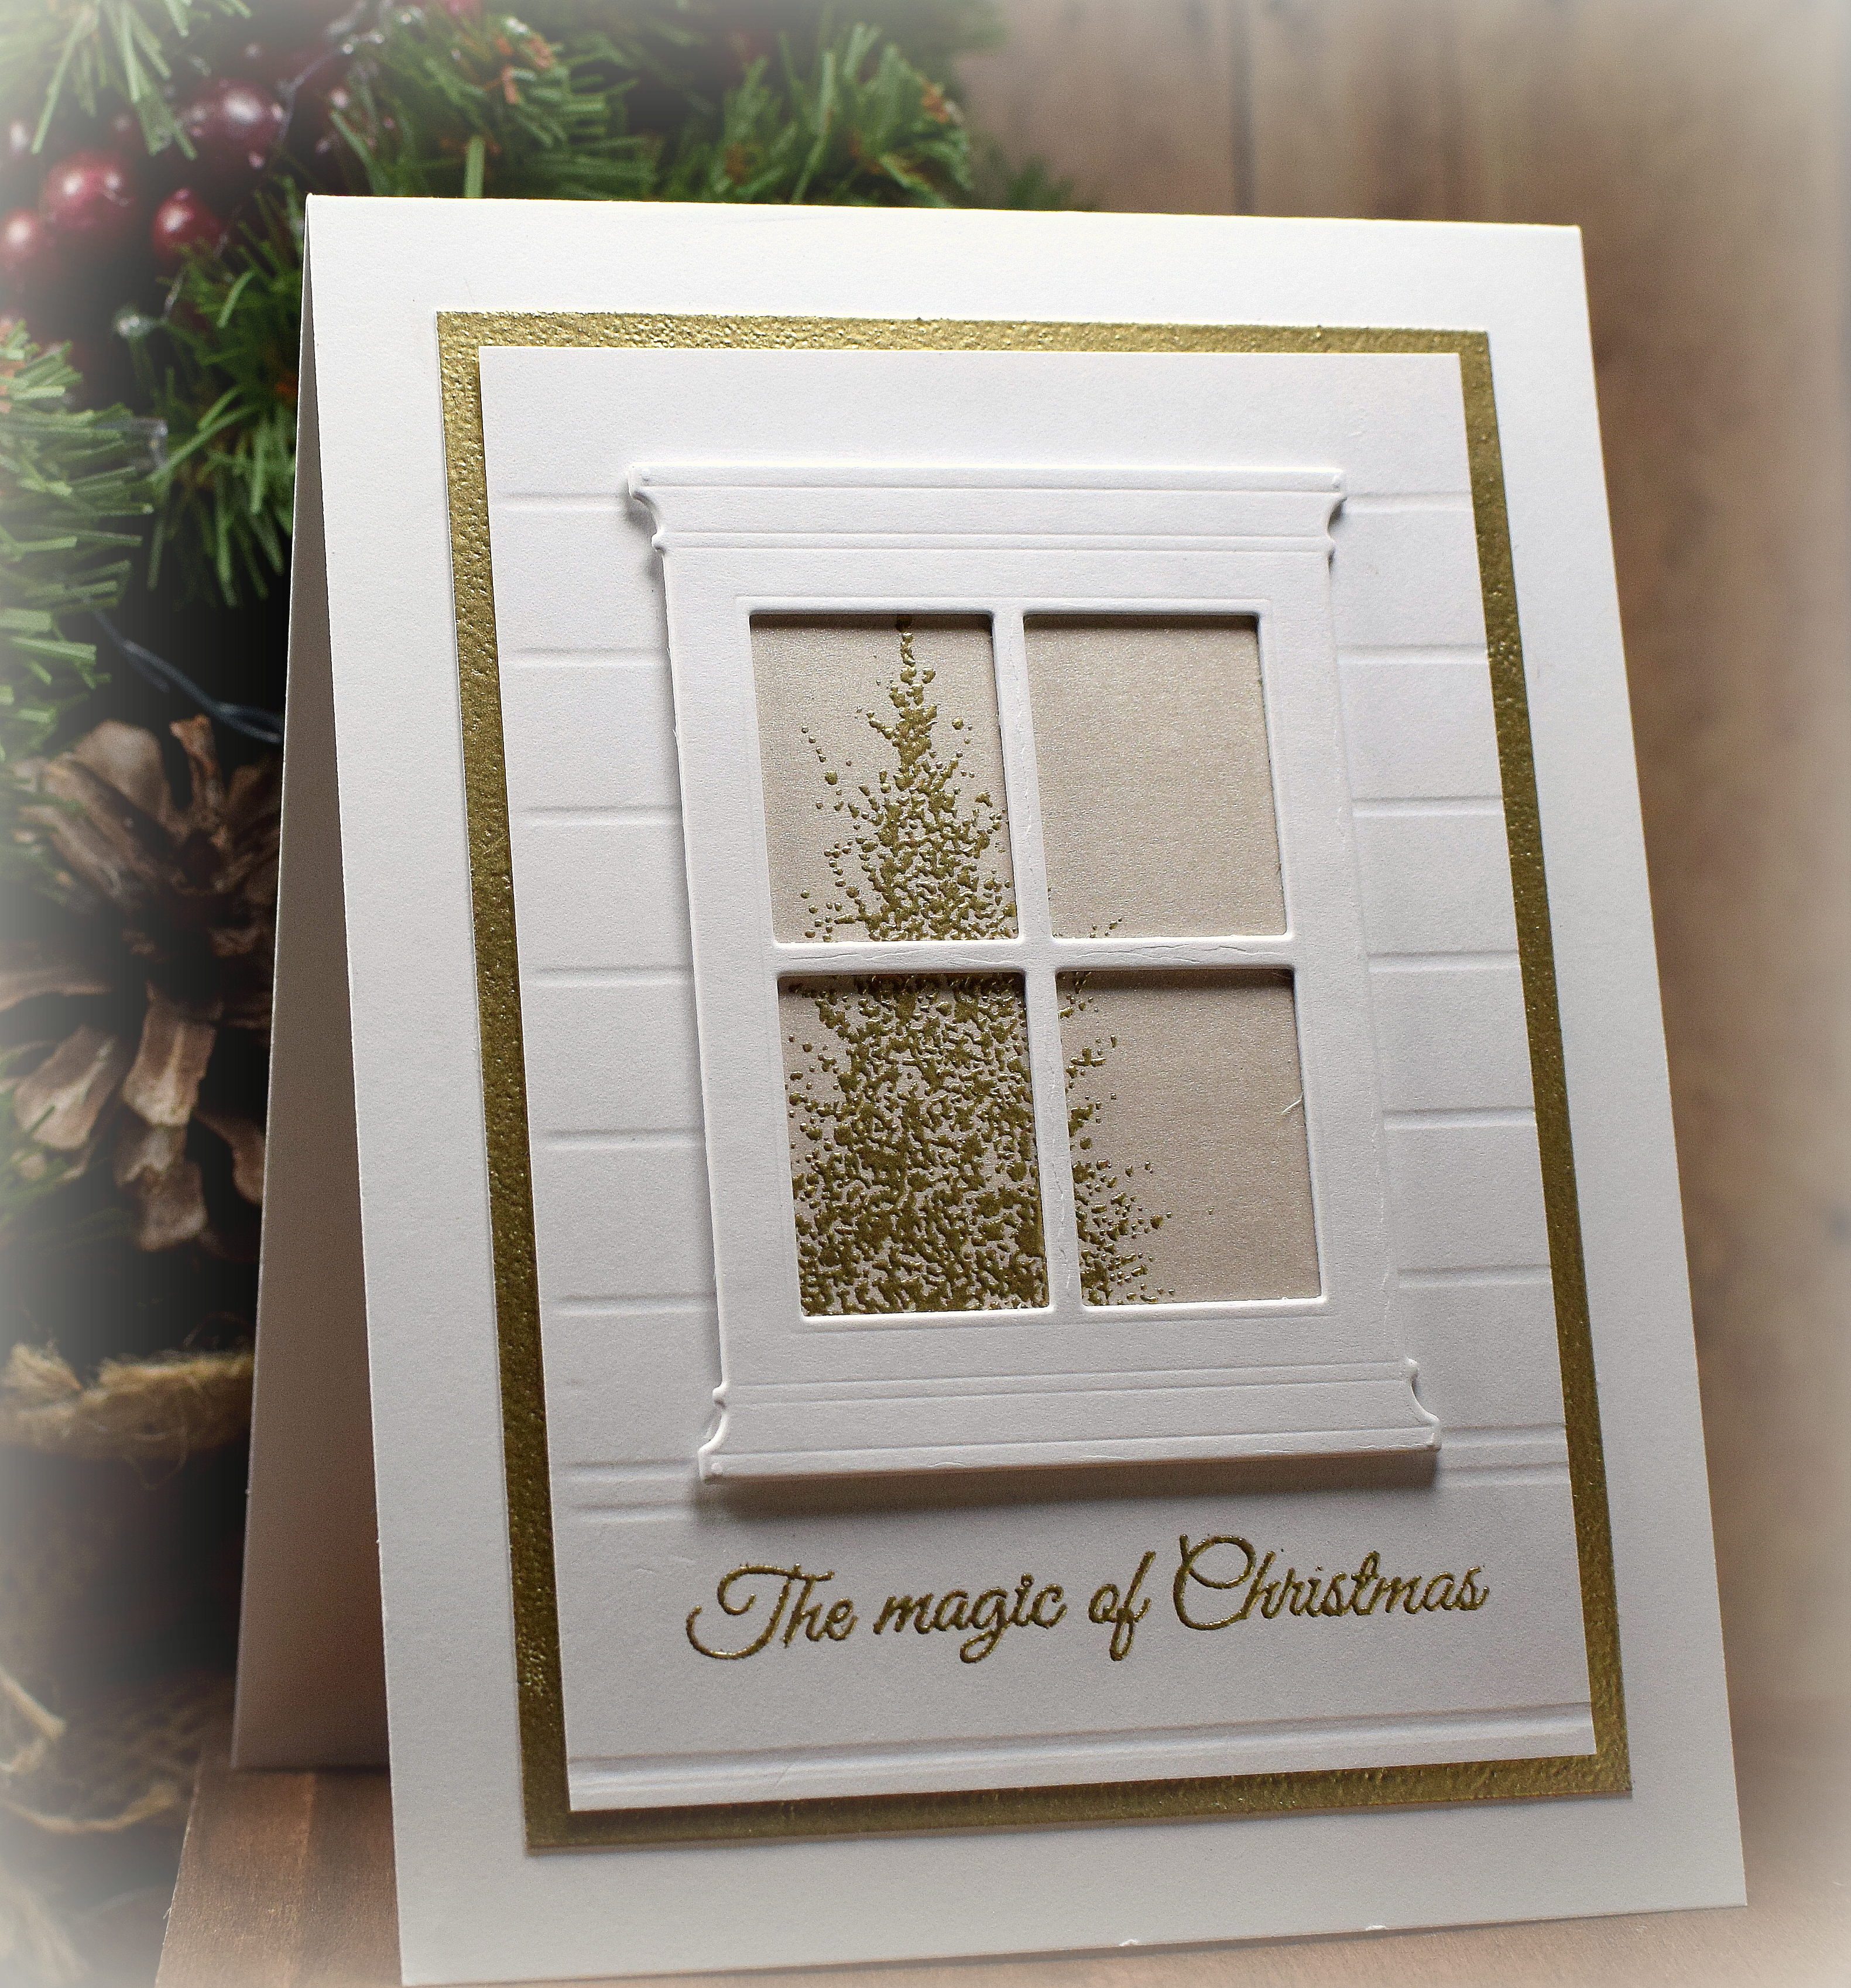
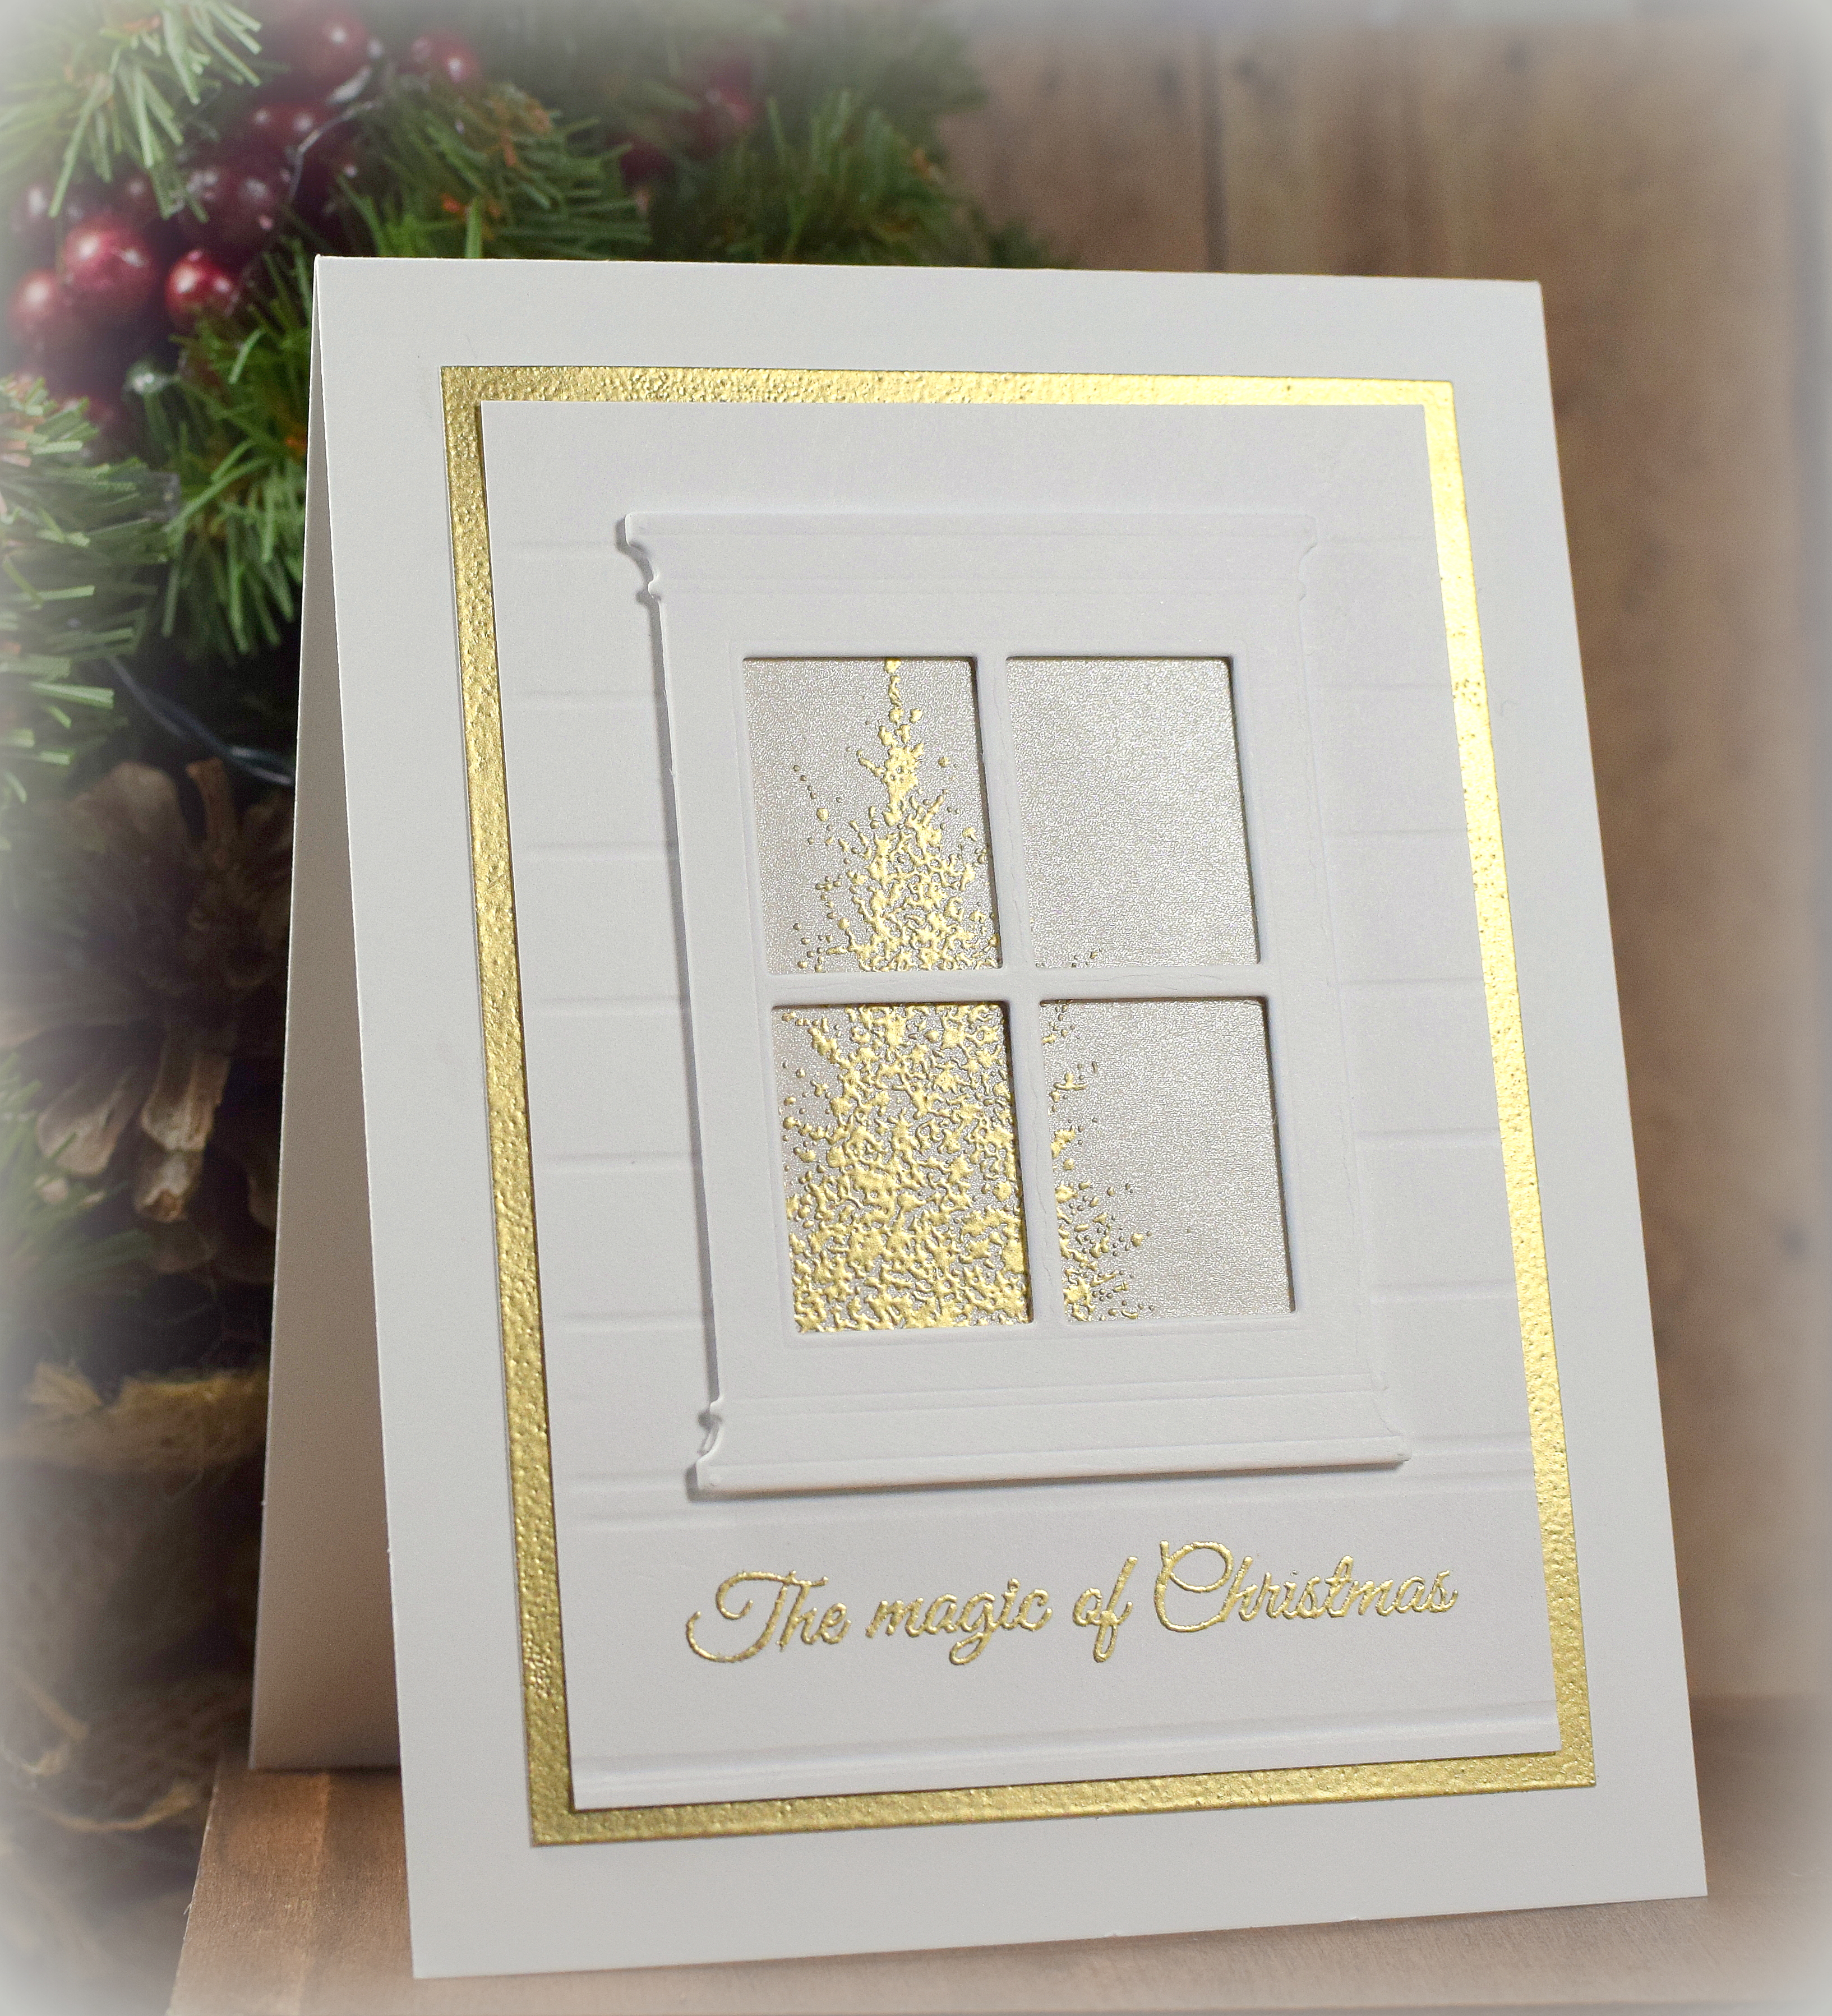
I’ve done multi-layer stamping before, but it has always been with three panels layered (and centered) one on top of the other.  I thought I’d try a more horizontal “scene” approach with this one.  (My scene layout was inspired by this card.)

HERE’S one I had done before…

Best Wishes Color Challenge wwDSCN6186

To do multi-layered stamping:

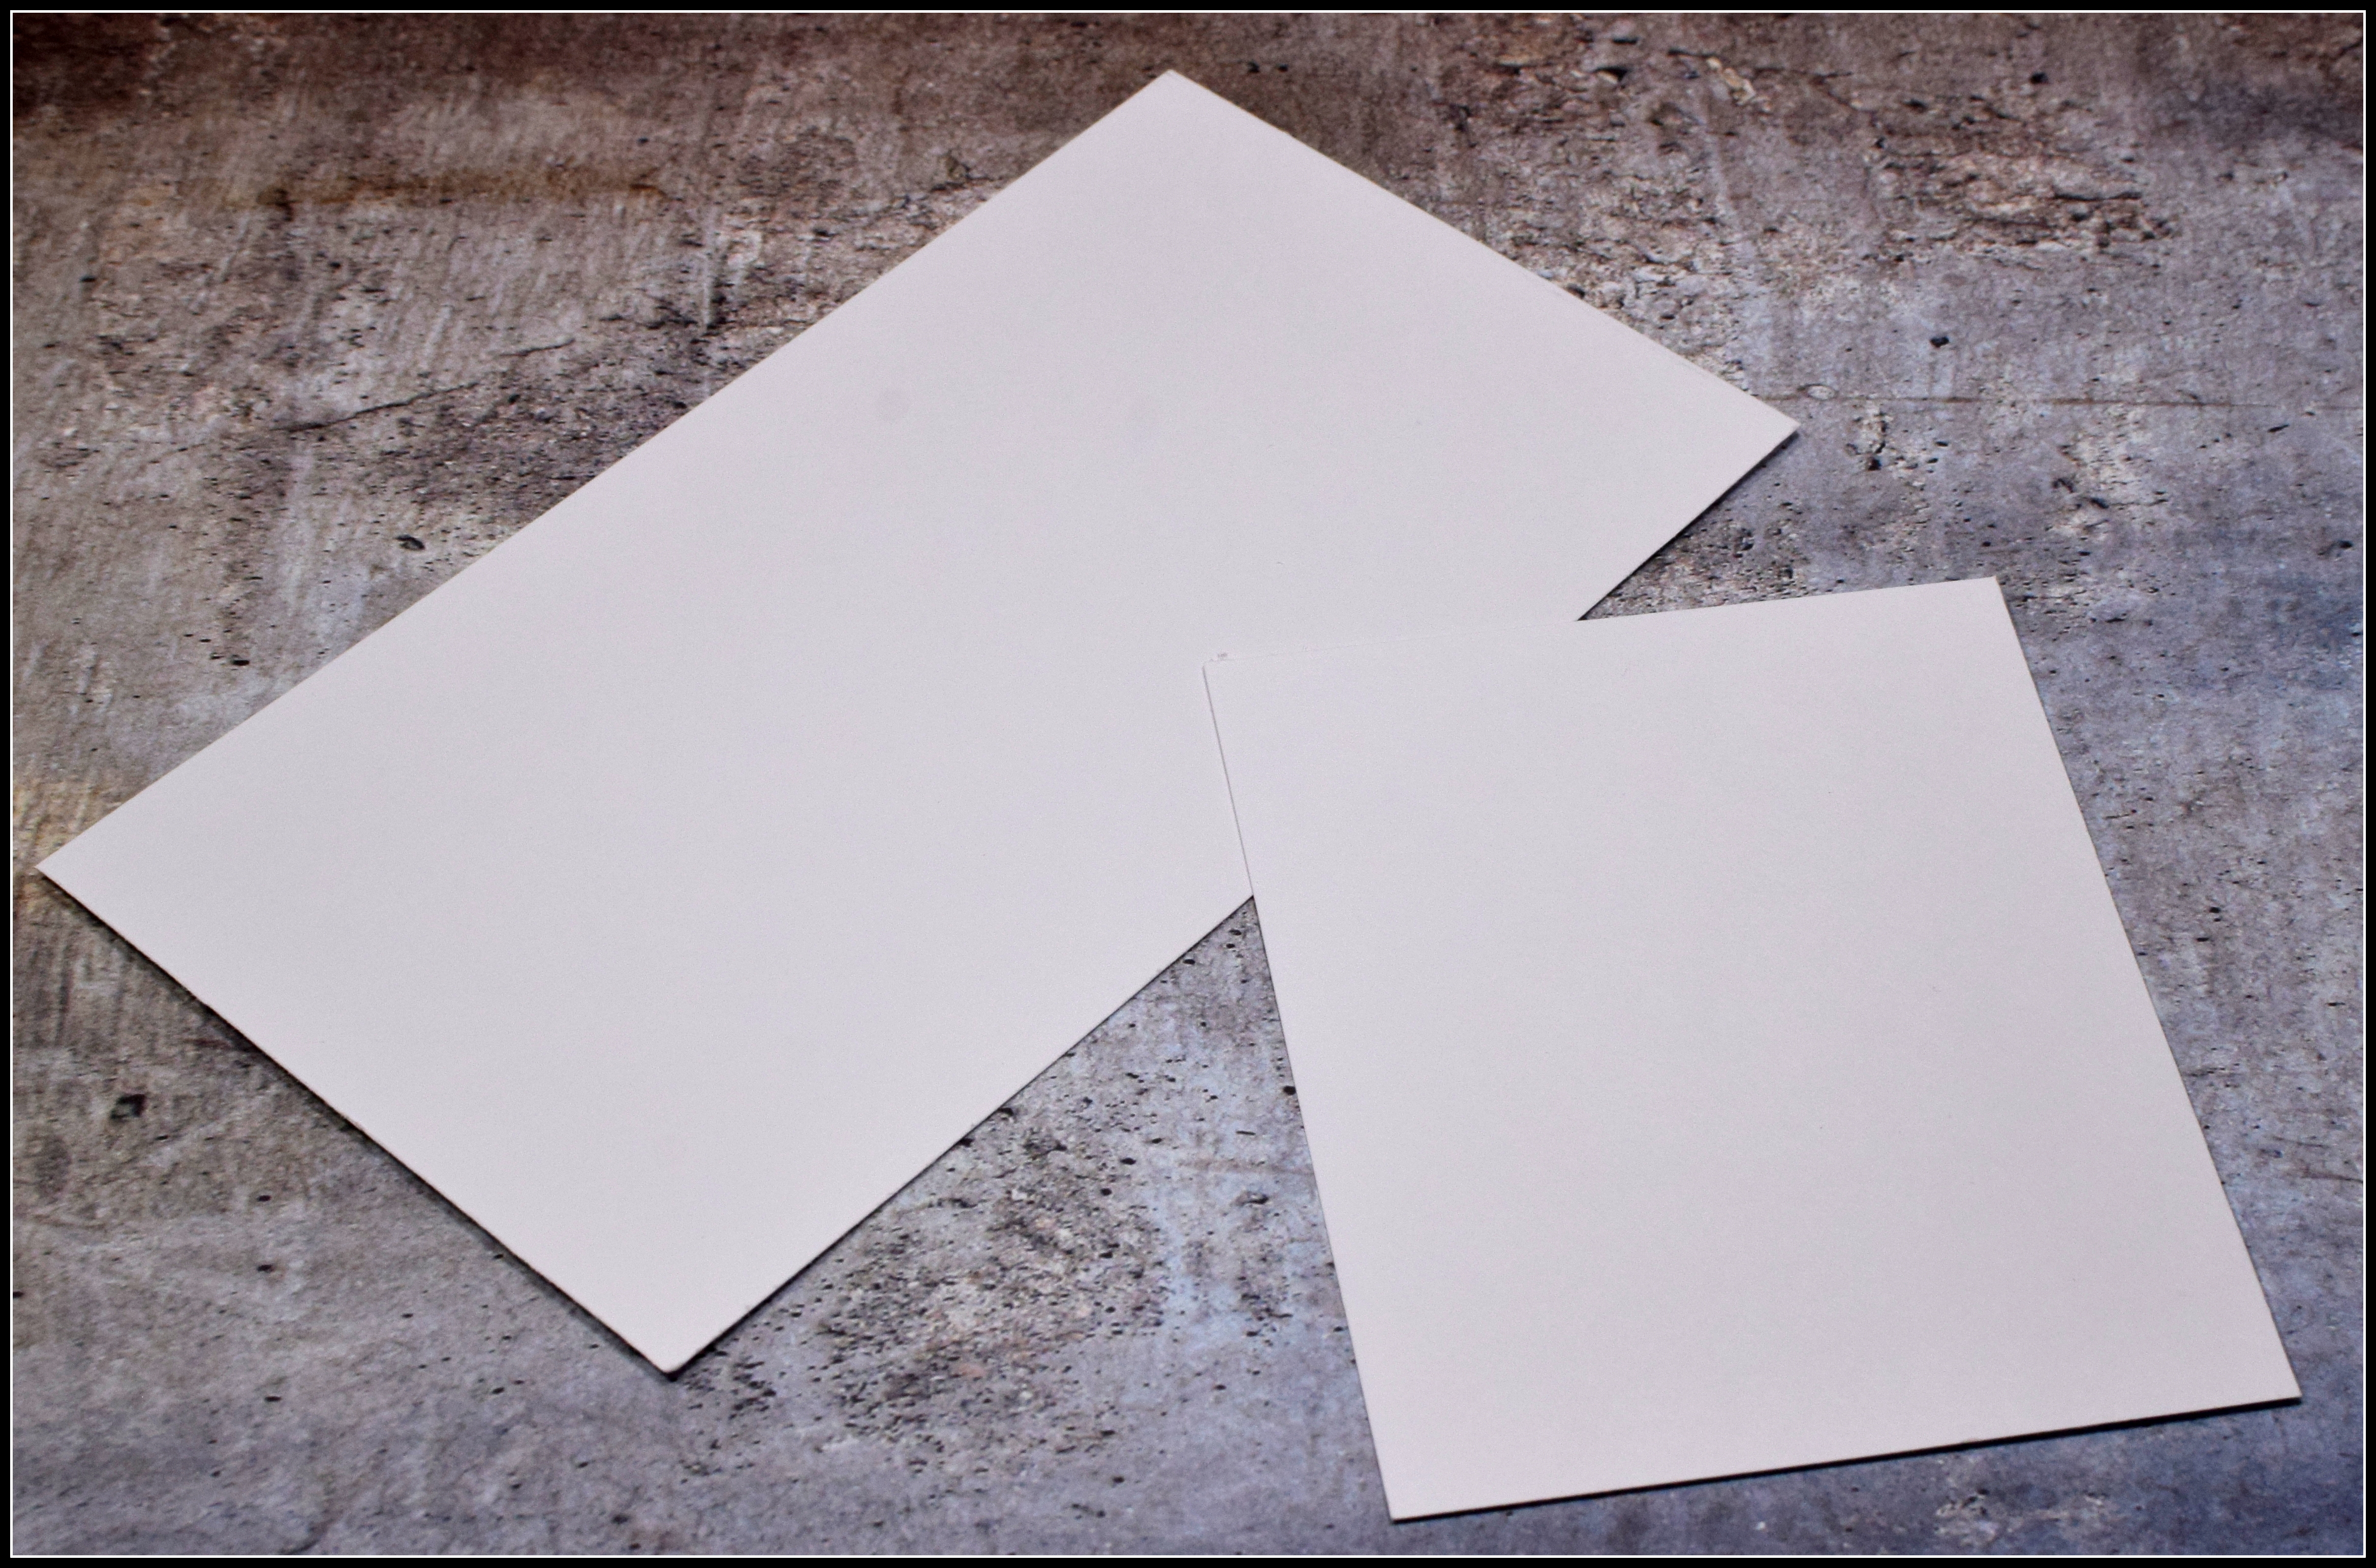
1.  Cut the panels you plan to layer and on which you plan to stamp.  (The sizes don’t matter; make them fit your design!)

001 DSC_0129

*

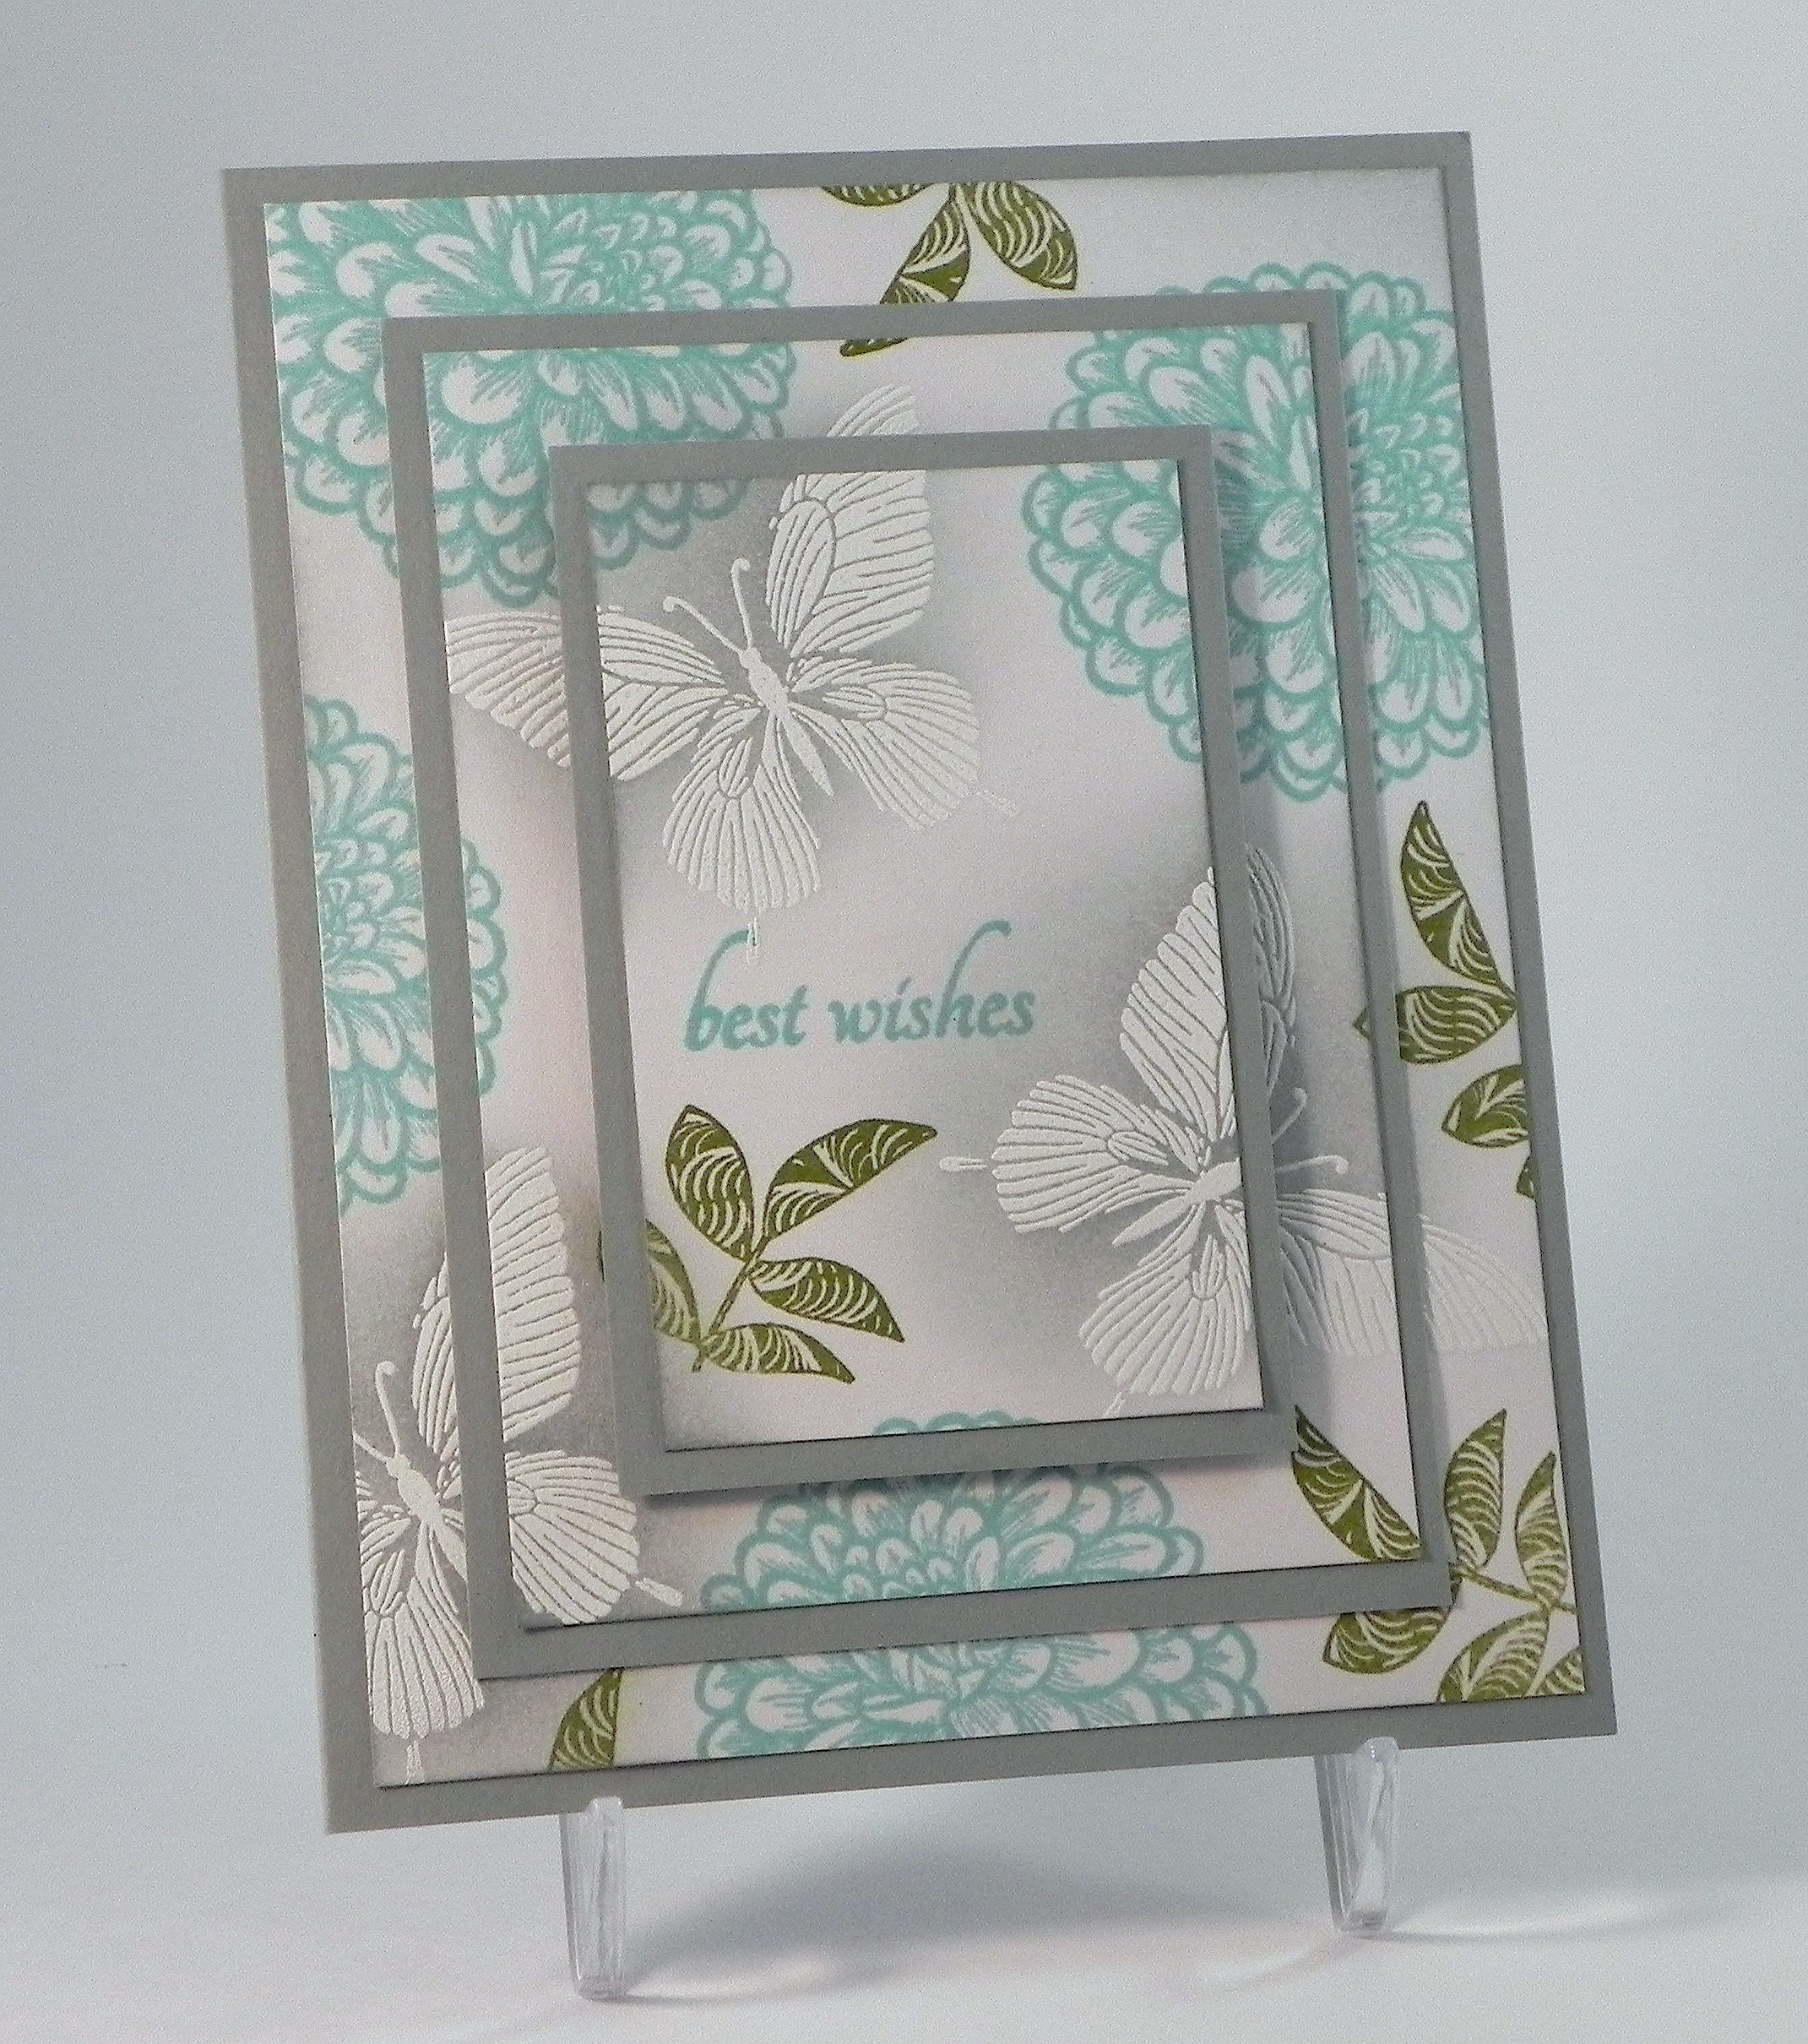
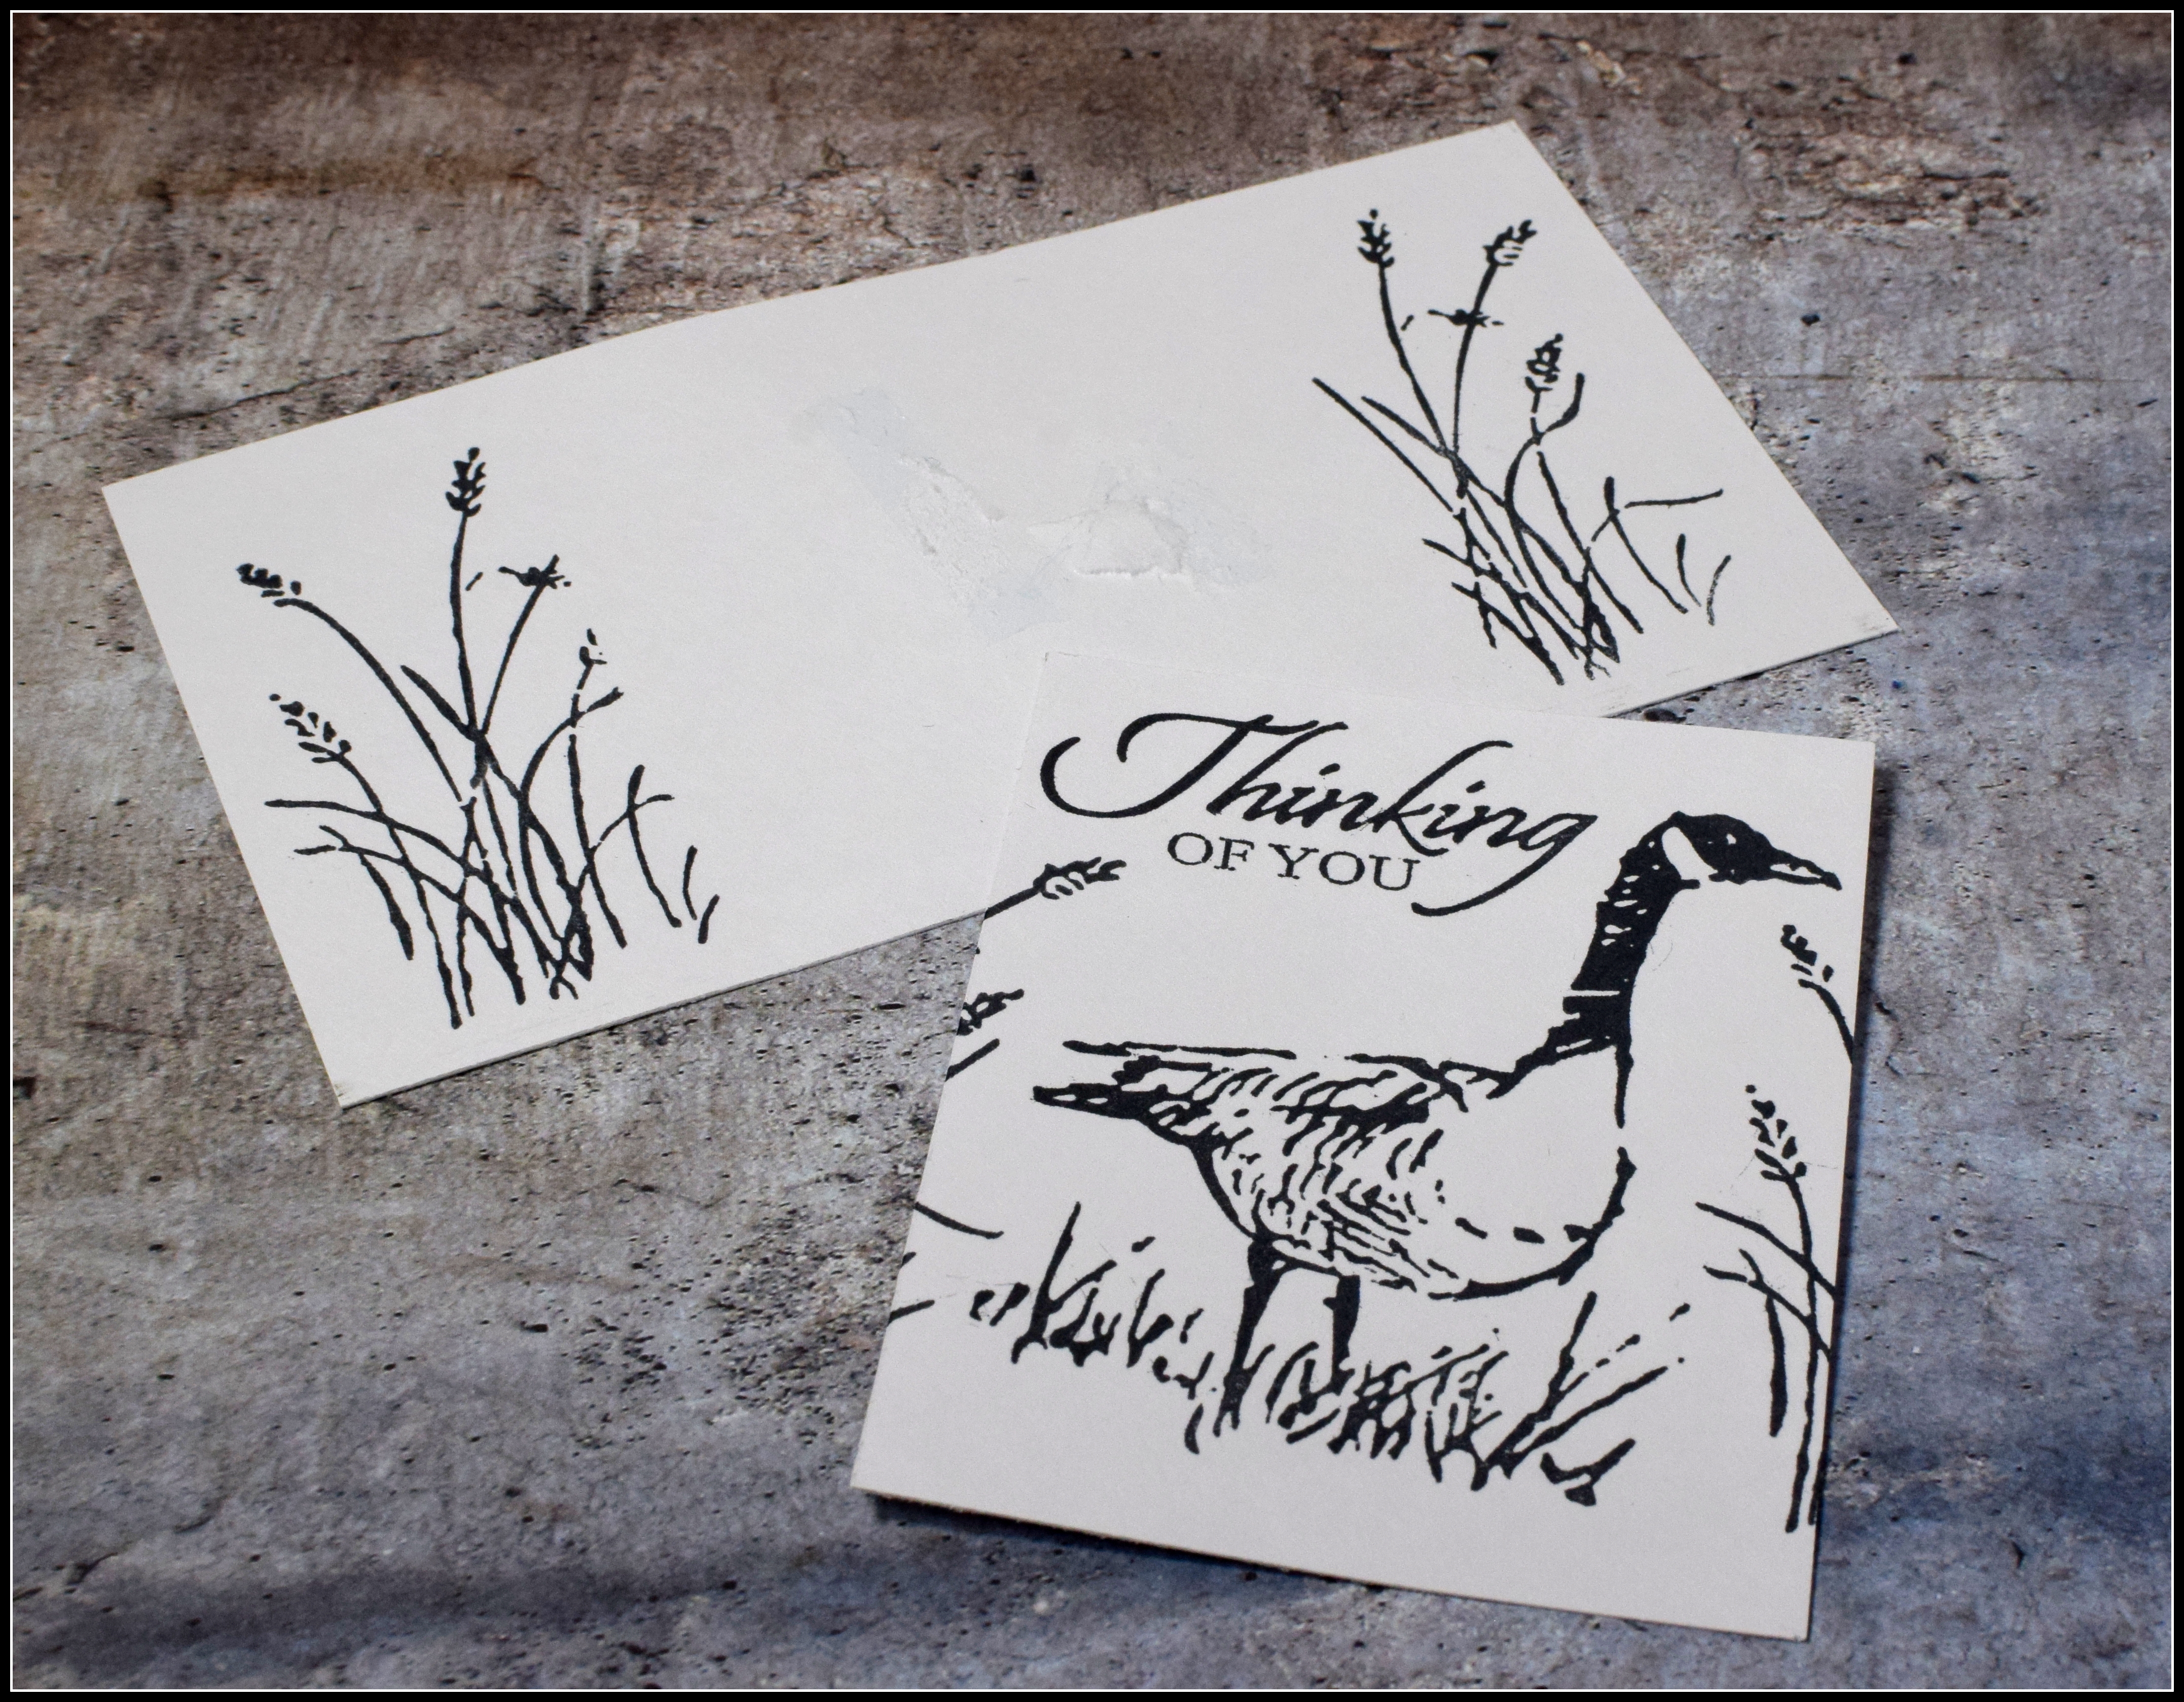
2.   Layer and temporarily adhere the panels as desired.  (Use removable adhesive behind the panels so it does not interfere with your stamping.)  For the goose sample above, I used two white rectangles – one positioned horizontally and the other smaller one positioned vertically and centered on the first.  (For the older sample, I used three white rectangles layered and centered from smallest to largest.)  Do not add the mats at this point; you are just layering the panels on which you will be stamping.

002 DSC_0131

*

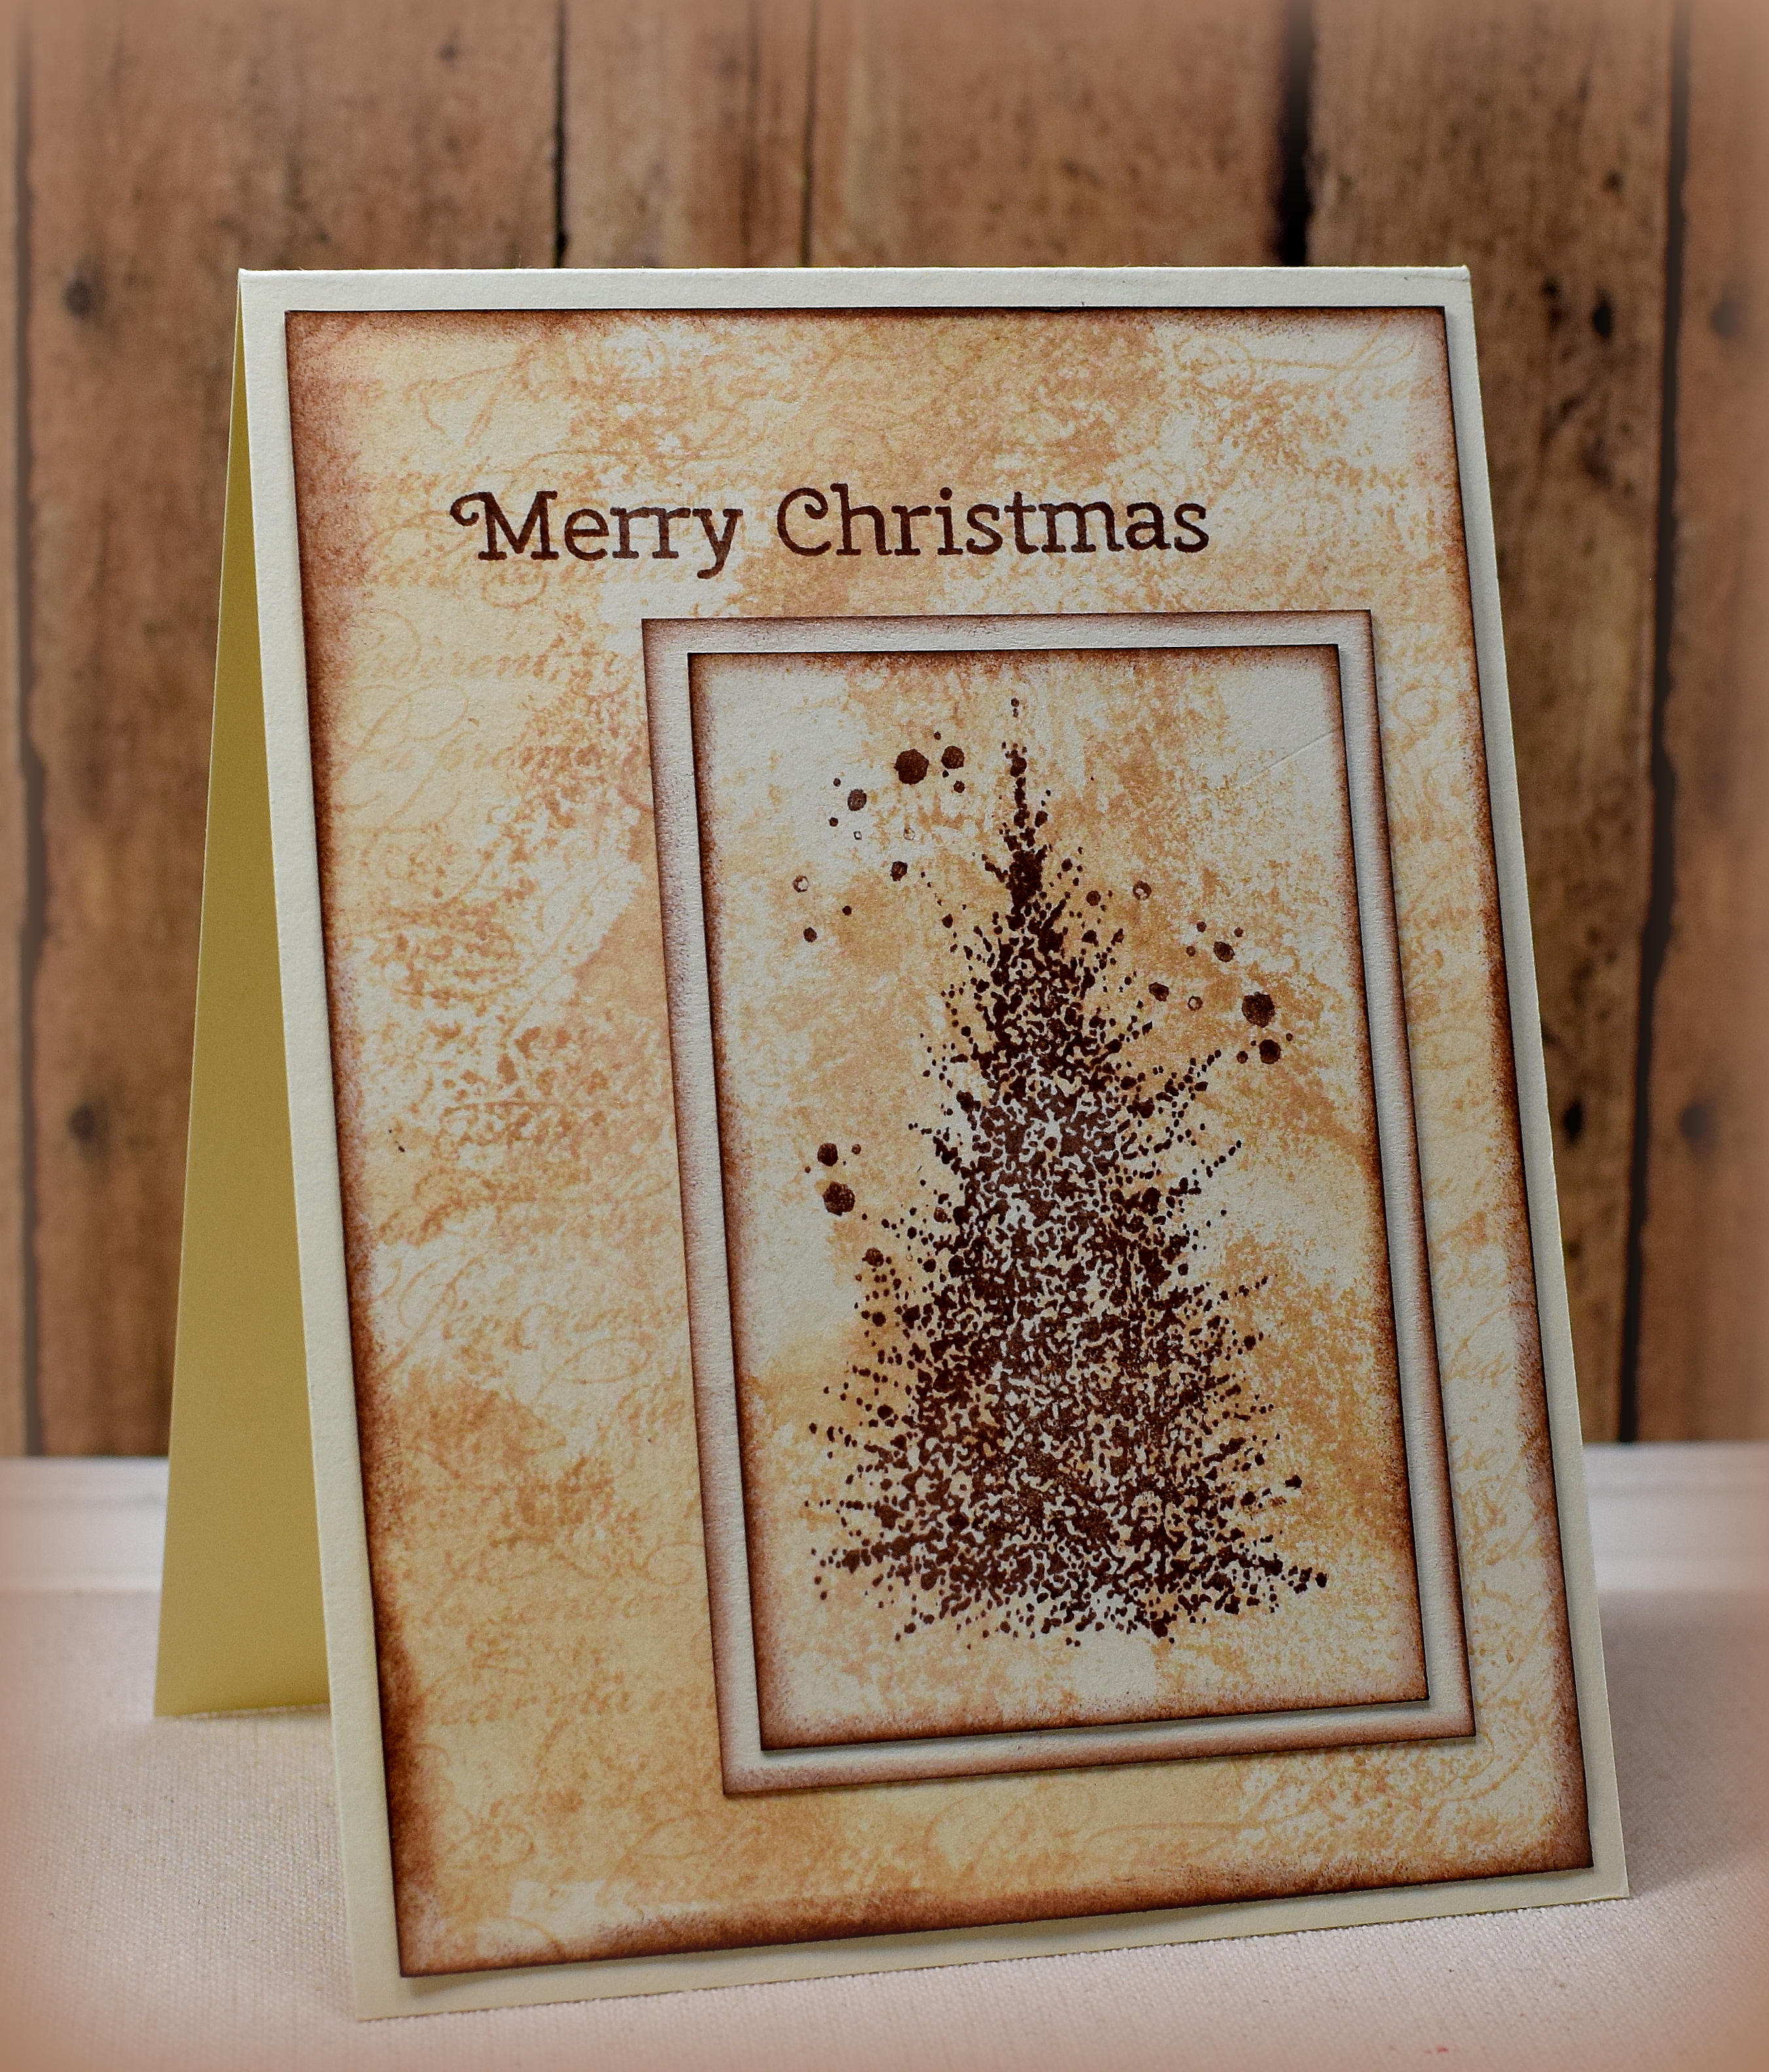
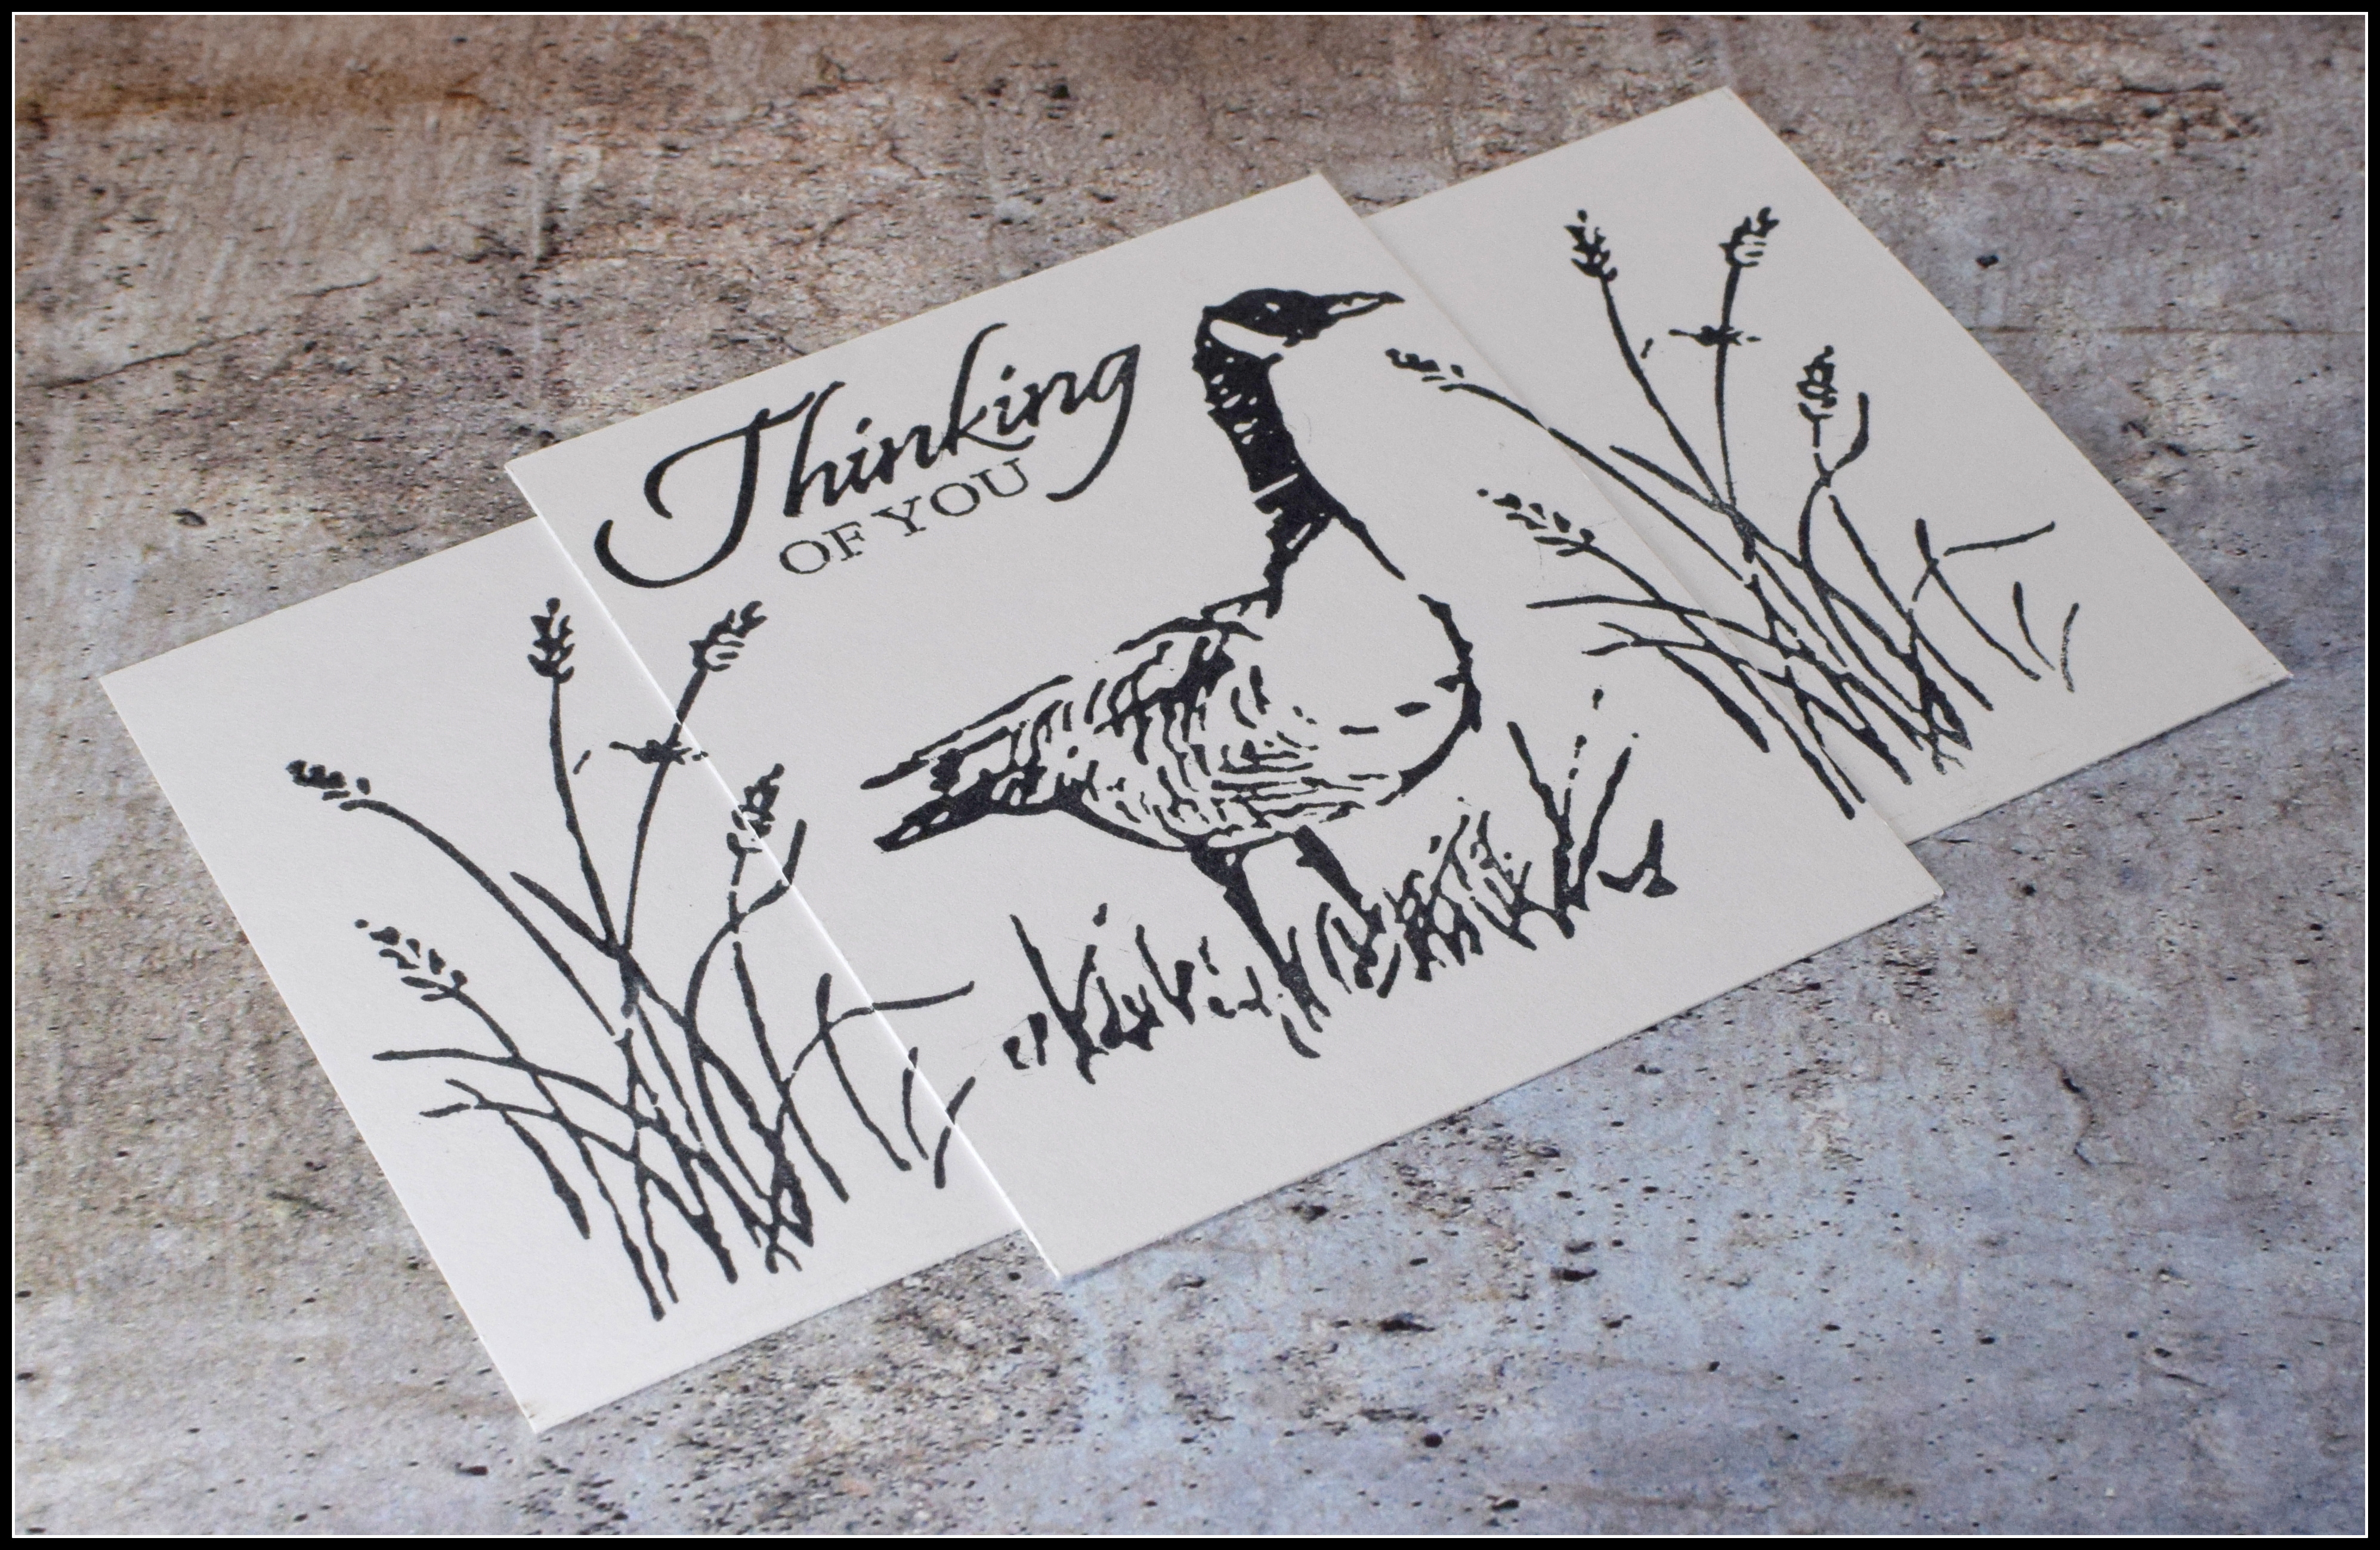
3.   Simply stamp your images onto the layered panels making sure that some of the image(s) go over the border(s) so parts of the image(s) are on two (or more of the layers).  You may notice that the images don’t stamp really close to the borders of the overlapping card stock and leave a little gap.  That’s because the thickness of the card stock is preventing the stamp from making contact with the neighboring card stock.  That’s fine; these “gaps” will be covered with the mats.

003a DSC_0134

(At this point, add color if desired.  You want the color to flow across the panels just as the stamping does.  I did not add any color here in this quick tutorial but did in my finished card project.)

*

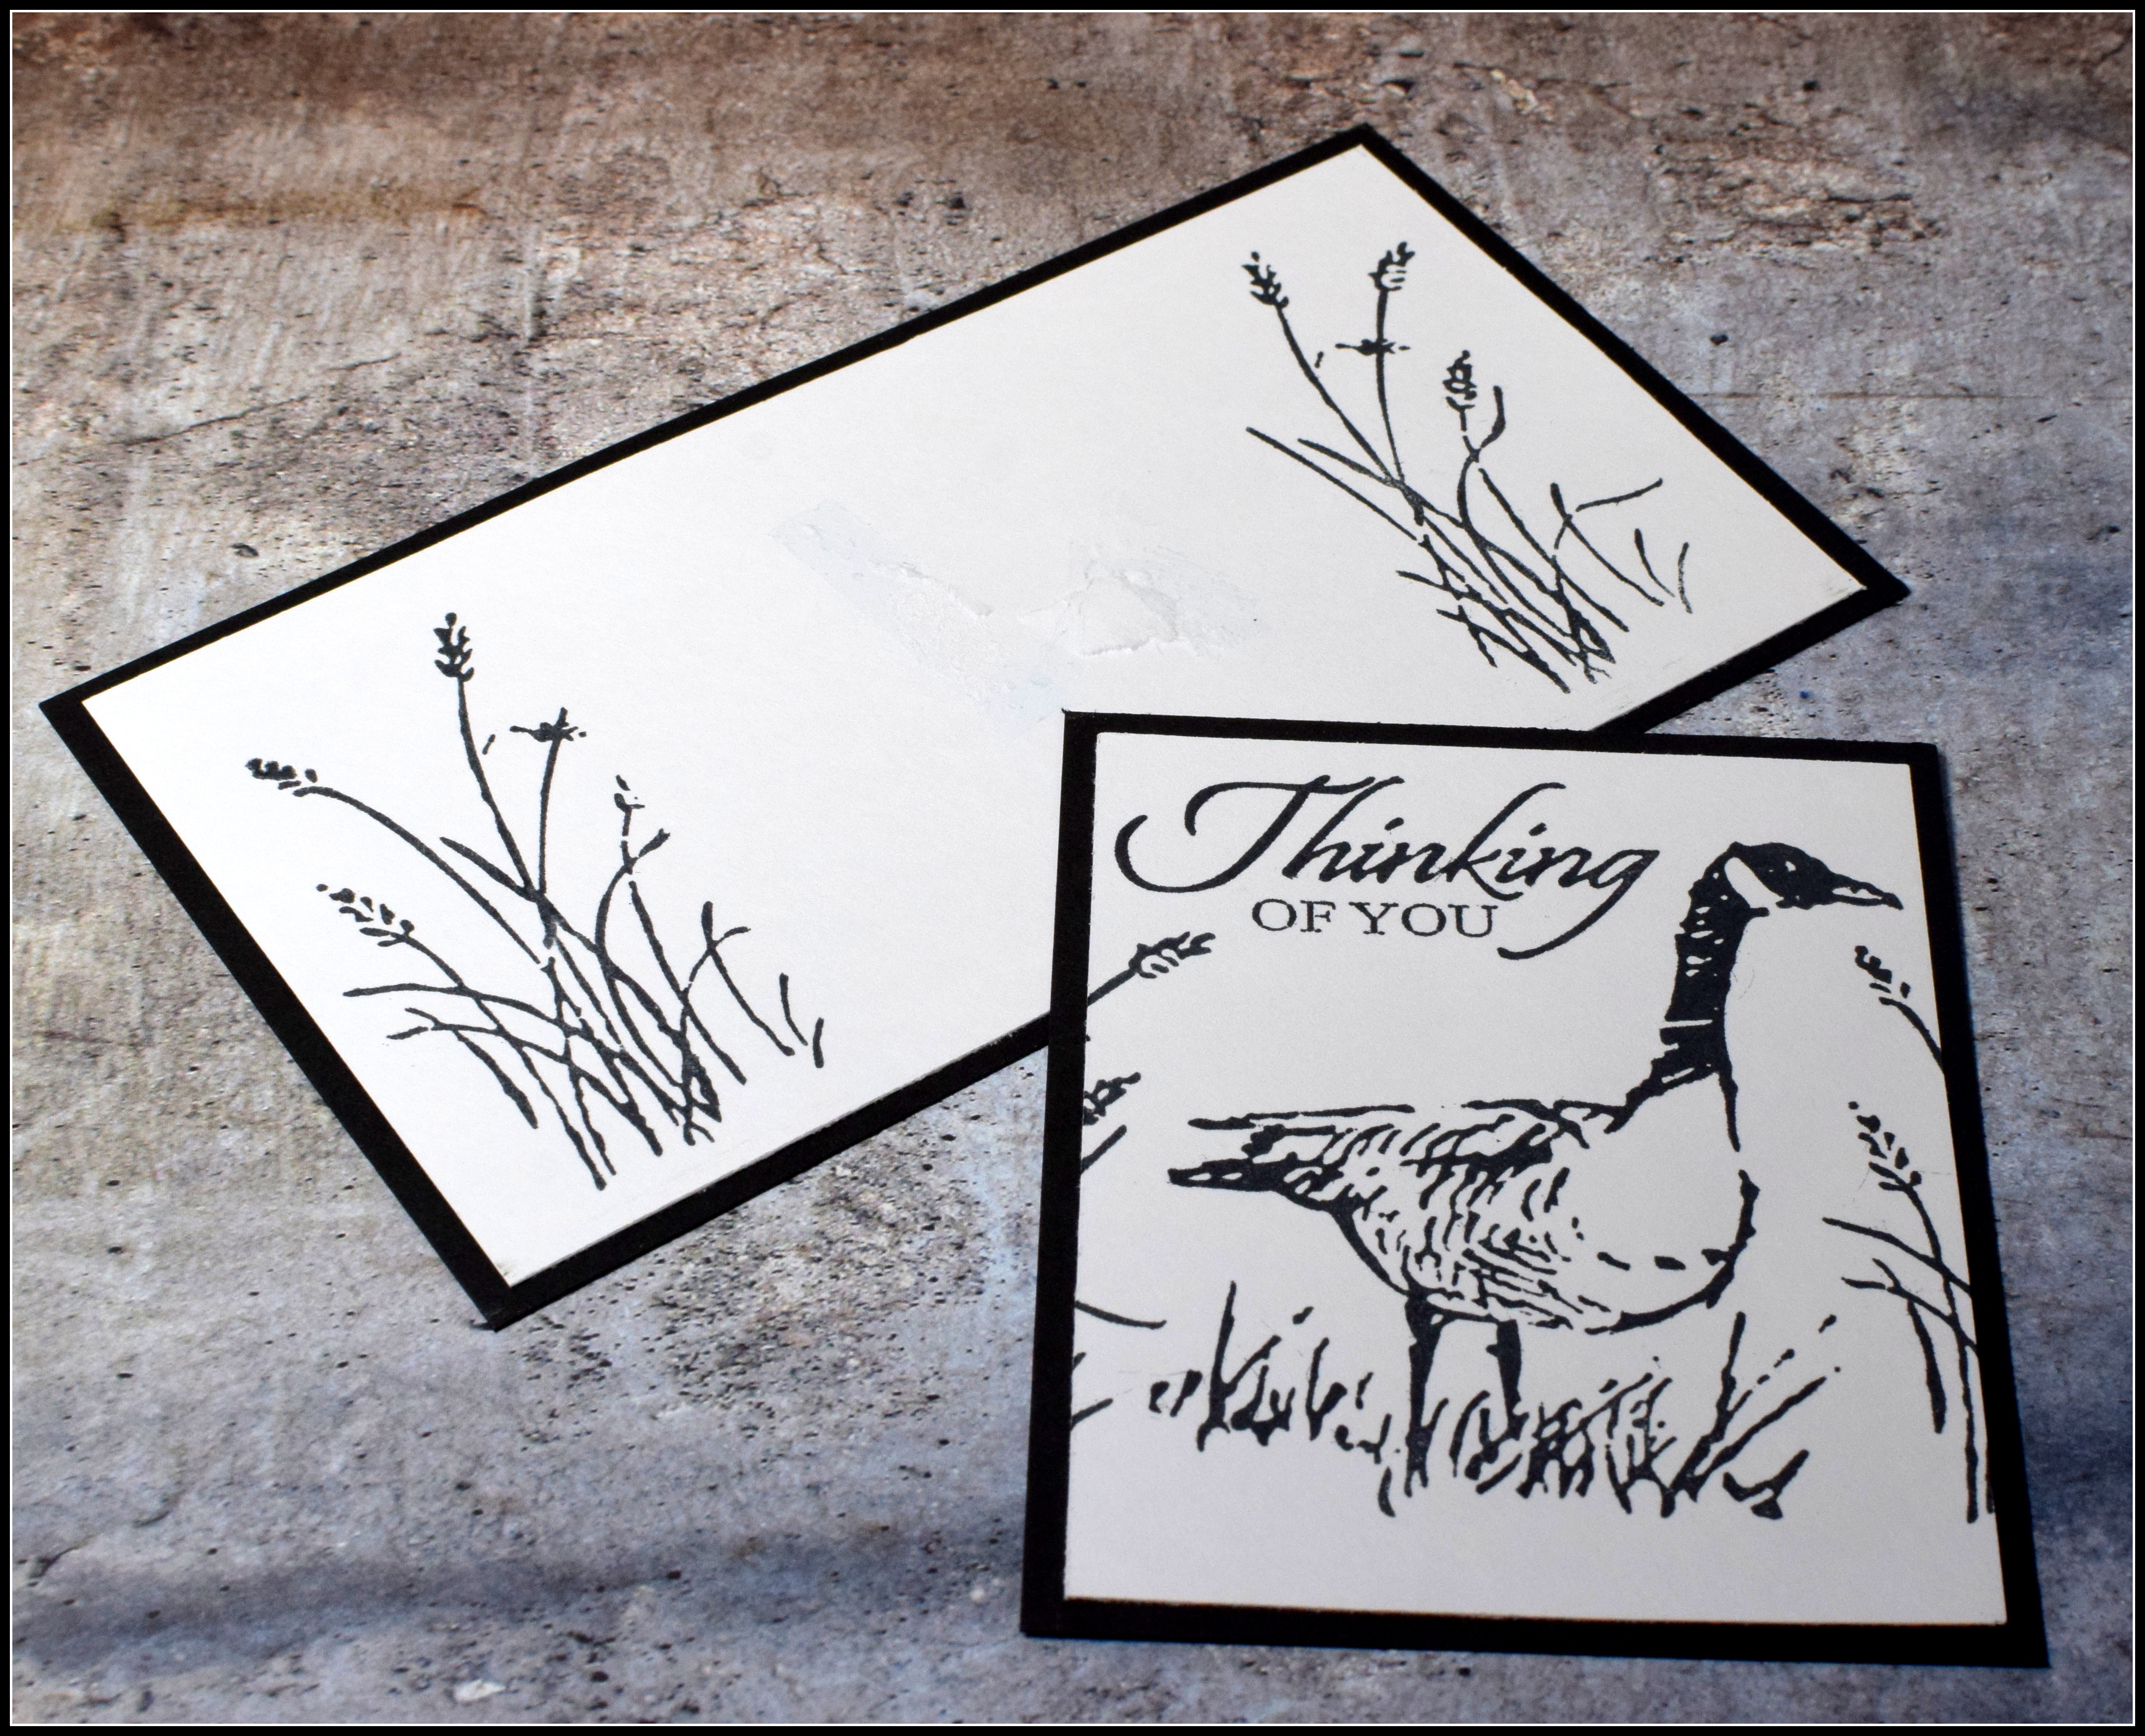
4.   Once all the stamping (and coloring/inking/shading if desired) is complete, separate the stamped panels, mat each one, and re-attach them by layering them the same way they were originally stamped.  Make sure to line up the images as best you can so it looks like they continue past the mats.

   004 DSC_0135   005 DSC_0137

006DSC_0138

Play around with different sizes and positions for your layered panels for a variety of card layouts!

*

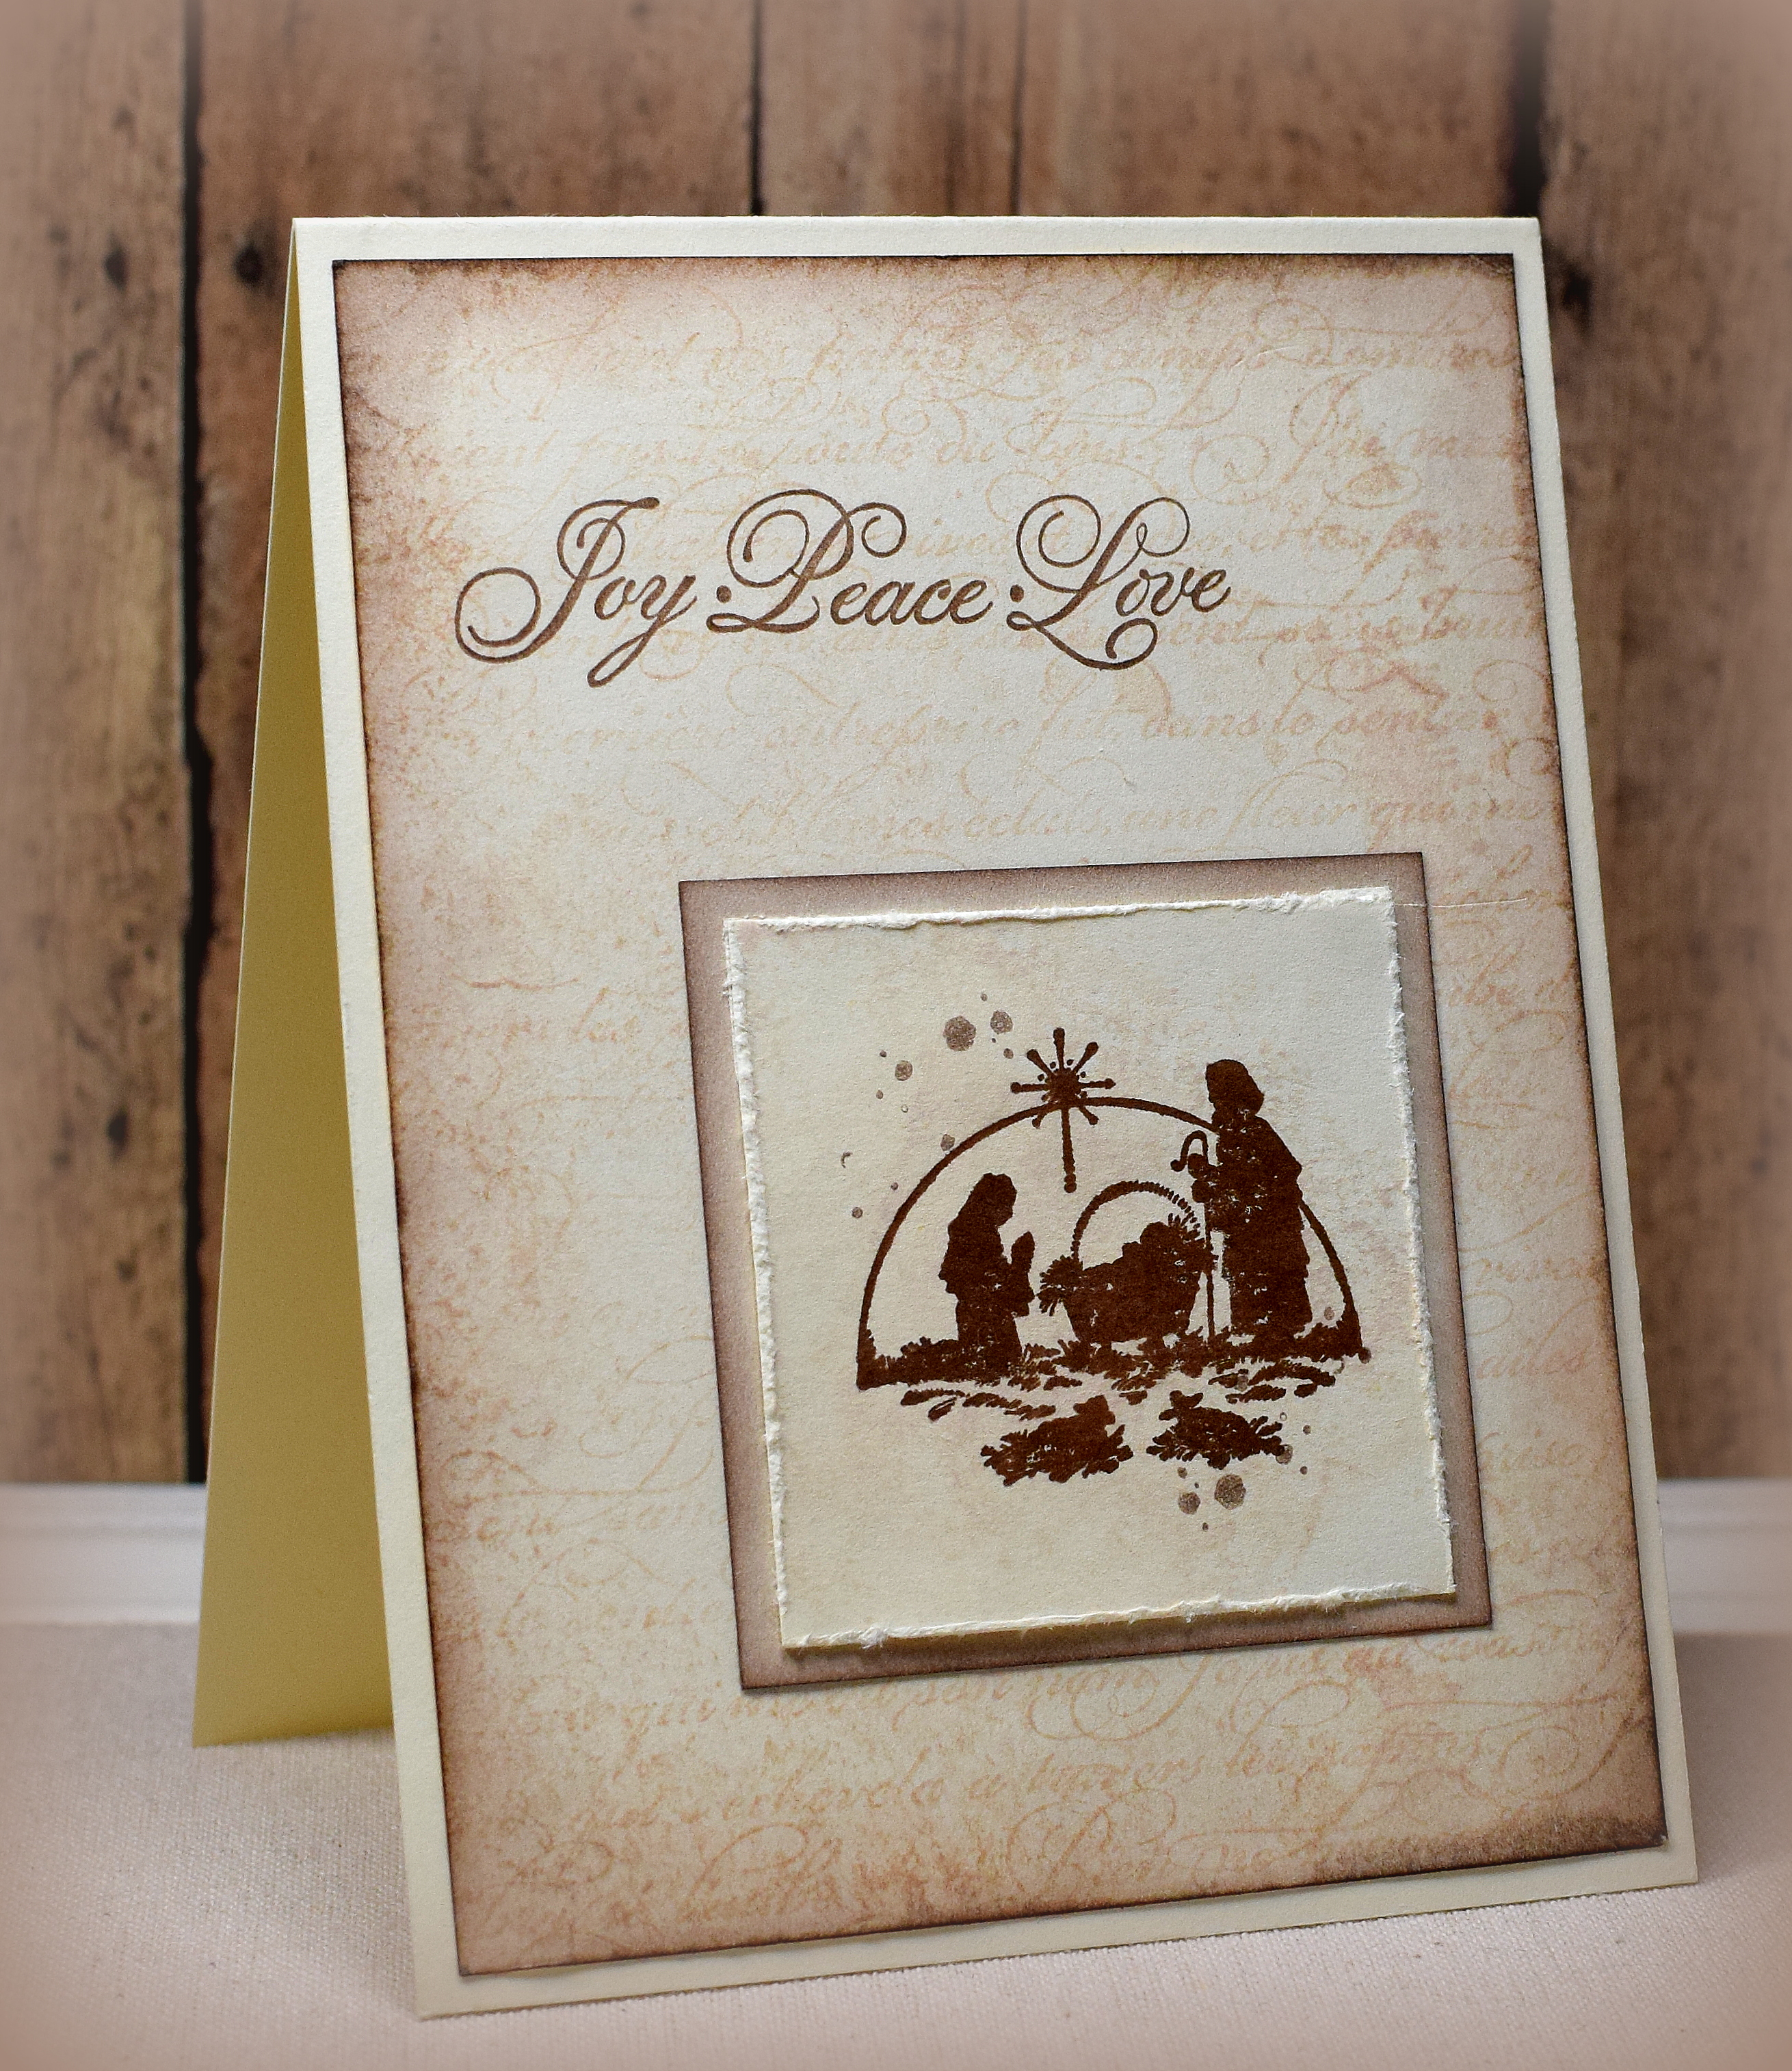
To add the color to my images, I loosely sponged ink over and around the areas with a foam blending tool.  I just wanted a hint of color and was not going for a neatly colored scene.

wDSC_0128 cropped

I used Recollections white, black and kraft card stock along with Tim Holtz Vintage Photo distress ink and Memento Tuxedo Black, Desert Sand, Bamboo Leaves, and Summer Sky inks.  I spritzed ink over the panels with a Walnut Stain distress marker and a Tim Holtz marker spritzer tool.  The embossing folder is Multi Stripes by Darice.  Stamps were from the Stampin’ Up “Wetlands” set (retired?).

Thanks for checking out my card project!

This content uses referral links as described in the disclosure policy on my sidebar.