Embossing Folder with Powders

Embossing Folder with Powders

I came across THIS VIDEO by Jennifer McGuire where she used Lindy’s Magical Powders and embossing folders to create a bunch of background panels for cards. I did not have those powders, but I did have Bisters and Color Burst powders so I thought I’d give it a try.

A few tips/comments: When she says a little powder goes a long way, listen to her! (I think I used way too much powder!!) And when she shows the sandwich she used for her embossing, pay attention. (I kind of ignored that thinking I knew how to emboss, but the watercolor paper is so thick that I struggled to get the folder through with the regular embossing plate. It eventually squeezed through but shot out the other end when done and wet ink went everywhere!) And finally, the next time I work with these powders, I may seriously consider wearing gloves. (My hands were a mess, and I struggled to get the ink off!) It was fun to experiment with all the different methods she showed in the video, though.

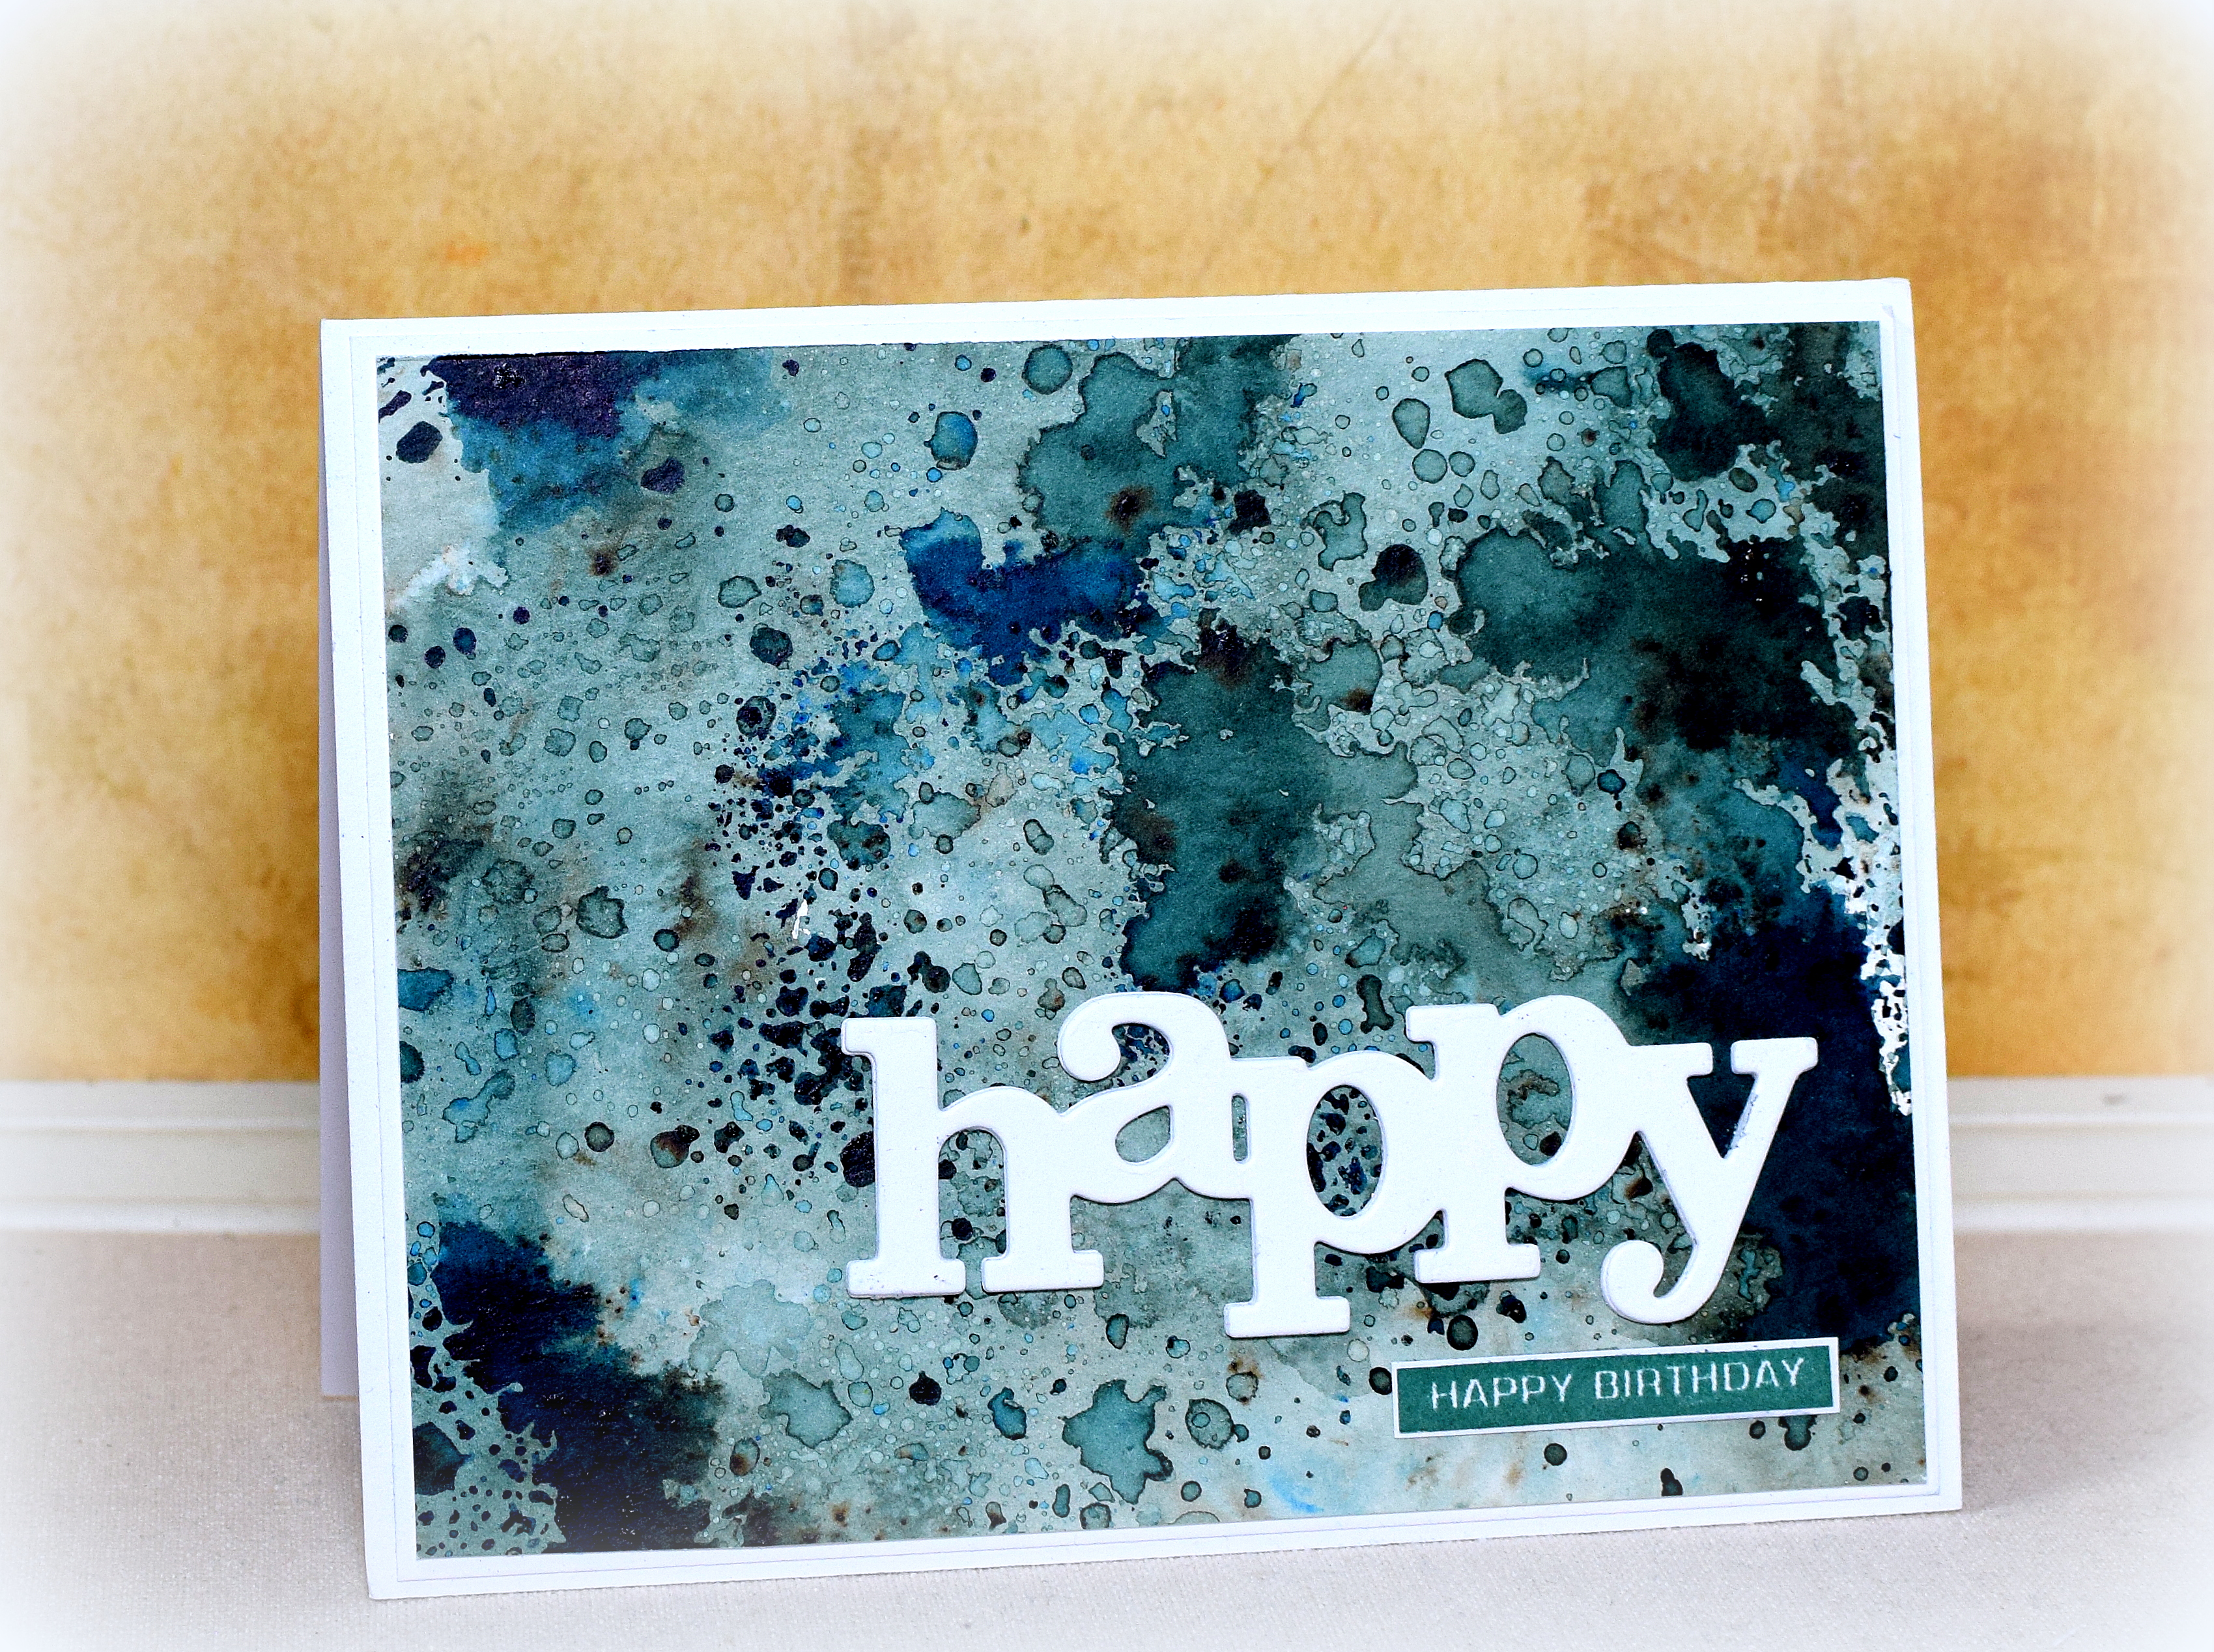
The greenish samples were made with blue and green Bisters. For the sample above and this one (below), I put the powders directly on the folder, spritzed with water, and embossed a piece of watercolor paper:

For the next one, I sprayed the embossing folder (with the leftover ink) with water and pressed the watercolor paper down on it as if I were stamping the image (and then smooshed parts with ink on mat).

I had tons of ink/water on my mat so I smooshed watercolor panels through it to pick up the color.

The blue and purple samples were made with Color Burst. In her video, she shows how to add white pigment ink to the embossed surface (once dry) to bring out the pattern better. (You can see this on the second and third samples below.)

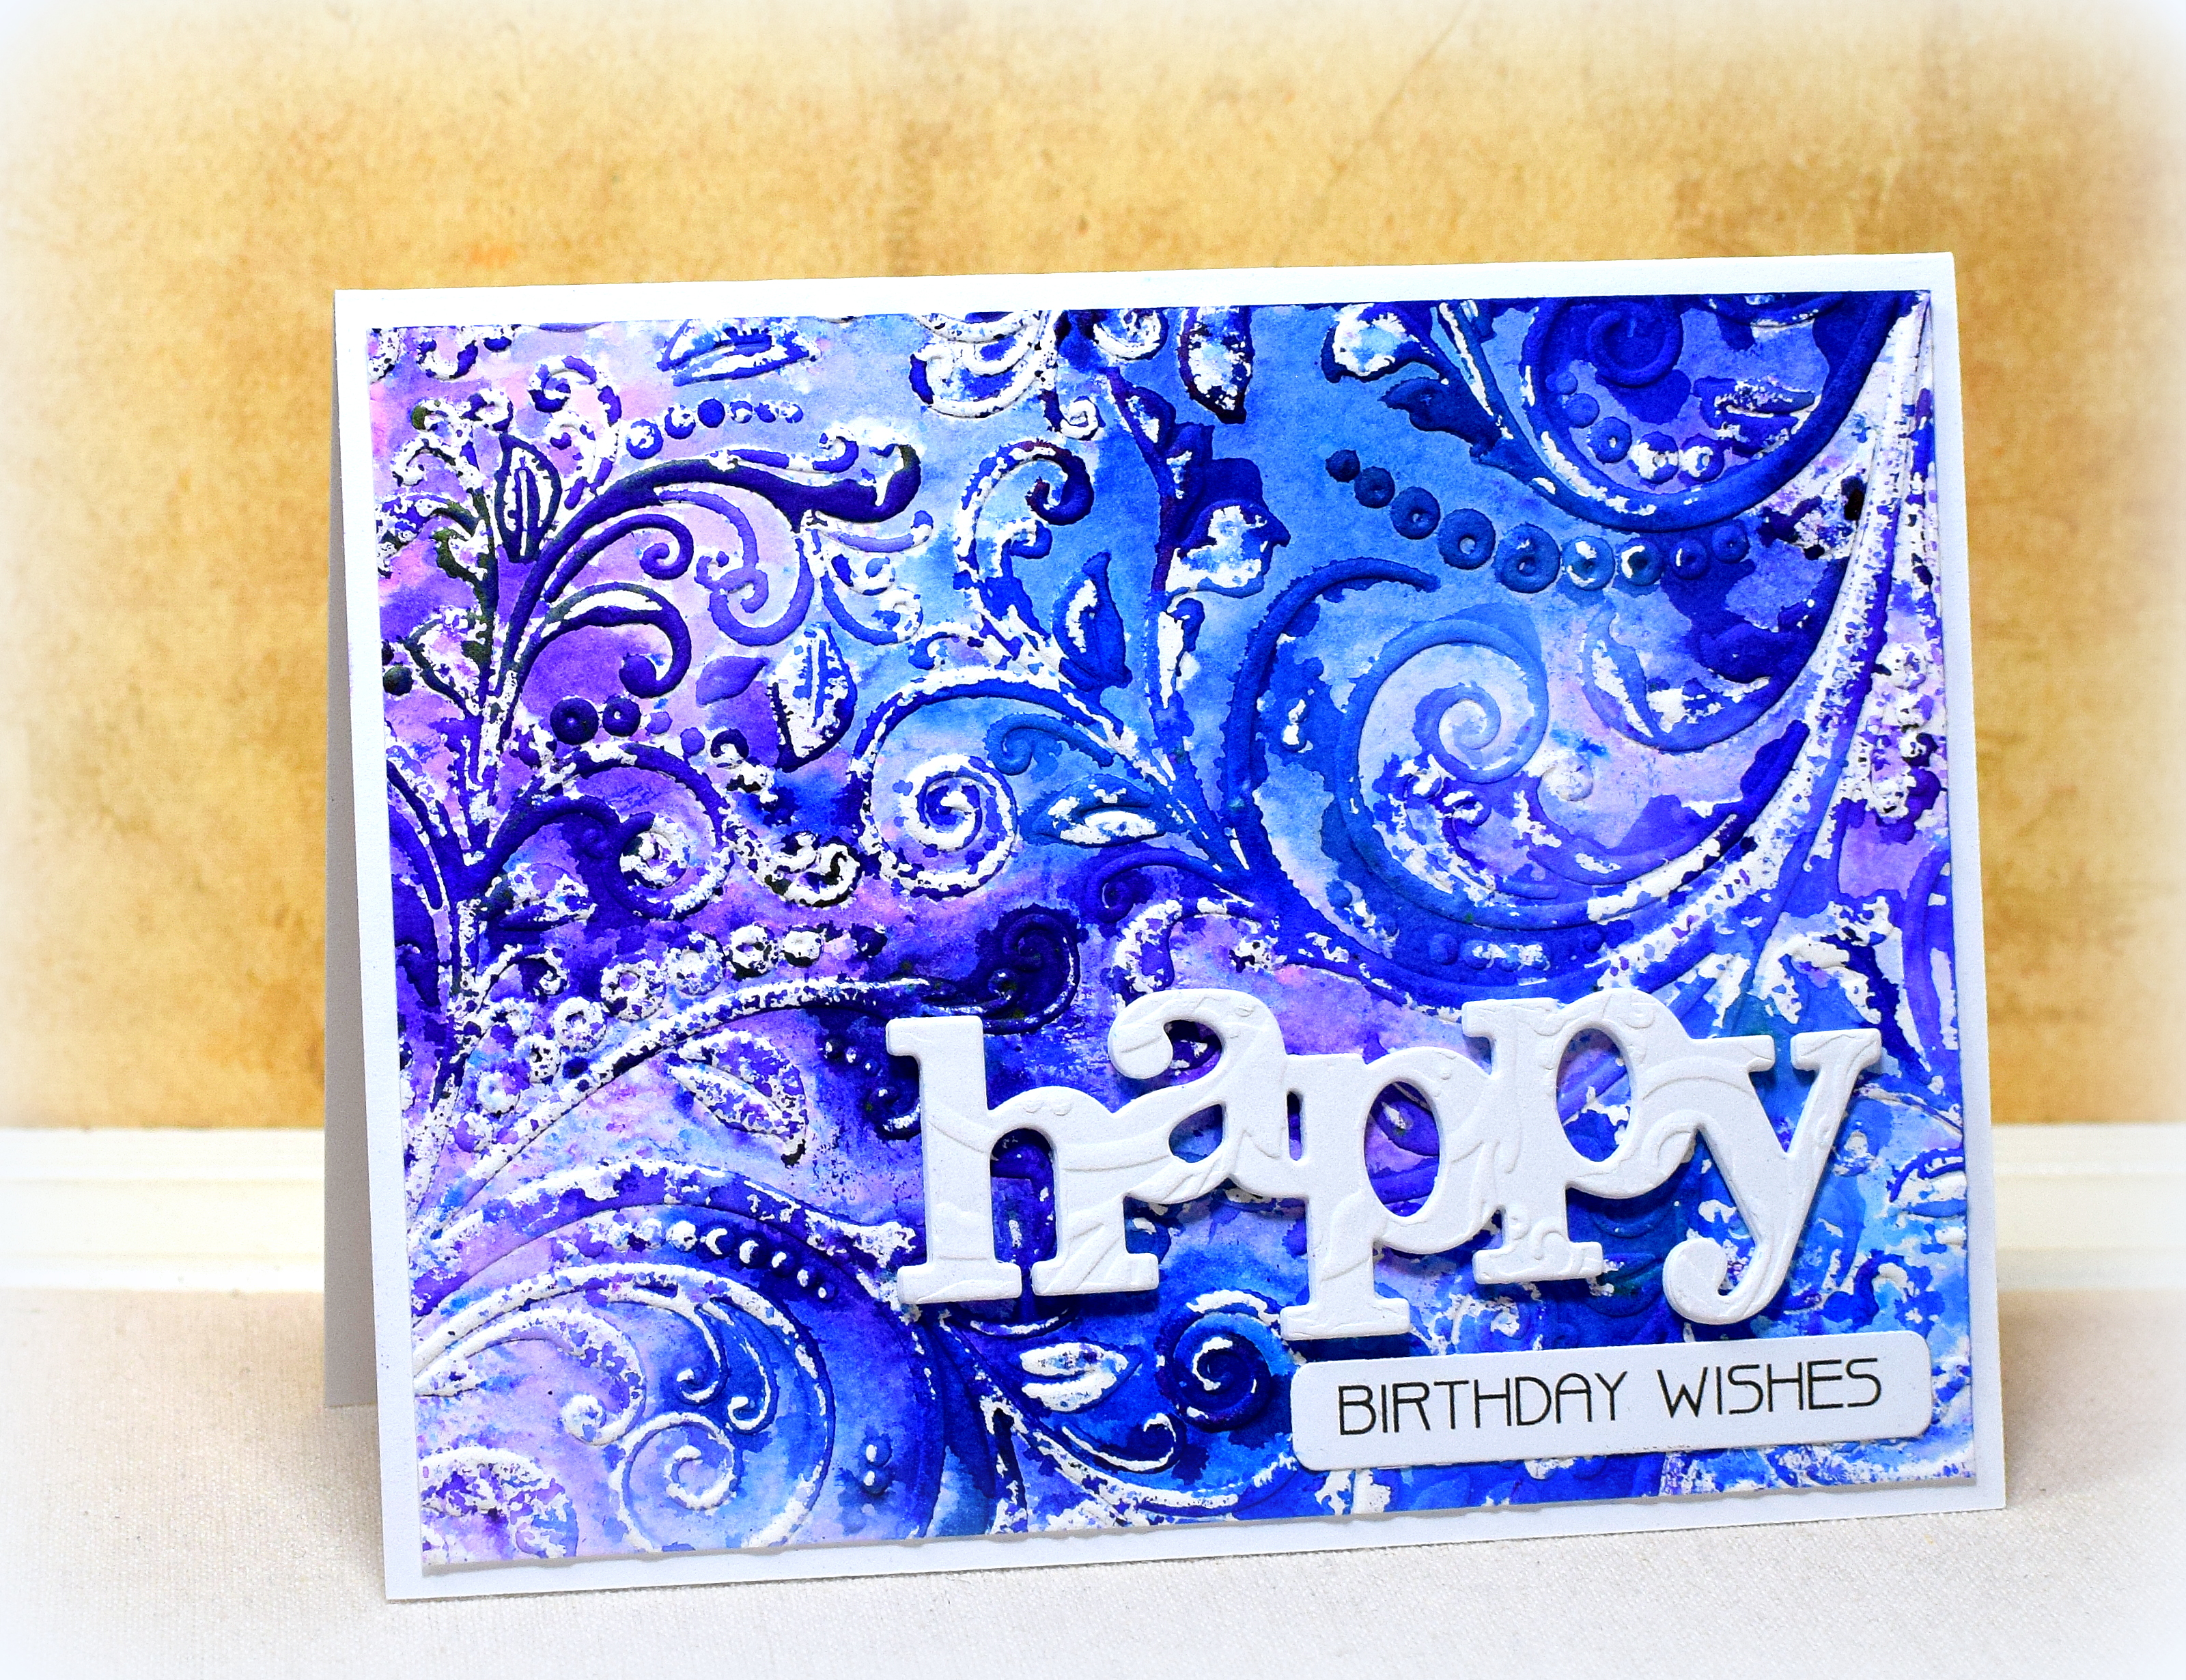
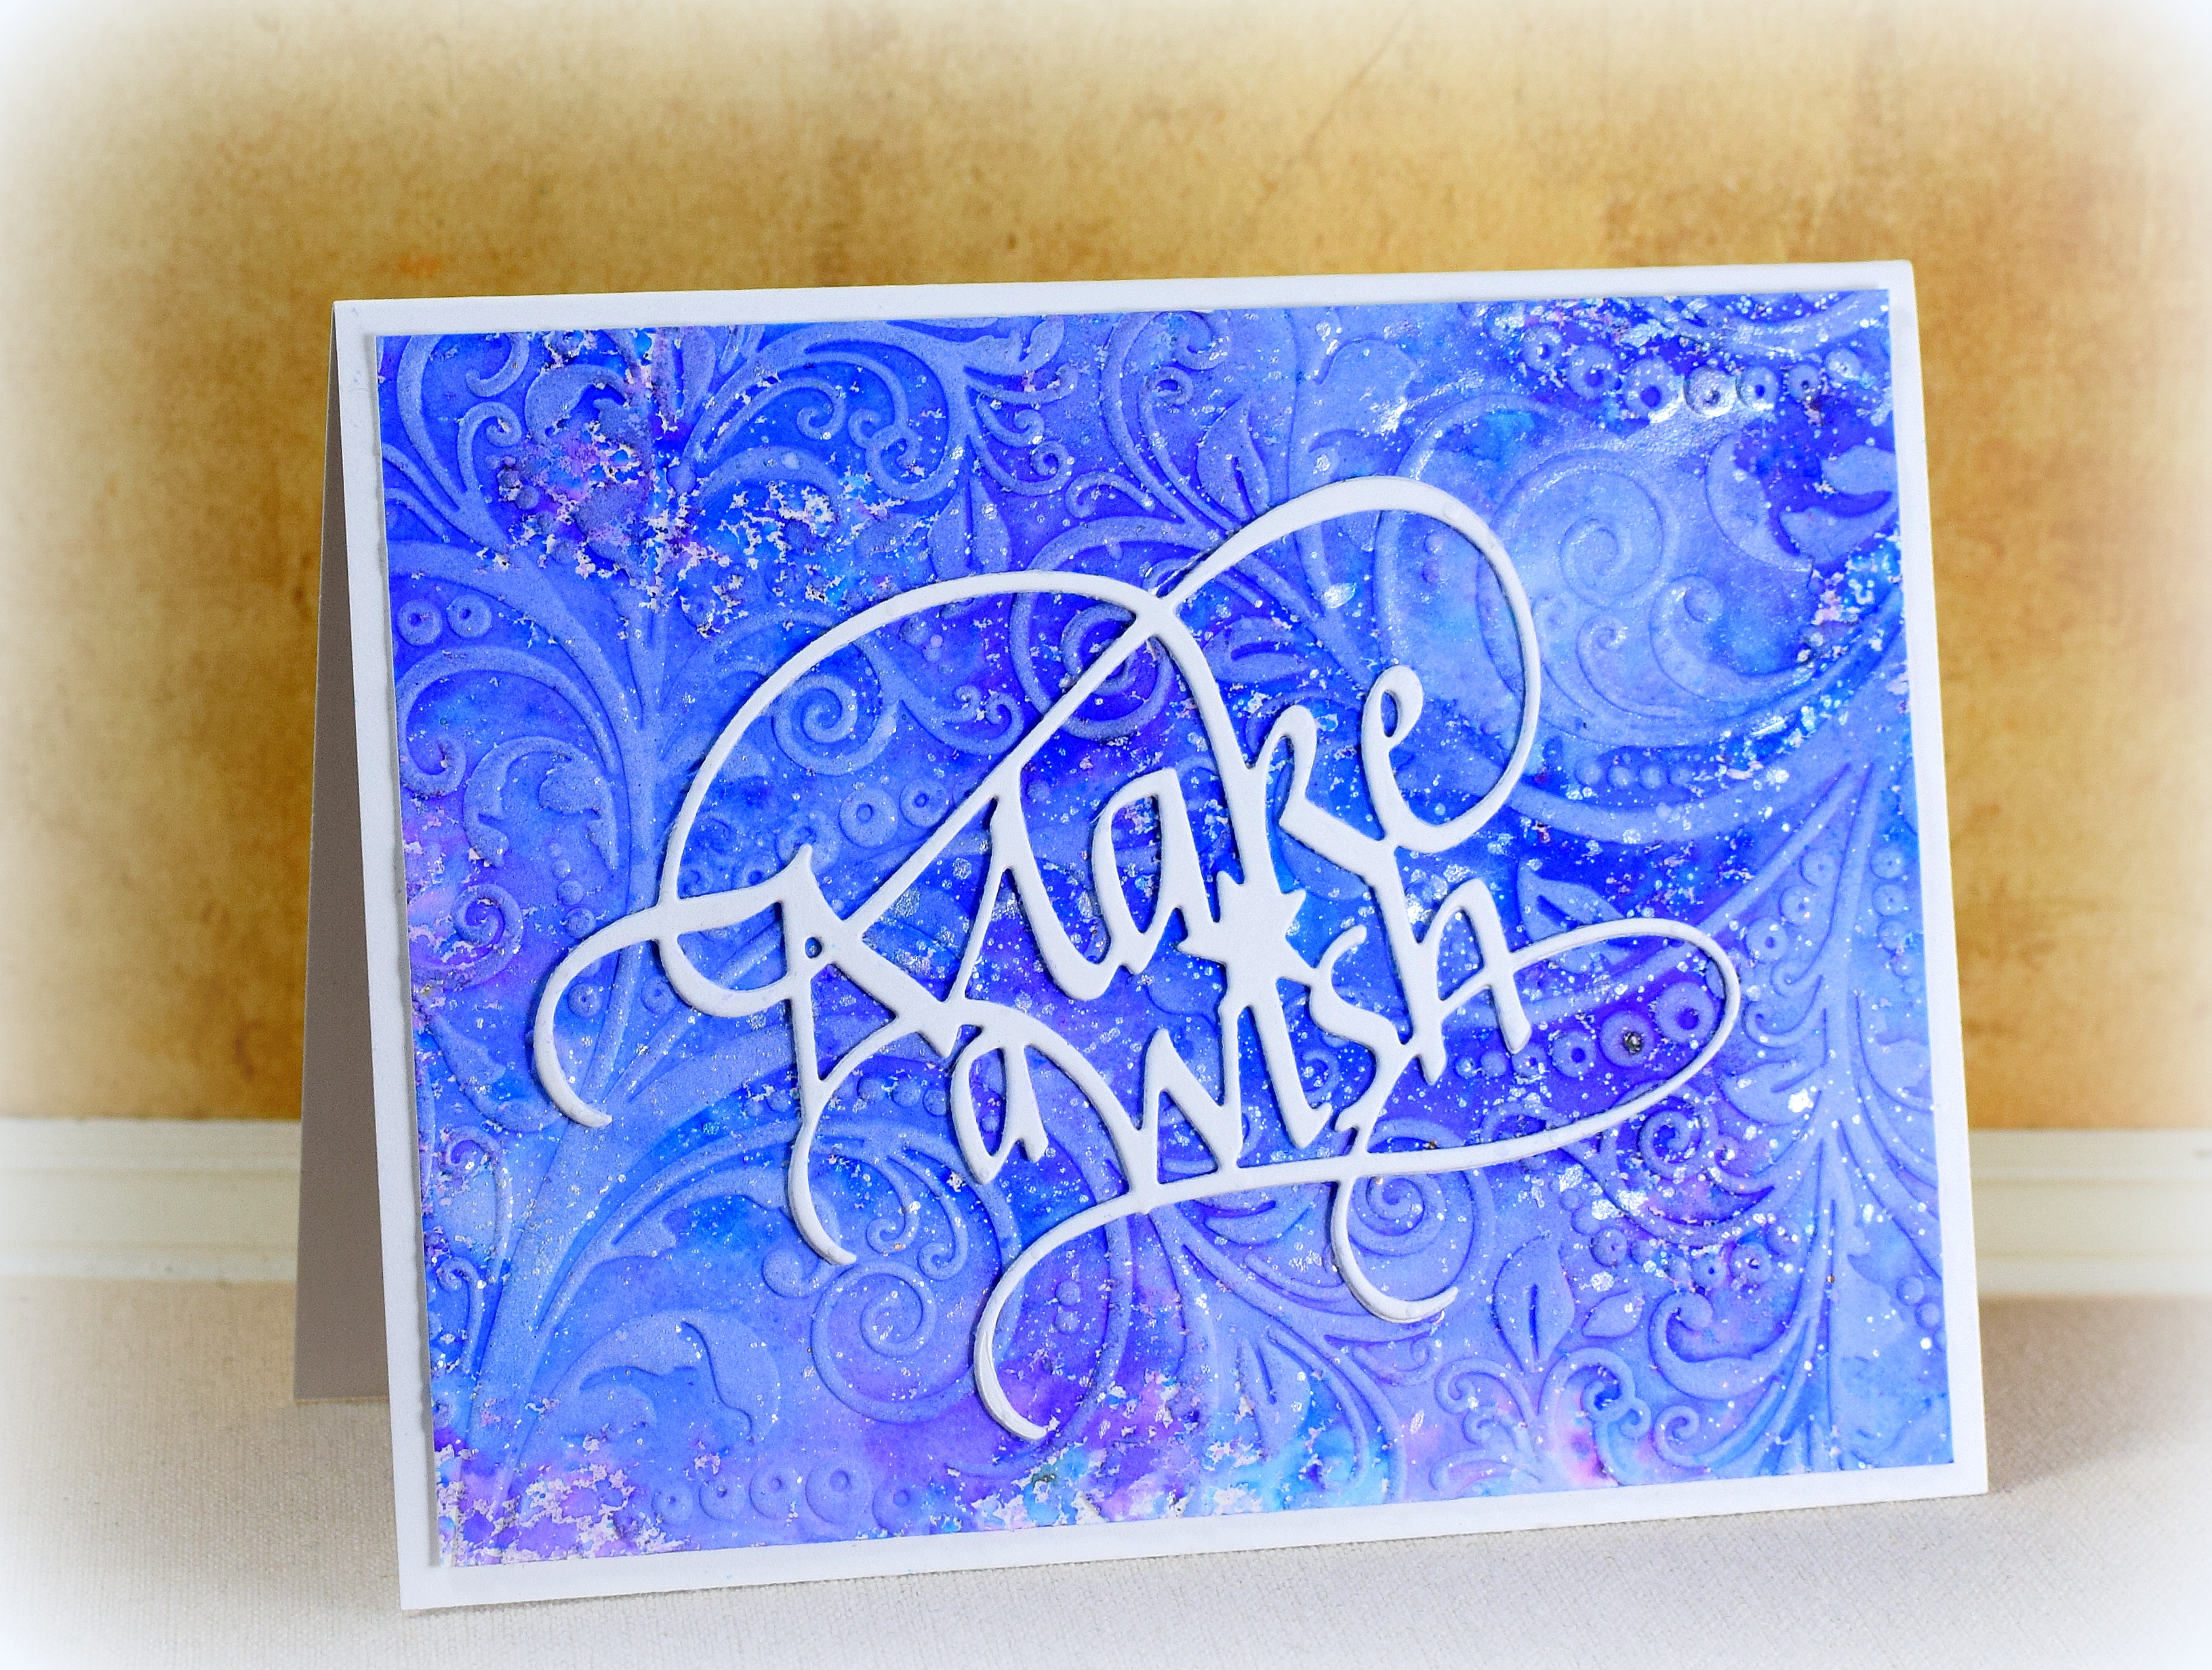
Once the panels were completely dry, I added greetings with either the “Make A Wish” die from Elizabeth Craft Designs or the “Happy Cutaways” die from Walter & Winnie (no longer available) and either a printable sentiment strip or one stamped from the “Label Me Bold” set from Stampin’ Up (retired). The embossing folder I used was the 5×7 “Leaf Floral” from CGull.

Thanks for checking out my card projects!

This content uses referral links as described in the disclosure policy on my sidebar.

Blooming Branch Birthday Card and the HDSA fundraiser from Simon Says Stamp

Blooming Branch Birthday Card and the HDSA fundraiser from Simon Says Stamp

This card features the “Blooming Branch” stencil set and stamp from Pink Fresh Studio. The greeting die cuts and stamp are from the “Happy Thoughts Stamp and Die Set” from Gemini/Crafter’s Companion which came from the craft box I received from Simon Says Stamp with my donation to HDSA (*see below).

Gina K Designs inks (Tomato Soup, Coral Reef, Faded Brick, Honey Mustard, and Dark Sage) and card stock (Warm Glow, Faded Brick, and White) were used as well as Memento Tuxedo Black ink. After the image was stamped and stenciled, the panel was embossed with the “Subtle” embossing folder from Stampin’ Up.

*UPDATE (6/29/22) – IT APPEARS THAT THE CRAFT BOXES DESCRIBED BELOW ARE OUT OF STOCK, BUT DONATIONS CAN STILL BE MADE.

Simon Says Stamp is sponsoring a fundraiser to raise money for the Huntington’s Disease Society of America. The following is from Simon Says Stamp:


We are working to make a difference in the lives of those affected by the devastating illness, Huntington’s Disease.

Make a $50 donation through this purchase and the net proceeds will be donated to HDSA Central Ohio.  You will receive a box of craft supplies donated by our generous vendors to support this campaign [while supplies last]. The retail value of this box is at least $100 and includes random, exciting supplies… There is also a $150 box available.


100% of the net sales from the Donation Boxes will be going to help those in need.  For more information or to donate directly to HDSA Central Ohio, please visit: https://centralohio.hdsa.org/simonsays.

(Thanks, Diana, for making me aware of this very worthy cause.)

Thanks for checking out my card project!

Tuxedo and Gown Wedding Card

Tuxedo and Gown Wedding Card

As I mentioned in my last post, a friend had asked me for an “engagement card tutorial” and showed me two samples she found online and liked. I CASED and came up with two variations of the second design she chose. (The online sample is at the bottom of this post.) My finished cards are 5×7.

I adapted cut files from the Silhouette file #101542 called “Bride and Groom Card” by Nilmara Quintela. For the sample above, I cut and folded the card stock for the tux and changed the shape of the dress to look more like the online sample. For the sample below, I used the tux from the file. “Tracers” were created so she could cut the pieces on her own without an electronic die cutting machine.

My second sample:

The shimmer card stock (2nd sample) is “White Pearl” by The Paper Studio. (It’s actually an off-white but so elegant in real life!) For the first sample, I used plain white and embossed the bottom half of the gown with a 5×7 Damask Background embossing folder by Darice. I also used Gina K Designs Slate and Black card stock.

I aded ribbon to the gowns and adhesive pearls or sequins (no holes) to the tuxes. The greeting is from the “Congratulations Sentiment and Mat” die set from Creek Bank Creations.

(This is the original card that I CASED – found HERE; scroll down in that post)

Thanks for checking out my card projects!

This content uses referral links as described in the disclosure policy on my sidebar.

Folded Doily Wedding Card

Folded Doily Wedding Card

A friend asked me for an “engagement card tutorial” and showed me two samples she found online and liked. This is my CASE of the first design she chose. (The online sample is below.) My finished card is 5×7.

For the skirt, I used a half of an 8 inch doily. You can see how I folded it HERE.

I created cut files for the tuxedo parts. (The bowtie and bodice of the dress are from the Silhouette file #101542 called “Bride and Groom Card” by Nilmara Quintela.) I then created “tracers” so she could cut the pieces on her own without an electronic die cutting machine.

I embossed the bodice with the Cuttlebug D’vine Swirls embossing folder and added ribbon and a flower to the gown and black sequins (no holes) to the tuxedo. (She can “go to town” adding embelishments to hers- lol!)

The background paper is American Crafts #368312. The greeting, from the “Banners” set from Joy! Crafts, was stamped with Versafine Onyx Black ink and die cut with a die from the “Sentiment Strips Die” set from Creek Bank Creations.

This is the original card that I CASED – found HERE

Thanks for checking out my card project!

This content uses referral links as described in the disclosure policy on my sidebar.