Star of David Hanukkah Card

Star of David Hanukkah Card

I saw this card base design online (I wish I could remember where) and went to work to figure out how to make it. (No instructions were given; I’ve included instructions below on how I made mine.) The sample I saw was also a Hanukkah card; I think it would work well for a snowflake themed card as well.

The patterned paper is from a digital pack called Silver and Blue Hanukkah Paper by KlouiseDigiArt that I purchased on Etsy. The focal star is from “Menorah Medley Die Collection” from Papertrey Ink (no longer available?). I added another circle panel to the back for my sentiment which is from the “Blessed Hanukkah” stamp set from Altenew.

This card folds flat for mailing and fits in an A2 sized envelope. (The flattened card measures 4 1/4″ x 5″.)

If you care to see how I made this card base, continue reading…

Continue reading

Gel Press Printed Holiday Cards

Gel Press Printed Holiday Cards

Day 3 of the Holiday Card Workshop 2022 focused on making fast backgrounds. One of the lessons was called “Gorgeous Gel Press Printing” taught by Lydia Fiedler. I still had plaid on my mind from the day 2 class, so I thought I’d try a plaid stamp with this technique for today’s lesson.

Lydia used alcohol inks and acrylic paint for her backgrounds. I used Distress Oxide inks. She also used dies to create her images while I used rubber stamps. (I’d get a “does not follow directions” on my report card for this class – lol!)

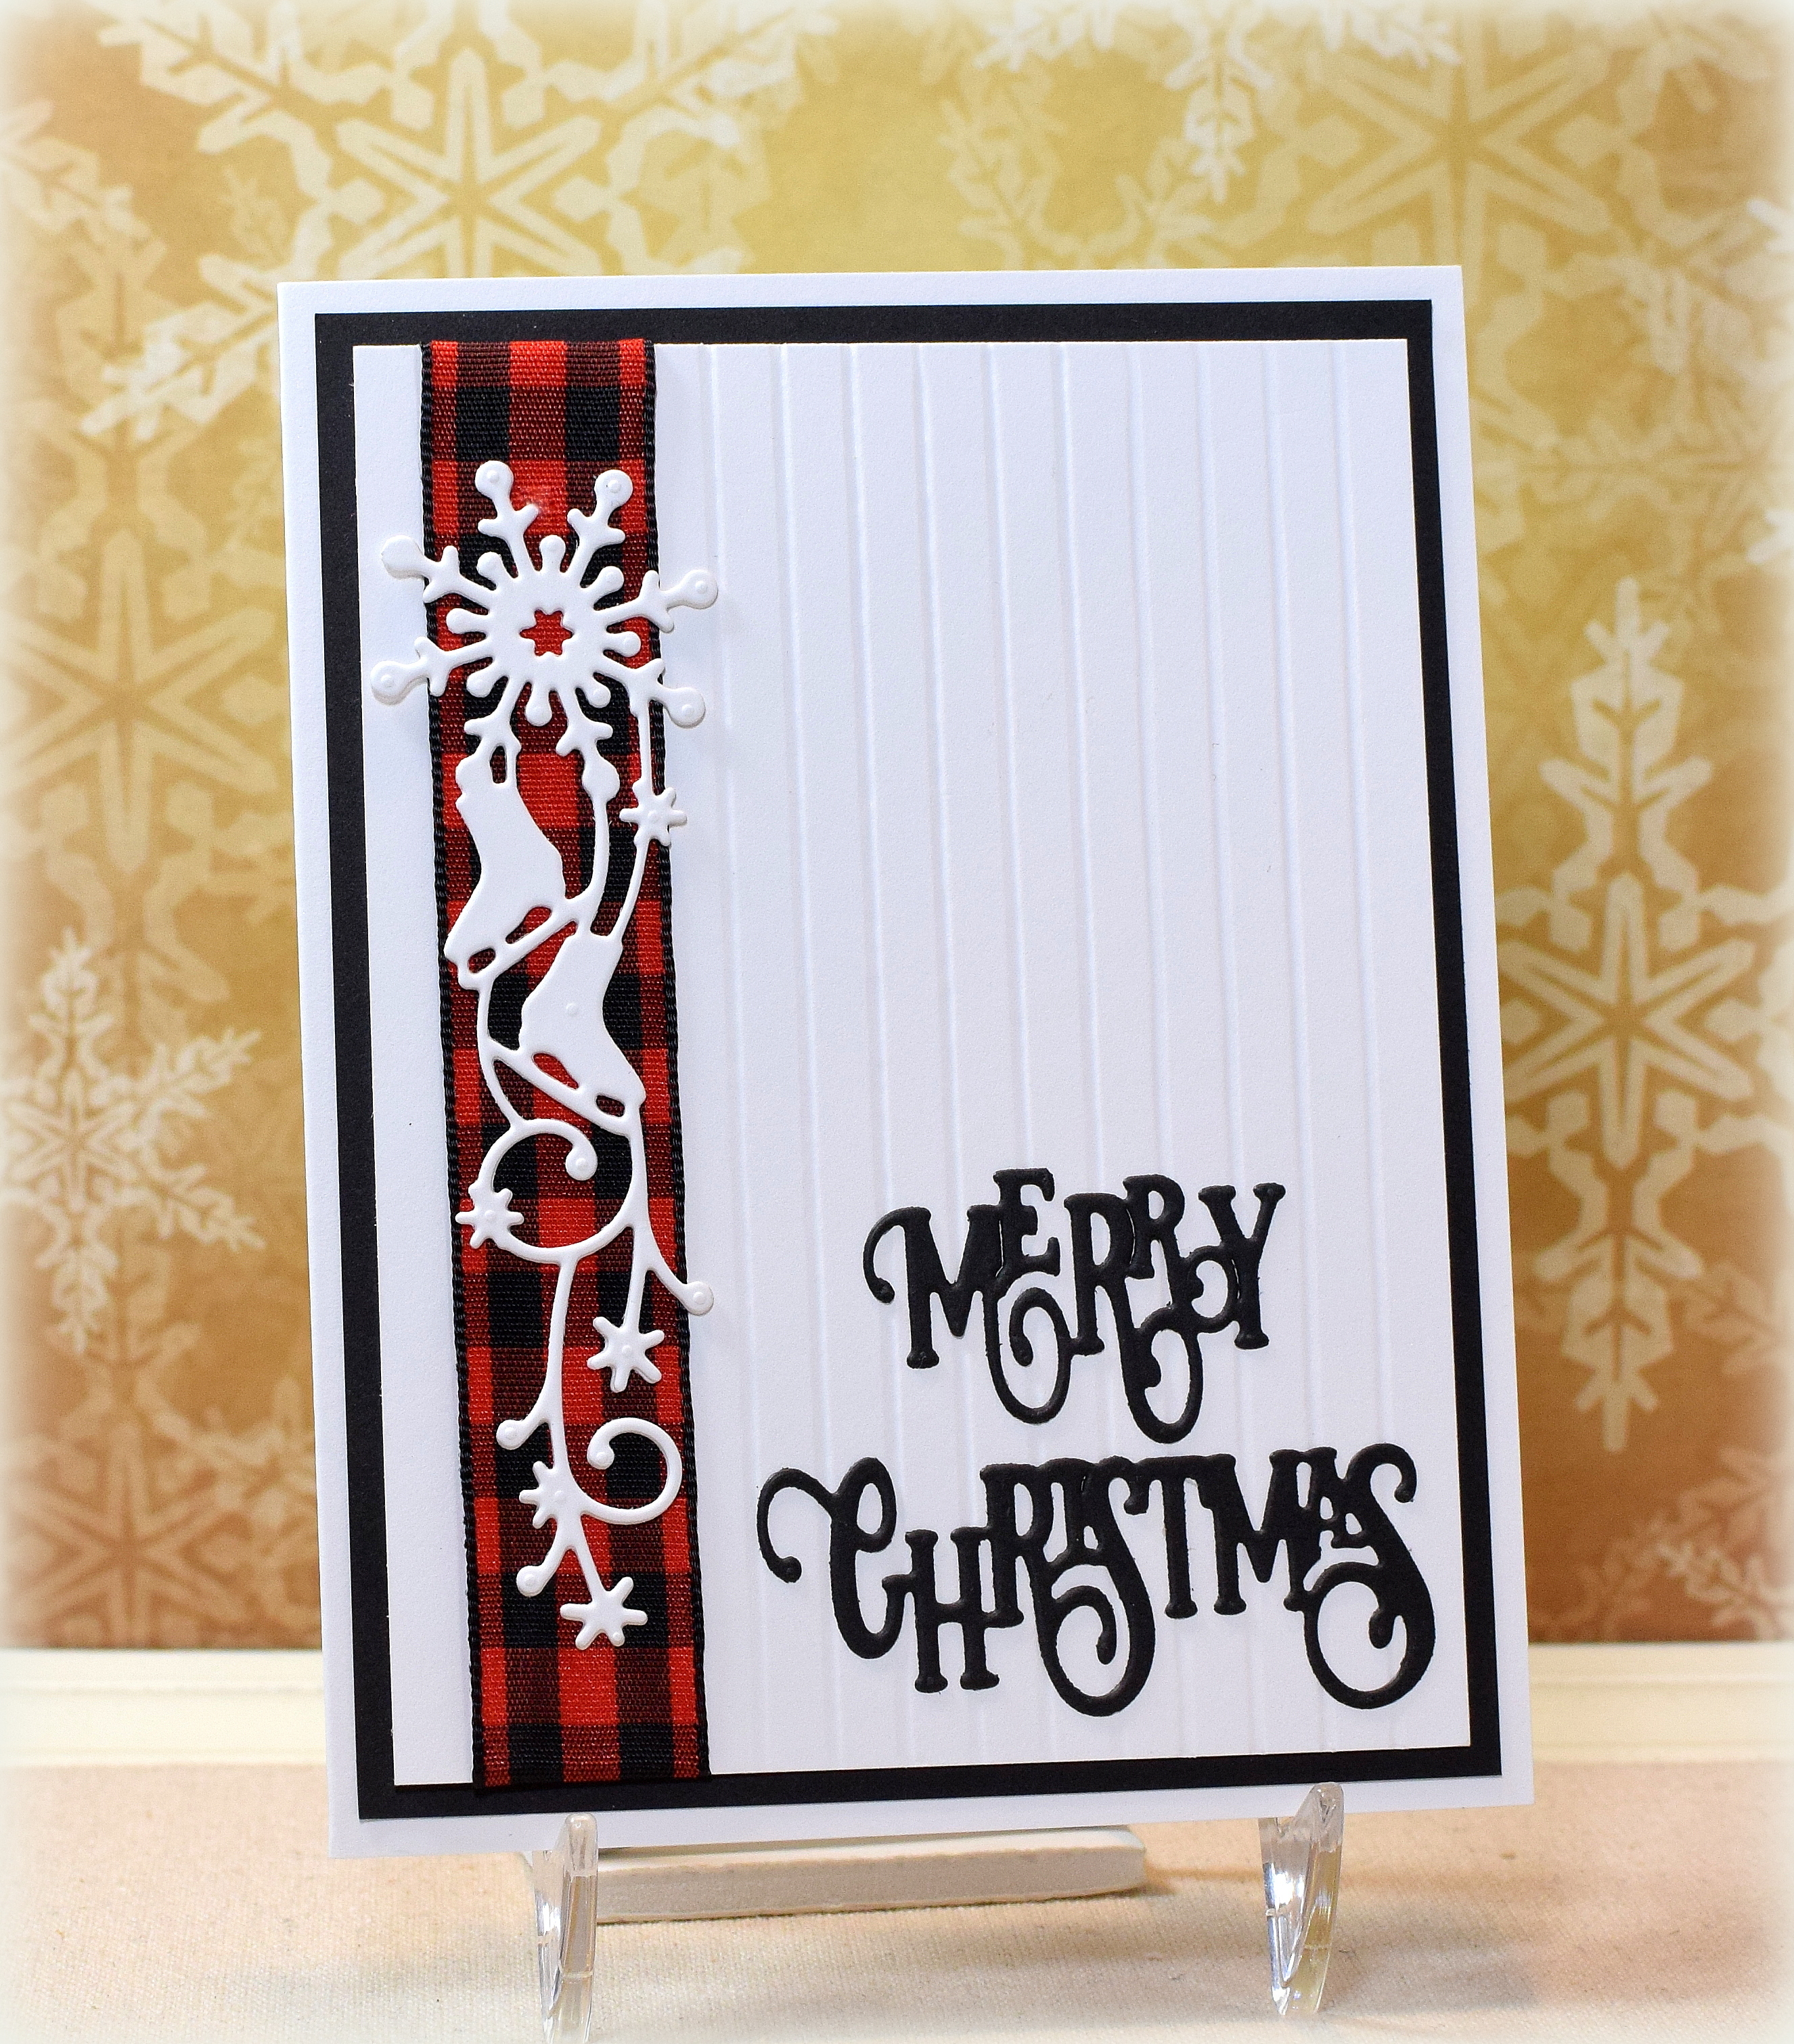
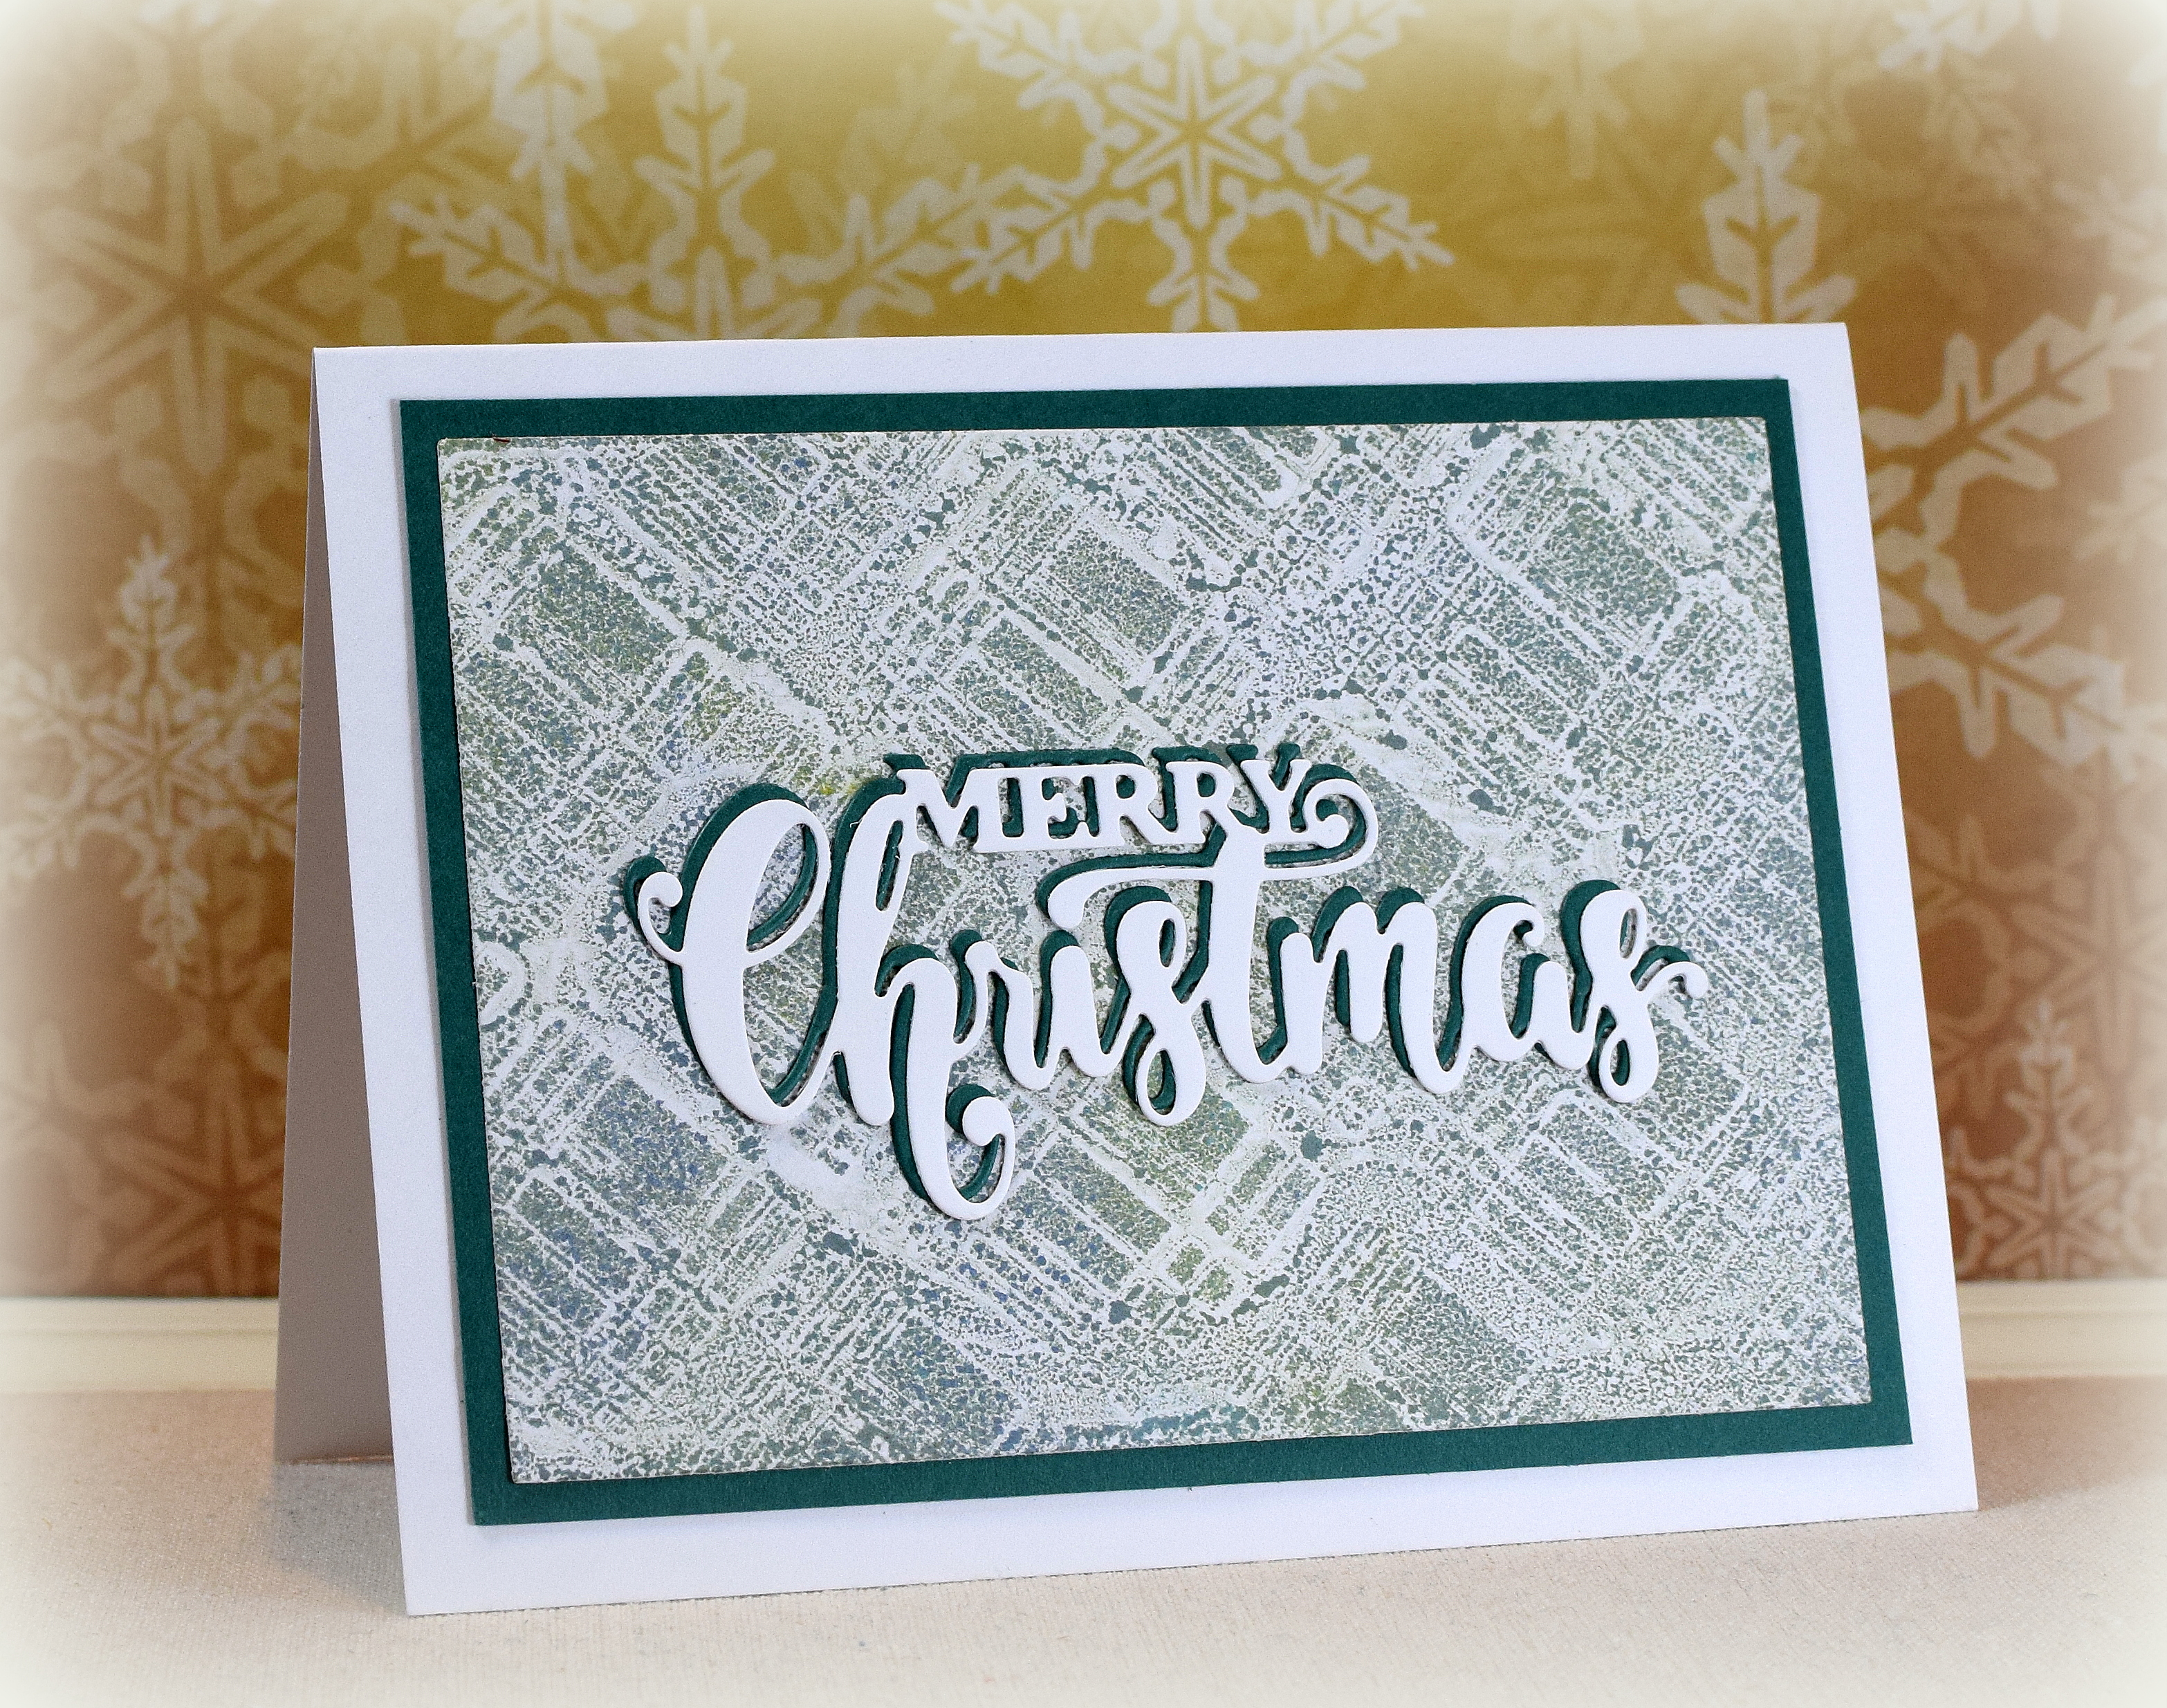
The background on this one (above) was made with ink that was picked up by the stamp from the gel plate after the inks were blended with a brayer. (The gel plate acted as an ink pad.) My stamp seems to have an imperfection in the center, and I have never been able to get a clean image with it. This technique is very forgiving in that the image is not meant to be clean and crisp so it is perfect for this particular stamp of mine!

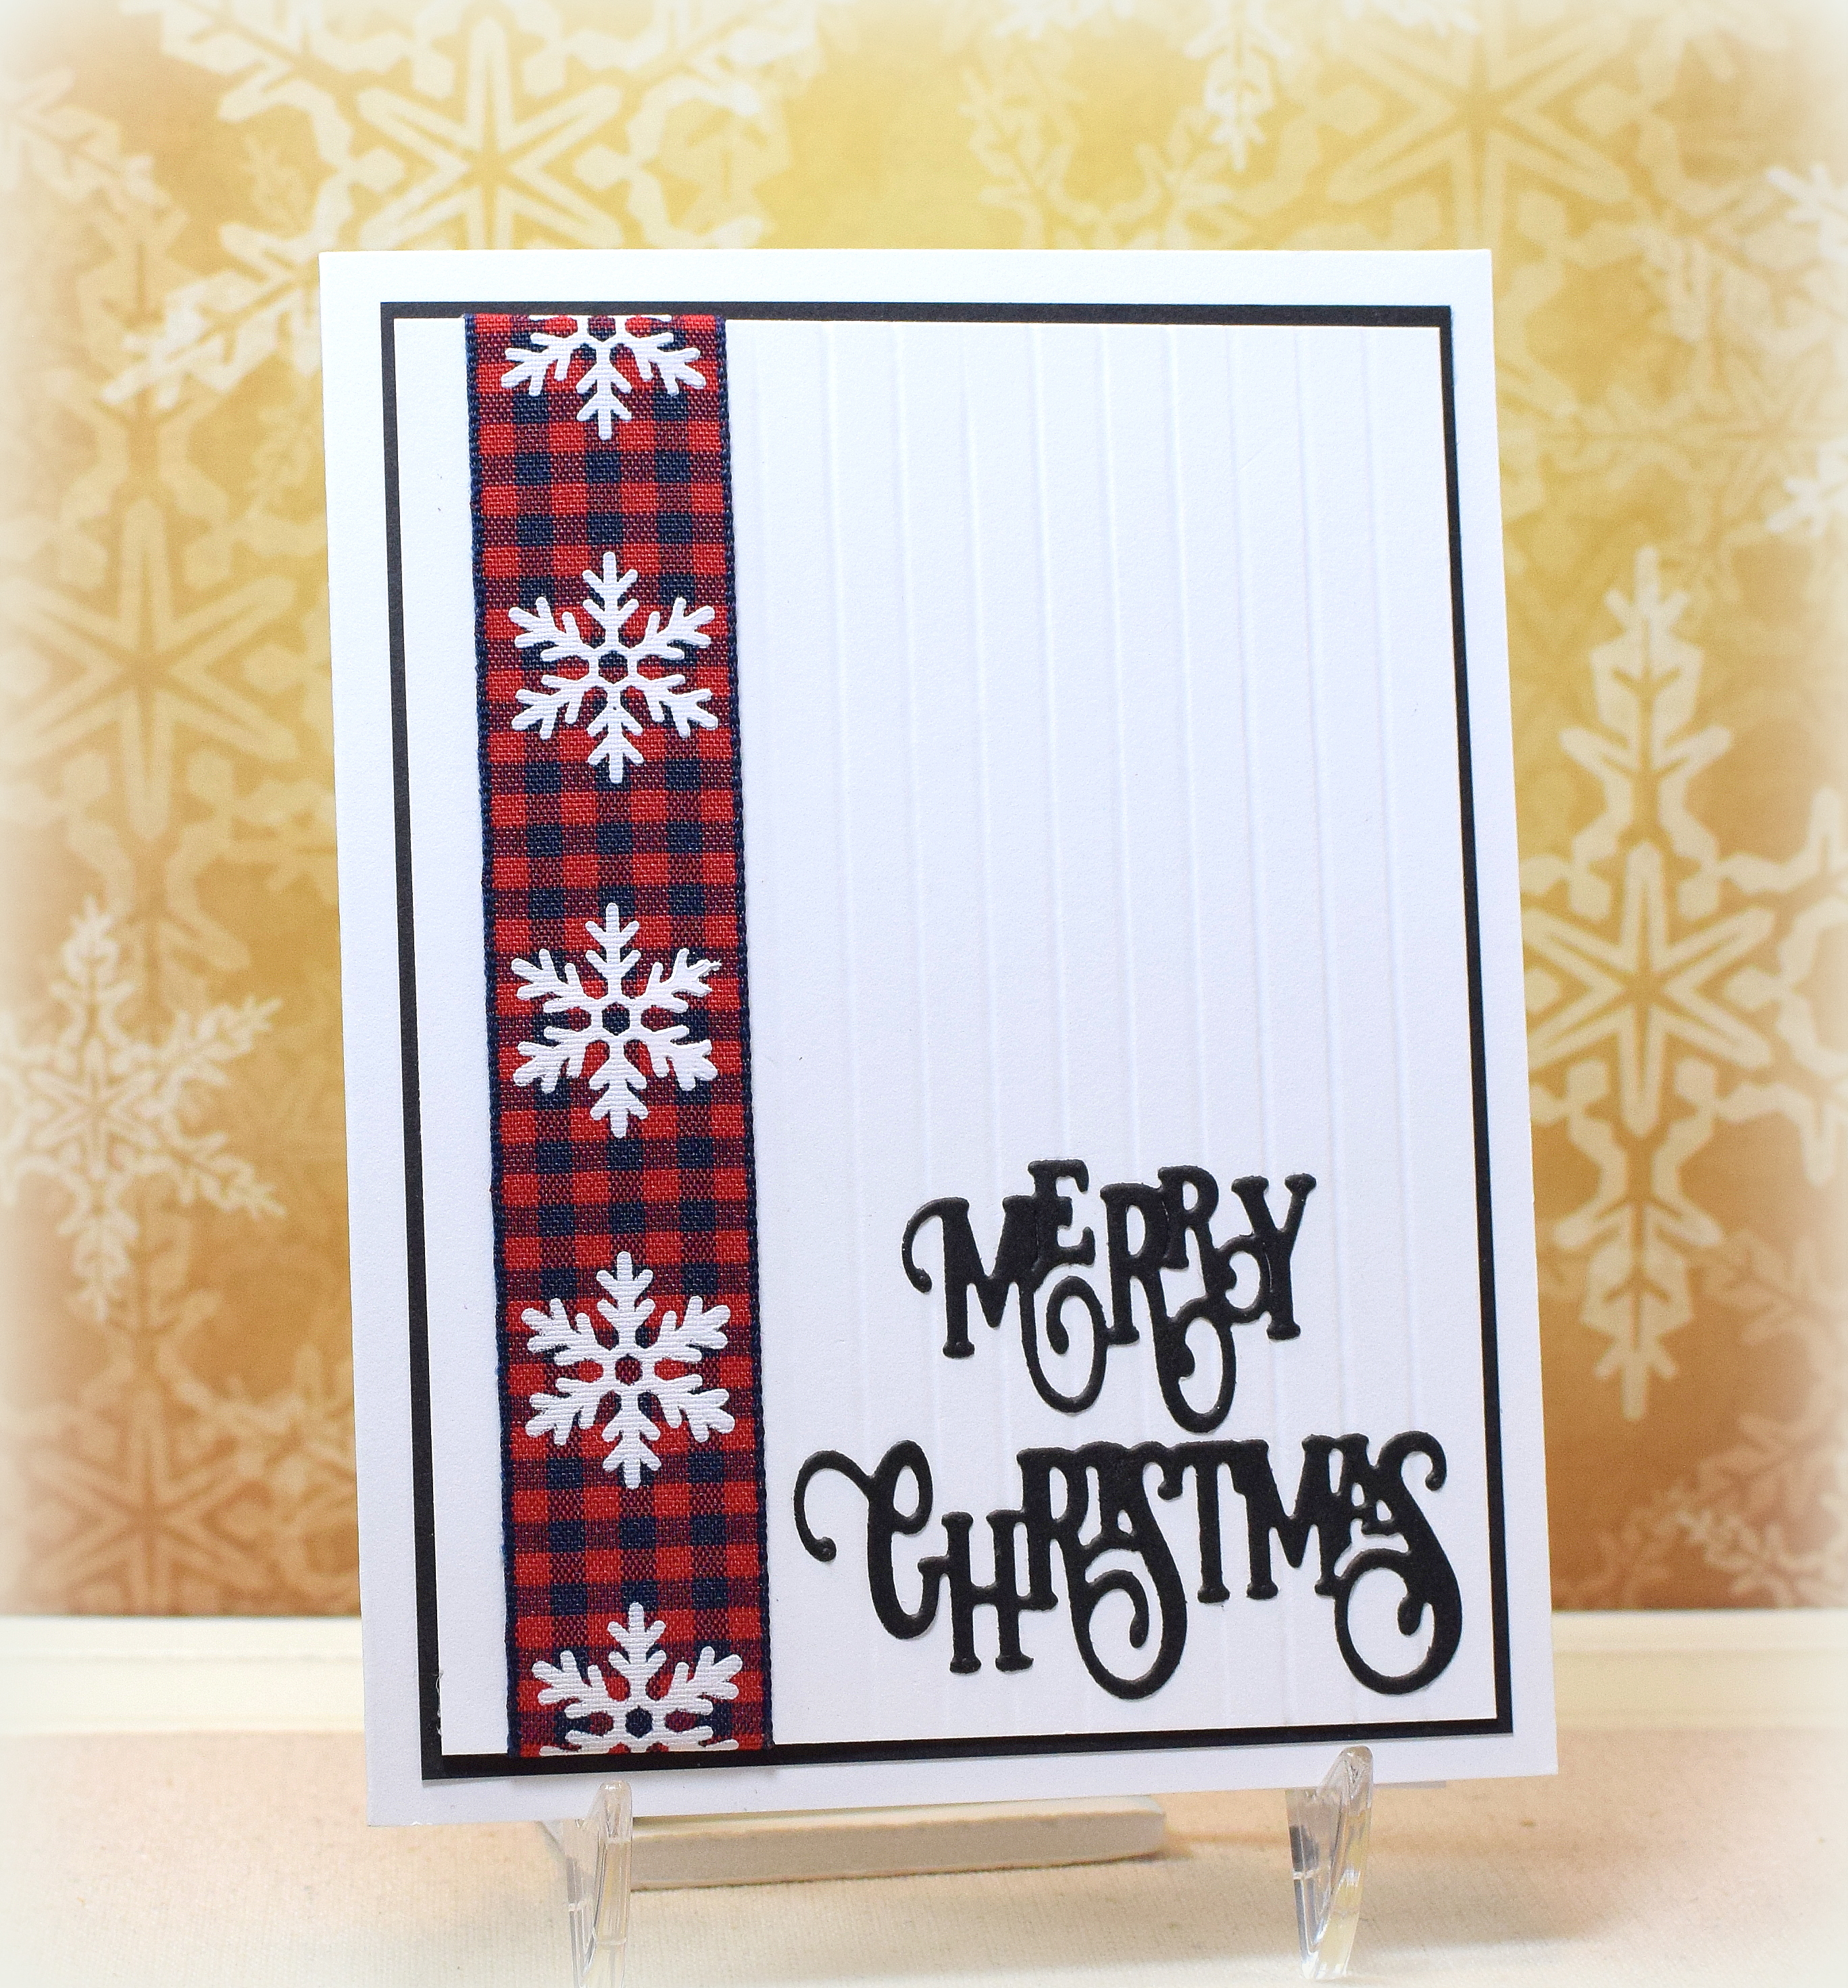
The background on this next one was made with the ink that was left behind after lifting the ink with the stamp for the first one. I simply placed the card stock on the inked gel plate and gently rubbed.

And one more card to share…

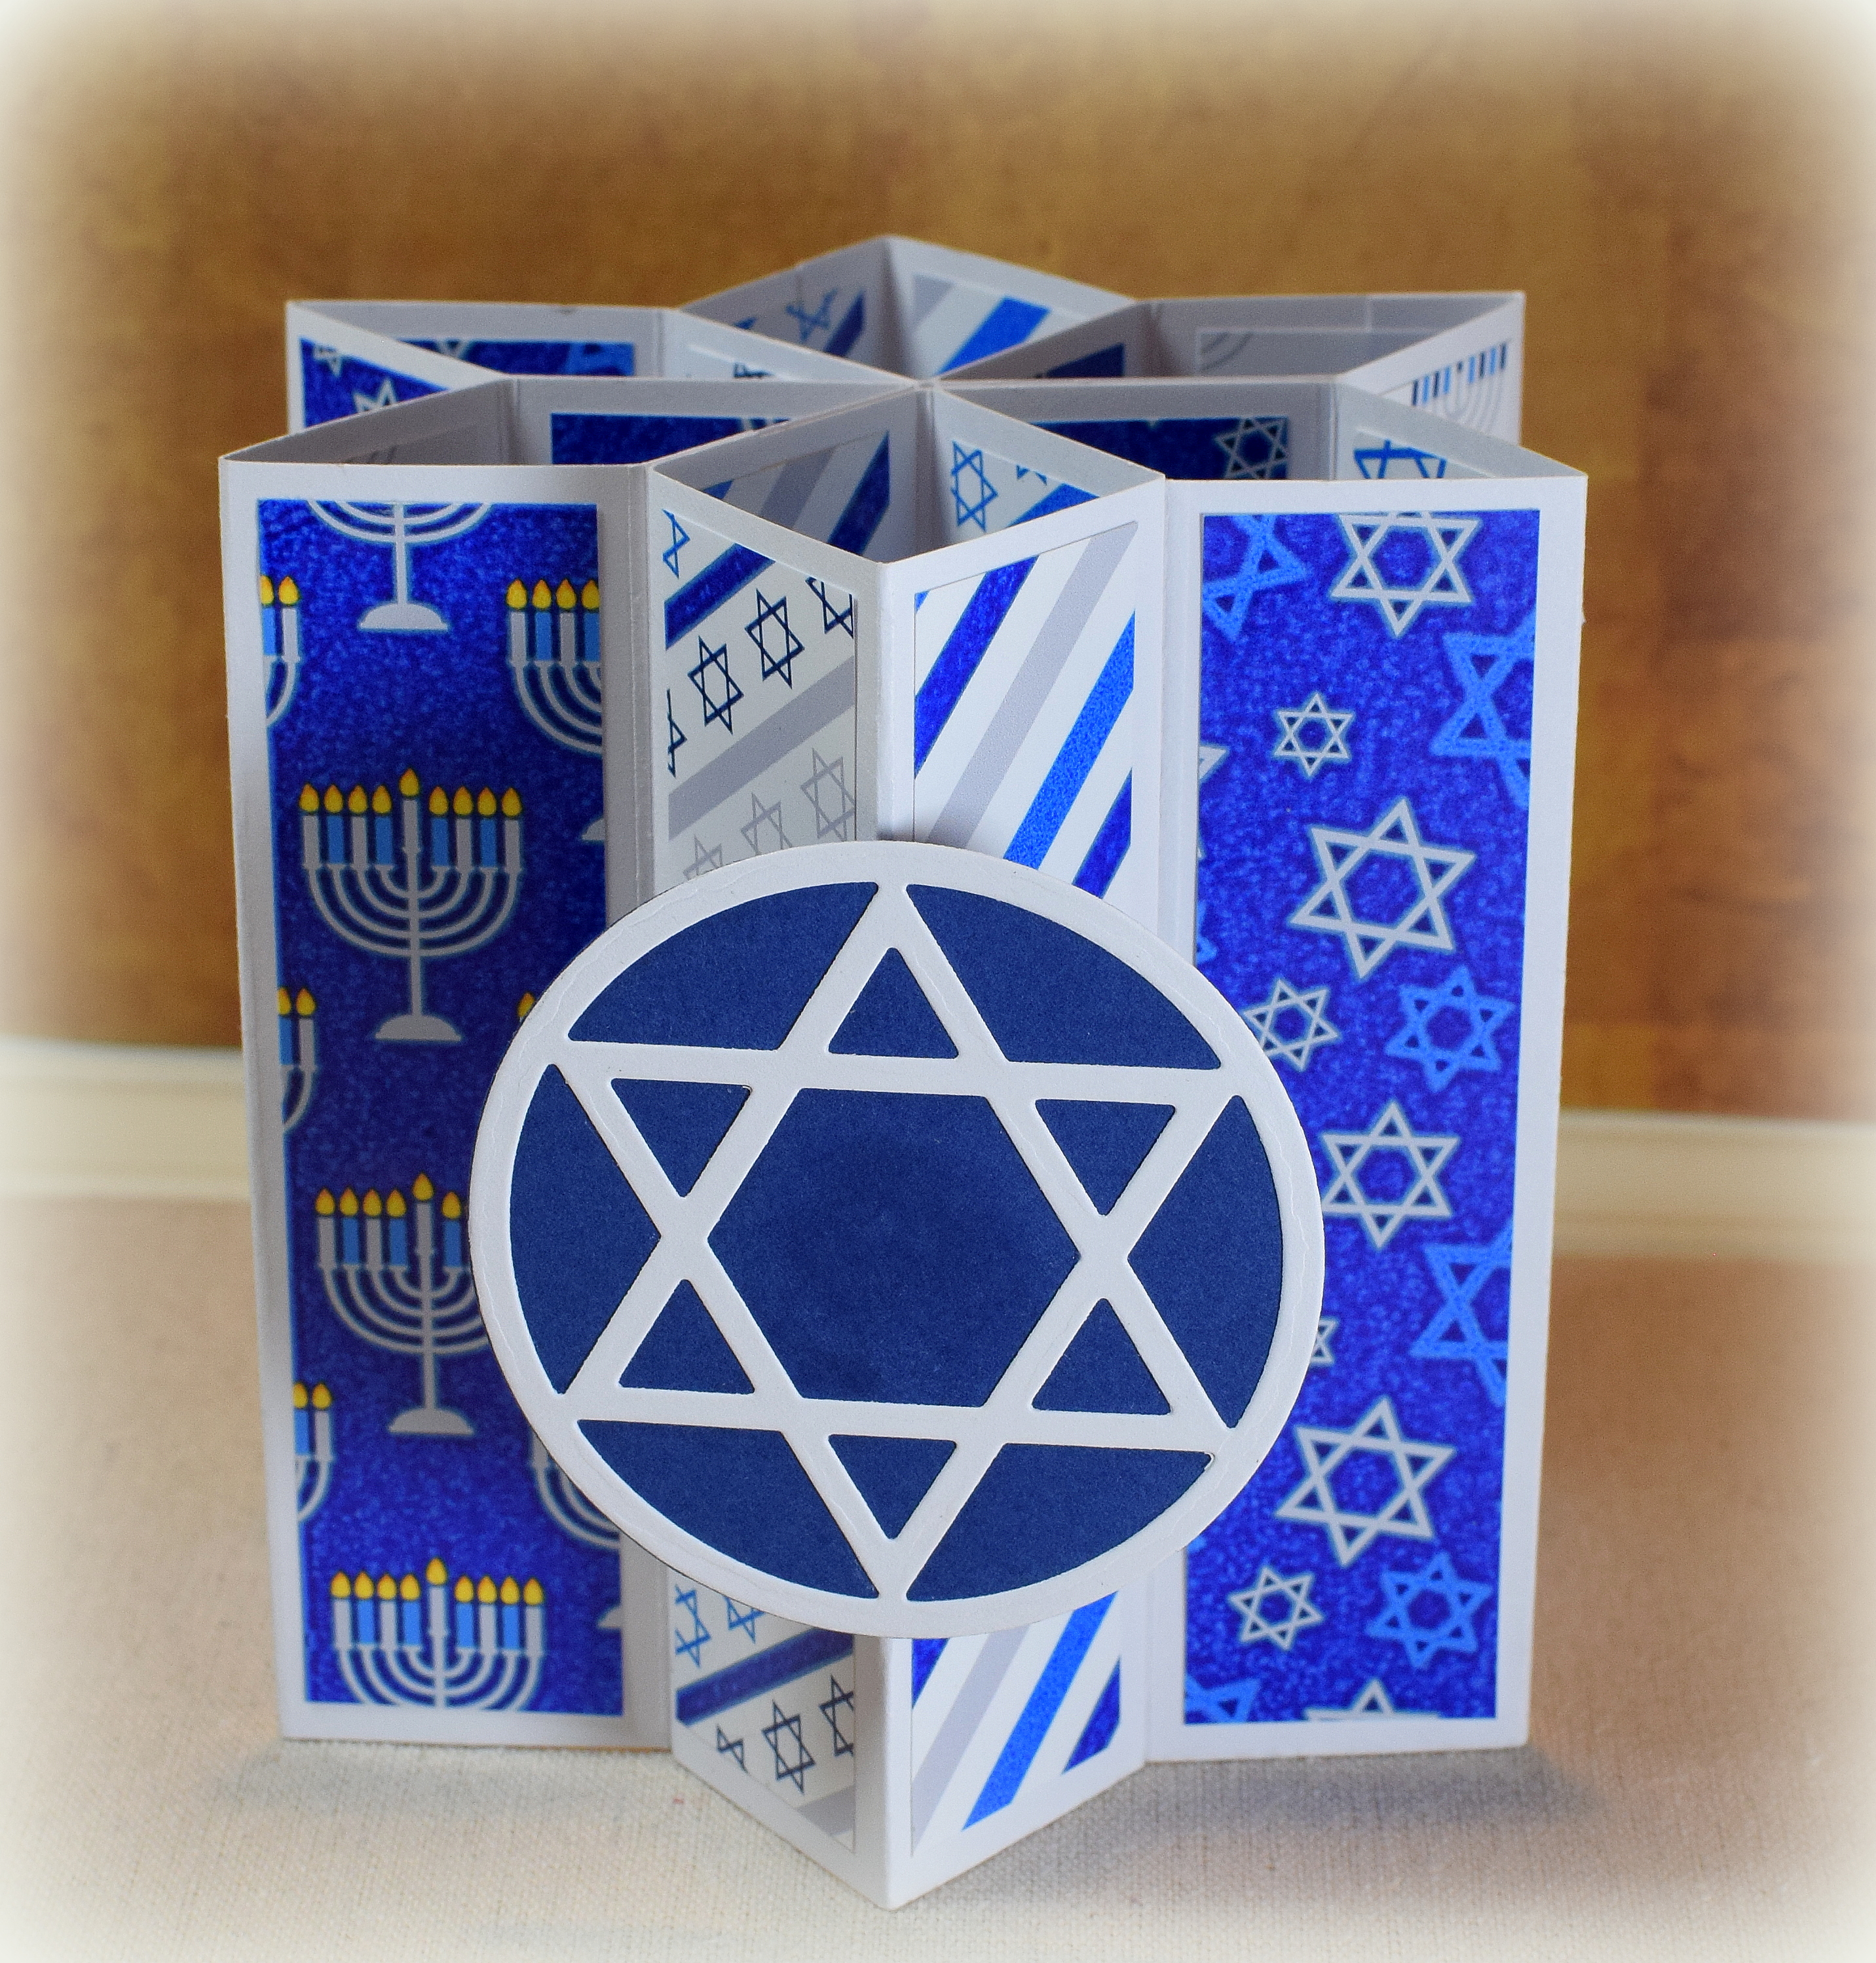
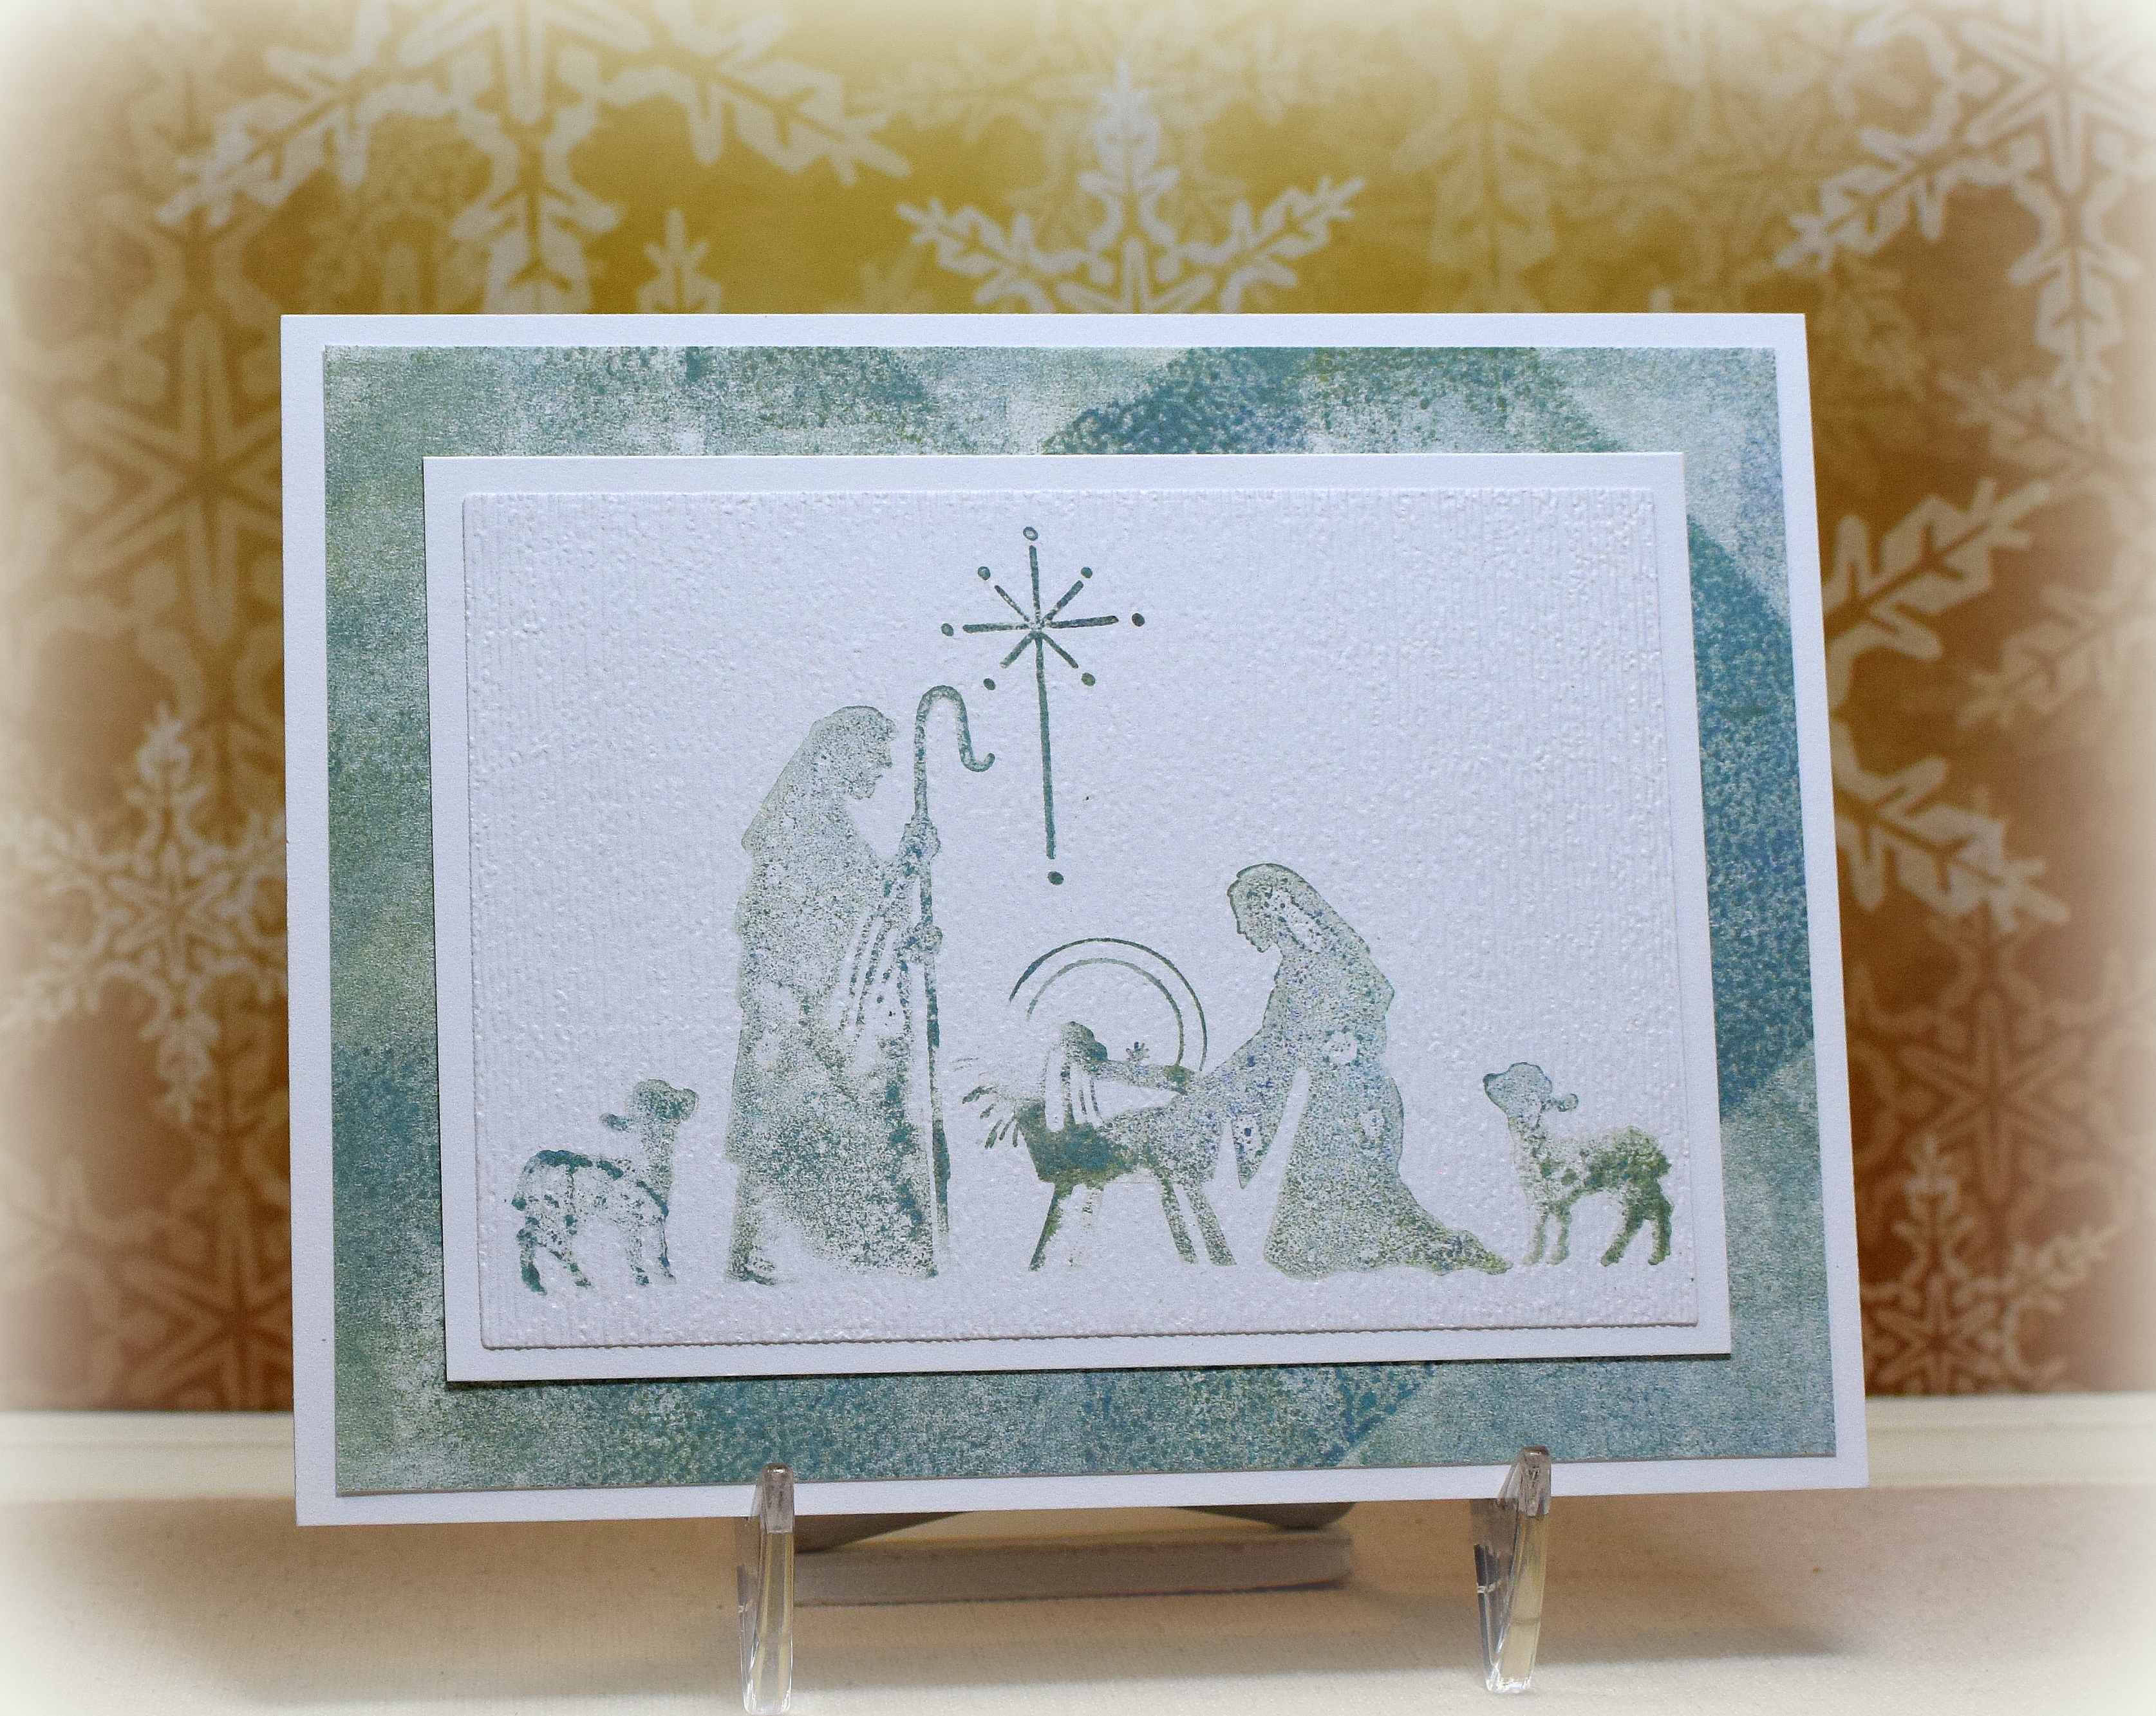
I reinked and blended the gel plate and cleaned my brayer off onto another piece of card stock that I used for the background (mat) on this nativity card design. I then inked the stamp from the gel plate and stamped the image onto the card stock.

The supplies used for these cards are: a gel plate, “Plaid 4×6” stamp from Echo Park, the “Merry Stamp & Cut” set from Hero Arts, “Tree Punch” from Stampin’ Up, “Star Punch” (unbranded), “Stacked Merry Christmas” Die from Creative Expressions, “Cling Manger Scene” from Stampendous, “Subtle” embossing folder from Stampin’ Up, and Broken China, Faded Jeans, and Peeled Paint Distress Oxide inks.

I have a bunch of stamped and inked panels for additional cards. (You really can make a lot of panels quickly with this technique!)

If you are interested in seeing how to create some fast backgrounds using a gel plate, check out the class over at Online Card Classes!

Thanks for checking out my card projects!

This content uses referral links as described in the disclosure policy on my sidebar.

Faux Embossed Snowflake Cluster

Faux Embossed Snowflake Cluster

Day 9 of the Holiday Card Workshop 2022 is called Snowflakes. One of the lessons was called “A Faux Embossed Look” taught by Kristina Werner. For my card, I used the Hero ArtsSnowflake Cluster Fancy Die” and the Hero Arts “Snowflake Confetti Fancy Die” along with the “Festive Mini Expressions – Warmest Wishes” die from Creative Expressions. The card stock is White Pearl from The Paper Studio (Hobby Lobby) and Recollections heavy weight White Dove. Lots of cutting and gluing!

If you are interested in seeing how to use create a faux embossed look on your card, check out the class over at Online Card Classes!

Thanks for checking out my card project!

This content uses referral links as described in the disclosure policy on my sidebar

Gold Joy Nativity

Gold Joy Nativity

Day 8 of the Holiday Card Workshop 2022 focused on Foiling. One of the lessons was called “Hot Foiling for the Win” taught by Yana Smakula. I have used hot foil plates before, but she shared several tips and tricks for successful foiling which I found helpful.

For my card, I used the Spellbinders “Plaid Tidings Background” plate with gold foil. I do own a solid hot foil plate (to create my own foiled/gold card stock) but had already cut the CottageCutz Joy Nativity die cut from the metallic gold card stock so I used that (and the scrap from which I had cut it) for my focal image and mat. Gina K Designs Chrismas Pine and white was also used.

***

Day 5 of the Holiday Card Workshop 2022 focused on Using Scraps.

Jennifer McGuire, and Koren Wiskman taught two lessons with really cute ideas for using scraps to create holiday cards which I will definitely need to try when I have a bit more time, but I had some scraps on my desk (including a messed up foiled panel from the above project) and a “Tree Punch” from Stampin’ Up, so I whipped up this quick and easy card.

The red trees were embossed with the “Subtle” embossing folder from Stampin’ Up. I used my score board to deboss the background. The greeting was foiled with a hot foil plate from the “Holiday Sentiments Series 2” set and the scrap of plaid was made with the “Plaid Tidings Background” hot foil plate, both by Spellbinders. Gold foil was used along with GKF Christmas Pine and Cherry Red card stock.

If you are interested in seeing how to use hot foil plates or in creative ways to use your scraps, check out the classes over at Online Card Classes!

Thanks for checking out my card project!

This content uses referral links as described in the disclosure policy on my sidebar

Using Tiny Stamps to Create Backgrounds

Using Tiny Stamps to Create Backgrounds

Skipping around a bit…

Day 6 of the Holiday Card Workshop 2022 focused on using our small and tiny stamps. One of the lessons was called “Teeny Tiny Backgrounds” taught by Chari Moss. She created a tone on tone background using small stamps and then filling in the spaces with tiny stamps.

This first card was done as taught. I used Gina K Designs Cherry Red card stock and Cranberry Tart ink along with stamps from an unmarked set that had several adorable holiday characters (and coordinating dies). I also used tiny filler stamps from the GKD “Holiday Wreath Builder” stamp set and the “In A Word: Merry” stamp set from Winnie & Walter.

For the second card, I created a background with the same unmarked stamp set, but I created a colorful background without the filler stamps. Copic Markers used were R59, G29, Y17, 100, E21, B29, E31, E35, E37, N0 R83, C4, and YR04. The greeting is from the GKD “Holiday Wreath Builder” stamp set and Christmas Pine ink. I also used a die from the “Alison’s Ribbons” set from Cheery Lynn Designs.

Just for fun, I created a third note card featuring the Santa image!

Also used on these cards, greetings from the “Itty Bitty Holiday” stamp set from My Favorite Things, GKD Christmas Pine card stock, GKD Black Amalgam ink, Cuttlebug “Swiss Dots” embossing folder, Stampin’ Up “Subtle” embossing folder, Spellbinders circle dies, and a score board.

If you are interested in seeing how to use your small stamps to create fun backgrounds, check out the class over at Online Card Classes!

Thanks for checking out my card project!

This content uses referral links as described in the disclosure policy on my sidebar.