Ranger Ink Pad Storage Rack

Ranger Ink Pad Storage Rack

Most of the stamp pads that I use regularly are stored behind my desk in racks on the pegboard.

a070 DSCN5485


I found these great wire racks at the Ranger Warehouse Sale that they hold once a year at the Ranger Headquarters in Tinton Falls, NJ.  (HERE  is the link to their blog post announcing this year’s sale.)  I went this year and last, and they had these racks both times, for $5 a piece.  Incredible value, I think!! (I think they are usually sold with ink pads to suppliers; I guess they sell off the surplus at the warehouse sale because I can’t find them sold separately online or in stores anywhere.)

aDSCN9656


I have 3 of them and have them hanging on hooks on my pegboard.  They are easily removed and can stand upright on my desk if needed, but I usually just leave them hanging.

a070 DSCN5485 cropped

DSCN9653


I have each of my ink pads in a 4″ x 6″ plastic bag.  I do this to keep a foam pad for the foam applicator for each color with the ink pad and also to keep the ink from drying out.  (I’m not sure if that’s at all necessary, but I just feel better keeping them sealed well!)

aDSCN9659

HERE is a link for the bags I use for my ink pads.

A note about storing ink pads on their sides – I have heard some people say that ink pads are best stored upside down so the ink stays on the surface of the pad.  I have been storing my ink pads on their sides without a problem.  I did have a problem years ago when the few ink pads I owned were just tossed in a cardboard box, and they dried out.  I don’t know if the lids were not secure since they were bumped about in the box, or what, but that is why I now store them in the bags.  I also tend to ink up my stamps by keeping the stamp on the table facing up and tapping the ink pad down on the stamp.  As I work, I place the ink pad face down on its lid on my desk.  Maybe, the ink “moves” to the surface while it sits on my desk like that – who knows!!

For what it’s worth, I found this HERE on the ranger site :   “How should I store my Distress Ink Pads?    The molded plastic case is designed to create the proper fit needed for the ink formulation. While storing the pads flat with the bottom side up will neither help nor hurt, we usually store pads on their sides or flat with the right side up.”  I’m not sure if this is correct for all ink pads.

Thanks for checking out my post!

This content uses referral links as described in the disclosure policy on my sidebar.

IRIS Scrapbook Case and Craft Organizer Tray

IRIS Scrapbook Case and Craft Organizer Tray

I use these scrapbook cases for storing quite a bit of stuff in my craft room.  They are the perfect size to hold 12″ x 12″ paper and other scrapbooking materials that size.  They are roomy enough to hold a lot of stuff, but not so much stuff that it becomes hard to find things in the box.  I store my re-inkers in one, alcohol inks and supplies in another, heat embossing stuff in one, etc.  These scrapbook storage boxes are sold separately or with the storage unit (scrapbook chest).

scrapbook case   aDSCN9639

IRIS 6-Compartment Storage System

I also really like the organizer tray that was designed to fit inside this box.

aDSCN9607   aDSCN9609

The organizer comes with 10 adjustable dividers which is nice because they hold items in place if you don’t have enough to fill the section of the tray completely.

aDSCN9615   aDSCN9618


One of the things I use the case and organizer tray for is my Tim Holtz Distress Ink Pads.

I have 44 ink pads and several foam applicator tools in mine.  (The right column is wider than the middle two; the left column is smaller and not as wide as a distress ink pad.  However, if you rotate the ink pad a quarter of the way around, you can fit a few more on the left.)  I have each of my ink pads in a 4″ x 6″ plastic bag.  I do this to keep a foam pad for the foam applicator with each ink pad and also to keep the ink from drying out.  (I’m not sure if that’s at all necessary, but I just feel better keeping them sealed well!)

aDSCN9632   aDSCN9645

HERE is a link for the bags I use for my ink pads.

I made my own labels for my ink pads since you can’t see the colors when they are stored in the box.  I recently found a pdf file here that contains labels for the distress pads on the ranger site:

Distress Ink Pads Labels

Distress Mini Ink Pad Labels

I like how they are colored and may need to re-label mine!

pdf file

(There are a lot of good organizational goodies on their site which you can check out here: http://rangerink.com/organize-your-ranger-products/.)

I store this box (and one other that contains extra foam applicators, foam pads, mini misters, reinkers, etc.) in the storage unit.

a070 DSCN5485   aDSCN9643

A note about storing ink pads on their sides – I have heard some people say that ink pads are best stored upside down so the ink stays on the surface of the pad.  I have been storing my ink pads on their sides without a problem.  I did have a problem years ago when the few ink pads I owned were just tossed in a cardboard box, and they dried out.  I don’t know if the lids were not secure since they were bumped about in the box, or what, but that is why I now store them in the bags.  I also tend to ink up my stamps by keeping the stamp on the table facing up and tapping the ink pad down on the stamp.  As I work, I place the ink pad face down on its lid on my desk.  Maybe, the ink “moves” to the surface while it sits on my desk like that – who knows!!

For what it’s worth, I found this HERE on the ranger site :   “How should I store my Distress Ink Pads?   The molded plastic case is designed to create the proper fit needed for the ink formulation. While storing the pads flat with the bottom side up will neither help nor hurt, we usually store pads on their sides or flat with the right side up.”


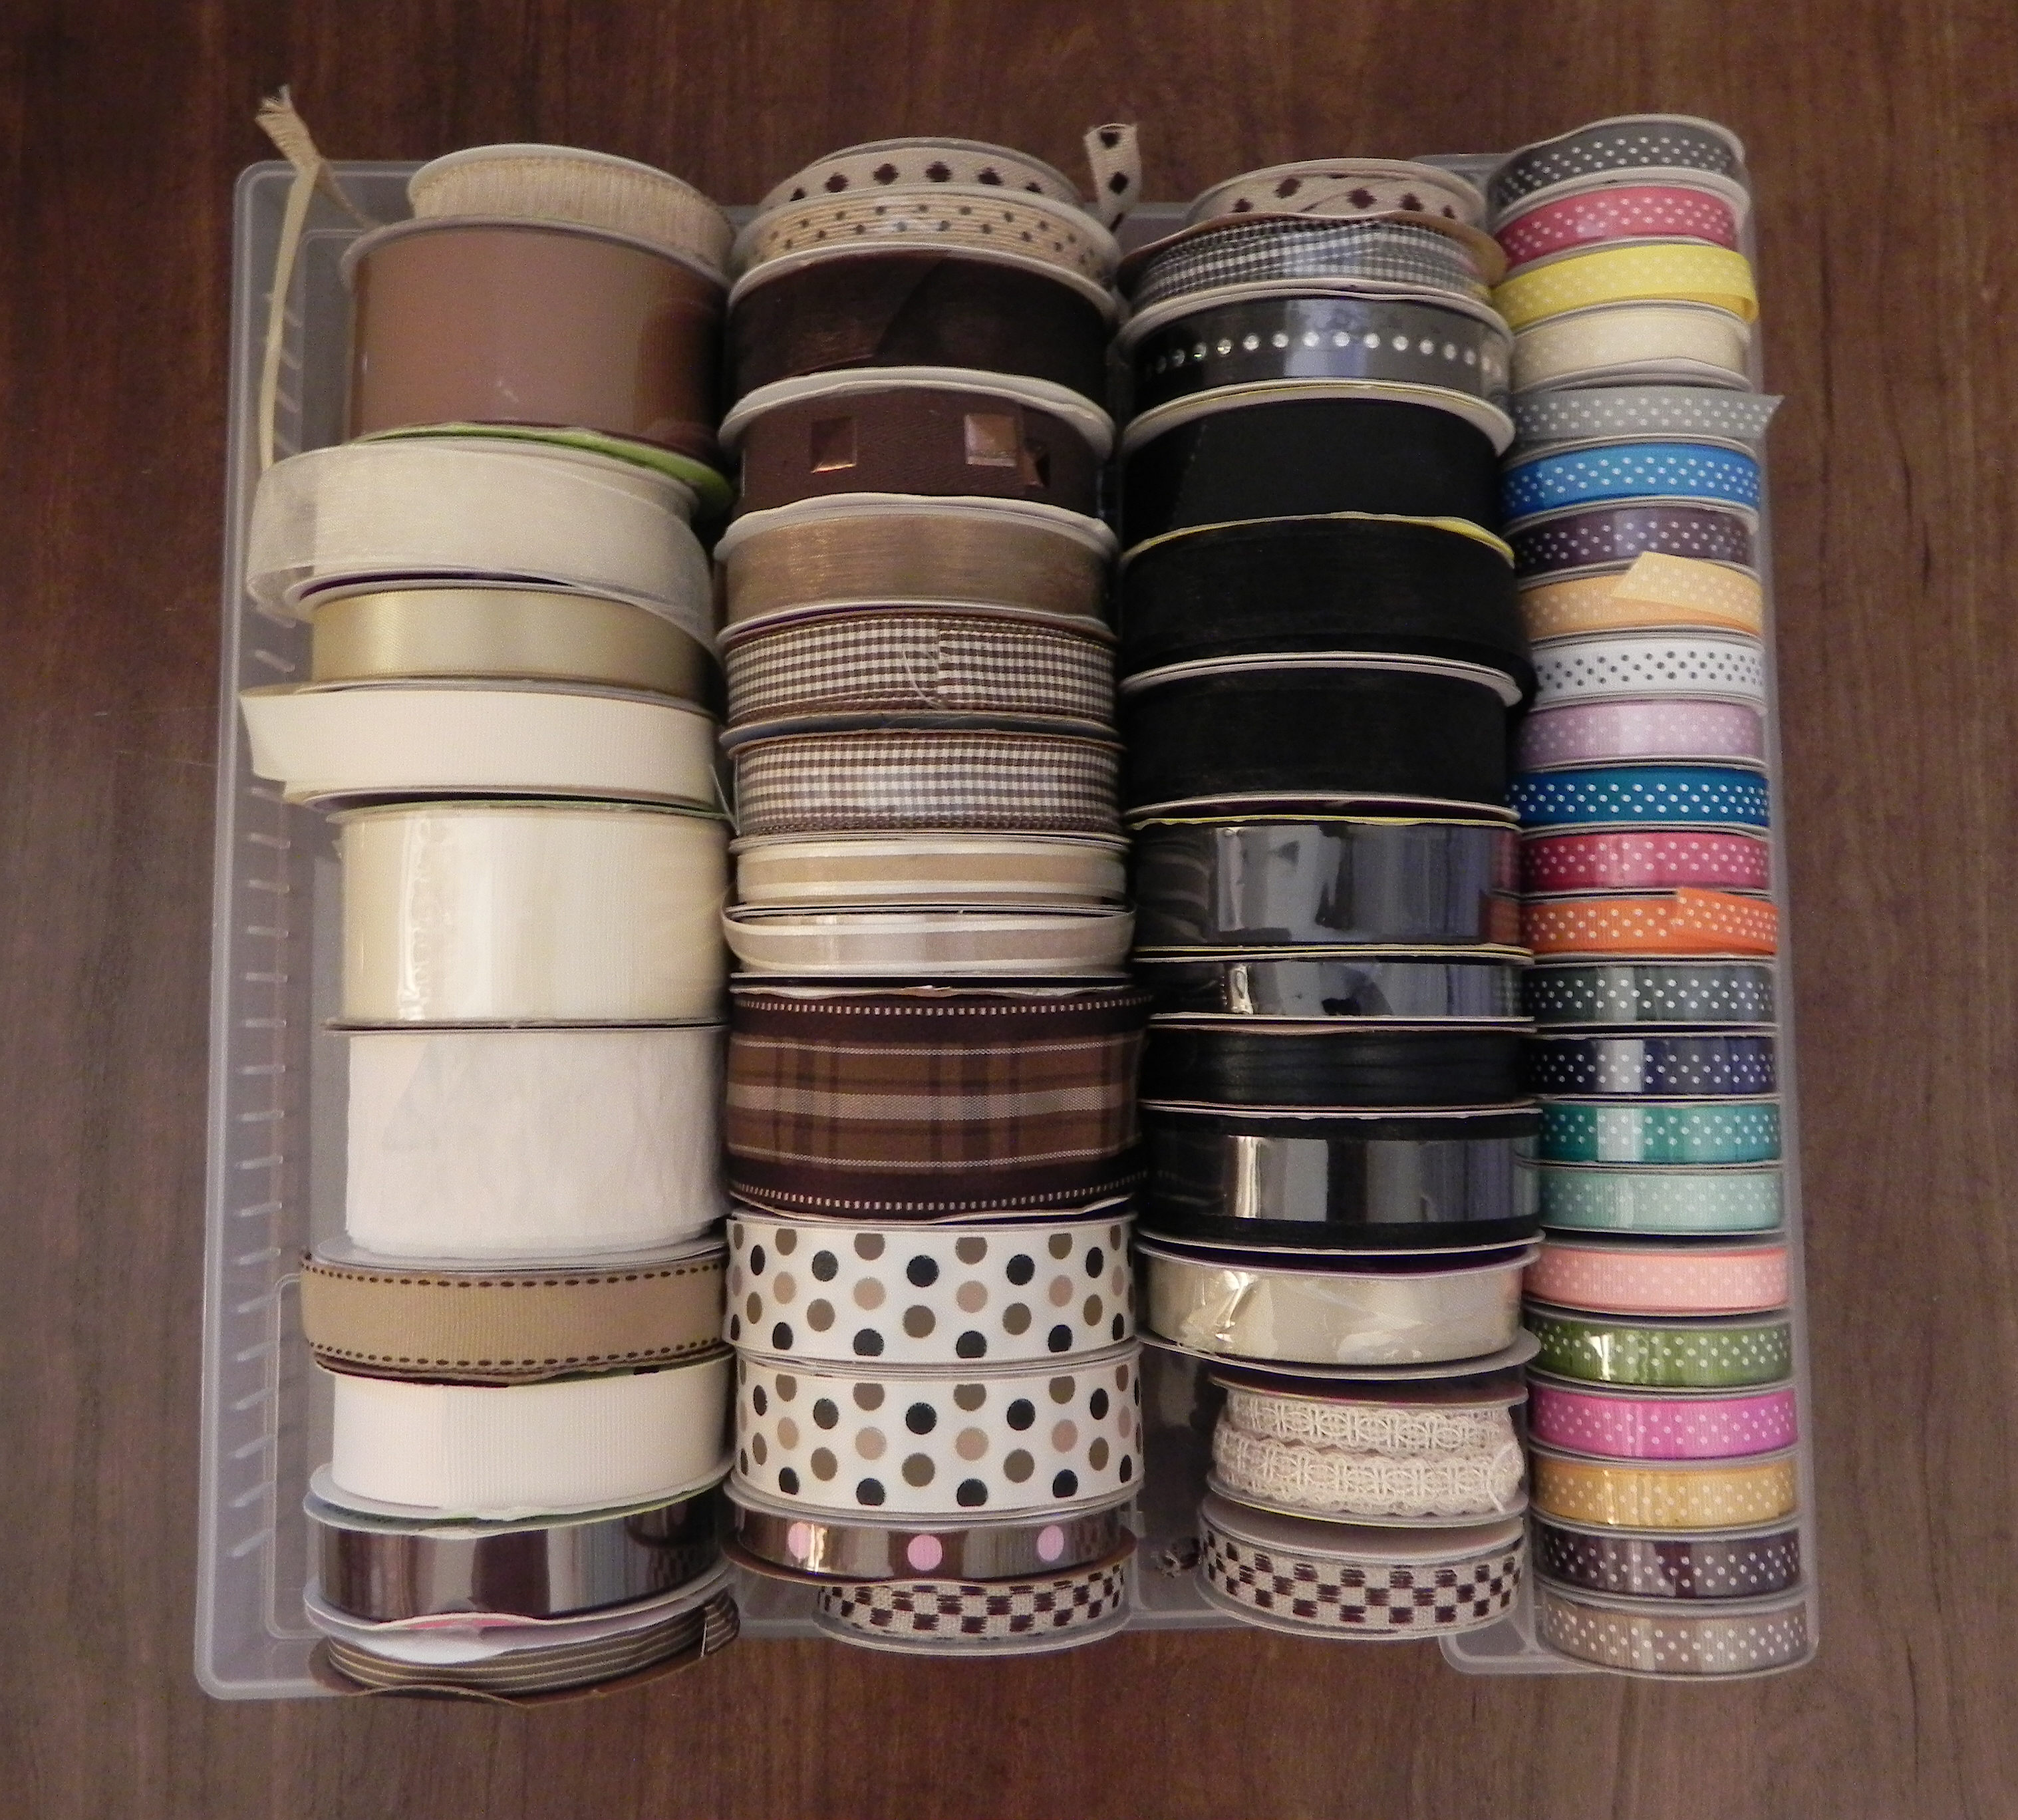
Another thing I use the box and organizer for is ribbon storage.

I have to confess, I am not a lover of ribbon as some crafters are.  (I use a lot more jute, raffia, etc.)  I admire ribbon on others’ projects, but I often can’t seem to make it work on mine.  As a result, I probably own less than most, but what I do have was making me crazy because I didn’t know what to do with it!  Originally, I had all the spools thrown in a few plastic bins with lids.  I could never find the colors I needed, and the ribbon always unraveled and got tangled when I rooted around the bins. When I moved into my craft room, it all got placed in a drawer which quickly became an even bigger disaster than the original bins because it was bigger so there was more of a mess in there!  Then I discovered that the ribbon fits nicely in these scrapbook cases, and if you use the organizer trays in them, the ribbon all stays put!

aDSCN9621  aDSCN9626

aDSCN9631

The dividers that come with the tray hold the ribbon in place if there isn’t enough to fill a whole column, and when the lid is closed, the ribbon does not move around at all!  Again, one of the columns is wider than the middle two and one is more narrow.  The small spools of ribbon that I bought in packs at the craft store fit perfectly in the thinner one.  I have two of these boxes filled and they sit stacked in the drawer.  (There were a few spools that were larger than most that didn’t fit in the case so I put those in a box to the side.  Since there are so few, it’s easy to keep them in order.  I also have loose pieces of ribbon in a bag stored with the larger spools.)

aDSCN9667

I put my twine, jute, string, yarn, raffia, etc. in the bins I was using before since they are too big for these boxes.  This system is working out much better for me!


Thanks for checking out my post!

This content uses referral links as described in the disclosure policy on my sidebar.

Basket of Snowmen

Basket of Snowmen

aaDSCN9603

This card is being entered in the Mod Squad Challenge – It’s My Favorite, where we are to create our all-time favorite kind of card, be it a technique, color, layout, or whatever else we may love.  We have free rein to do whatever we want, as long as it’s our most very favorite kind of card. (Sadly, this site is no longer active.)  My favorite type of card is distressed or vintage and country or primitive.  I tend to like warm colors and use a lot of browns!

It is also being entered in the Perfectly Rustics “PR Design Challenge No. 34 – Holidays” where we are to show our holiday creations (any holiday). (http://perfectlyrustics.com/2014/10/20/prdc-no-34-holidays/)

I fell in love with this basket stamp the second as I saw it!  It is by Stampington & Company and is called Snowmen Basket designed by Debbie Mumm.  I stamped it in Mememto Tuxedo Black on white card stock and colored it with Copic Markers (E40, E43, E44, E47, R89, G29 and 0).  The image was masked, and then the background was inked and wood-grained with Memento Desert Sand and Gina K Kraft.  I added some speckles with Gina K Warm Cocoa ink and a Tim Holtz stamp from the Visual Collection – Nature’s Elements.

The greeting came from the Gina K Designs Warm Woolen Mittens set (retired?) and was stamped with Gina K Charcoal Brown ink.  The background was done the same way as the snowman panel.  The edges of both were then distressed with a razor (the Tonic Studios Tim Holtz Paper Distresser) and inked with the charcoal brown.

The card stock I used was Gina K Cranberry Tart and White.  The plaid printed paper was from Basic Grey’s Little Black Dress paper pad, and the brown was on the back of a piece of Joyeux Noel Santa card stock by Glitz Design.  Raffia, jute and metal snowflake charm were from my stash.

Thanks for checking out my card project!

This content uses referral links as described in the disclosure policy on my sidebar.

Embossed Gold Tree

Embossed Gold Tree

Embossed Gold Tree.jpg

This card is being entered in the StampTV MIUM Challenge –  STV14MON41 – “Christmas Comes Early” where our card project should be Christmas themed.  (Sadly, this site is no longer active.)

It is also being entered in the Perfectly Rustics “PR Design Challenge No. 34 – Holidays” where we are to show our holiday creations (any holiday). (http://perfectlyrustics.com/2014/10/20/prdc-no-34-holidays/)

The card stock used is Gina K dark chocolate.  The background die is Spellbinders A2 Filigree Delight. After cutting out the die, I covered the entire surface with versamark ink and then heat embossed it with gold embossing powder.  The center oval panel was also heat embossed in gold with stamps from the Gina K Designs “Cheers Mini Stamp Set” and was cut using the oval die also from the Filigree Delight set.  A piece of gold cording was tied along the fold.  I was trying to keep the card easy to duplicate and flat so it is easy to mail.

I tried the card in Christmas Pine and Cranberry Tart as well.  I really like it with the Dark Chocolate, though.

aDSCN9375

Thanks for checking out my post!

This content uses referral links as described in the disclosure policy on my sidebar.