Questions? Comments?

Leave a comment or question below, or email me at lisababitz@gmail.com.
How to Make a Frame with a Paper Trimmer
I made this tutorial to answer this specific question asked by a member on StampTV: “I want to frame designs without using a whole sheet of the framing paper under the stamped object. Basically, just a frame with no inner paper. How is this done? Unfortunately, most dies do not always fit the stamped design. I would like to find a way to use a paper cutter to achieve the results.”
I recently used my paper trimmer to make the plaid frame on this card:
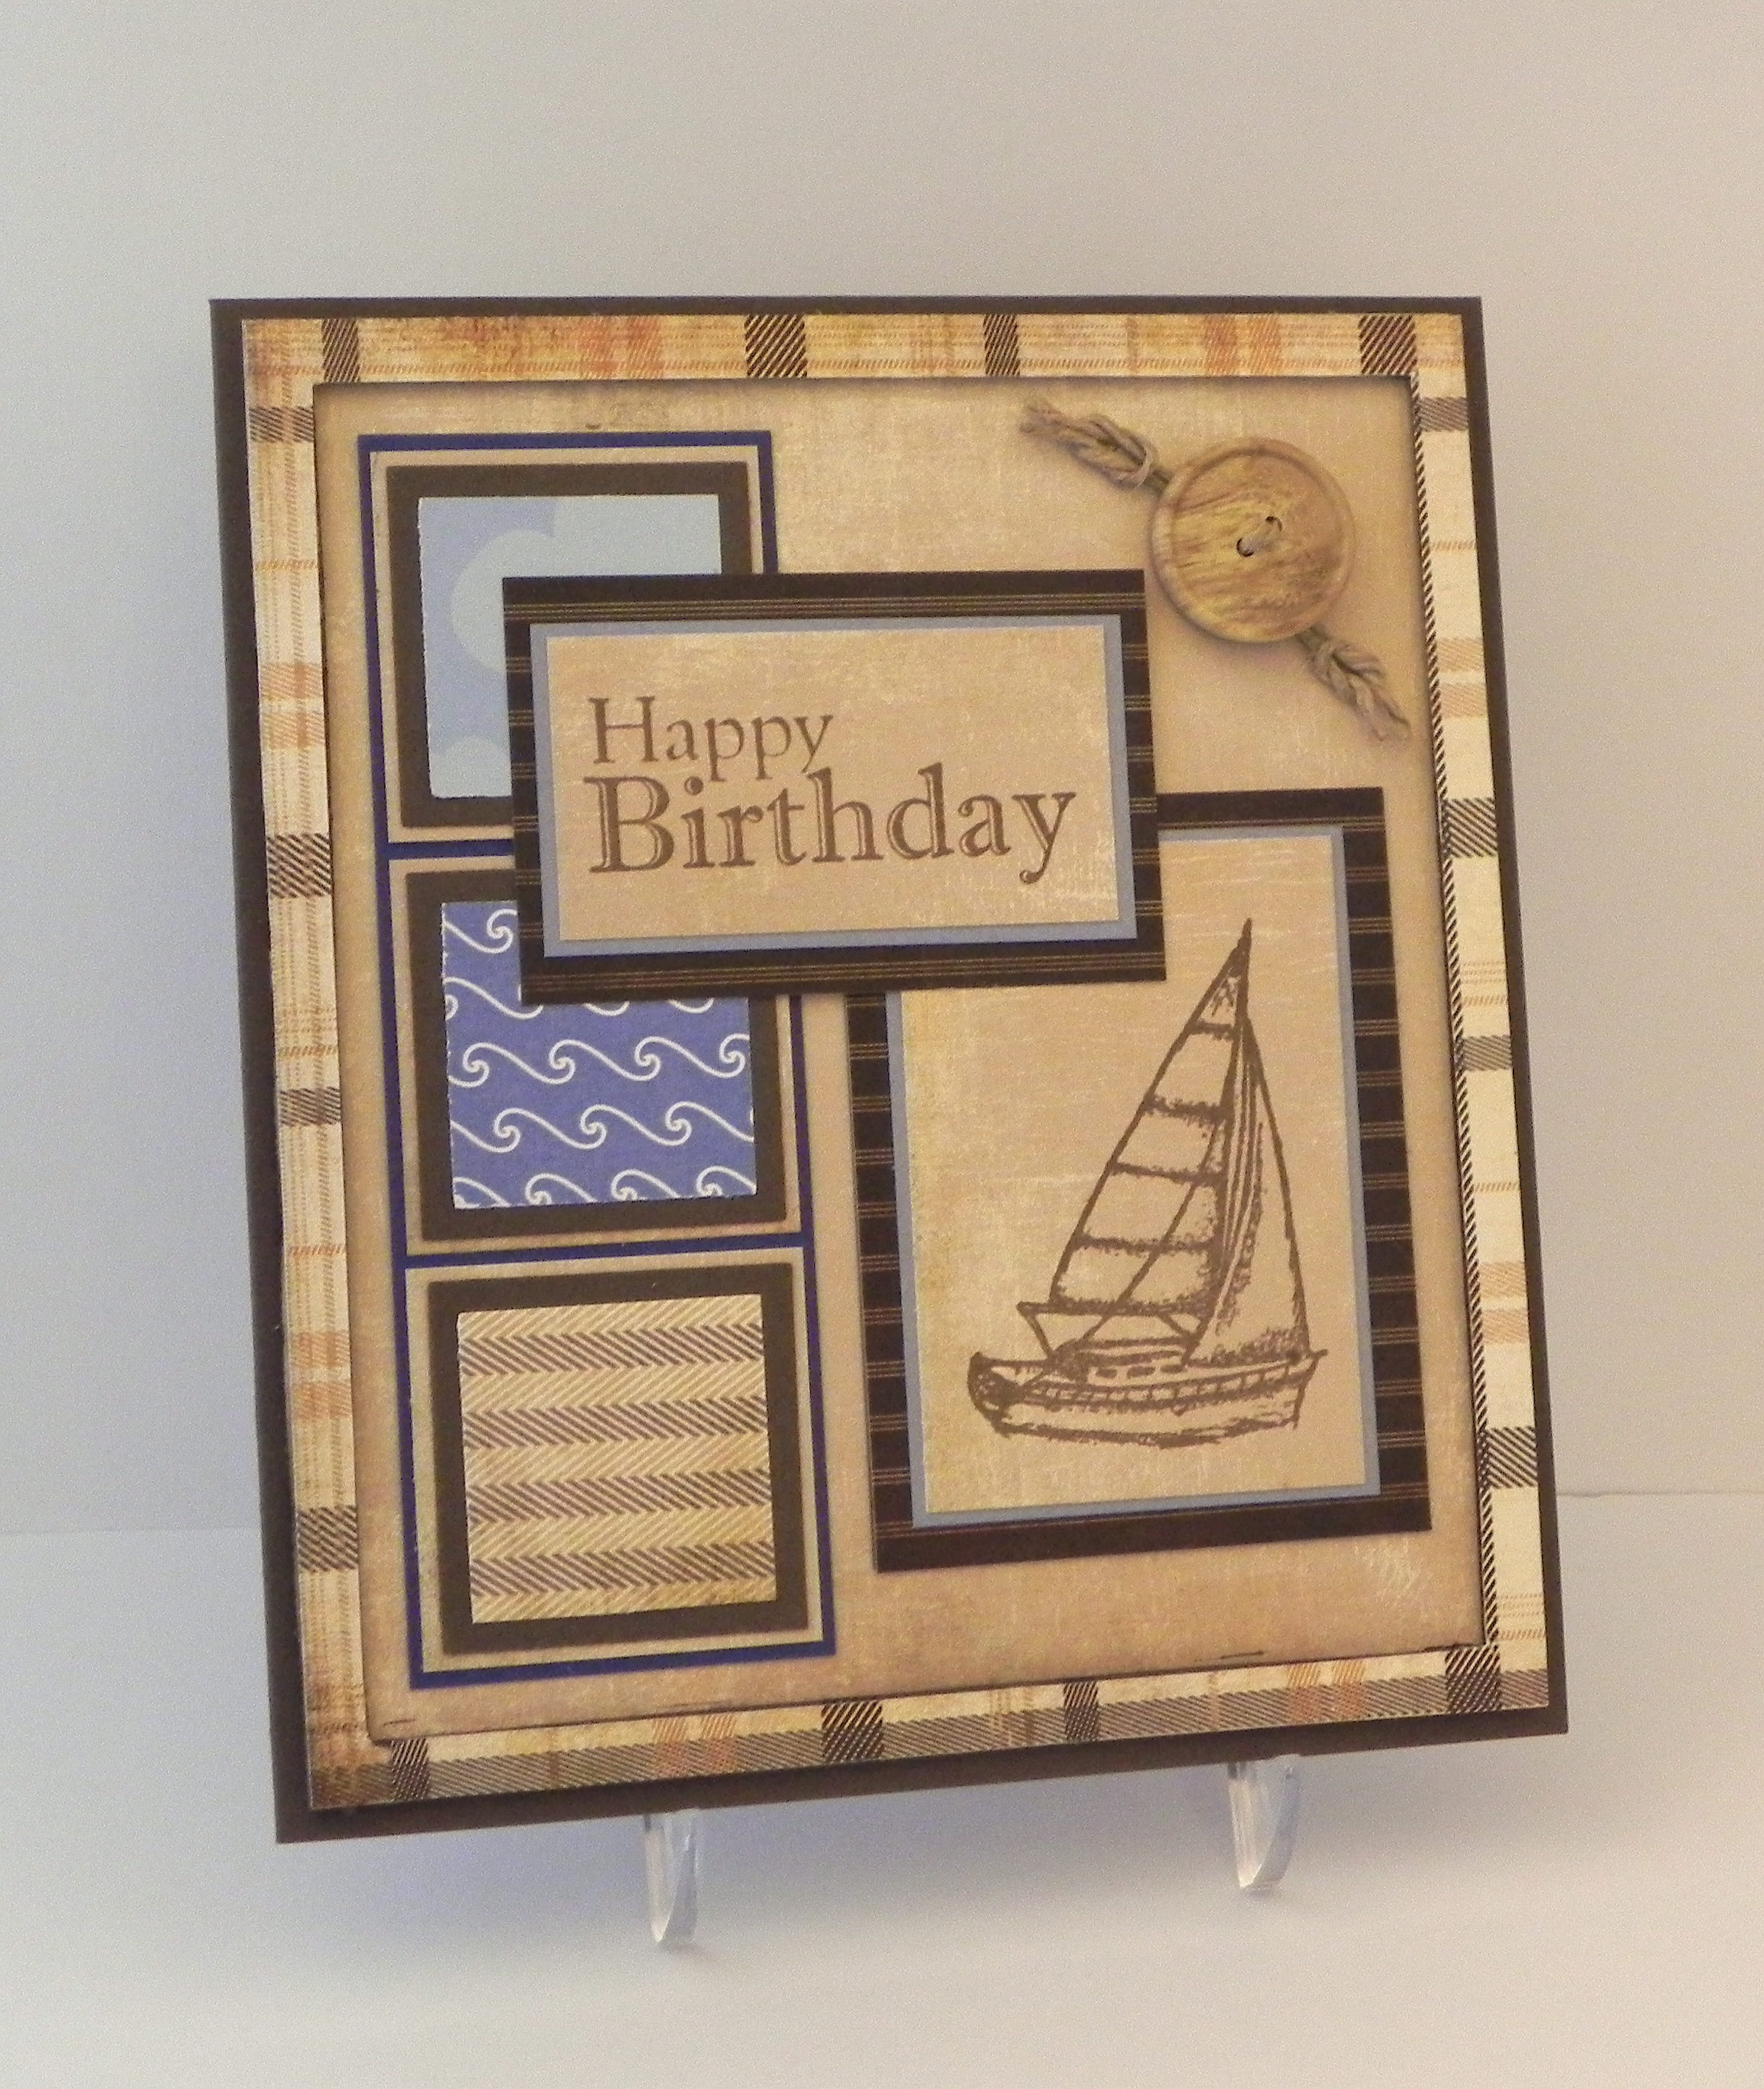
(Click HERE to see original card post.)
Here’s how I did it:
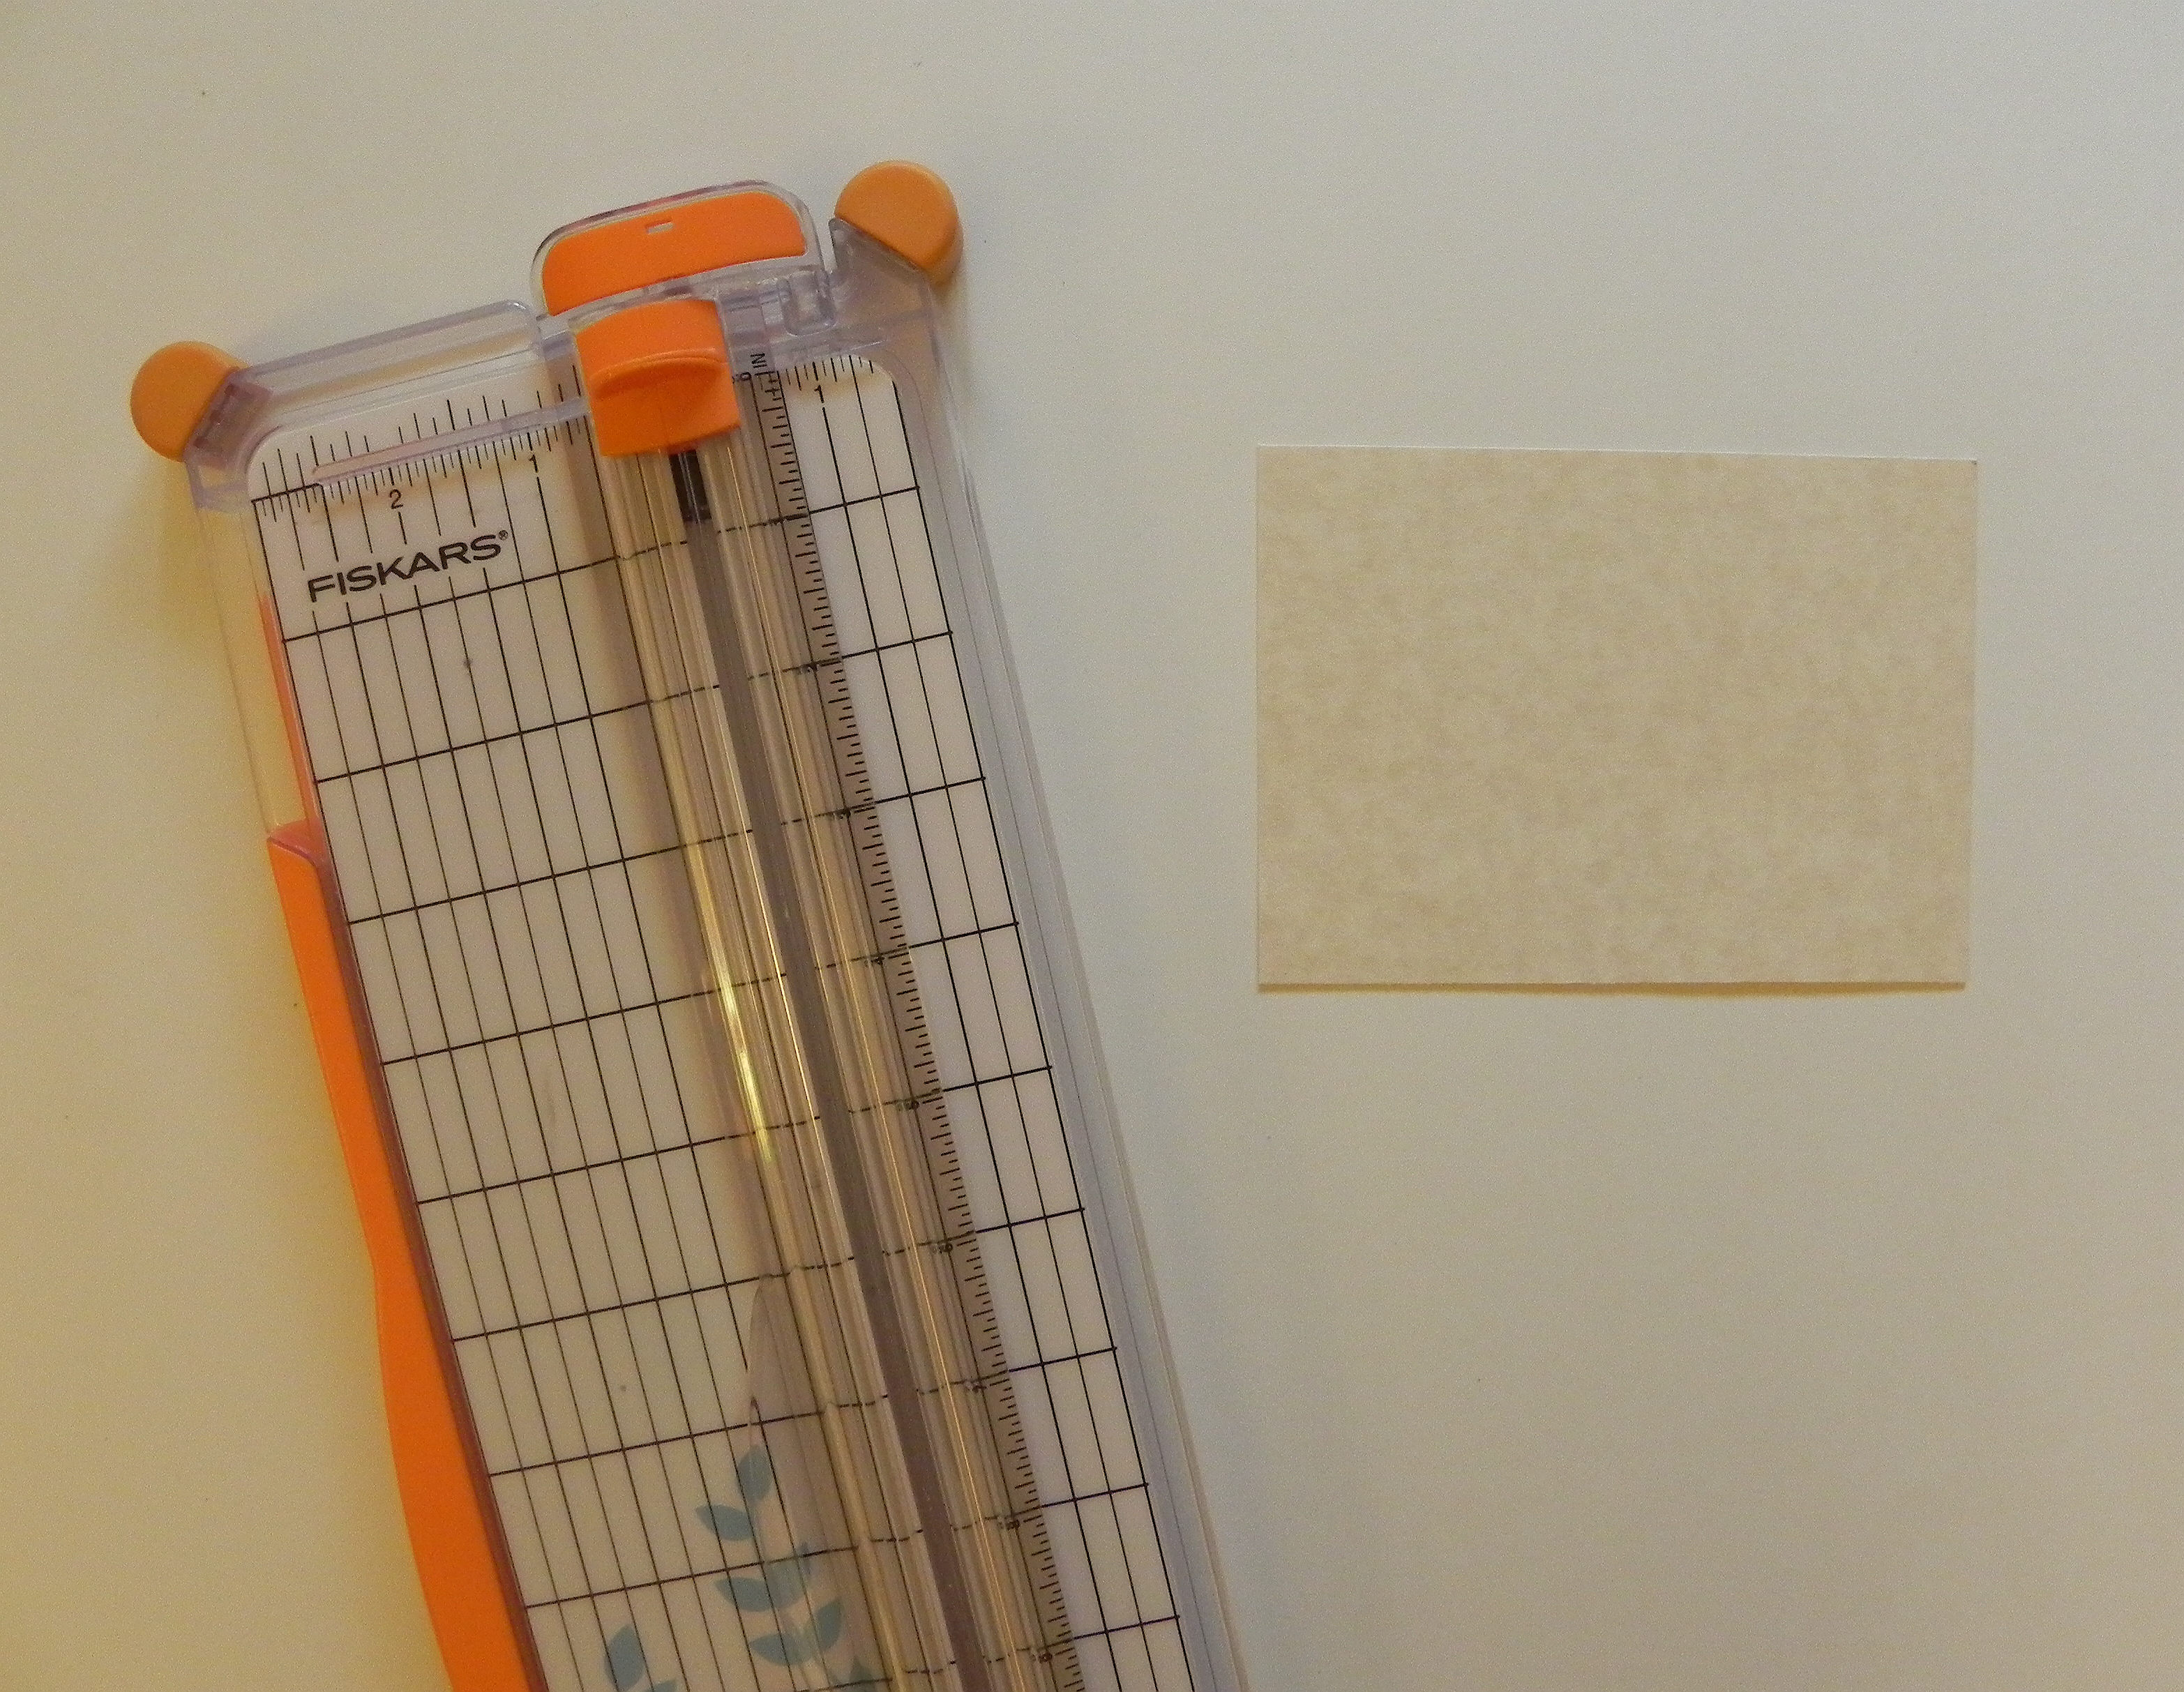
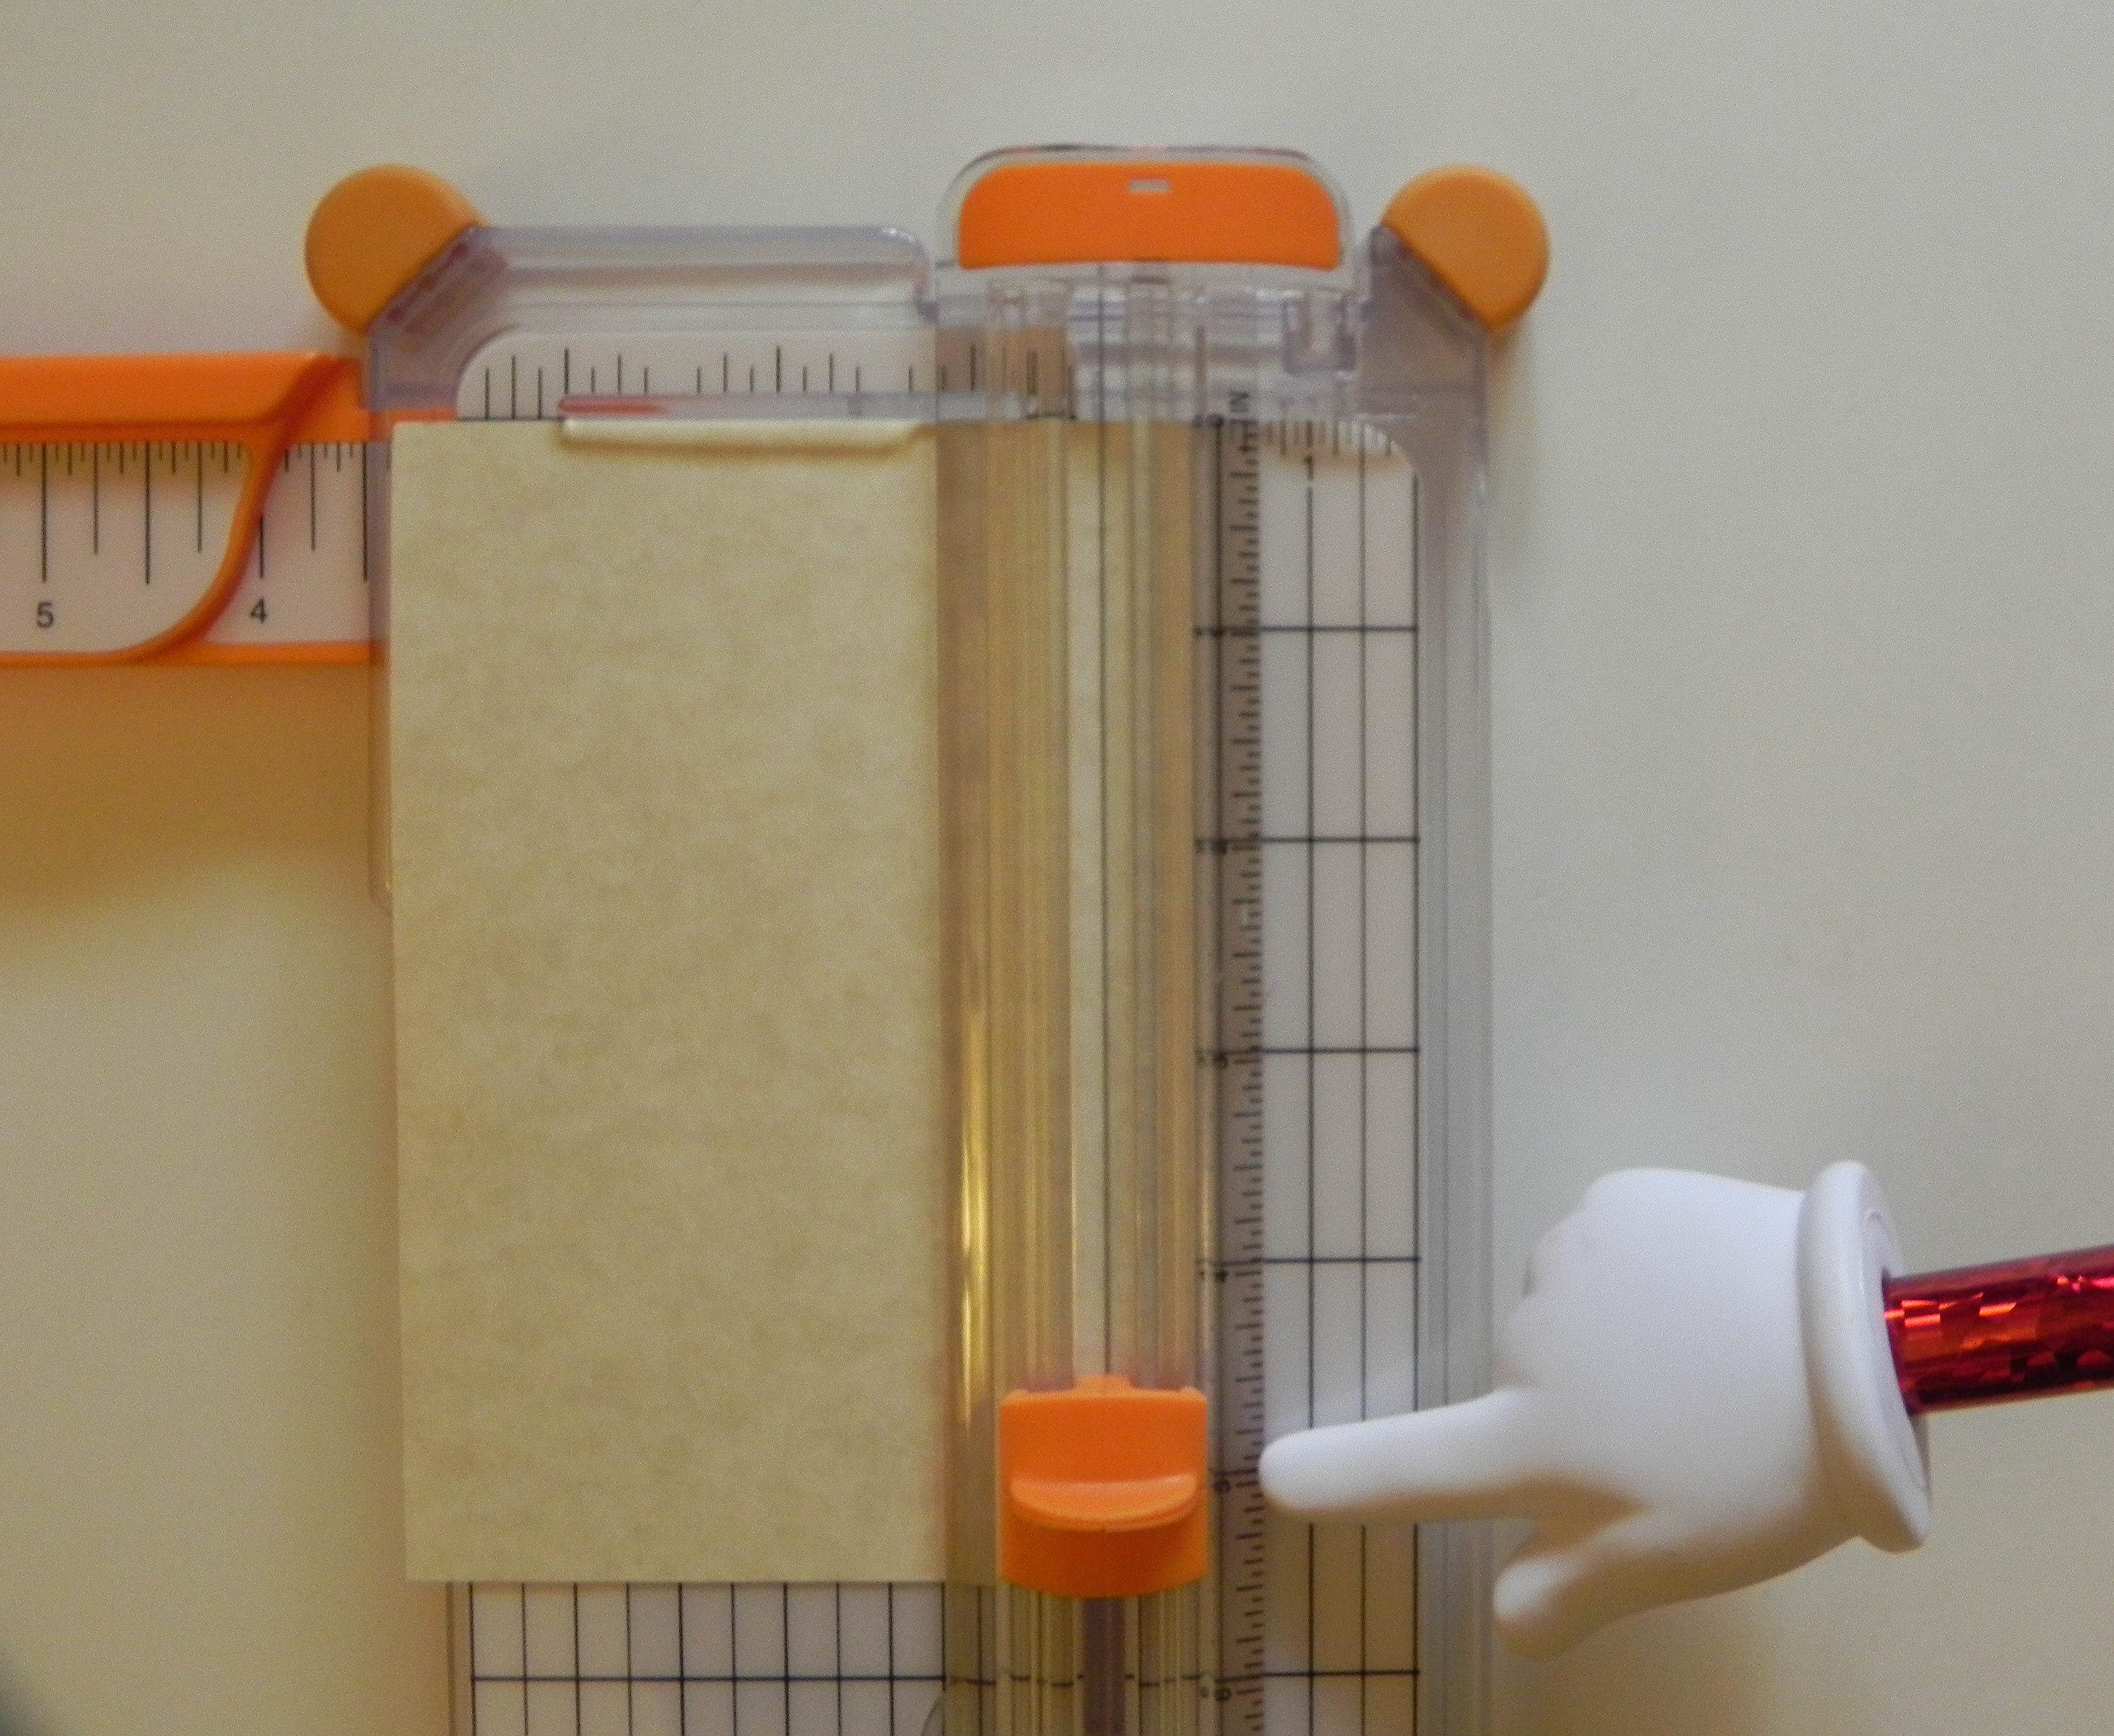
I’m using a Fiskar’s trimmer, although any trimmer with a sliding blade will work basically the same way. (Click on a photo if you need a closer view.)
Notice the lines on the blade handle. These lines indicate where the blade is “hiding” underneath. Since you cannot see the blade when it is down, you use these lines to position the blade where you want to make a cut. (If your trimmer does not have lines, you can use a Sharpie to make a mark on the edge of your blade handle that lines up with your blade.)


Notice the place on the trimmer where the blade actually makes the cut.

Let’s say you want to make a half inch frame. You want to find the mark on the trimmer that is 1/2 inch from the place where the blade is cutting. On my trimmer, you could go a half inch to the right or left. I am going to use the half inch mark on the right of the cut line.
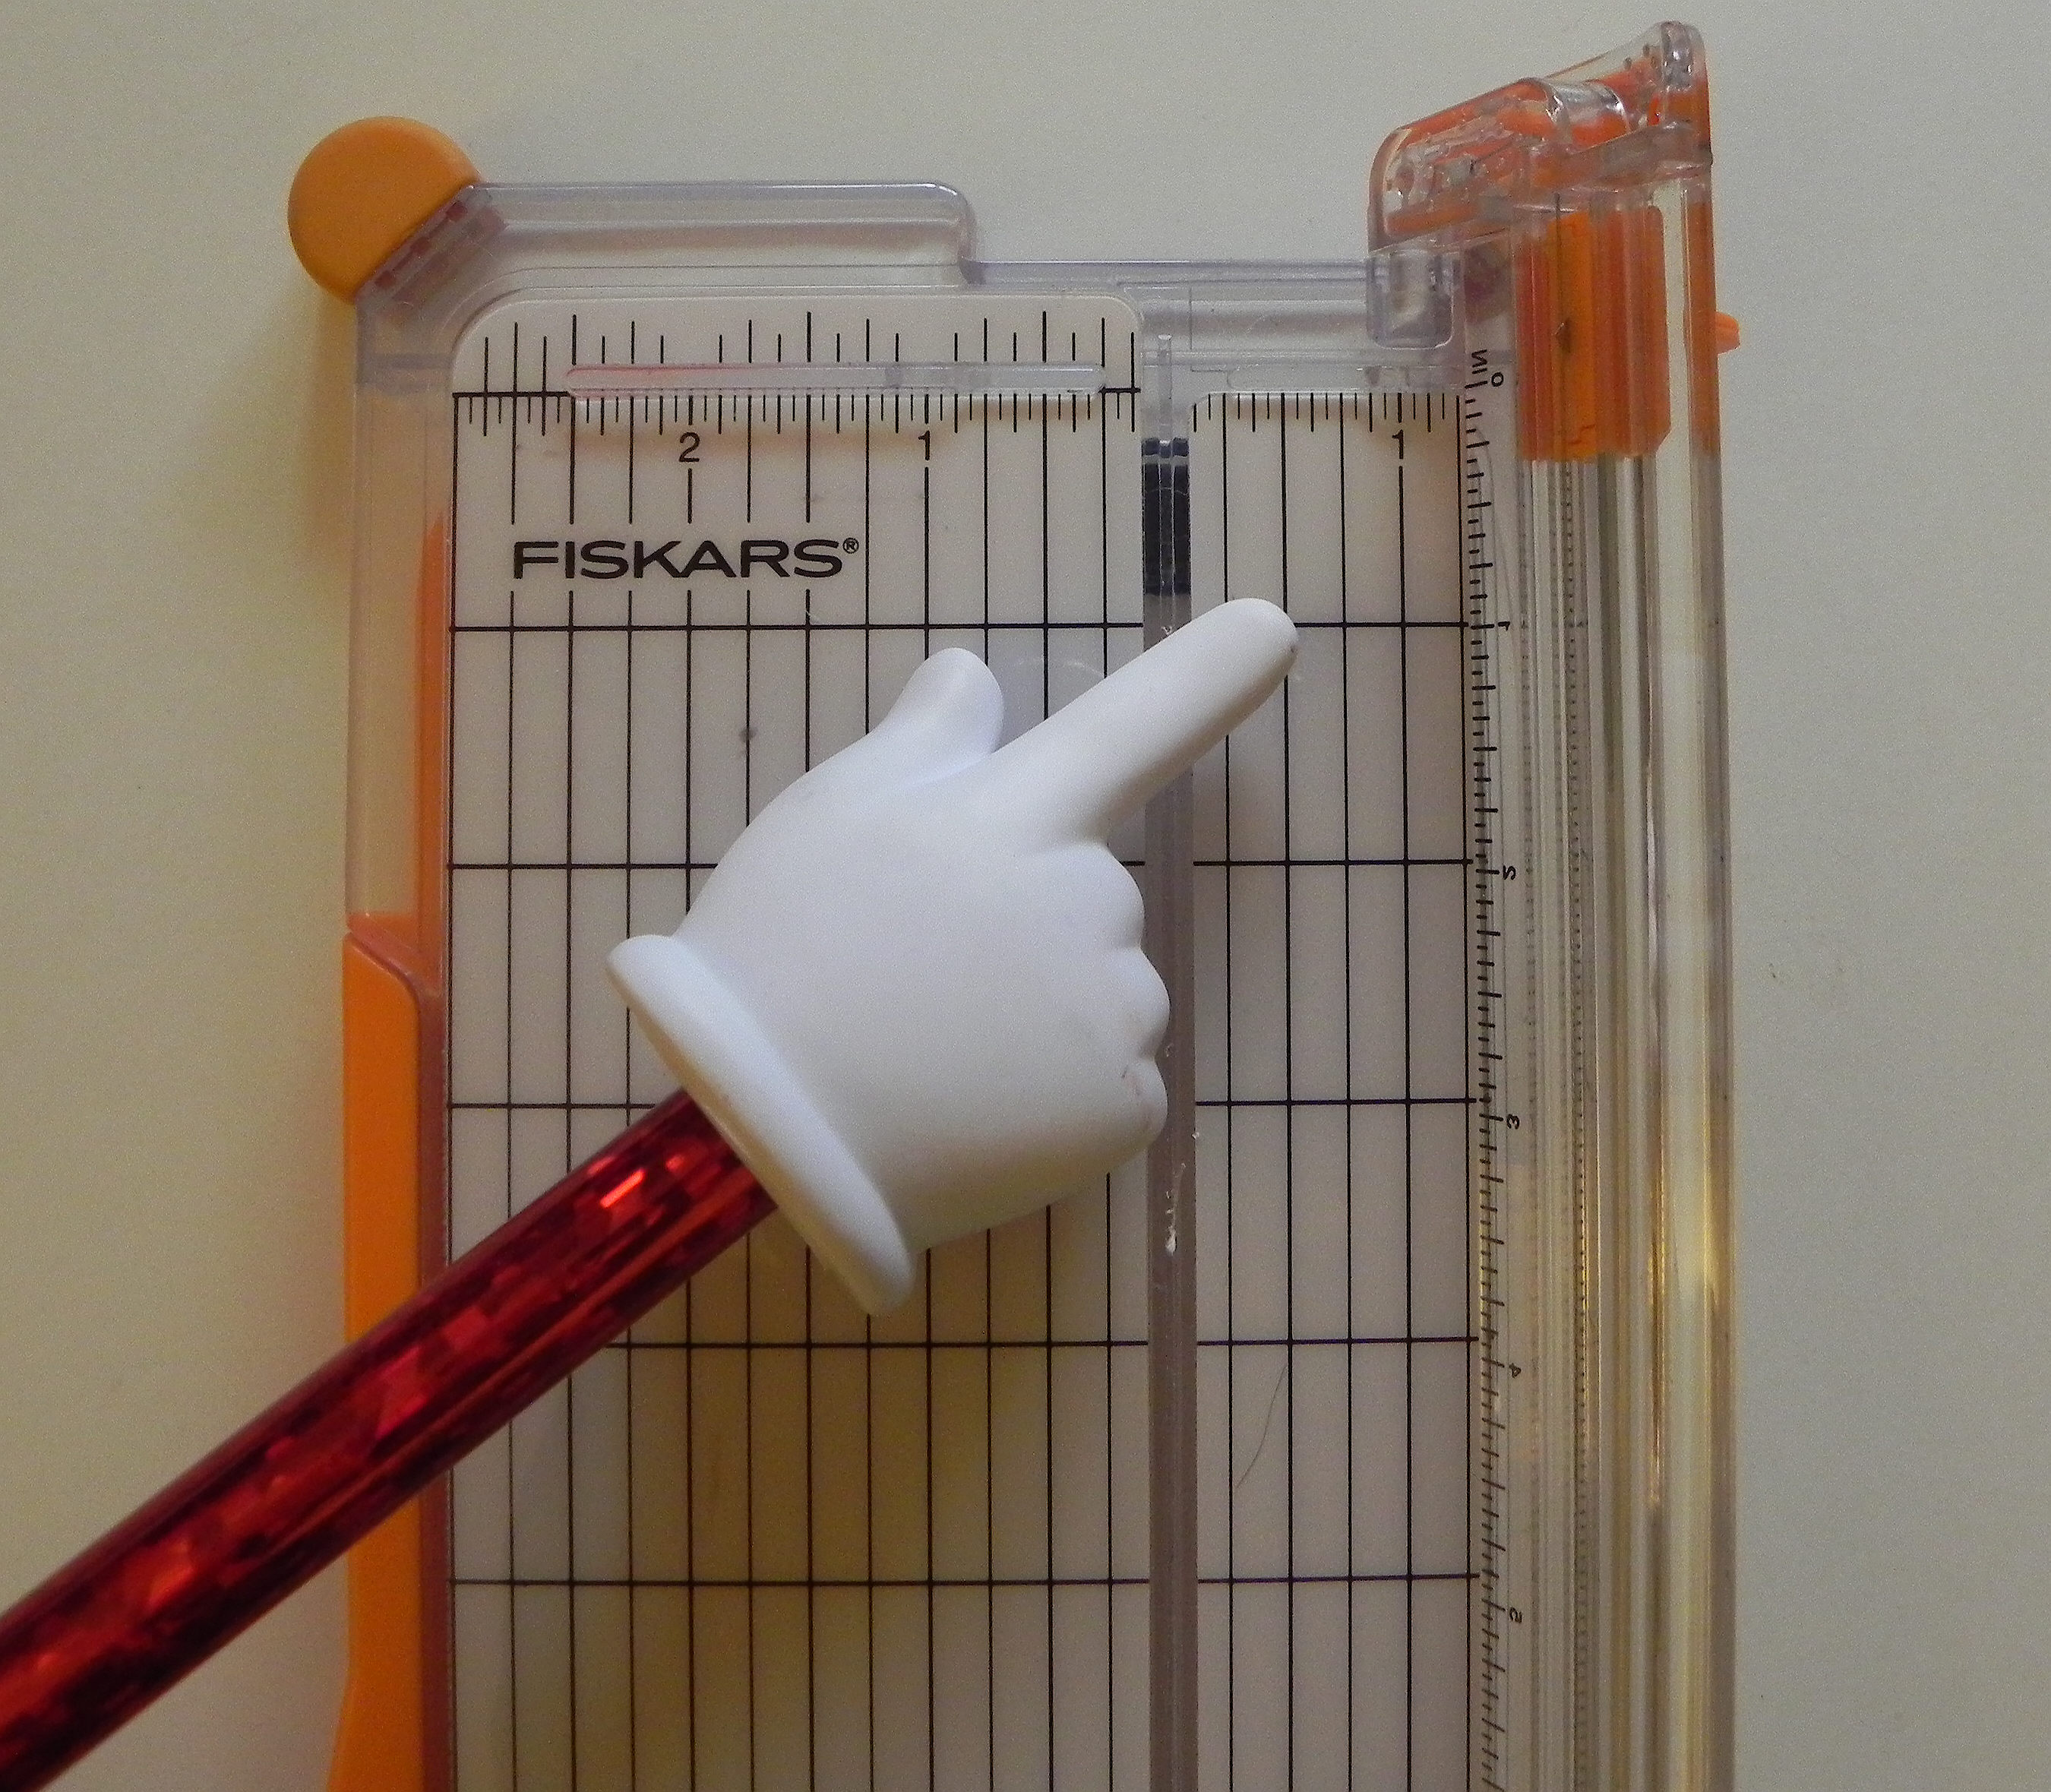
Line up the edge of your paper from which you plan to cut the frame at the 1/2 inch mark indicated in the previous step.

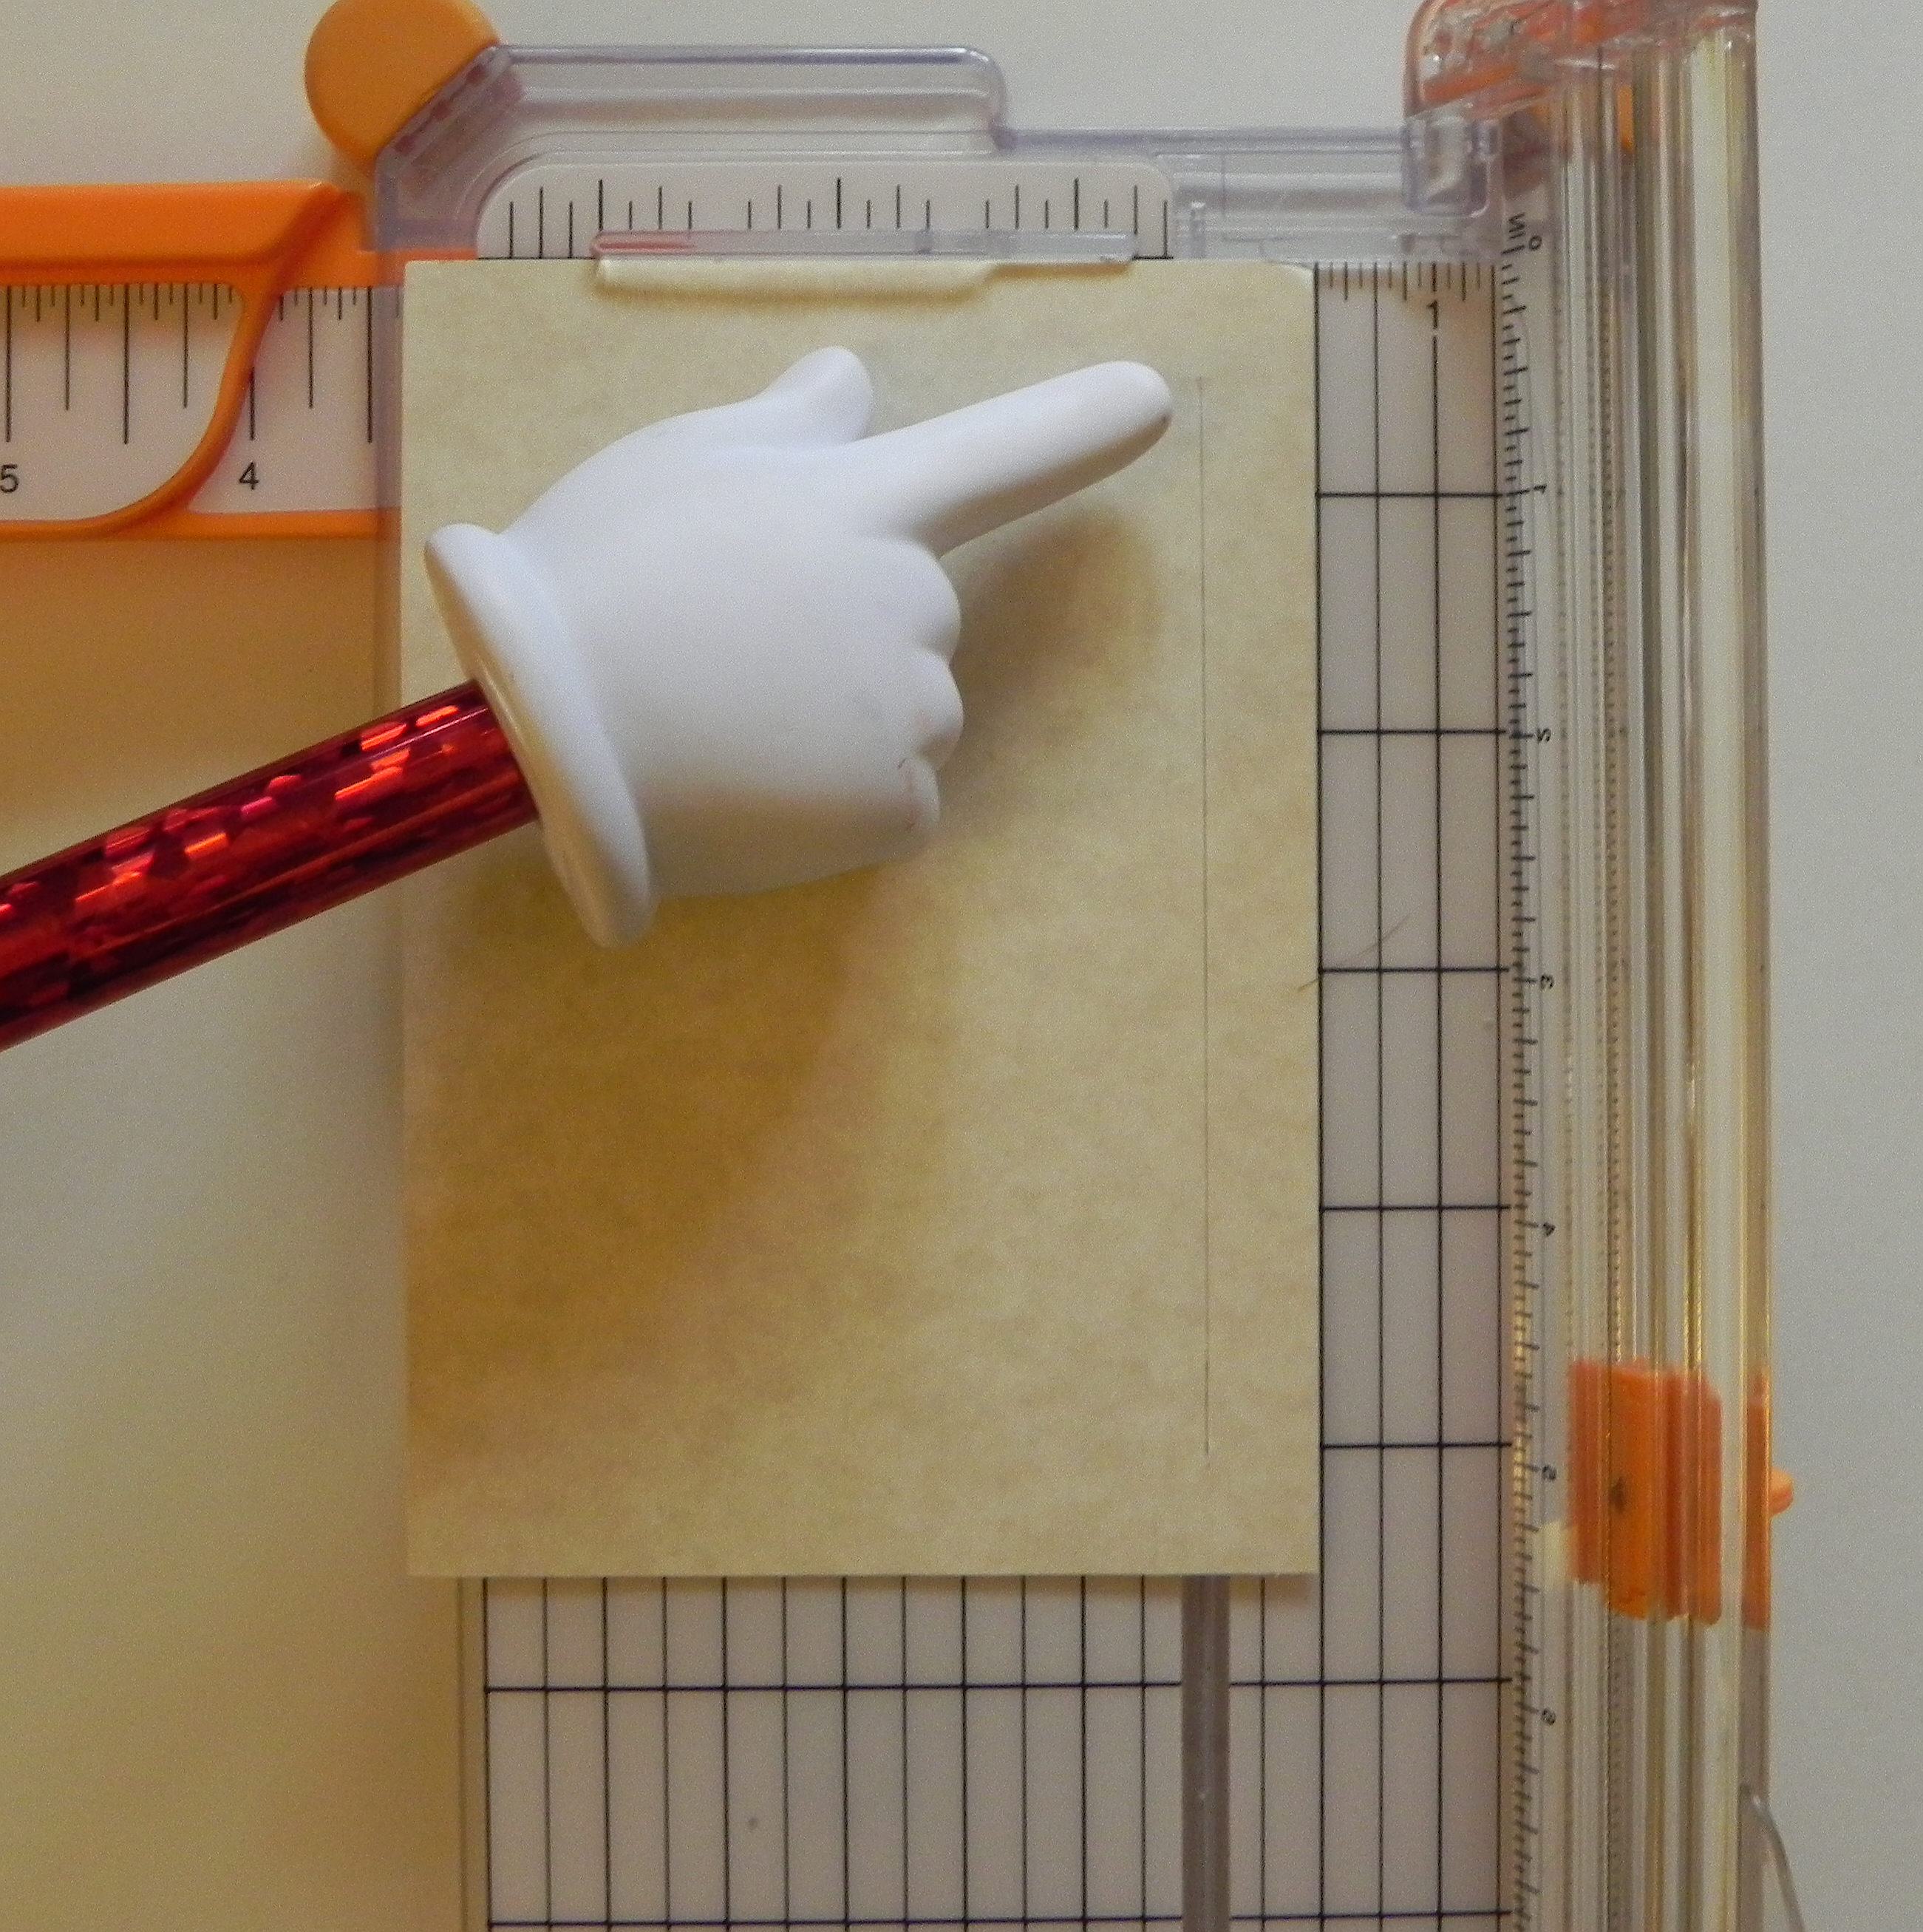
You want to line up the marks on the side of the blade handle with the 1/2 inch mark (from the top of the paper) on the ruler where the blade slides back and forth. DO NOT drag the blade into position; it will cut your paper. Lift the blade off the paper to position it. Then put it on the paper. The blade positioned here on the ruler is going to start cutting 1/2 inch from the top.

(Just a quick note – The lines on the side of the blade handle usually start all the way at the top or zero mark on the ruler and the blade will cut from the edge of the paper when in this position. This in NOT where you want it for the frame!)

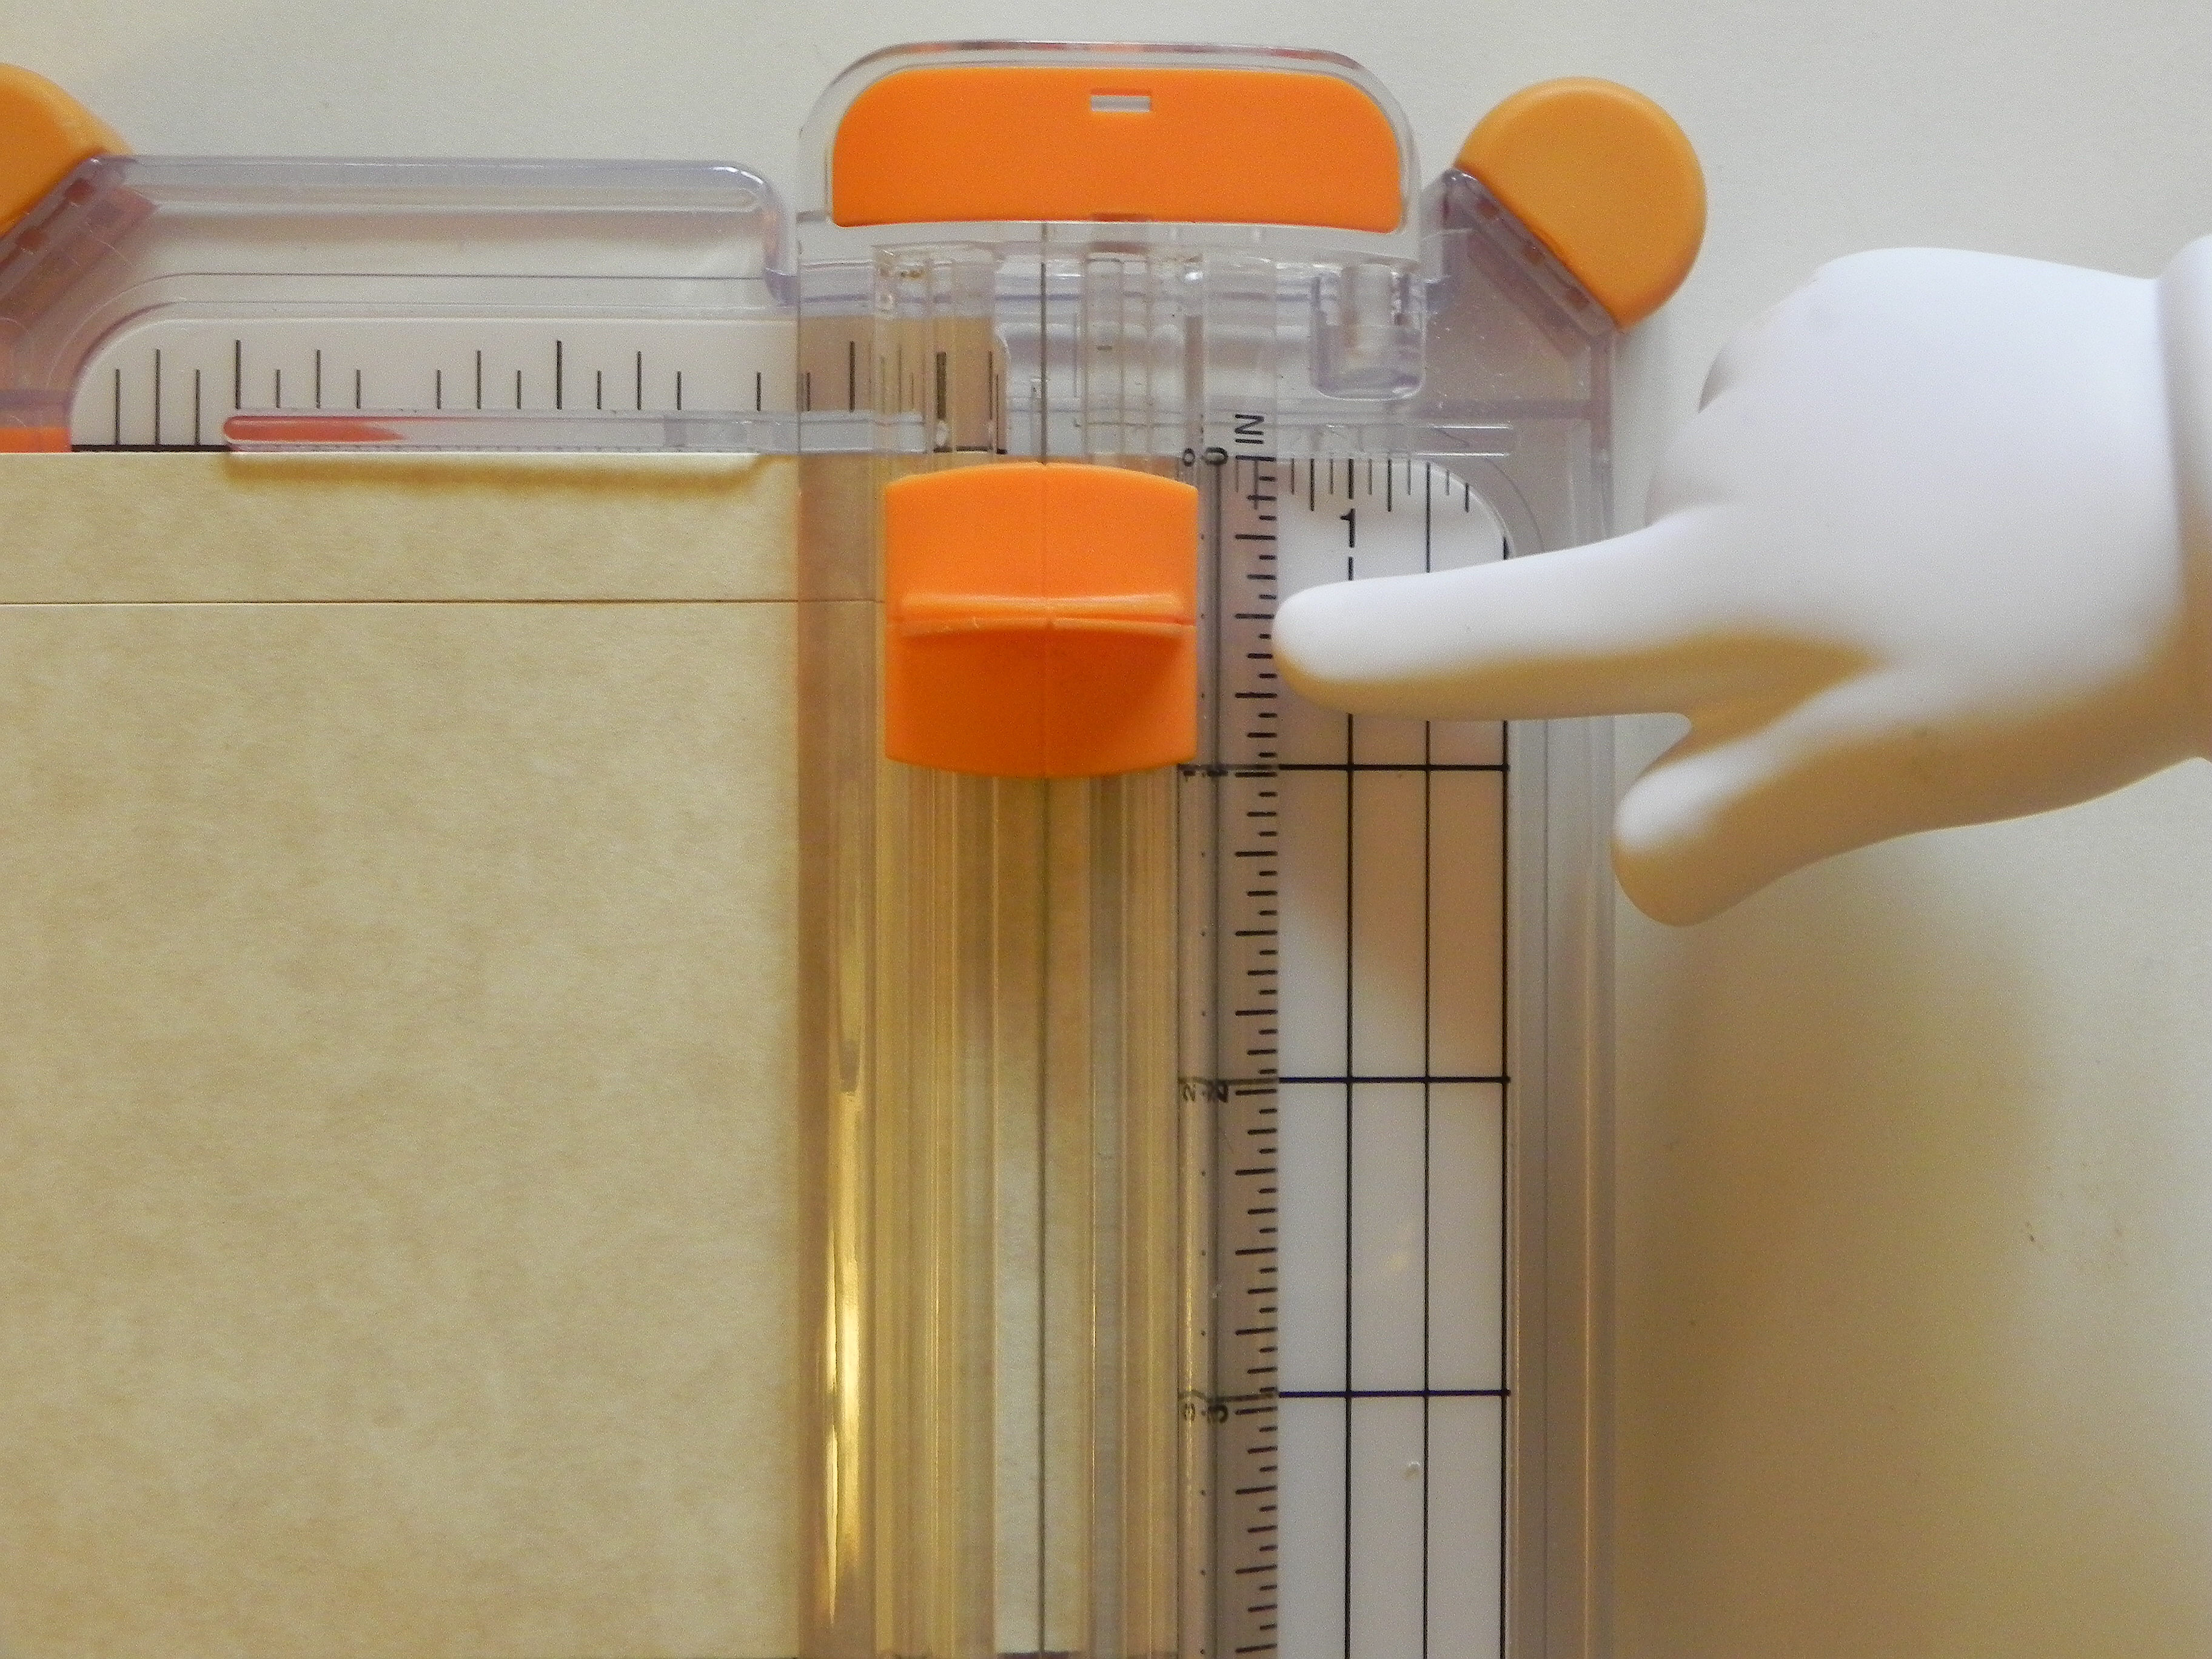
Before you drag the blade down the paper to make your first cut, note where you will be stopping which will be 1/2 inch from the bottom of the paper.
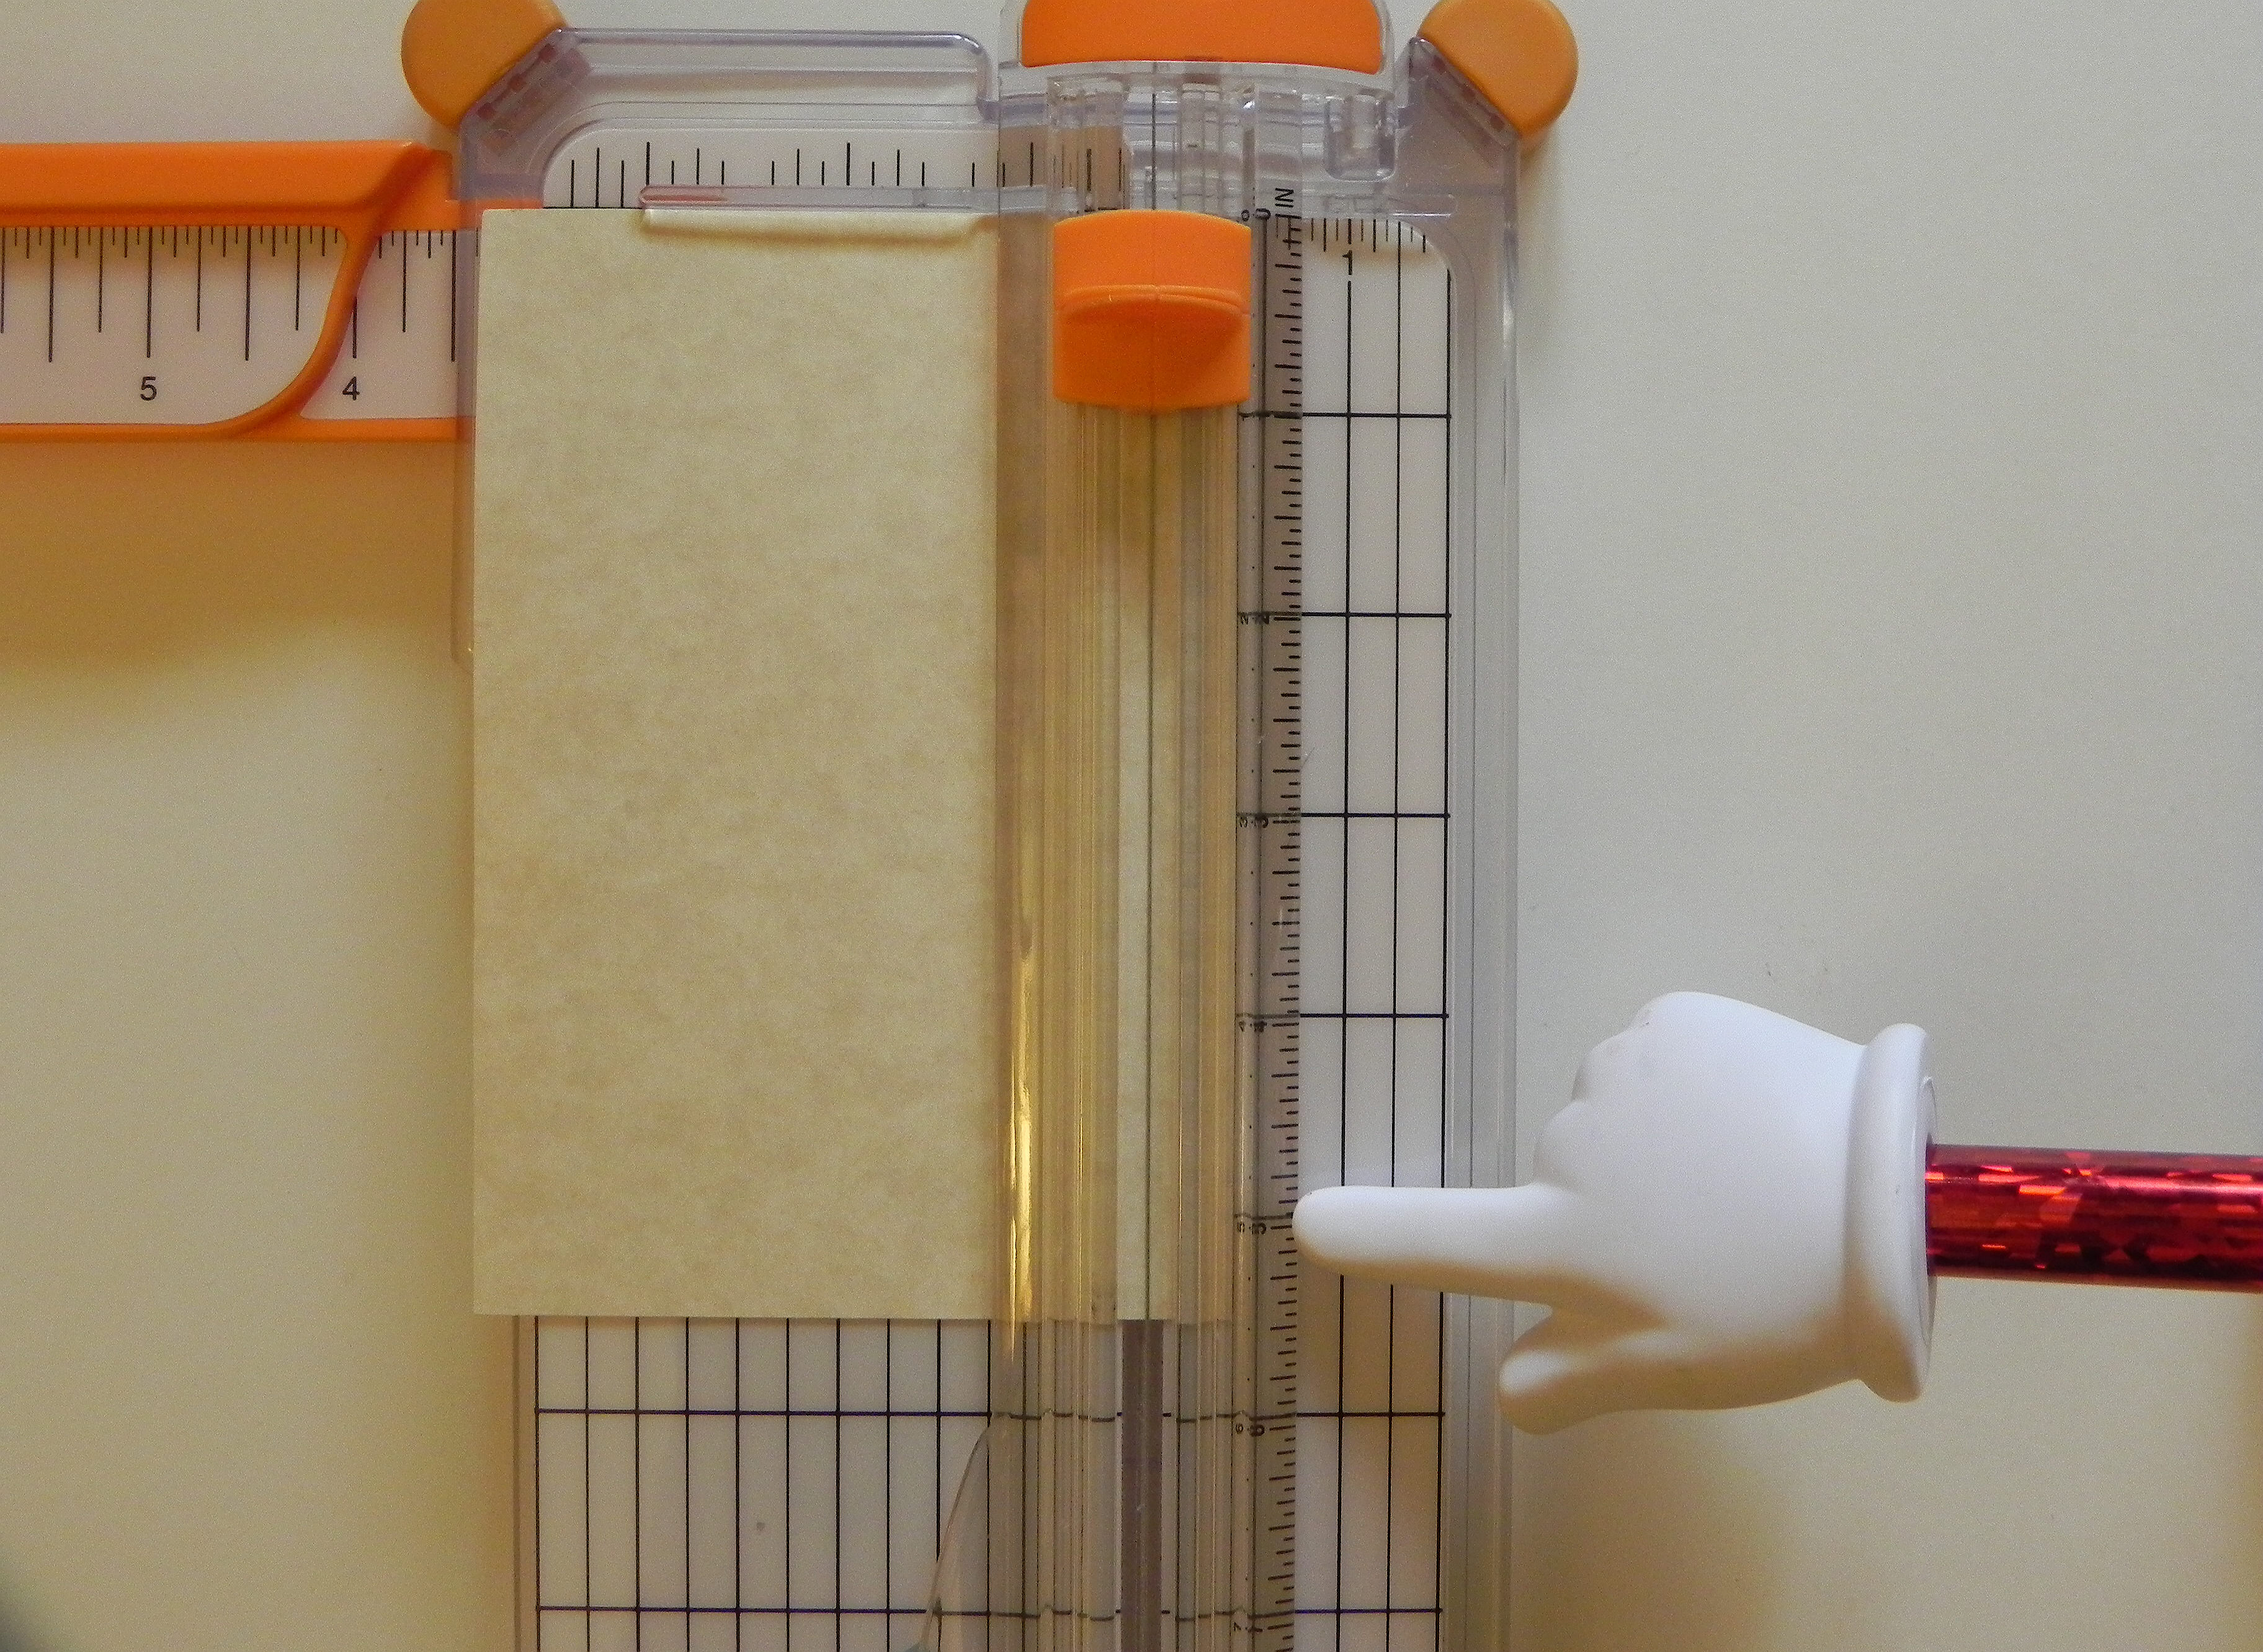
Now drag your blade down to the point you noted (1/2 inch from the bottom.)
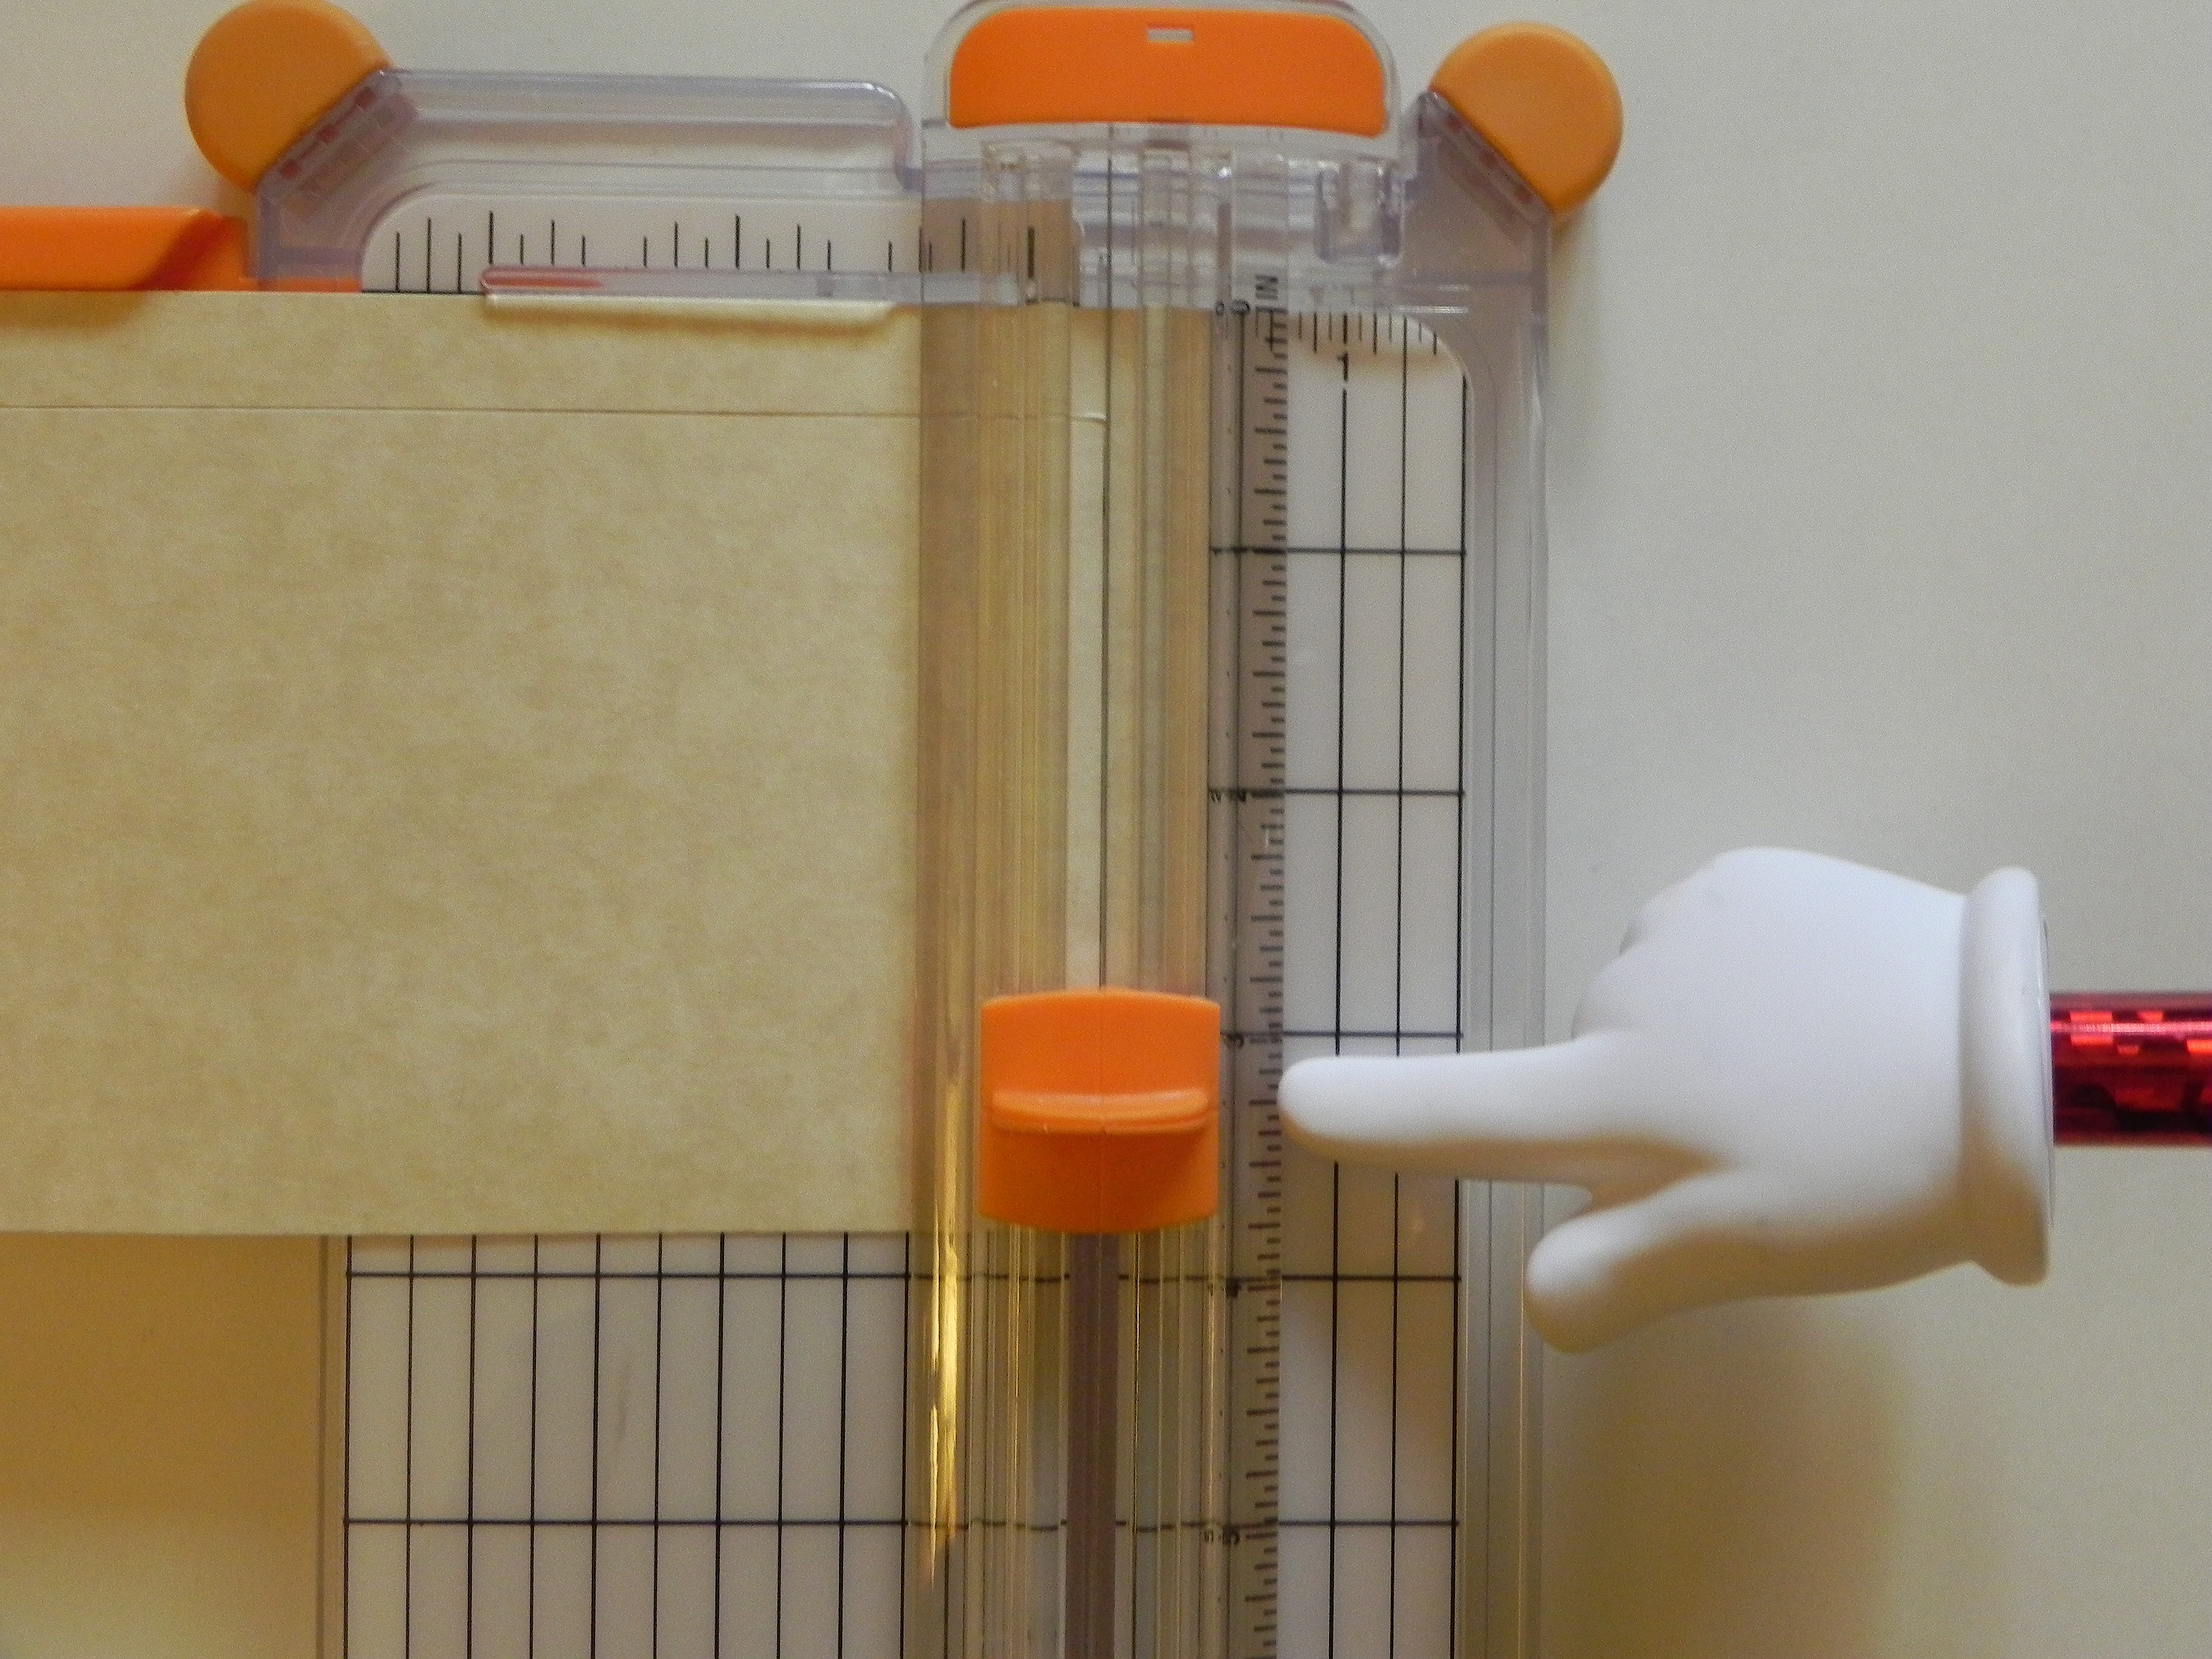
Here’s your first cut. Notice that it is an interior cut that does not go off the top or the bottom. It starts 1/2 inch from the top and stops 1/2 inch from the bottom.

Now turn your paper a quarter of the way around to make your second cut. Again, make sure it lines up with the 1/2 inch line on your trimmer like before.

Again, line up your blade 1/2 inch down from the top of the paper using the ruler where the blade slides up and down. (DO NOT drag it on the paper to get it in position.)
Before cutting, note where you will stop, 1/2 inch from the bottom of your paper.
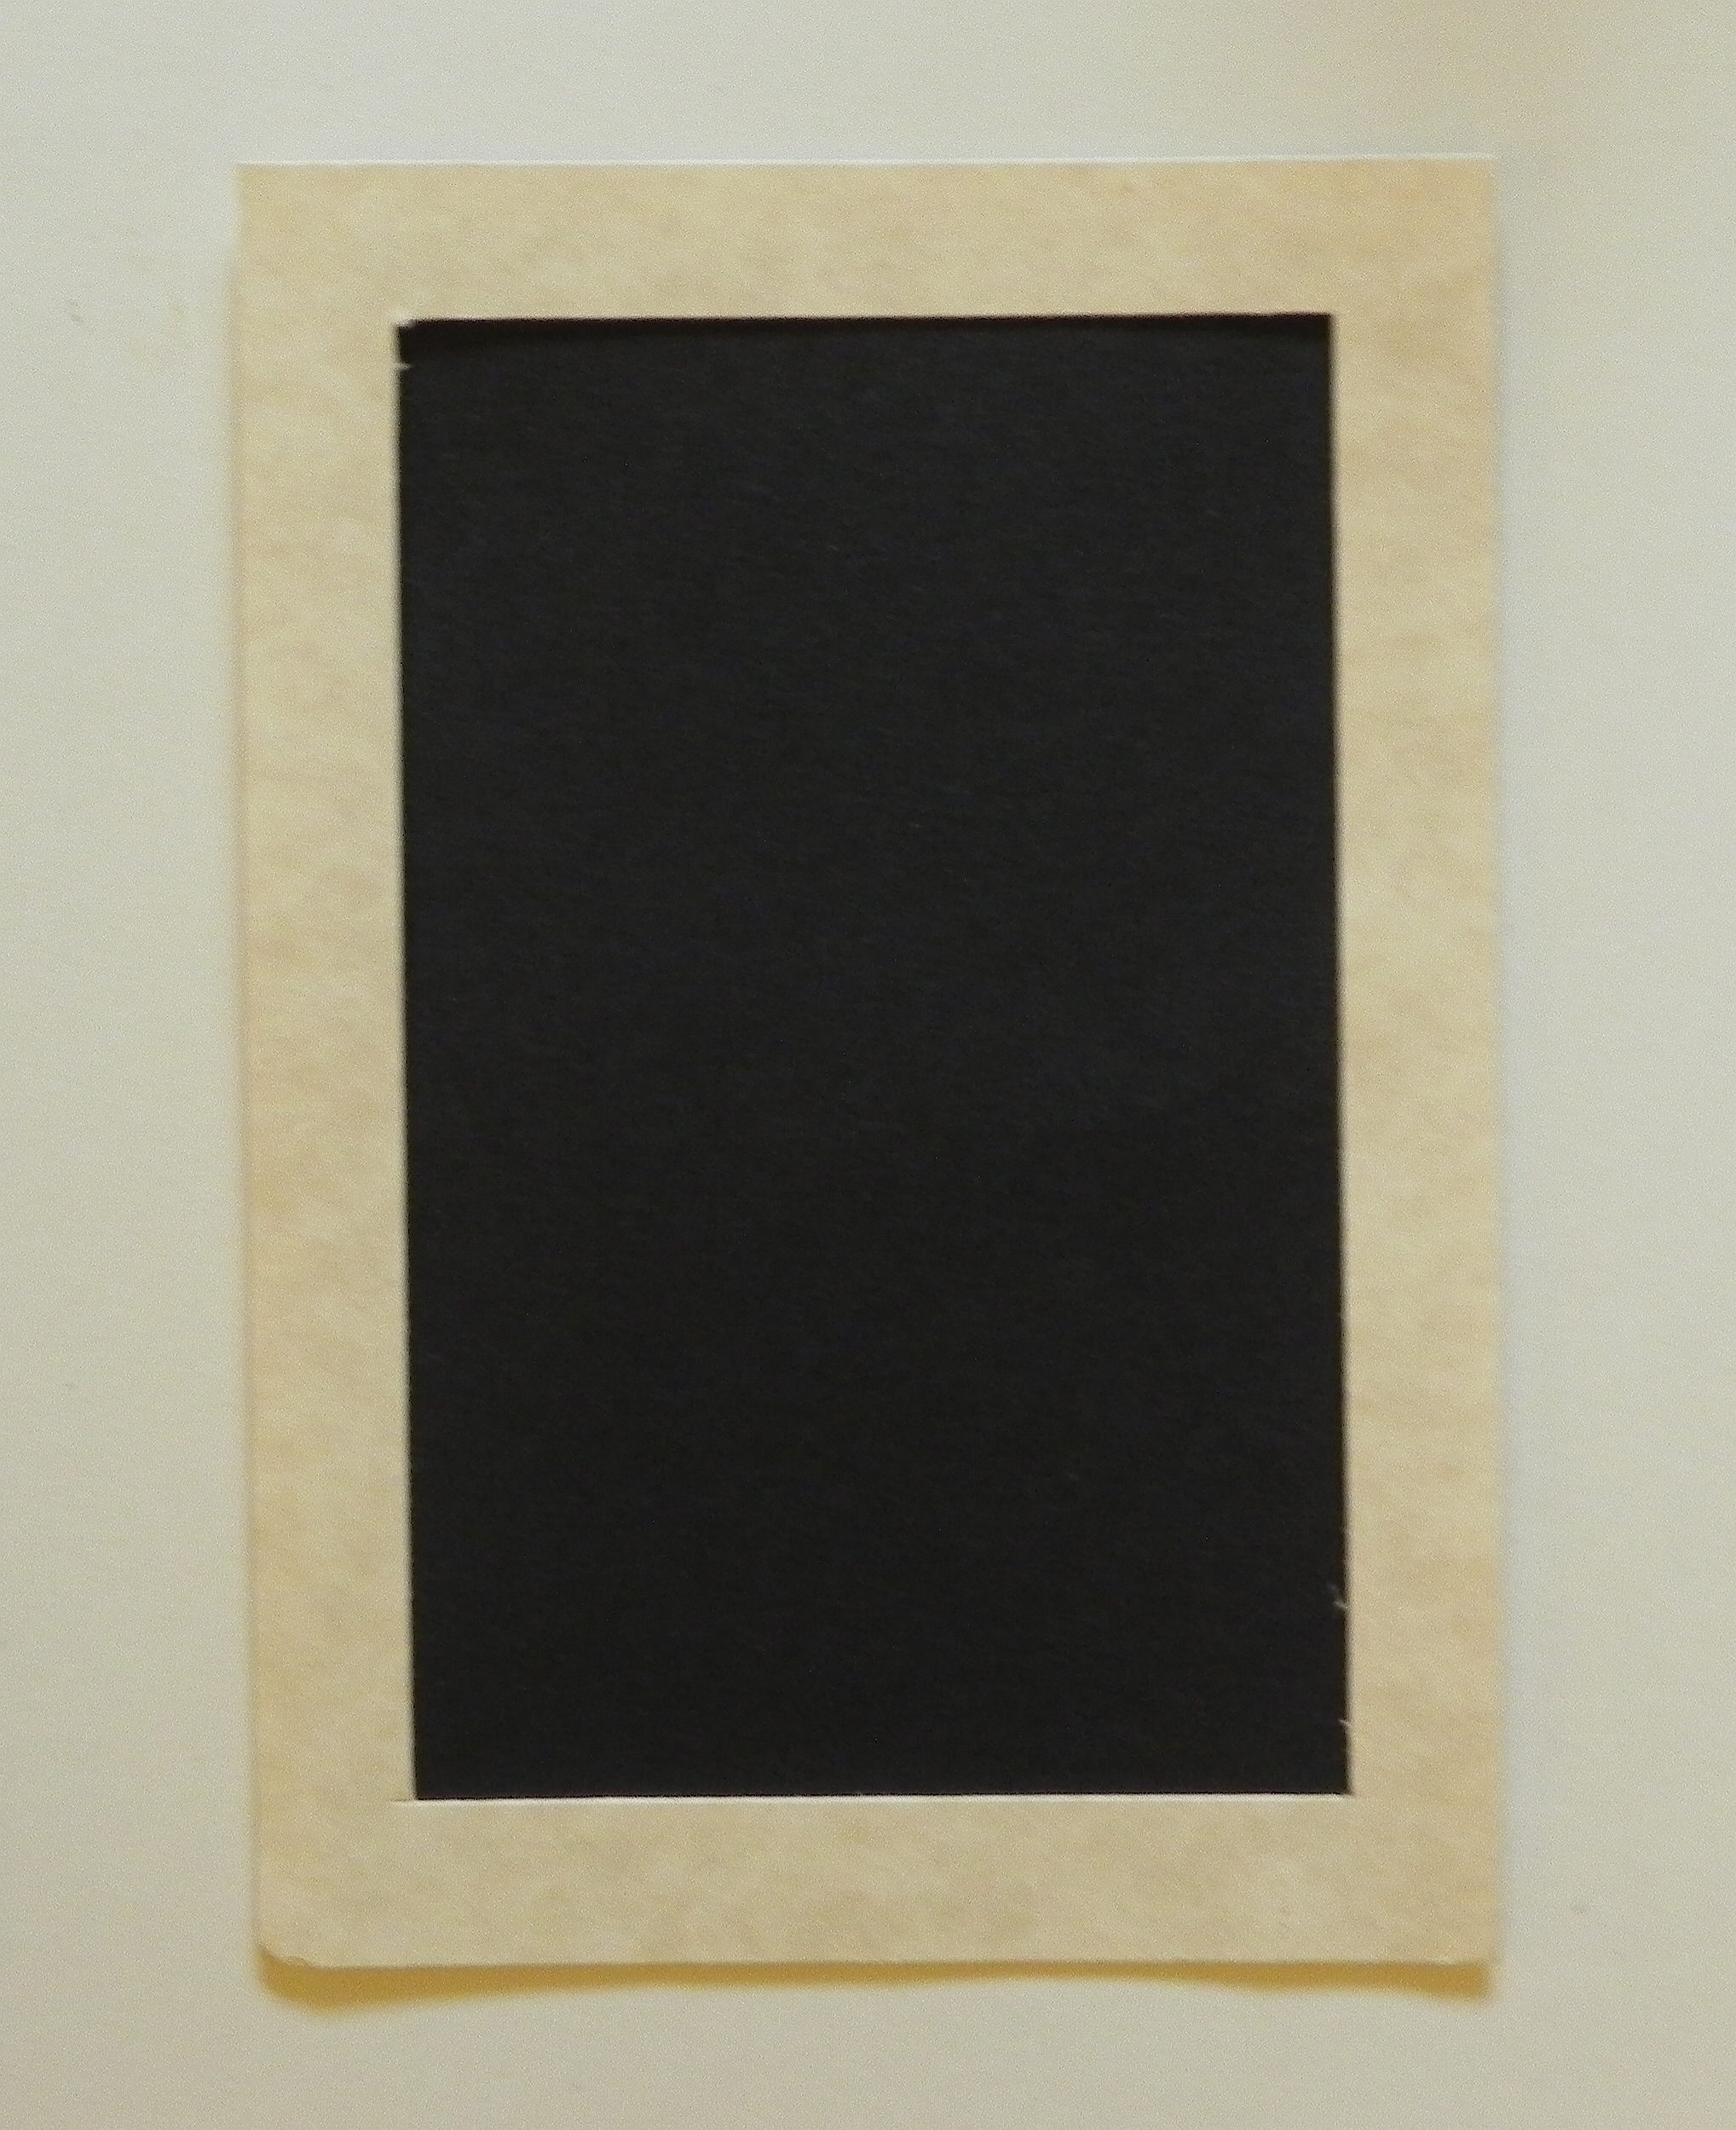
You will do this for all 4 sides. When you are done, you will have a frame and a rectangle from the center. You can use this rectangle to make another smaller frame or for whatever you want!

Once you have your frame cut out, you have 2 options. You can either put the panel you want framed (my example is the black paper) behind the frame you just cut out, and the frame will be on top. Or you can place your image on top to use it as a mat. Because you took the time to cut out the center, you have saved some of the paper for another use. If you do it this way, your frame doesn’t have to be measured as precisely.


There are many ways to make a frame for highlighting an image – by using nesting dies, a craft knife and ruler, an electronic die cutting machine, strips of paper, etc. Here is one way using a tool you probably have in your supplies.
Thanks for checking out my post!
This content uses referral links as described in the disclosure policy on my sidebar.
Mod Squad Challenge – Grandma’s Attic – An “Outstanding Entry” Pick

Mod Squad Challenge – An “Outstanding Entry” Pick
(November 11, 2014)

(The host/hostess picked the “Top 3” which will be featured on PINTEREST.)
Click HERE to see the winning announcement. (Sadly, this site is no longer active.)
Click HERE to see the original challenge post. (Sadly, this site is no longer active.)
Click HERE to see original blog post.
Thanks for checking out my post!
How to Make A Folded Christmas Tree (from a semicircle)

For this tree, I used an 8 inch doily. (Click HERE to see original card post where this tree was used.) You can make a tree with any size (plain or decorative) circle. If you use double-sided, printed paper, you will get alternating patterns on your tree.

(I’m going to include pictures of both the doily and the printed paper in my instructions.)
To make the tree:
First, cut your circle in half. Position your semicircle as shown. (Click on a photo for a closer view.)


Start at the upper right hand corner. You are going to take this corner point and fold it over to the left along the top, straight edge so the point ends up approximately 3/4 of the way over. (Mine is an 8 inch circle, so the point will end up about 6 inches over or 2 inches from end. Adjust if your circle is a different size.) It does not have to be exact. Just make sure when you fold it that the top edges line up perfectly.


Next, take the corner point you just folded over, and fold it in half (on a diagonal) to the right vertical edge to form a triangle. Make sure the edge that had been on the top lines up with the vertical edge on the right, and you have a clean point on top.


This side should be lined up after you make the fold:


Now, turn the whole thing over, and position it as shown.


Take the point you haven’t used yet. You are going to fold it across and down to the left, forming another triangle. Make sure the left edges line up.


When you flip it over, this is what you should have.


Fold the edges with a bone folder to make them stay flat. Use some adhesive to keep it flat and together if necessary/desired.
Thanks for checking out my tutorial!
Folded Doily Christmas Tree
This card was made for the Mod Squad Challenge – Grandma’s Attic – where we are to incorporate a doily into our card or project. (Sadly, this site is no longer active.)
For this 5″ x 7″ card, I started with an 8″ doily and sponged Viva moss green metallc 3D Stamp Paint on the front and back. Click HERE to see how I made the tree. For the trunk, I sponged Tim Holtz walnut stain distress ink onto a Ranger mini craft stick. I wrapped jute around the tree and made a bow for the top. The tree was adhered to the tag with pop dots.
I made a tag using glossy card stock and the Tim Holtz alterations Moves & Shapers Bigz Die – Tags and Bookplates. Stampin’ Up Early Espresso and Soft Suede reinkers and foam shaving cream were used to create the marbleized effect on the tag. First, a large blob of shaving cream was sprayed on a paper plate. Then, several drops of each of the two inks were added to the shaving cream. The colors were swirled (not mixed) around with a craft stick. The glossy tag was placed, face down, on the shaving cream and ink. Once the whole tag had made contact with the shaving cream, it was removed from the plate and placed on my craft mat. Then the shaving cream was scraped (or “shaved”) off with a metal ruler. What was left behind once the shaving cream was removed were the swirls of ink. I used the (Tonic) Tim Holtz paper distresser on the edges of the tag and then inked the rough edges with Tim Holtz walnut stain distress ink.
The greeting stamp was from the Gina K Designs “Merry Tree” duo and was stamped on Gina K dark chocolate card stock with versamark ink and Recollections champagne embossing powder. The panel’s edges were distressed, and then it was pinned to the tag.
The background paper is “Reindeer Fly” from the My Mind’s Eye Holly Jolly collection. It was also distressed and inked with the walnut stain ink. The card base is Gina K dark chocolate card stock.
Thanks for checking out my card project!
This content uses referral links as described in the disclosure policy on my sidebar.


