Here is a fun technique to add texture to an image you’ve colored with alcohol markers by using scraps of fabric and a colorless blender solution.
You will need:
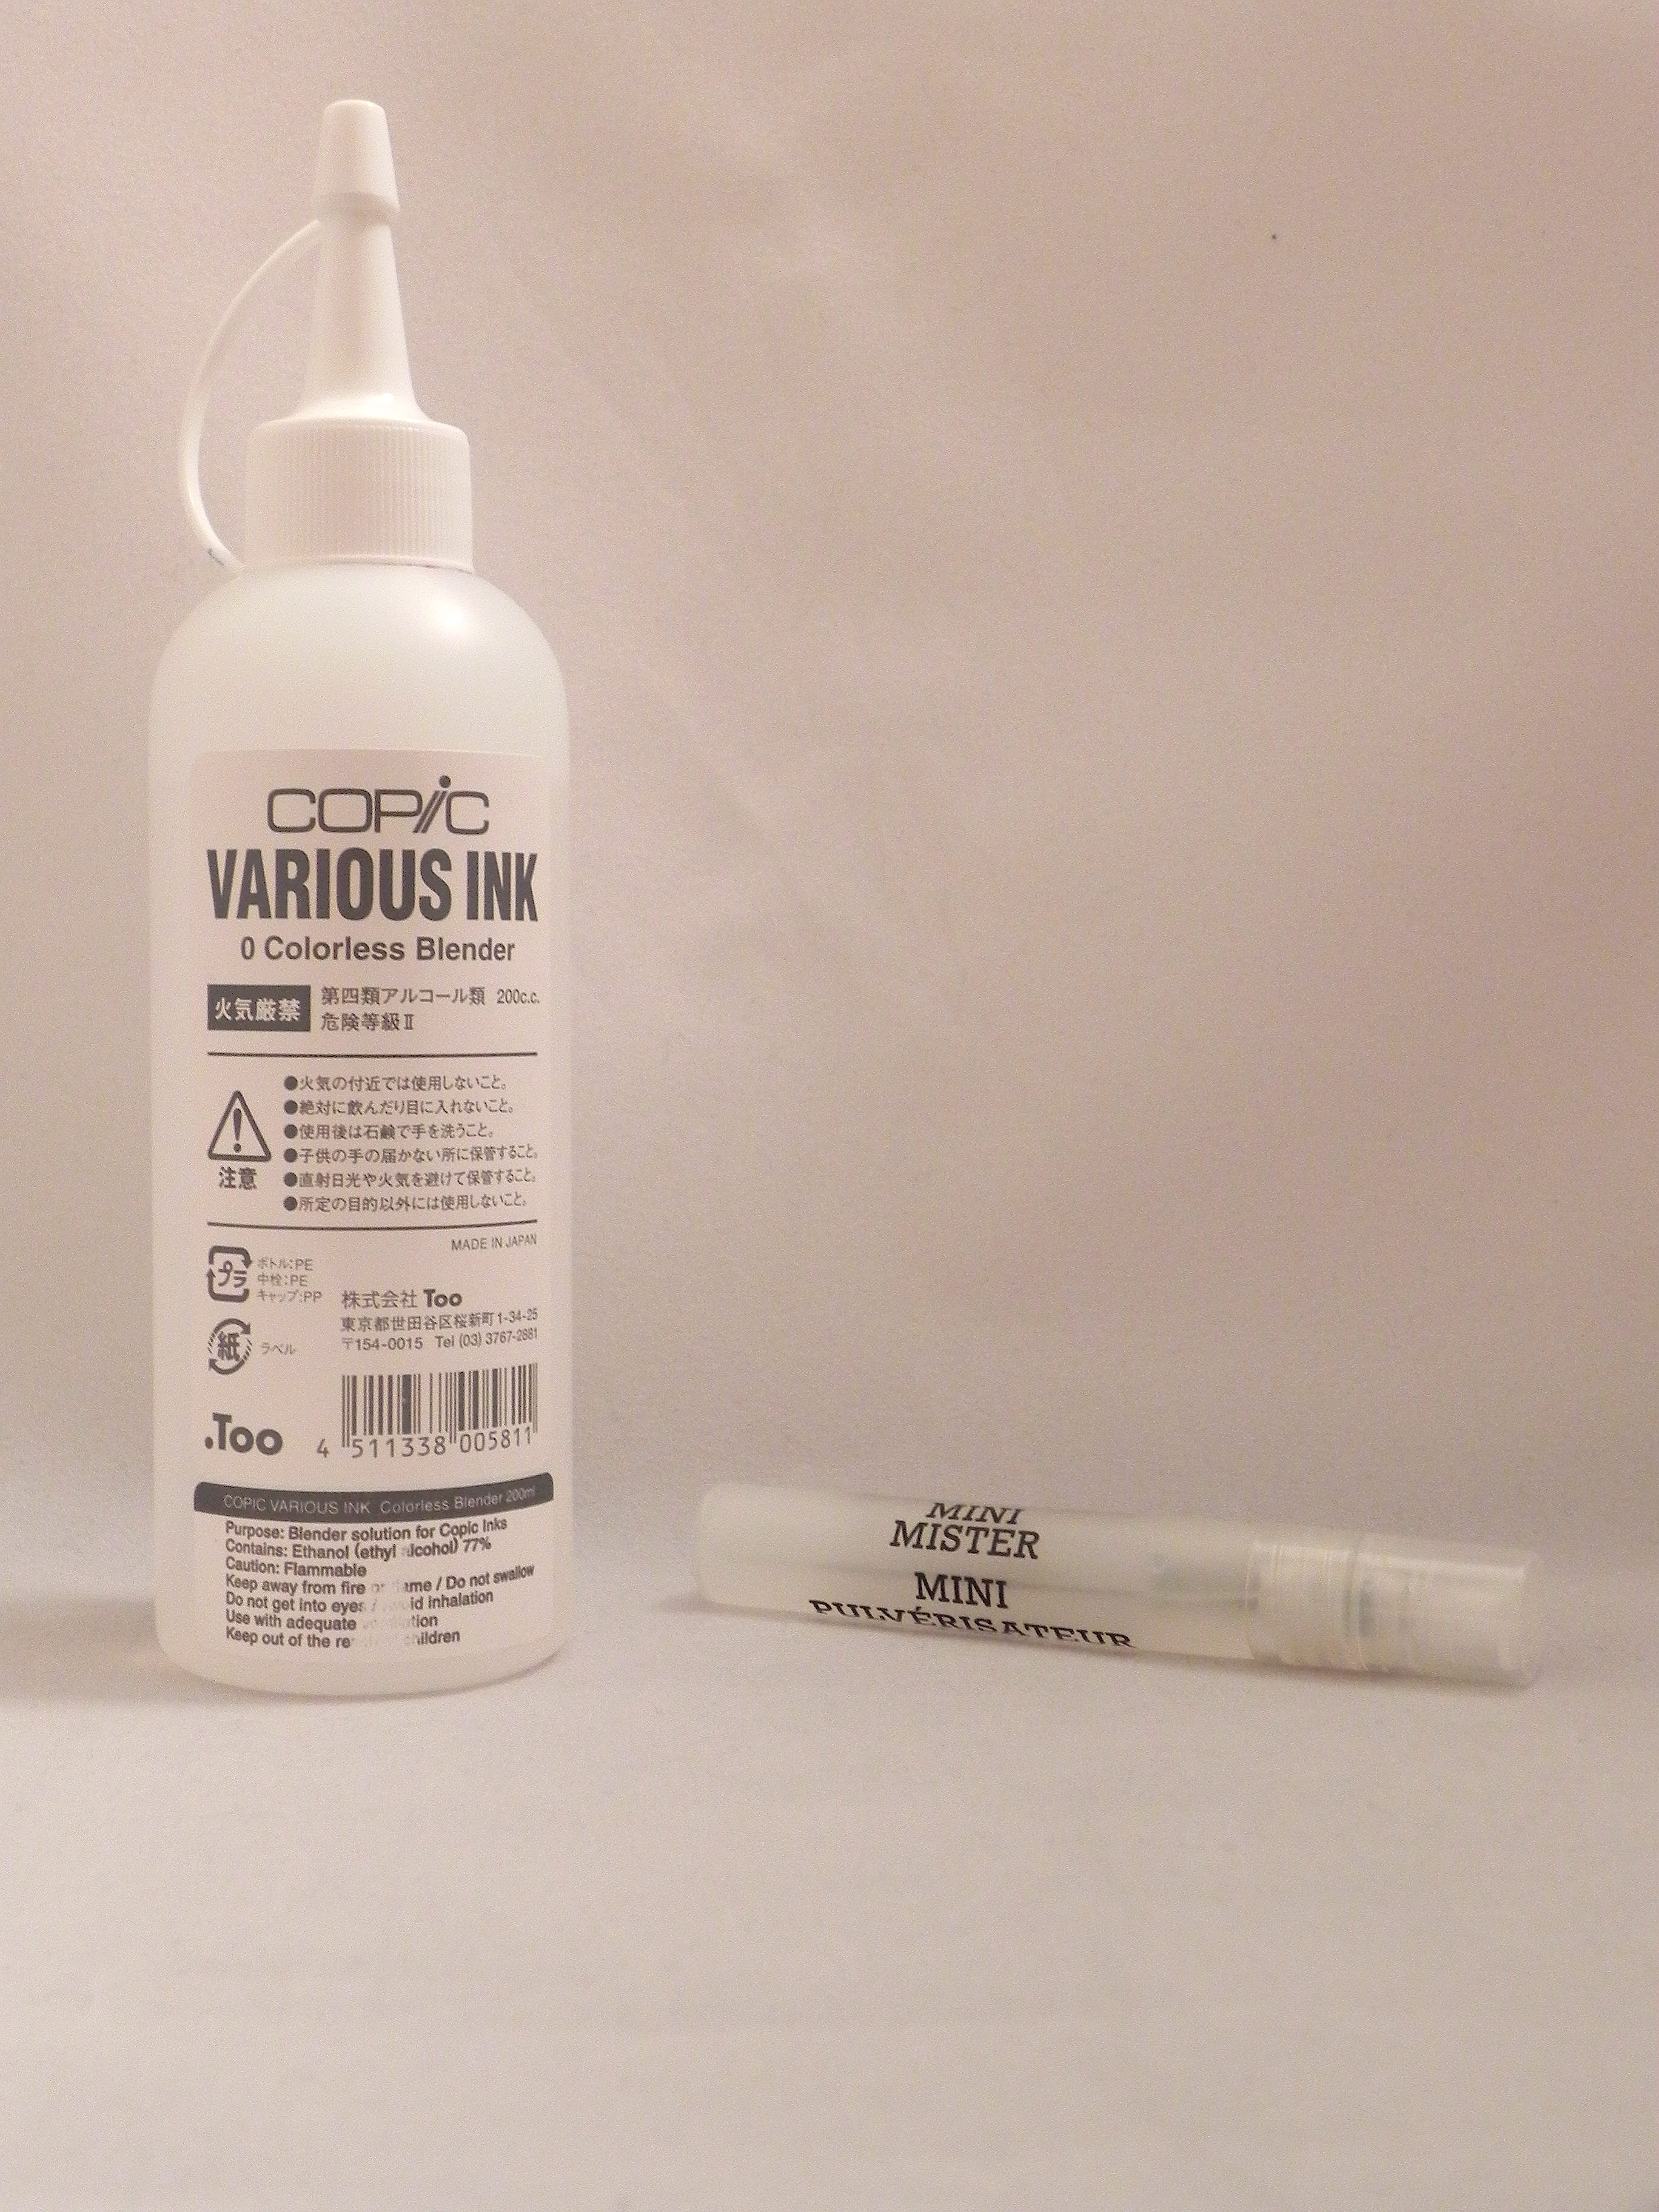
- A stamped image colored with alcohol markers
- An alcohol blending solution (like Adirondack Alcohol Blending Solution or Copic Colorless Blender solution)
- A spray bottle (like a ranger mini mister)
- A scrap or scraps of fabric (like terry cloth, denim, paper towel, something fuzzy like a glove, etc.)
(Click on a photo for a larger view.)

- Optional – If you’ve colored the entire stamped image, you may want to use something to mask the colored areas where you do not wish to add texture (like Frisket Masking Liquid, post it notes, etc.)
- Scrap paper for under your stamped, colored image.
A little background:
- Alcohol blending solution doesn’t really blend colors. Instead, it moves or pushes colors around on a surface. With it, you can lighten areas that you’ve colored, erase mistakes by pushing the mistake back into the colored areas, add highlights, and add the appearance of texture to your image.
- Adding blender solution to a colored surface that is still “wet” or saturated with ink will give you soft, blended edges.
- Adding blender solution to a colored surface that is dry will give you more noticeable texture and crisp edges.
How to do it:
1. Fill a spray bottle with the alcohol blender solution.
2. Select a piece of fabric that looks like the texture you are trying to create. For example, if you are adding texture to a sweater, you may want to use a scrap of an old sweater or other fabric that may look like a sweater. (Or have fun and add a funky texture to your image!)
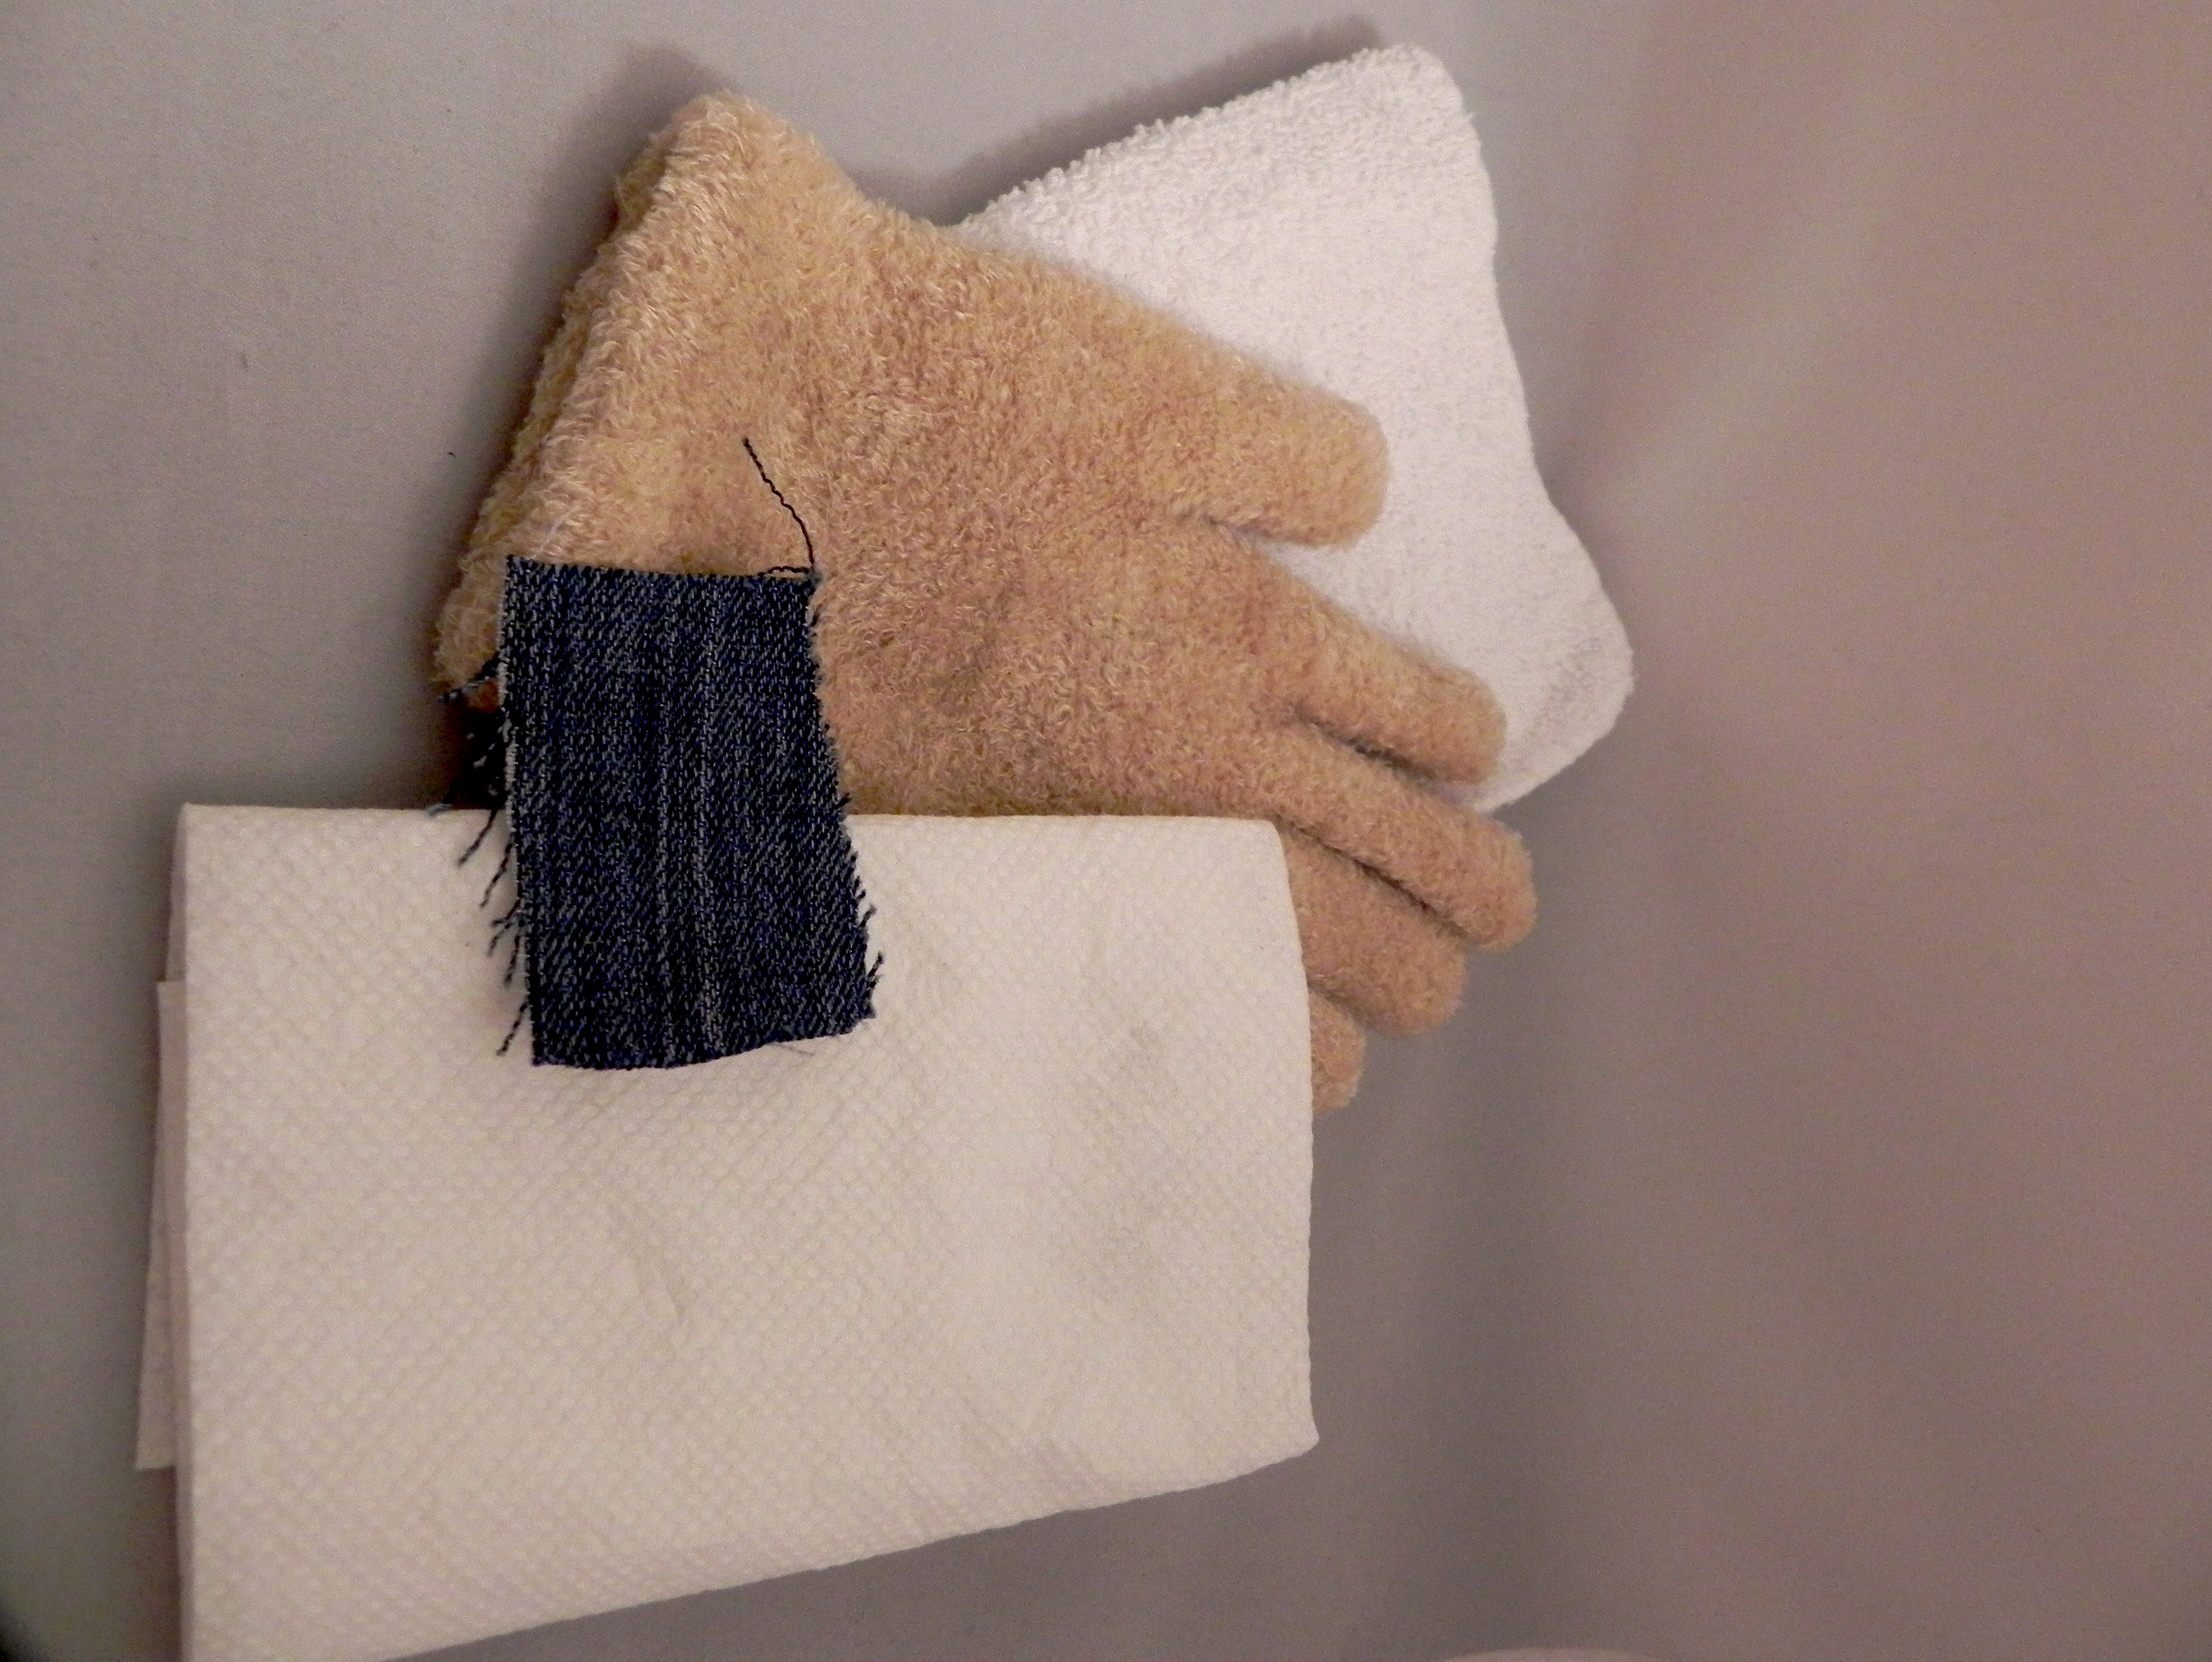
3. Spray the blender solution (2 or 3 spritzes) on the piece of the fabric you wish to use. (Start off with a small amount of solution, and see if you get the desired effect. If not, add more solution.) Pinch the fabric between your fingers and dab the damp fabric on the colored area of your stamped image where you want to add texture. Do not squeeze or press too hard. Experiment with how long you hold the fabric on the image until you get the desired result. (If necessary, mask any adjoining areas where you do not wish to add the texture.)
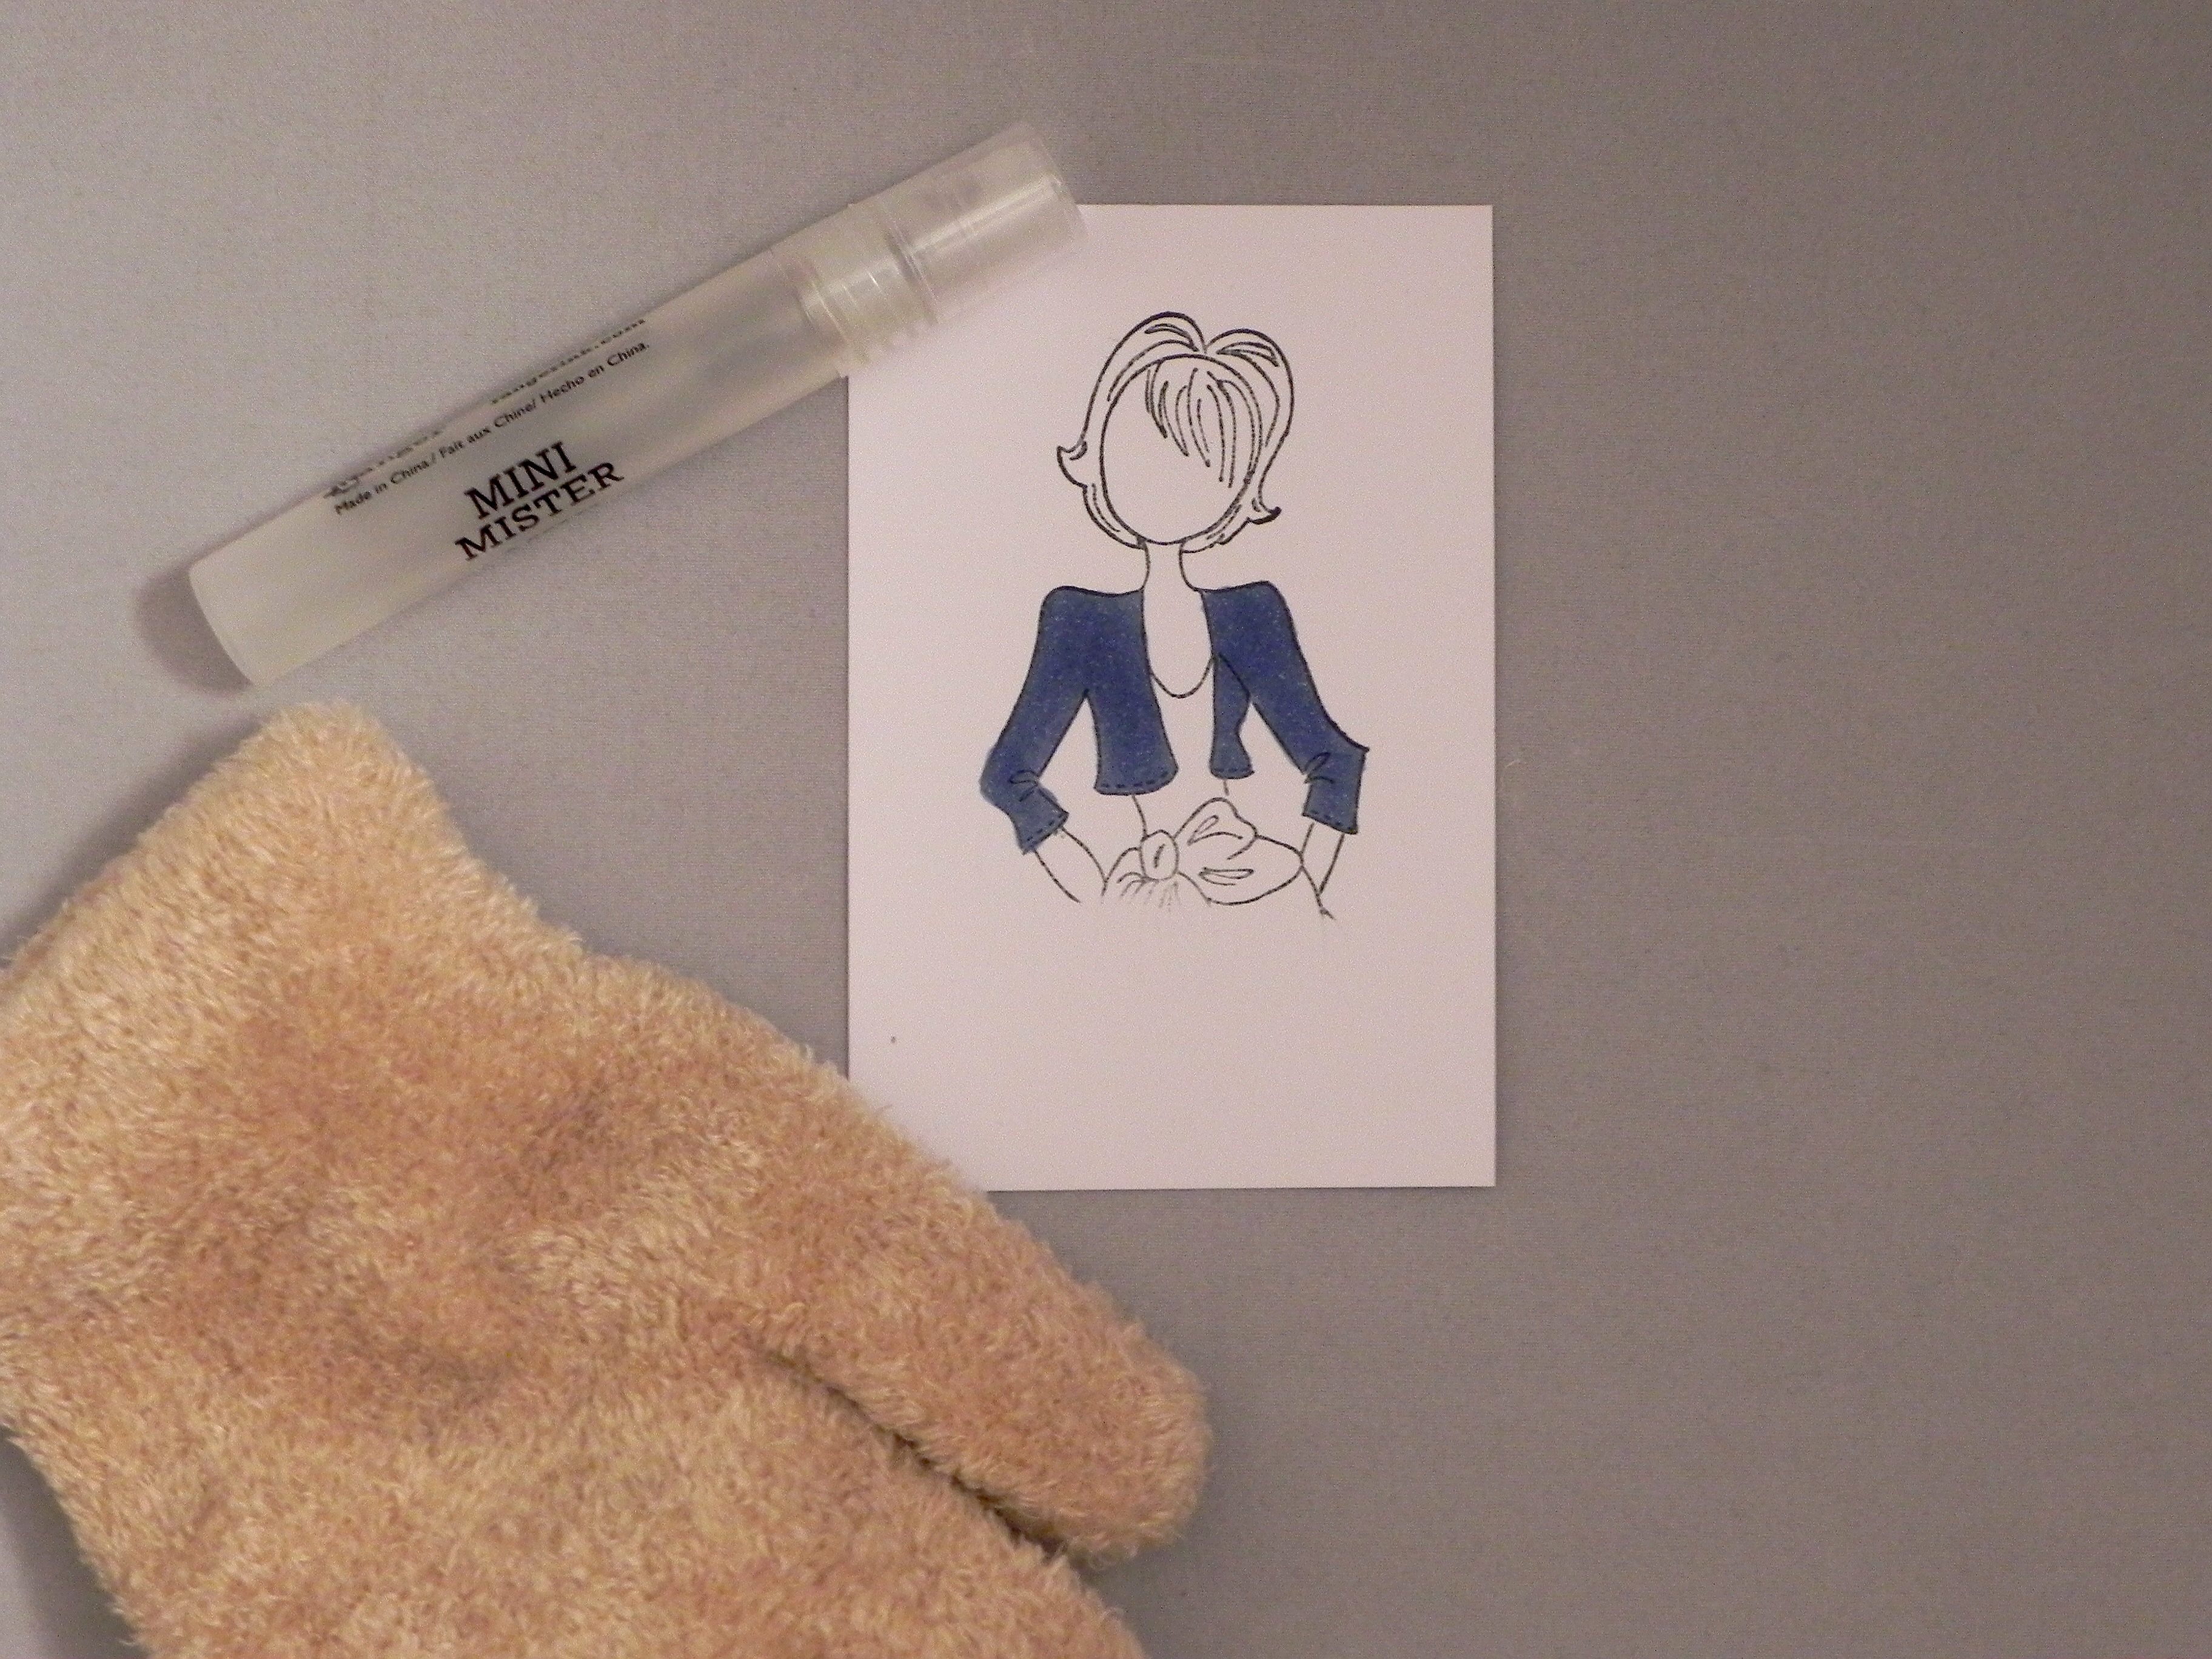
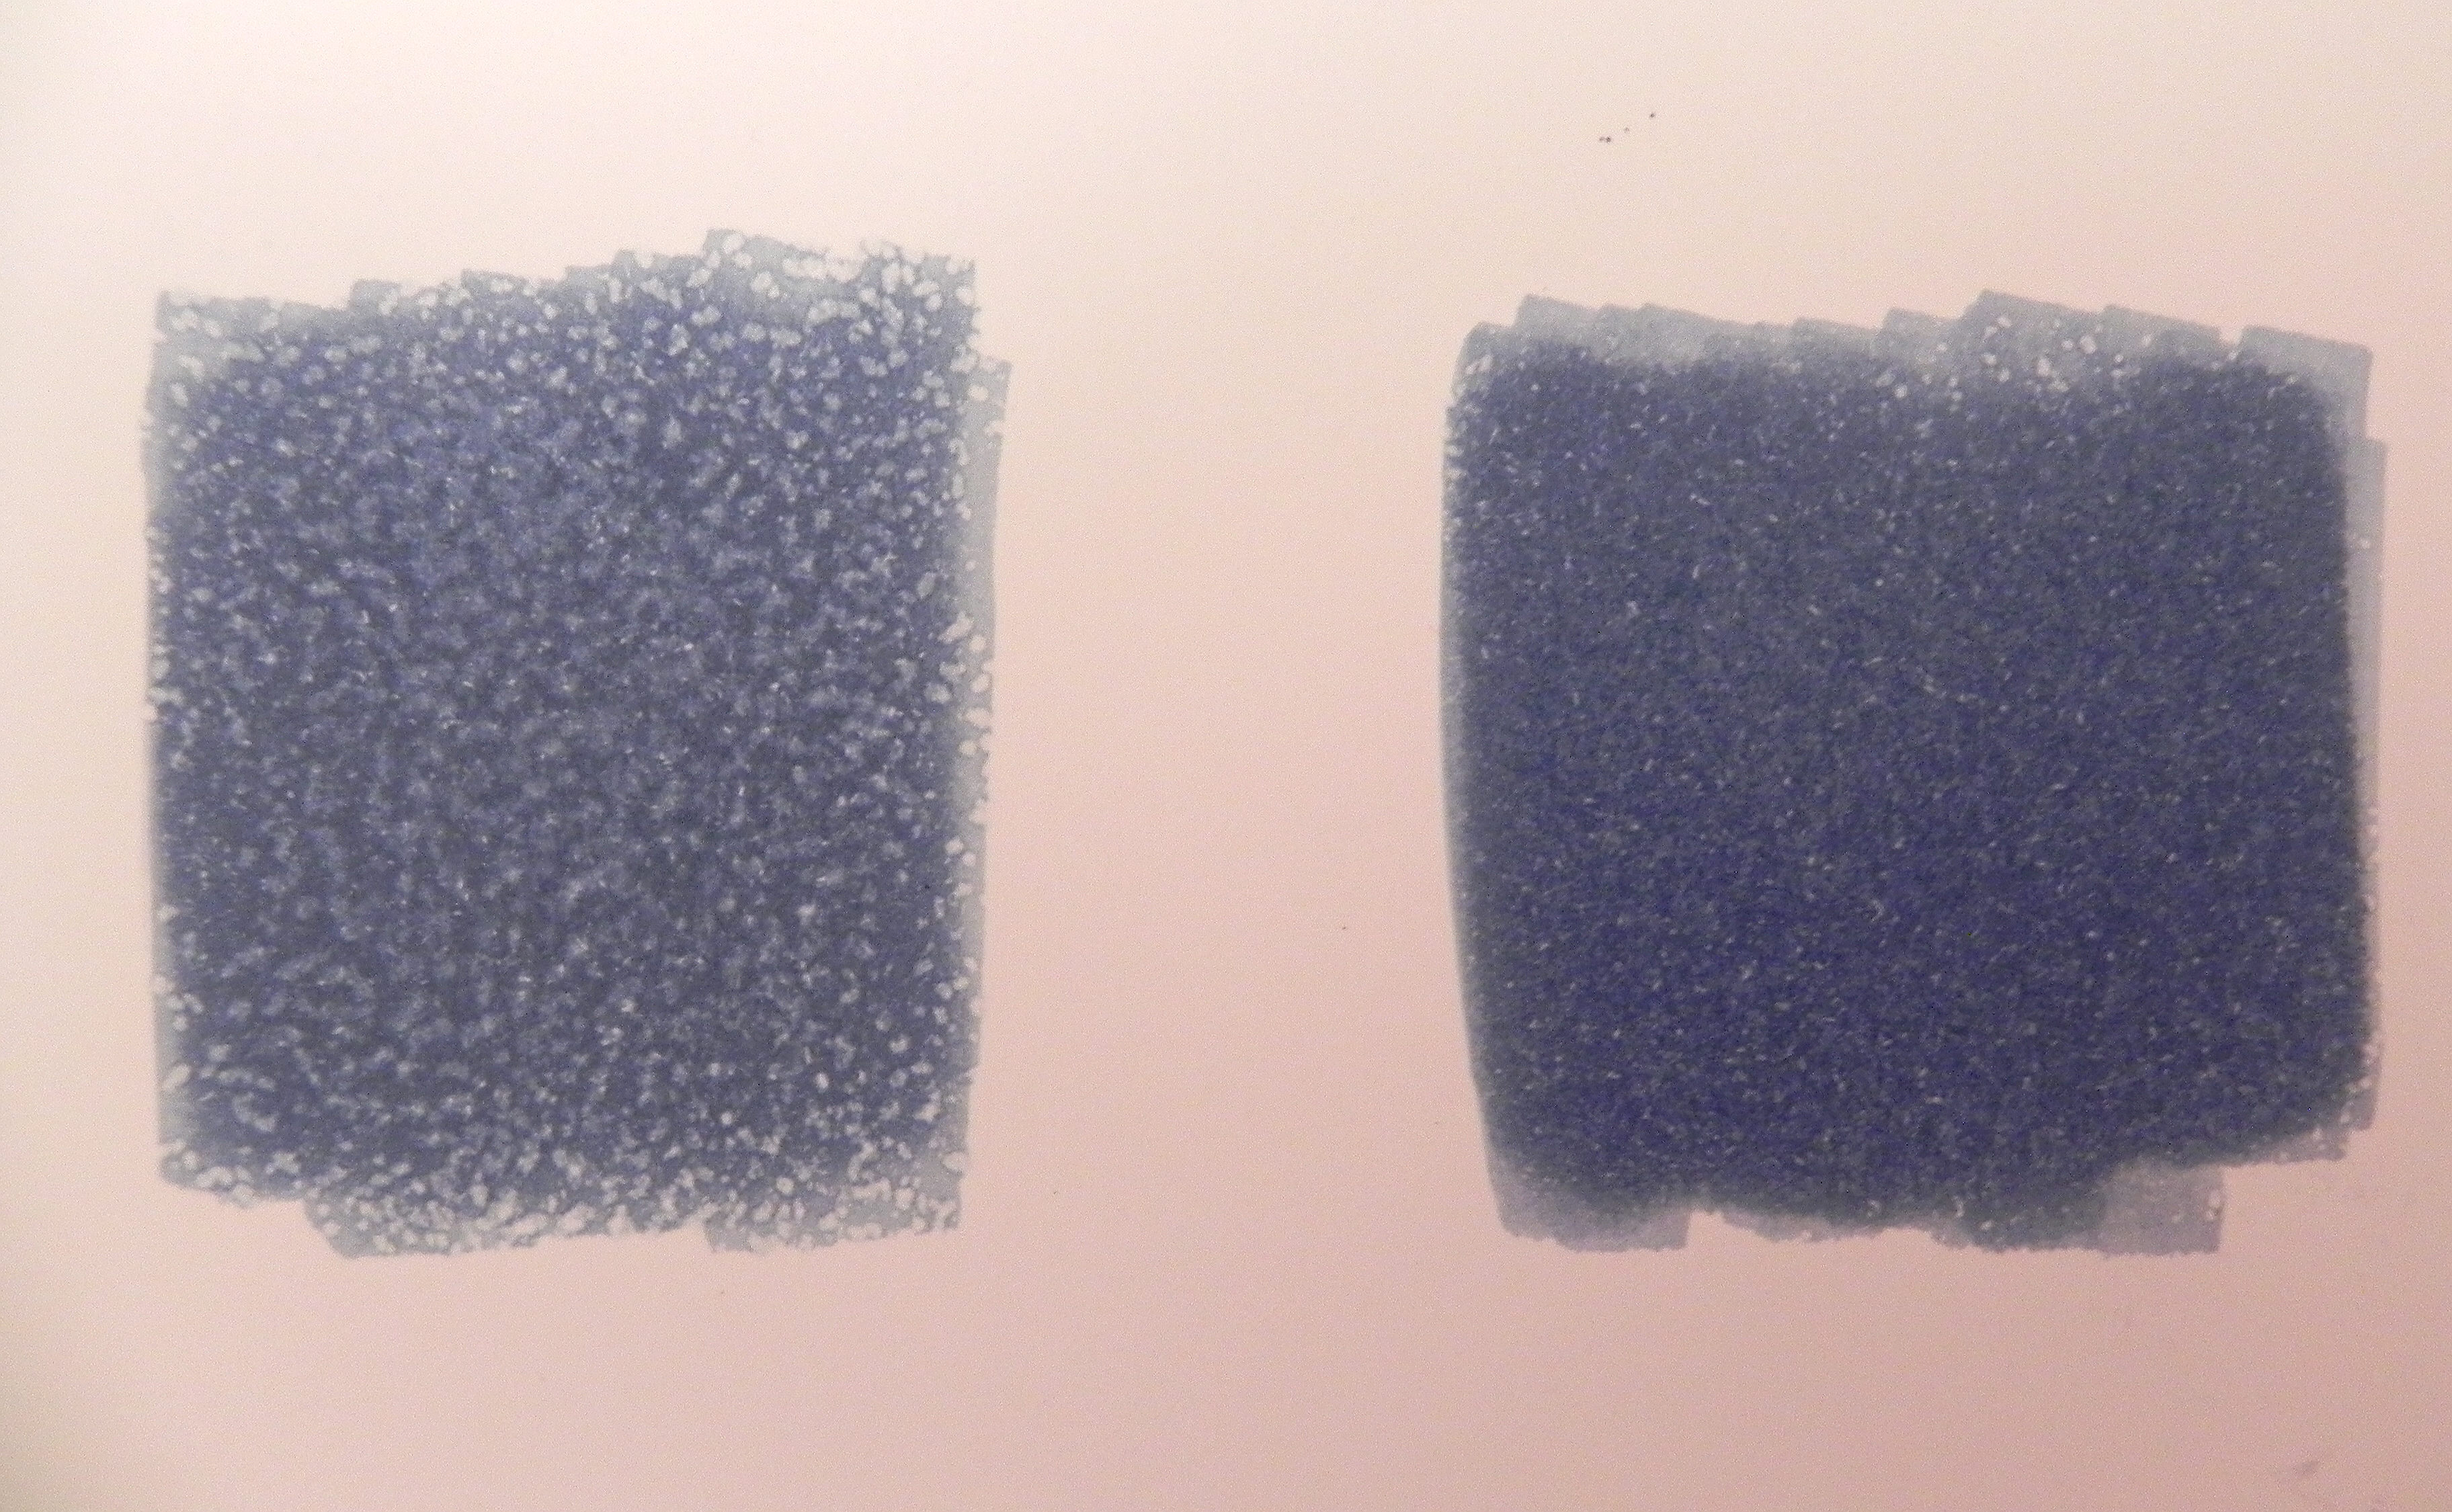
This is what it looks like with the fuzzy glove.


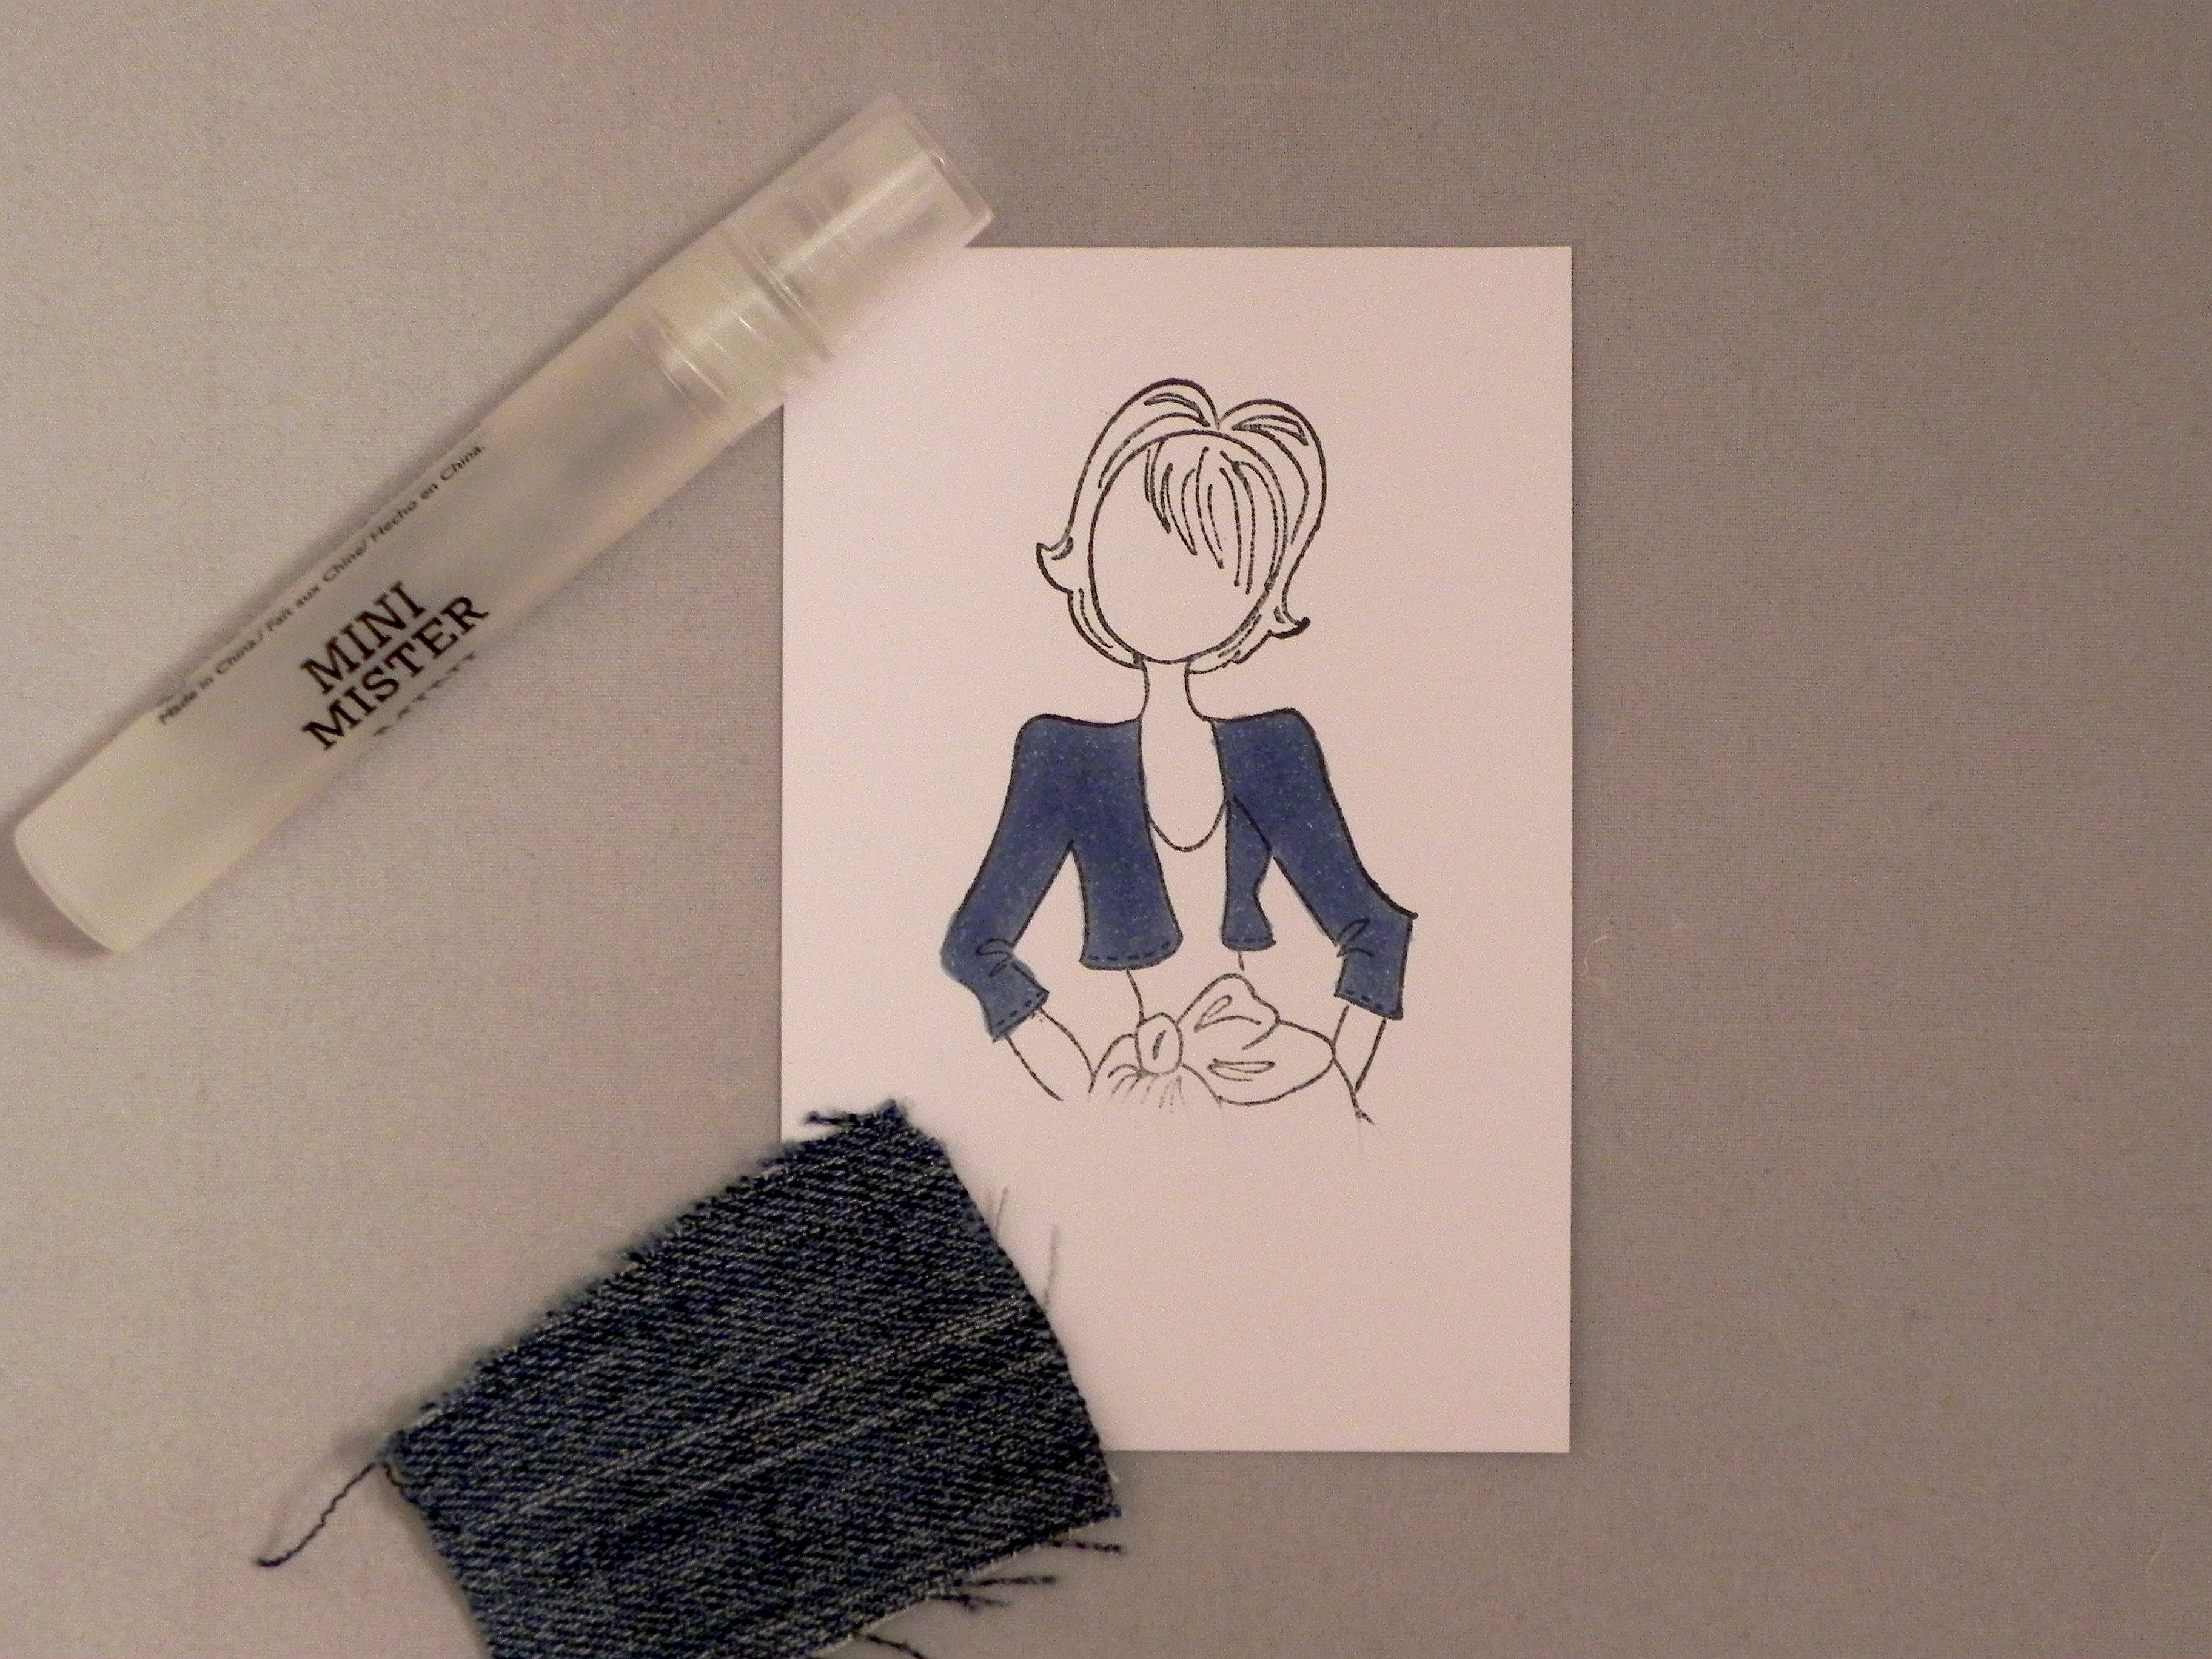
This is what it looks like with a piece of denim.

This is what it looks like with a terry cloth wash cloth.

This is what it looks like with a Bounty paper towel.

Notice the difference between the two bear images below. They were both colored (with no shading) the same way. The second image had texture added with the fuzzy glove.
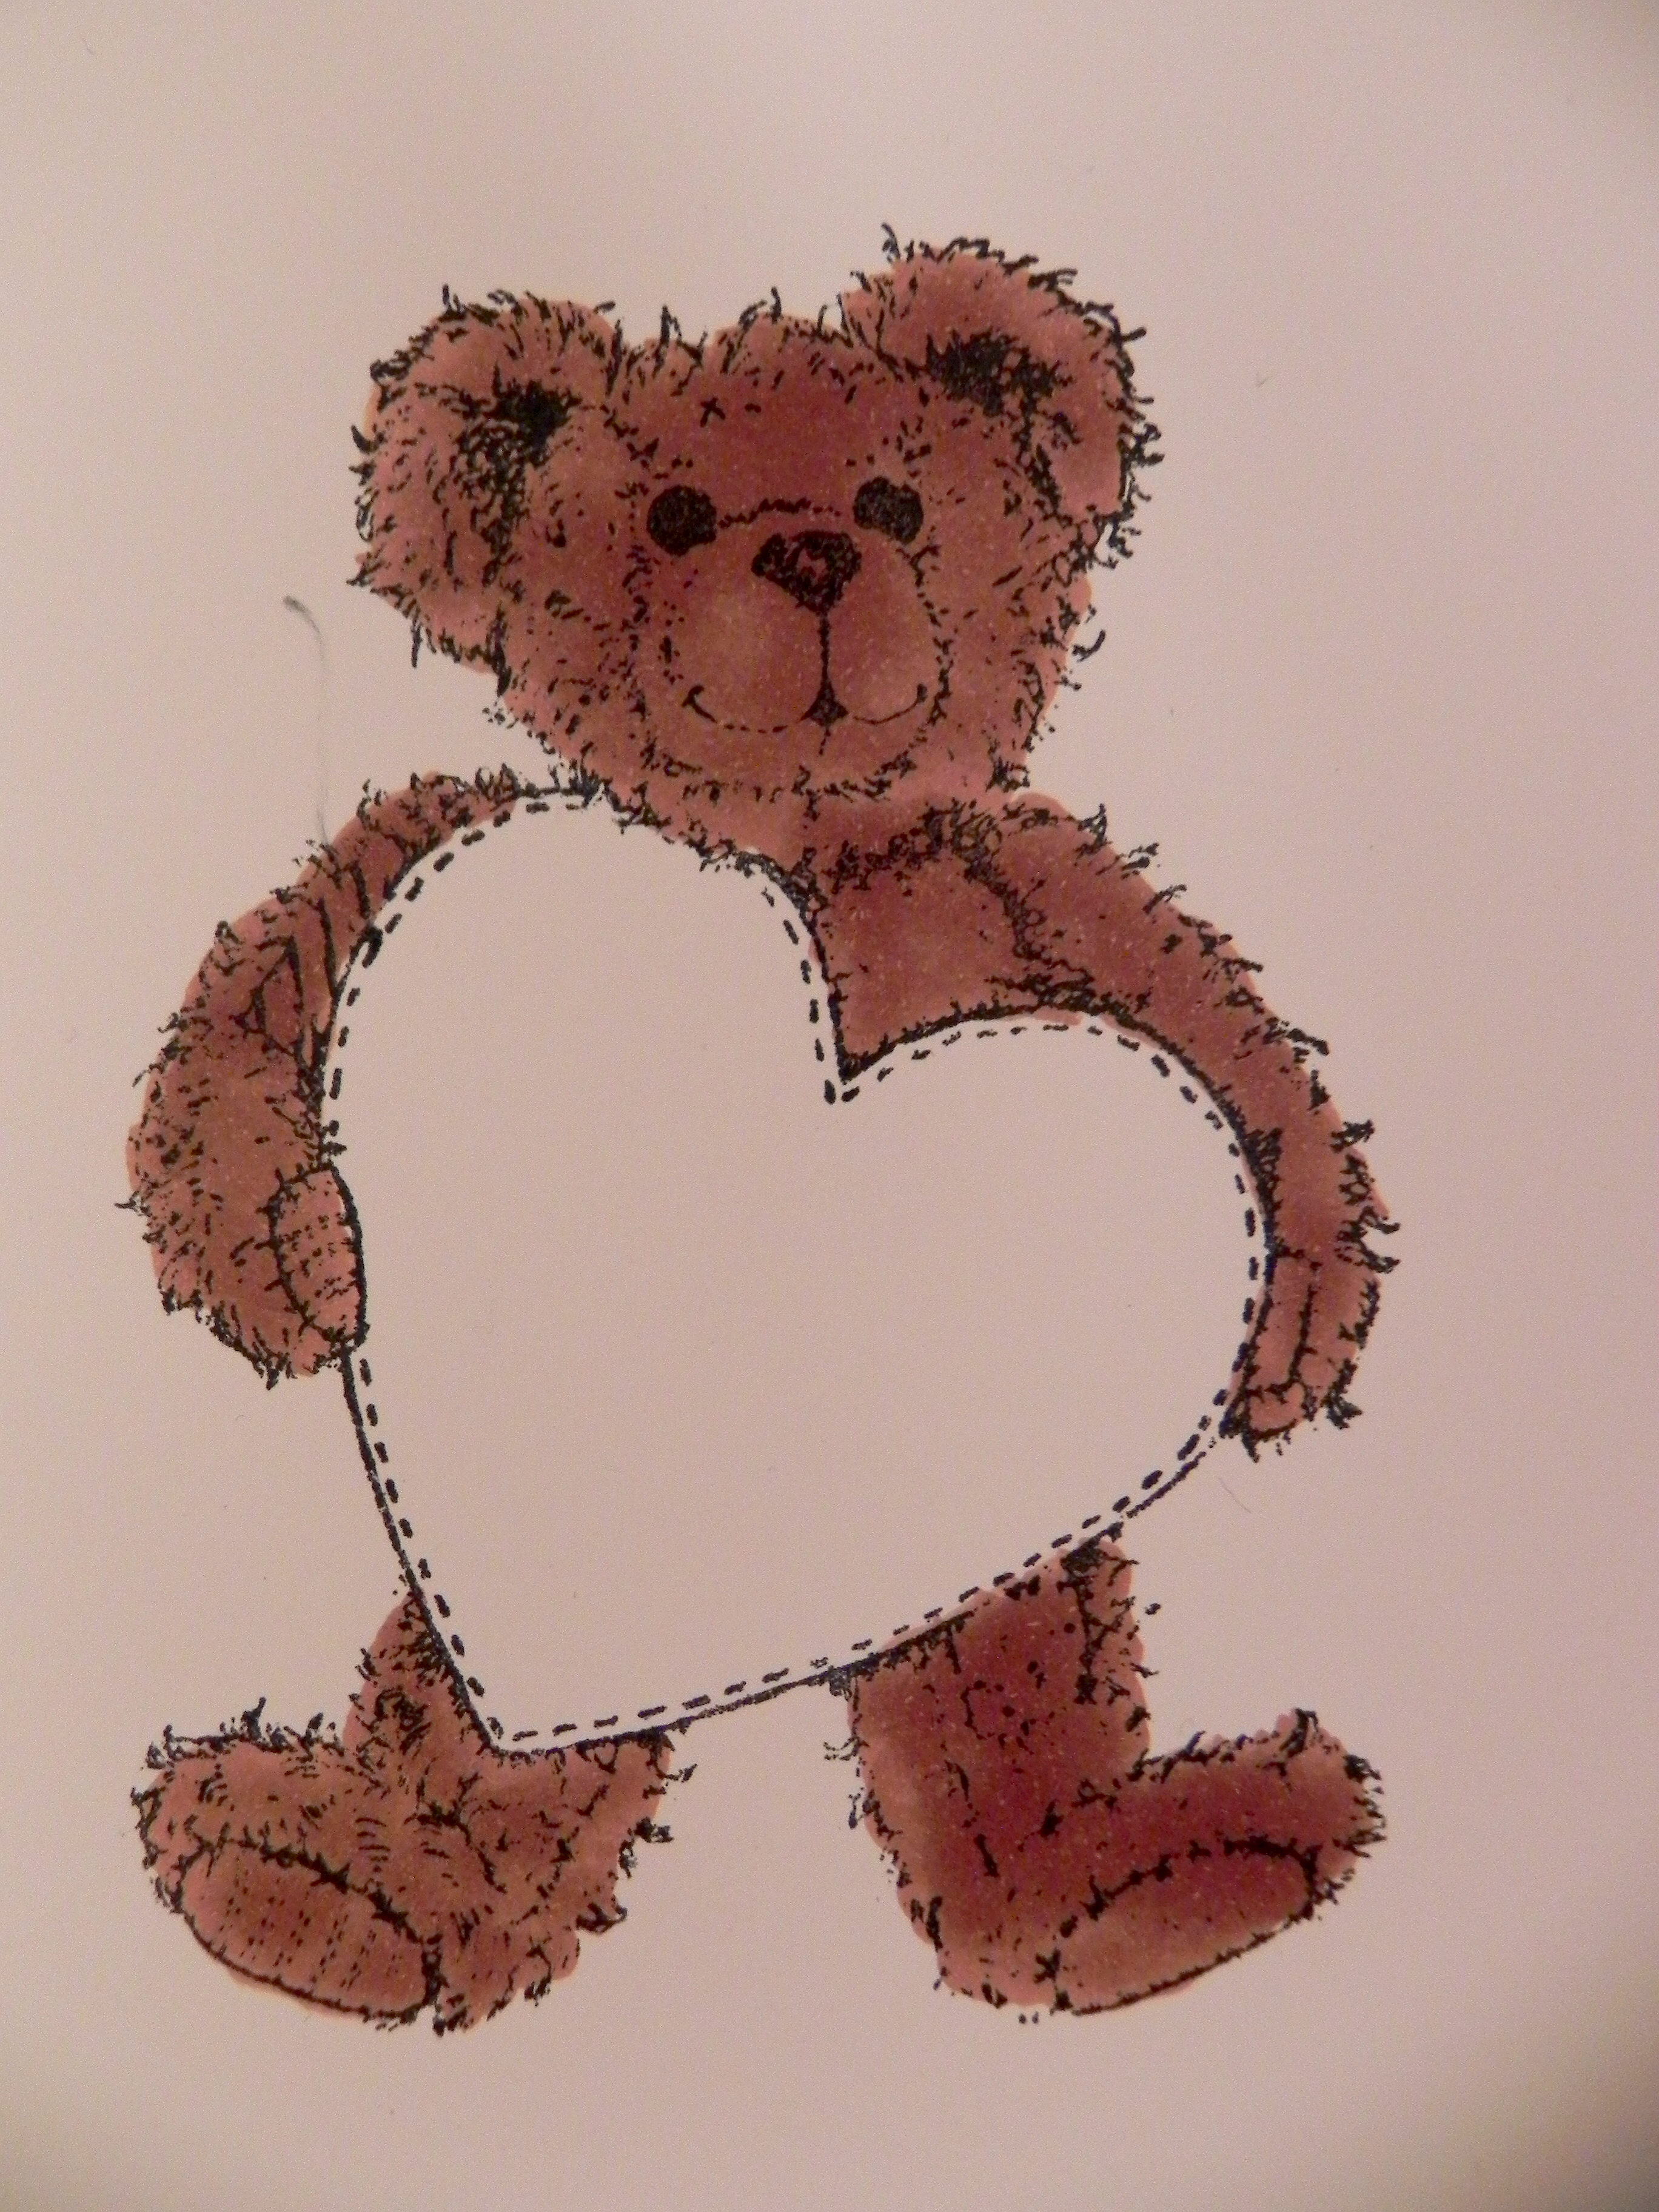
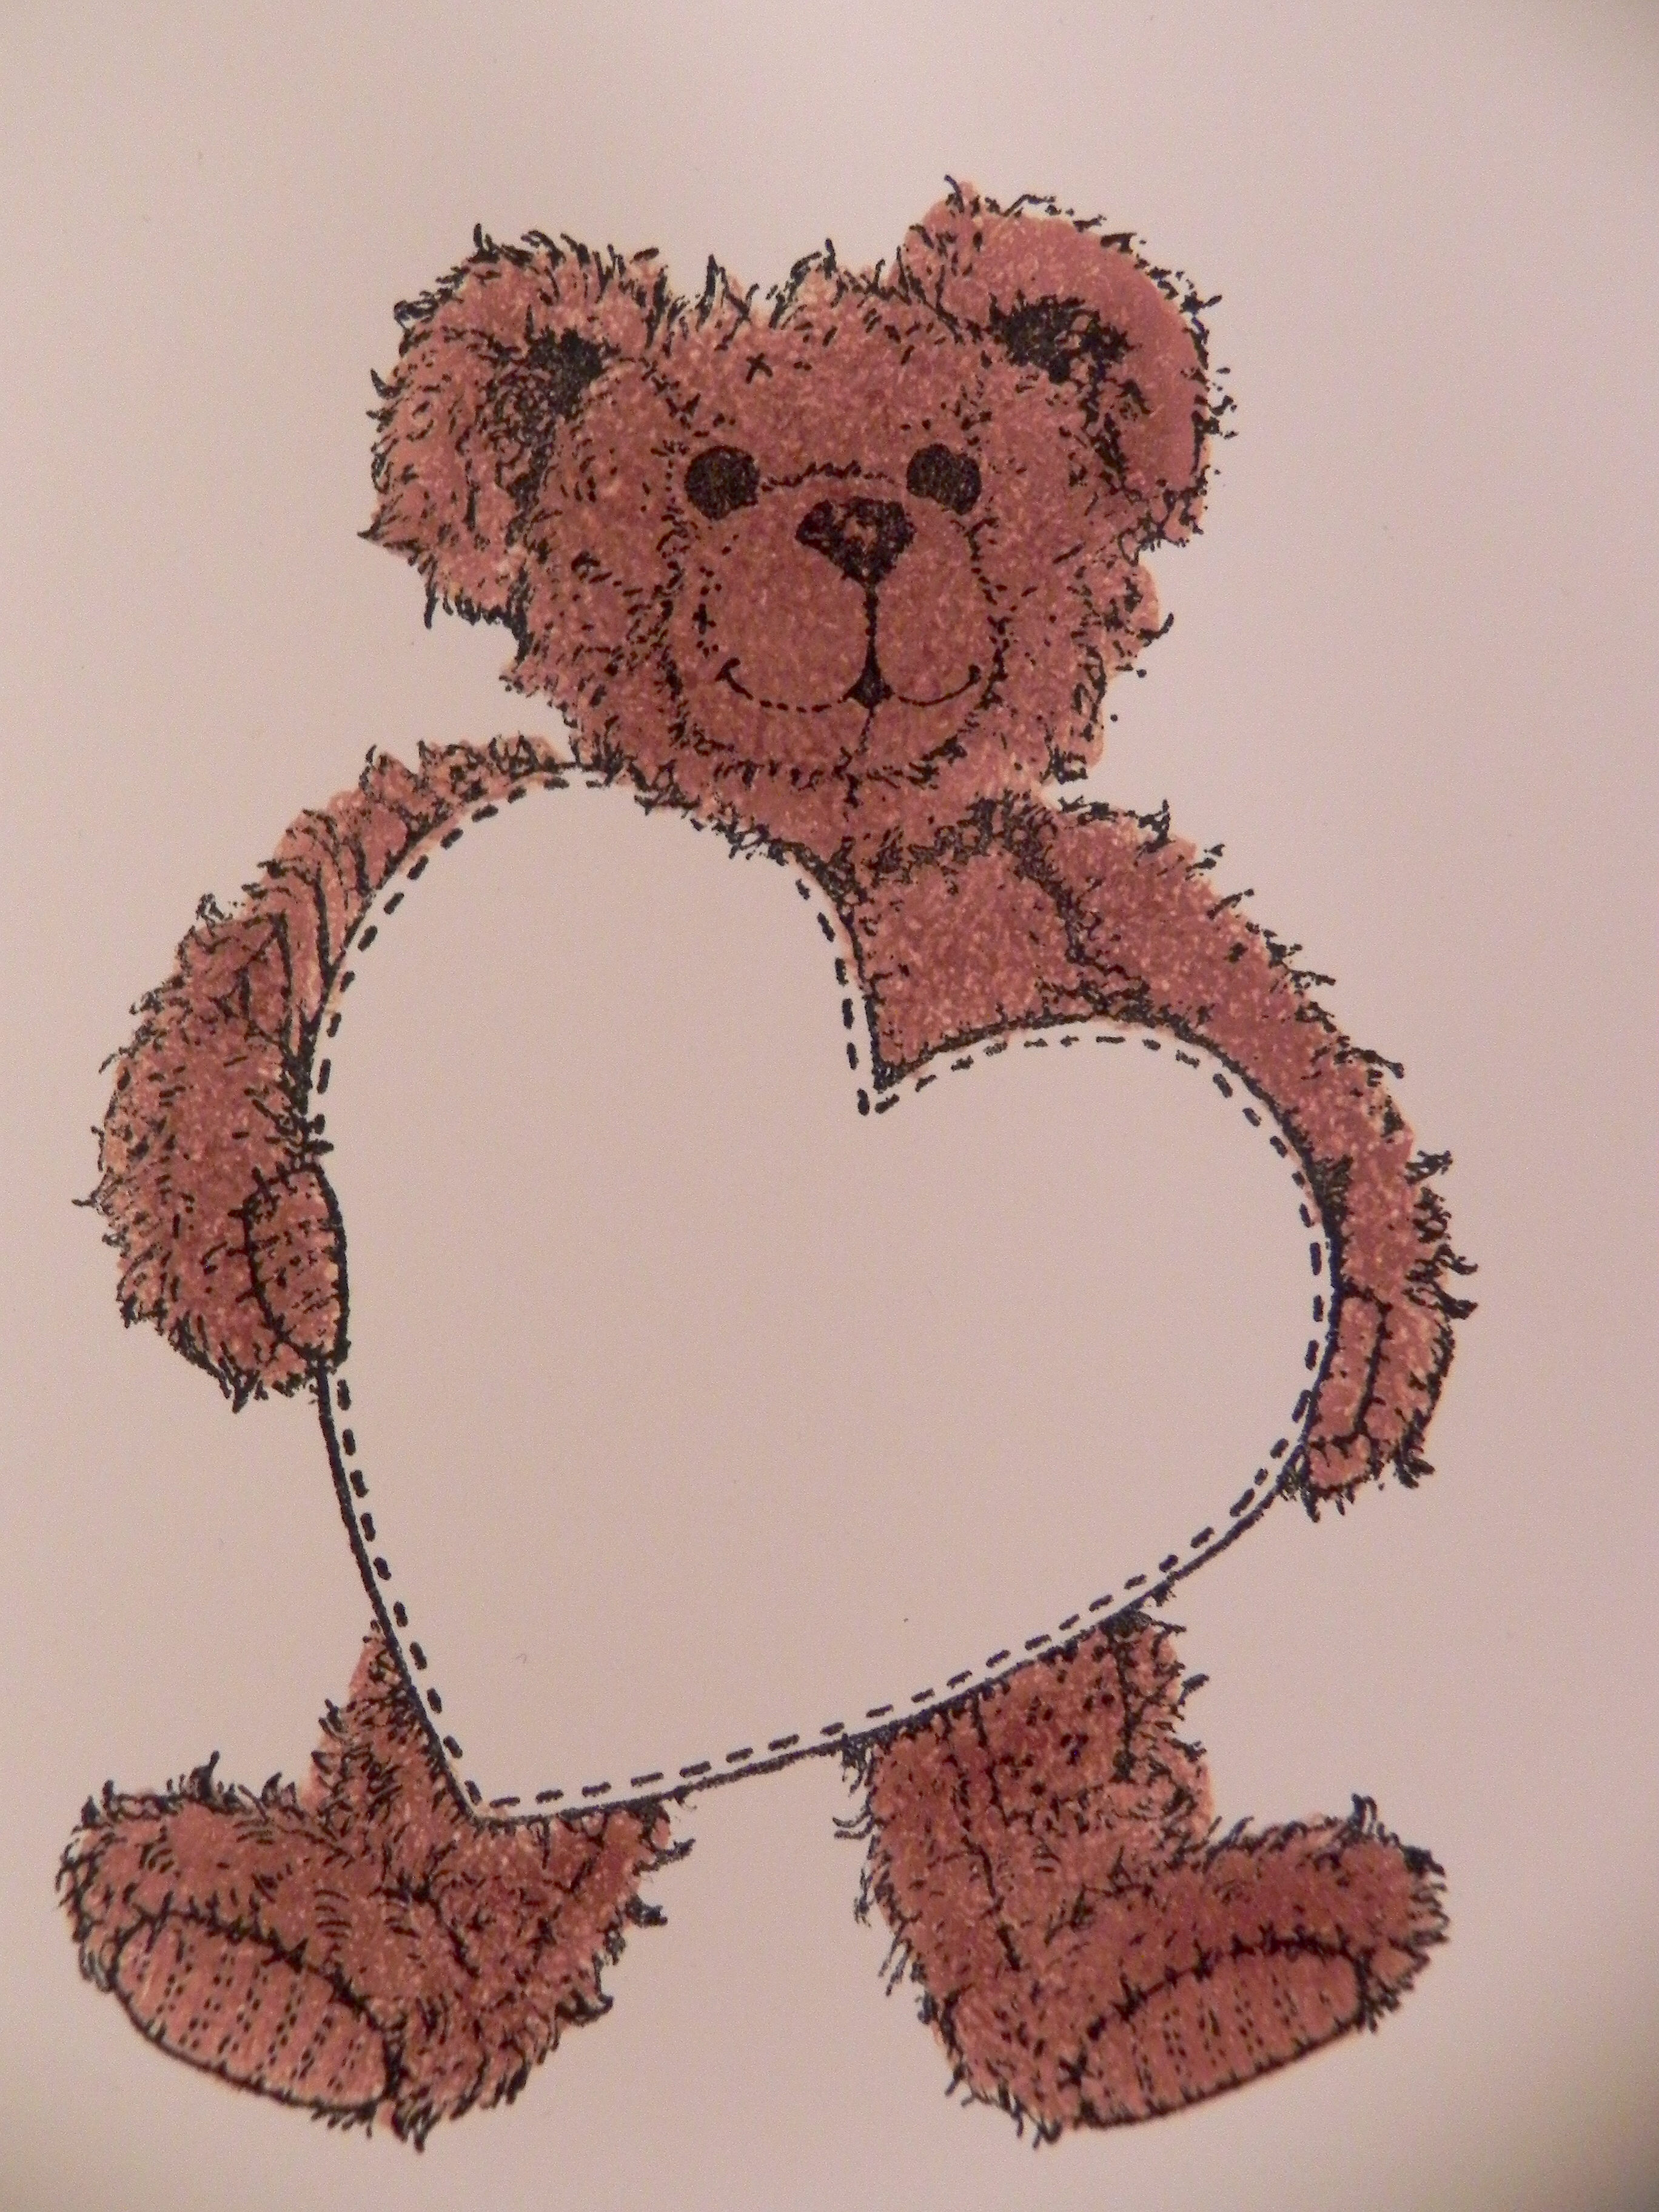
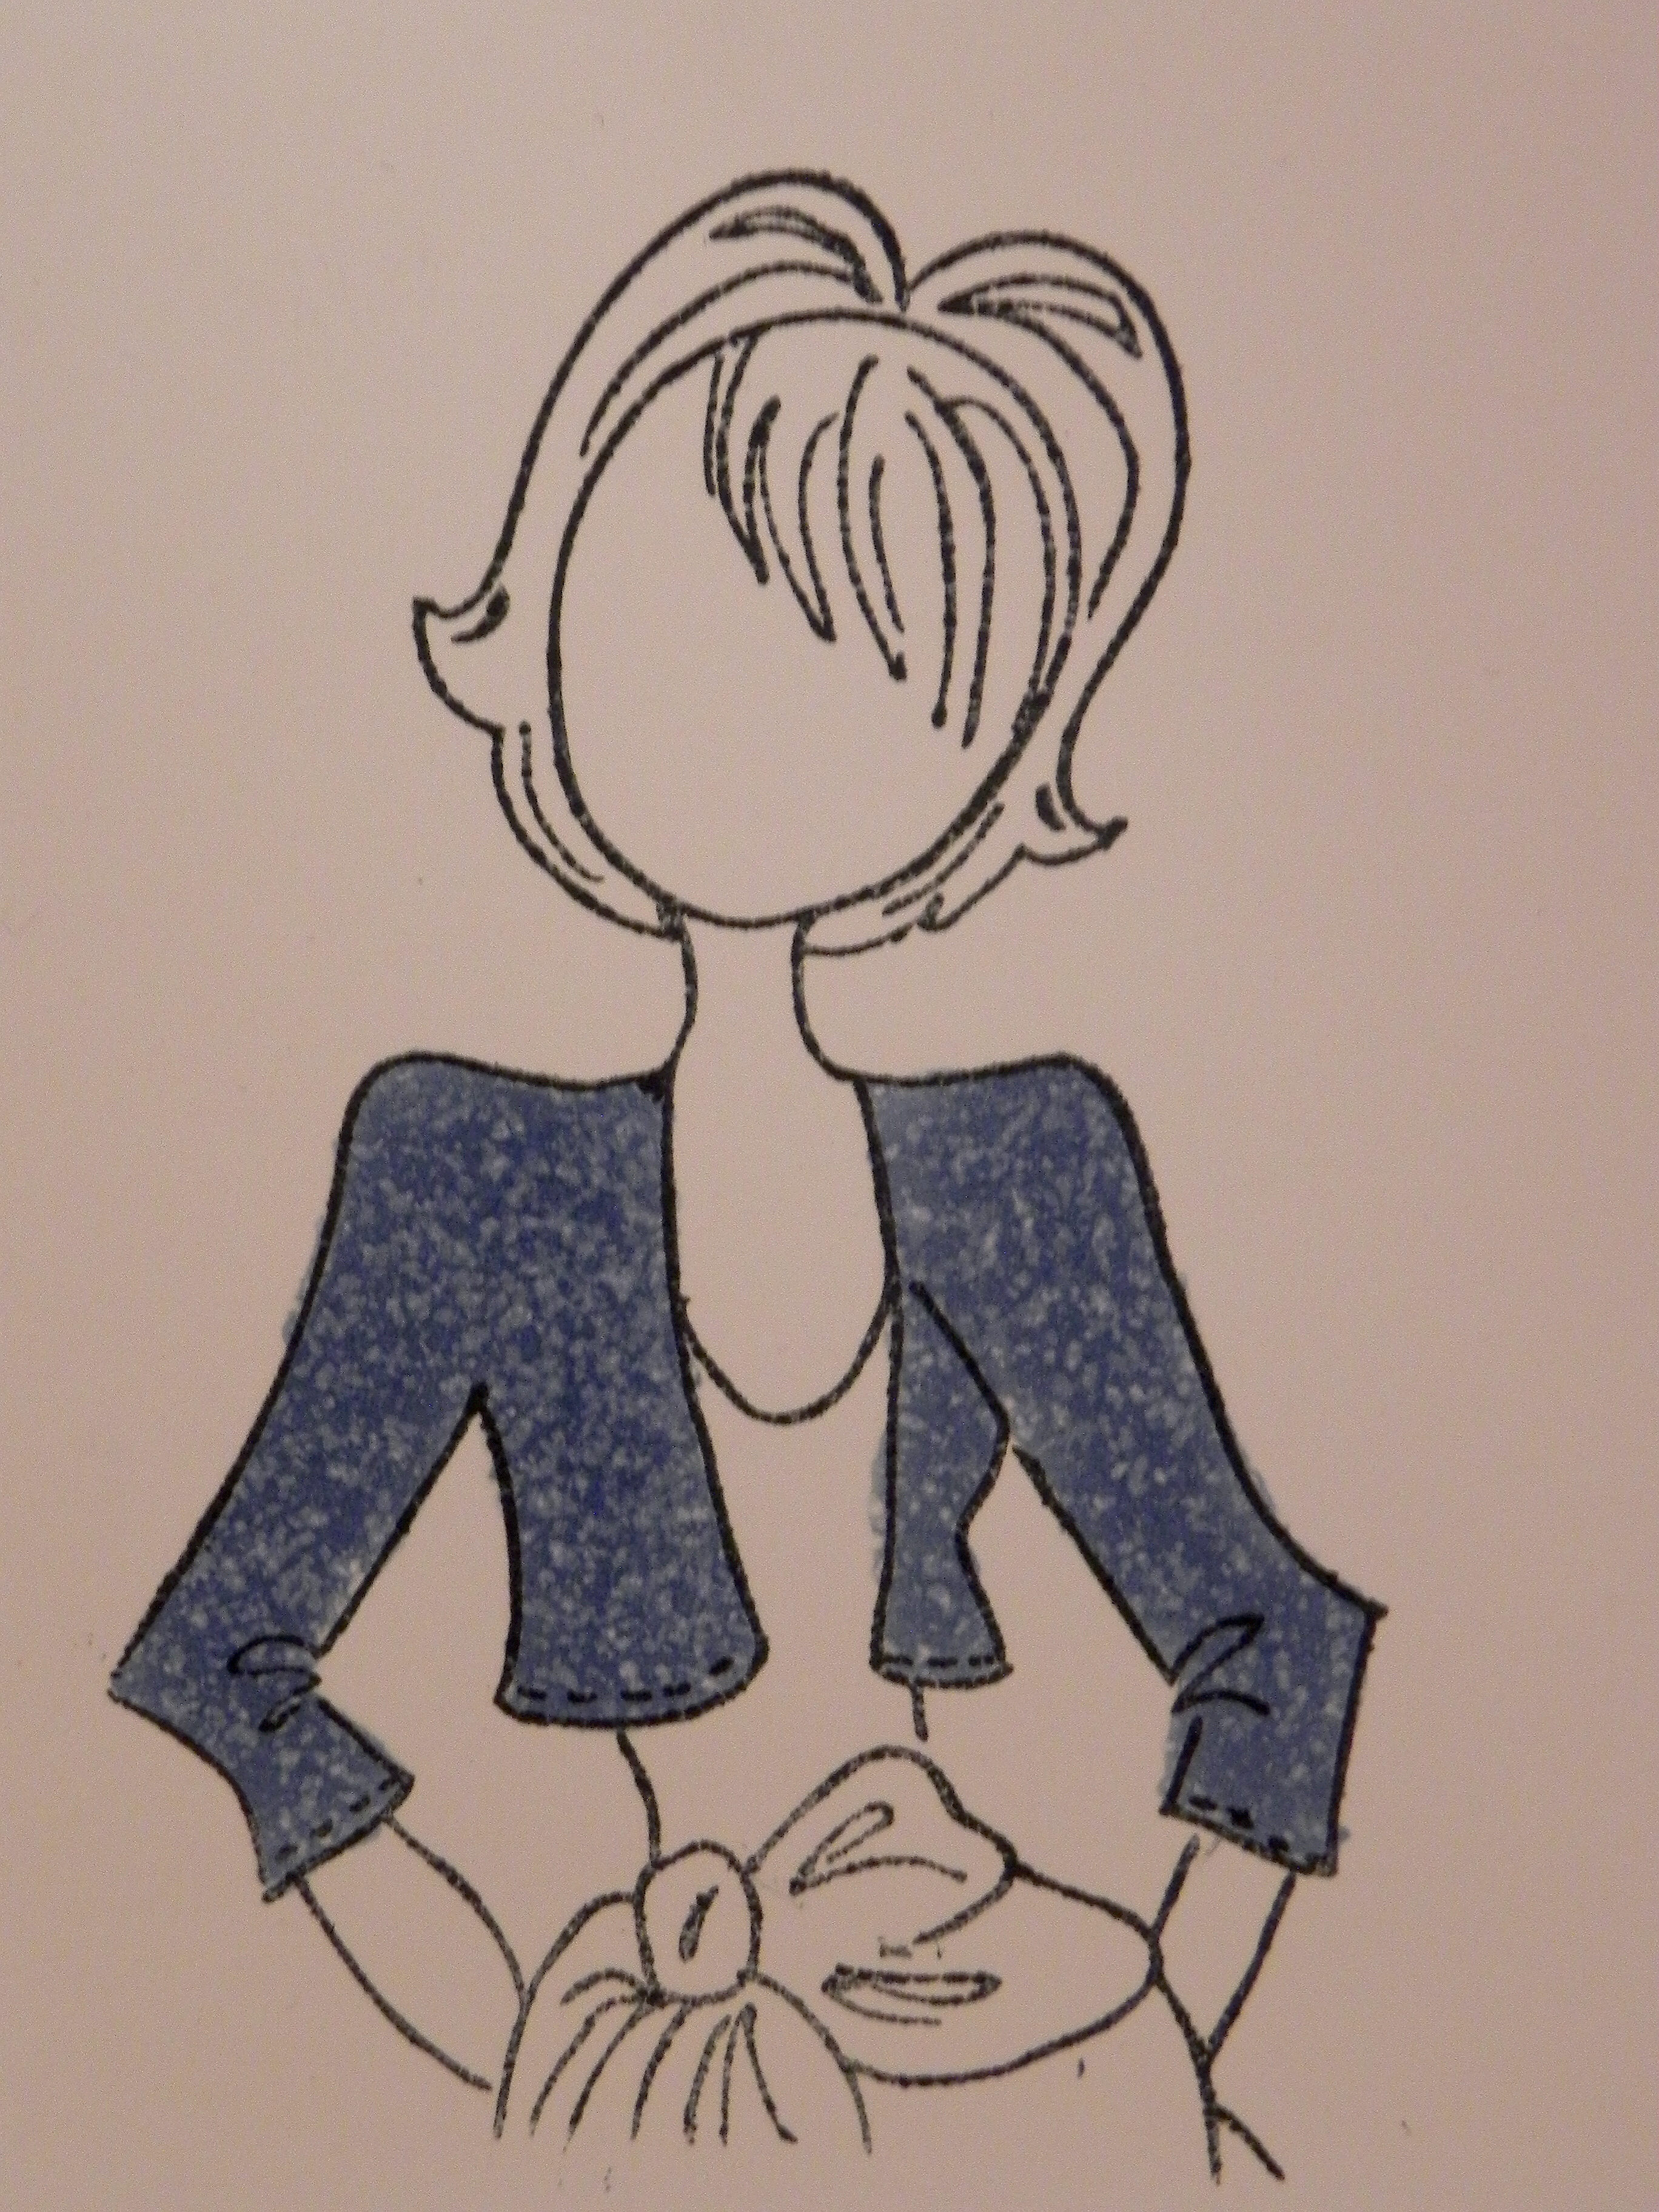
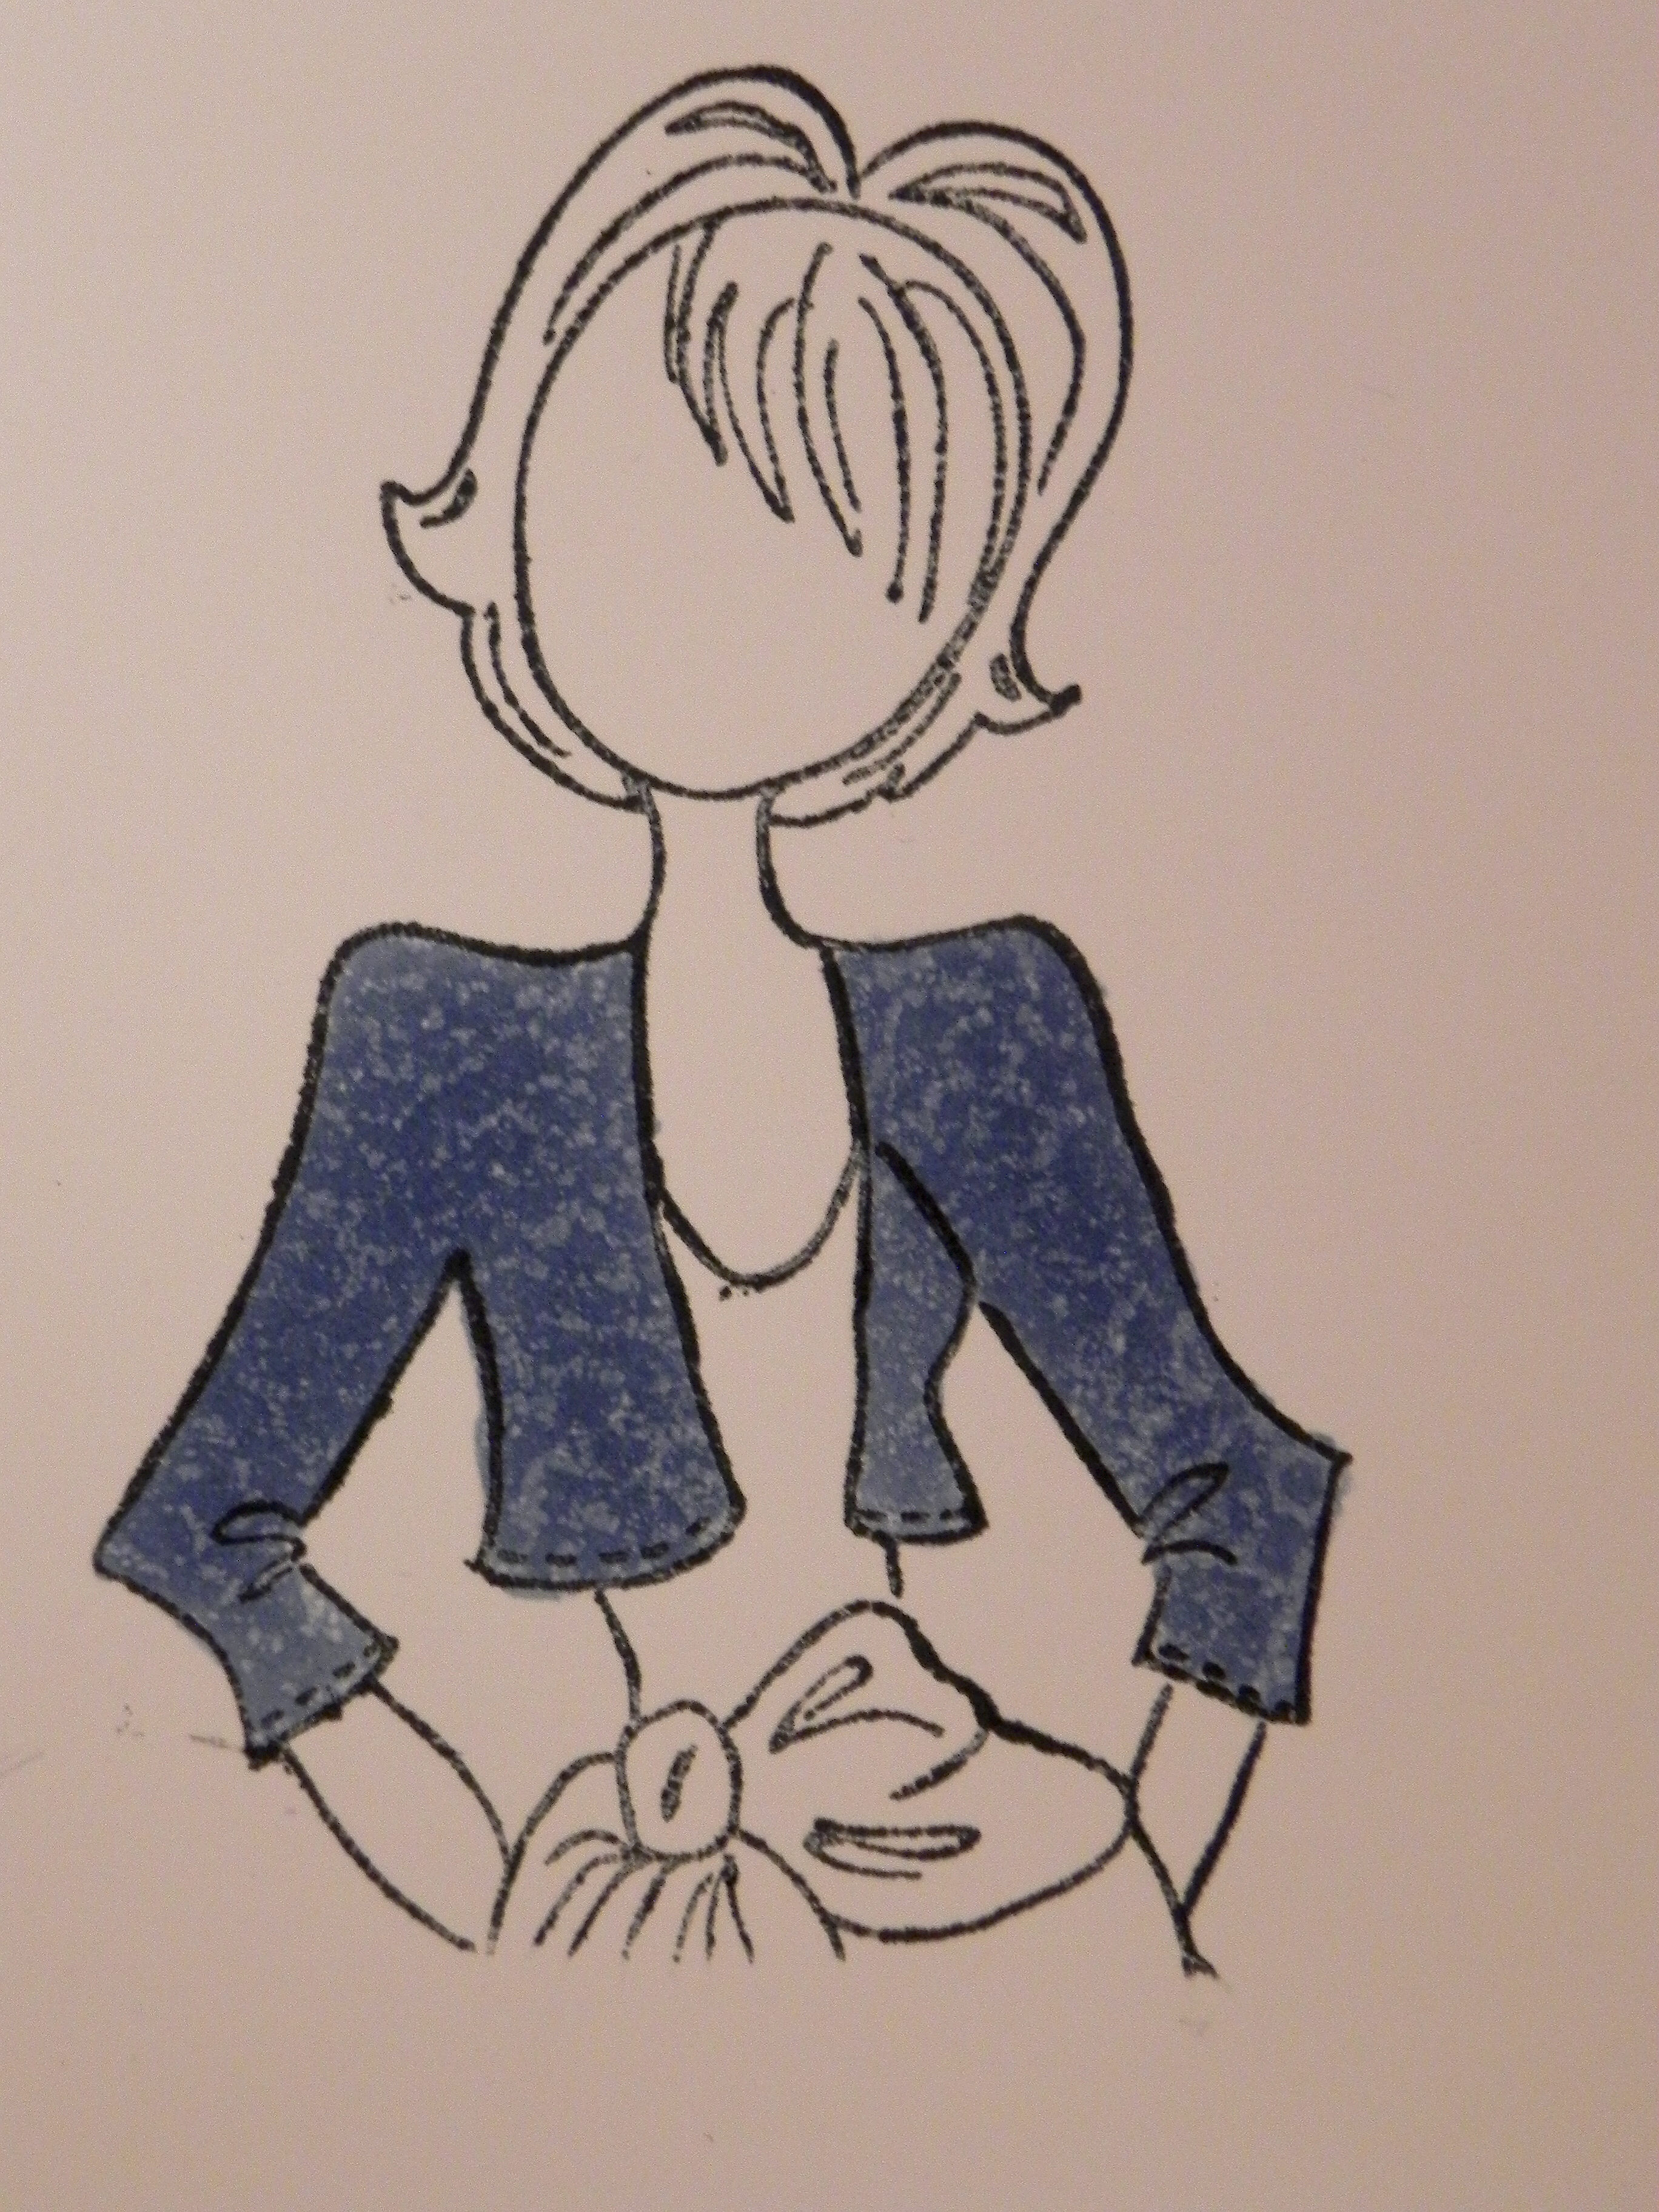
4. If you wish to have a more noticeable, crisp texture, allow the ink to dry on your colored image first (as pictured below on left). If you wish to create a more subtle texture, dab the damp fabric while the image is still wet (as pictured below on right).
5. If your scrap paper under your stamped image becomes too wet while you are working, replace it with a dry piece. (The blender solution from the scrap paper can seep into the back of your stamped image and alter it. I’m speaking from experience!!)
6. Keep a collection of fabric scraps for adding a variety of textures to your projects!
*The stamps used in this tutorial were “Prima Marketing Mixed Media Doll, Natalie with Crop Jacket Dress” and ” K Stamp, Have a Heart Teddy” (- I think. I’ve had this stamp forever and there is no label on it).
Hope you enjoyed this tutorial. Thanks for visiting!
This content uses referral links as described in the disclosure policy on my sidebar.