A little info…

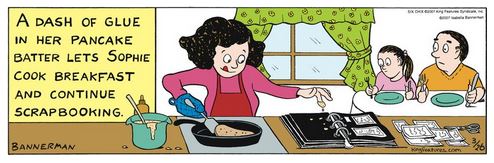
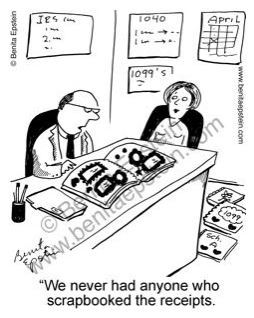
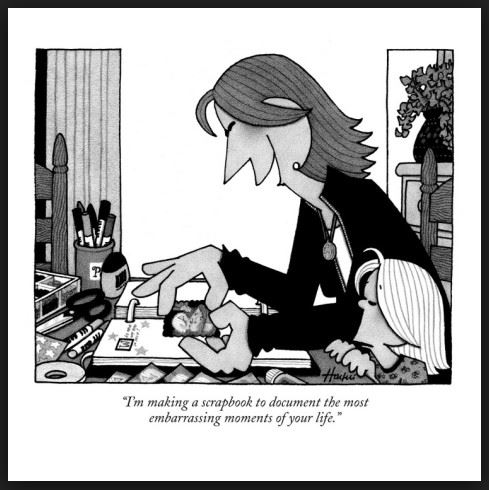
(Cartoons and clip art on this page are from google images from various sources and are not my artwork.)

My plan for this scrapbook section is to post random layouts, in no particular order.

Cartoon 17

As you will see, my pages are pretty clean and flat. I use mostly paper to decorate my layouts, and I usually try to get as many photos on a page as possible. I often see gorgeous layouts/works of art posted online that contain such beautiful embellishments and decorative papers. These layouts often contain 1 or 2 photos. I admire them from afar, but that style doesn’t really work for what I am trying to do; I need my books to close flat, I have way too many photos to put one on a page, and I am trying to keep the focus on the photos and journaling without too much distraction. Presenting my photos and memories in a way that’s pleasing to look at is my goal. As with any craft, one gets better over time, or at least one’s style evolves.

Cartoon 16

I laugh when I look at some of my earlier layouts and compare them to the later ones!

Cartoon 7


cartoon 8

I started scrapbooking in the summer of 1999. My friend was a Creative Memories consultant and asked if I’d like to host a workshop at my house. She taught us what scrapbooking was, why it was important to use the right products, and how to get started.   I was immediately hooked! (We still try to meet monthly to scrap and catch up!)

Cartoon 2

cartoon 10

Cartoon 12

cartoon 11

I decided to make a scrapbook in place of a baby book for each of my children. My mother had kept a baby book for me, and I still enjoy looking at it. It covers my first 7 years and contains a few photos, my mother’s thoughts, my milestones and firsts. I wanted to have something like that for each of my children as well, but I thought a scrapbook would be a better idea because it could contain everything a baby book has and more. Since I was starting with blank pages, I could customize it to include whatever I wanted.

cartoon 9

Cartoon 13

Well, one book for each turned into several, and the first 7 years will now be the first 18. I take soooo many photos and I want to include , among other things, every holiday, major event, vacation, and sometimes cute photos of nothing in particular! As a result, I am hopelessly behind because I just keep snapping away!

Cartoon 4

Cartoon 3

 Eventually, I’ll finish! And if not, they will have the first 5 years at least since that’s where I am at the moment!!

Cartoon 6

cartoon 1

I am so glad I started this project for them.  I really enjoy scrapping, and they really enjoy looking at their books at what I’ve done so far. And it will be something they will have, from me, for years to come!

I Love Scrapbooking! clipart

Cartoon 5

Thanks for checking out my scrapbook posts!

Golden Sunshine – Childhood Cancer Awareness Card

Golden Sunshine – Childhood Cancer Awareness Card

Golden Sunshine - Childhood Cancer Awareness Card.jpg

I made this card for Lee’s “Stamp Out Cancer – Challenge #8 – Many Colors” for StampTV. For this challenge, we are to make a card using colors to bring awareness to and honor those affected by cancer other than breast cancer, BUT we may NOT use any pink…..not at all!  (Sadly, this site is no longer active.)

September was Childhood Cancer Awareness Month, and the ribbon for childhood cancer is gold.

childhood awareness image

My daughter. Kelly, was diagnosed with thyroid cancer three years ago, when she was 12. She was successfully treated at the Children’s Hospital of Philadelphia and continues to be cancer-free today. I wanted to do a project with the thyroid cancer colors (blue, teal, and pink), but we are not permitted to use pink for this challenge! So I decided to use the color for all childhood cancers instead.

The cheery, yellow paper I used is really a great color for a card inspired by Kelly. She was so strong throughout her treatment and always had such a positive, cheery attitude which I find remarkable for a child going through all that she did!

This card is also being entered in the Simon Says Stamp Wednesday Challenge – Use Watercolors.  For this challenge, we could “use watercolor paints, pencils, crayons, gelatos, distress inks, whatever we can think of.”  We could “create backgrounds, color stamped images or die cuts, or color a stamp, spritz with water and use the direct to paper technique.”(http://www.simonsaysstampblog.com/wednesdaychallenge/simon-says-use-watercolors/)

For my card, I used stamps from the Gina K Designs “Sunkissed Autumn” set, and stamped them in black archival ink on watercolor paper. I needed a waterproof ink since I planned to watercolor the background, and I didn’t want the ink to smear.

I masked my stamped image with Frisket masking liquid. I applied the Frisket with a fine liner paint brush and allowed it to dry. Frisket is a watery substance that dries like rubber cement and creates a mask on the image.

For the background, I used Tim Holtz faded jeans, broken china, peeled paint, and mowed lawn distress inks. I wiped some of each on my craft mat, spritzed the ink with water, and painted it on the card with a brush. (I am not at all good at watercoloring!!! It took several tries, and it’s still not exactly what I was going for. I need to practice this technique since I really like the watercolored look!)

After my background was watercolored, the frisket mask was rubbed off with a rubber cement eraser (or you can use your finger). I colored the image using Tim Holtz distress markers: tattered rose (for her skin) and vintage photo, tea dye, wild honey, and mustard seed (for her hair). I tried to blend these hair colors and discovered it is next to impossible to blend markers on watercolor paper! After coloring, I paper pieced her dress and the sun balloon with the same yellow paper I used for my mat.

My watercolored panel was mounted on a small white mat. This was then adhered to a wider yellow mat using a piece of printed paper from a Recollections paper pack (not sure which one since the cover came off a while ago), and then all was attached to a white card base.

Here is the thank you note I made to thank people for their support and gifts while Kelly was undergoing treatment.  She loves giraffes and had surgery on her throat, so …

Thyroid Cancer Thank You Card

Thanks for checking out my card projects!

This content uses referral links as described in the disclosure policy on my sidebar.

You Are So Beautiful – Purse Card

You Are So Beautiful – Purse Card

You Are So Beautiful Purse Card

This project was made for Joyce’s “Stamp Out Cancer – Challenge #7 – No Rectangles or Squares” for StampTV.  For this challenge, we are to make a card that is not square or rectangle and to use designer paper (can be custom made).  (Sadly, this site is no longer active.)

This card was made with elements from a kit from svgcuts called Luxury Handbags SVG Kit.  CLick HERE  to check it out at svgcuts.com.

I cut the pieces out with my Silhouette electronic die cutting machine.  The 2 pieces of designer paper I used for this project came from the Recollections “Memories Documented” paper pad.  The solid card stock is gina k sandy beach.  The greeting stamp came from the Gina K Designs “Fight Like A Girl” set and was stamped with gina k charcoal brown ink on the sandy beach card stock.  The circle was cut using a Spellbinders standard circle die, and it was adhered to the center of the flower.  The greeting was the only stamp used on this project. The metal heart charm, jute and raffia were in my stash.

Choose any (small) greeting to put on the flower and select coordinating card stocks, papers, and embellishments, and this card design can be used for a variety of occasions!

Thanks for checking out my card project!

This content uses referral links as described in the disclosure policy on my sidebar.

Pink Get Well – Sketch

Pink Get Well – Sketch

Pink Get Well - Sketch.jpg

This project was made for Joyce’s “Stamp Out Cancer – Challenge #6 – Sketch” for StampTV. For this challenge, we are to create a card using the sketch provided.  (Sadly, this site is no longer active.)

Here is the sketch:

Sketch

It was also made for Lee’s “In the Pink for October” Mod Squad Challenge. In following with the very important theme of cancer awareness…..her challenge this week is to use pink – any pink, any way.  (Sadly, this site is no longer active.)

For the background panel on this card, I used a technique called  ABS Monoprinting, done with the Copic Airbrush System (ABS) which creates a marbleized background.  The Copic markers I used were R56, R83, and R85, along with colorless blender solution in a mini mister (spritzer), and glossy card stock.  The ink was airbrushed in spots on my craft mat and then spritzed (with a mini mister) with the colorless blender.  Once the ink started to pool or formed puddles, I put the glossy card stock, face-down, onto the craft mat into the ink puddles. I twisted the card stock slightly when picking it up and then placed it in the ink again, and again until I covered my panel.  A few notes:  If you use too much colorless blender, your ink will look very light and washed out.  (I probably used a little too much on mine, although I wanted a soft, muted look.)  If you don’t use enough colorless blender solution, your ink will look spotted without much blending.  If the ink runs out on the craft mat, more ink and blender could be added.  Regular card stock can be used instead of glossy which will give you a softer look.  Waxed paper can be used if you don’t have a craft mat.  And finally, I think you can probably just scribble ink onto the craft mat directly from the marker if you don’t have an airbrush system.  I tried it, and it worked, but I think you use less ink with the ABS.  (You can use the colorless blender solution to clean your mat when you are done.)

For the butterfly and greeting, I used stamps from the Gina K designs “With Love and Prayers” and “A Little Something” sets.  I stamped the images with versamark on thick vellum card stock and heat embossed them using white embossing powder, being careful not to over heat and burn the vellum.  I then colored the butterfly, from the back of the vellum, with Copic Marker R56.  The vellum was then adhered to a piece of pink card stock using Tombow adhesive made for vellum, and this was then mounted on a white mat created with a Spellbinders lacey circles die.  (I originally planned to just use the vellum with no pink paper, but you couldn’t really see the embossed images too well when it was placed against the white mat.)

The silver panel across the bottom was from the DCWV “The Formal Affair Stack” which was mounted on a piece of white card stock.  A white card base was used as well.  A sheer ribbon and bow were added.  Then the circular panel was adhered using pop dots.

This card was VERY difficult to photograph.  It is a very soft looking card, and the camera had trouble picking up the details in the background and the actual colors on the card.  It also looked slightly blurry to me no matter what I tried!  Maybe my camera had trouble focusing with the glare from the glossy card stock?  I took over 70 pictures (thank goodness they were digital!!) and finally settled on the above photo; it was the best I could get!  Sigh…

Thanks for checking out my card project!

This content uses referral links as described in the disclosure policy on my sidebar.

Thinking of You – With Glitter

Thinking of You – with Glitter

Thinking of You with Glitter.jpg

This project was made for Karen’s “Stamp Out Cancer – Challenge #5 – Glitter Glitter” for StampTV. For this challenge, we are to create a card that must have some kind of glitter on it in along with both pink and black somewhere on the card.  (Sadly, this site is no longer active.)

It was also made for Lee’s “In the Pink for October” Mod Squad Challenge. In following with the very important theme of cancer awareness…..her challenge this week is to use pink – any pink, any way.  (Sadly, this site is no longer active.)

The stamped images for this card are from the Gina K designs “A Little Something” and “Little Branches” sets stamped with versamark ink and heat embossed using gina k fine detail black embossing powder. I used Bic Mark-It alcohol markers (fandango pink and pink flamingo) to add color. Glitter was then added to the vase and flowers using a ZIG Wink of Stella Glitter Brush Pen (clear). I used white and black cardstock along with Recollections Pink Pindots printed paper and Recollections pink cardstock (no name given on label).

This card was fun to make with the bright colors and the added sparkle. The real challenge was trying to capture the glitter in the photo without messing up the color!

Thanks for checking out my card project!

This content uses referral links as described in the disclosure policy on my sidebar.