Bow Making Tutorial

Bow Making Tutorial

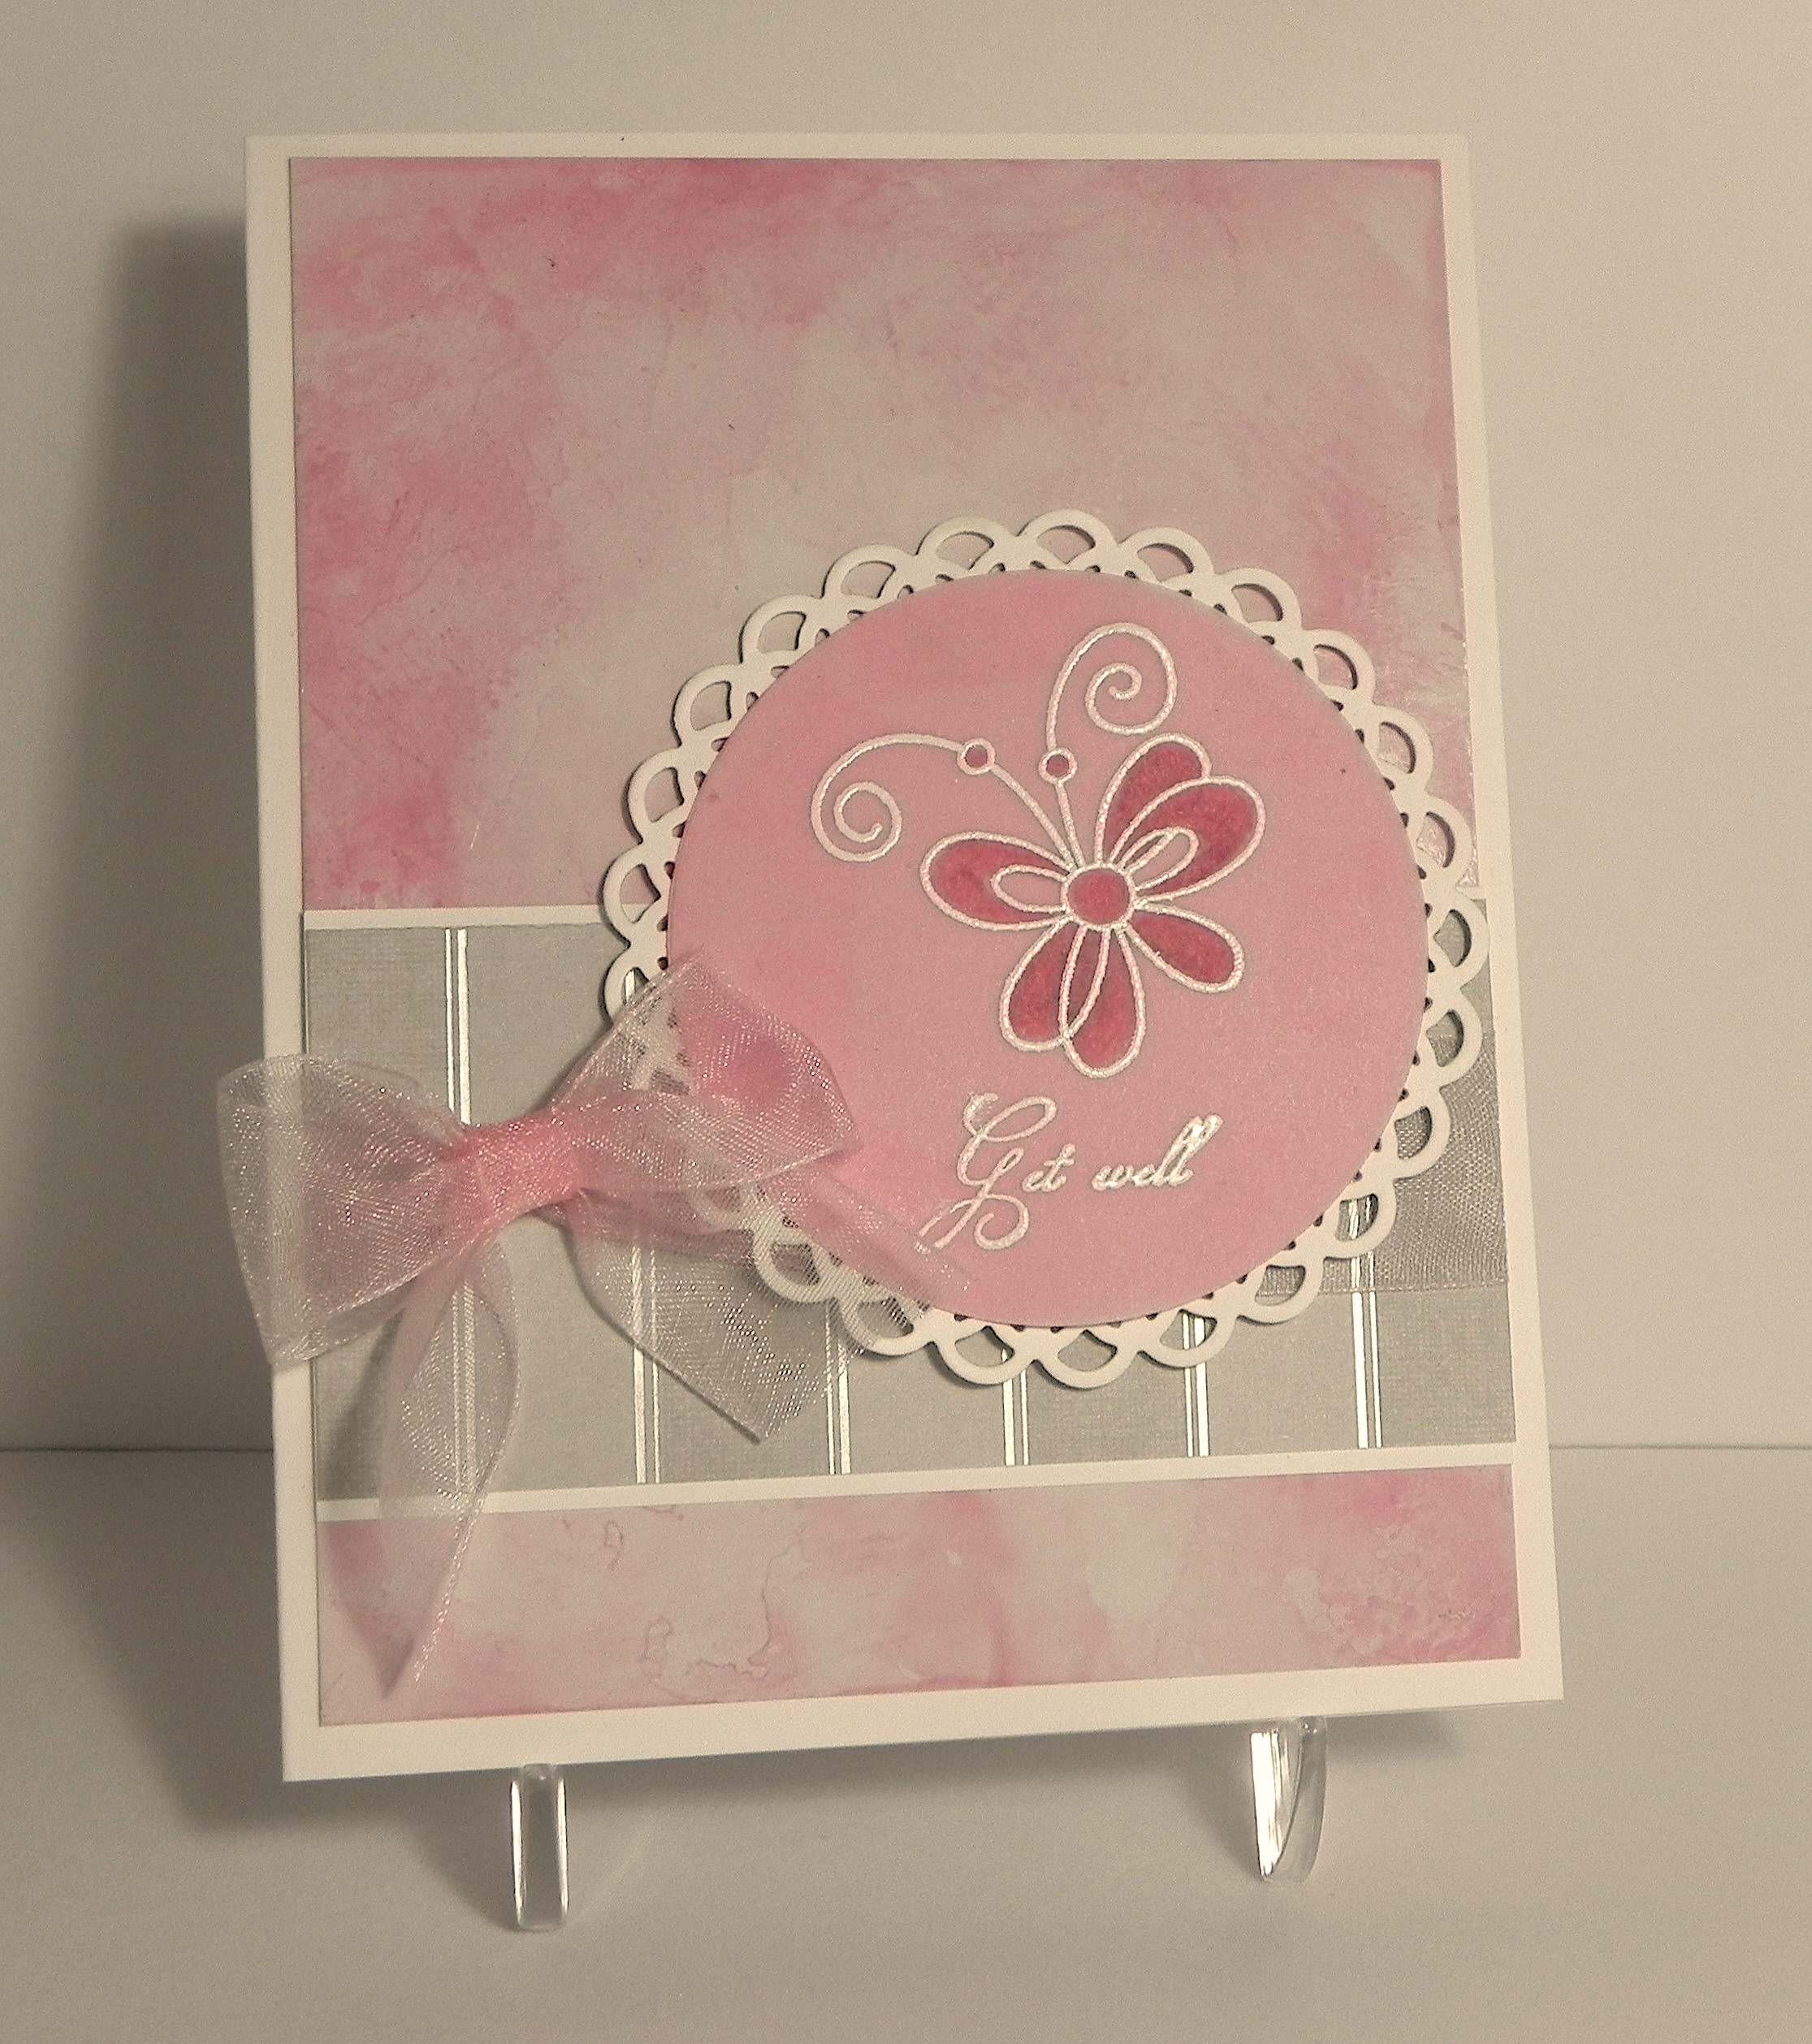
Pink Get Well - Sketch

 (Click HERE to see original card post.)

Making the “perfect bow” for your project is easy to do, and you don’t even need fancy tools to do it! While there is a variety of bow makers on the market, I’m going to show you how to make a beautiful bow using something I am sure you have plenty of in your home – cardboard or chipboard.


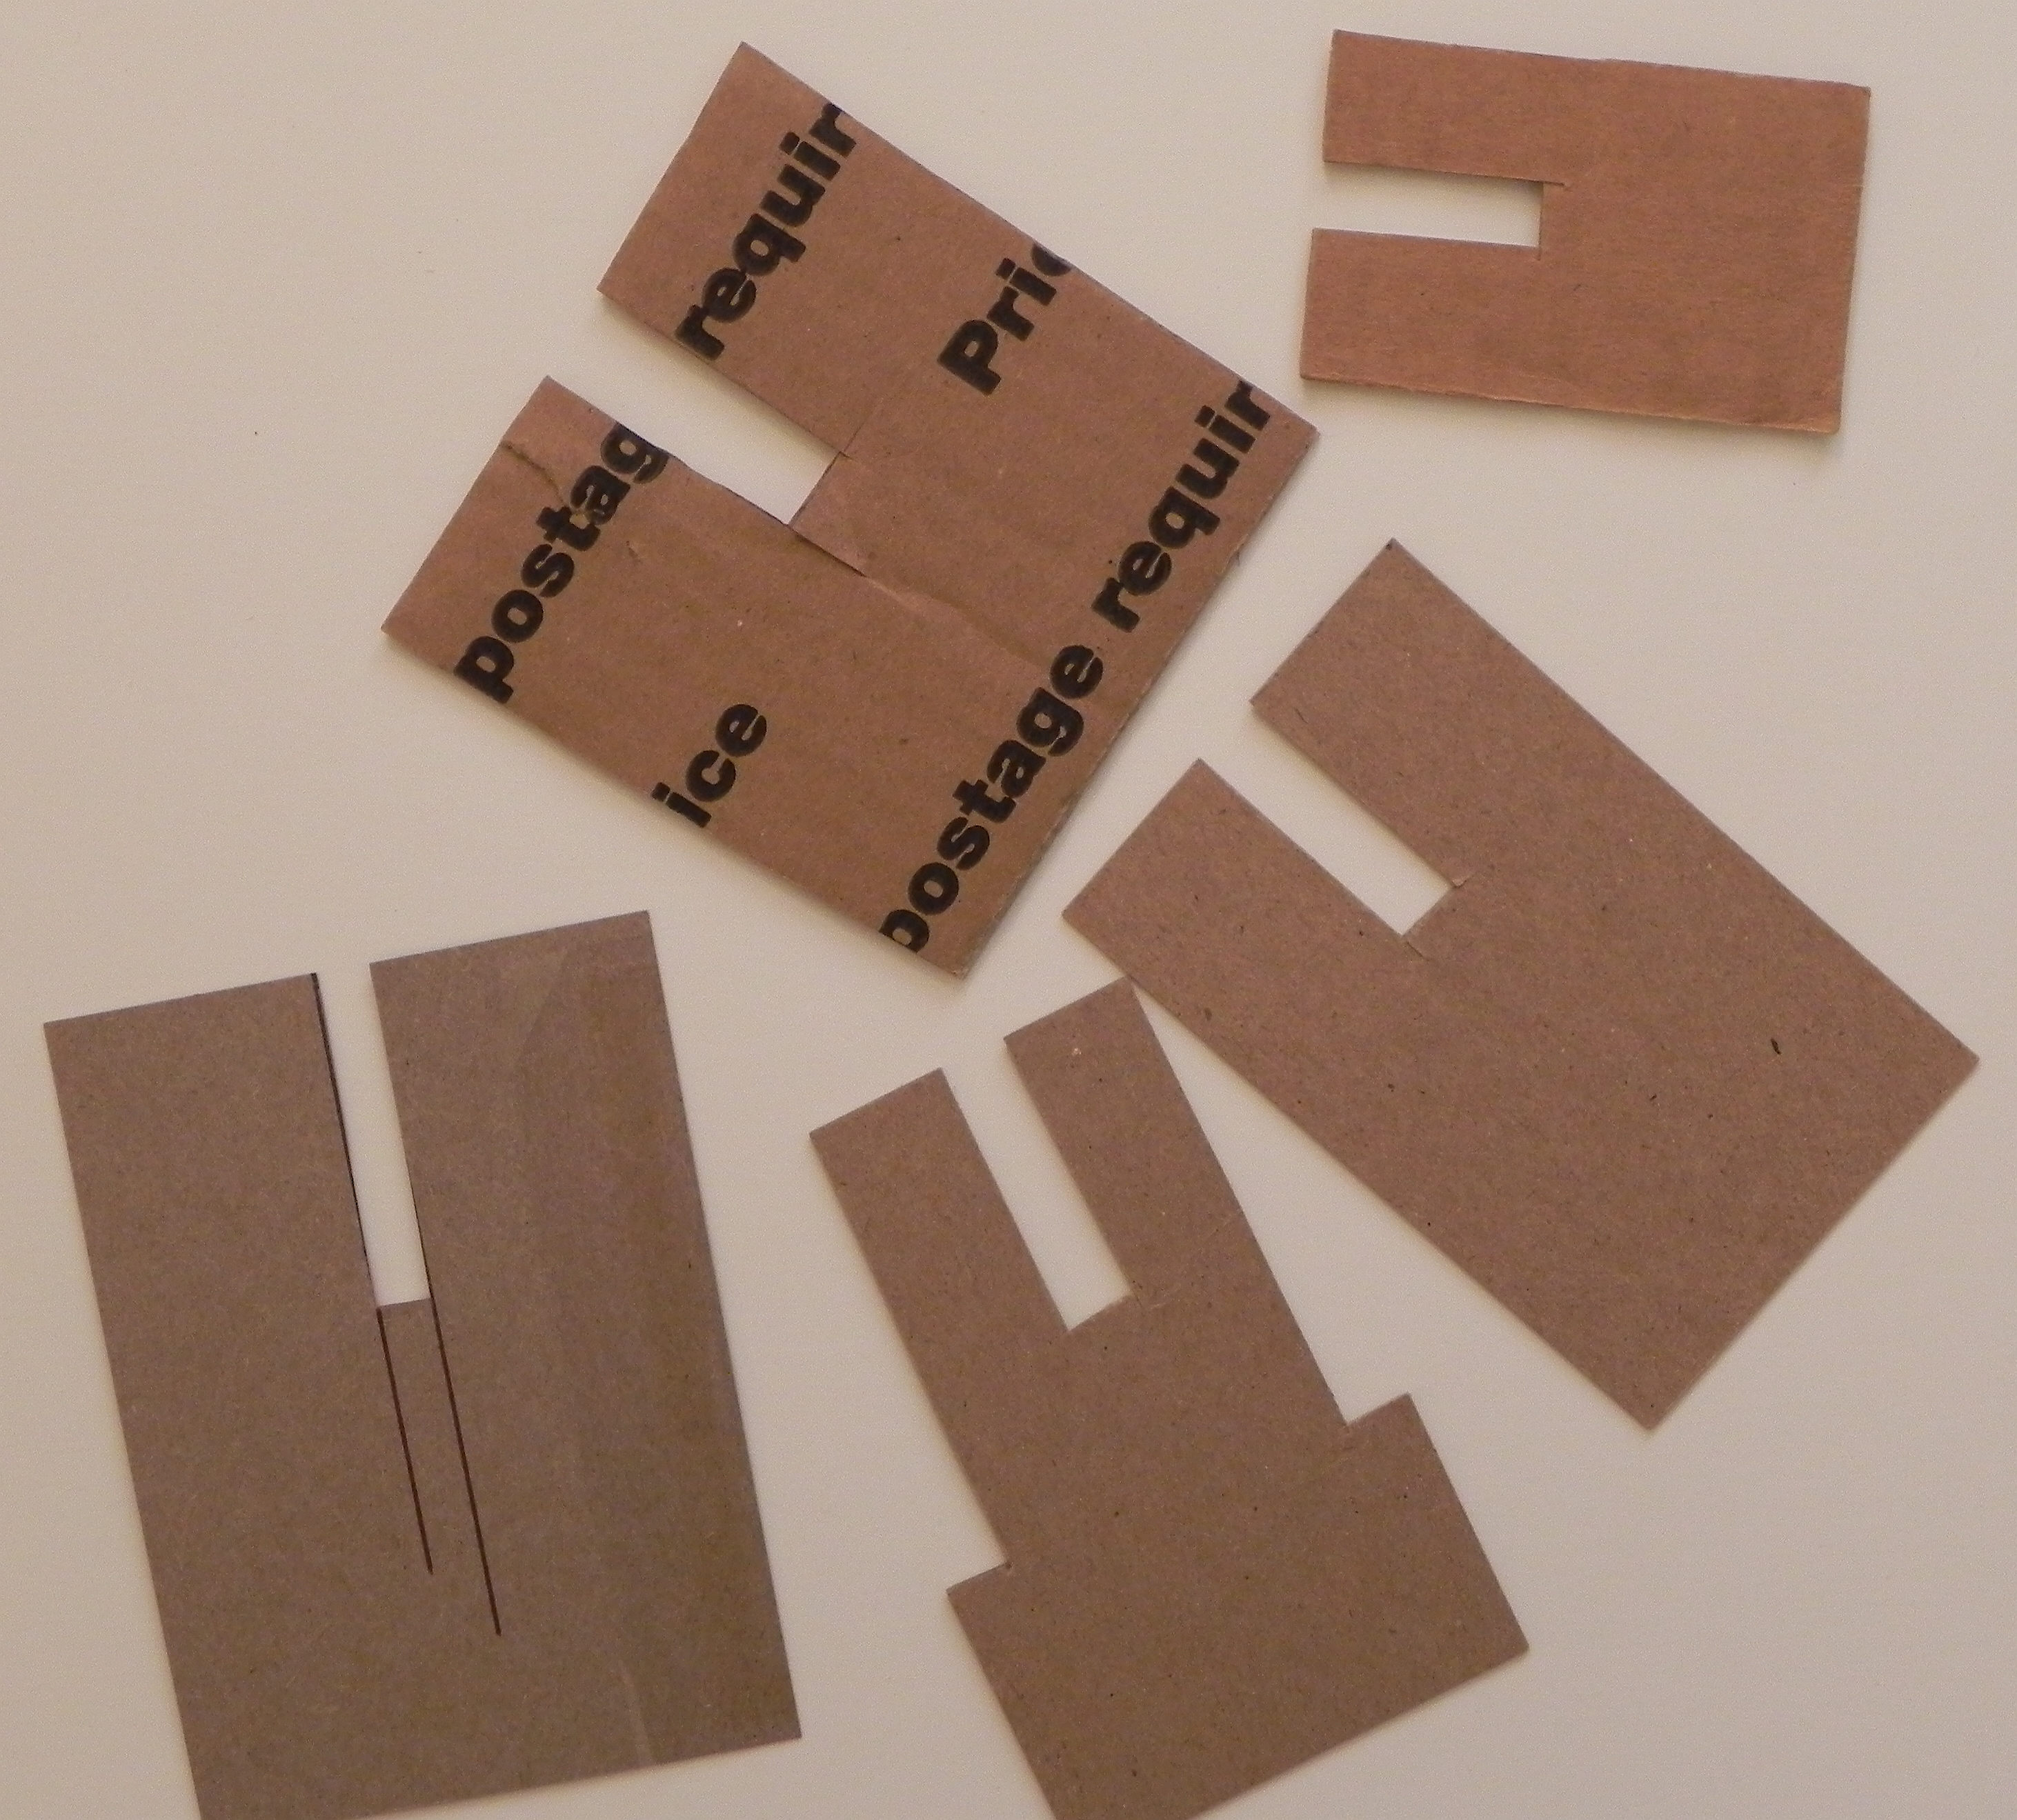
First, you need to make your tool:

For my demonstration, I used a scrap of a pasta box.  Any piece of sturdy cardboard or chipboard will do.

00000001 aDSCN0825


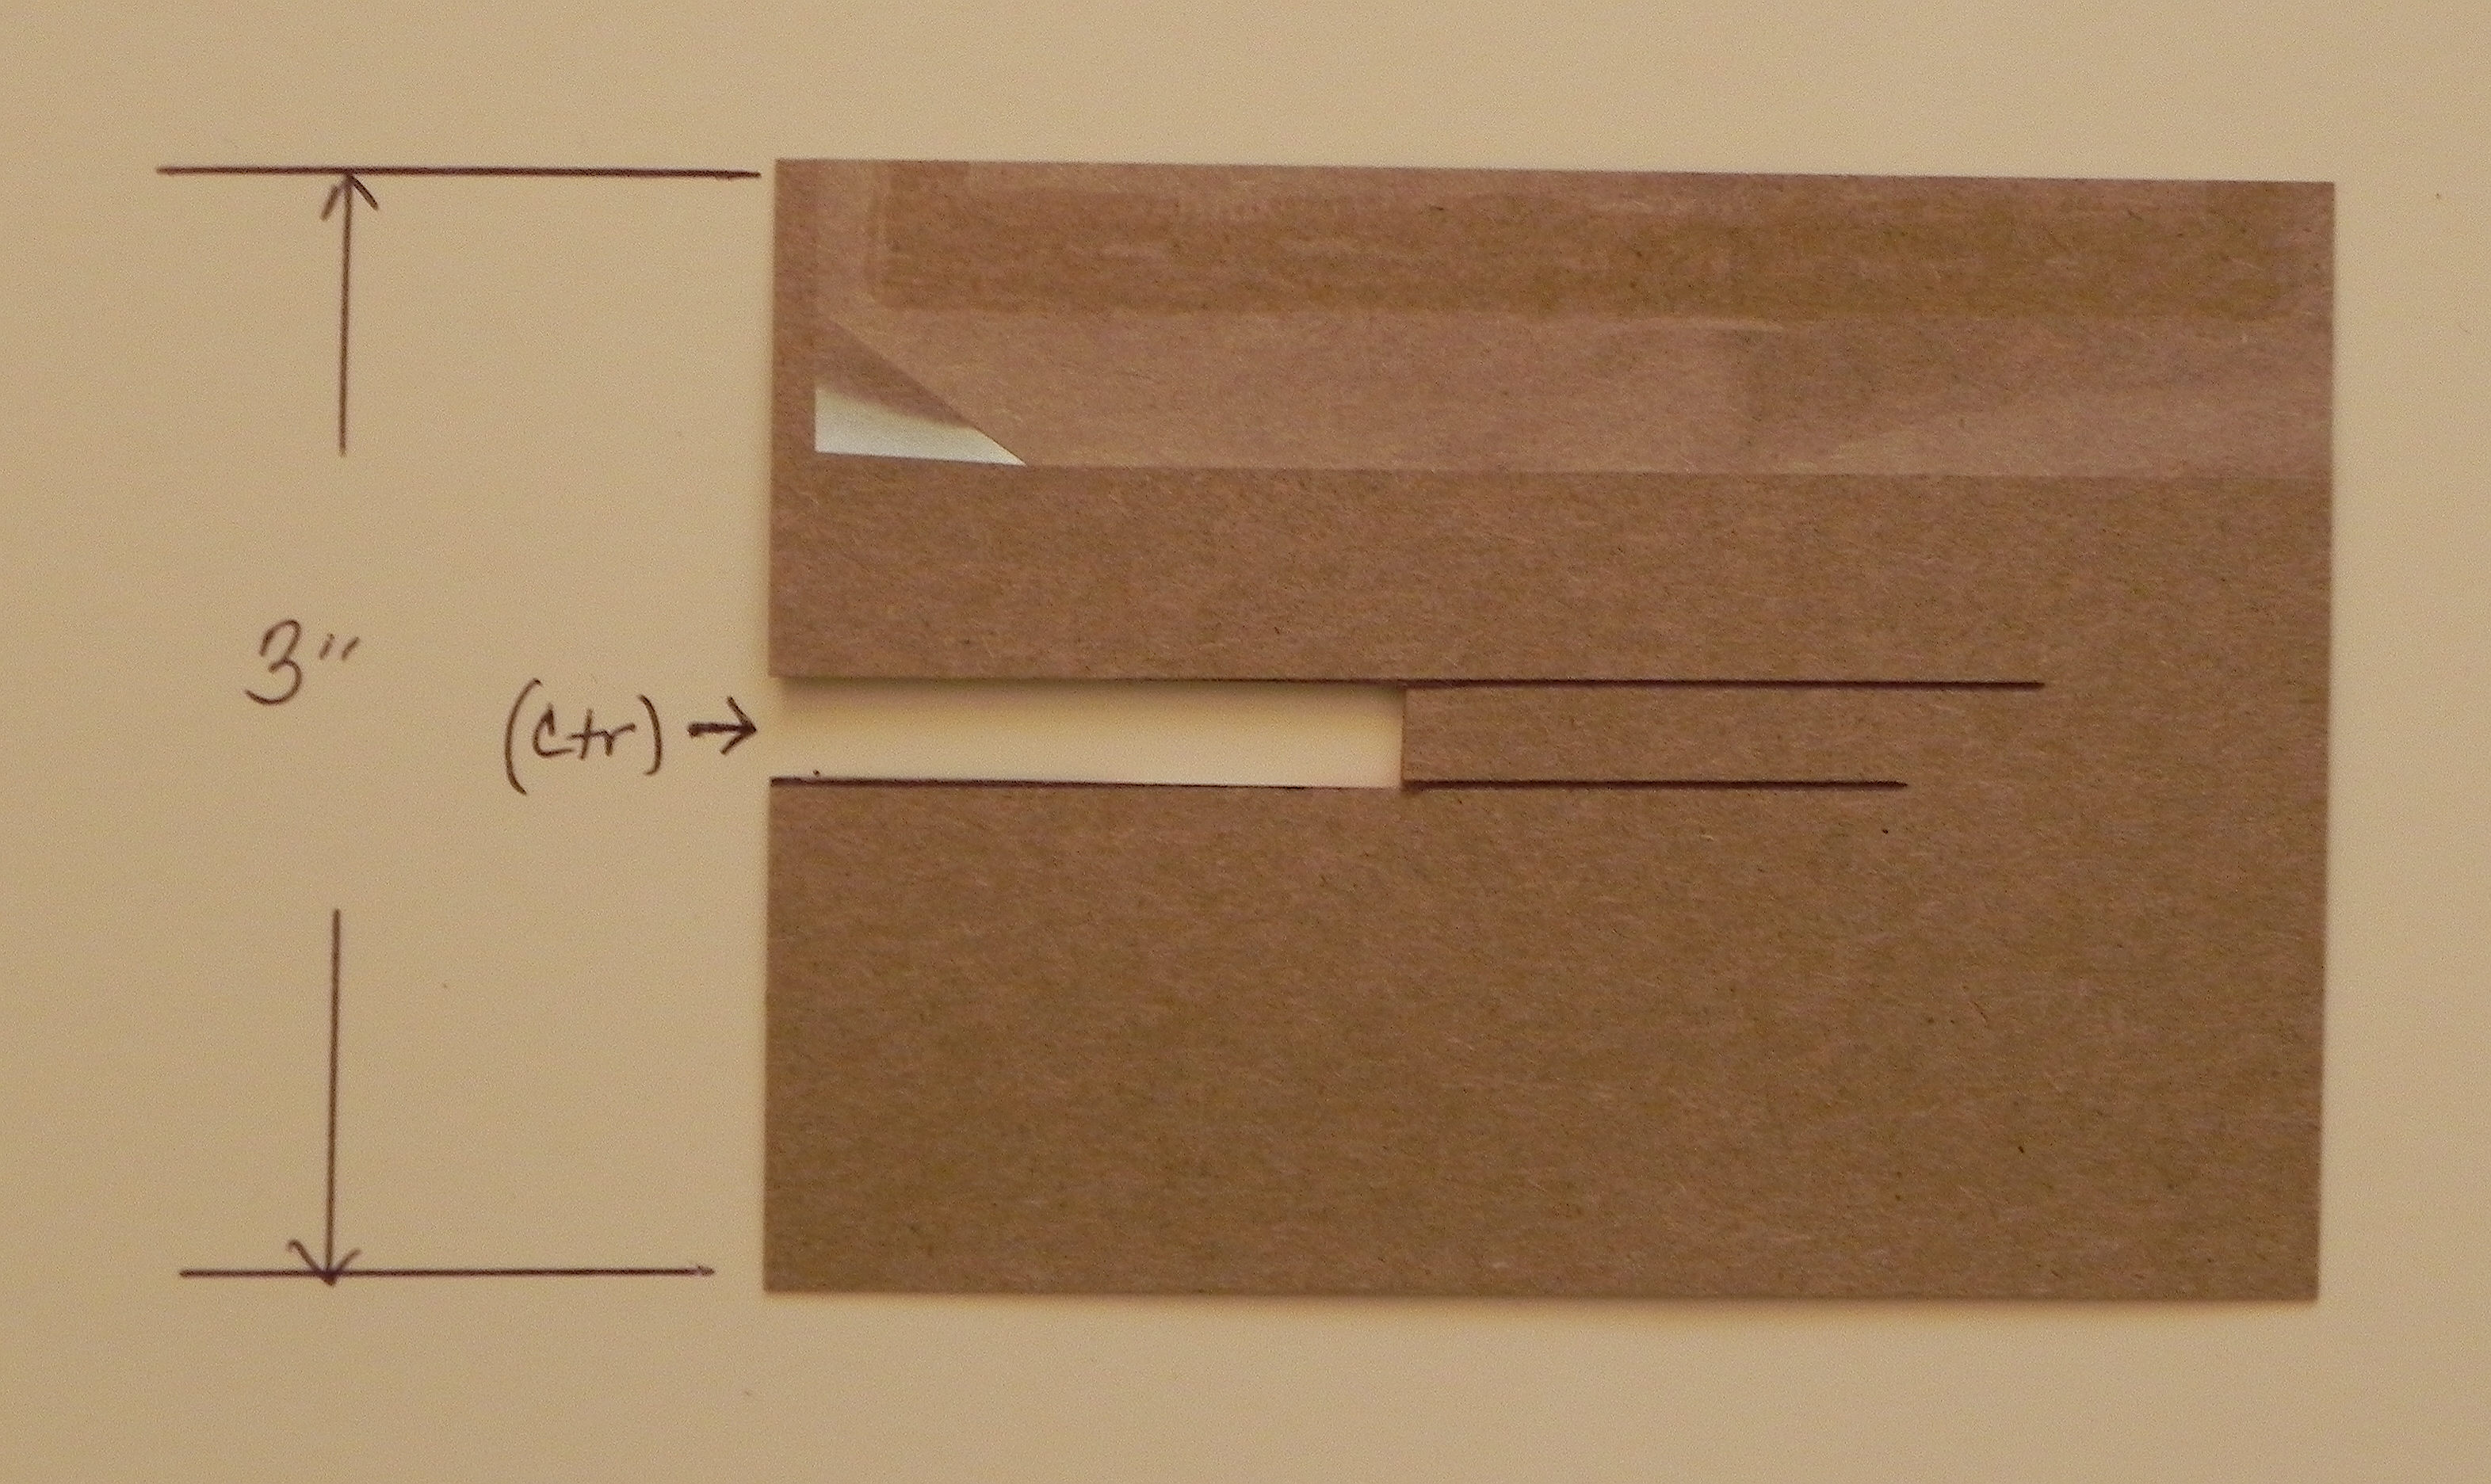
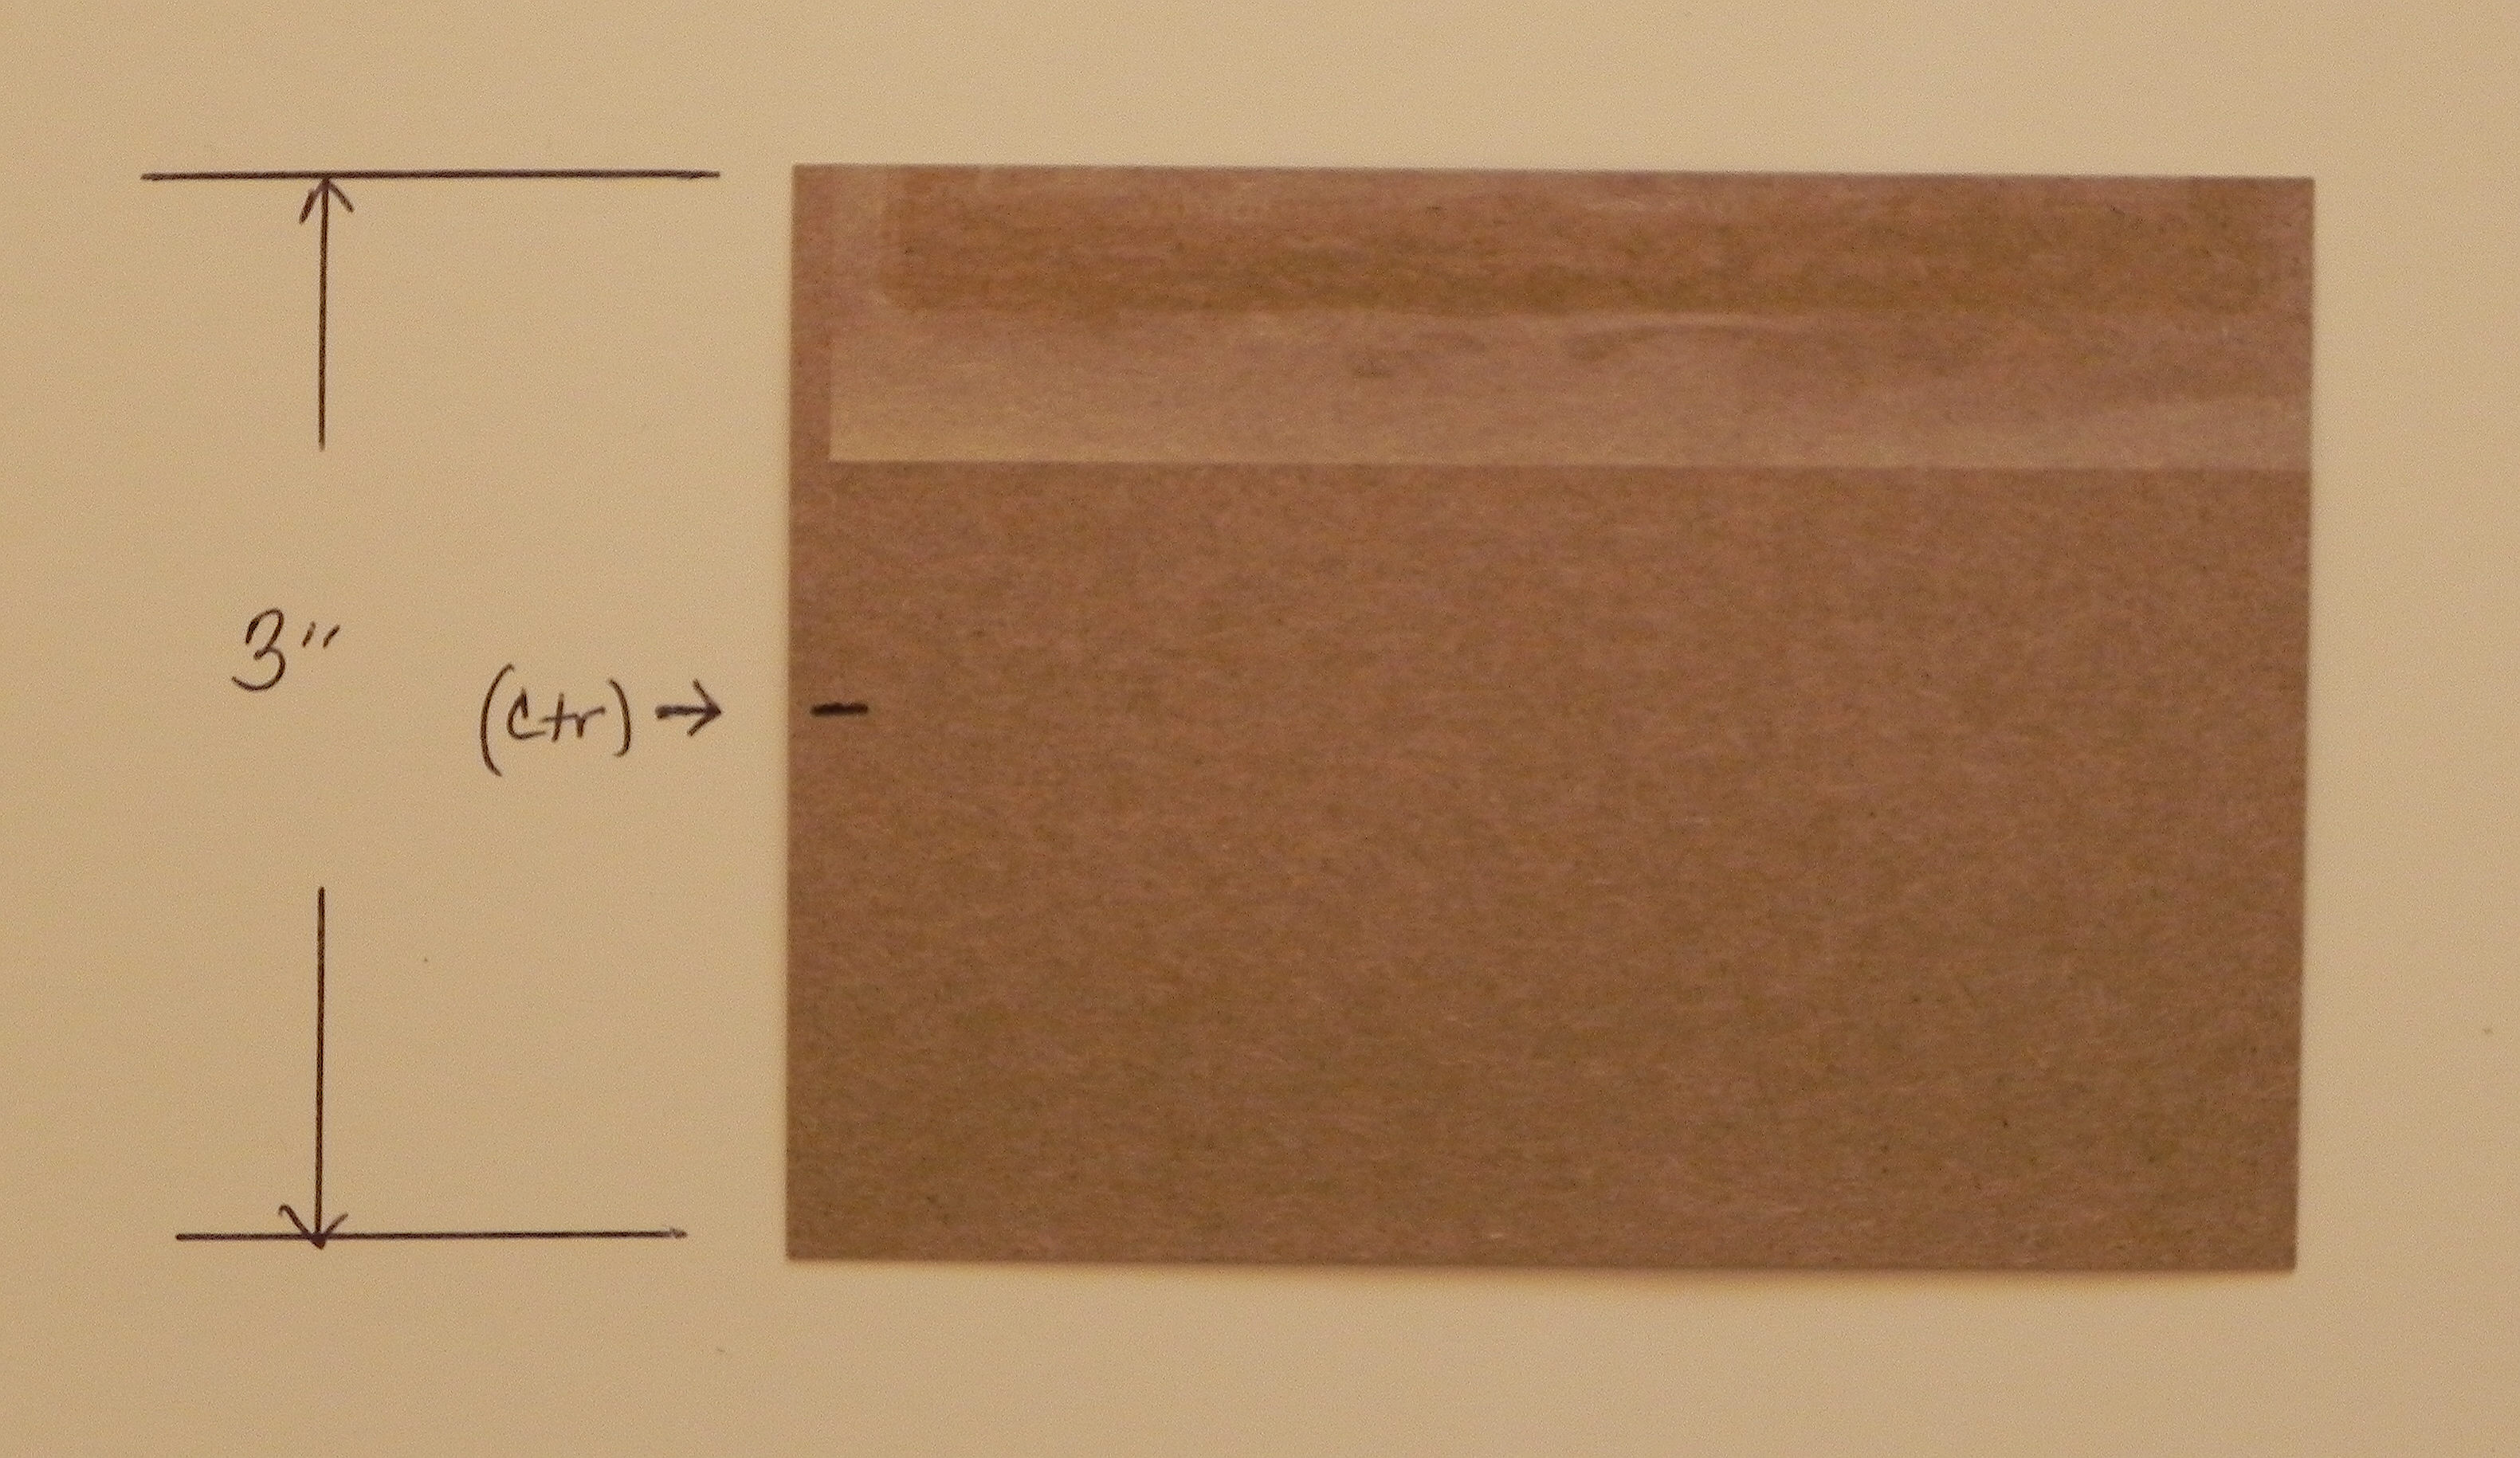
I trimmed the chipboard to 3 inches wide since I wanted to make a bow that was 3 inches wide.  (If you wanted to make a 2 inch bow, trim your chipboard to 2 inches, etc.)  It doesn’t really matter how long it is; it just needs to be big enough to hold it and work with it as you will see below.

0000001 aDSCN0831


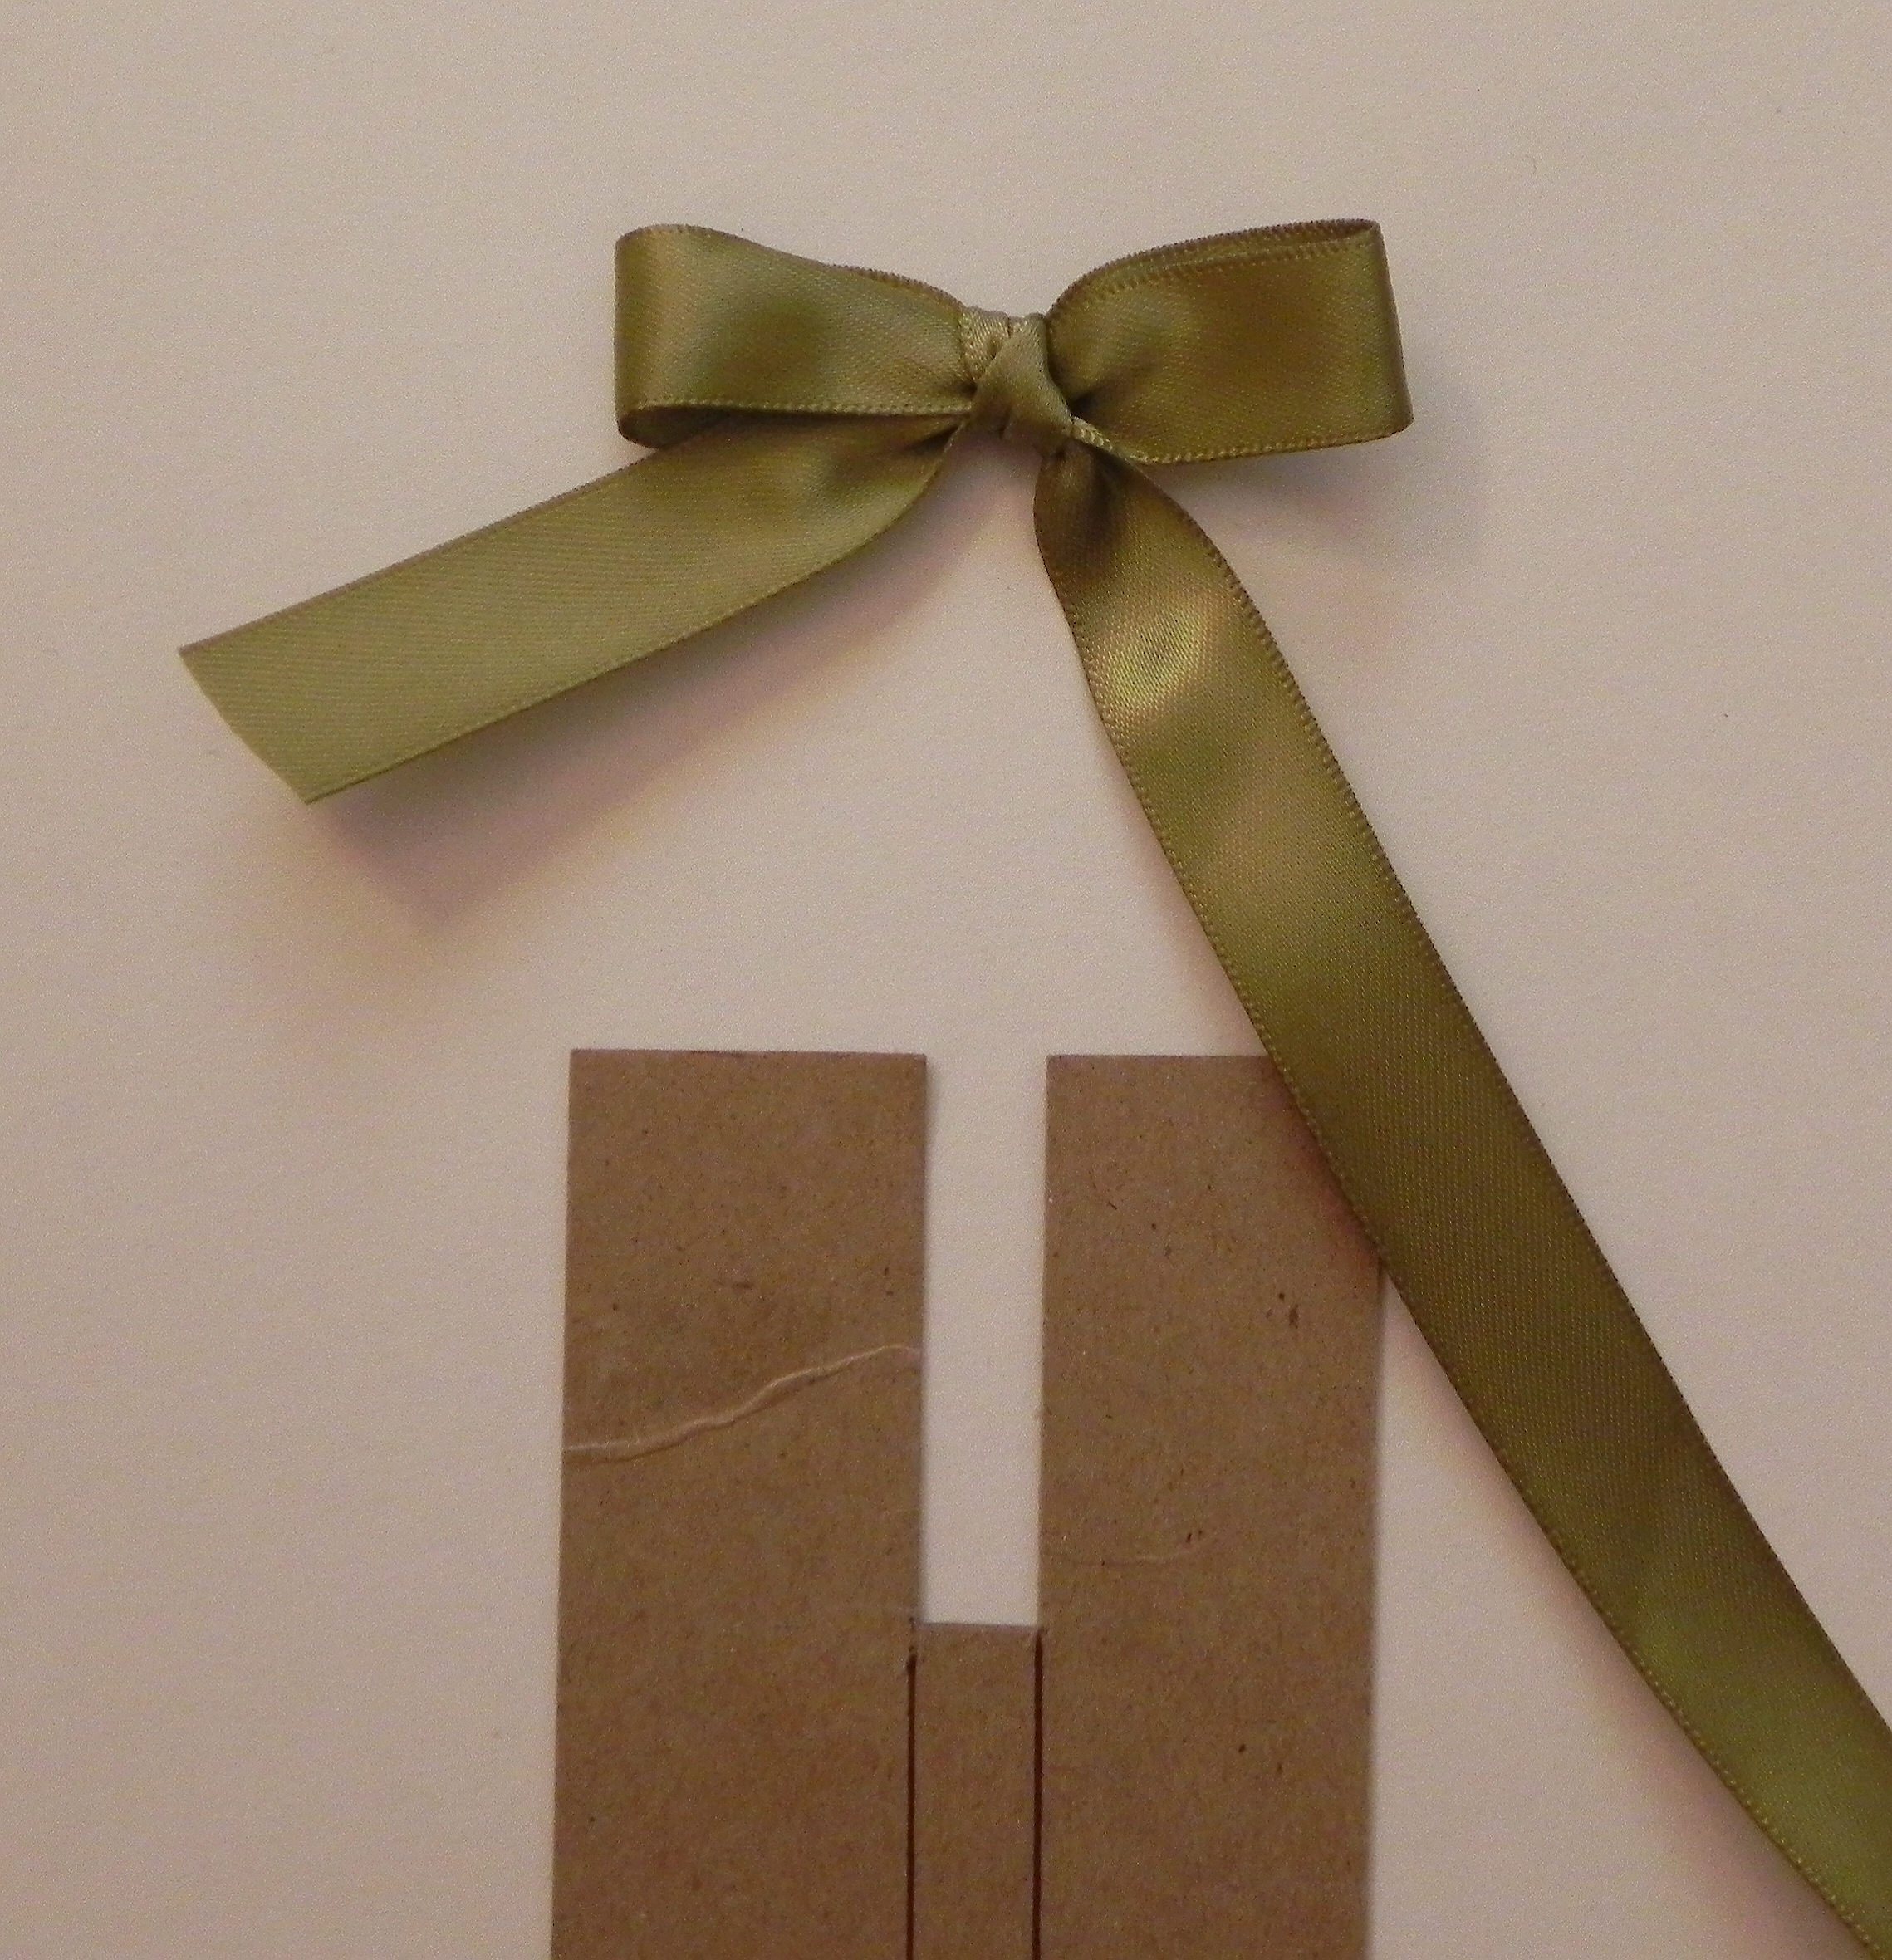
Find the center, and cut a slit about a quarter inch wide and longer than the width of your ribbon.  (I find it much easier to work with the tool when this slit is long – the longer the better!)
000001 aDSCN0832  00001 aDSCN0833

0001 aDSCN0834


That’s it!  You have a bow making tool.  You can make a number of them in different sizes to have on hand, or you can make them as you need them!
001 aDSCN0835


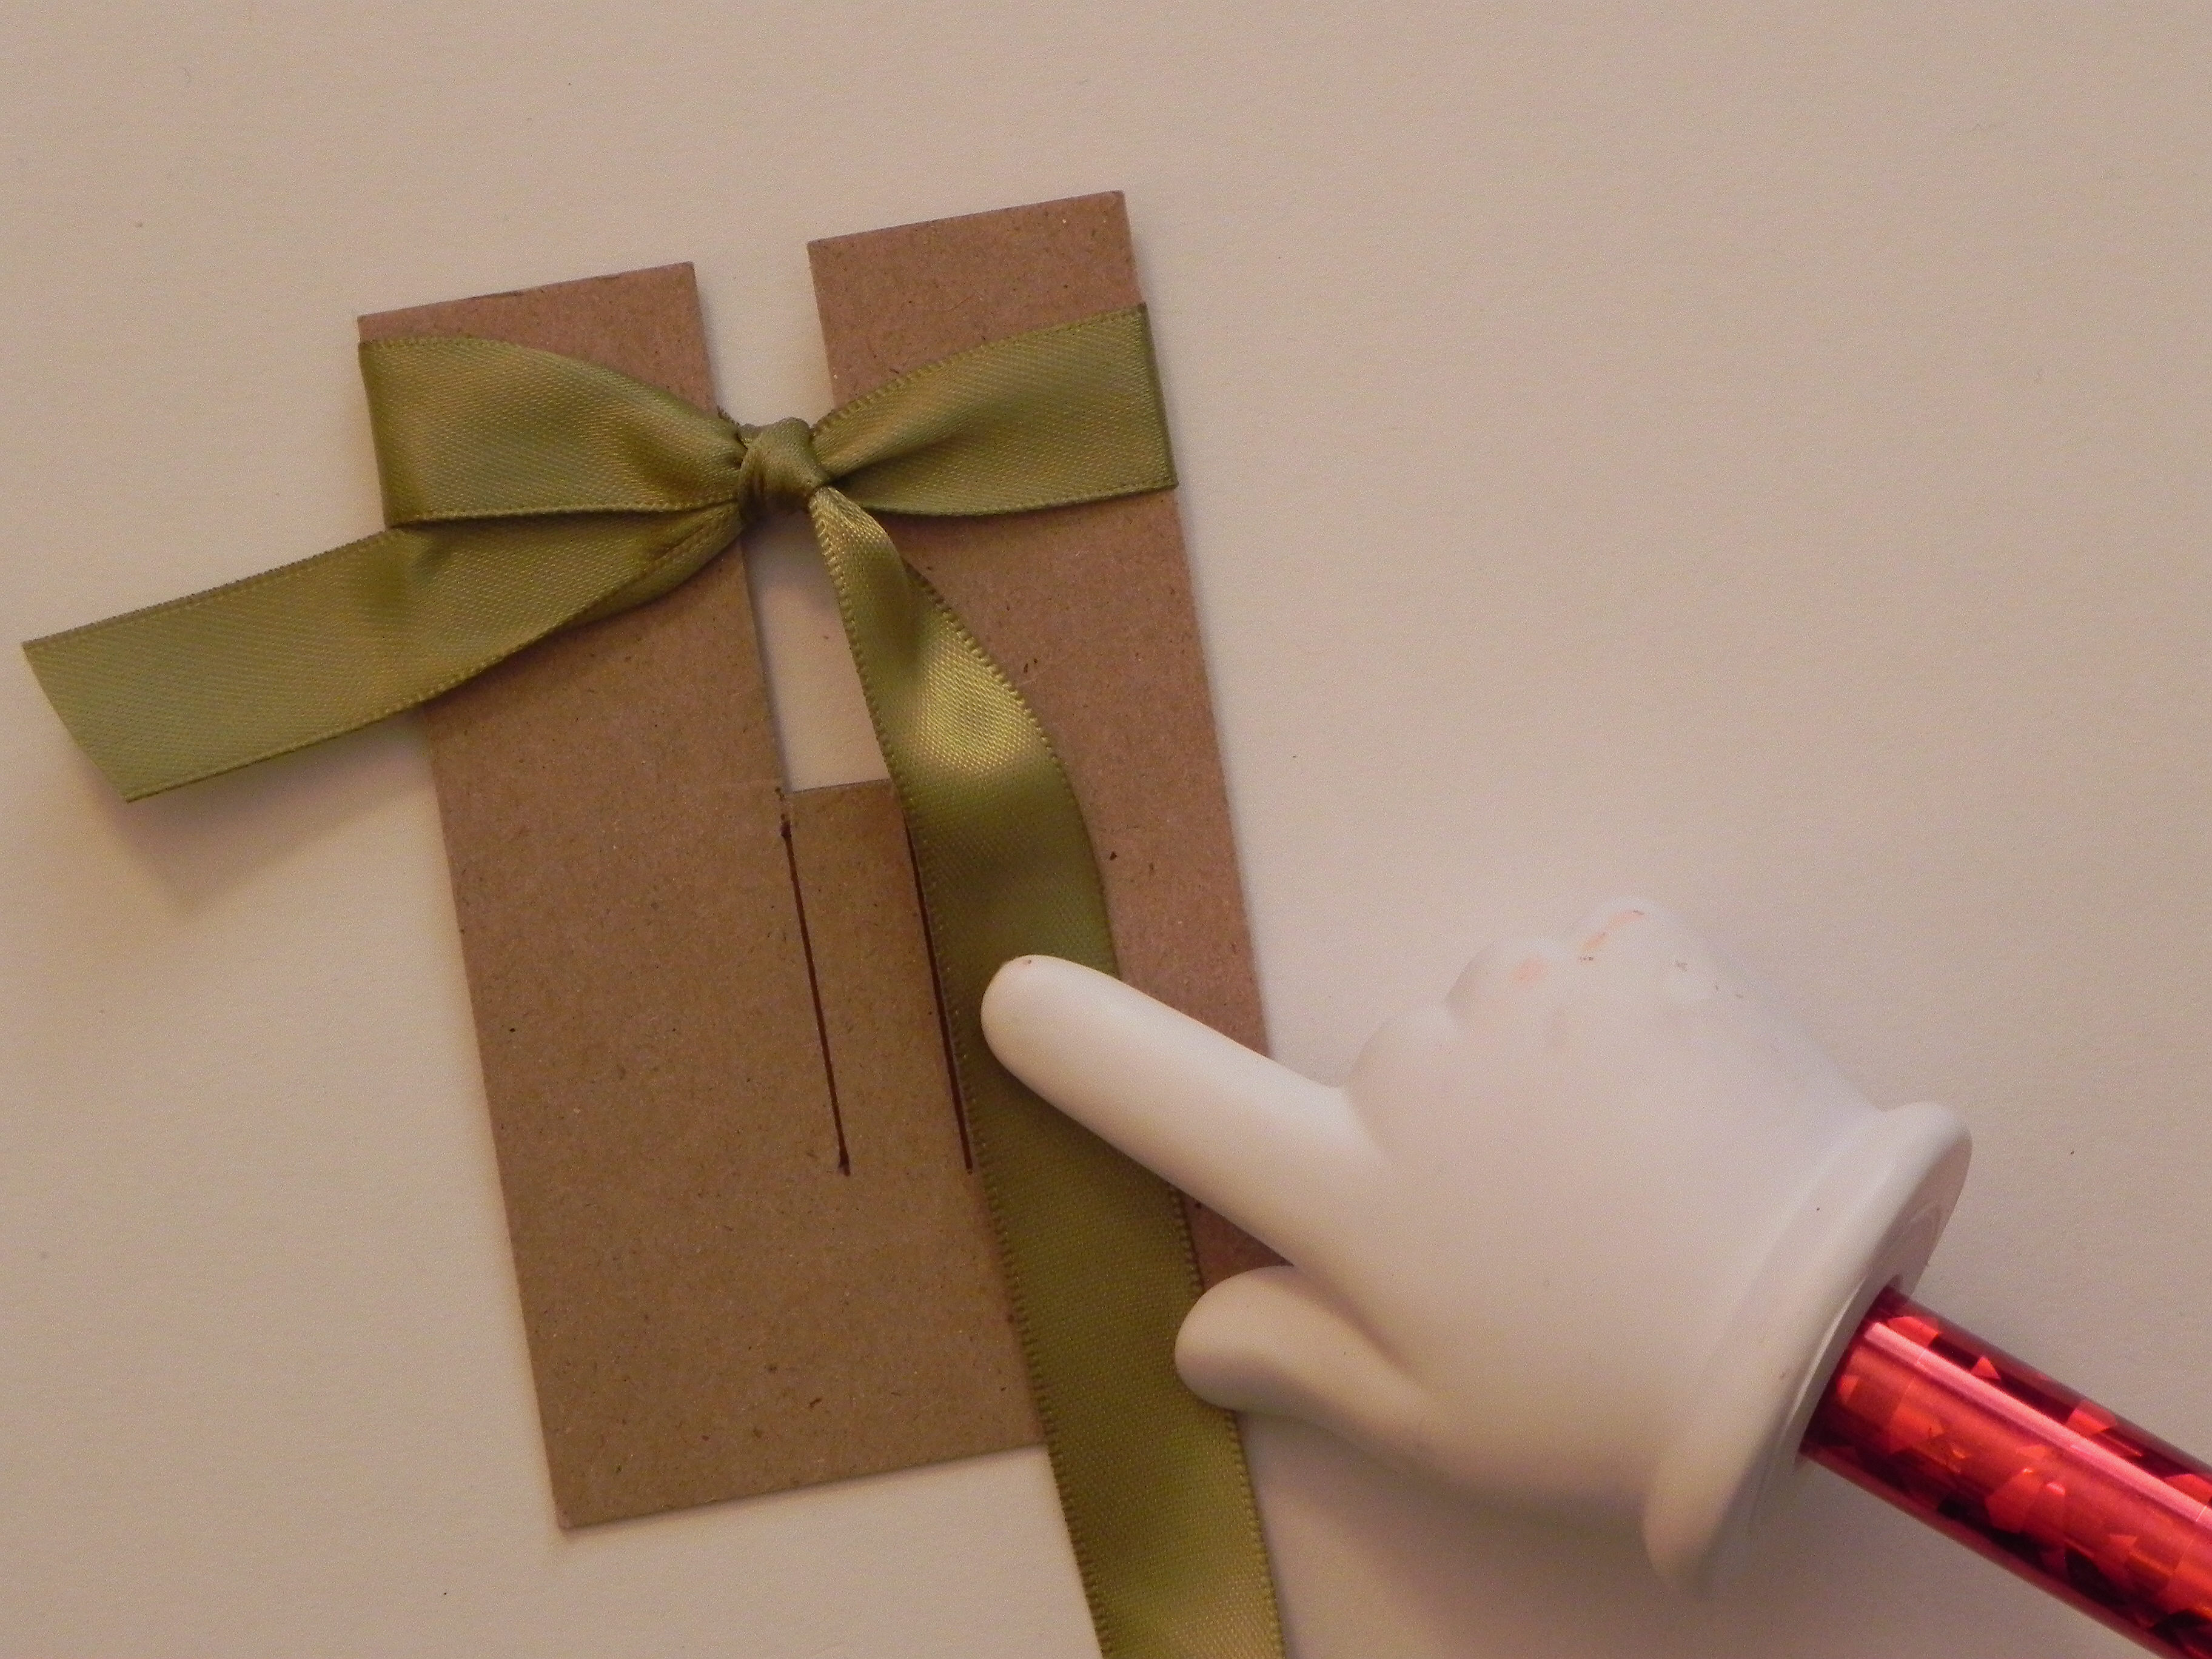
Here is your tool in action!  (Pictured below is a double looped bow.)

aDSCN0840  aDSCN0841


And here is how you use the tool to make a bow:

(For purposes of this tutorial, I made my bow with the tool and ribbon on the table so you could see each step without my hands in the way.  It is much easier to hold the tool and ribbon while you work. I’m right handed, so I start with my ribbon on the left and hold the ribbon in place against the tool with my left hand.  My right hand does all the moving and looping.)

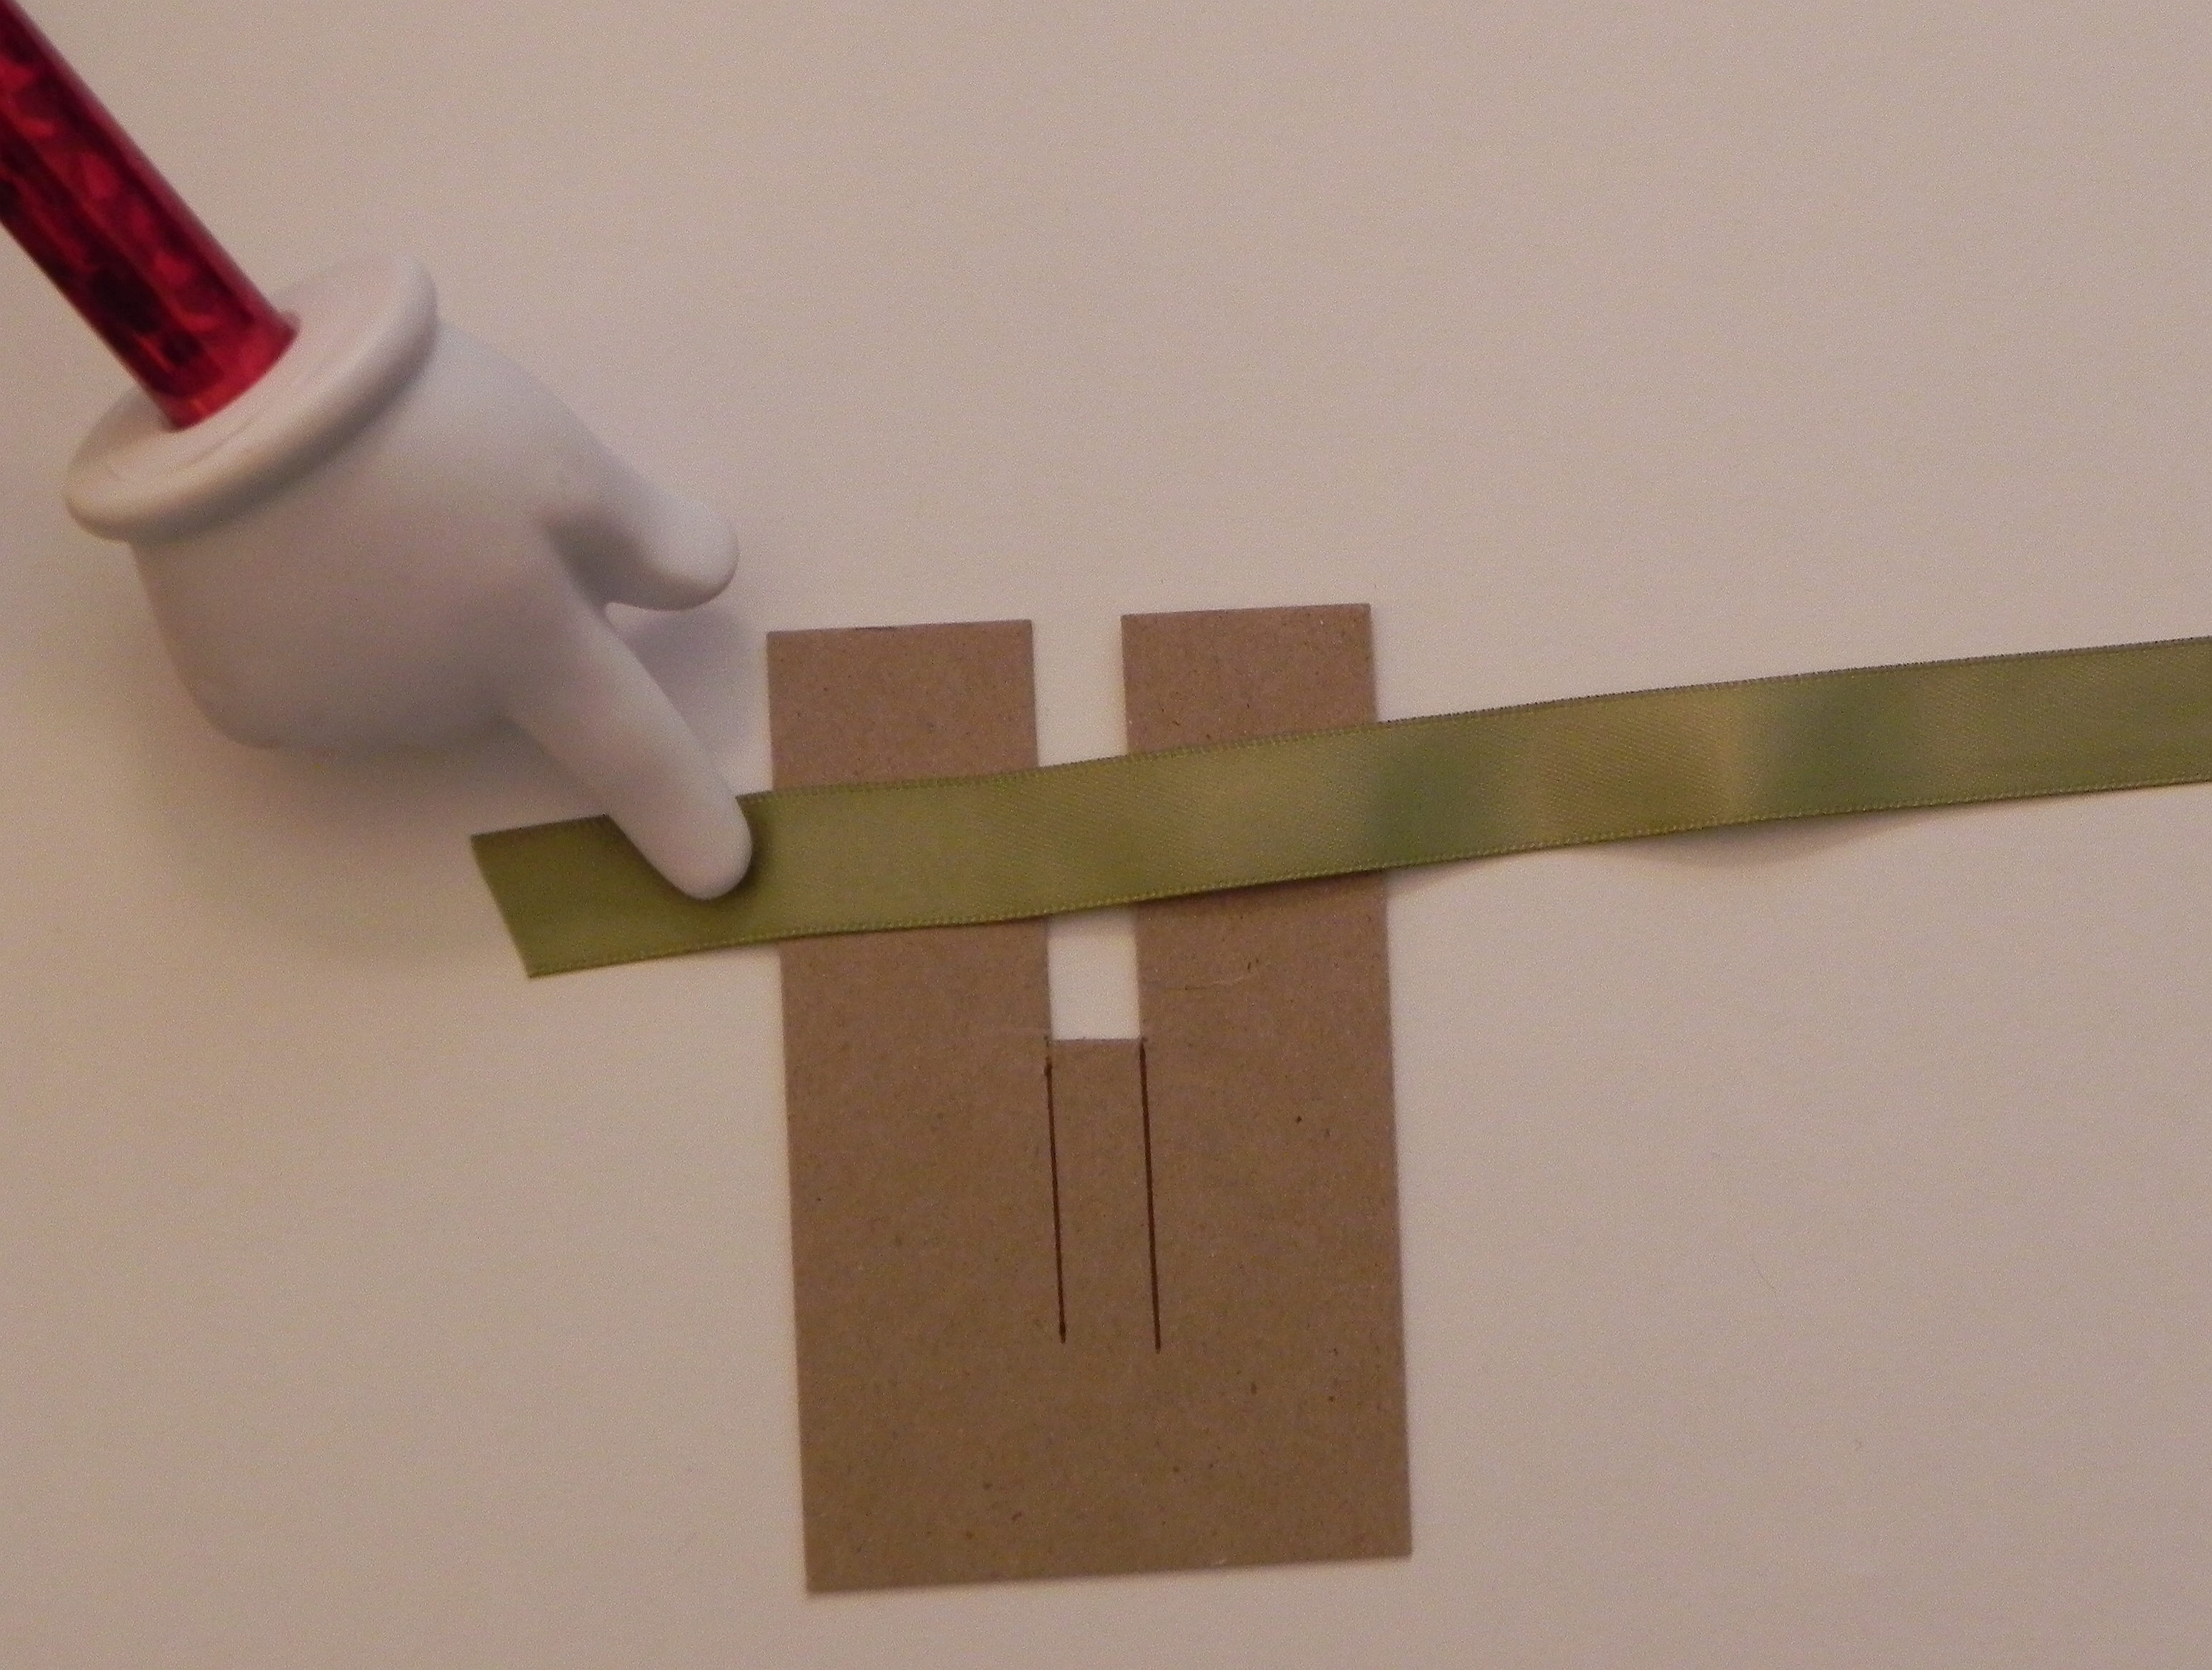
1.  Start with one end of the ribbon, and place it on the left side of the tool.  This end will not really move at all while you create your bow.
010 DSCN8047


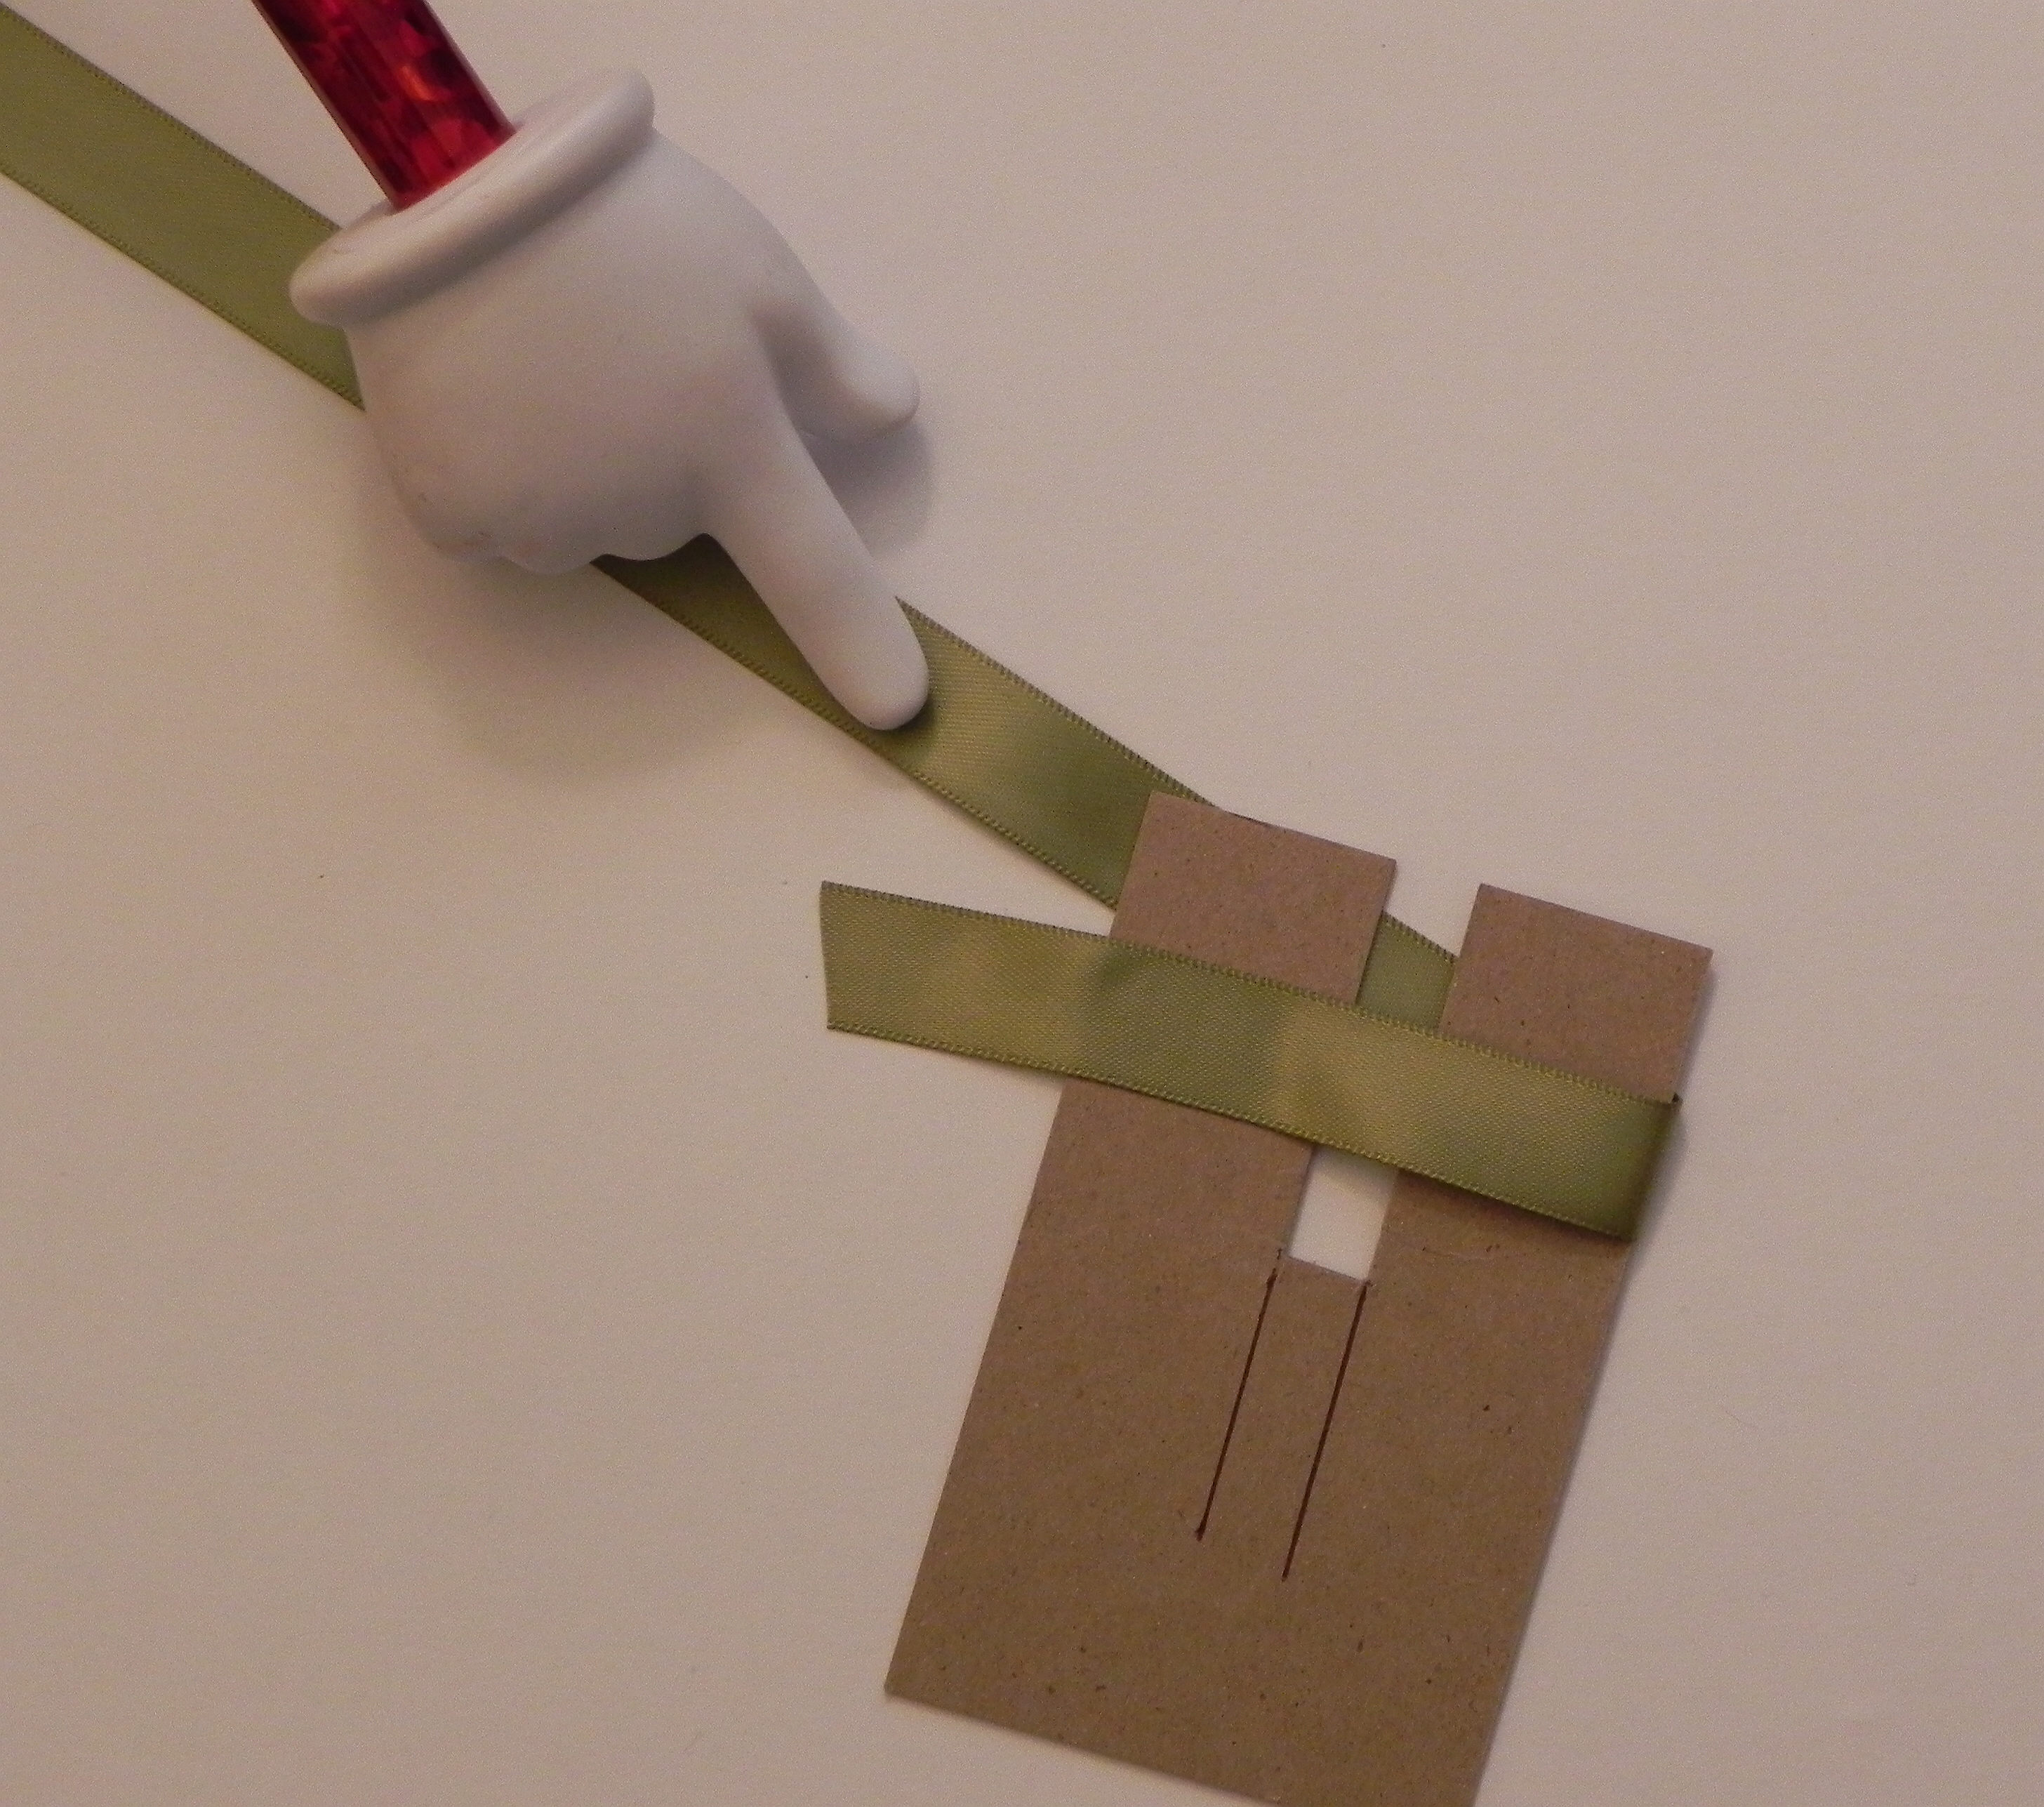
2.  Working with the other end of the ribbon from this point forward, wrap it around the tool over the front and to the right and bringing it around the back and to the left.
020 DSCN8049


3.   Then bring it back to the front (toward the right side).

030 DSCN8052

(To make the double bow pictured above, wrap ribbon around a second time – ending up in the same place pictured above – before moving on to next step.)


4.  See the opening at the bottom of the slit?

040 DSCN8054


5.  Take the end of the side you’ve been wrapping, and insert it in the slit, below your wrapped ribbon.

030 DSCN8052  050 DSCN8055


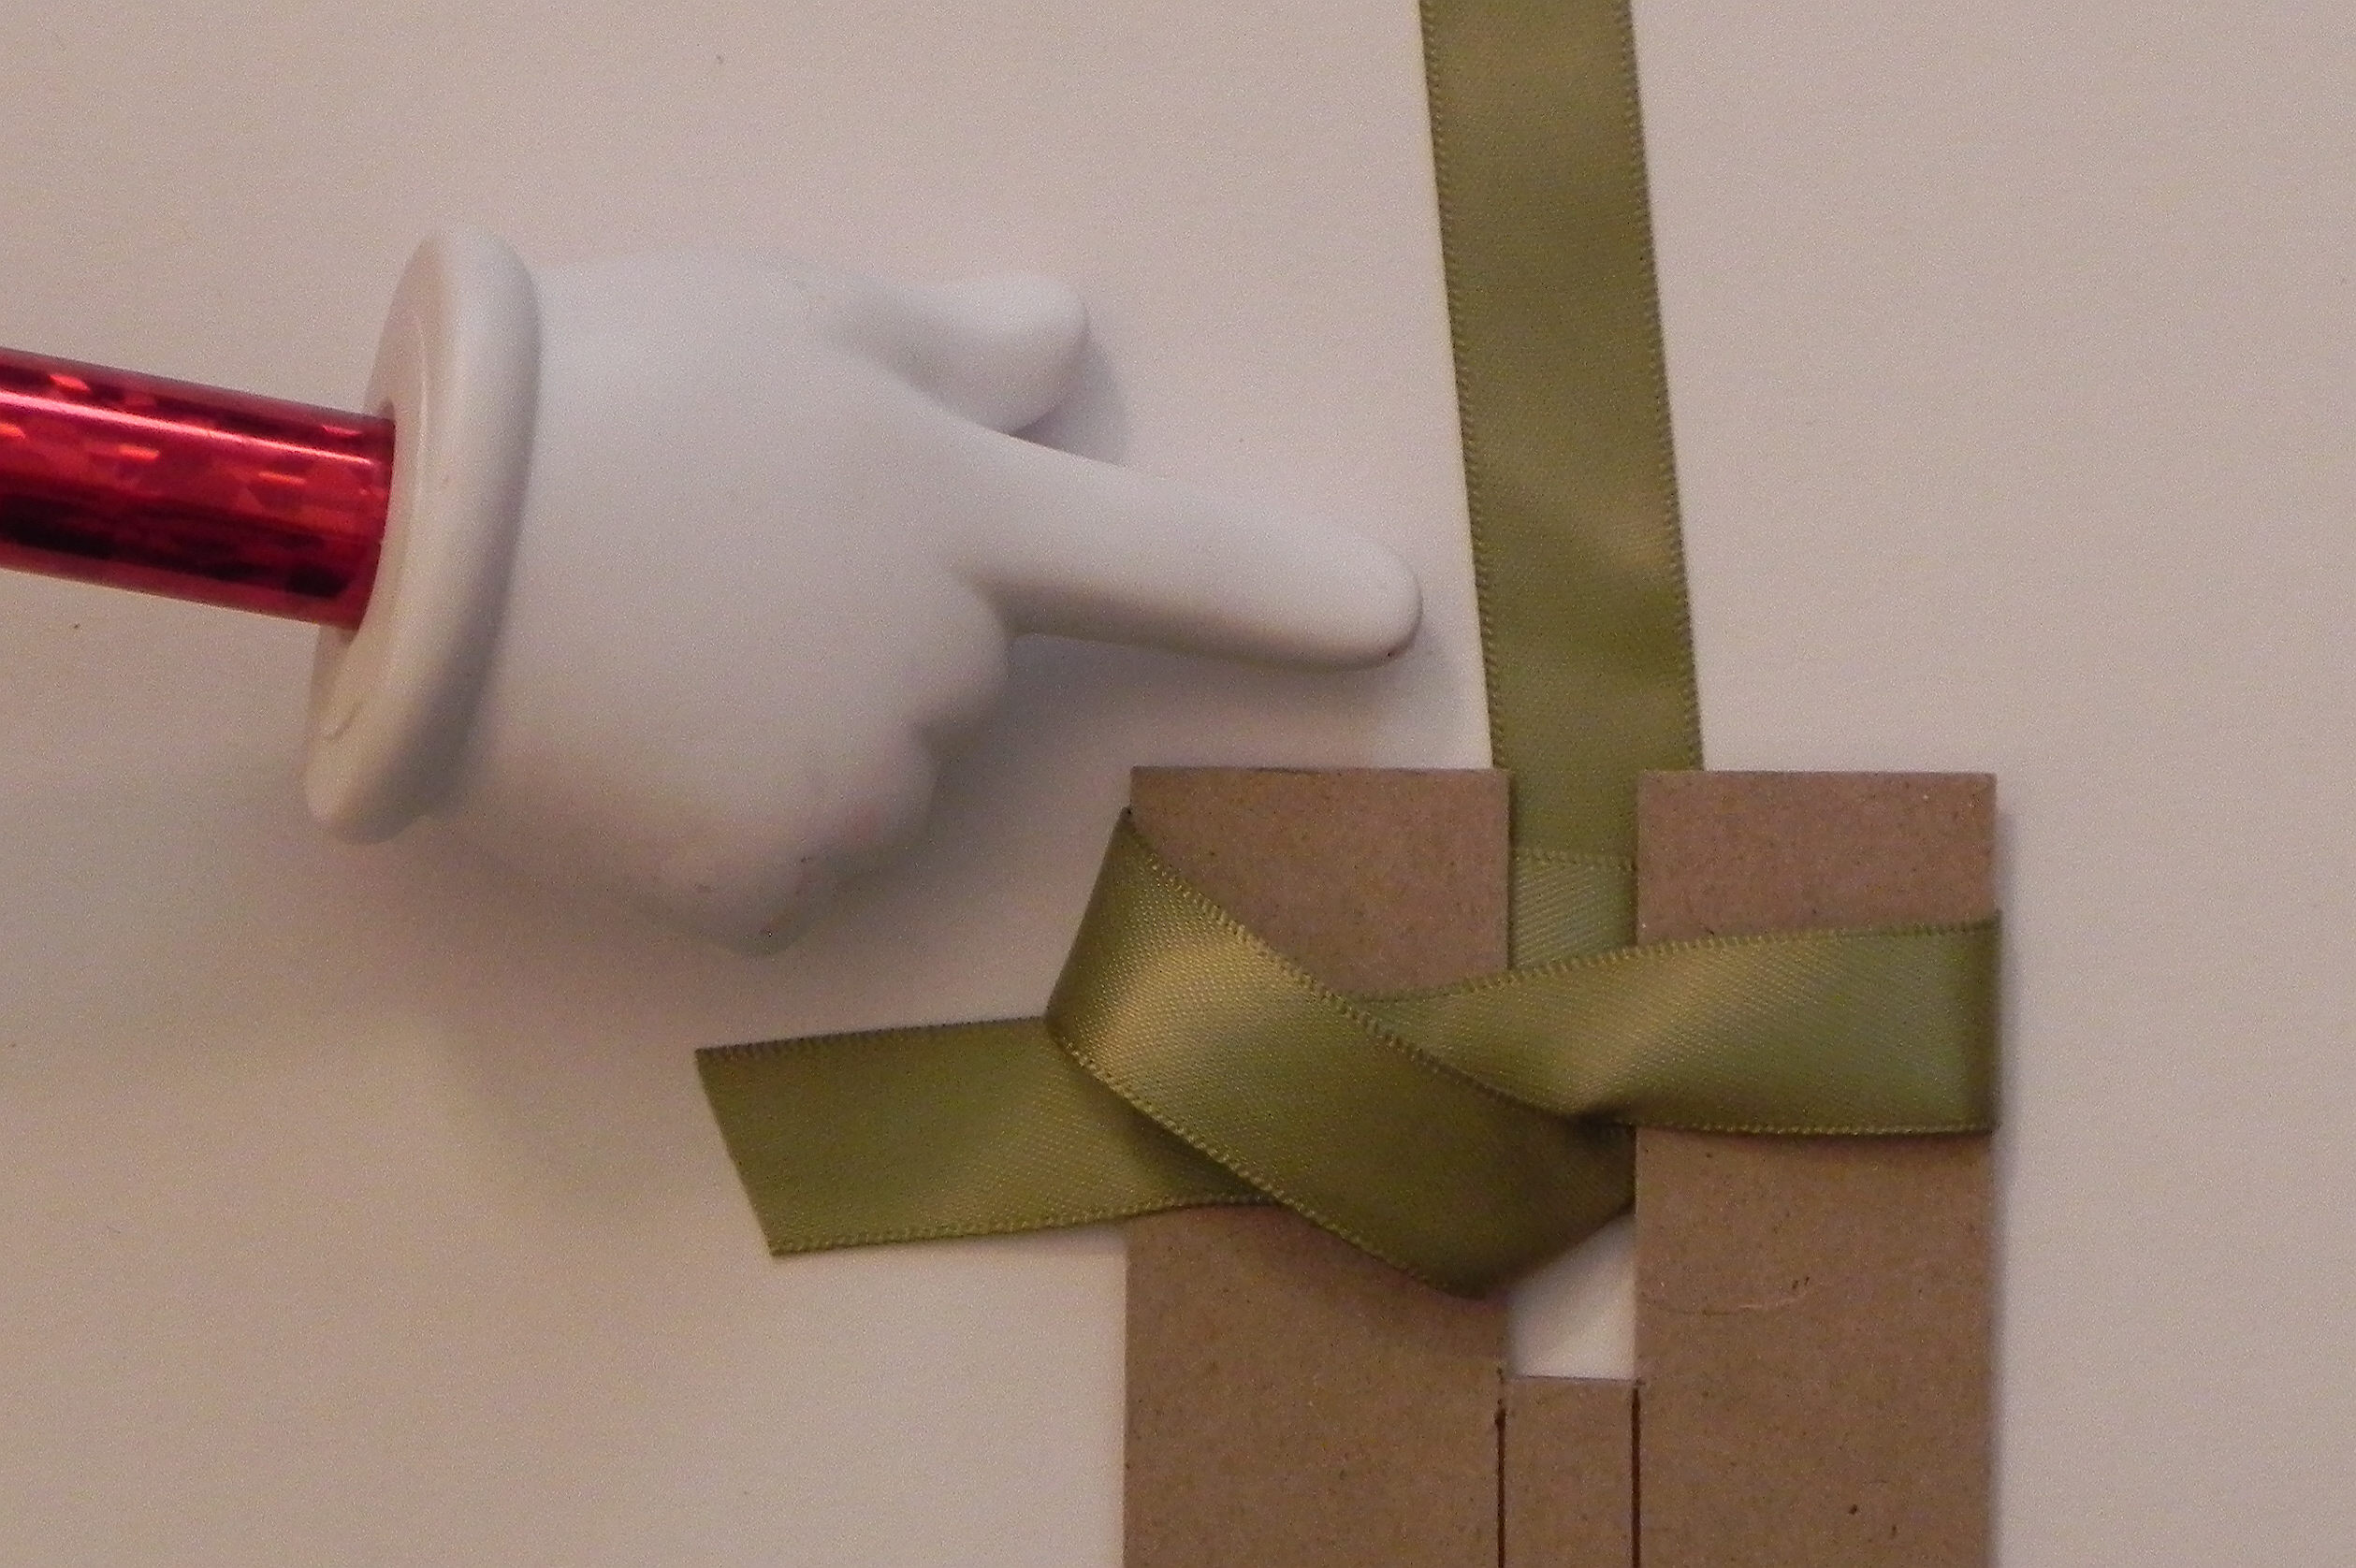
6.  With the ribbon still behind the tool, bring it straight up so it lines up with the slit.
060 DSCN8058


7.  See this loop here?

070 DSCN8062


8.   Hold this loop down on left.

075 DSCN8065


9.  (Here’s where it gets a little tricky to explain!!)  Bring the ribbon forward, and feed the end under the loop you are holding (from bottom/left side to top/right side) and staying to the right of the top loop by the slit.
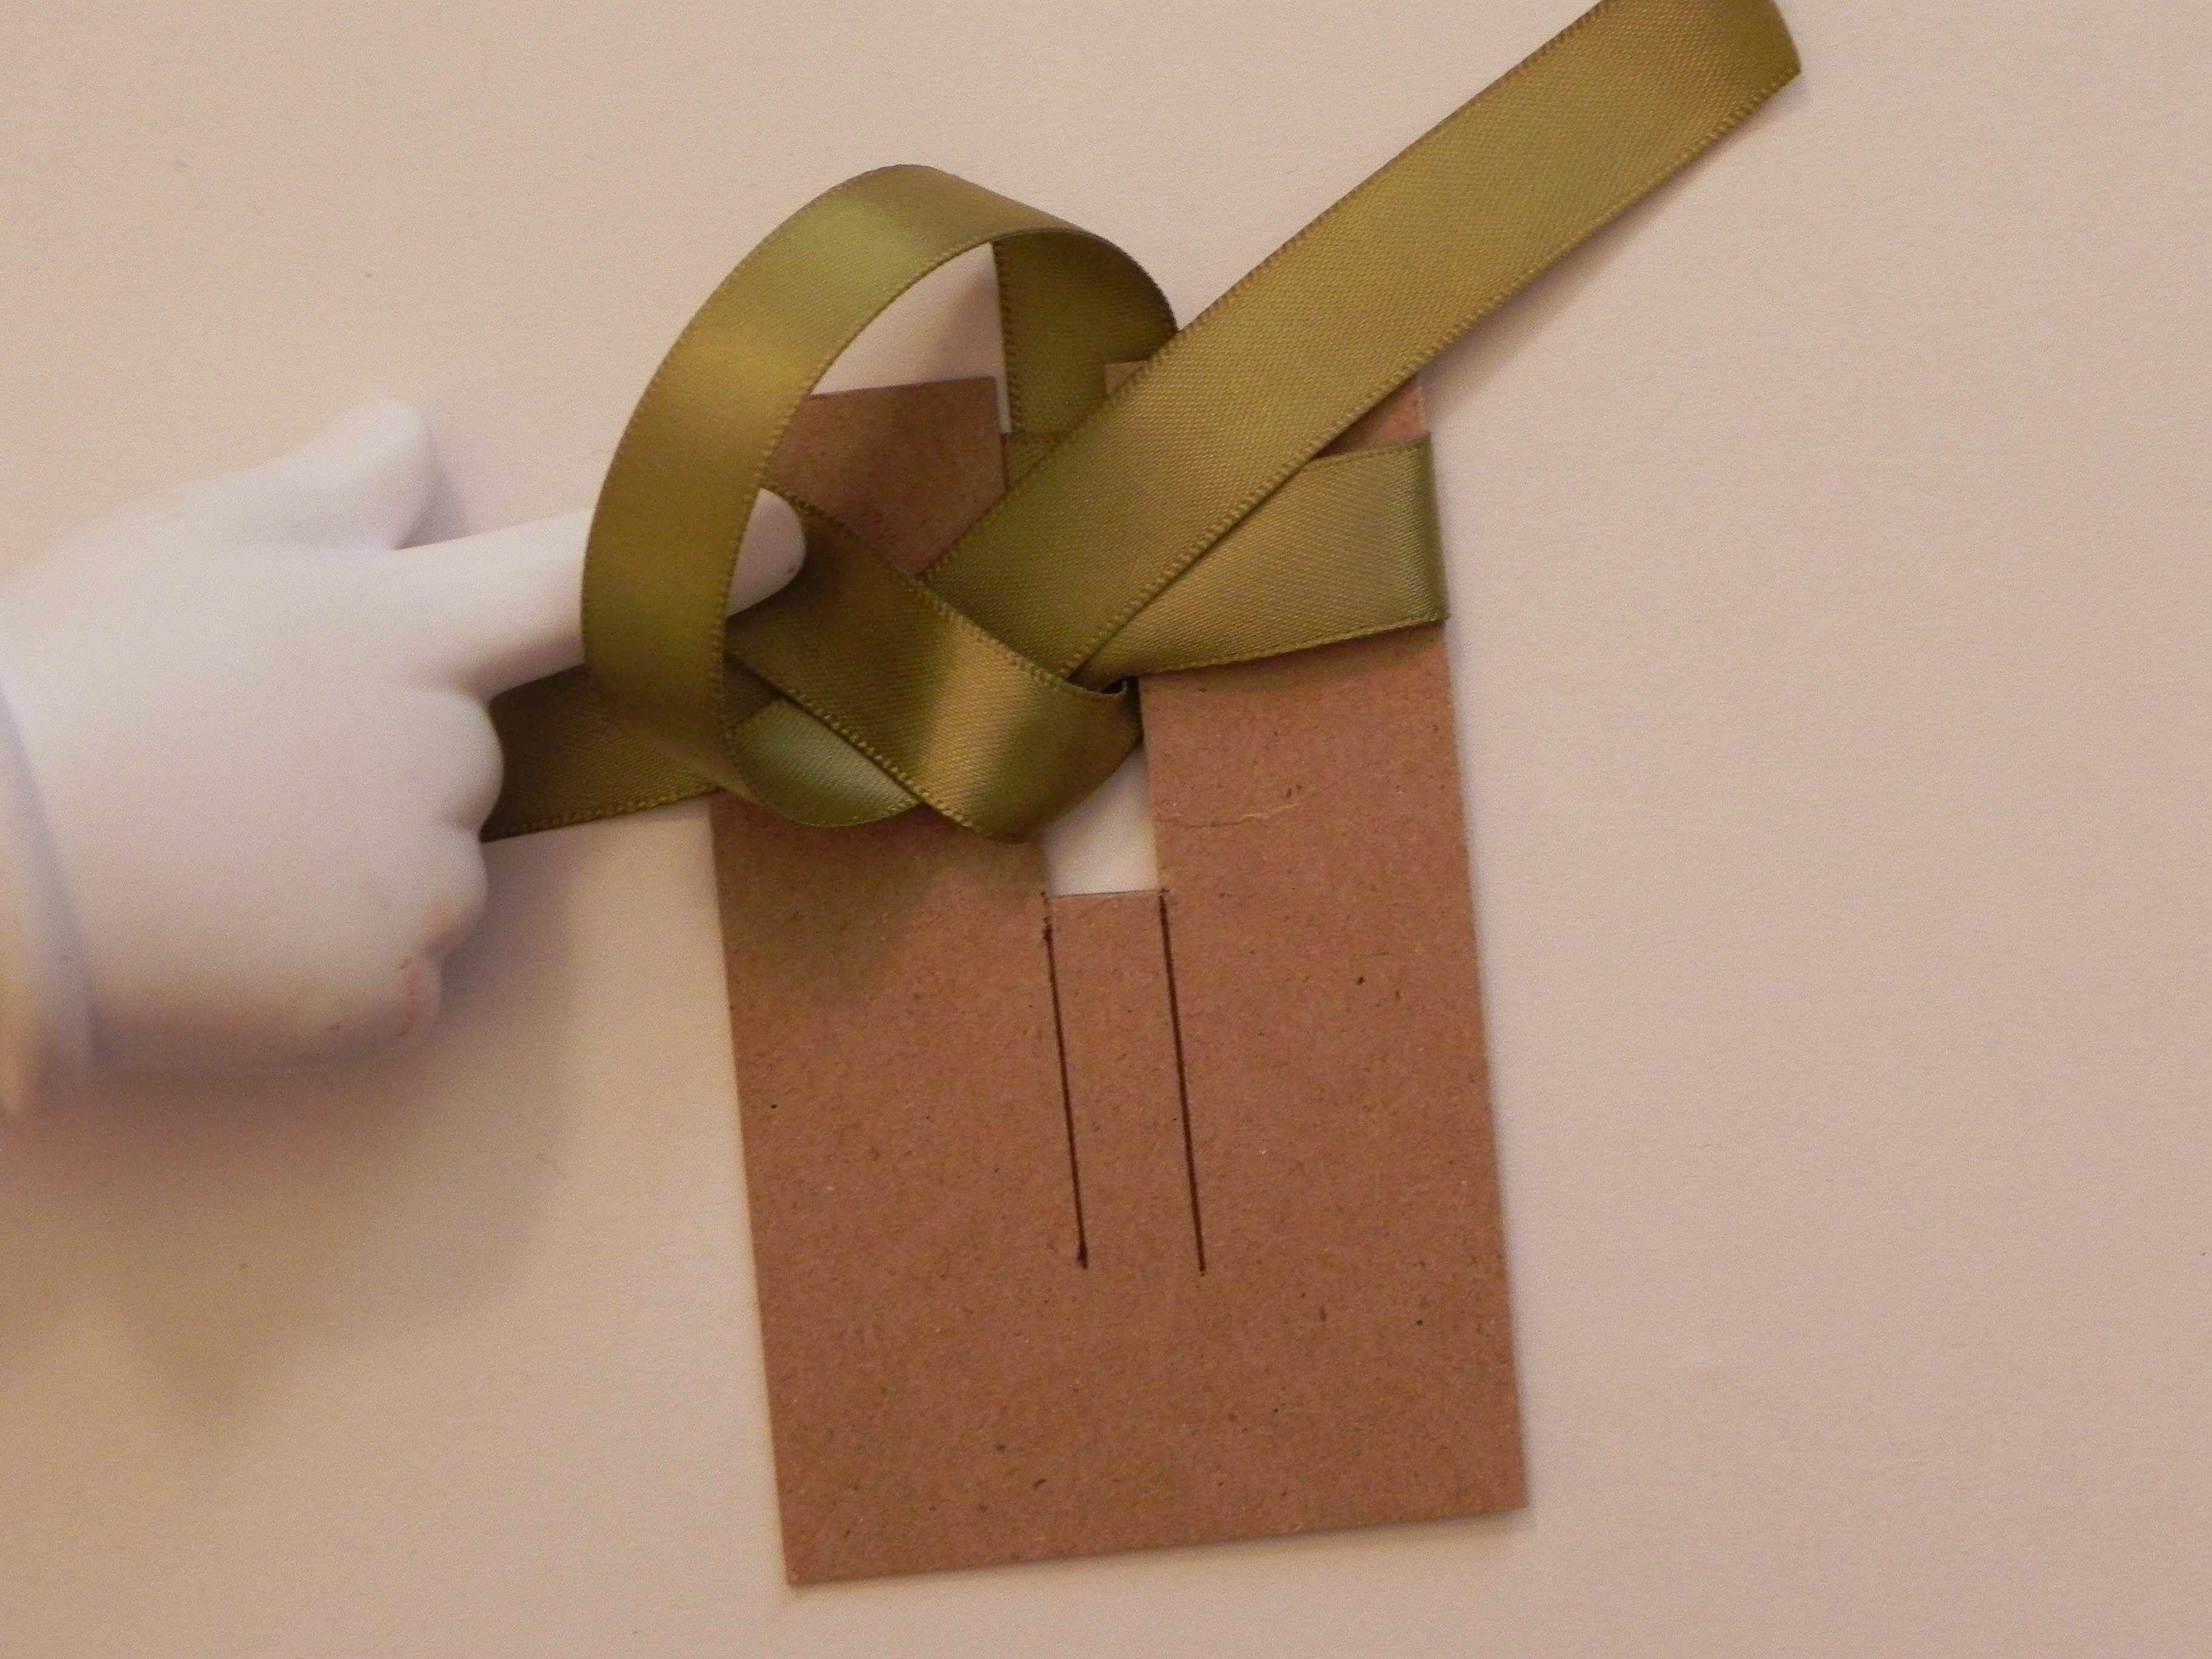
 080 DSCN8068

 Important:  Make sure you pull through in this direction:
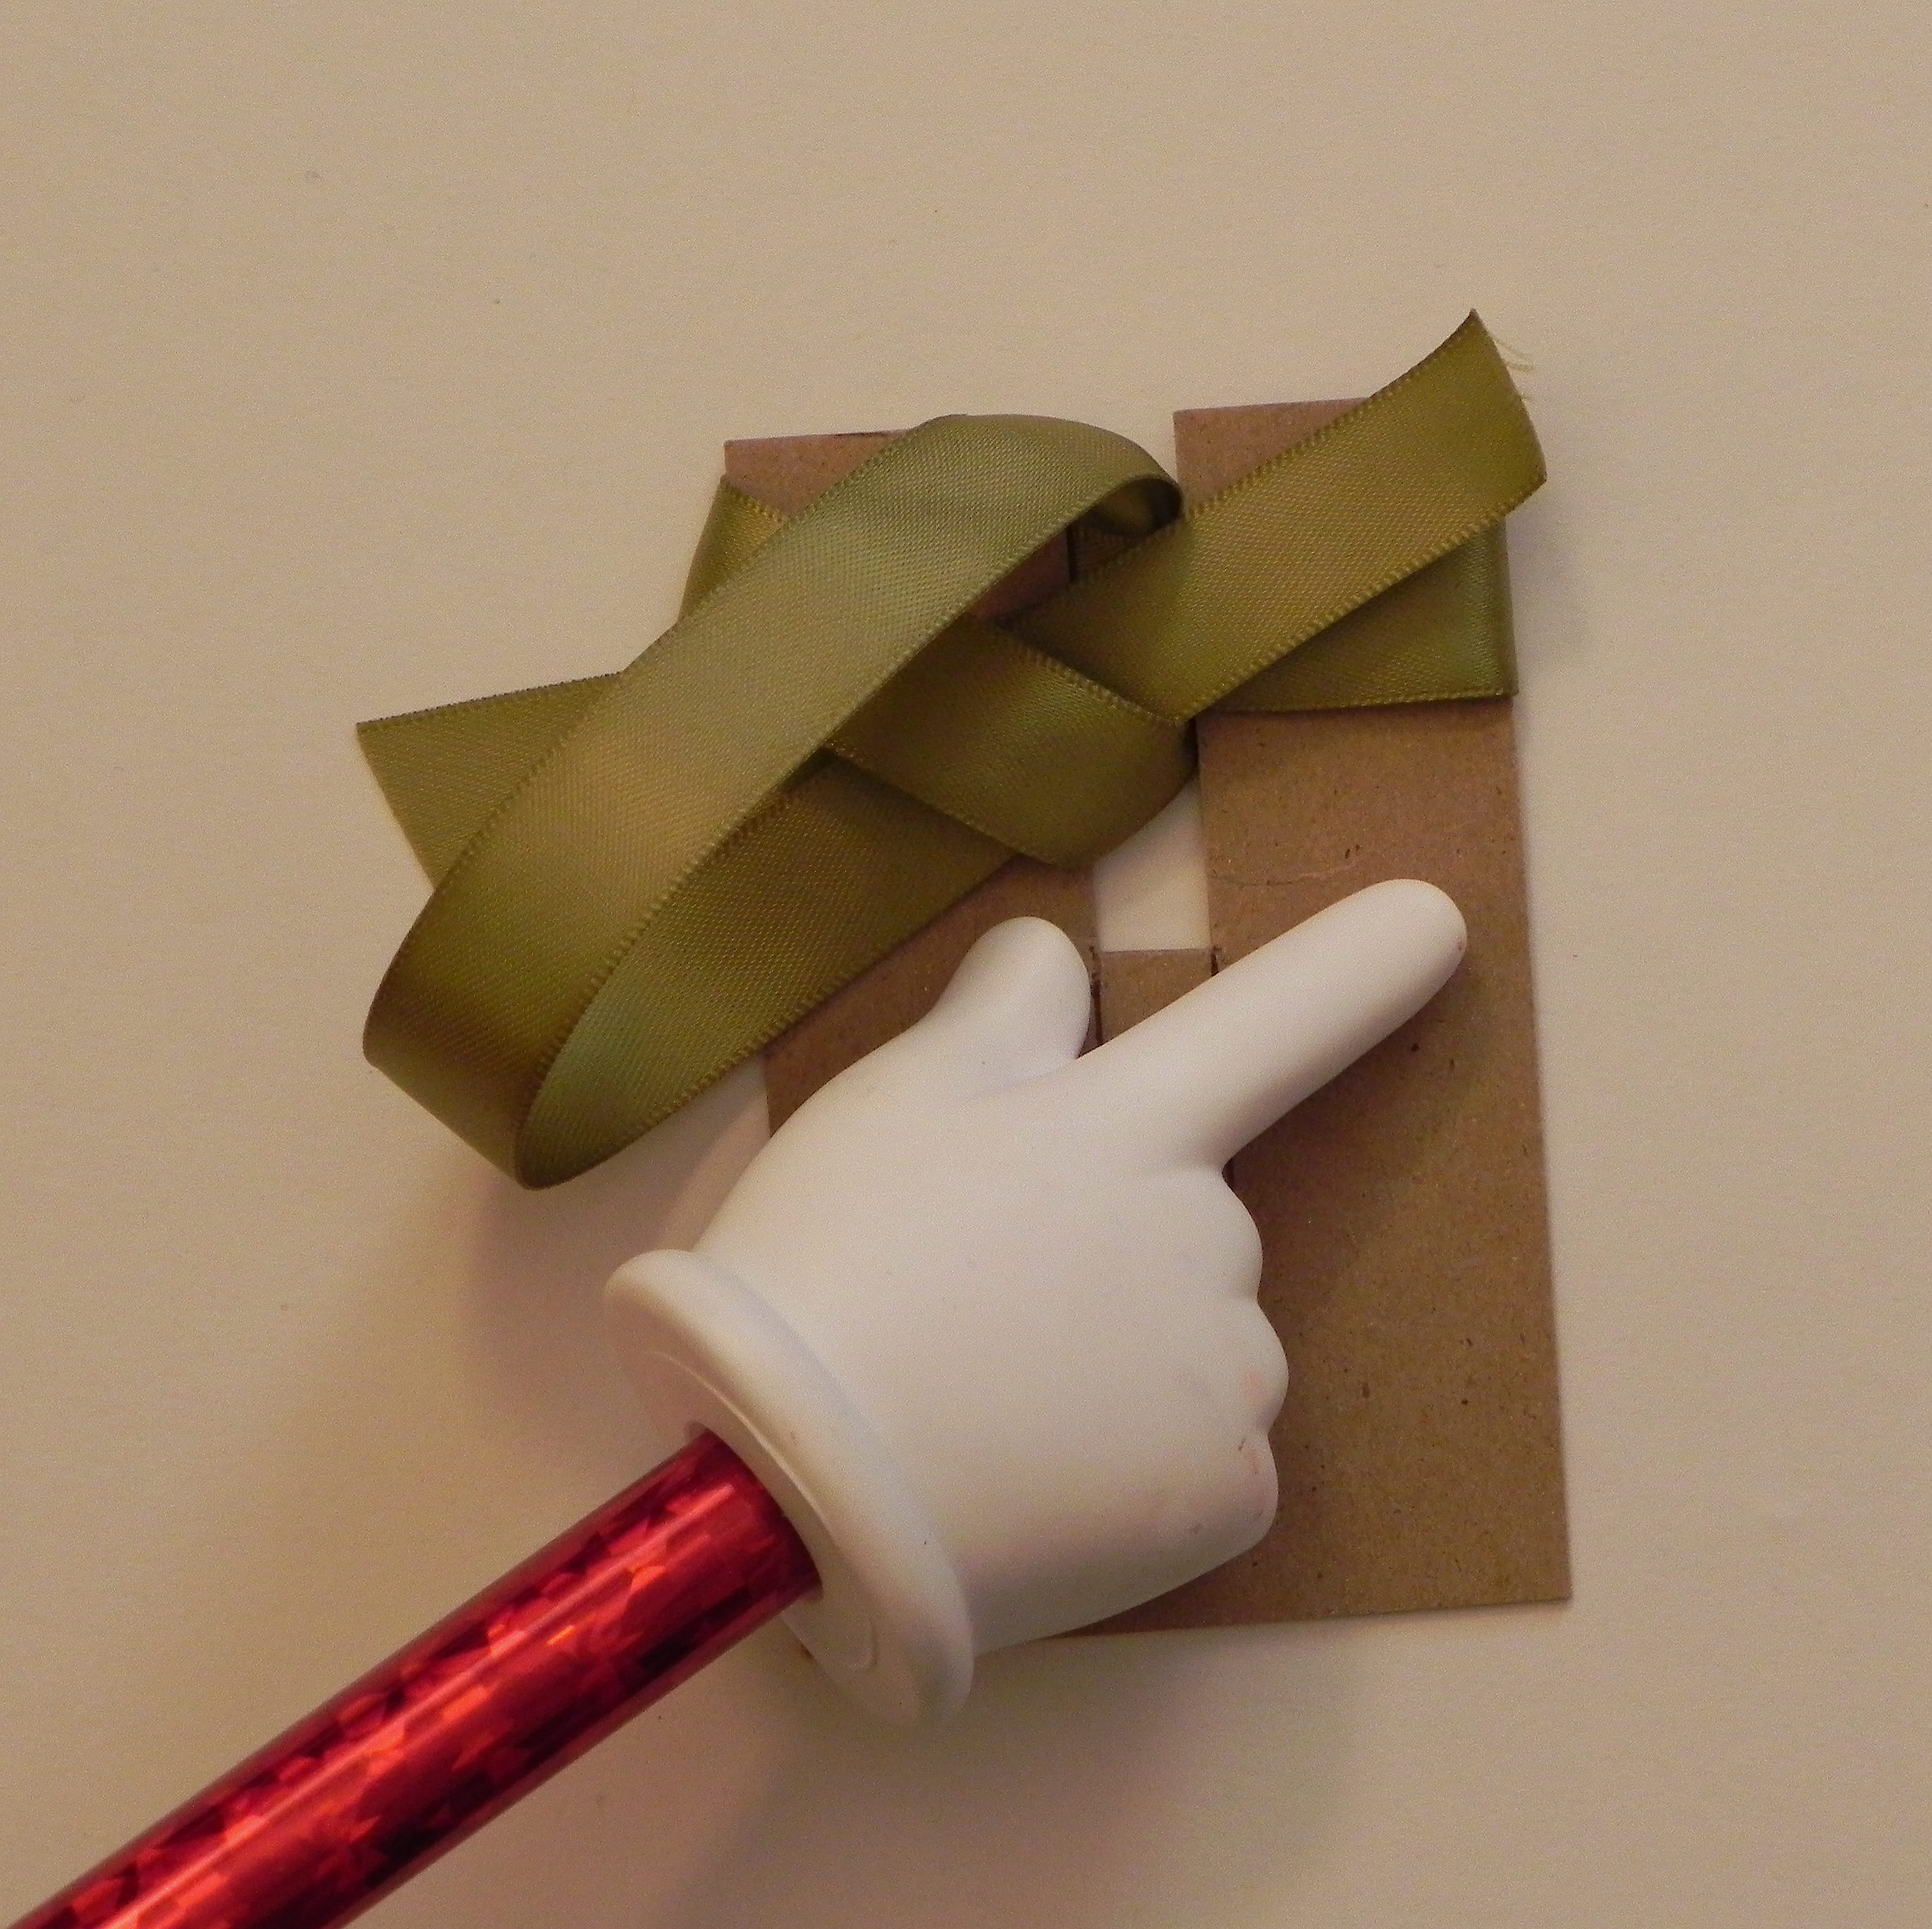
  090 DSCN8073


10.  Make sure the ribbon stays in the slit from this point forward.
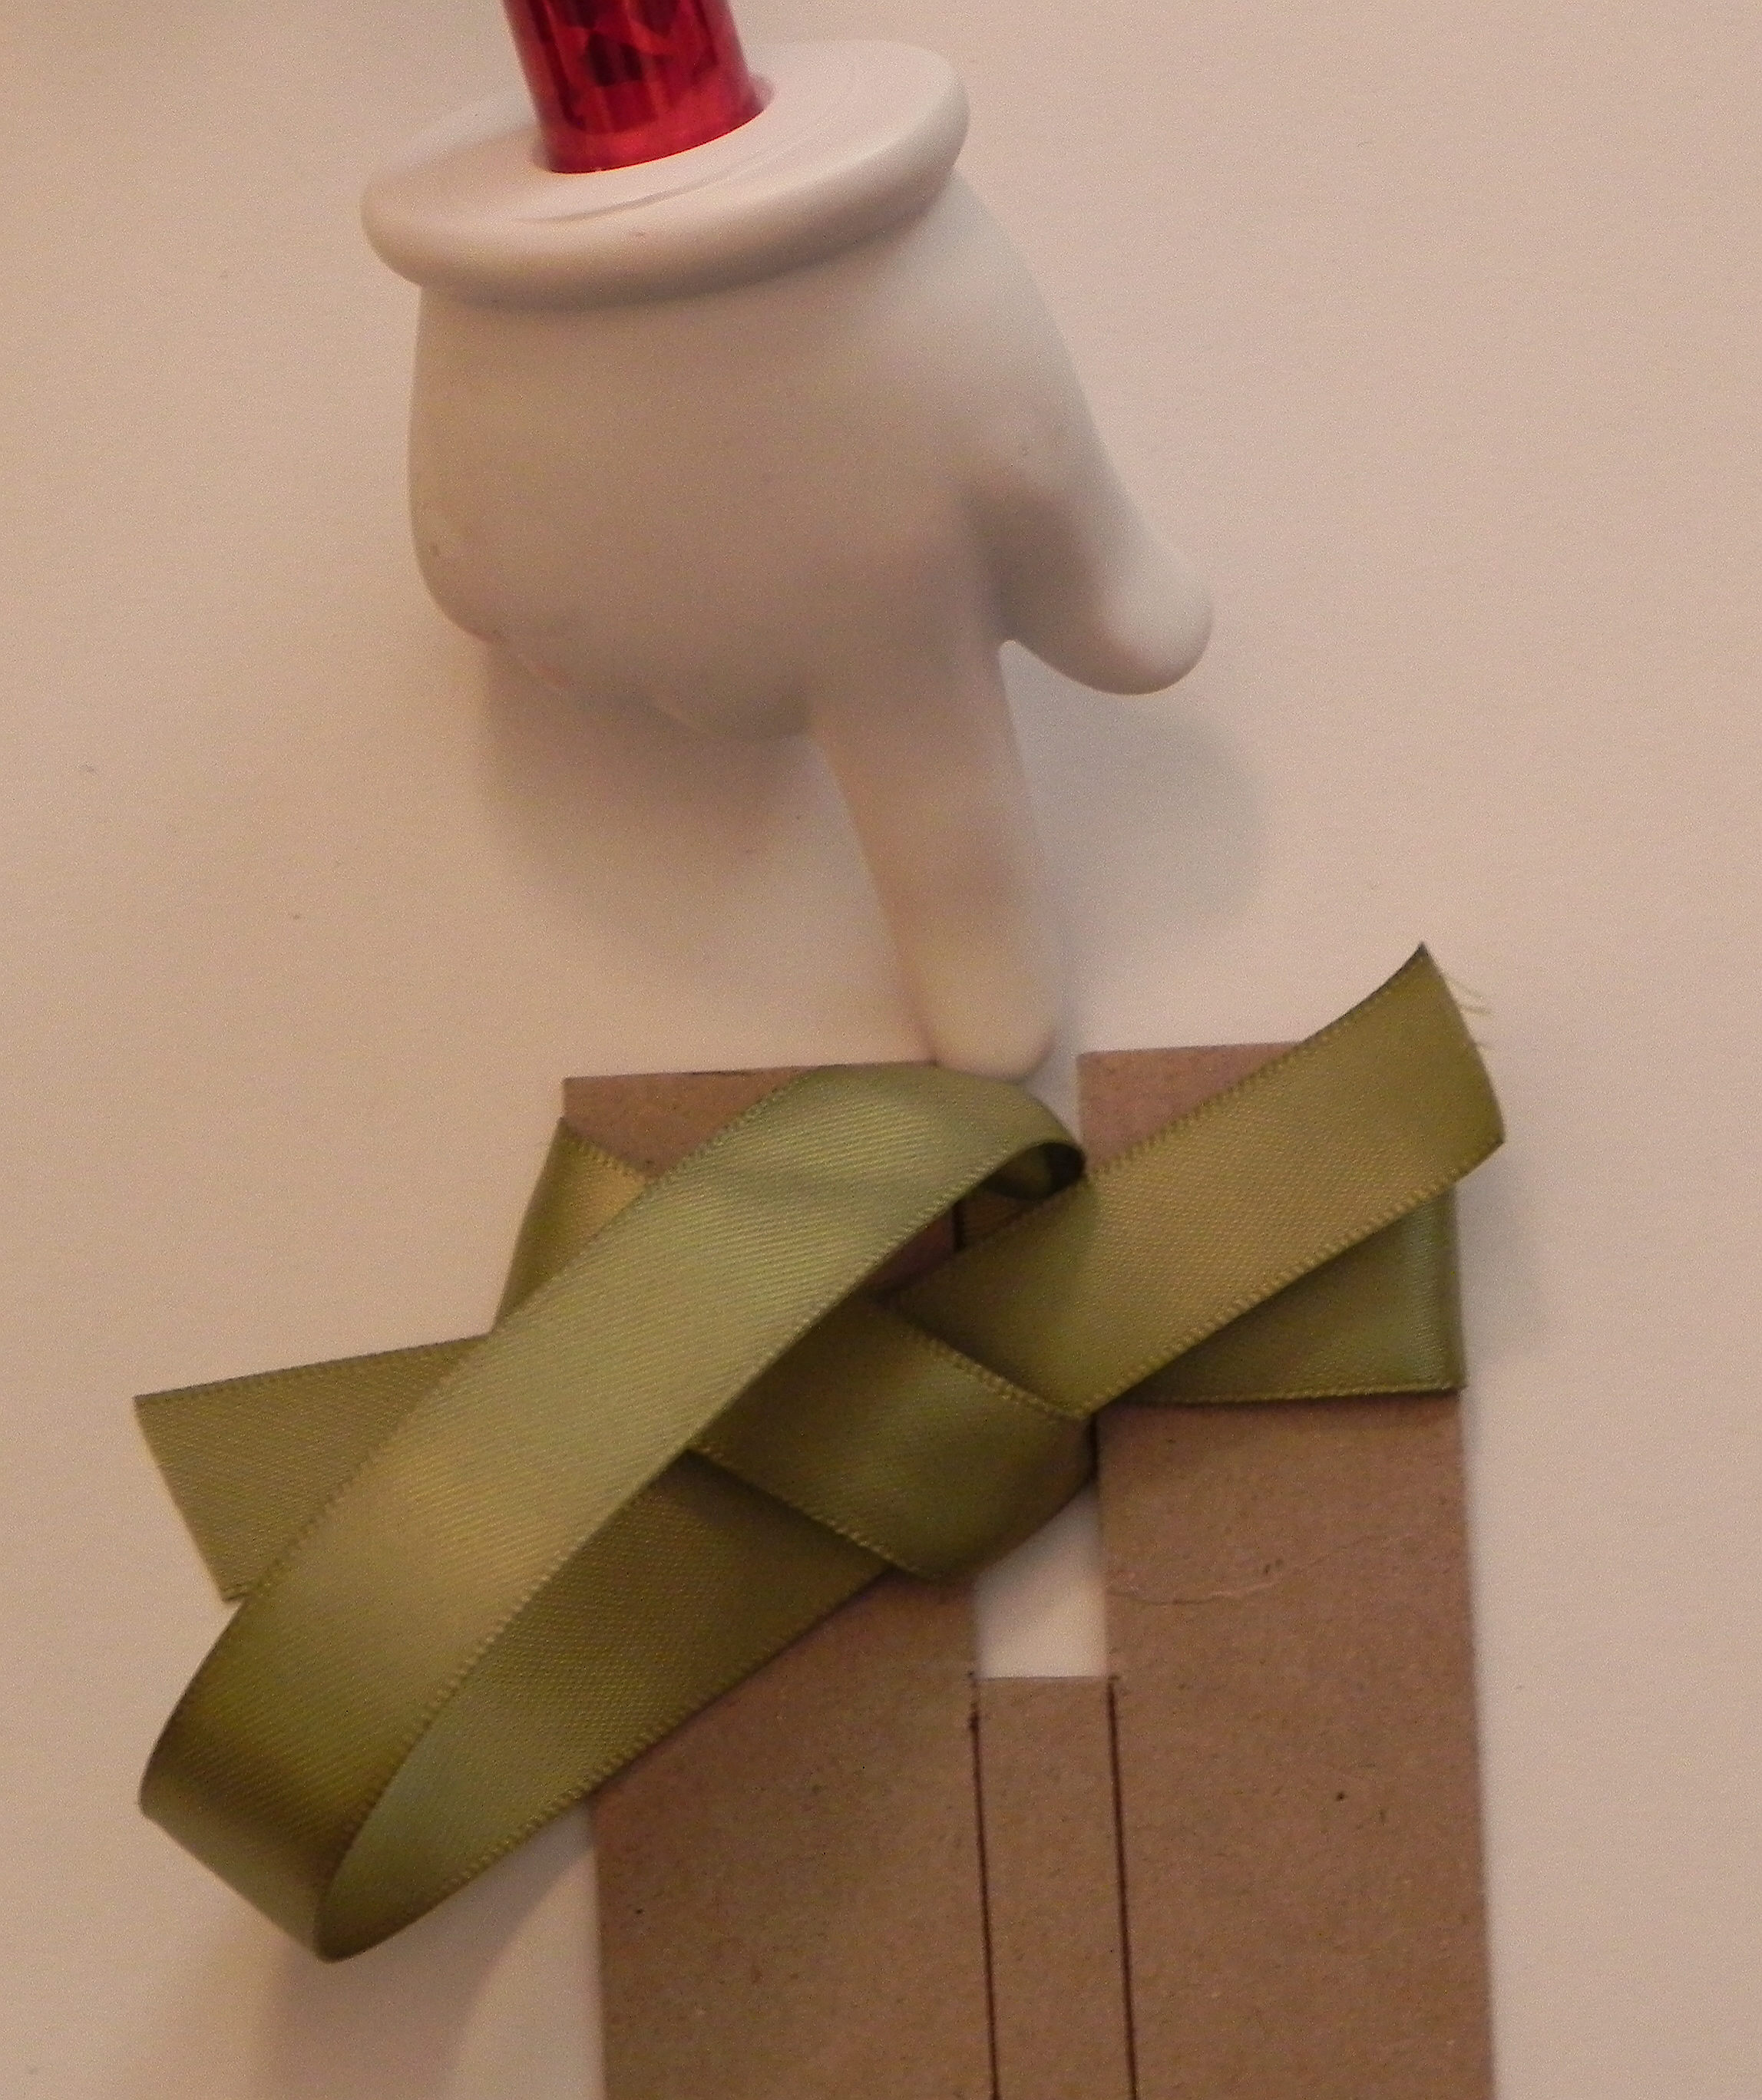
085 DSCN8071


11.  Pull the end of the ribbon you’ve been working with tight.  The best way to do this is to pull it straight up toward you, perpendicular to the tool.  When you are done, the photo below shows what it should look like.  This is the back of the bow.
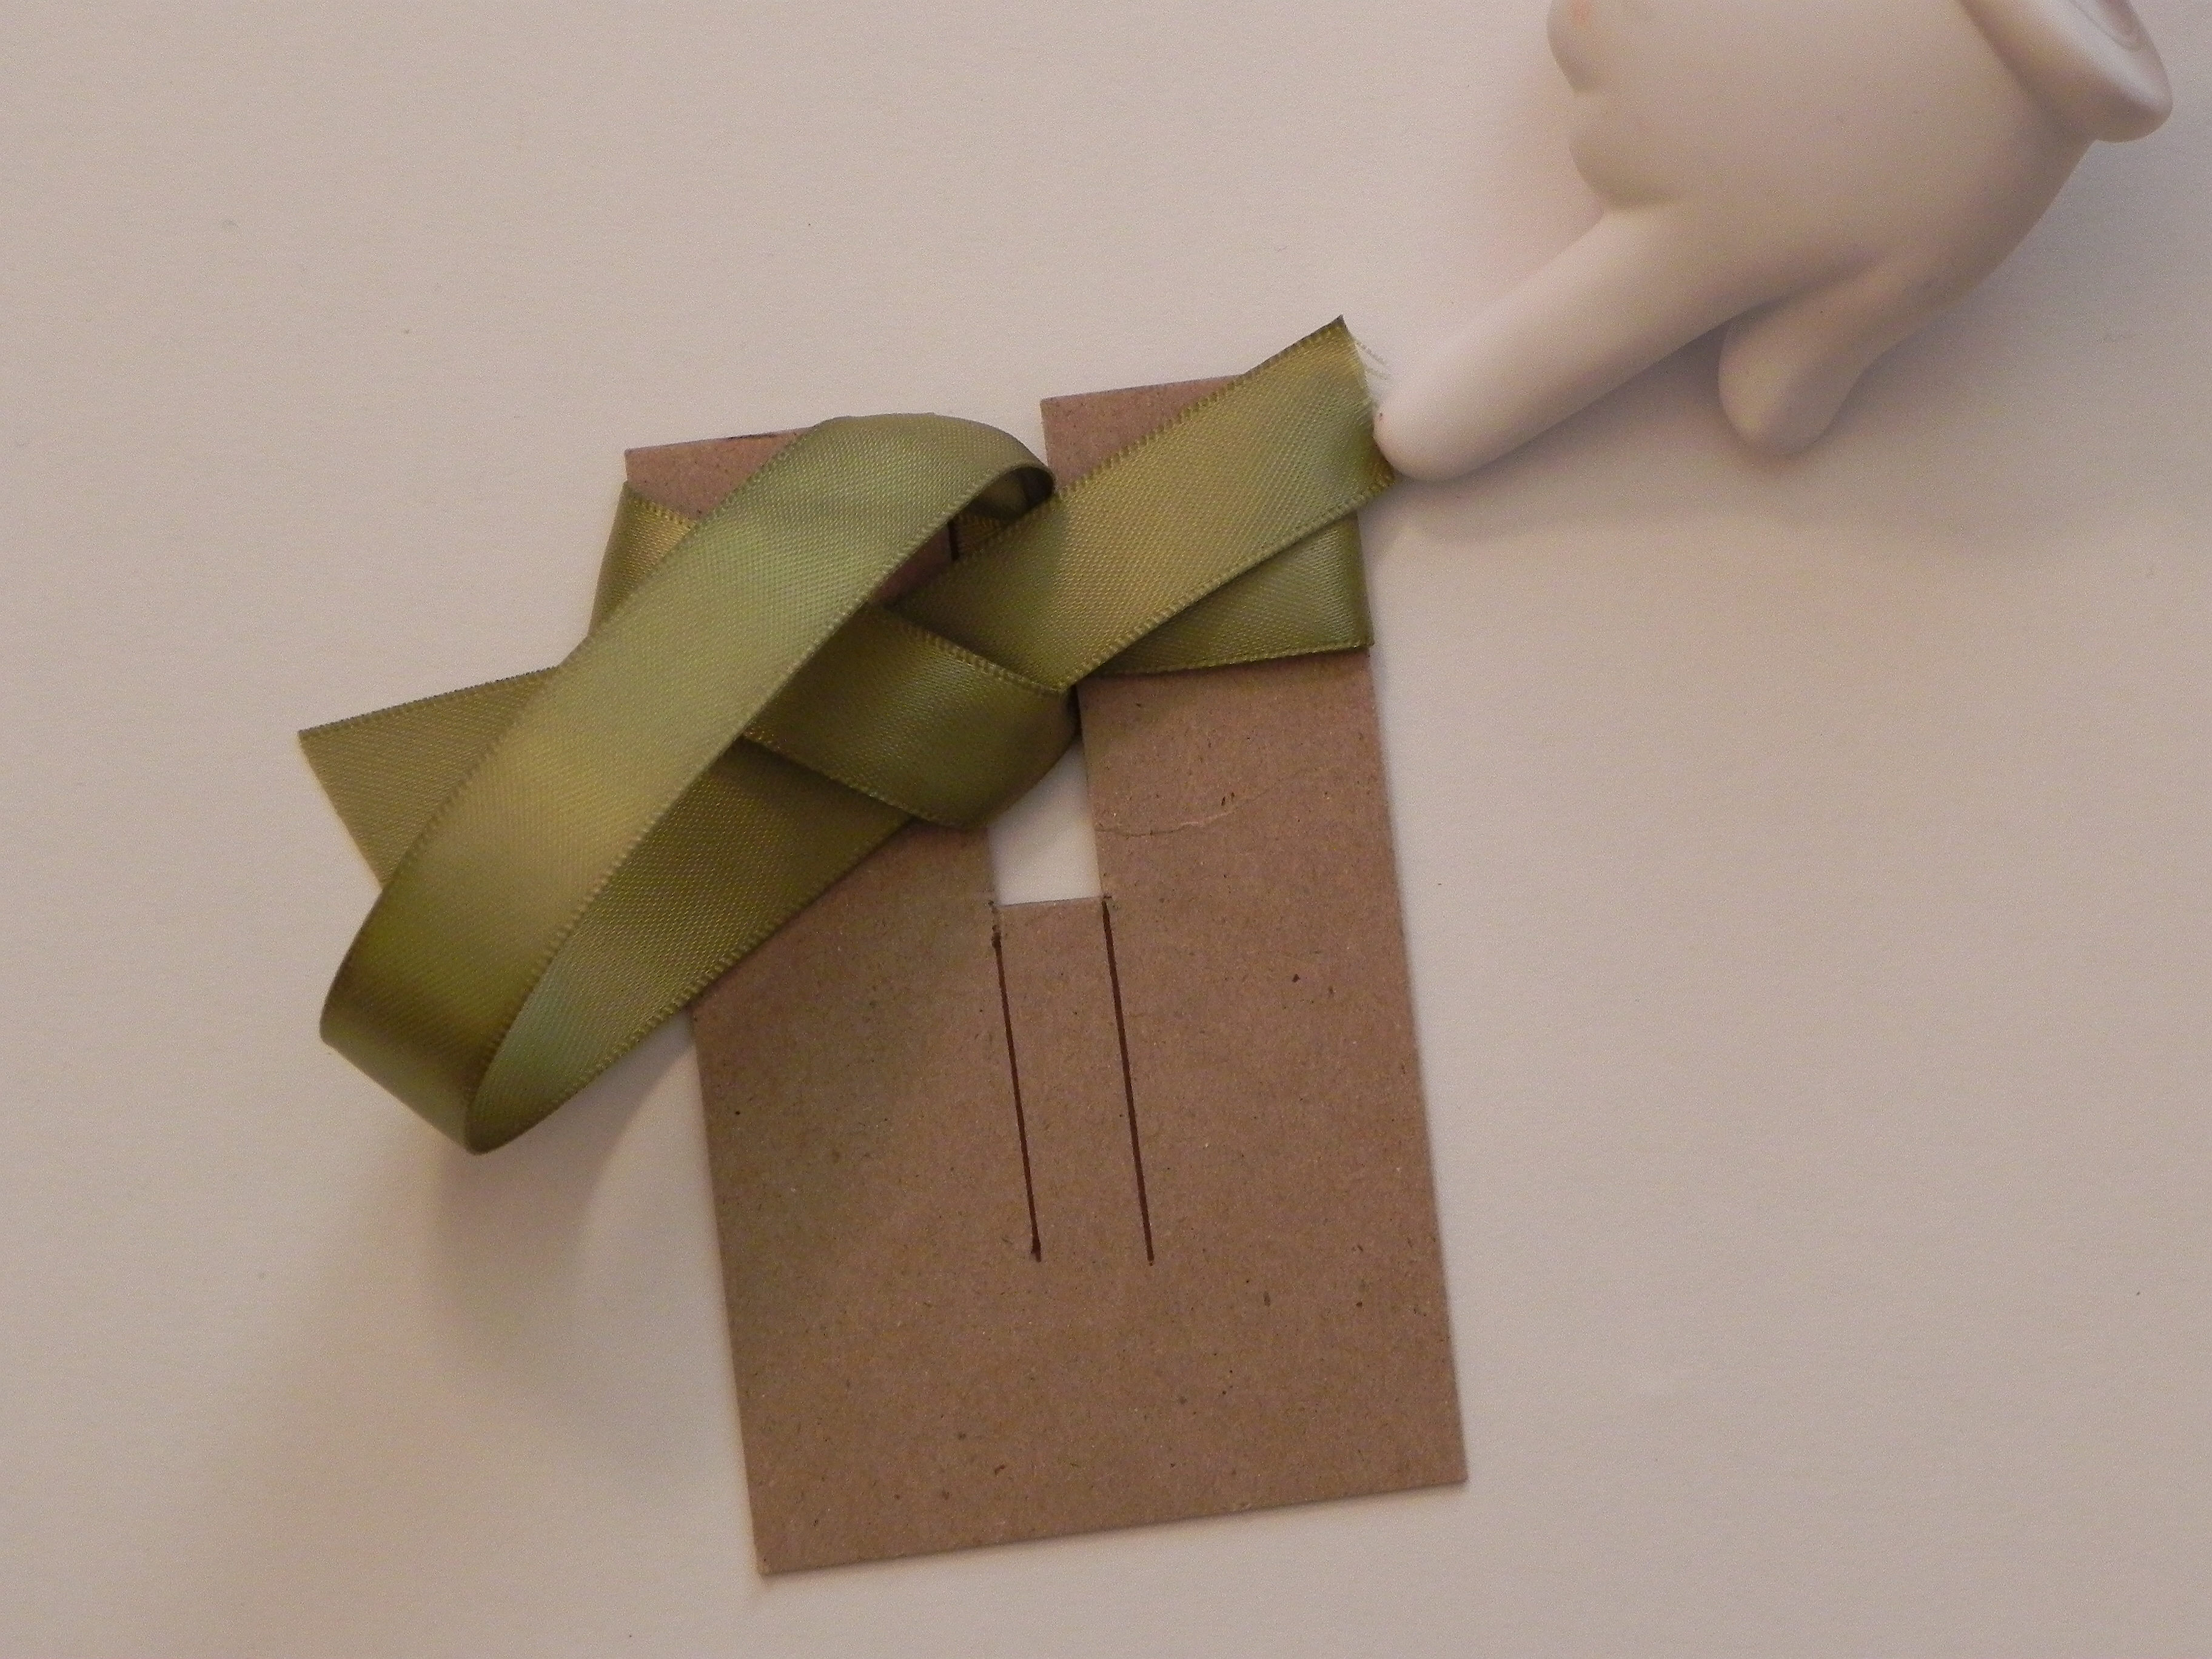
095 DSCN8075  105 DSCN8078


12.  If you turn the tool over, you will see the front of your bow.  Make any adjustments to the bow (making tighter or looser, straightening out the ends or bow center, etc.) while the bow is still on the tool.

110 DSCN8080


13.  Once you have everything the way you want it, slide the bow up and off the tool.
120 DSCN8091


Here’s the back:

130 DSCN8084

&

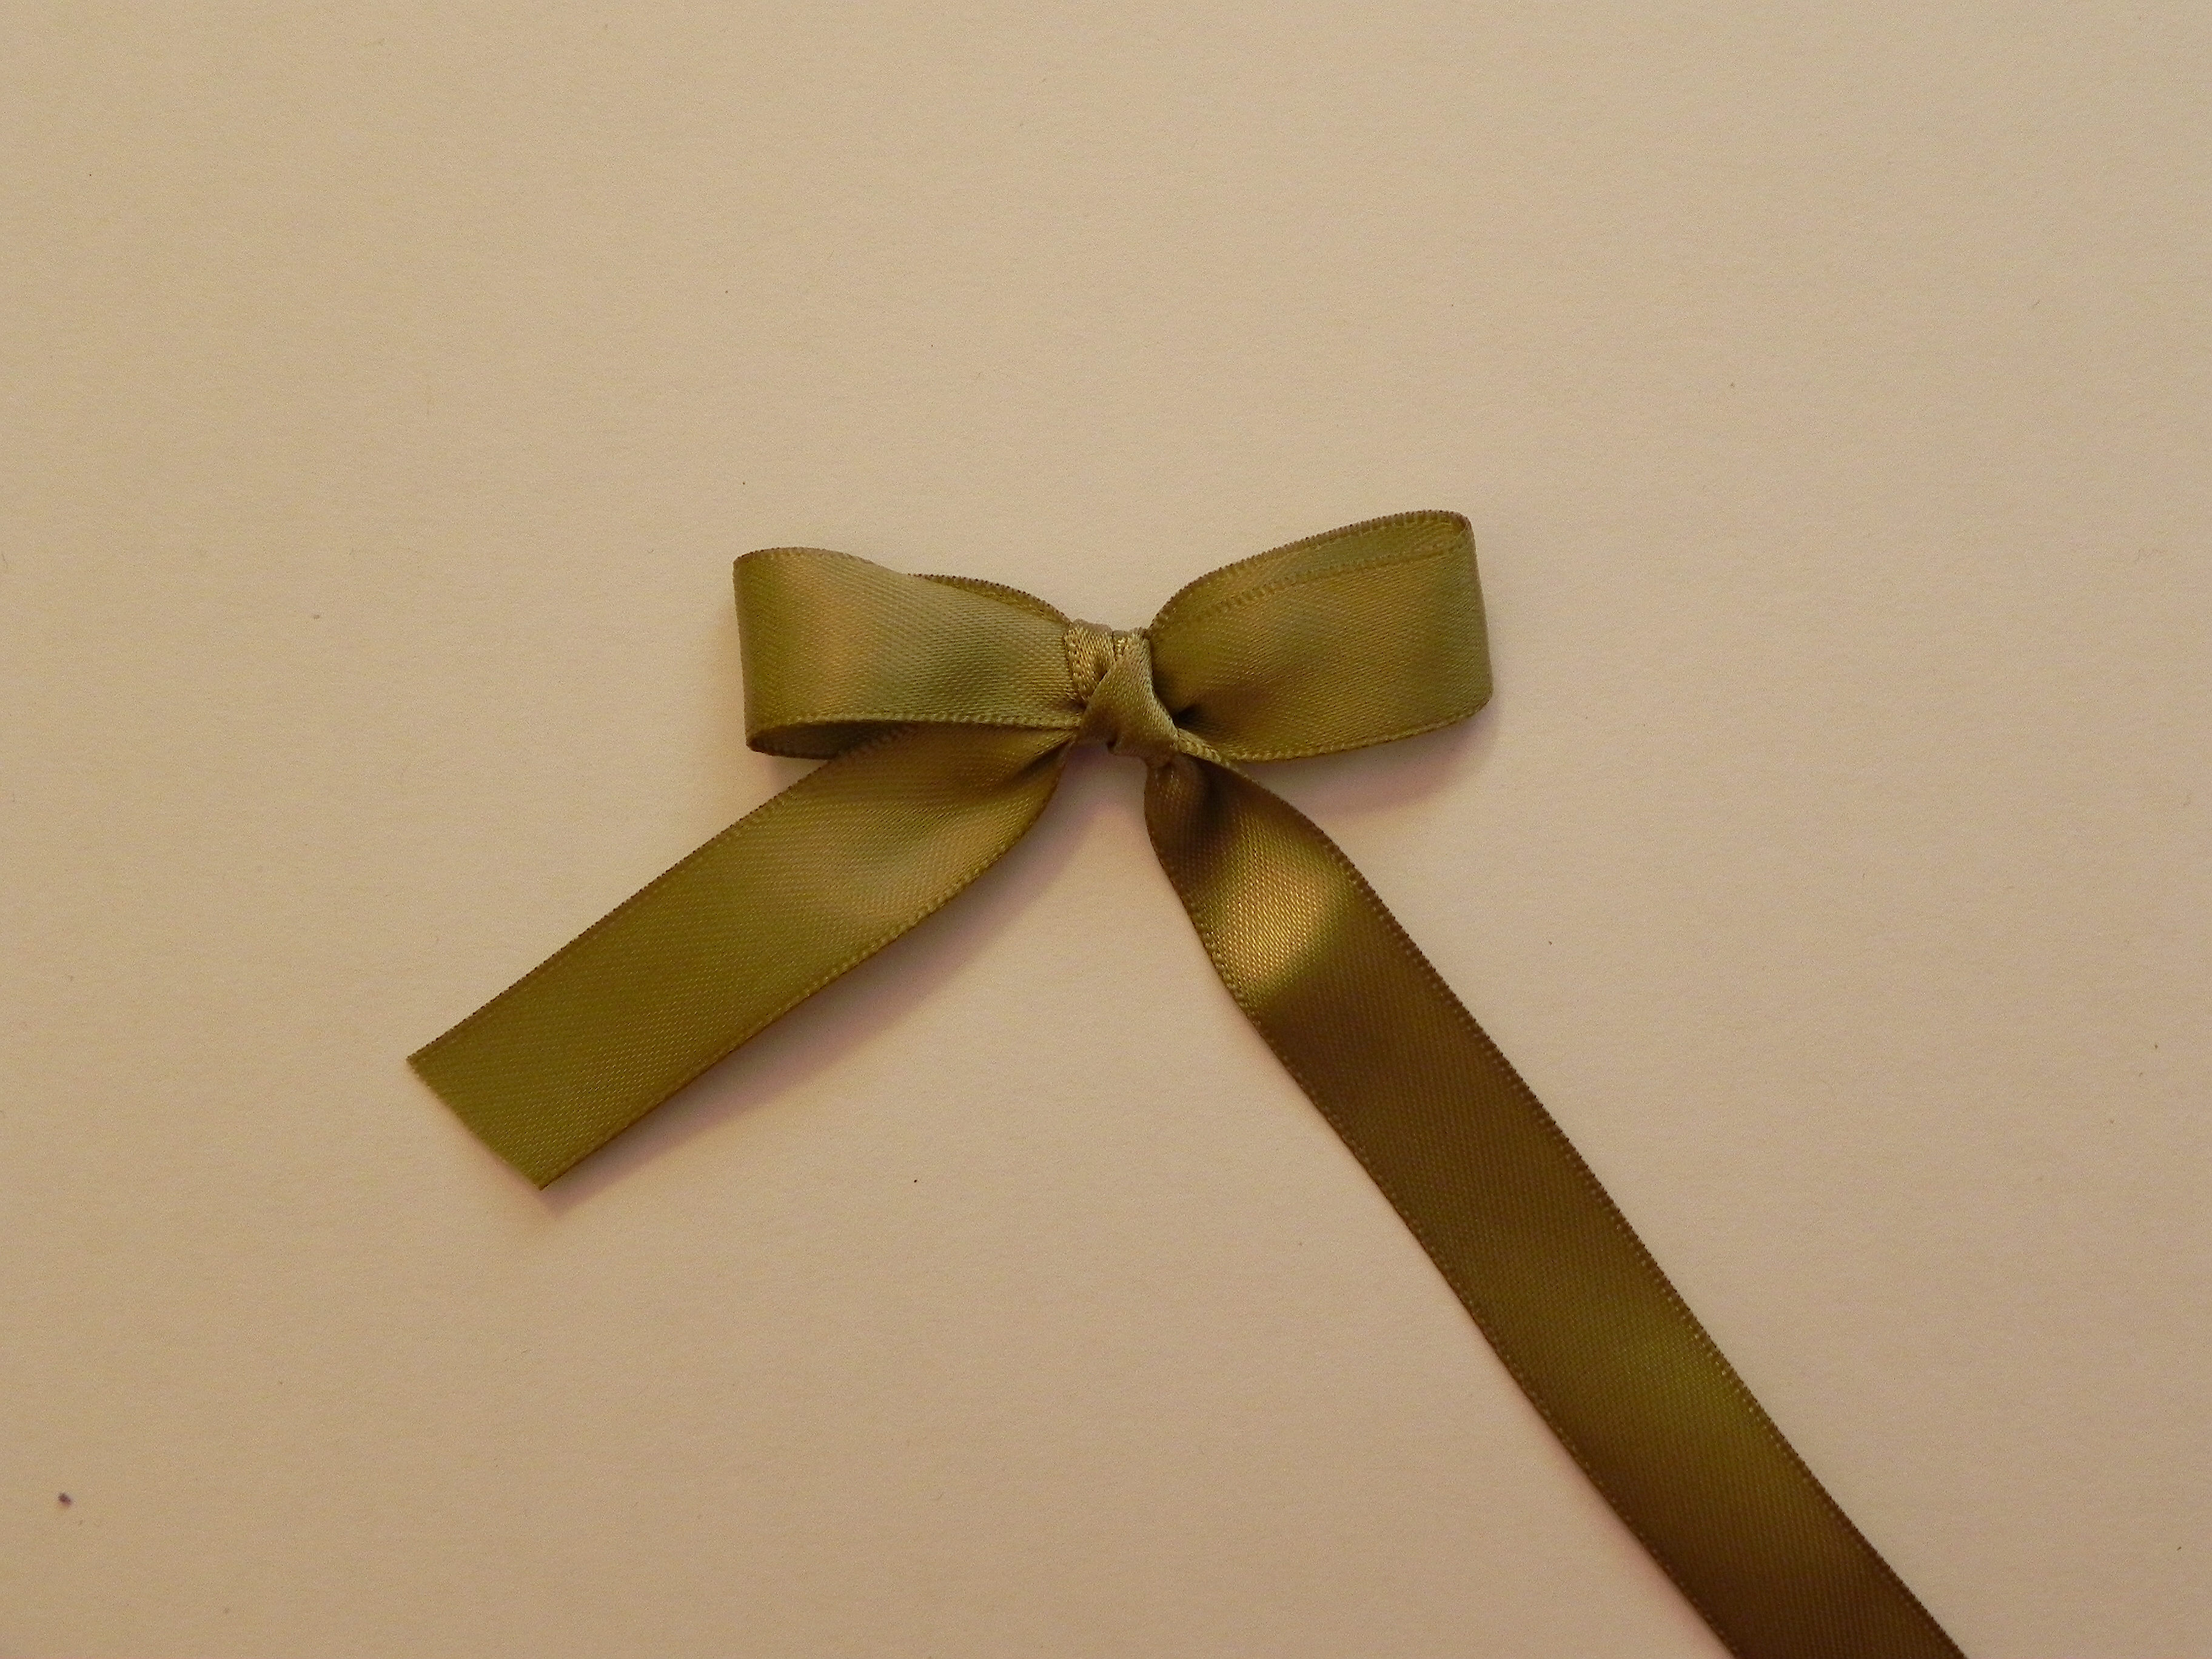
Here’s the front:

140 DSCN8086


Thanks for checking out my tutorial on how to make a bow making tool and on how to use it!

Palm Tree Thanks

Palm Tree Thanks

Palm Tree Thanks DSCN7876.jpg


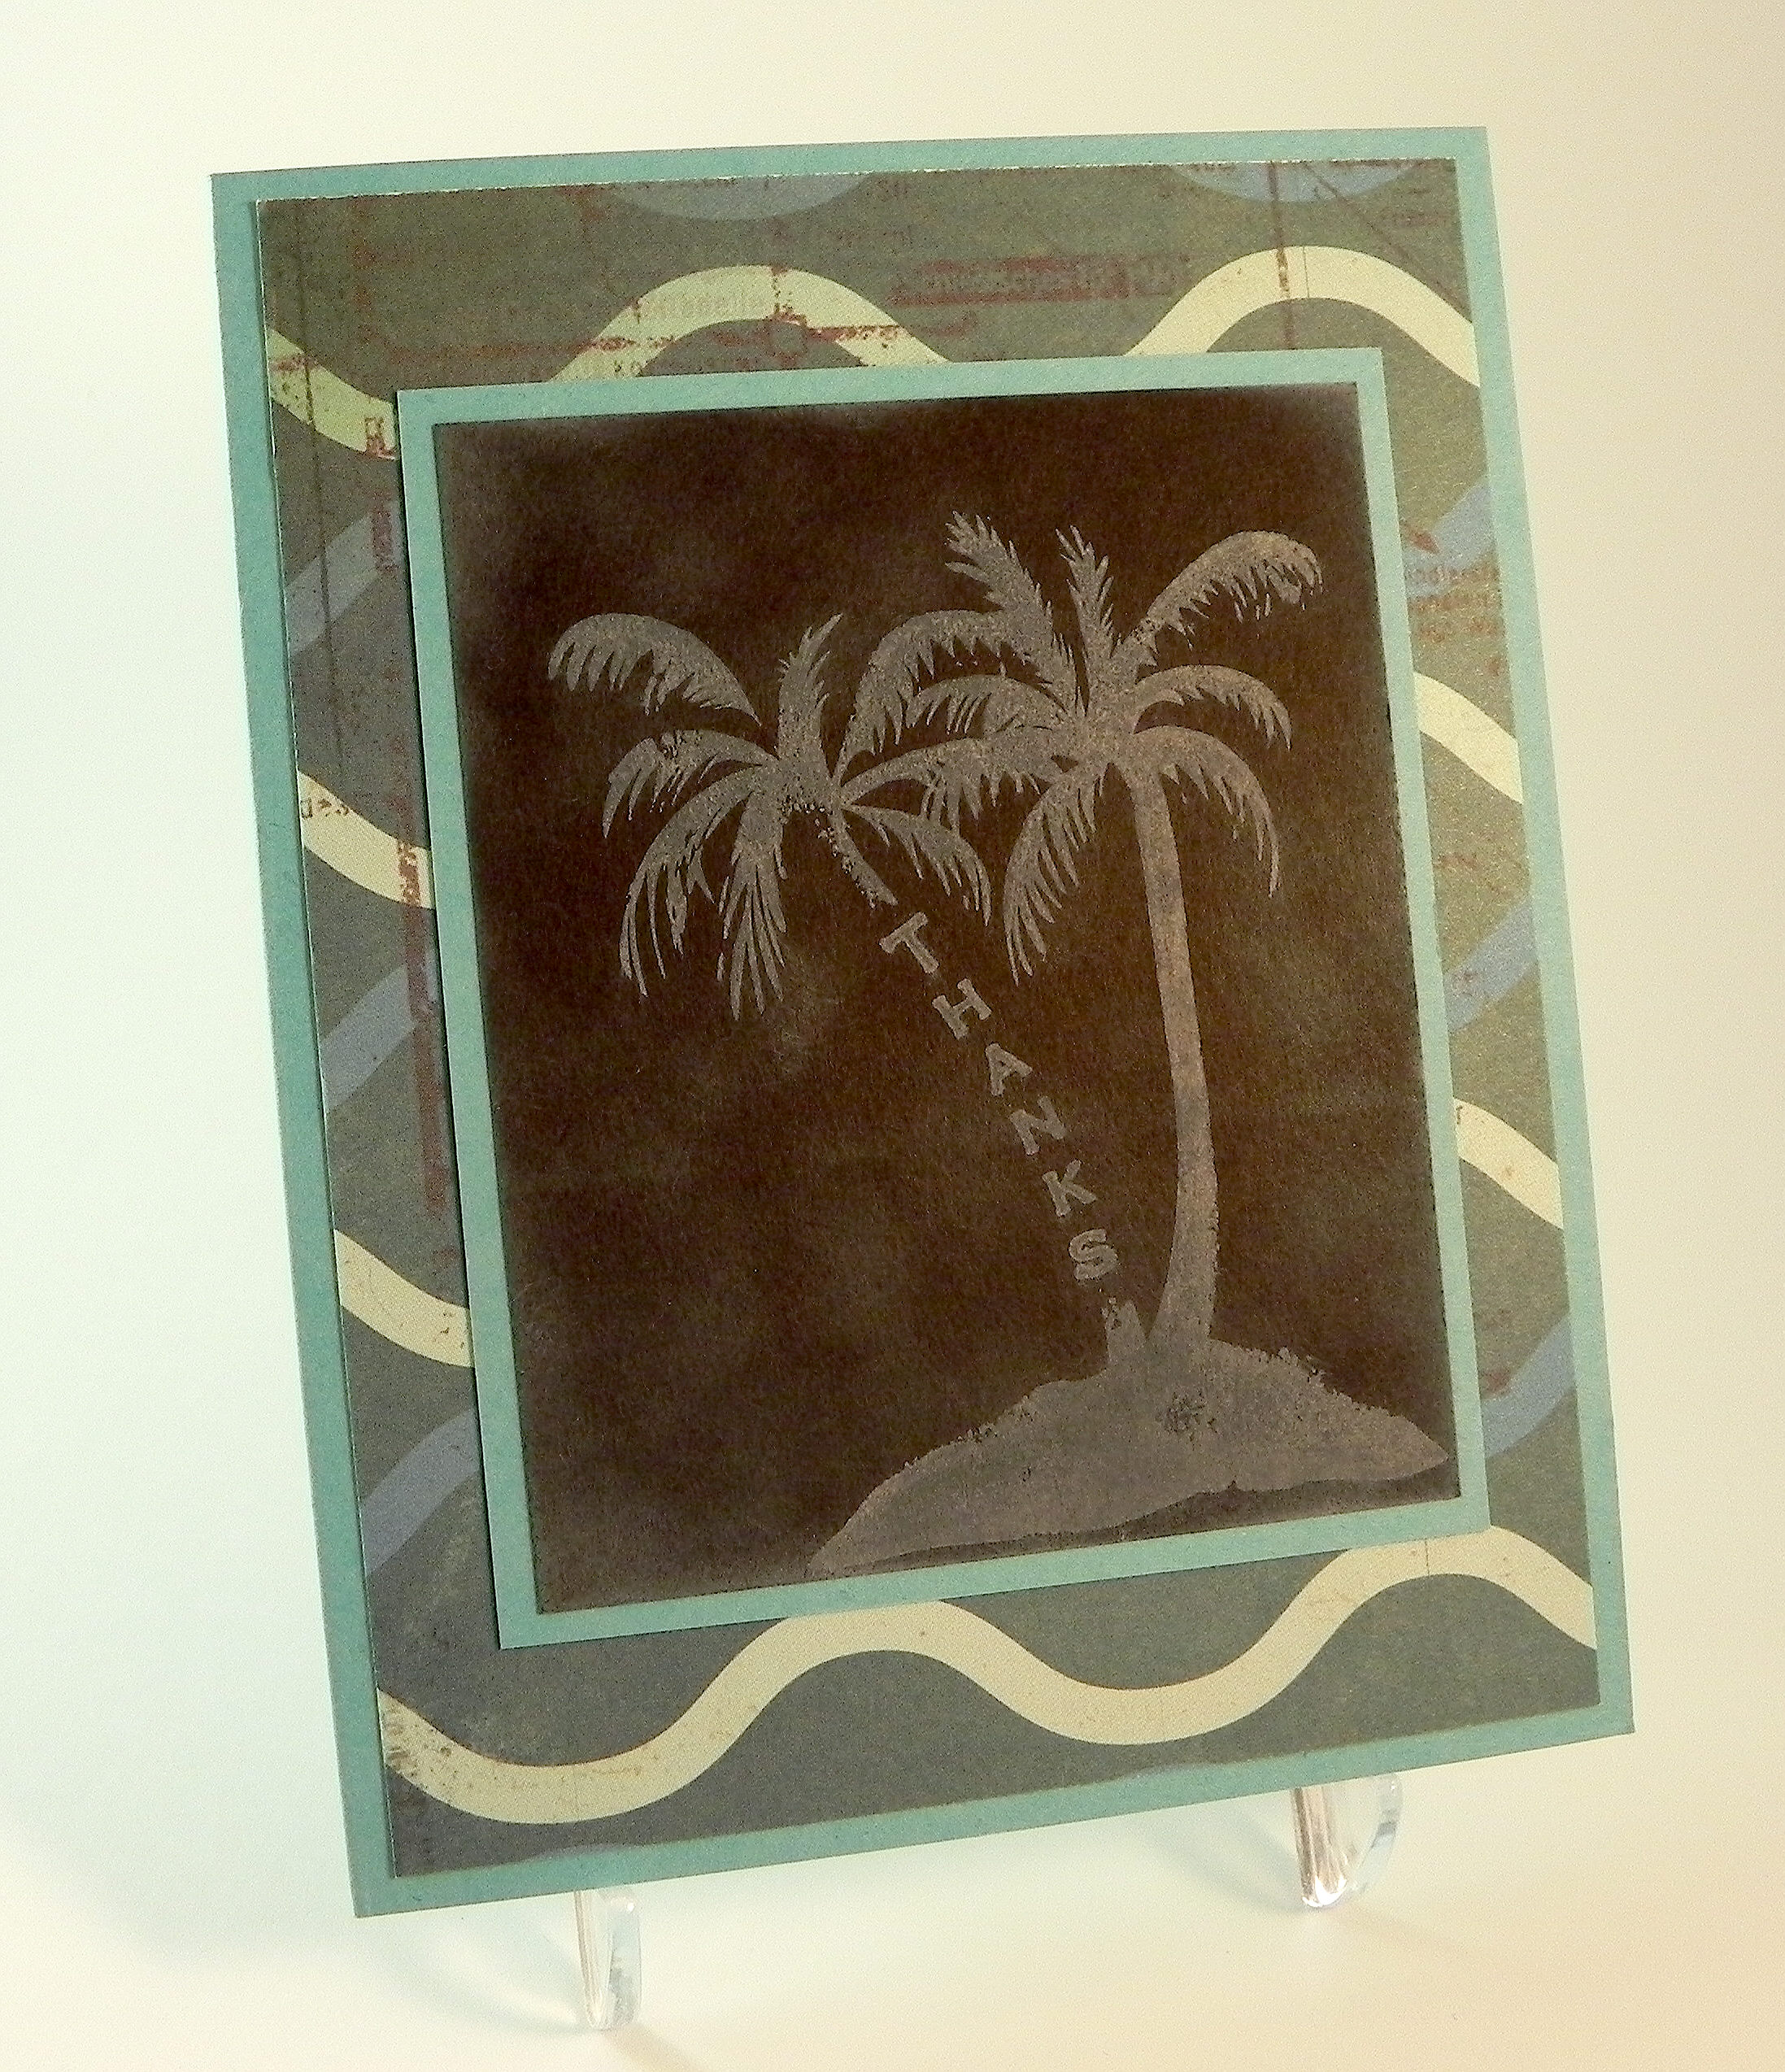
Did you ever get stuck on an idea and even though it just isn’t working the way you envisioned it, you spend way too much time trying and trying?  I can be very stubborn and have been known to do this… a lot!  That’s what happened with this card.  My husband needed to send a thank you note to a friend he recently saw in Florida, and my daughter loves palm trees and needed some notes for her birthday which is coming up next week.  My original idea was to use the chalkboard technique to make a card using the palm tree stamp with the “Thanks” as the trunk.  (I was trying to avoid a realistic scene with a lot of sponging and coloring since I needed to make a number of these thank you notes, and I really wanted to use the wavy paper I just got on clearance at AC Moore.)

Here is my first attempt:

Chalkboard Palm Trees DSCN7871


It wasn’t bad, but I felt like it needed something more on the “chalkboard” panel, and in trying to make multiple copies, I just kept making a mess.  (I hate using pigment inks!)

I finally gave up on the chalkboard idea and the palm trees and tried to work around the wavy paper. Here is my second attempt:

Many Thanks DSCN7885


I actually really liked this design with the “Many Thanks” stamp (Gina K Designs “Lots of Lines” set) and was happy with the ease with which I could duplicate it.  However, my husband and daughter seemed to like the palm tree idea better.  So….

I ended up combining the two ideas and used the sponging and inking idea from the second card with the palm tree and greeting idea from the first card and ended up with my final project:

Palm Tree Thanks DSCN7876

A lot of time and wasted paper, but I am happy with the way it came out.  I guess it’s not so bad to be a stubborn crafter!  (Sometimes it just takes me a while to get to the end of the process!!)

The “thanks” stamp is from the Gina K Designs “Vertical Greetings” set, and the palm trees are by Recollections.  I created a mask to sponge the background and used Gina K turquoise sea and Tim Holtz pine needles distress inks.  The images were stamped with Memento tuxedo black ink.  The wavy paper is by Crate Paper called Poolside from the Pier Collection.  Gina K turquoise sea, black and white card stock was also used. I used my stamp-a-ma-jig and a mask to put the greeting where the trunk should have been, and these (along with the background mask) made it easy to make multiple copies of this layout.

Thanks for checking out my card project!

This content uses referral links as described in the disclosure policy on my sidebar.

Perfectly Rustics Design Challenge WINNER!

Perfectly Rustics Design Challenge No. 39 – Animals – (Winner)

Perfectly Rustics Challenge WInner

Perfectly Rustics Challenge WInner

(January 26, 2015)

Giraffe Birthday 1 DSCN7724

Click HERE to see the Perfectly Rustics winning post.  (Sadly, this site is no longer active.)

Click HERE to see the original Perfectly Rustics Challenge post.  (Sadly, this site is no longer active.)

Click HERE to see the original post for this project.

Thanks for checking out my post!

Giraffe Birthday Card

Giraffe Birthday Card

Giraffe Birthday 1 DSCN7724.jpg

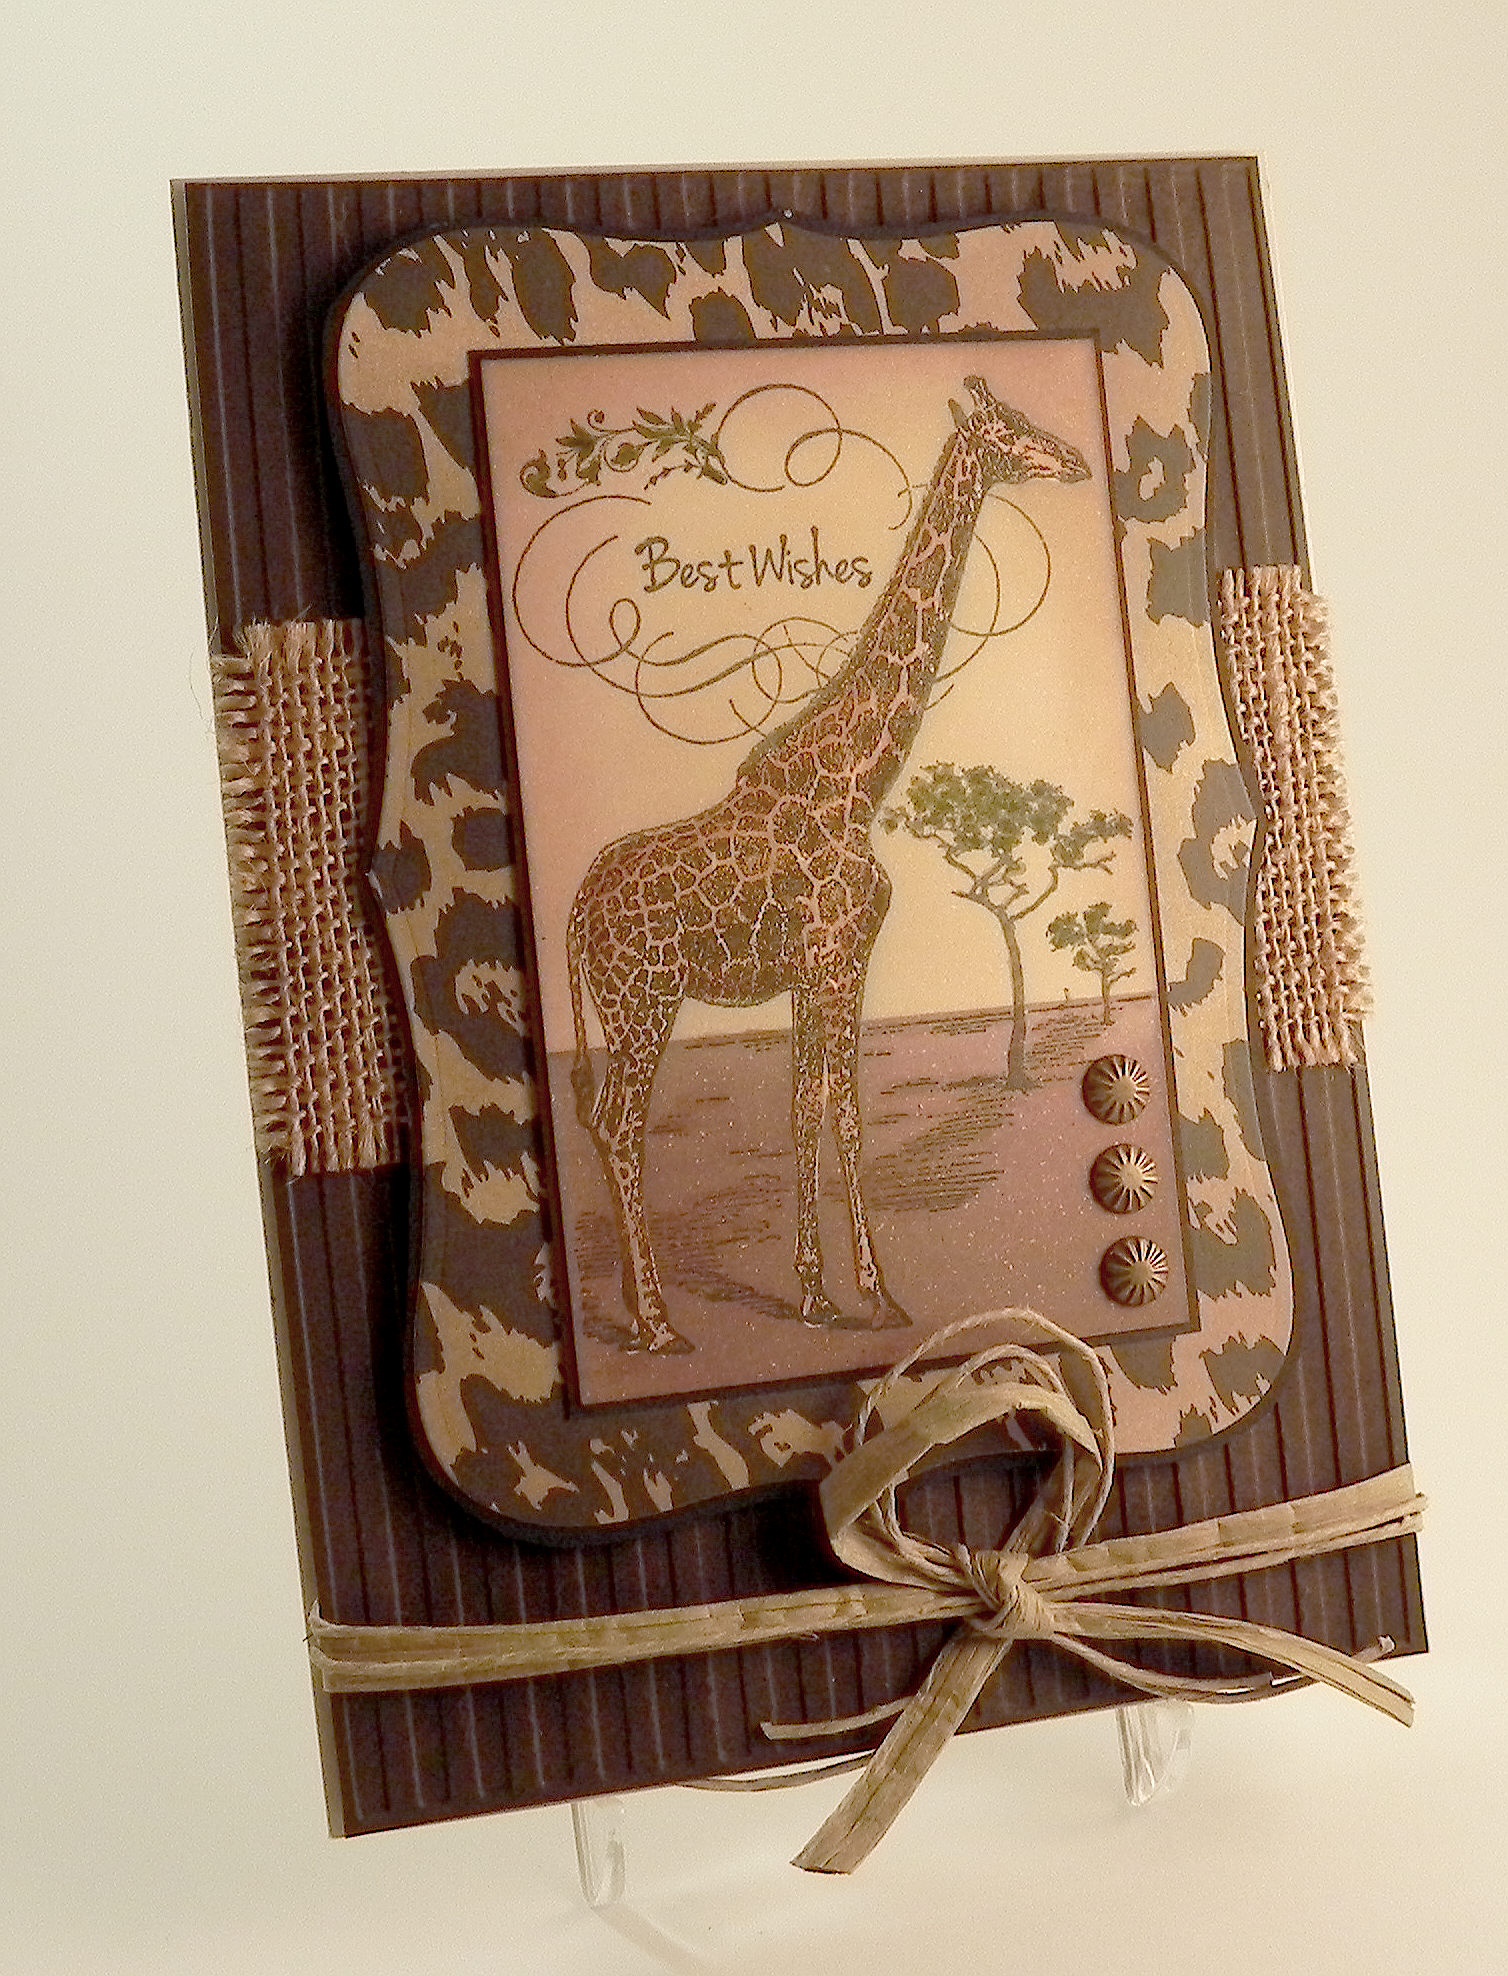
This card is being entered in the Perfectly Rustics – PR Design Challenge No. 39 – Animals, where we are to “go wild” with animals in our creations. (http://perfectlyrustics.com/2015/01/12/prdc-no-39-animals/)

The Stamp I used for this card is called “Cling Giraffe Savanna” by Stampendous which was stamped on white card stock with Memento tuxedo black ink.  The whole scene is on the one stamp.  The original image has the word “Giraffe” in the swirls by his neck.  I masked this and stamped the “Best Wishes” Greeting which is a Gina K Designs stamp from the “A Wish For You” mini stamp set.  The scene was colored with Copic Markers (E51, E33, E35, E37, YG97, YG99, and E44) and was inked with Memento desert sand and rich cocoa inks.

The background printed paper is DCWV “All Dressed Up Leopard Chic” which I lightly inked with the desert sand ink to make it match a bit better.  It was cut with a Spellbinders “Labels Eight” die.  The dark chocolate panel (Gina K) was embossed with a Darice “Stripes” embossing folder, and black card stock was used for the mats.  The card base is Gina K sandy beach.

Burlap, raffia ribbon and jute, and a few metallic stickers embellishments by K & Company finished it off.

Thanks for checking out my card project!

This content uses referral links as described in the disclosure policy on my sidebar.

Hog Wild Birthday Card

Hog Wild Birthday Card

Hog Wild Birthday  DSCN7819.jpg

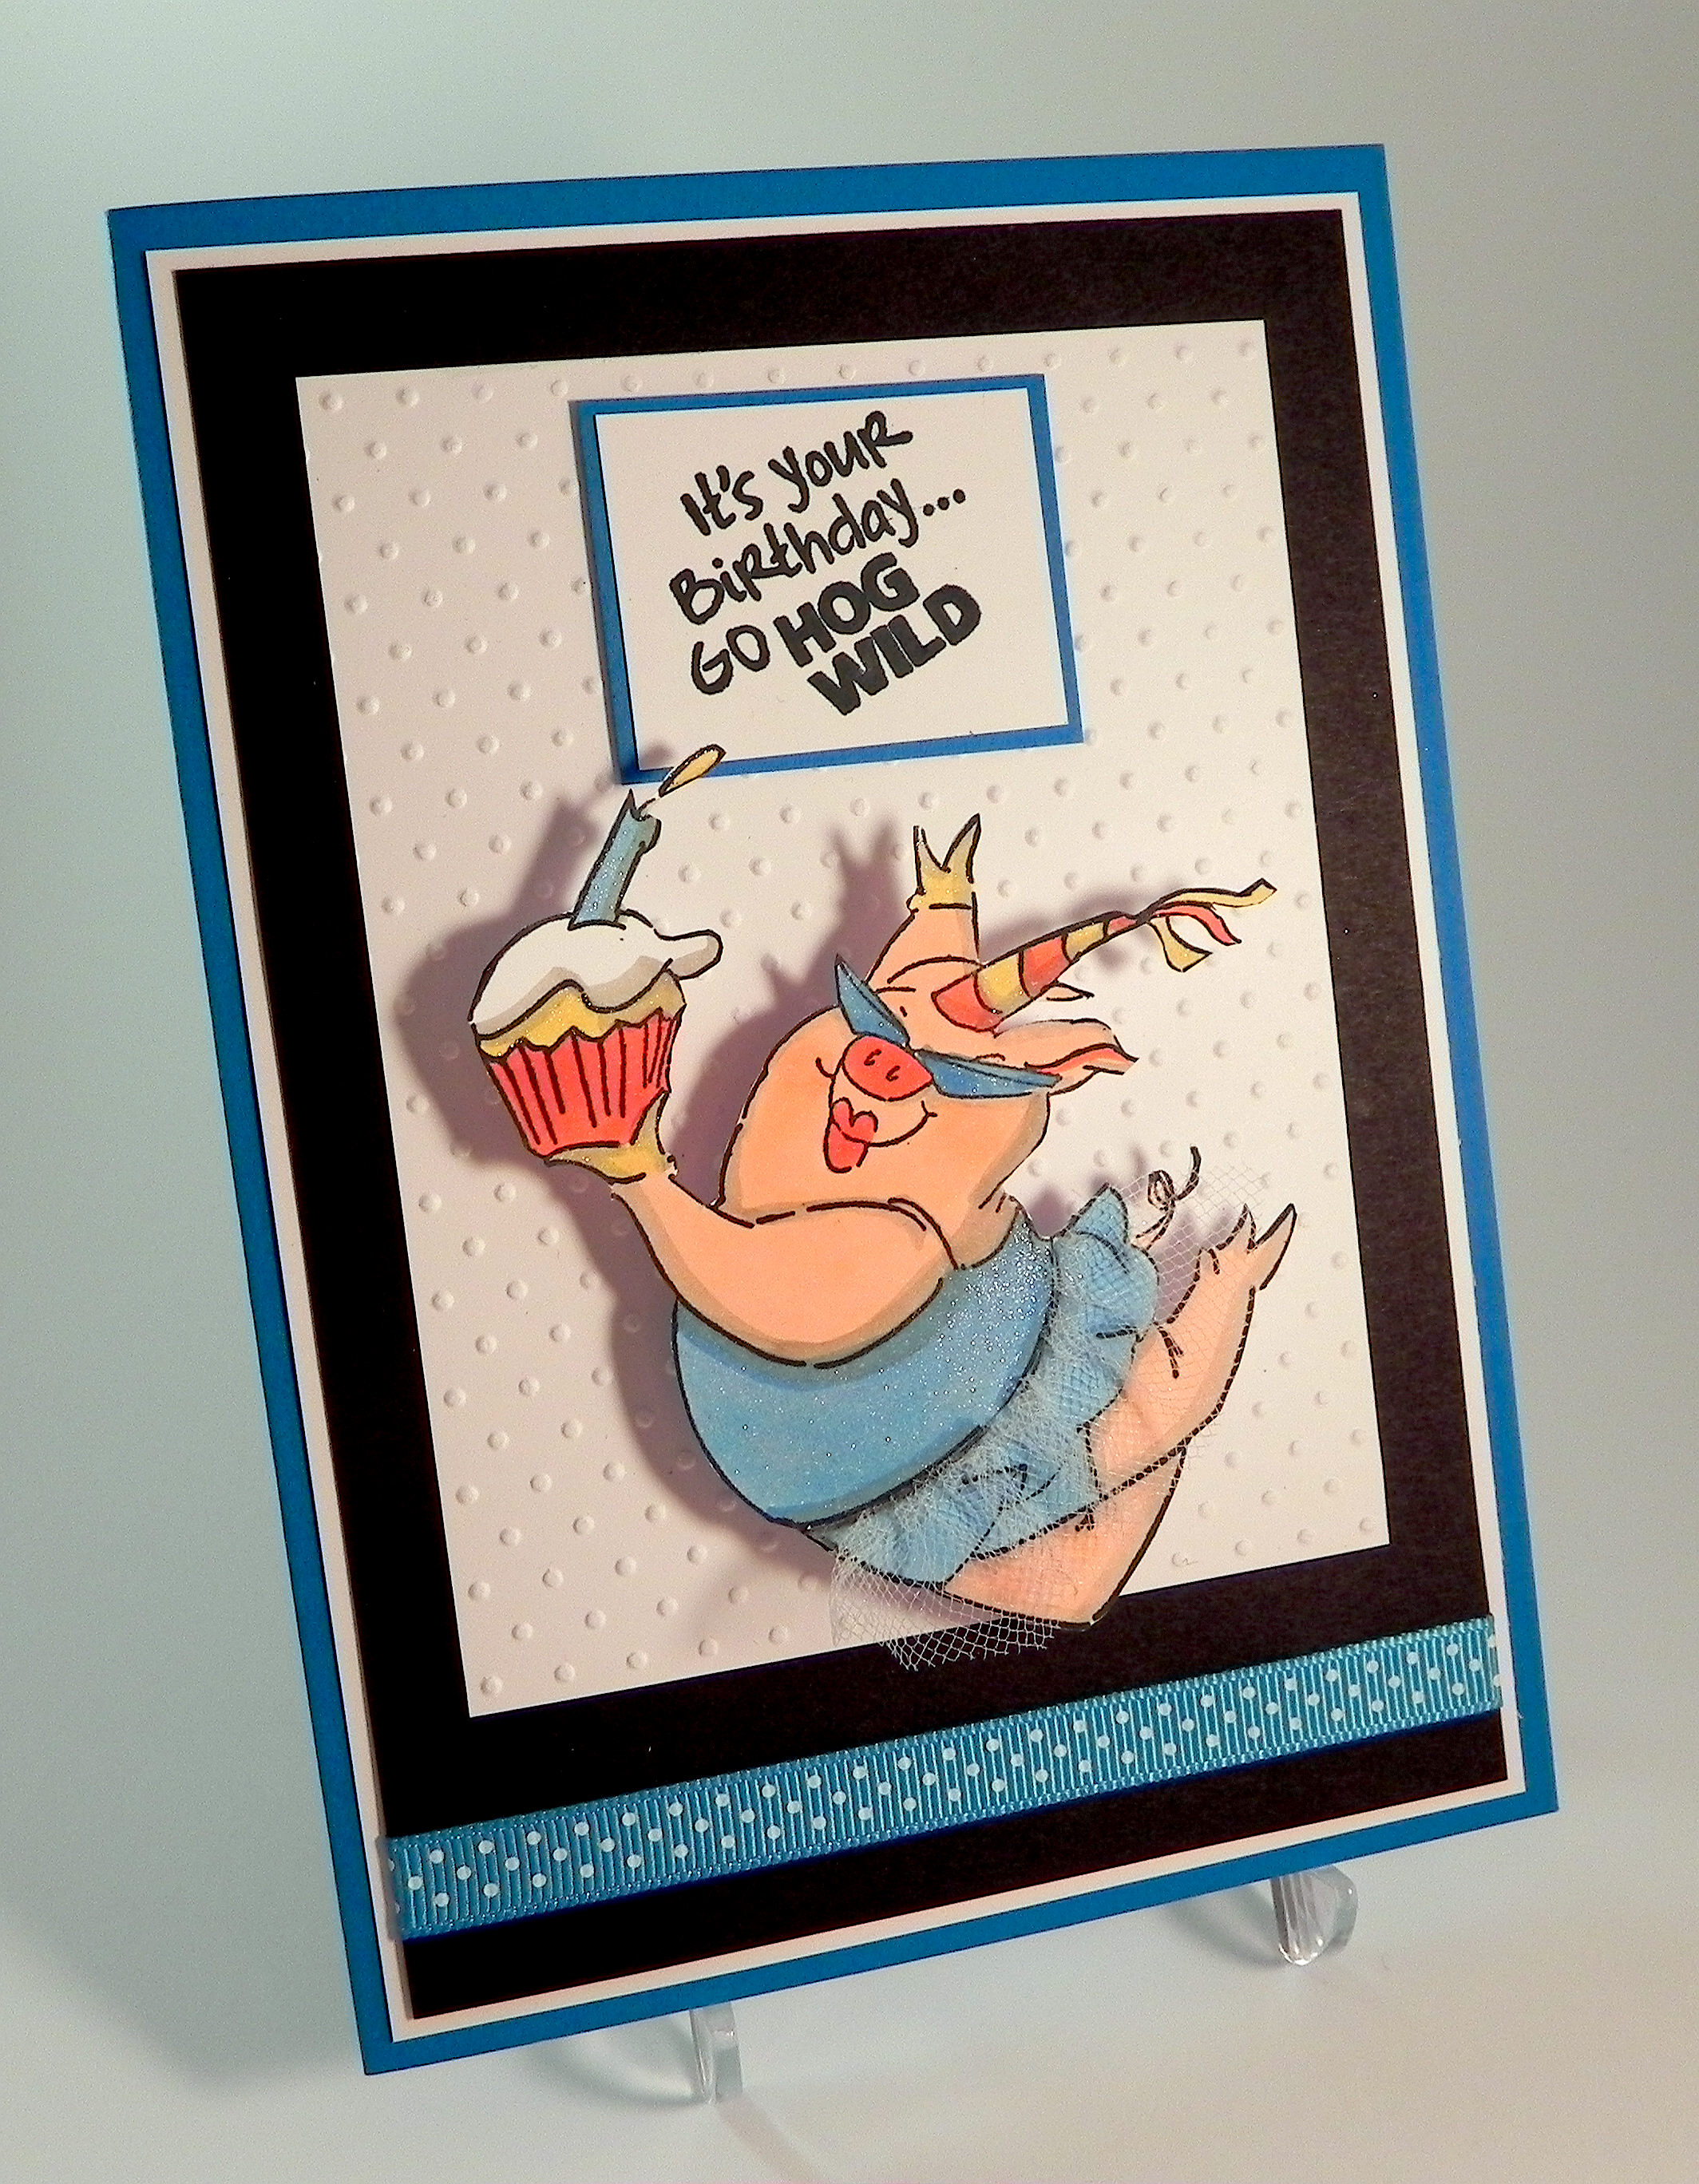
 This card is being entered in the Perfectly Rustics – PR Design Challenge No. 39 – Animals, where we are to “go wild” with animals in our creations. (http://perfectlyrustics.com/2015/01/12/prdc-no-39-animals/)

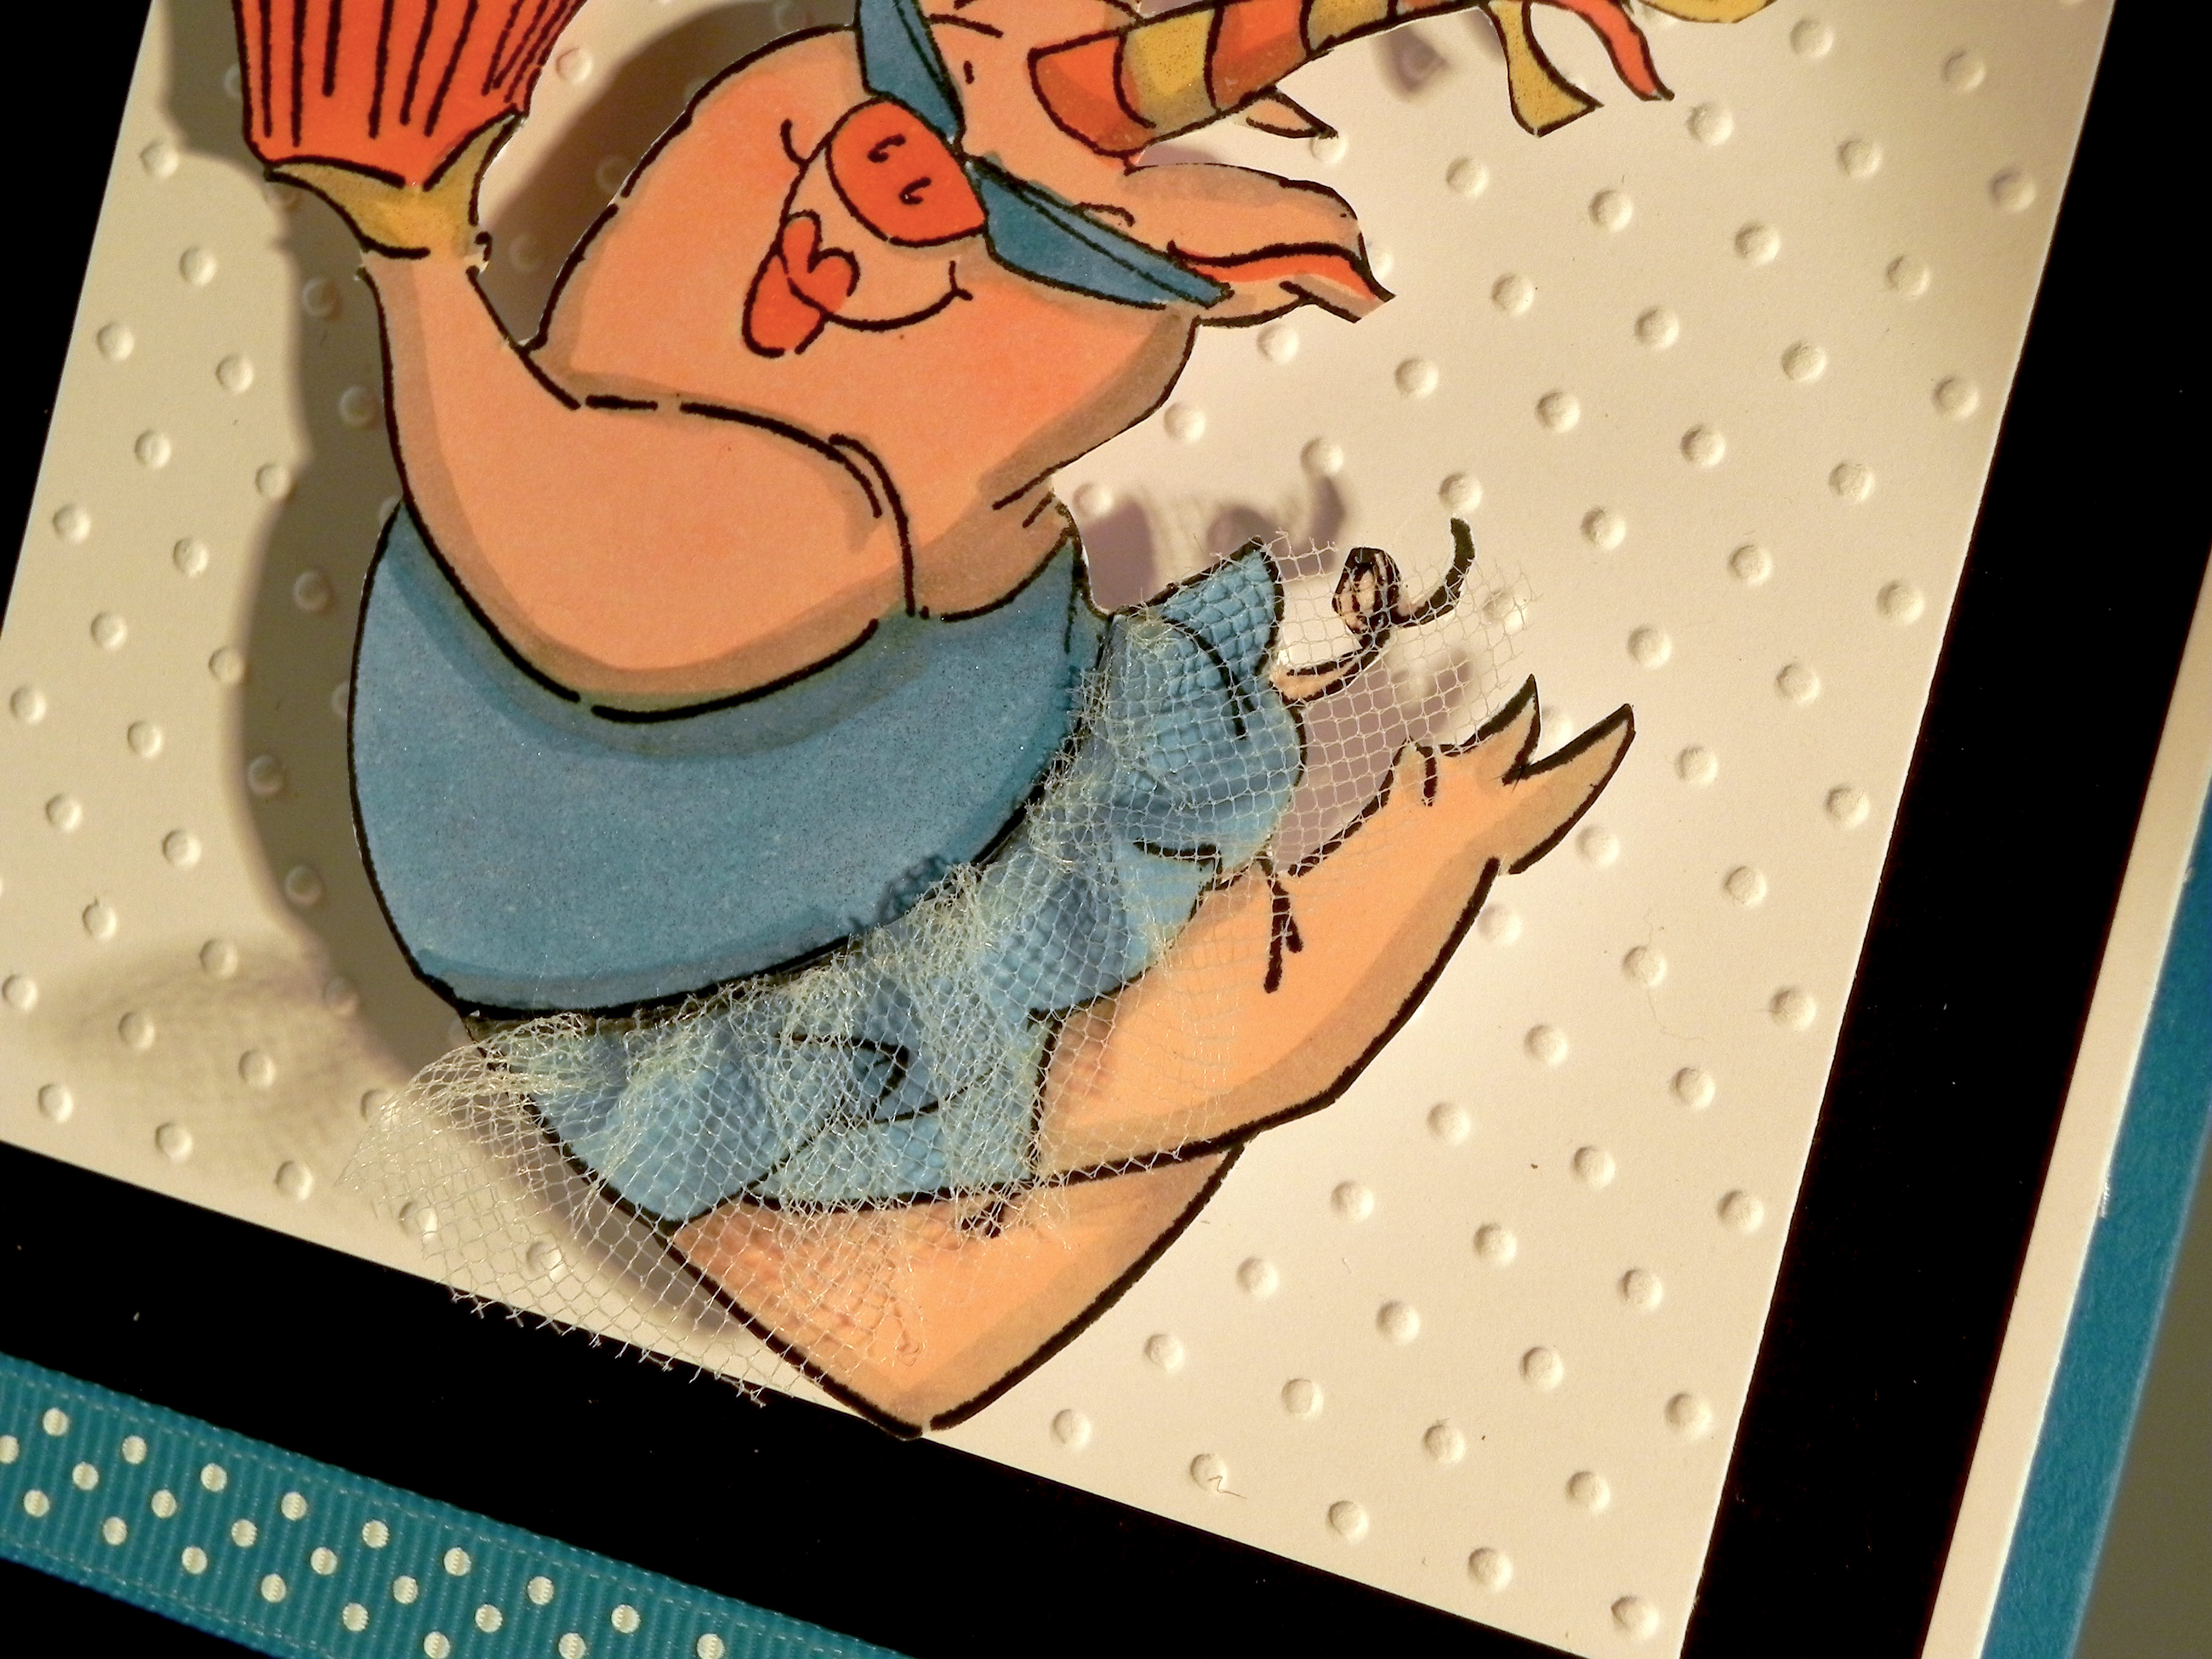
This was a fun card to make!  I love this awesome party pig and sentiment by Art Impressions called “Hog Wild Birthday” from their Zoo Crew collection.  She was stamped with Memento tuxedo black ink and colored with Copic Markers (R20, R24, Y23, B12, B14, and W4).  I made her a tutu from white tulle which I attached with Score Tape.

wwDSCN7785

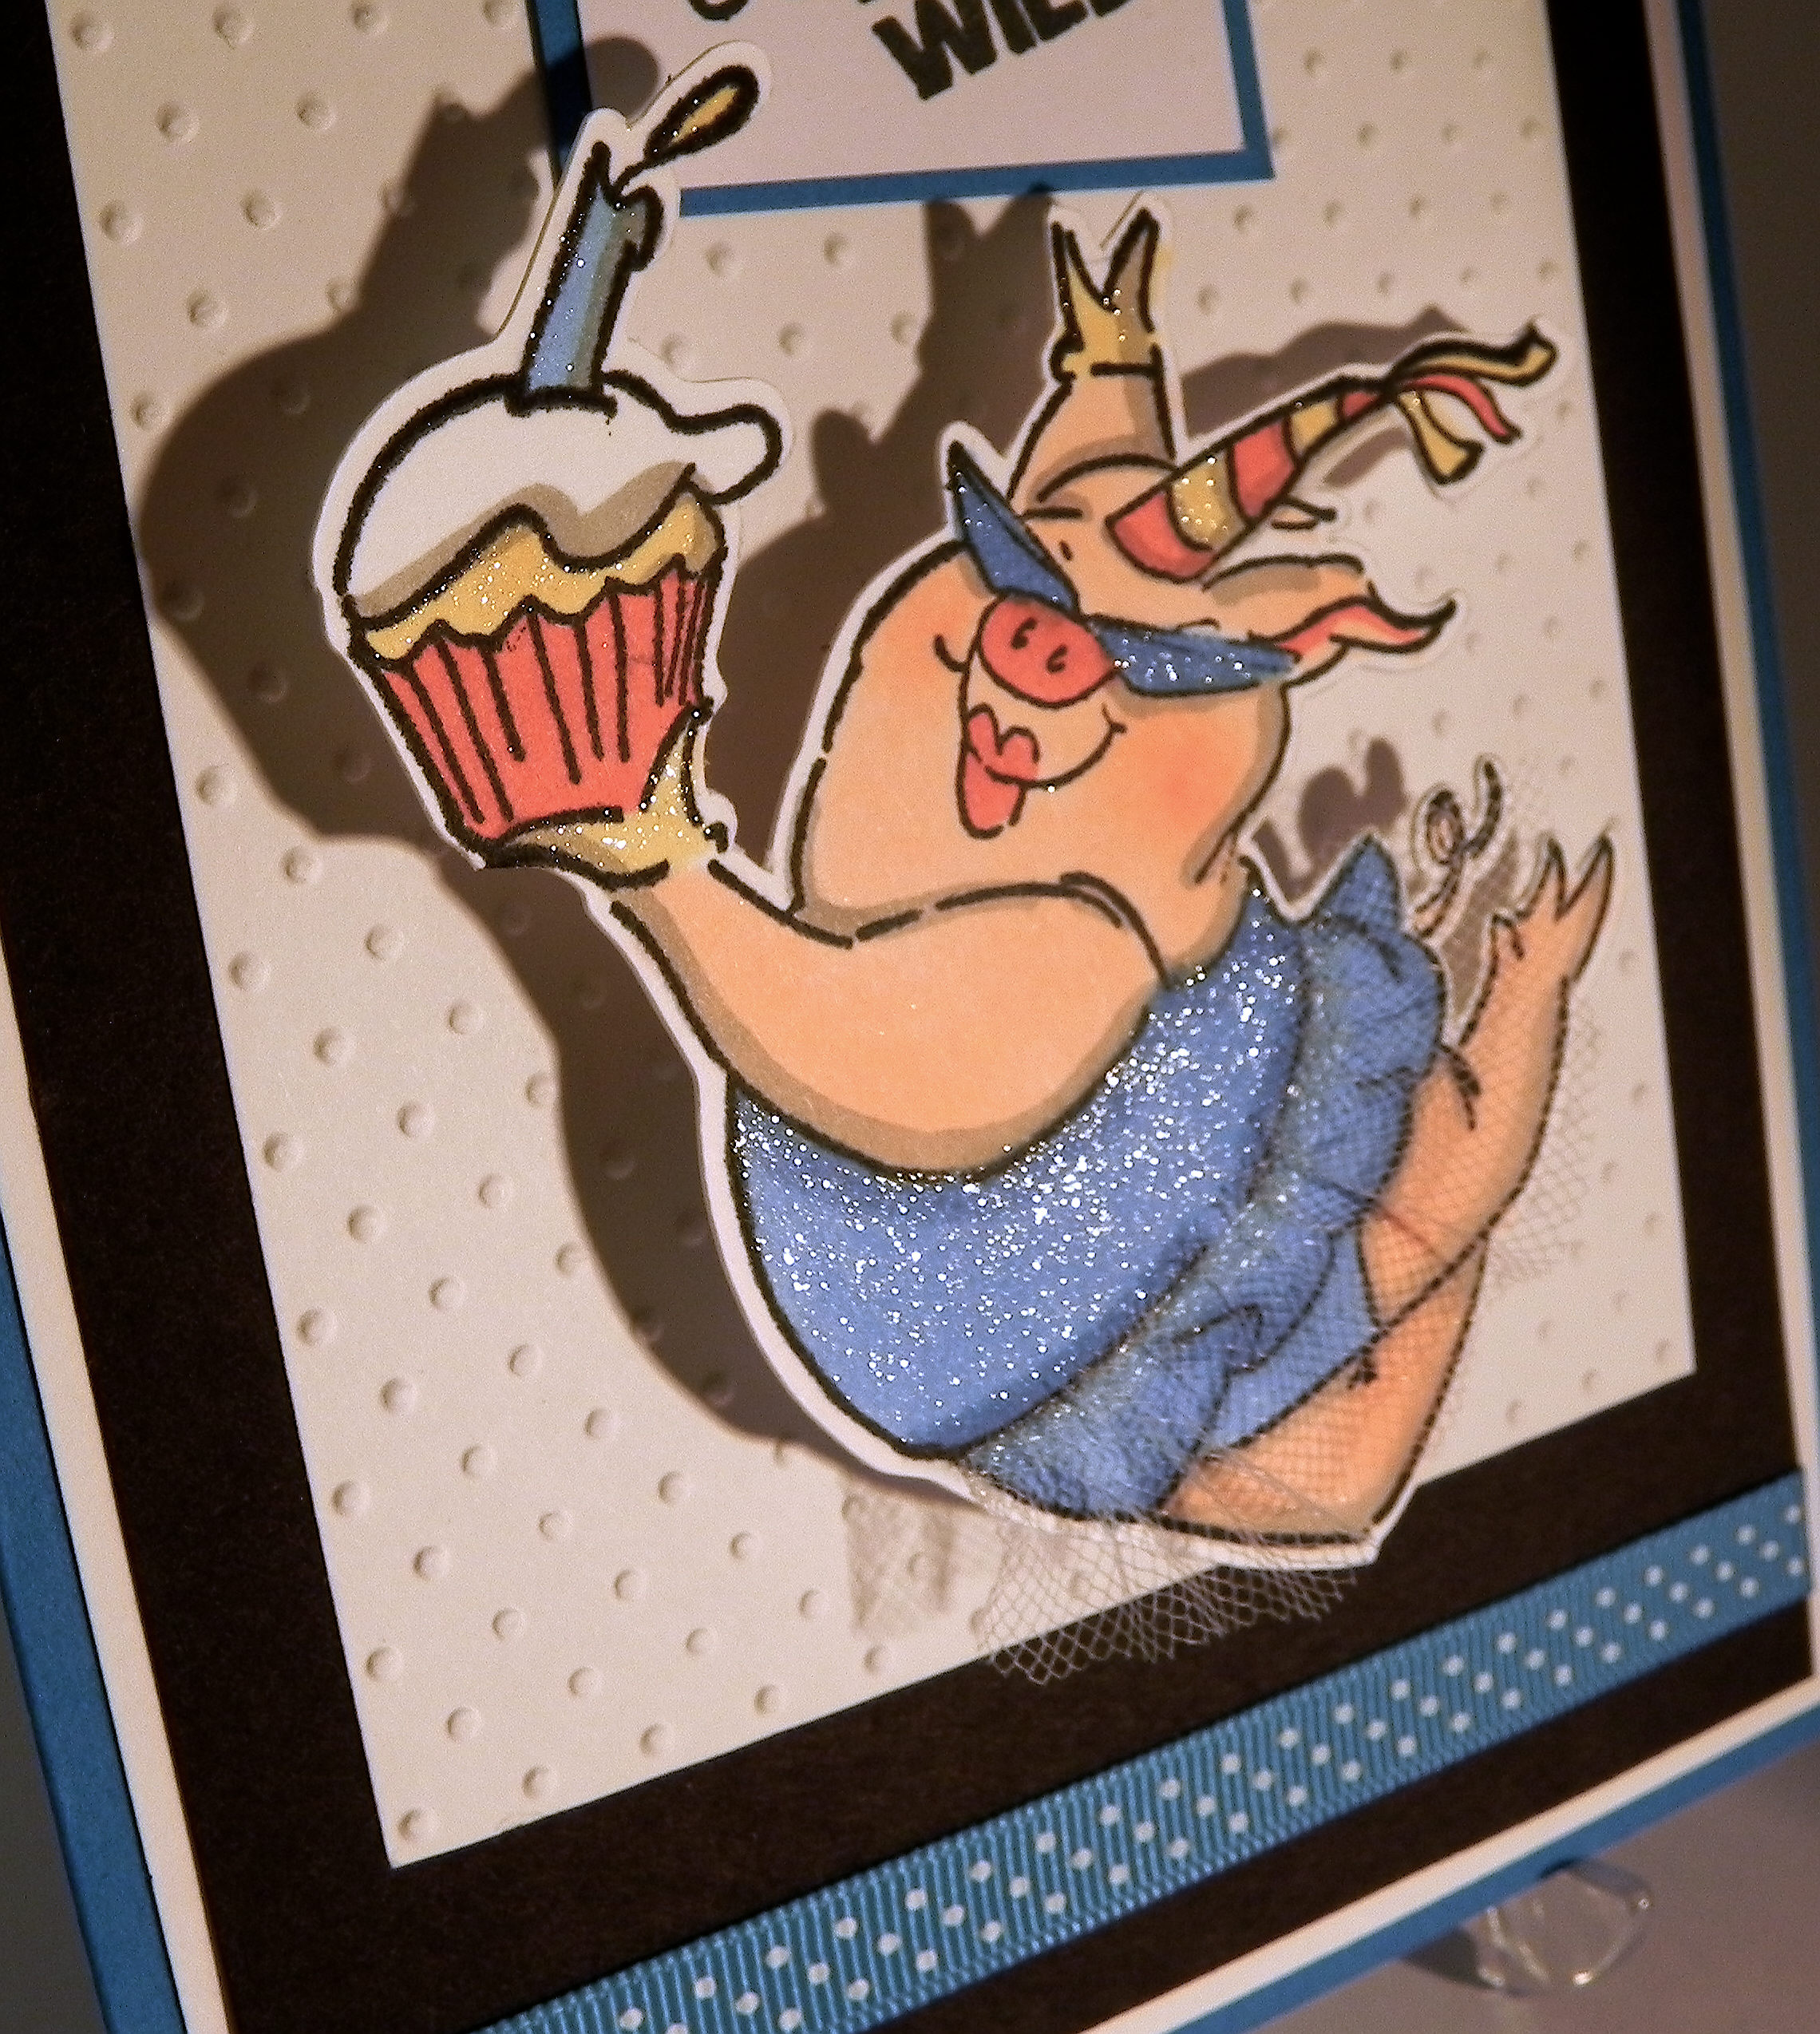
She was originally stamped on plain, white card stock and was then hand-cut, but there were too many thin lines, and I felt she wasn’t all that sturdy. I decided to make a second card using a heavier weight card stock for the stamped pig, but this was very hard to cut without bending it so I made a cut file on the Silhouette and stamped the image on that.  (You’ll see the thin white border around the pig on the photo below.)  Glitter was added with a clear Wink of Stella brush pen.  (It’s on the card in the photos above, but it’s hard to see unless it catches the light at the right angle.)

glitter DSCN7771

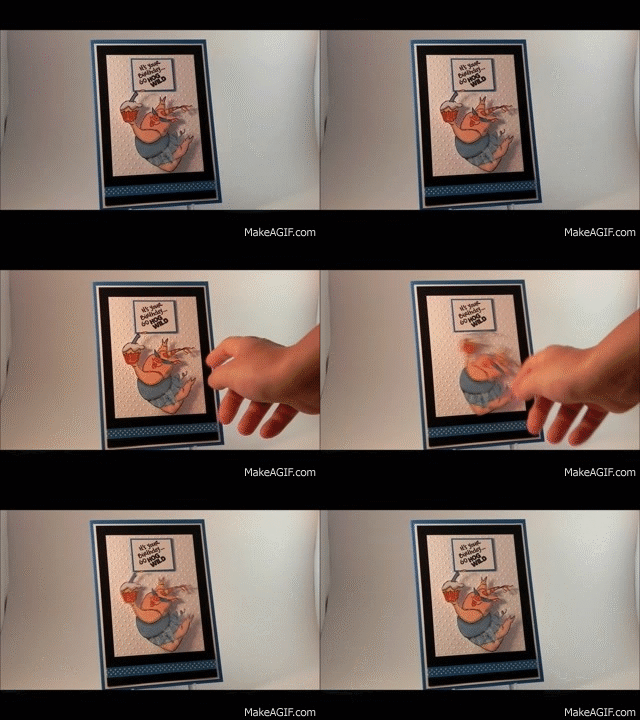
The pig cut-out was mounted on a spring, and it wobbles when the card moves.  (If there is a big blank space below, click on it to see the gif file of the pig moving.  Not sure why it’s sometimes visible and sometimes not!!)

Hog Wild Birthday Card video clip


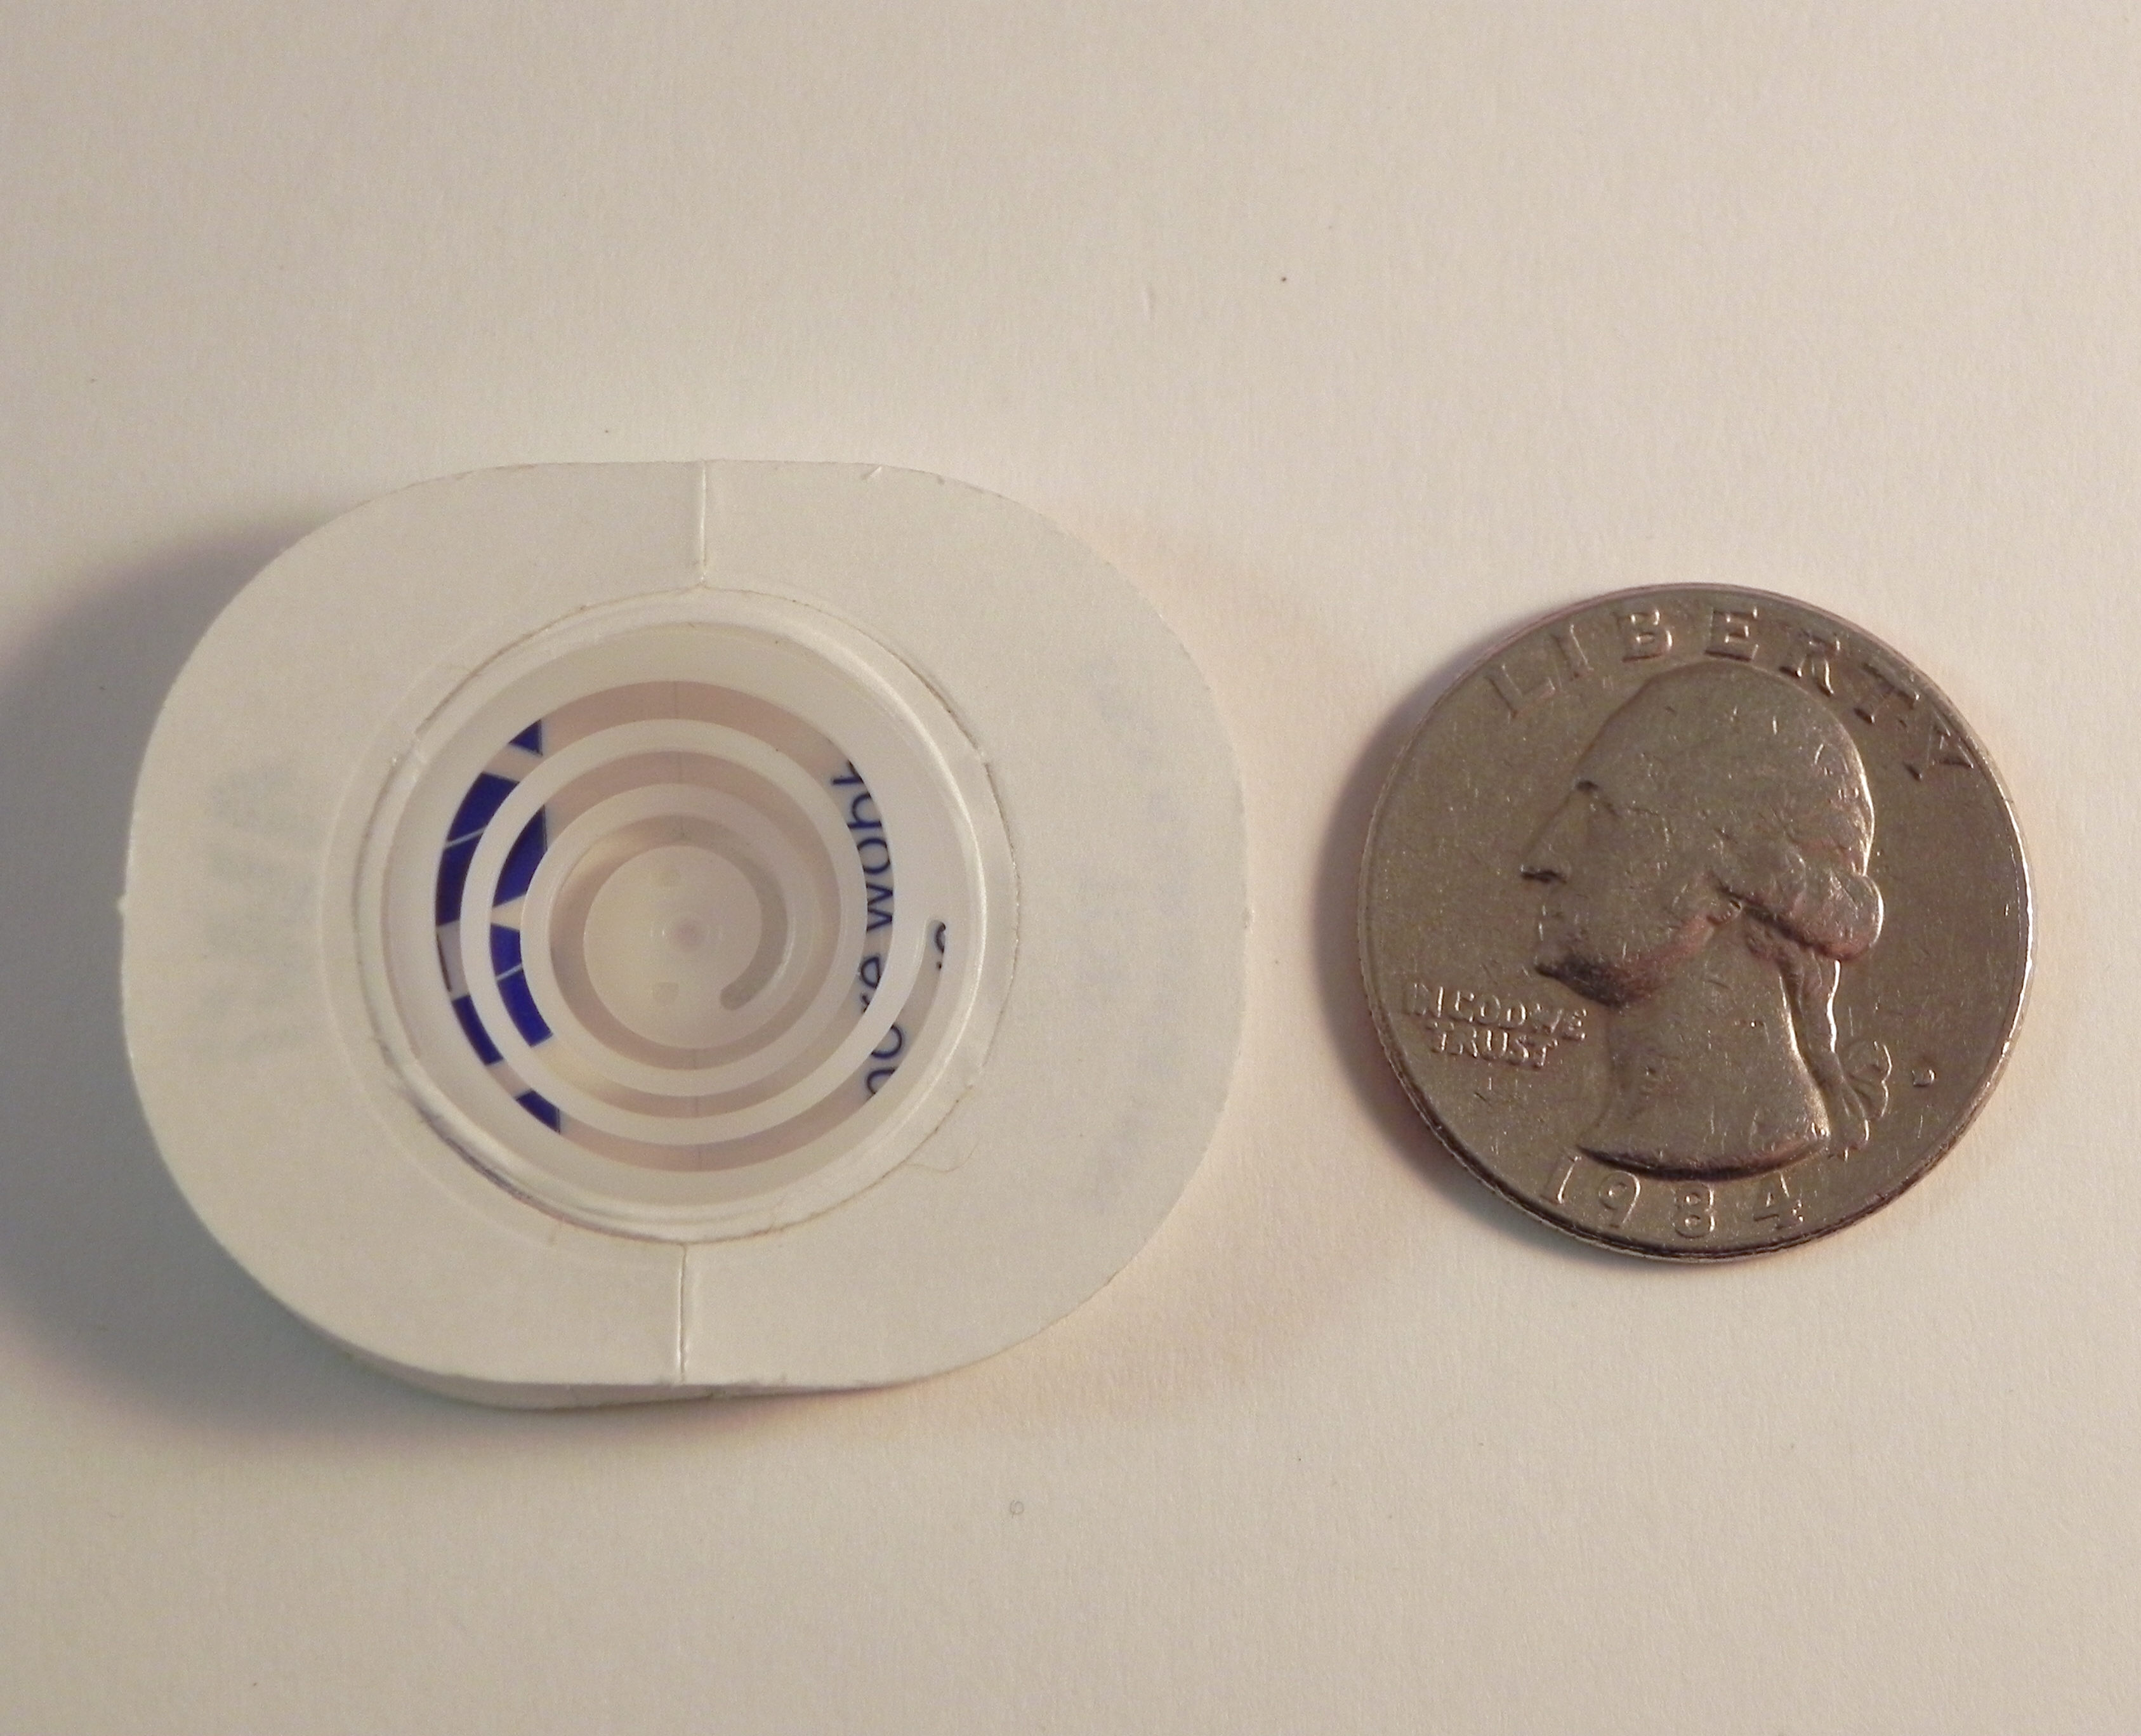
The spring is called an “Action Wobble Spring” and is a plastic spring with adhesive on both sides so it sticks to your card project and to the element you want to wobble.  I really love using these springs, but as you can see in the photo below, the adhesive panels are fairly large so your element needs to be big enough to cover the spring.  (They now come in a smaller/mini size as well.)

wwDSCN7833  wDSCN7839

wDSCN7842

Thanks for checking out my card project!

This content uses referral links as described in the disclosure policy on my sidebar.