Spinning Santa

Spinning Santa

Spinning Santa wDSCN7952.jpg

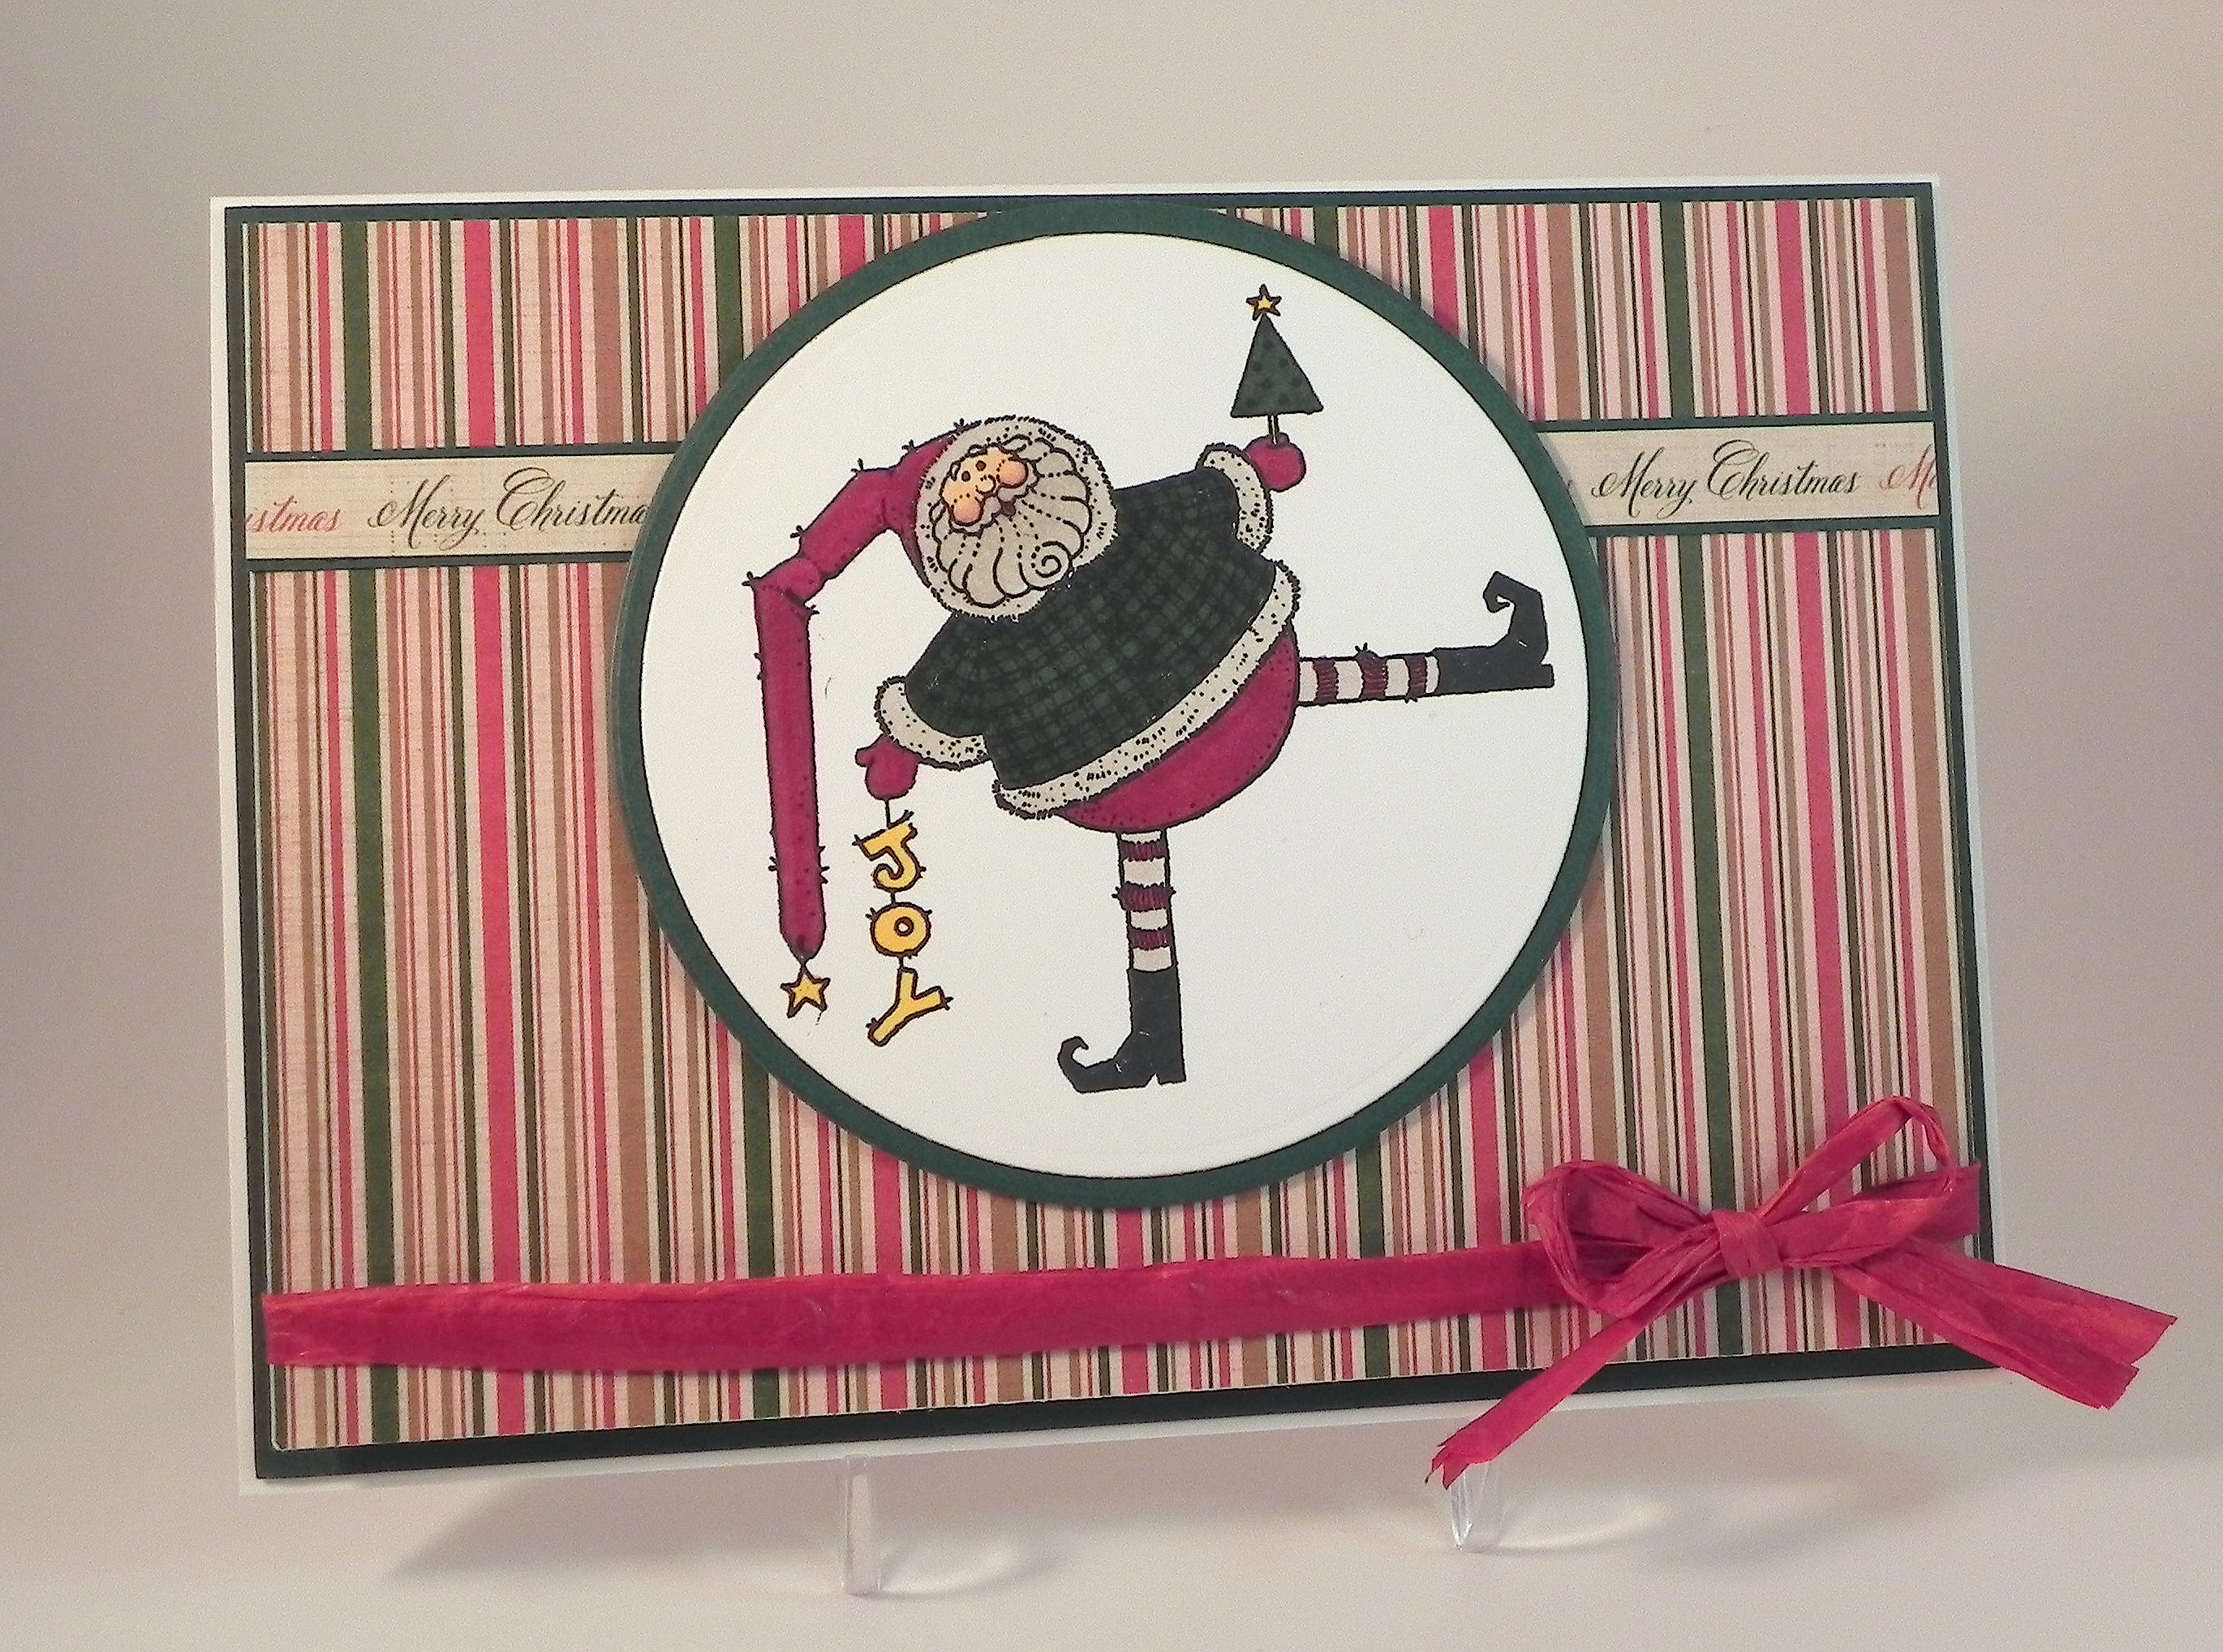
This adorable Santa stamp called “Santa Falling Off Roof” is by Uptown Rubber Stamps.  It just seemed to me like he needed to be “tumbling” so I created a penny slider/spinner card to allow him to “tumble” freely!

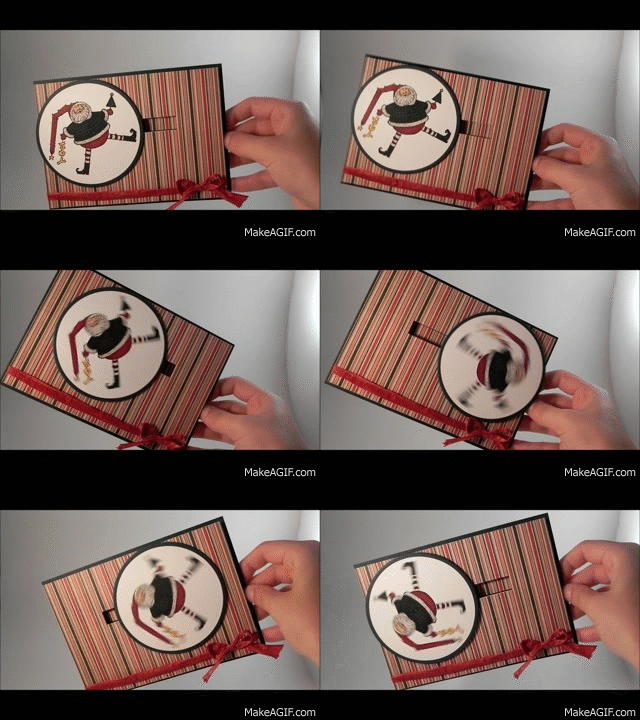
A penny slider or spinner card (I’ve seen them called both) has an element on the card that spins as it travels across the card.  It’s called a penny slider or spinner card because the spinning element is mounted on a “sandwich” of two pennies with a pop dot in the center which rolls across the card in a slot or channel that you create on the front of your card.
Spinning Santa

Click HERE to see a tutorial on how to create a penny slider or spinner card.

After I stamped and colored my image, I used two dies (the 7th and 8th from the outside) from the We R Memory Keepers Nesting Dies “Circles” set to cut out the image and the mat.  I used the smaller of the two long, skinny dies from the Spellbinders “A2 Matting Basics B”  set to cut the channel or slot across the middle of my card.  (It made a beautiful, clean looking cut, but it was slightly wider than I would have liked so I ended up using quarters instead of pennies to insure that the spinning element didn’t fall out.  I discovered later that using larger pop dots would also have fixed the problem.)  What I really like about this design is that with such a large spinning element, it is possible to display the card with the channel completely hidden from view when you are not “playing” with it.  (I created another penny slider card HERE where the channel is always visible.)

I colored the image with Copic Markers (R59, G29, E21, E04, W1, and Y17) .  The striped designer paper is called “Christmas Stripe” from the “A Christmas Story” line by Reminisce.  I mounted this panel on a piece of heavy weight card stock (before cutting the channel) to make it sturdier.  The strip of patterned paper that says “Merry Christmas” is actually the back of the bar code/label strip of a piece of paper called “Christmas Holly” from the same Reminisce line.  The mats are Gina K Christmas Pine.   Recollections heavy weight white was used for the card base.  I adhered the striped piece (that was removed to create the channel) to the card base directly behind the channel to make the channel less noticeable.   A piece of red raffia ribbon was added to finish it off.

This card is one of the cards being featured over at Die Cut Divas this month where I was invited to be a guest designer.  They have monthly challenges where all cards/projects must be made using at least one die cut or embossing folder, and this month’s challenge is Your Favourite Holiday.  (Click HERE to see all the challenge rules.)  Pop on over to Die Cut Divas and share your holiday projects.  I can’t wait to see what you create!

Thanks for checking out my card project!

This content uses referral links as described in the disclosure policy on my sidebar.

Hang in There Get Well Card

Hang in There Get Well Card

cDSCN7665

This card is one of the cards being featured over at Die Cut Divas this month where I am extremely excited and honored to have been asked to be a guest designer for the month of August.  (Thanks, Cathie, for asking me!!)  They have monthly challenges where all cards/projects must be made using at least one die cut or embossing folder.  (Click HERE to see all the challenge rules.)

The monkey image on this card is from “Monkey Business” by Stampin’ Up. If you move the green circle at the top of the card, the monkey “swings” back and forth.  The card design was inspired by a You Tube video called, “INTERATIVE CARDS – HOW TO CREATE A SWING CARD” by Craft Lovers (HERE).

Hang In There video clip 2 DSCN7783

The leaves were cut with my Silhouette (leaf design id #1221 from the Silhouette Store).  The ovals were made with dies from the Spellbinders Classic Ovals die sets.  The greeting is computer generated.  The green patterned paper is from a digital paper set called Jungle from an Etsy shop called PrettifulDesigns (HERE).  The two solid green papers were made by importing the digital paper into the Silhouette Software and using the “Fill Color” dropper to “copy” the colors onto panels to print.  This paper was then used for the leaves.  The ivory panel behind the monkey was made with the Hero Arts “Florentine Scroll Background” stamp and memento dessert sand ink.

Pop on over to Die Cut Divas and check out their current challenge – Your Favourite Holiday.

Thanks for checking out my post.

Embossed Snowman

Embossed Snowman

Embossed Snowman DSCN6057

This card (previously posted) is one of the cards being featured over at Die Cut Divas this month where I was invited to be a guest designer.  They have monthly challenges where all cards/projects must be made using at least one die cut or embossing folder.  This month’s challenge is Your Favourite Holiday. (Click HERE to see all the challenge rules.)

The snowman on this card was made with the Sizzix Snowman & Hat Bigz die which also came with a bonus embossing folder that fits the die.    The snowman was cut from Gina K Pure Ivory card stock, and the hat was cut from a scrap of textured black DCWV card stock.  The arms were cut freehand from a scrap of black.  Ribbon and gems were added to finish him off.

The background panel is Gina K Kraft card stock embossed with the Darice Snowflake Swirl folder.  The frame was cut using my trimmer from a piece of Pebbles “Mary” card stock from the Walnut Grove collection.  The Card base is Gina K Pure Ivory.

The greeting stamp is from the Gina K Designs “Winter Cheer” set and was stamped with versamark and heat embossed with gina k black embossing powder on kraft card stock and matted on pure ivory. A scrap of ribbon, jute and a glittered, wooden mini snowflake ornament from Michaels were added to the greeting banner.

This card was originally made for the Perfectly Rustics Challenge No. 36 – Embossing – where we were to use wet or dry embossing on our project. I used both.  (http://perfectlyrustics.com/2014/11/17/prdc-36-embossing/)

Pop on over  to Die Cut Divas and check out their current challenge – Your Favourite Holiday.

Thanks for checking out my card project!

This content uses referral links as described in the disclosure policy on my sidebar.

Always and Forever Quilled Wedding Card

Always and Forever Quilled Wedding Card

Quilled Wedding Card DSCN5602

This card is one of the “guest design team” cards being featured over at Die Cut Divas.  I am extremely excited and honored to have been asked to be a guest designer for the month of August!  (Thanks, Cathie, for asking me!!)  They have monthly challenges where all cards/projects must be made using at least one die cut or embossing folder.  (Click HERE to see all the challenge rules.)

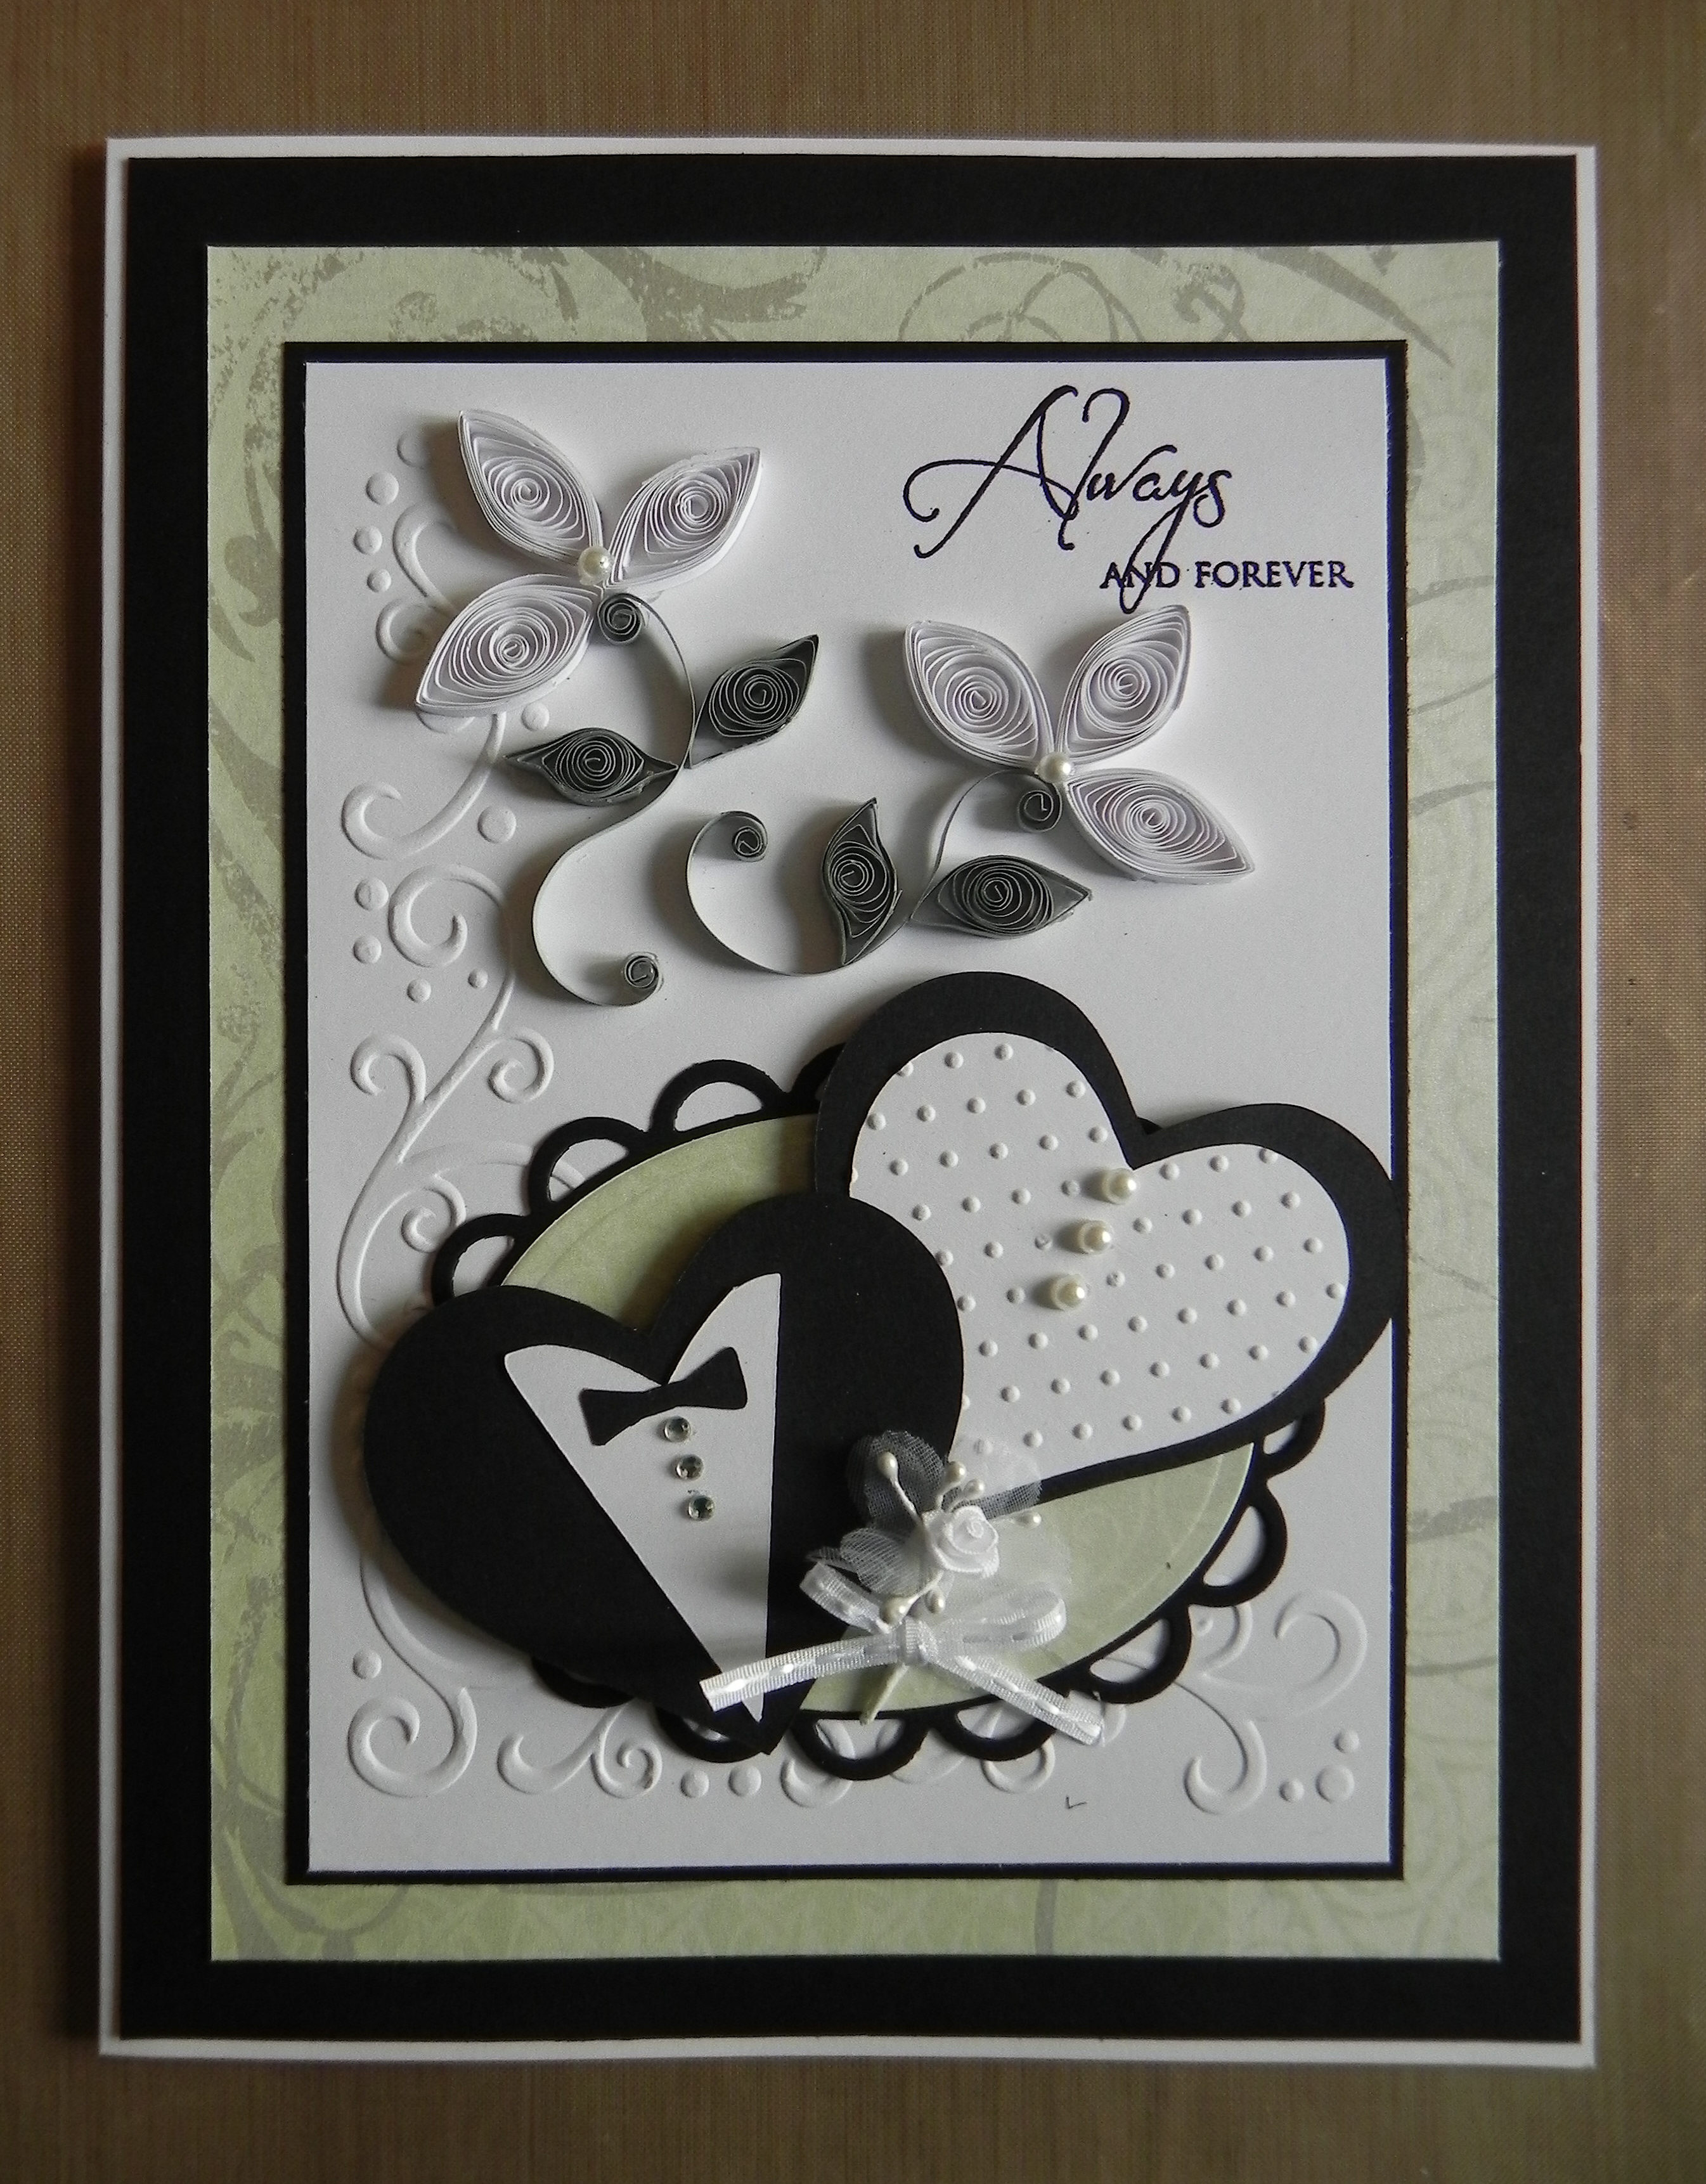
The bride and groom hearts are from the Sure Cuts A Lot 2 Basic Shapes Library and were cut with my Silhouette.  Dies from the Spellbinders Classic Ovals and Classic Scalloped Oval sets were used behind the hearts. The embossing folders used are Cuttlebug Swiss Dot and Darice Corner Scroll.  

I used a basic marquise shape for the quilled flowers and leaves.  My Quilled Iris post shows a few other cards I made where I tried my hand at quilling.

The greeting was stamped with Memento Tuxedo Black ink with a stamp from the Gina K Designs “Always and Forever” stamp set (retired?).  Recollections white and black card stock was used along with a piece of printed paper from the DCWV  “The Luxury Stack” paper pad.  Pearls, rhinestones, a flower and ribbon finished it off.

Pop on over  to Die Cut Divas and check out their current challenge – Your Favourite Holiday.

Thanks for checking out my card project!

This content uses referral links as described in the disclosure policy on my sidebar.

Flowers in Vase Sympathy Card

Flowers in Vase Sympathy Card

Flowers in Vase Sympathy Card DSCN6075.jpg

This card is one of the cards being featured over at Die Cut Divas this month where I was invited to be a guest designer.  They have monthly challenges where all cards/projects must be made using at least one die cut or embossing folder.  (Click HERE to see all the challenge rules.)

A mask was made using the Spellbinders Deckled Rectangles. The background panel was then stamped (using the mask) with the Rubbernecker Stamps “French Script BKG” stamp and Tim Holtz Frayed Burlap Distress Ink on Gina K Pure Ivory card stock. Then, a second mask was used to create the two squares over the script to add a bit of color. The inks used were Memento Elderberry and Stampin’ Up Pistachio Pudding. Using the deckled rectangle mask again, the area over the script and squares was lightly inked using Memento Elderberry. The sentiment stamp was from the Gina K Designs “With Love and Prayers” stamp set and was stamped with the frayed burlap ink.

The flowers were made using the Heartfelt Creations “Sun Kissed Fleur” die and the “Sun Kissed Fleur PreCut Stamp” for detail. They were stamped and sponged with Stampin’ Up Soft Suede ink on Stampin’ Up Pistachio Pudding card stock. Buttons and jute were added to the centers. I made several of these flowers when I made my Thinking of You Card back in October and had saved the extras to use later. (Originally, I had stamped flowers directly onto this card base over the inked squares but decided to use these 3D flowers and the vase instead. I may have positioned the squares differently had I thought of this earlier.)

The two layers of the vase were cut with the Spellbinders Filigree Vase dies from Gina K Edible Eggplant card stock. The vase and the flowers were adhered to the ivory panel using pop dots.

I hand-embossed the lines around the edges of the ivory panel using a score board. The card base was made from Gina K Edible Eggplant card stock.

Pop on over to Die Cut Divas and check out their current challenge – Your Favourite Holiday.

Thanks for checking out my post.

This content uses referral links as described in the disclosure policy on my sidebar.