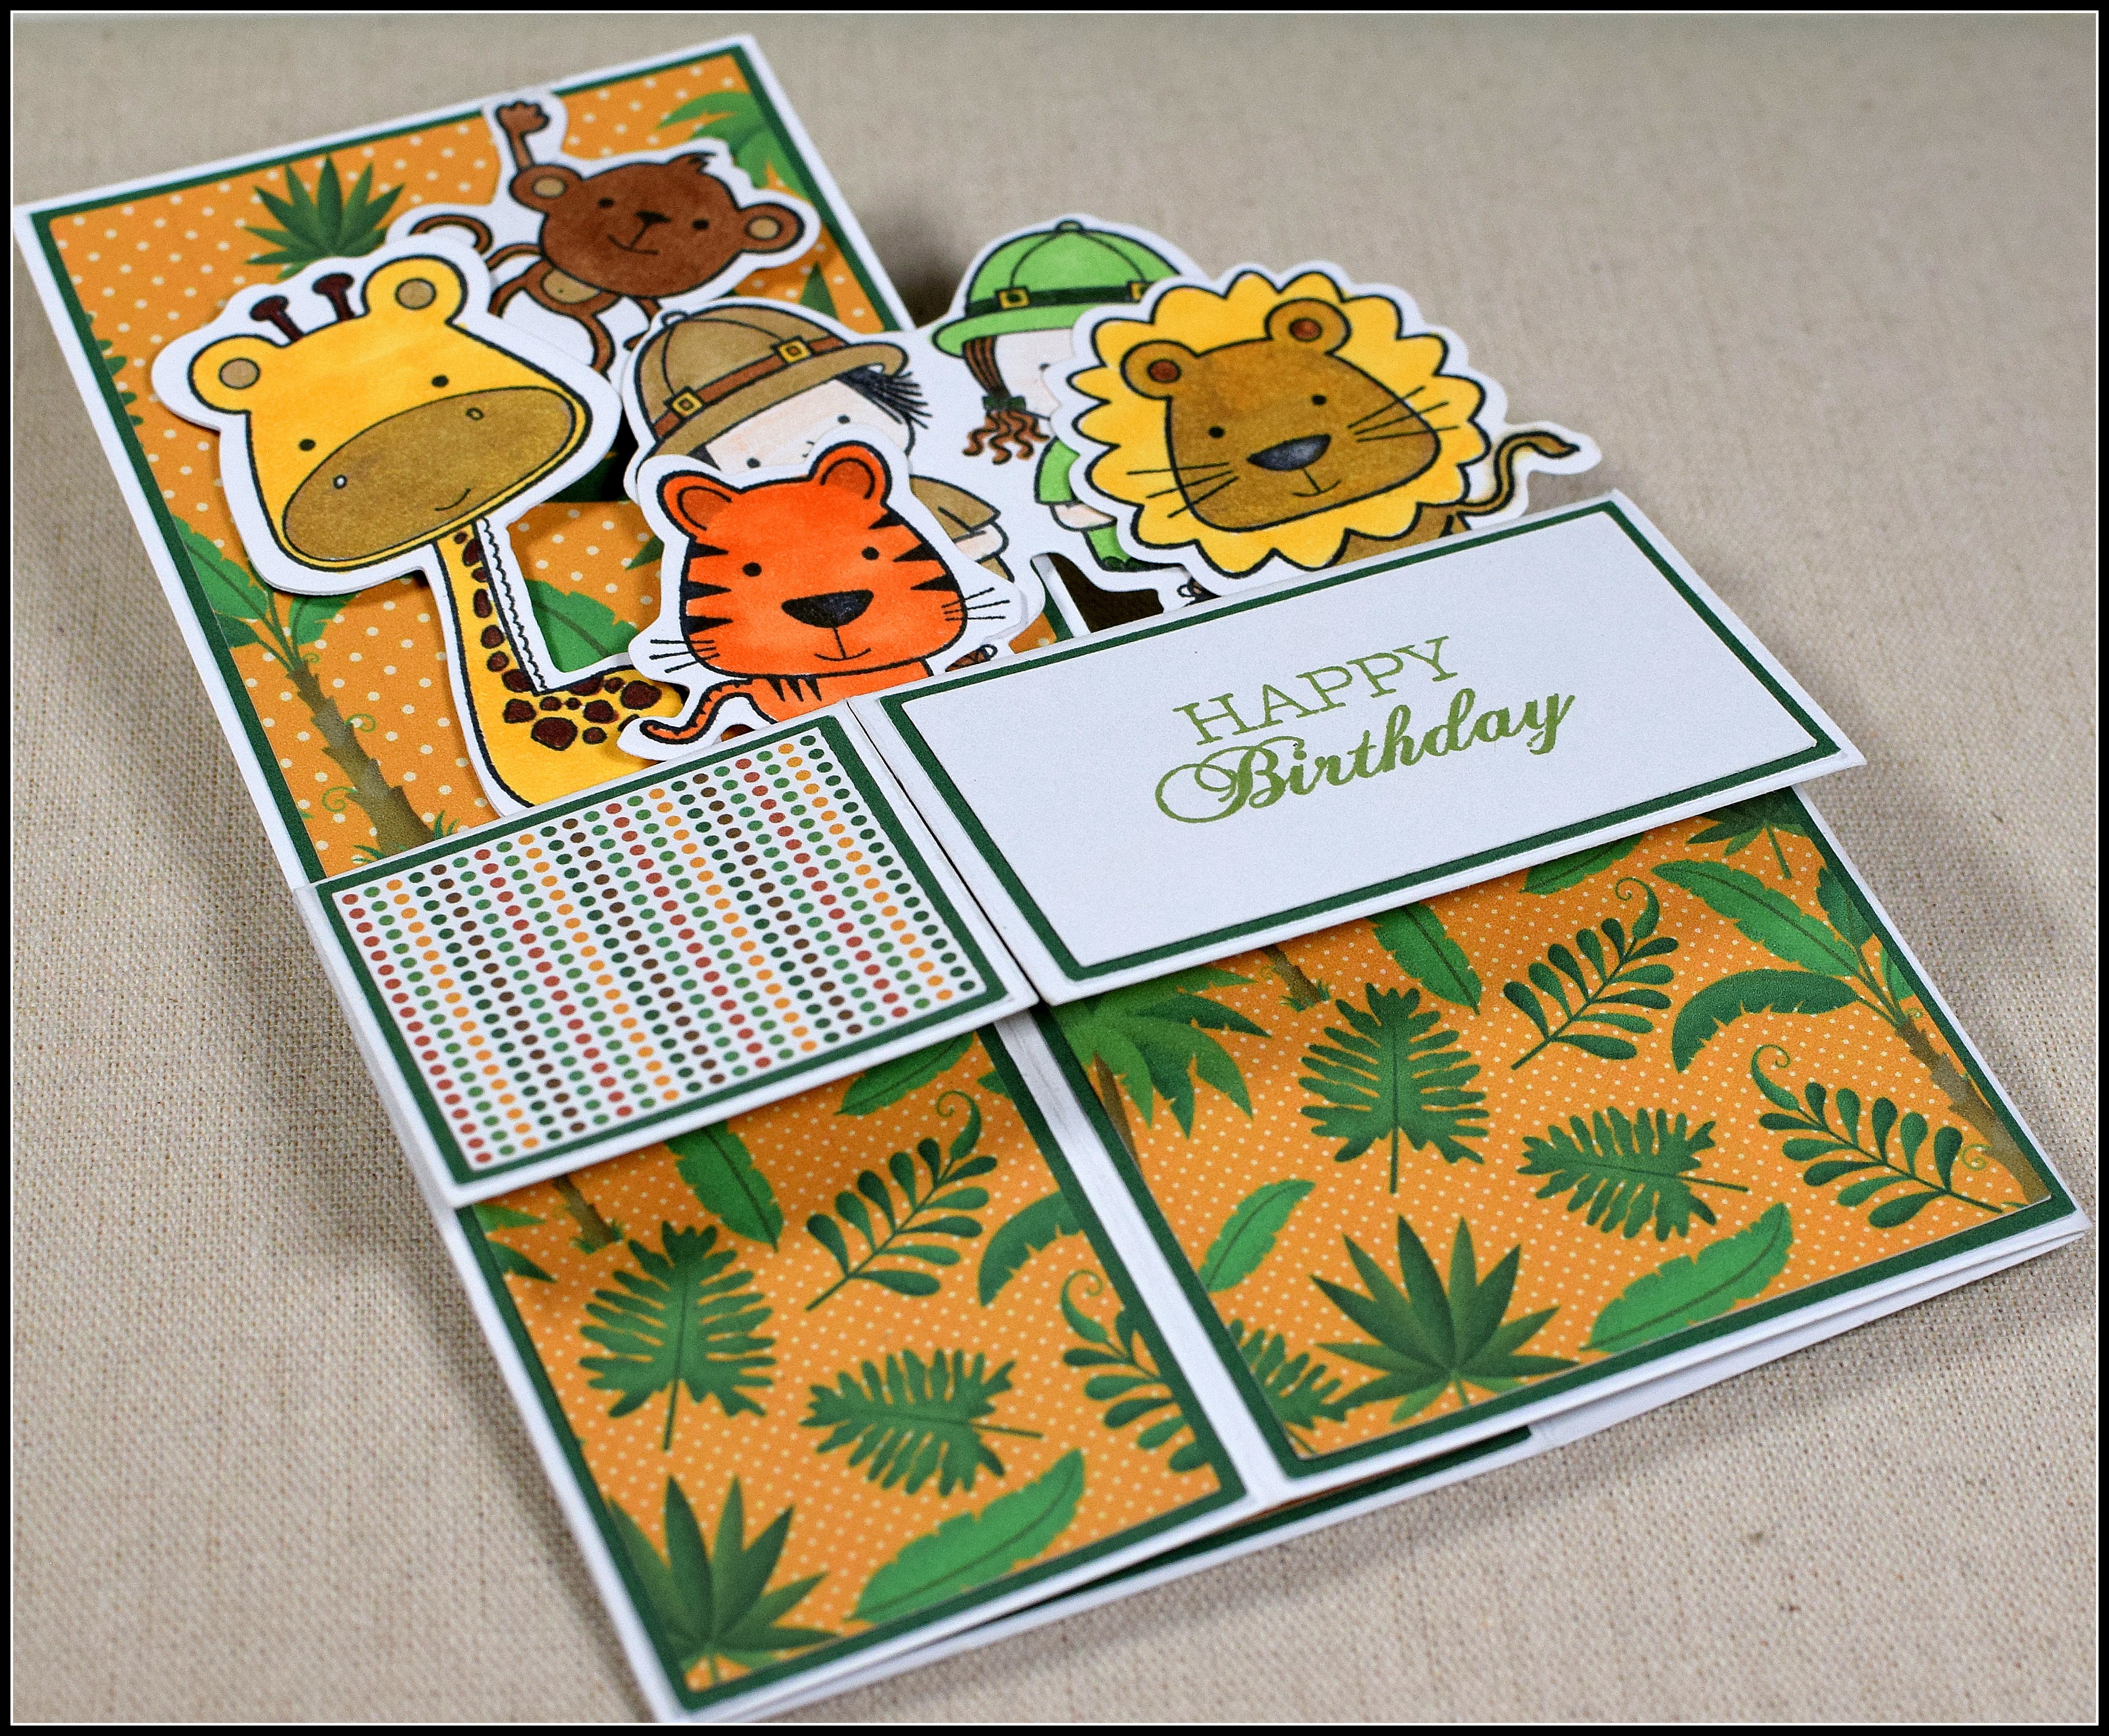
Birthday Balloons (and Bucks) Bridge Card
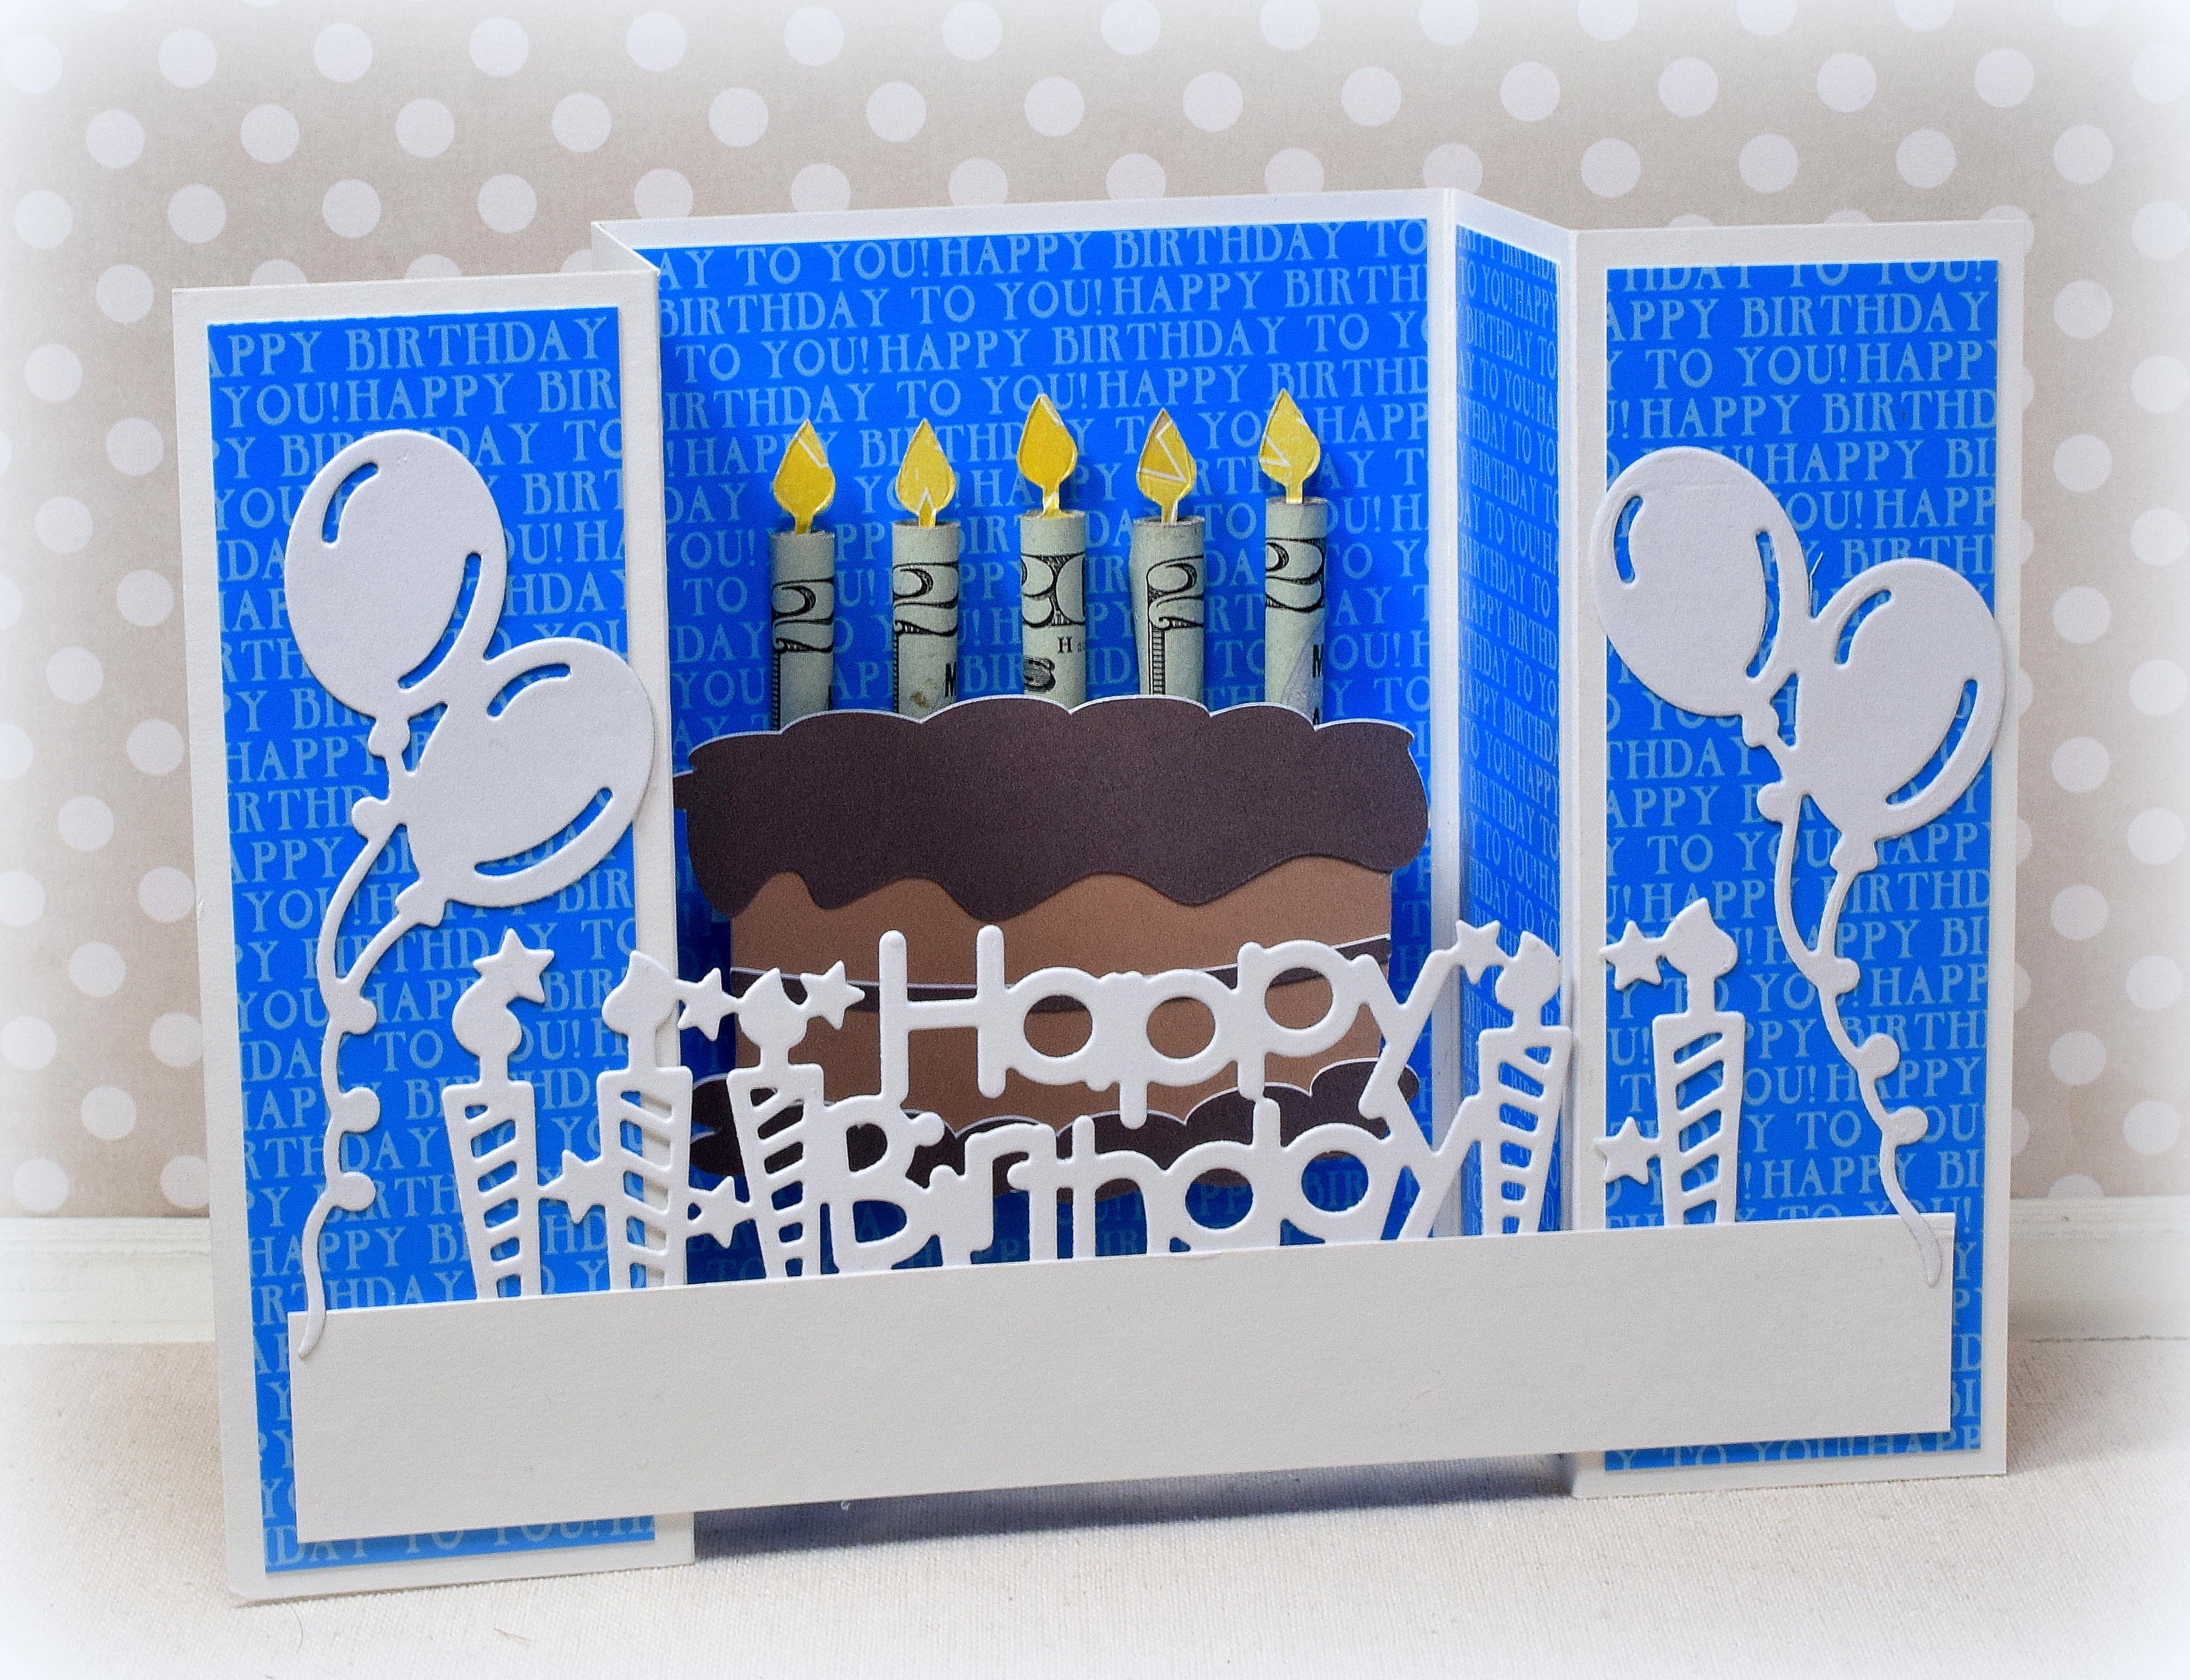
This card features a fun card base, a few die cuts… and some bucks! I was looking for a fun way to present a monetary gift as part of a card layout and had been meaning to try a bridge card with this (unbranded/no longer available?) “Happy Birthday” die (which is actually supposed to make a birthday hat).

The cake was adapted from an svg file called “Birthday Elements” from svgcuts. The balloons were made from an unbranded die I found online. And the flames were cut with the Karen Burniston Cake Pop-Up Die (#1028).
To create this card base which is 5″ x 7″ when folded, I used a 10 1/2″ x 5″ piece of card stock scored at 1 3/4″, 3 1/2″, 7″, and 8 3/4″ and folded as shown:

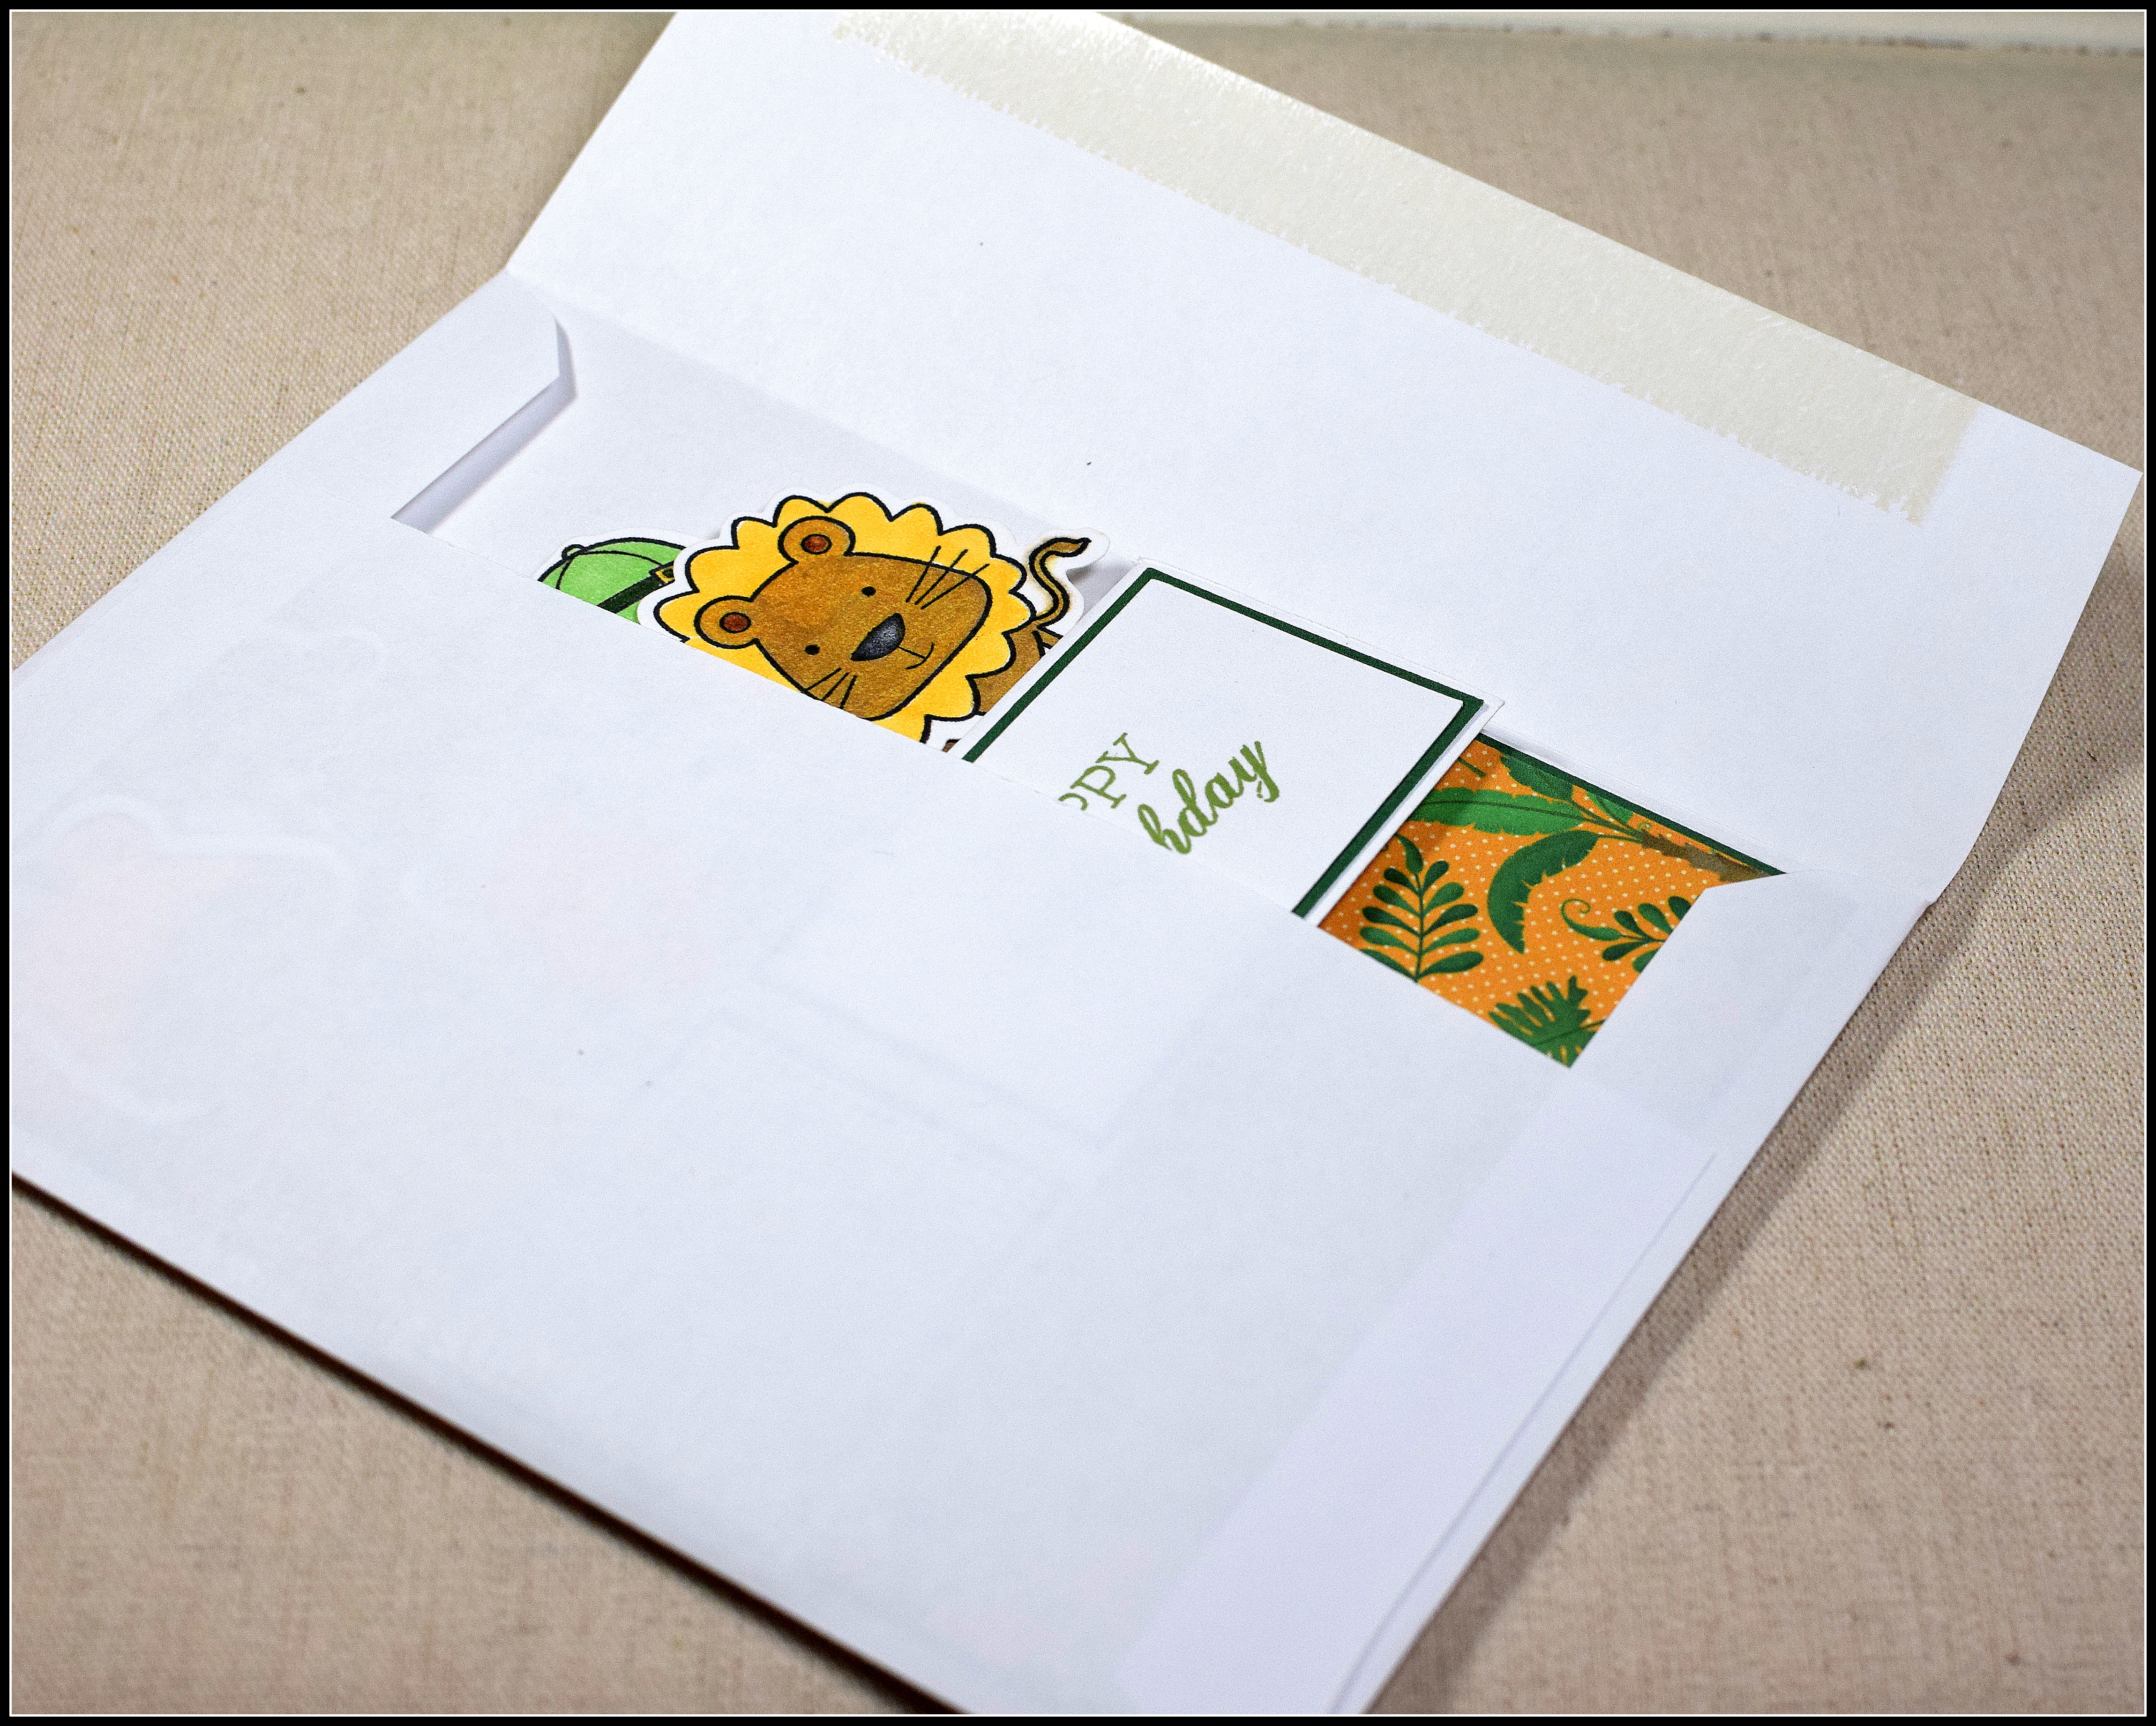
There is plenty of room on the back for a stamped or handwritten sentiment and signature. This card, with the money, folds flat (kind of). It fits in a regular A7 size envelope but is a little bulky and would require a trip to the post office if mailed – if you are comfortable mailing cash.


And here’s a version without the money. (This one does fold flat, but some may argue it’s not quite as fun to receive – lol!)

Thanks for checking out my card project!
This content uses referral links as described in the disclosure policy on my sidebar.


