Snowflake Thank You Card

Snowflake Thank You Card

Snowflake Thank You Card wDSCN8993.jpg

This seemingly simple card design was a real bugger to make!  I heat embossed the snowflakes on acetate, and no matter how “clean” the stamped image looked, there were always flecks of embossing powder visible AFTER the heat was applied!  I don’t know if the heat tool was blowing tiny flecks around while heating or if the flecks were so small and were there but not visible until after they were heated, but I could not get a perfectly clean panel to use!  My daughter said it just looked like snow and was fine.  Ugh!!!  Anyway…

Gina K Kraft card stock was used along with thick, heat resistant acetate.  (I originally tried it with overhead transparency paper, and it melted as soon as the heat was applied!)  The images were all heat embossed with Versamark ink and Recollections Snow embossing powder.  The stamps were from the “Christmas Wishes” set, the “Triple Play Frame” set, and the “Massive Messages” set, all by Gina K Designs.

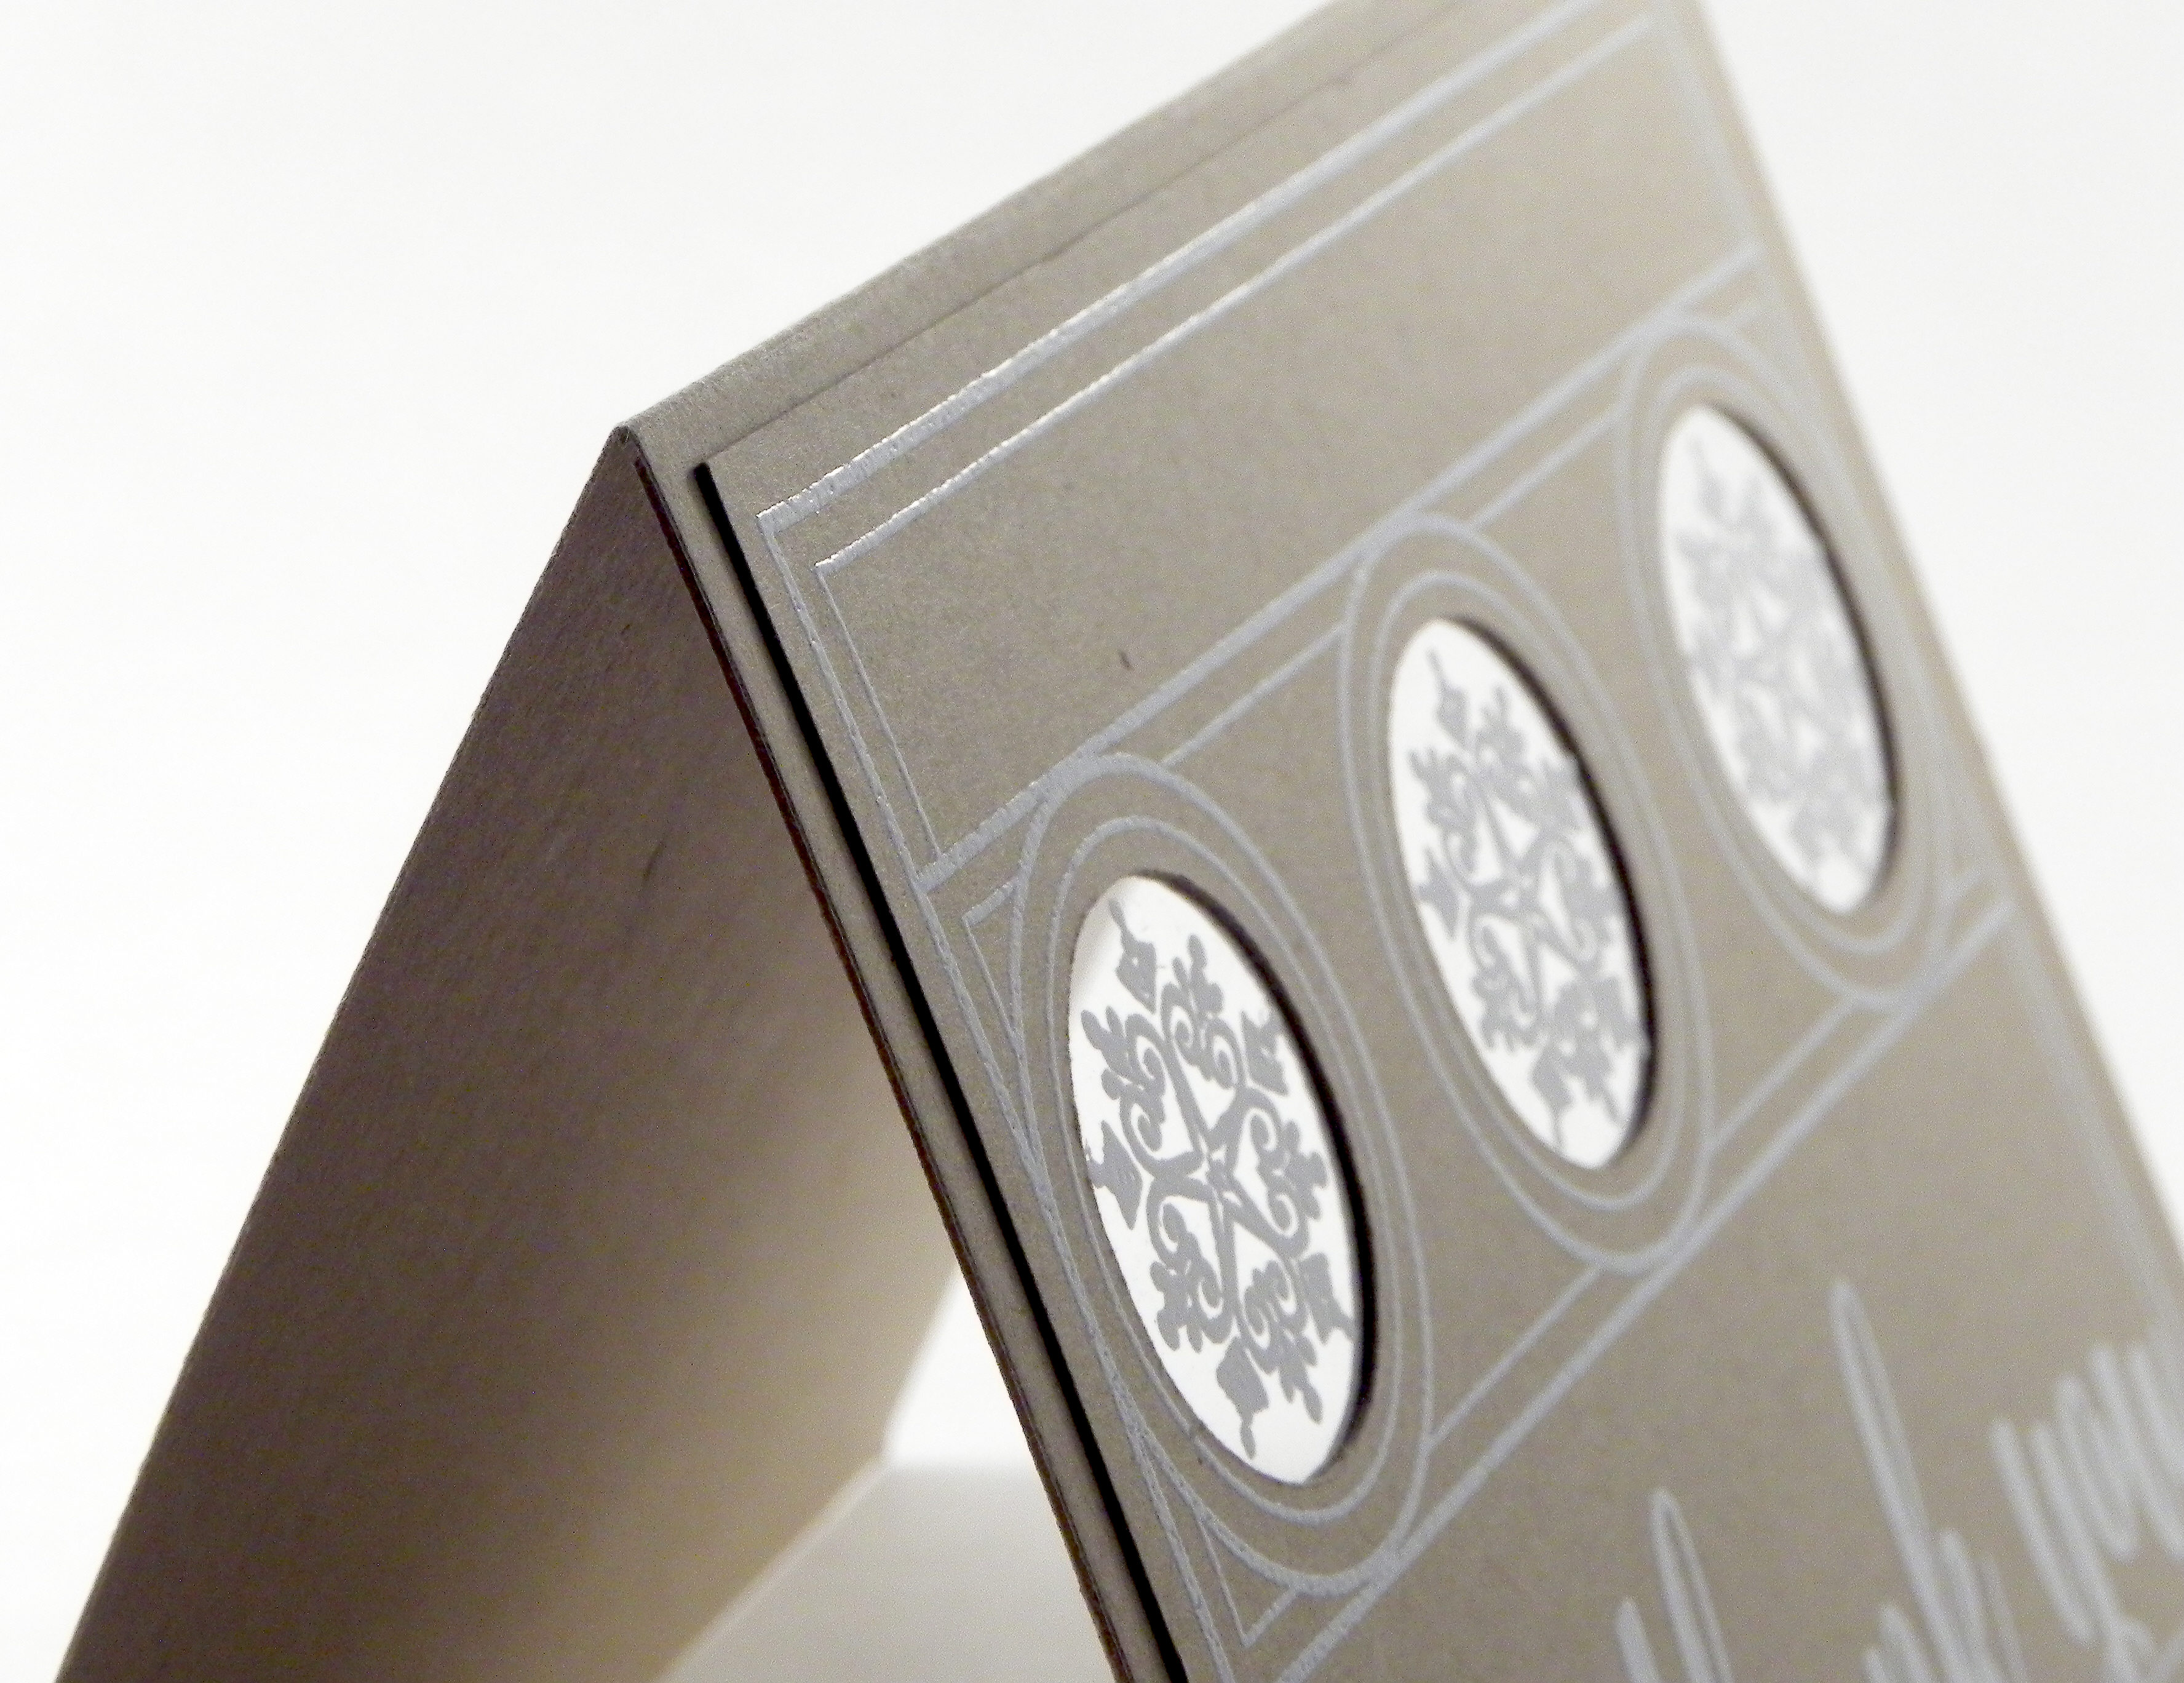
I used my Silhouette to cut the circles on the top layer and on the card base, and I used my MISTI to line up the frame stamp.  The acetate was sandwiched between these layers.

Below is a photo that better shows the snowflakes on the acetate. The circles look really dark at the angle in the photo above, but they are clear.

wDSCN9035

Before making the version with the acetate, I made the one below with the snowflakes stamped on the card stock.

wwDSCN9067

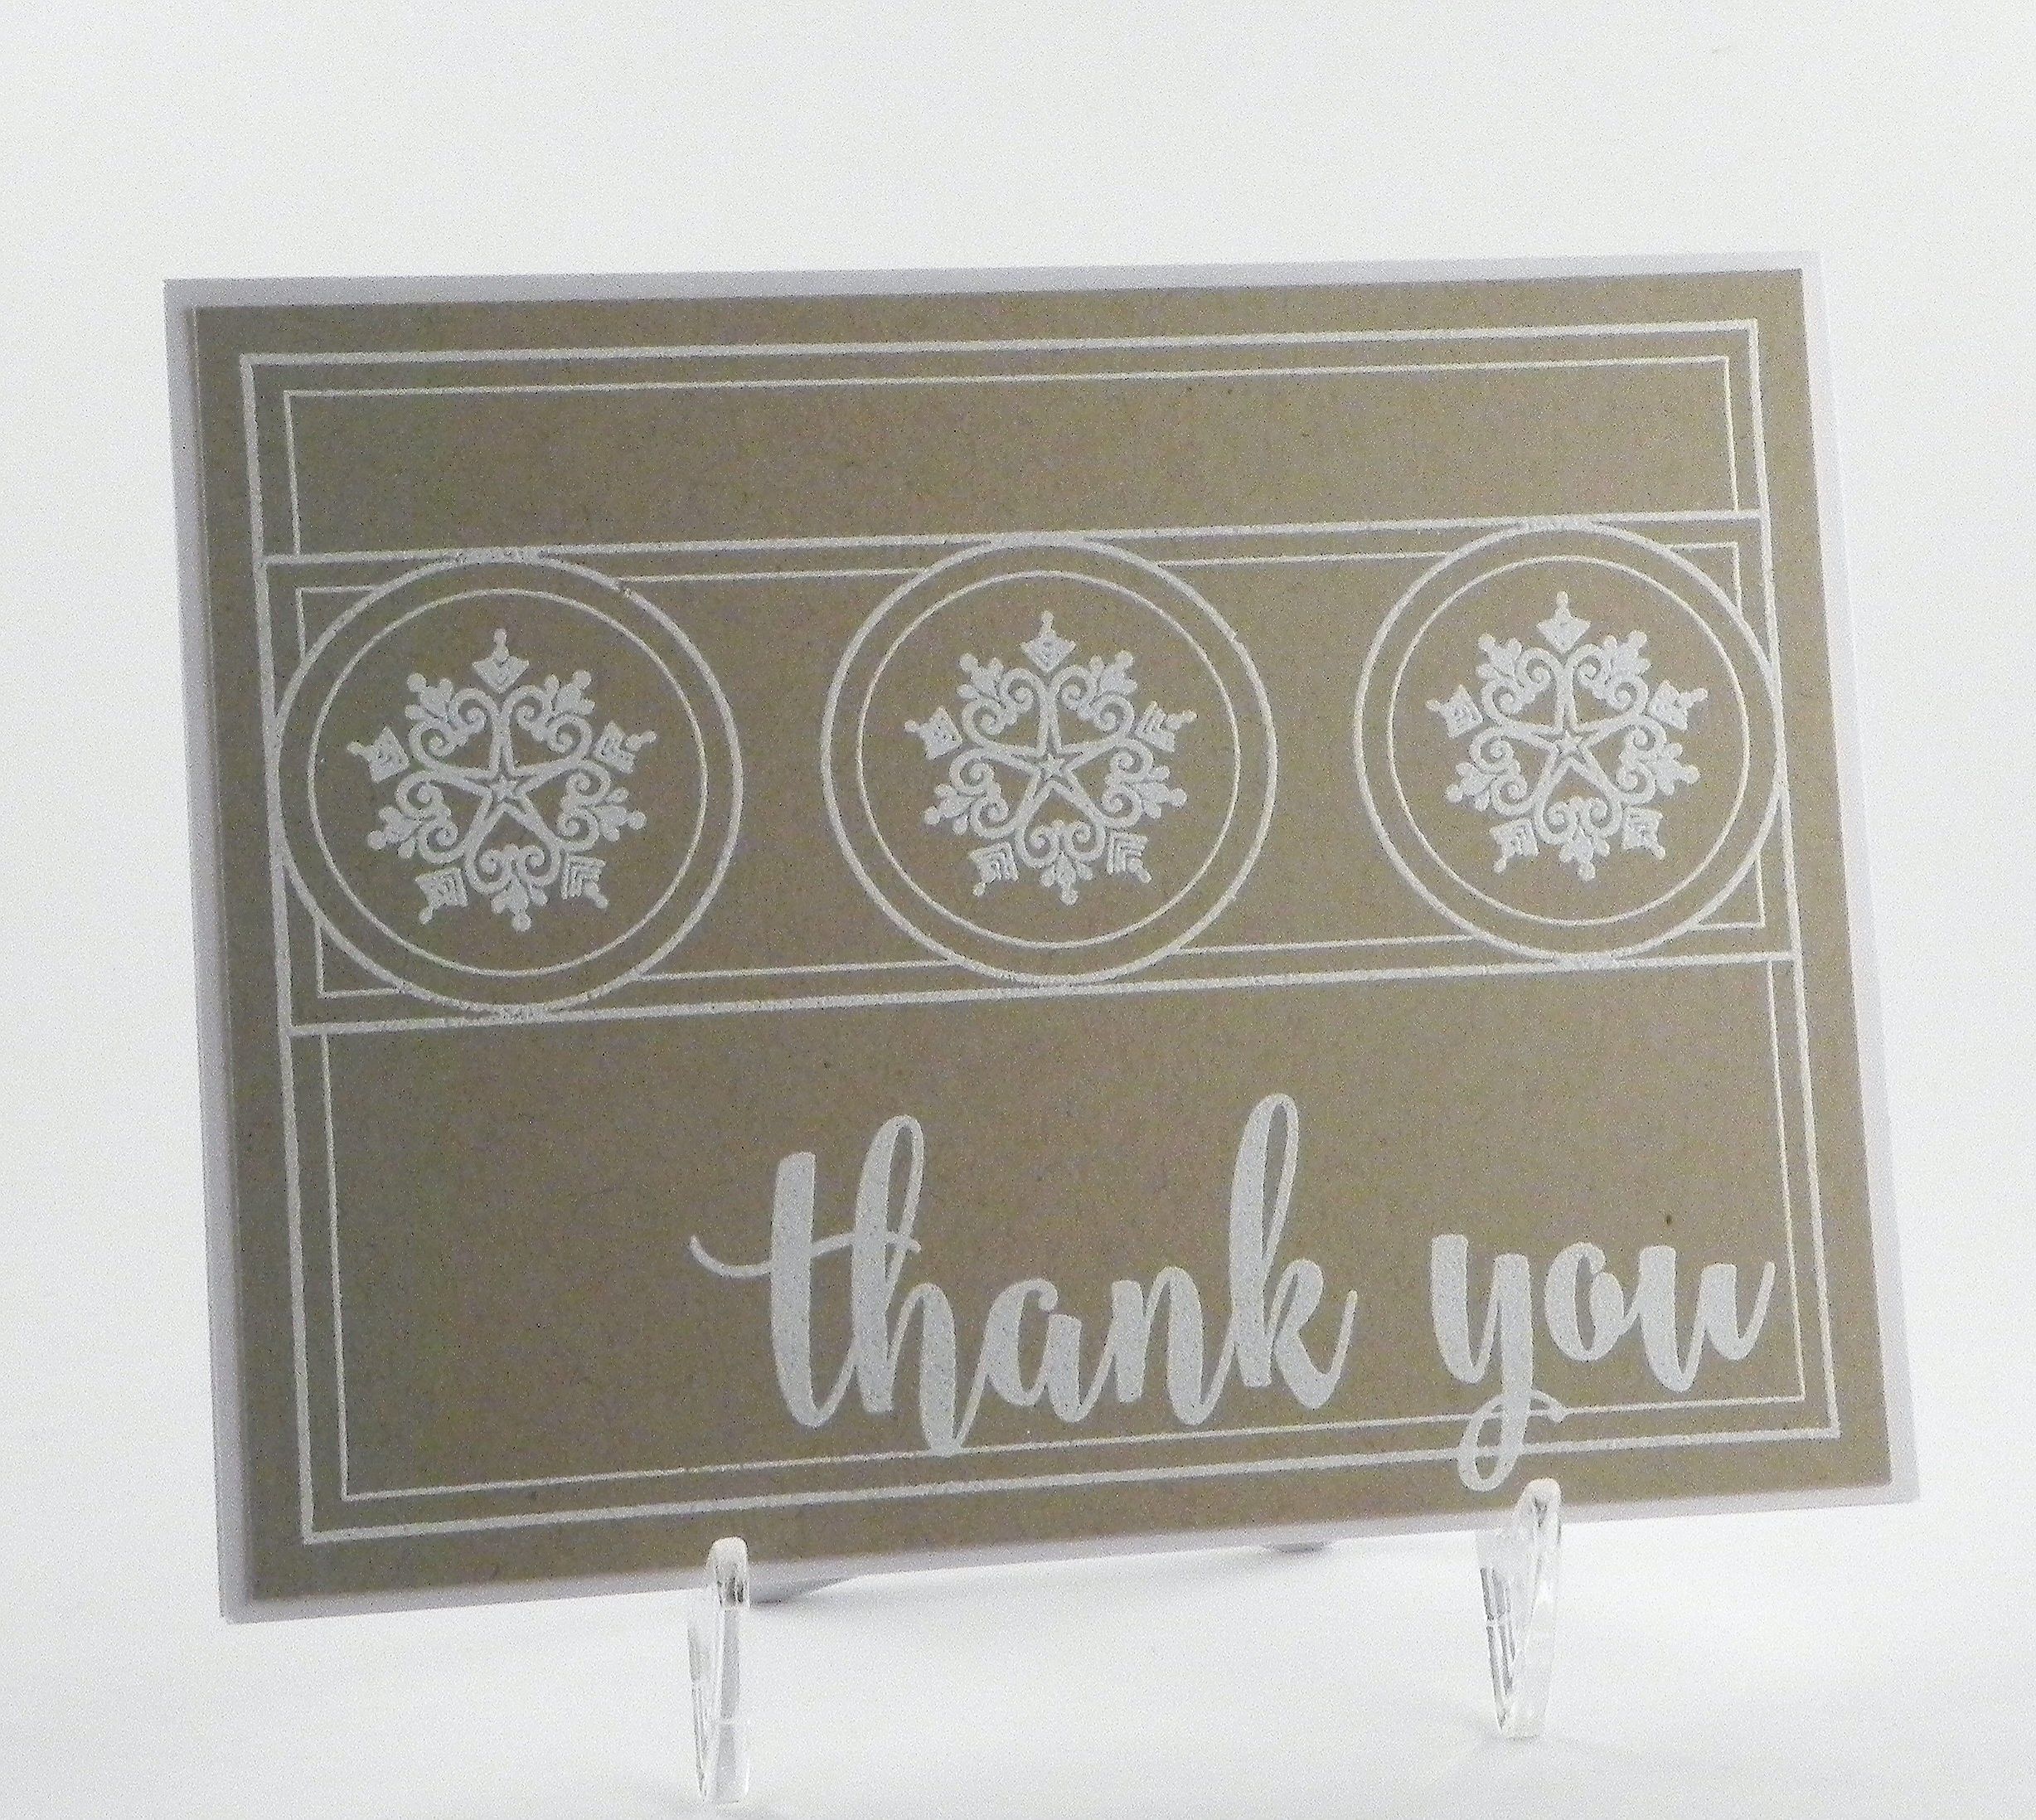
The embossing powder behaved much better on this version, and the detail of the snowflakes was better on the card stock than on the acetate.

The MIUM Challenge over at StampTV this week is to use Kraft cardstock somewhere on our project.  Check out the gallery of projects submitted HERE.  (Sadly, this site is no longer active.)

Thanks for checking out  my card project!

This content uses referral links as described in the disclosure policy on my sidebar.

Another Wine & Cheese Thank You

Another Wine & Cheese Thank You

Stamped Wine and Cheese zDSCN7601.jpg

This card (above) was actually my 3rd attempt at a thank you note with this wine and cheese stamp by Inkadinkado (and not completely planned).  As I mentioned in a previous post, I had an idea I had wanted to try which was inspired by a card project called “Peace, Love, Joy Holiday Card” using an emboss resist technique that I saw on StampTV.  This 2nd attempt is here:

embossed wine and cheese zzDSCN7583

I followed the “recipe” in the video.  I began by stamping the background stamp called “Wine Labels” by Stampendous with Memento Warm Cocoa ink on ivory card stock.  Then I embossed the wine and cheese image on top of that with versamark ink and clear embosssing powder.  Finally, I sponged Memento Toffee Crunch and Warm Cocoa ink over the whole panel.  (I needed to go much darker than Gina did in her video because I couldn’t see the embossed image.)  This panel was layered on ivory card stock and brown card stock from a Recollections pack called Neutrals.

I felt like the wine and cheese image was a little too small, that it was difficult to see all the image’s details, and that the words behind it were completely lost.  (With this technique, you should see the brown words through the clear embossing.)

I was kind of annoyed at this point, because I was sure I would like this version better than I did.  I then decided to stamp the thank you and wine & cheese images on a scrap of ivory card stock with the Warm Cocoa ink just to see how that would look.  When I placed that panel on my desk, it happened to “land” on the other card.  Much better!!  I created another background panel, adhered my new stamped panel, and was good to go – finally!!

I don’t think I would have come up with that background had I not tried the emboss resist technique first.  (I had actually ordered that stamp specifically for that technique.)  But that was exactly the look I had in mind before my chalkboard technique attempt.  It took me a while, but I finally got there!!

Thanks for checking out my card projects!

This content uses referral links as described in the disclosure policy on my sidebar.

Wine & Cheese Thank You Note – Chalkboard Technique

Wine & Cheese Thank You Note – Chalkboard Technique

Wine and Cheese Chalkboard Technique wwDSCN7310.jpg

I have been having one heck of a time trying to get my creative juices flowing!  I had the same problem last year around and after Christmas, although this dry spell seems to be lasting longer.  Sigh….

Anyway, we recently received a case of wine as a gift, and I needed to make a thank you note.  I saw this Wine and Cheese stamp and loved the sketched look of the image.

inkadinkado wine and cheese

However, once I got it home, I wasn’t quite sure what to do with it!  The image is pretty big which didn’t leave much room for much else on my A2 sized card, and I had trouble deciding on colors and paper.  After MANY attempts…..

The Wine and Cheese stamp is by Inkadinkado, and the greeting stamp is by Recollections.  I stamped the images on black card stock with Gina K Designs White Pigment ink.  Then I lightly sponged some of the white ink over the panel to create a “dirty” chalkboard look.  I like the idea of this image looking like it was drawn on a chalkboard, but a lot of the detail was lost with the thick, pigment ink.  I stamped 12 panels trying to get a cleaner image.  No luck.  (My original thought was to stamp the image to look like it was drawn with pencil.  Surprisingly, I have so much ink and none in the right shade of gray!  Ugh!!!)

The printed paper is by My Mind’s Eye from the “Wild Asparagus” paper pad.  I used more black card stock for mats and a scrap of Gina K “Faded Brick” to add a bit more color.

It’s not exactly what my brain “saw” when I started this project, but at least I finally got to the end with a finished card!  I have another idea in my head using the same stamps that I am anxious to try. Hopefully, it will work out, and I will be sharing it shortly….

Thanks for checking out my card project!

This content uses referral links as described in the disclosure policy on my sidebar.


Golf Photo Note Cards

Golf Photo Note Cards

Golf Photo Note Cards

This card is part of a set of note cards that I made with photos I took at Rolling Green Golf Club in Springfield, Pennsylvania.  These were made to sell as boxed sets at the annual Ladies’ Holiday Boutique and Luncheon that will be held at the club for the members in December.  (Thanks, Mom, for inviting me!)  In addition to the hand-made cards I will be selling, I thought it would be neat to create sets of photo note cards featuring scenery from their home course.

My dad drove me around the course on a golf cart while I snapped a ton of gorgeous shots (333 photos in all!!) – thanks Dad!  The hardest part was choosing which ones to use!  I ended up using 20 shots (divided into 2 sets) which includes all of the holes on the course.  I also made two bonus cards of their clubhouse (a front and back view) to give as a gift with the purchase of a set.

While I originally thought I’d make these cards as thank you notes, I decided to omit a greeting on the front so the cards would be suitable for any type of note.  I had the cards professionally printed on white card stock at a place in Cherry Hill, NJ called dpi Copies Printing & Grahpics, Inc.  (The cards look gorgeous in real life; what a difference professional printing makes!)

I purchased boxes online from BAGS Unlimited.  They have a wide variety of sizes from which to choose, include shipping in their listed prices, and deliver quickly.

Each box contains a sheet showing thumbnails of each of the cards and which hole is featured.

Thumbnails for box 1 final

Thumbnails for box 2

BONUS CARDS

Photo Only Card 31 Club House DSCN8267 with worker removed   Photo Only Card 33 Club House Front DSCN8327 cropped

After cutting, scoring, folding, collating, boxing…..they’re ready to go!

DSCN8534

(set 1 pictured above)

Hopefully the ladies at the club will like them!

Thanks for checking out my card post!

Thanks For Your Hospitality

Thanks For Your Hospitality

Thanks For Your Hospitality vDSCN7790.jpg

My son did an internship in Baltimore the first half of this summer (we live in NJ), and our nephew and his family were awesome and allowed Eric to stay with them while there.  This adorable digital image of Noah from a set called “Another Door Opens” from Sassy Cheryl’s Stamps (no longer available) reminded me of Eric as a little guy (he’s 19 now) and seemed perfect for the thank you note I wanted to send them.

I love Cheryl’s artwork and was excited that she had an image in her collection that worked for my project.  I was also excited to have the opportunity to practice coloring since I don’t do it as often as I probably should.  It took me MANY tries to get one I could live with.  Even after the Copic classes I’ve taken, I still struggle with faces, hair and shading.  With all the adorable images at Sassy Cheryl’s Stamps that I’ve purchased (shop now closed), it will certainly be fun practicing!

The white panel is X-Press It blending card stock, and the card base is Gina K Blue Denim.  The greeting is from the Gina K Designs “Vertical Greetings” set and was stamped with Memento Tuxedo Black ink.

Copic markers used:

Hair – E57, E59, E49

Skin – E00, E01, E31, E04

Clothes – B91, B95, B97, C1, C3, 0

Shoes – E57, E59, E49

Suitcase – E57, E29, E31, Y28, C1, C3, B97, 0

Thanks for checking out my card project.

This content uses referral links as described in the disclosure policy on my sidebar.