Monstera Leaves for Father’s Day
(inside:
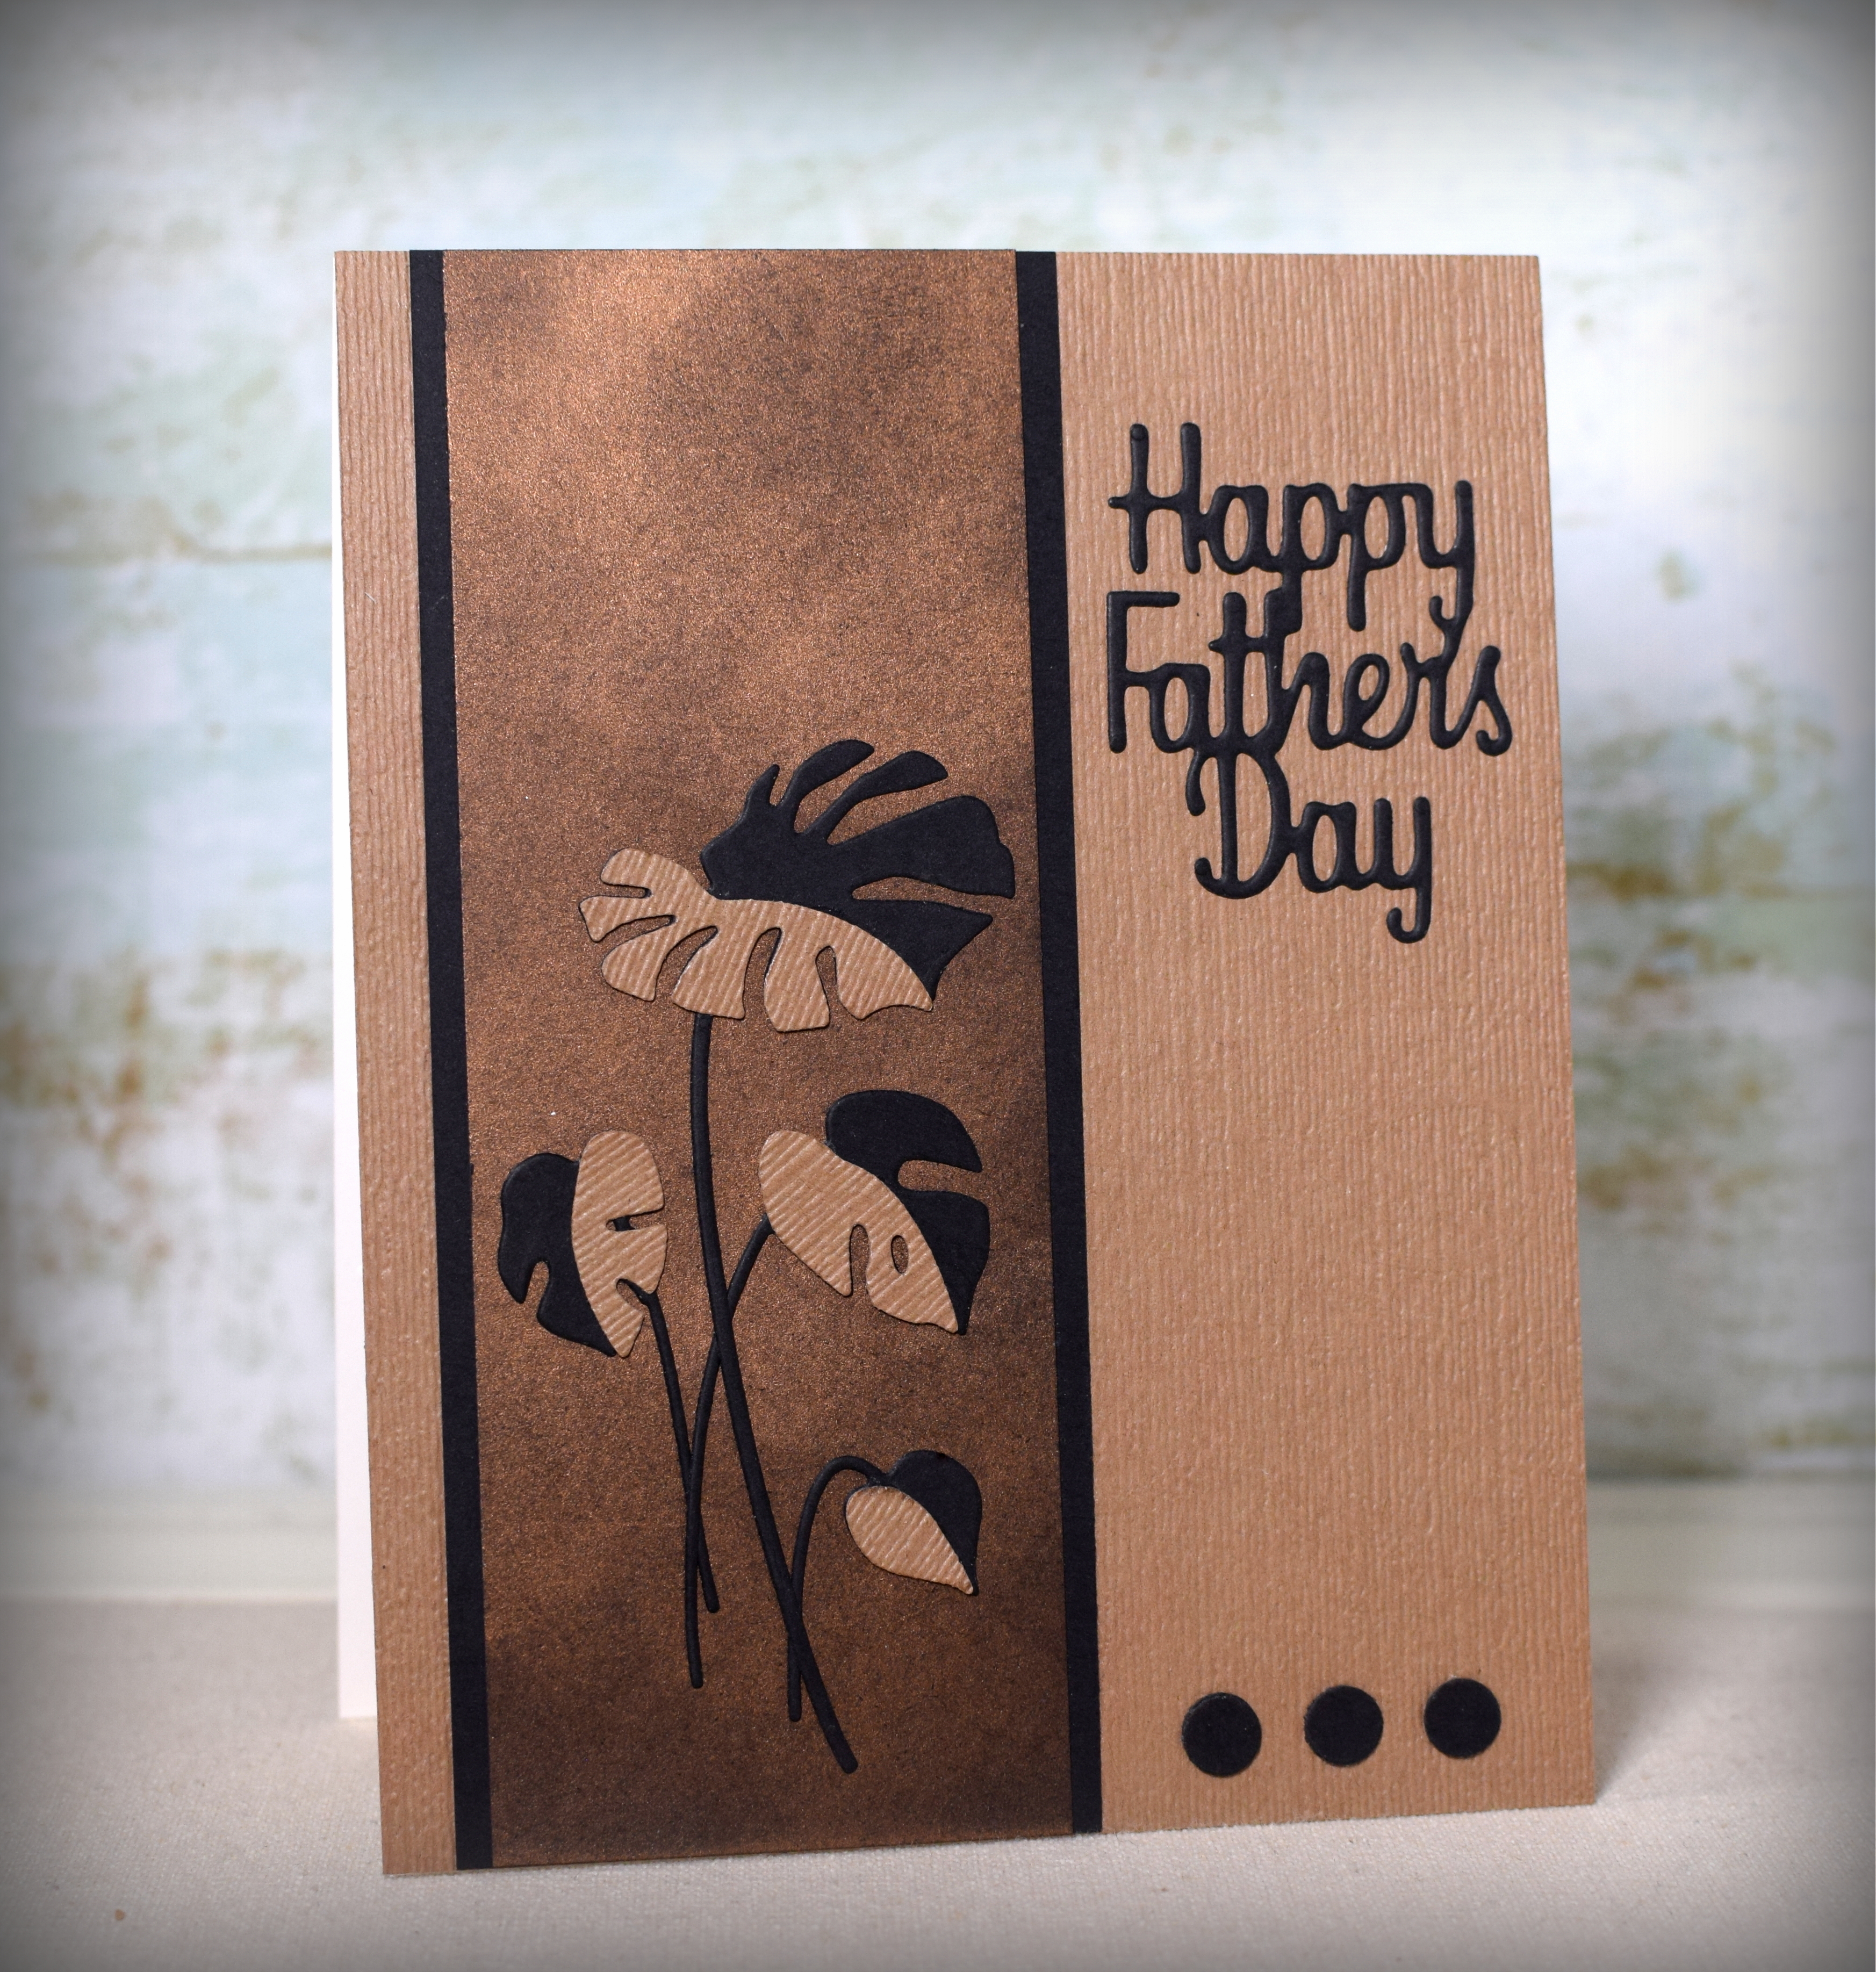
This card features a few of the leaves from the “Monstera” 3D die set from Altenew and some handmade metallic paper.
I used “Foundry Bronze” Guilder’s Paste Wax on black card stock to create the metallic panel and added a touch of texture to the background and leaf layers with the Stampin’ Up “Subtle” embossing folder.
The greeting die was unbranded, and my “dots” were punched with my Fiskars “Bubbles Border Punch” (retired?). The black and kraft card stock were by Recollections.
Thanks for checking out my card project!
This content uses referral links as described in the disclosure policy on my sidebar.