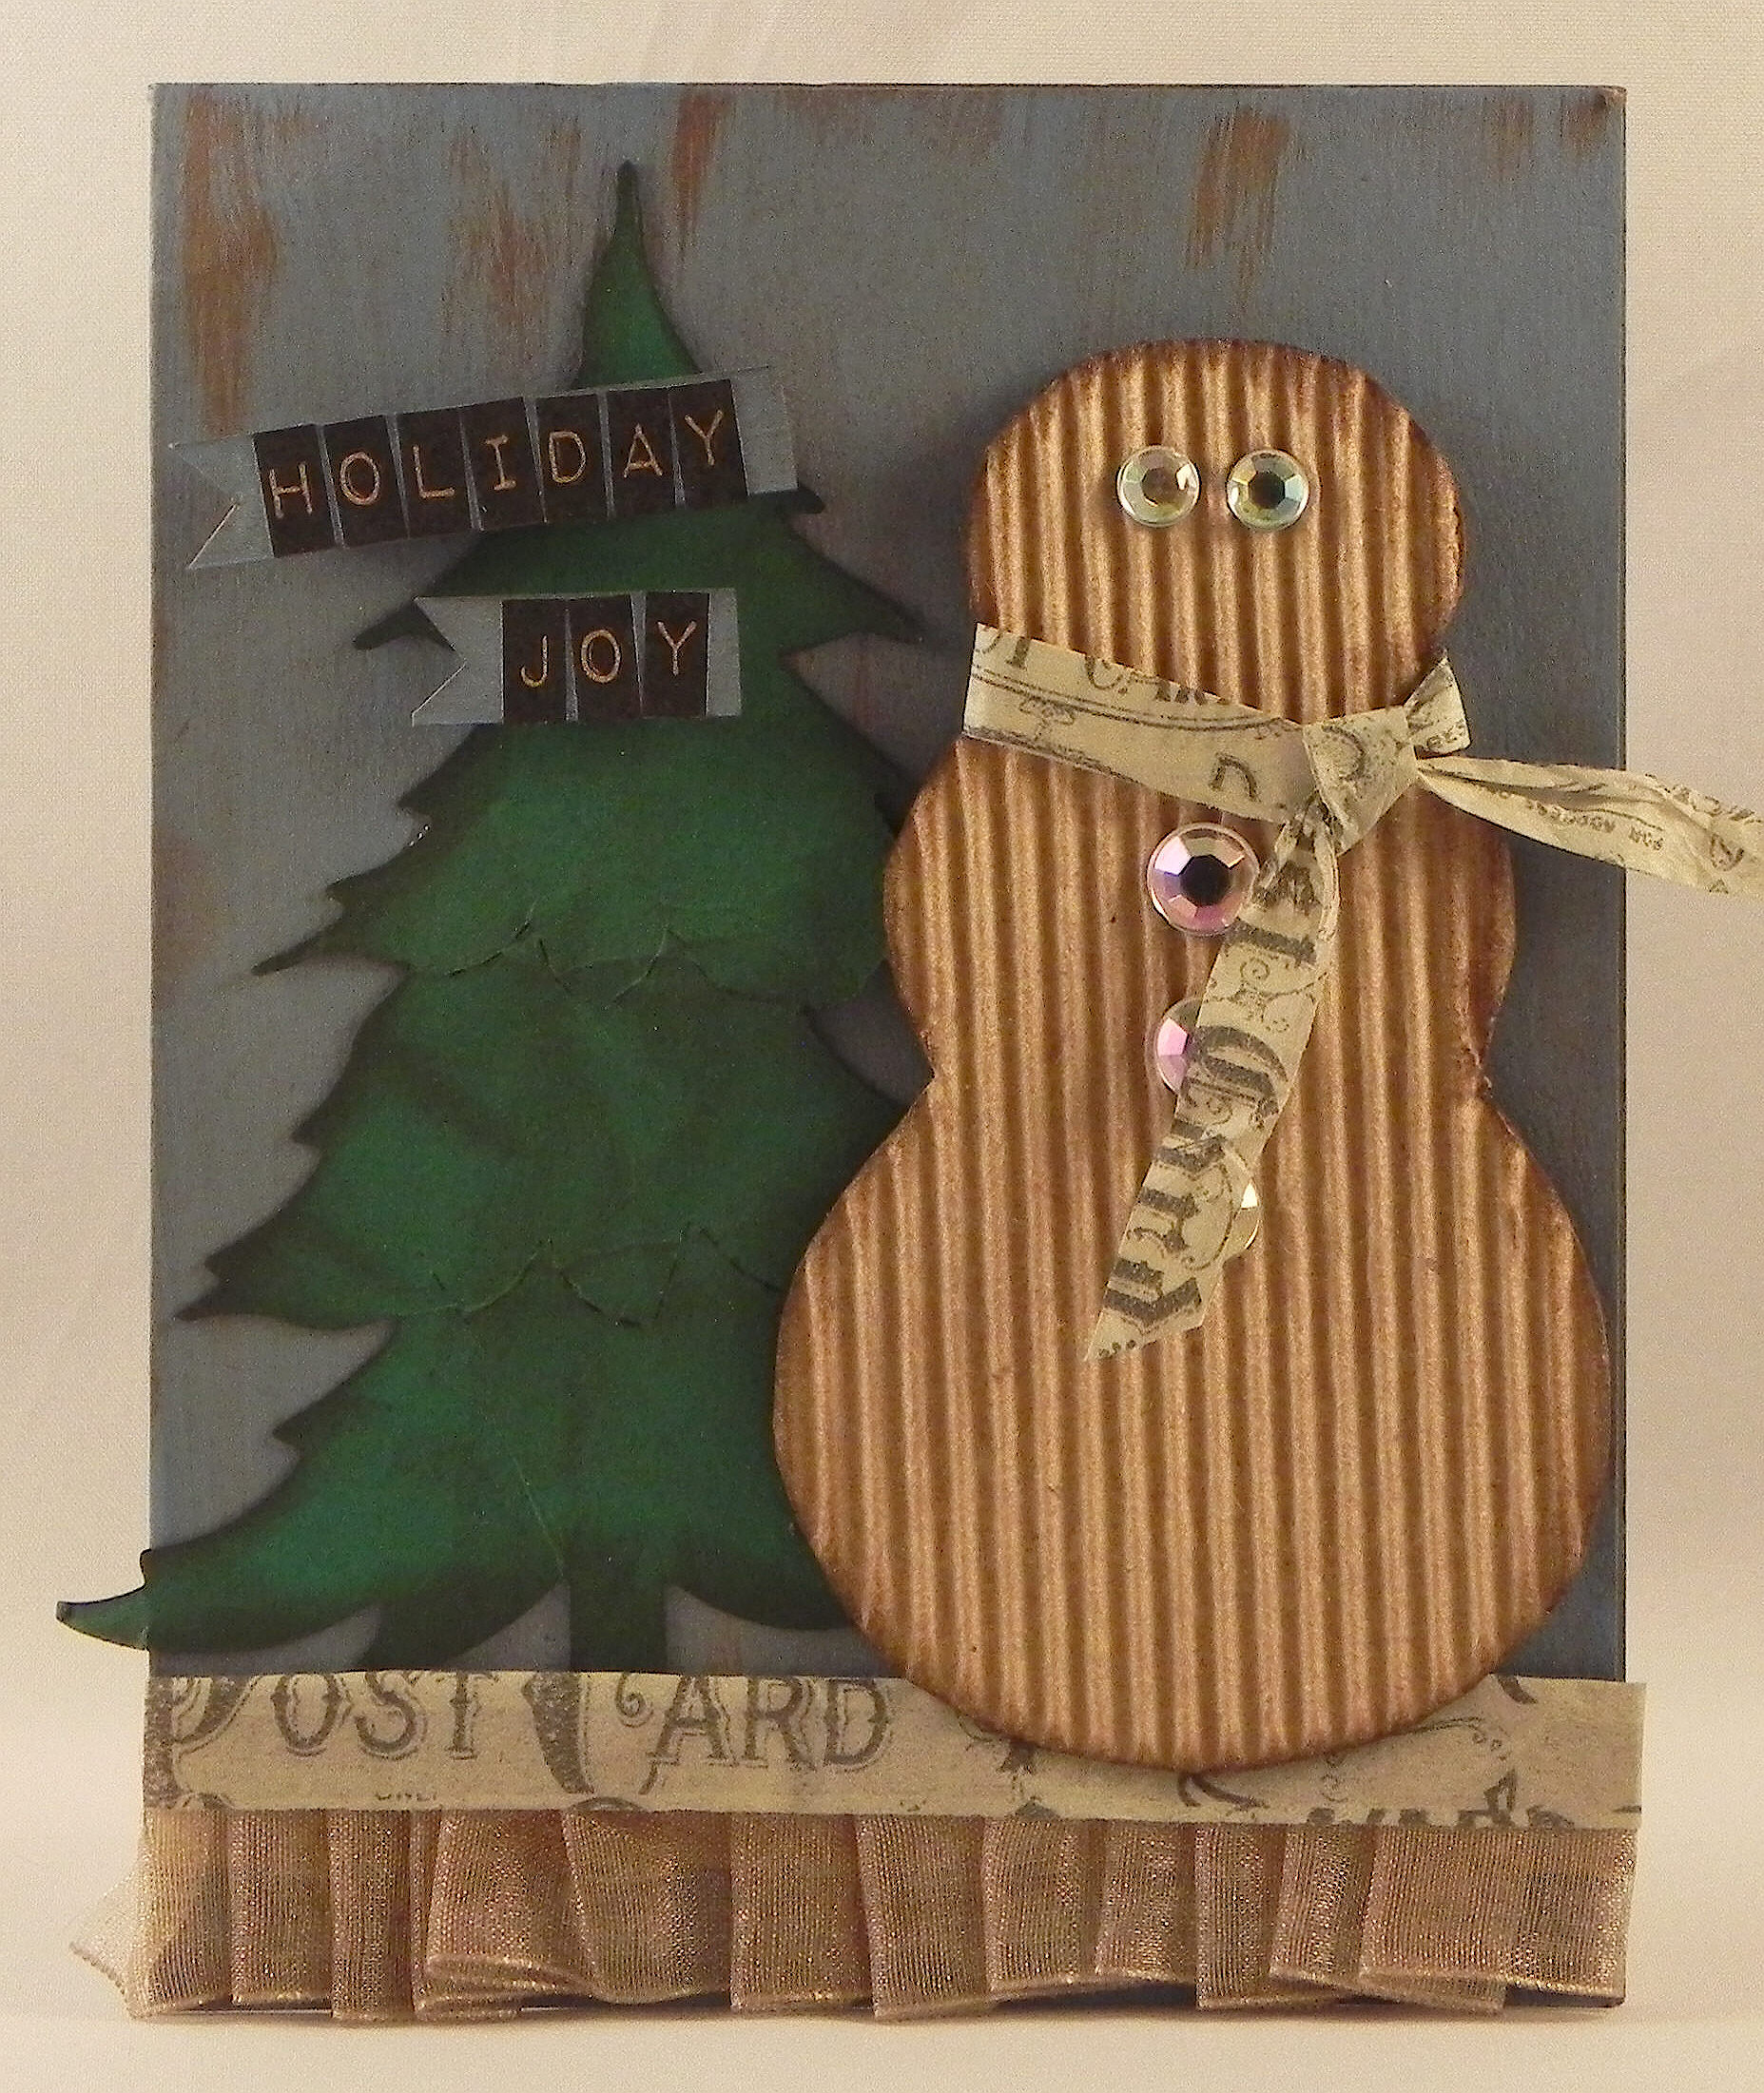
Stitched Santa

Stitched Santa

aDSCN0358 - Stitched Santa.jpg

This card is being entered in the Perfectly Rustics Design Challente No. 35 – Stitiching – where we are to use stitching on our creations. I have never sewn on a card before, so this was a great challenge for me to try something new!  (http://perfectlyrustics.com/2014/11/03/prdc-35-stitching/)

So I dug out my sewing machine, dusted it off, … and proceeded to make a mess!!  I discovered that stitching on a card is HARD!!!  I had quite a bit of trouble and wasted quite a bit of paper before I got something I could use.  I’m not sure what I was thinking, but I actually took my finished stamped and colored image and tried to sew on that as one of my first attempts.  UGH!  Luckily, the panel started out kind of big, and I was able to trim off the disaster!  My stitches weren’t straight (at all), my borders were very uneven, and the corners were just a mess.  I finally realized it was too hard to use the straight stitch because it was not at all forgiving.  The slightest bit of crookedness was too obvious.  I tried to tell myself it added charm, but it really was making me nuts on this layout with all the straight edges!  I found this zigzag stitch easier to control (or maybe I had just had more practice by the time I tried it!), but I still had trouble turning the corners with this stitch. Hence, the buttons!  The stitching is a really nice look for a country-ish card, but I need a lot more practice (or a lot more paper)!

The stamp I used for this card was by Hero Arts and is called Star Santa (H1100).  I stamped him on white card stock with Memento Tuxedo Black ink and colored him with Copic Markers (coat and hat- R46, R59; tree and holly leaves – G24, G29; hair – W1, E43; trim on coat and hat – E30, E33; face – E30, E13 (cheeks); mittens – B24, B29, C5, C7, C9; stars – Y17; and tree trunk – E59).  Besides the white card stock, I also used Gina K Cranberry Tart and Christmas Pine, and the patterned paper came from the Gina K “Cold Snap” patterned paper pack.  I used white thread for my stitching, and the white strands that I separated from two-colored baker’s twine for the bows on the buttons.

Thanks for checking out my card project!

This content uses referral links as described in the disclosure policy on my sidebar.

Peace

Peace

aDSCN9758.jpg

This card is being entered in the Perfectly Rustics “PR Design Challenge No. 34 – Holidays” where we are to show our holiday creations (any holiday). (http://perfectlyrustics.com/2014/10/20/prdc-no-34-holidays/)

The die cut elements on this card were from the “Home for the Holidays Fall & Winter” Cricut Cartridge.  The embossing folder used for the tan panel is the Cricut Cuttlebug (Anna Griffin) Matelasse embossing folder.  For this card, I was trying (not sure how successfully!) to add liquid pearl “bling” and had LOTS of trouble keeping the “pearls” rounded and consistent.  I’ll keep practicing!!!

Thanks for checking out my card project!

This content uses referral links as described in the disclosure policy on my sidebar.

Stained Glass Nativity

Stained Glass Nativity

vDSCN9835.jpg

This card is being entered in the Mod Squad Challenge – It’s A Blue Christmas – where we are to “show off some Blue Christmas designs.  (Sadly, this site is no longer active.)

It is also being entered in the Perfectly Rustics “PR Design Challenge No. 34 – Holidays” where we are to show our holiday creations (any holiday). (http://perfectlyrustics.com/2014/10/20/prdc-no-34-holidays/)

The stamp I used for this card is “Stained Glass Nativity” by I Brake for Stamps.  I stamped the image on vellum with versamark ink and silver embossing powder.  Then, I turned it over, and colored the image with Copic Markers on the back.  The markers I used were:  B95, B39, B97, E49, E55, E59, and Y17.  The card base is GIna K In the Navy.  I used a spellbinders A2 Matting Basics die to cut out a rectangular window in the card, and attached the vellum panel behind the window on the inside of the card front.  I lined the other half of the inside with white card stock so a message could be included, and also so the stamped image would be more visible (against the white) when the card is closed.  I created a decorative panel for the card front by cutting a slightly larger rectangular window that lines up with the window in the card base.  Before attaching it to the front of the card, I embossed it using the Cuttlebug D’Vine Swirls embossing folder.

When the card is standing on the table, a battery operated tea light can be placed inside to make the “stained glass” image glow.

bbDSCN9808 aaDSCN9870

Thanks for checking out my card project!

This content uses referral links as described in the disclosure policy on my sidebar.

Let It Snow

Let It Snow

Let It Snow

This card is being entered in the Mod Squad Challenge – It’s A Blue Christmas – where we are to “show off some Blue Christmas designs.”  The card stock used was “In The Navy” by GIna K Designs. It’s dark, but it’s blue!  (Sadly, this site is no longer active.)

It is also being entered in the StampTV MIUM Challenge – It Takes Two, Only Two! – where we are to create a card that can only use TWO colors, and that does include neutrals, on this challenge!  AND NO designer papers!  (Sadly, this site is no longer active.)

It is also being entered in the Perfectly Rustics “PR Design Challenge No. 34 – Holidays” where we are to show our holiday creations (any holiday). (http://perfectlyrustics.com/2014/10/20/prdc-no-34-holidays/)

The stamp set I used for this card is the Gina K Designs “Merry Little Christmas” set which I stamped with versamark ink and embossed with white embossing powder on Gina K In the Navy card stock. White was the other card stock I used.  The embossing folder used for the background panel is Snowflake Swirl (Darice 1218-39).

Thanks for checking out my card project!

This content uses referral links as described in the disclosure policy on my sidebar.

Holiday Card Collection from 2013 Michaels Classes

Holiday Card Collection from 2013 Michaels Classes

The following are the sample cards I made (and taught) for the 2013 Holiday Card Classes offered at Michaels last year.  I did not design these cards; the lesson plans were provided.  I thought I’d share them to show the types of projects/classes that were offered last winter.


Vintage Holiday Card Tricks Class:

This class featured distressing techniques, heat embossing, and using Sizzix dies with the Big Kick.  We created a waterfall card, used washi tape, and created an interesting ribbon embellishment.  I also added alcohol inks for coloring metal embellishments to the curriculum.

aDSCN1512  aDSCN1505

aDSCN1509


Very Merry Card Tricks Class:

This class featured heat embossing, using Spellbinders dies and a score board.  We added shimmer and bling  to all of the cards for a festive touch.

aDSCN1489     aDSCN1501

aDSCN1496


Classic Holiday Card Tricks Class:

This class featured dry embossing with an embossing folder and using a Sizzix die with the Big Kick. We created a card with vellum and a cut-out which glowed when a battery-operated tea light was placed behind the card front when it was displayed.  We also created a tri-fold card and a step card.

 
      aDSCN1532   aDSCN1519

aDSCN1515


Thanks for checking out my post!