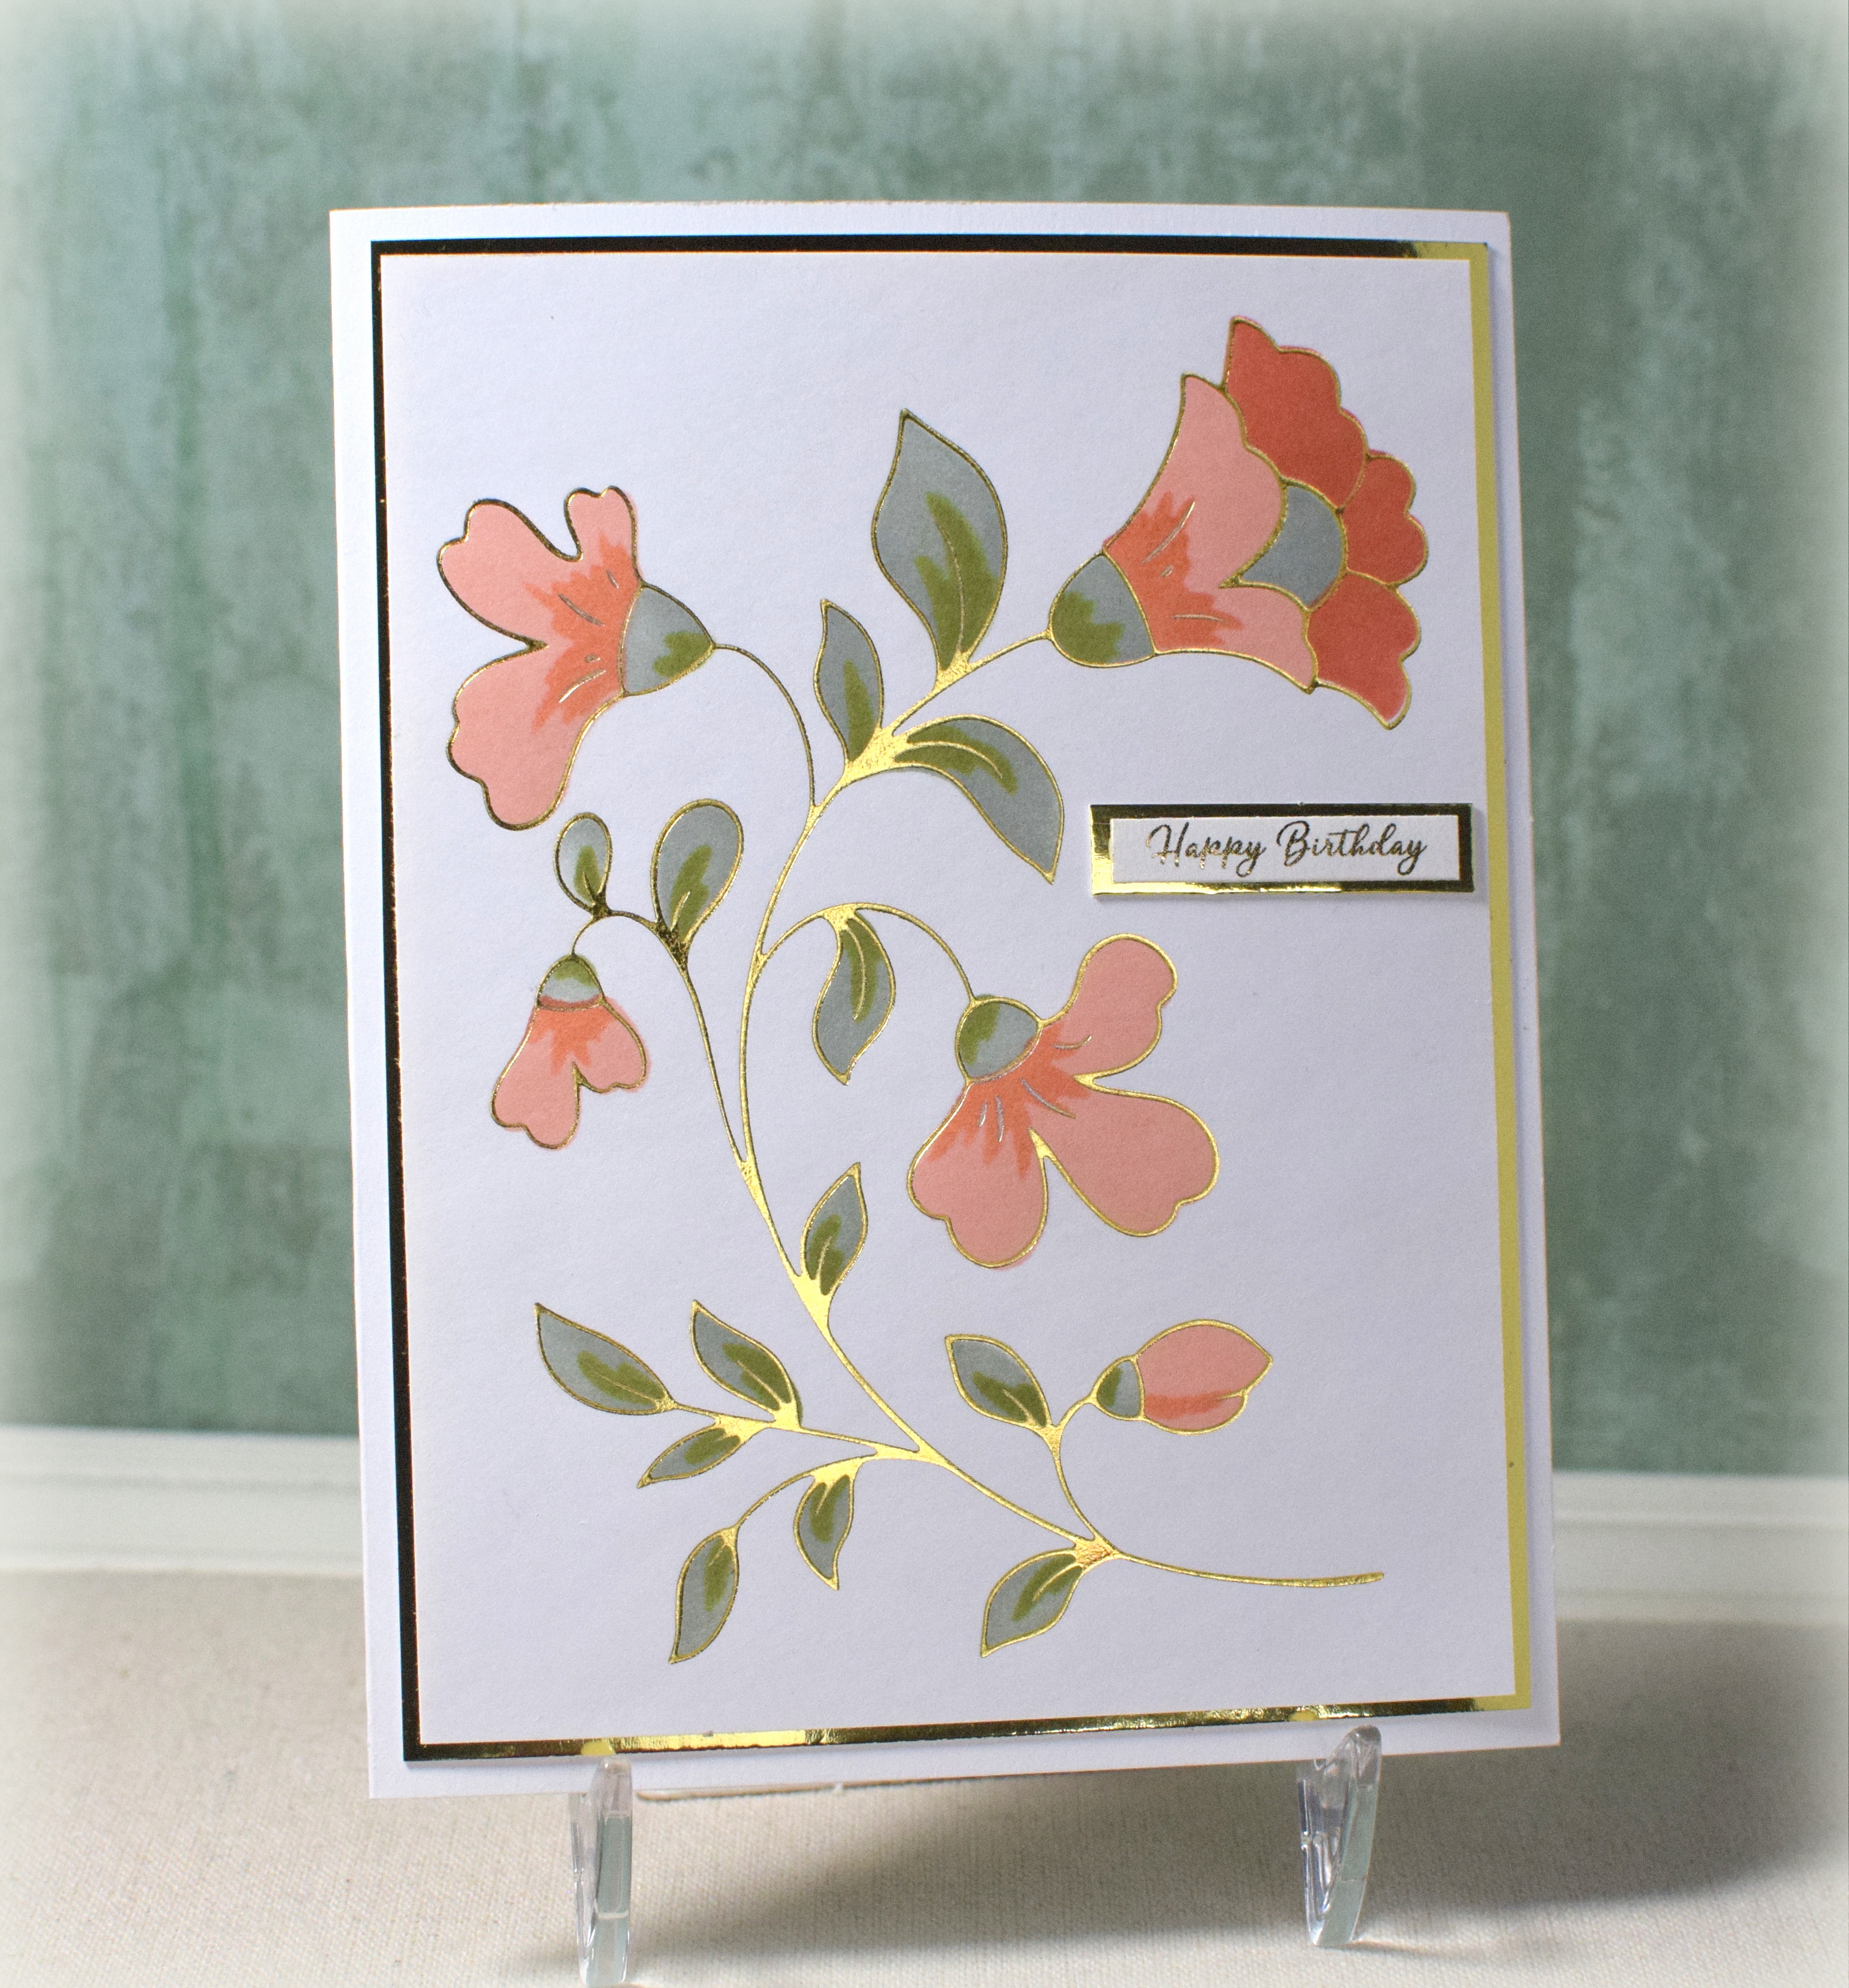
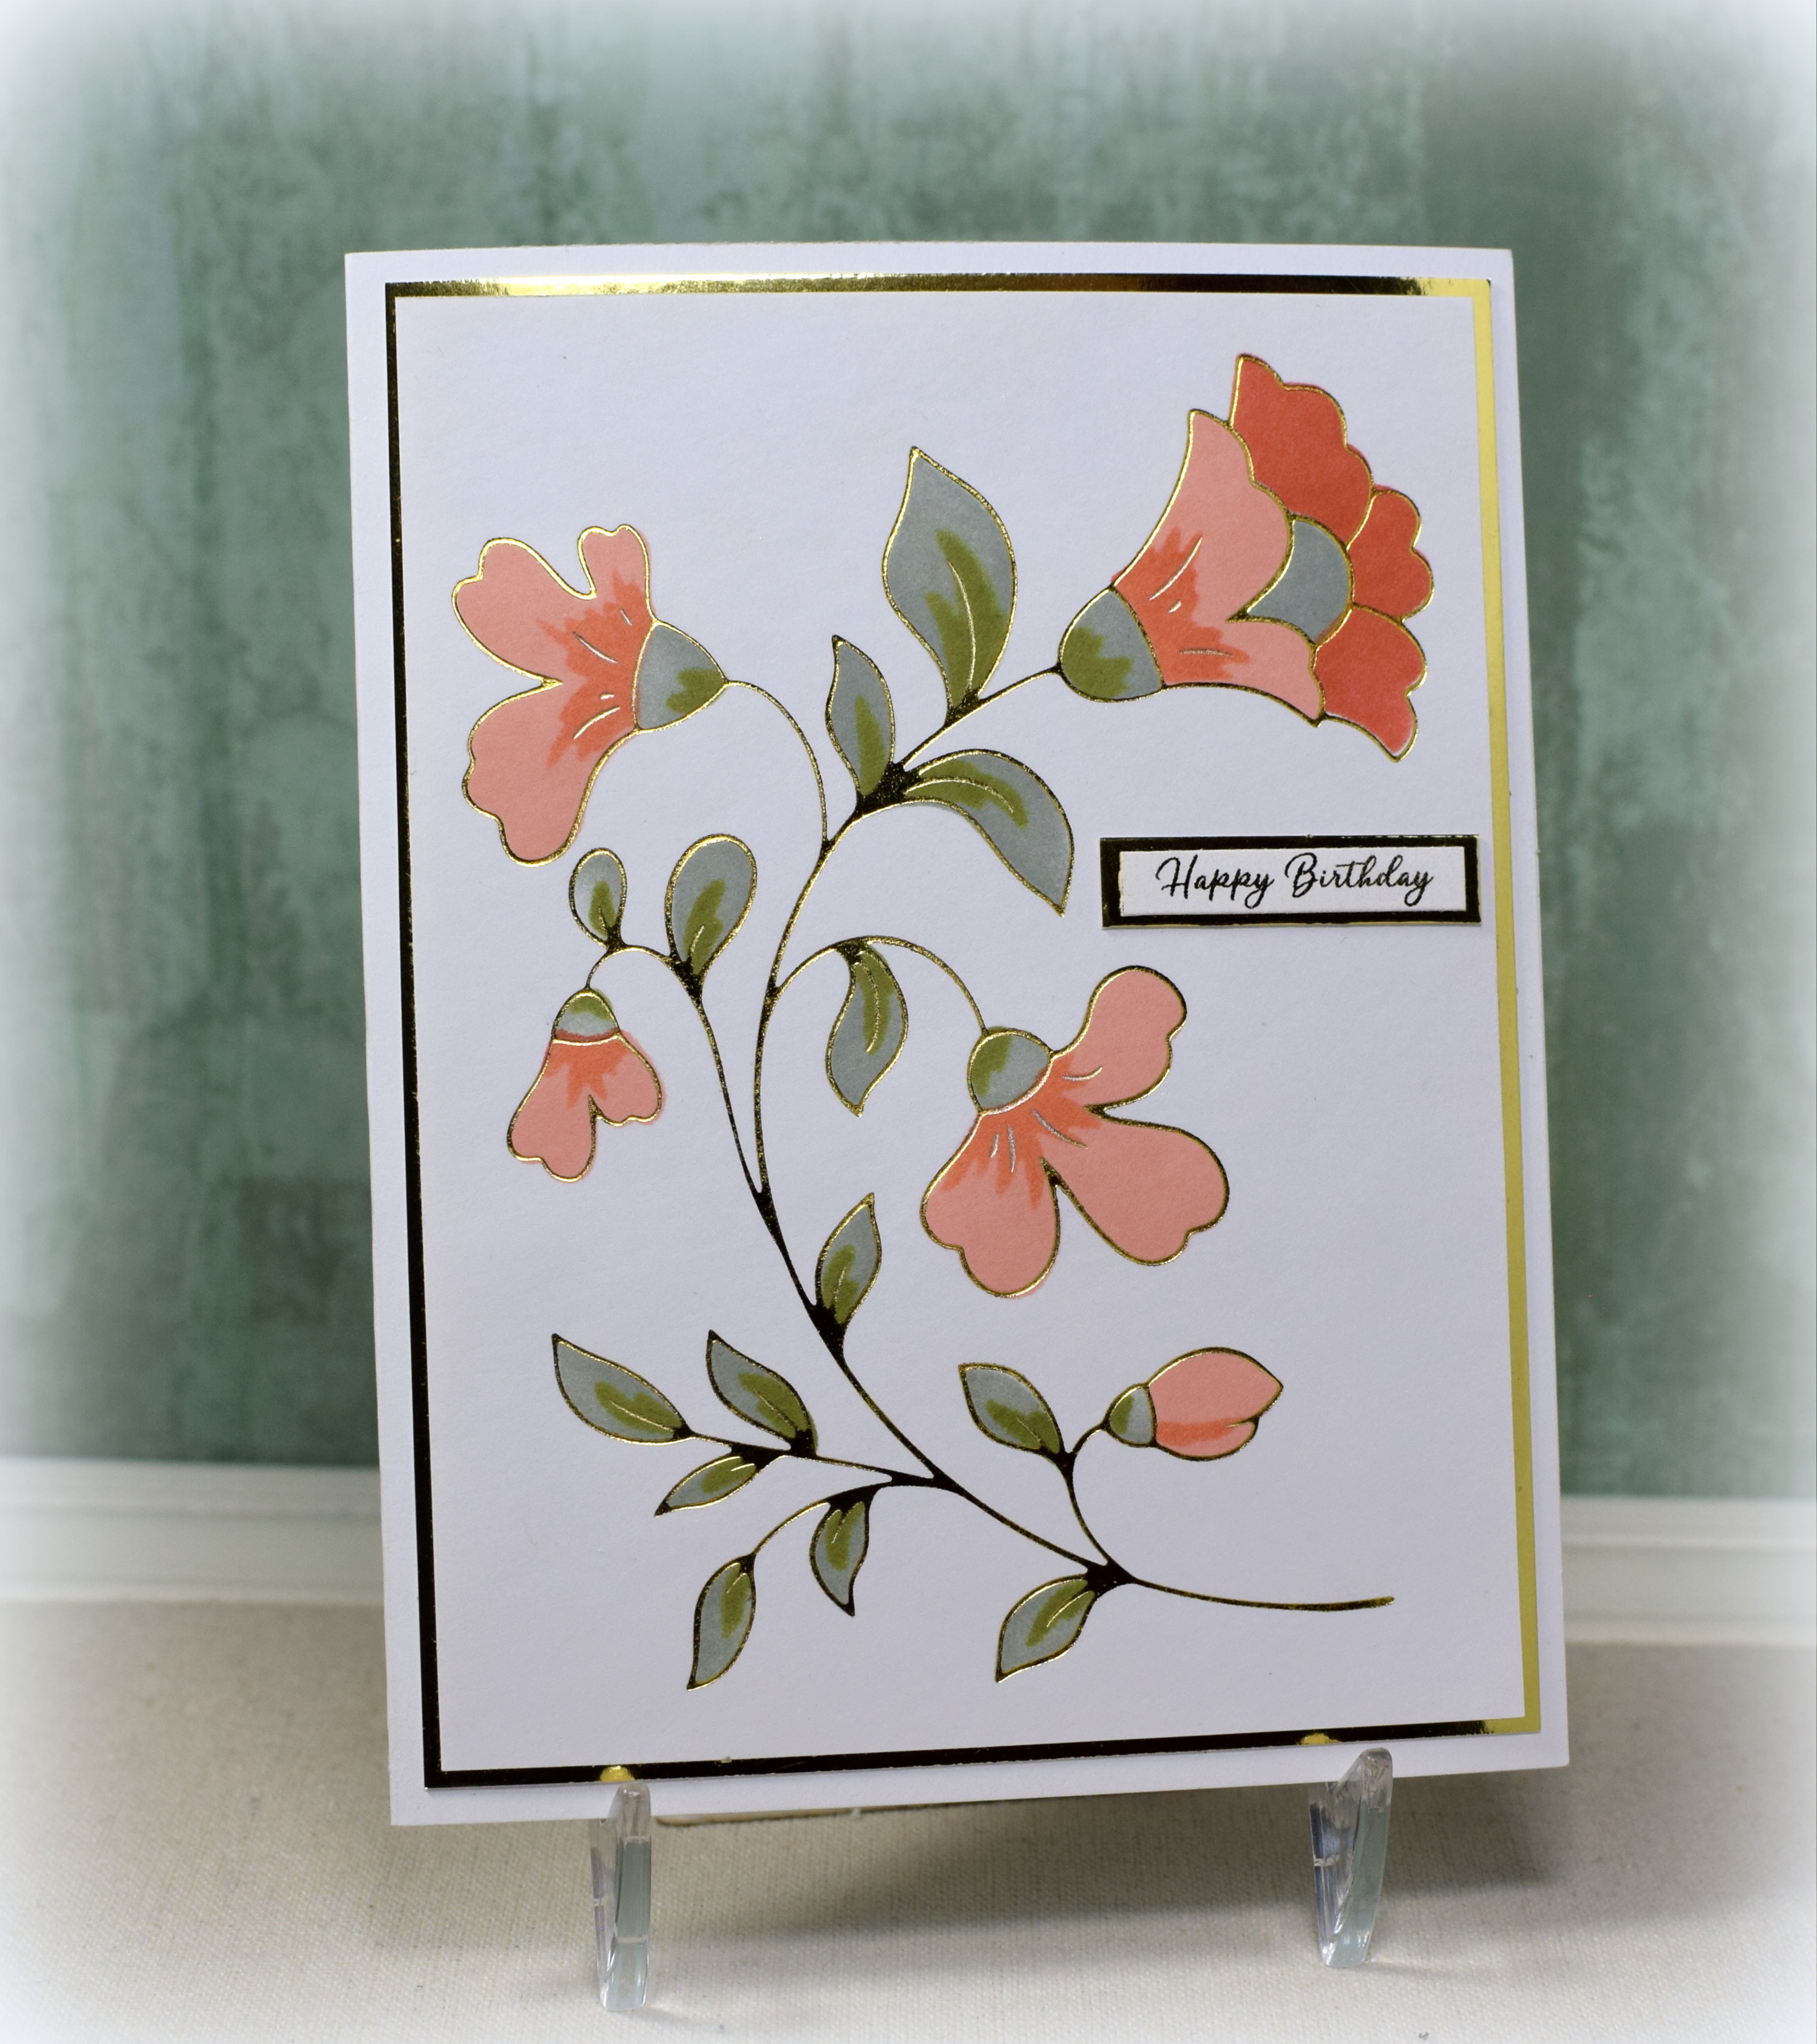
Folk Floral Stem (with two kinds of foiling)
(Inside: happy happy birthday to you)
The floral image on this card was made with the Folk Floral Stem hot foil plate and coordinating layering stencils by Pinkfresh Studio. Gold Glimmer Hot Foil was used along with Gina K Designs Peach Bellini, Tomato Soup, Moonlit Fog, and Fresh Asparagus inks. The foil for the image was applied using the Spellbinders Glimmer Hot Foil system and a die cutting machine.
I wanted a foiled, delicate script greeting that would fit on a 1/4 inch strip (and didn’t have an appropriate plate), so I decided to type my greeting on the computer instead. I used the “Yukikato” font (11 pt) for this card. In order to foil that, a different method was required. First, it needed to be printed with toner (and not ink), so I used a laser printer. This was then foiled with icraft gold decofoil and a minc foiling machine.
Metallic Gold card stock was used for the mats, and the inside sentiment stamp was called “Happy Happy Birthday” by dandelion designs.
For anyone new to foiling, each system uses a different type of foil and application tool and a different technique for applying it. The method using a hot foil plate pushes the foiled image into the surface a bit while the toner/minc method is flatter, but both methods give very similar looking results as far as shine. Here is some introductory information on using either the Glimmer Hot Foil System or the minc. And there are tons more videos out there showing other tips and variations for each.
It’s SO hard to photograph a foiled card as it’s hard to get the light to hit it just right! Here’s a photo of the card with less direct light hitting it…
While not used on this project, there is also a coordinating stamp set and a coordinating die.
Thanks for checking out my card project!
This content uses referral links as described in the disclosure policy on my sidebar.