Changing Picture Birthday Card

Changing Picture Birthday Card

zDSC_0796.jpg

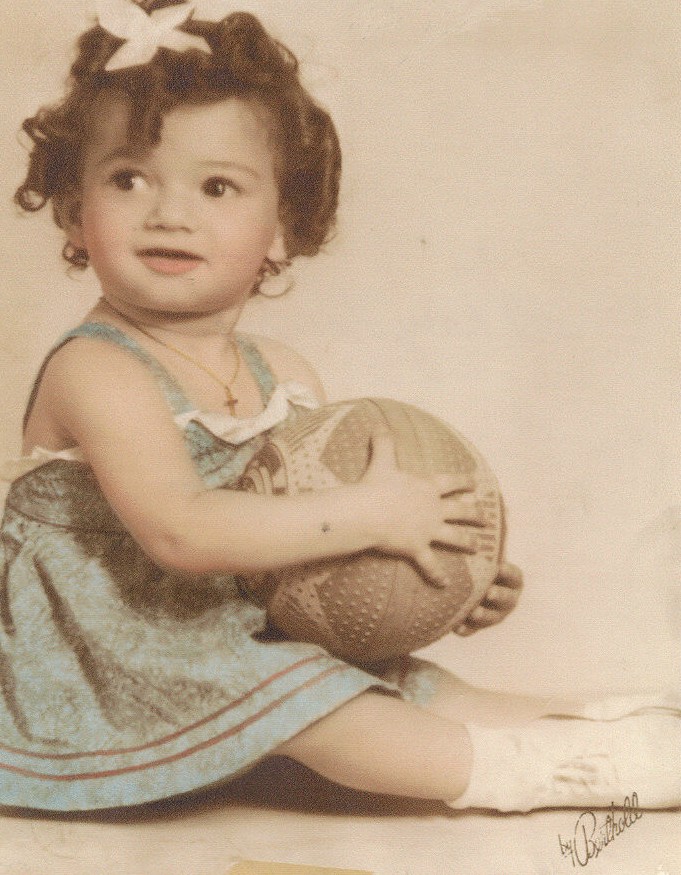
This adorable cutie is my mother when she was 2 years old.  She recently turned 75 (although she’s as youthful and active as a 30 year old!), and I thought this “Changing Picture” card was perfect for her birthday.  When you pull the tab, the photo “magically” transforms from her toddler photo to her present day photo.

zDSC_0796  zDSC_0797  zDSC_0798  zDSC_0795

zDSC_0795

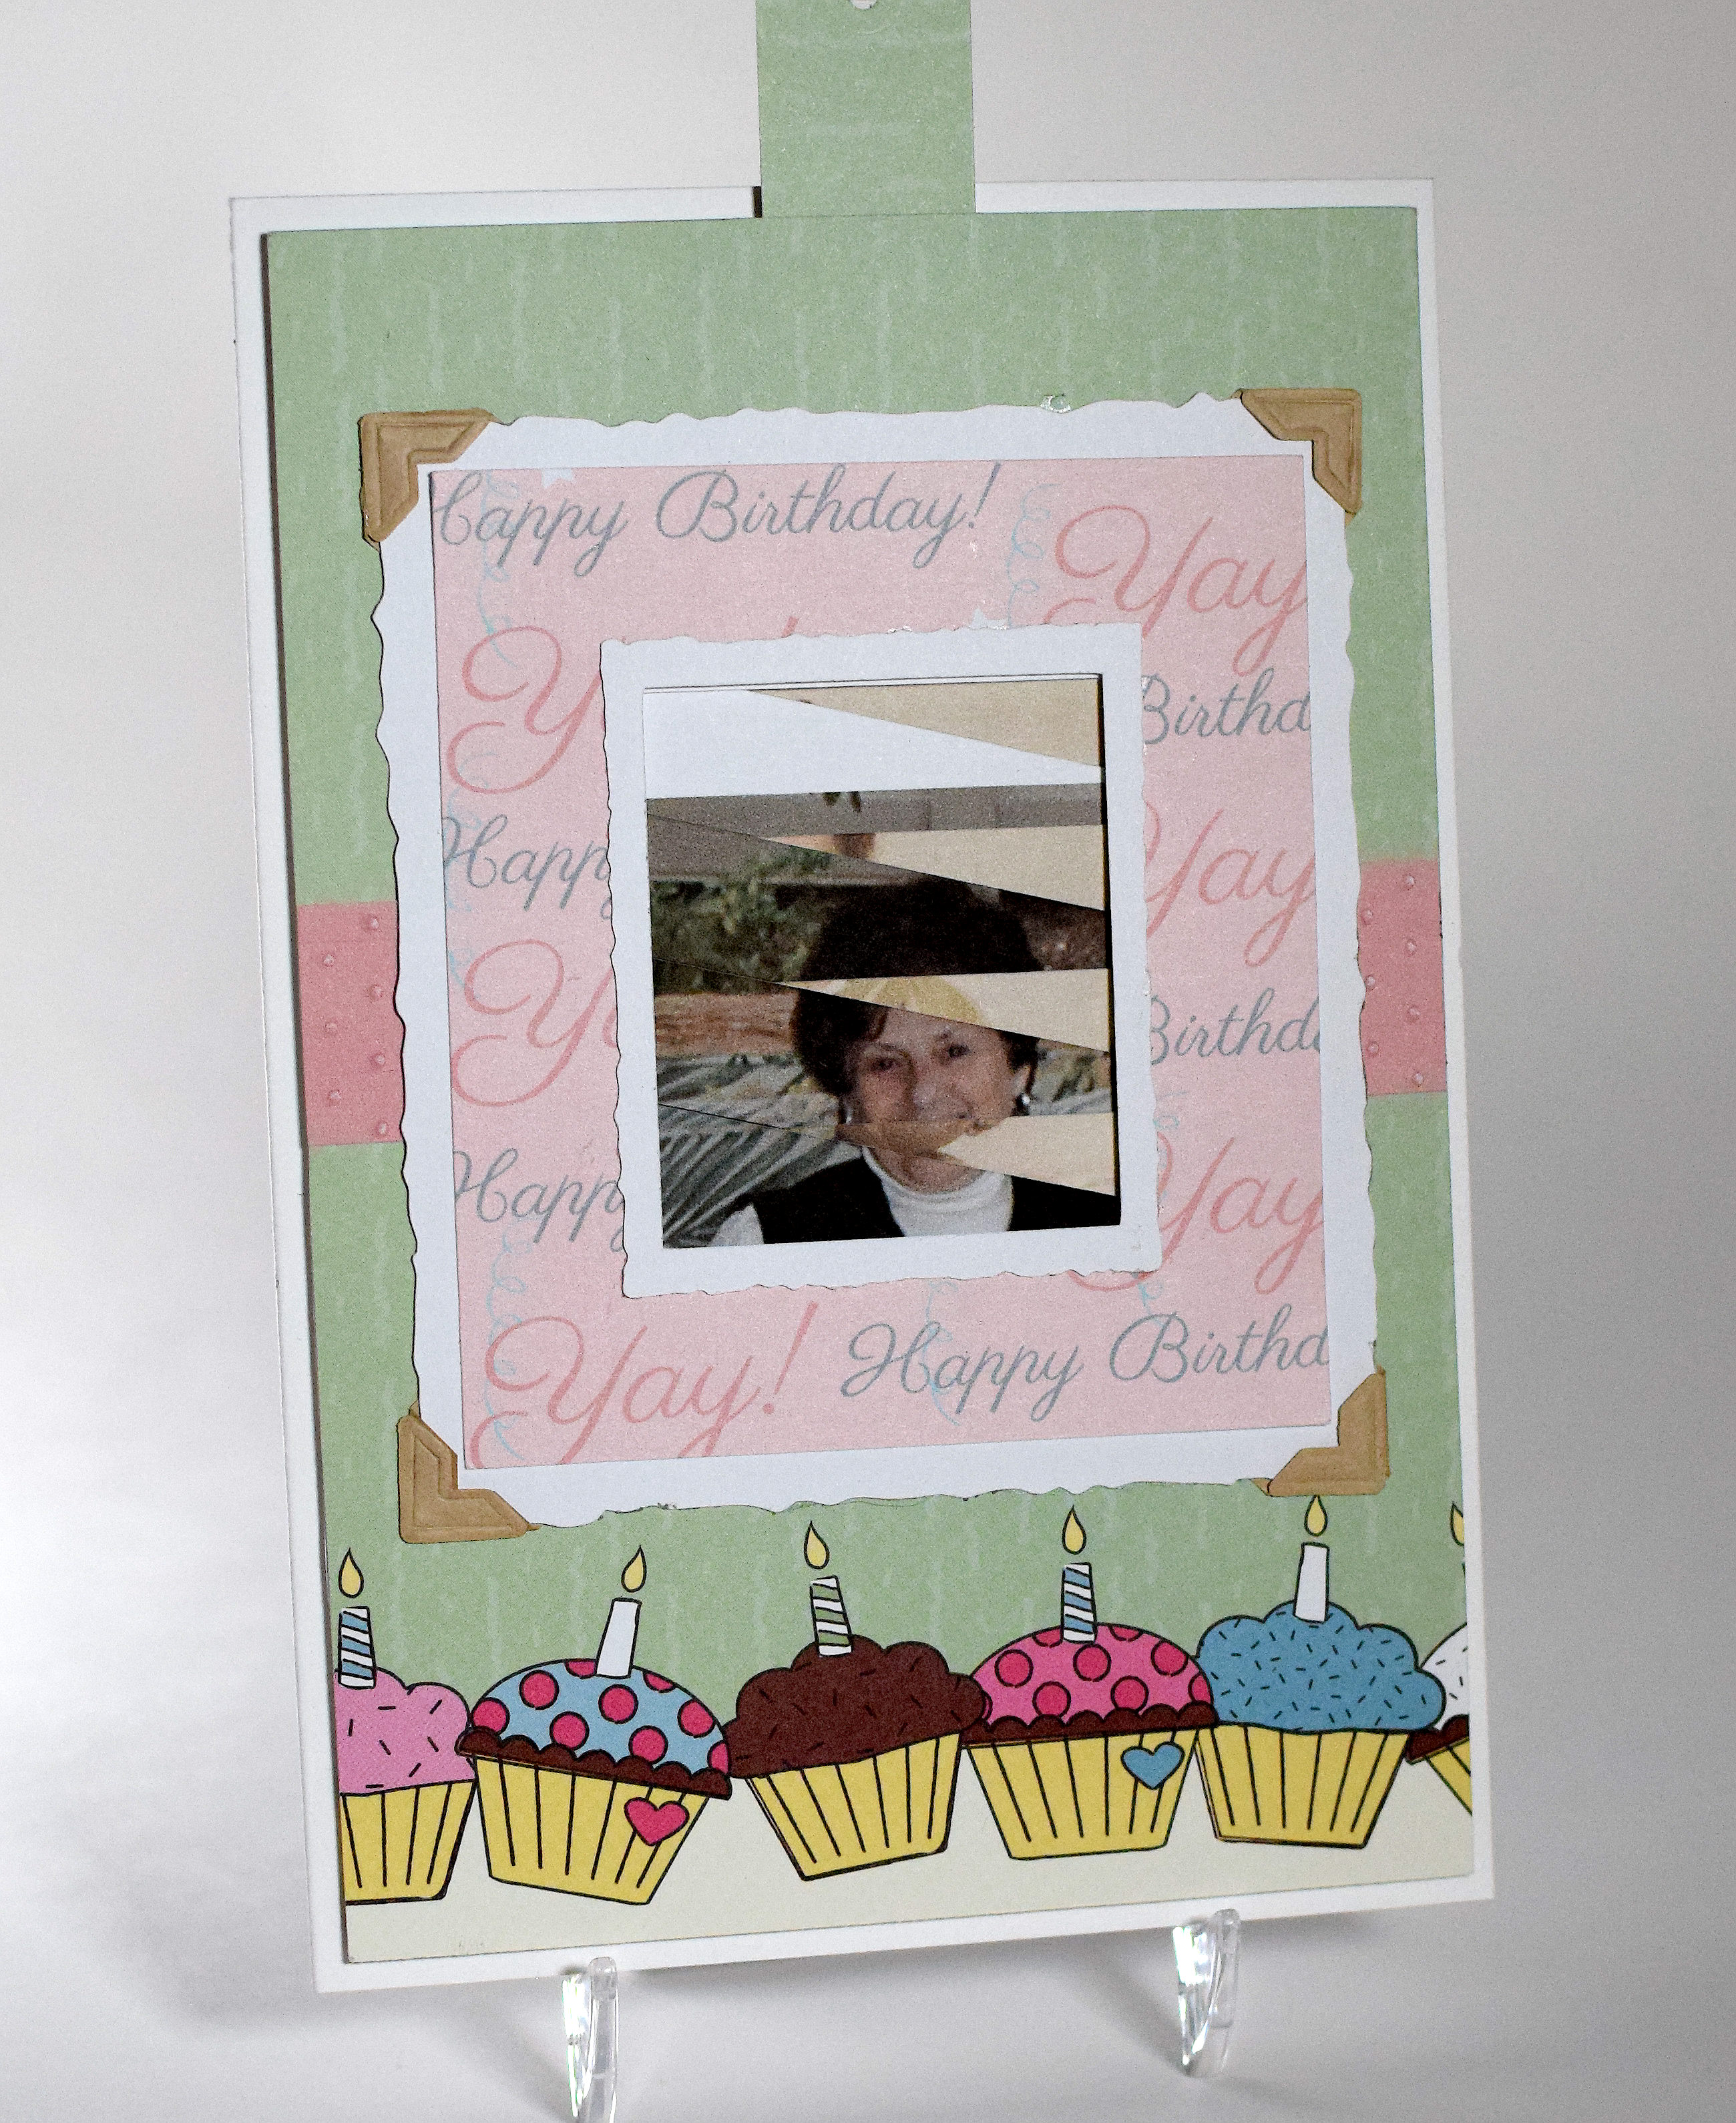
Happy Birthday, Mom!!

I first saw this project in a book called Making Mechanical Cards by Sheila Sturrock.  (She calls it the “Venetian Blind Variation” Technique and includes the needed templates to copy and cut out.)  Sara Sandberg did a video tutorial HERE of this technique which I found very helpful.  On her site, she includes all the templates for this project in a variety of file formats (including svg files, studio cut files, and pdf files for hand-cutting).

I originally watched her video on YouTube and didn’t see her templates so I created my own cut files using the templates that are included in the book.  After I was done my card, I discovered her website!  Ugh!!!  Anyway, it worked out ok because the first time I tried to make this card, I glued my photos on the photocopied templates as suggested.  I was having a hard time making the photos slide/change smoothly; the edges kept getting caught.  When I created my cut files, I did it as a “print and cut” and printed the photos directly onto the templates.  The photos slid much more smoothly this time around.

My photos were about 2 3/8″ x 2 3/8″ (about 6cm x 6cm).  (I think she recommends a 5cm square photo with her templates.)  The green panel with the cupcakes is called “Birthday Wishes” from the “It’s Your Day!” collection by Nikki Sivils.  The printed frame was made with digital paper from a set called “Birthday Digital Paper” by GraceGraphicDesign which I purchased on Etsy.  The white frames were made with a cut file from the “4 Vintage Frames (Design #24374)” set by Lori Whitlock which I purchased from the Silhouette Store and were cut with my Silhouette.  The pink center strip is Gina K Innocent Pink card stock and was embossed with a Cuttlebug Swiss Dot embossing folder.  I used a heavy weight white card base to make it easier to push and pull the tab without bending the card.

0005b Lidondici, Mary Lou-1943 cropped

Thanks for checking out my card project!

This content uses referral links as described in the disclosure policy on my sidebar.


Tropical Birthday Shaker Card

Tropical Birthday Shaker Card

Tropical Birthday zDSC_0778

(Inside Text:  May your birthday be filled with sunshine, smiles, laughter, love and cheer!)

Wow, it’s been a while!  Great to finally have some time to get back in my craft room…

Our family has several men who celebrate summer birthdays, so I thought I’d design a card with a tropical theme.  I ordered the stamps for this card just before I went on vacation with my family to Ocean City, NJ.  While sitting on the beach, I thought about what I would do with these images when I got home and came up with the shaker card idea.  I brought the shells and sand from the beach home with me!

wwDSC_0769 cropped

The image stamps are called “Tropical Island (L-24219)” and “Birthday Flamingo (J-29905)” and are from RubberHedgehog Rubber Stamps.  The birthday stamp is from the “Happy Birthday To You” set, and the sentiment on the inside is from the “Happy Birthday Duo” set, both from Gina K Designs.

I made another version of this card with the “Let’s Party (G-9610)” stamp from RubberHedgehog Rubber Stamps.  I love this stamp for a party invitation as well as a birthday card.

zDSC_0780

The tropical island image was stamped with Memento Tuxedo Black ink on white card stock and was colored with Copic Markers (G24, G28, E55, E57, E59, E42, E43, and E44).  I masked the colored image and inked the background with Gina K Powder Blue, Sweet Mango, and Ocean Mist ink.

The flamingo was stamped on the frame with Versamark ink and embossed with Ranger black embossing powder.  (A portion of the image was lost when it was stamped  over the cut-out portion of the frame.)  I then created a cut file and die cut with my Silhouette Electronic Die Cutting Machine for the body of the flamingo so it could hang over the shaker window.  I stamped the body onto this die cut with Memento Tuxedo Black ink (click HERE to see how) and colored it with Copic Markers (R14, R29, and BG18).  Then, to make it bolder to match the embossed legs better, I stamped over the colored image with Versafine Black Onyx ink.  I was able to stamp over the image because I used my MISTI for all my stamping so it was easy to line up the image to stamp it a second time.  The colored die cut was lined up over the embossed image on the frame.

The greeting was also stamped with the Versafine Black Onyx ink.

The solid card stock is Gina K Blue Lagoon and Ocean Mist, and the patterned paper is DCWV Green Woodland Stripe.  The background panel was embossed with a Darice “Basketweave” embossing folder to add some texture.

I cut the printed frame with my Silhouette, and I used a sizzix die (38-0163 Frame Rectangle) to cut fun foam (3 layers glued together) that I used to raise the frame up to create the pocket for the shaker window.  This window needed to be pretty deep to accommodate the thickness of the shells.  (Here’s a video showing you how to create a shaker pocket with fun foam.)  I also used a small piece of thick acetate for the shaker window, and raffia ribbon to finish it off.

The Mod Squad Challenge this week is “Lazy Days of Summer” where we are encouraged to create a project that makes one think of the lazy days of summer.  Lying on a hammock on the beach…ahhhhh!  (Sadly, this site is no longer active.)

The “Let’s Party” card will be entered in the RubberHedgehog 2016 card contest.

Thanks for checking out my card post!

This content uses referral links as described in the disclosure policy on my sidebar.

It’s almost June?!

It’s almost June?!

calendar canstockphoto3701821

I have no idea what happened to the month of May!!  I have been a bit busy this month and haven’t had much time in my craft room or on my computer.  I hope things quiet down in June and that I can get back to stamping and to enjoying everyone’s latest projects soon!  I really miss it!!  (And I am soooo behind on cards I need to send!)

Calendar image  (csp3701821) purchased from Can Stock Photo (HERE)

Pleated Skirt Fold – Mother’s Day Card

Pleated Skirt Fold – Mother’s Day Card

Pleated Skirt Fold Mother's Day Card yyDSC_0352.jpg

I was asked to co-host the Mod Squad Challenge again this week with the very talented Peggy Timmerman.  The theme of the challenge is MOTHER’S DAY.  (Sadly, this site is no longer active.)

For this card sample, I used two stamps from the Newton’s Nook Designs – Versatile Vases stamp set along with a die from the Gina Marie Designs – Stitched Rectangle Dies set and the Happy Mother’s Day border die by Lawn Fawn. All of these items are available at Kat Scrappiness who is one of the Mod Squad Challenge sponsors this week .

Versatile Vases Stamp Set

Kat stocks the products that she loves and uses as well as what her customers request.  If you don’t see it in her store, feel free to contact her.  She is happy to do special orders for you!  And she offers a DISCOUNT CODE for The Mod Squad Challenge: MSC10!

I had recently seen a card made with the Pleated Skirt Fold technique and thought I’d give it a try. For this technique, a two-sided piece of patterned paper works best since you see both patterns once the pleats are created.  I started with a 5 1/2 x 12 inch panel and scored it at 1 then 1/2 inch intervals.  (I wanted a tall panel with narrow pleats.)  HERE is the tutorial I found and adapted for my measurements.  The two-sided patterned paper I used is called “Mail Poste Correo” from the “From Me to You” collection by Pebbles.  The “white” on this paper was not pure white so I created my own matching card stock by coloring a plain piece of white card stock with Copic W1 for the stamped panel and the die cut greeting.  (The greeting die cut was cut apart so it would fit in the space on the bottom corner of the card.)

I stamped the flowers and vase with Memento Tuxedo Black ink and colored it with Copic Markers (BG78, V000, and R14).

I also created a mat for my card front by coloring the edges of a plain white piece of card stock with Copic Marker (BG78) to match the vase.  This panel was adhered to a white card base.

Here is another sample with different paper and a different stamp:

Pleated Skirt Fold Mother's Day Card wwDSC_0353

For this one, I used the tulip stamp from the Lawn Fawn – Fairy Friends stamp set along with a die from the Gina Marie Designs – Stitched Square Dies set and the Happy Mother’s Day border die by Lawn Fawn.  All of these items are also available at Kat Scrappiness.

Lawn Fawn Fairies Stamp Set

The two-sided patterned paper is called “Garden Walk” from the Happy Day collection by Pebbles.  The tulip was stamped with Memento Tuxedo Black ink and colored with Copic Markers (YG03, YG93, and R14).  I placed a piece of vellum behind my stamped panel to “separate” it from the busy background.

Now it’s your turn!  Head on over to the Mod Squad Challenge Blog, and show us your Mother’s Day projects. I can’t wait to see what you create!

Thanks for checking out my card project!

Fun Floral Mother’s Day Card

Fun Floral Mother’s Day Card

Fun Floral Mother's Day Card xDSC_0333.jpg

The challenge this week over at the  Mod Squad Challenge is Mother’s Day.  I was asked to co-host with the very talented Peggy Timmerman.  (Sadly, this site is no longer active.)

For my card, I used the lily of the valley, coneflower, and tulip stamps from the Lawn Fawn – Fairy Friends stamp set along with dies from the Gina Marie Designs – Stitched Rectangle Dies set and the Happy Mother’s Day die by Lawn Fawn.  All of these items are available at Kat Scrappiness who is one of the Mod Squad Challenge sponsors this week .

Lawn Fawn Fairies Stamp Set

Kat stocks the products that she loves and uses as well as what her customers request.  If you don’t see it in her store, feel free to contact her.  She is happy to do special orders for you!  And she offers a DISCOUNT CODE for The Mod Squad Challenge: MSC10!

This was a fun challenge for me because I wanted to create a card using one of the stamp sets I had previously purchased from Kat Scrappiness while I waited for the arrival of a new set I ordered, but I didn’t have any that seemed Mother’s Day-ish…at first.  I liked the bold and chunky style of these flowers and was able to quickly color them with Copic Markers (YG03, YG93, R14, BV04, and V000) to create my bright, whimsical  card.  I chose the patterned paper called “Garden Walk” from the Happy Day collection by Pebbles to complement these images.  This patterned paper is two sided; the front is the floral pattern I used as my background, and the back is primarily peach/orange that I used for my greeting die cut.  I chose to use the black mats to complement the bold black outlines of the flowers.

Now it’s your turn!  Head on over to the Mod Squad Challenge Blog, and show us your Mother’s Day projects. I can’t wait to see what you create!

Thanks for checking out my card project!