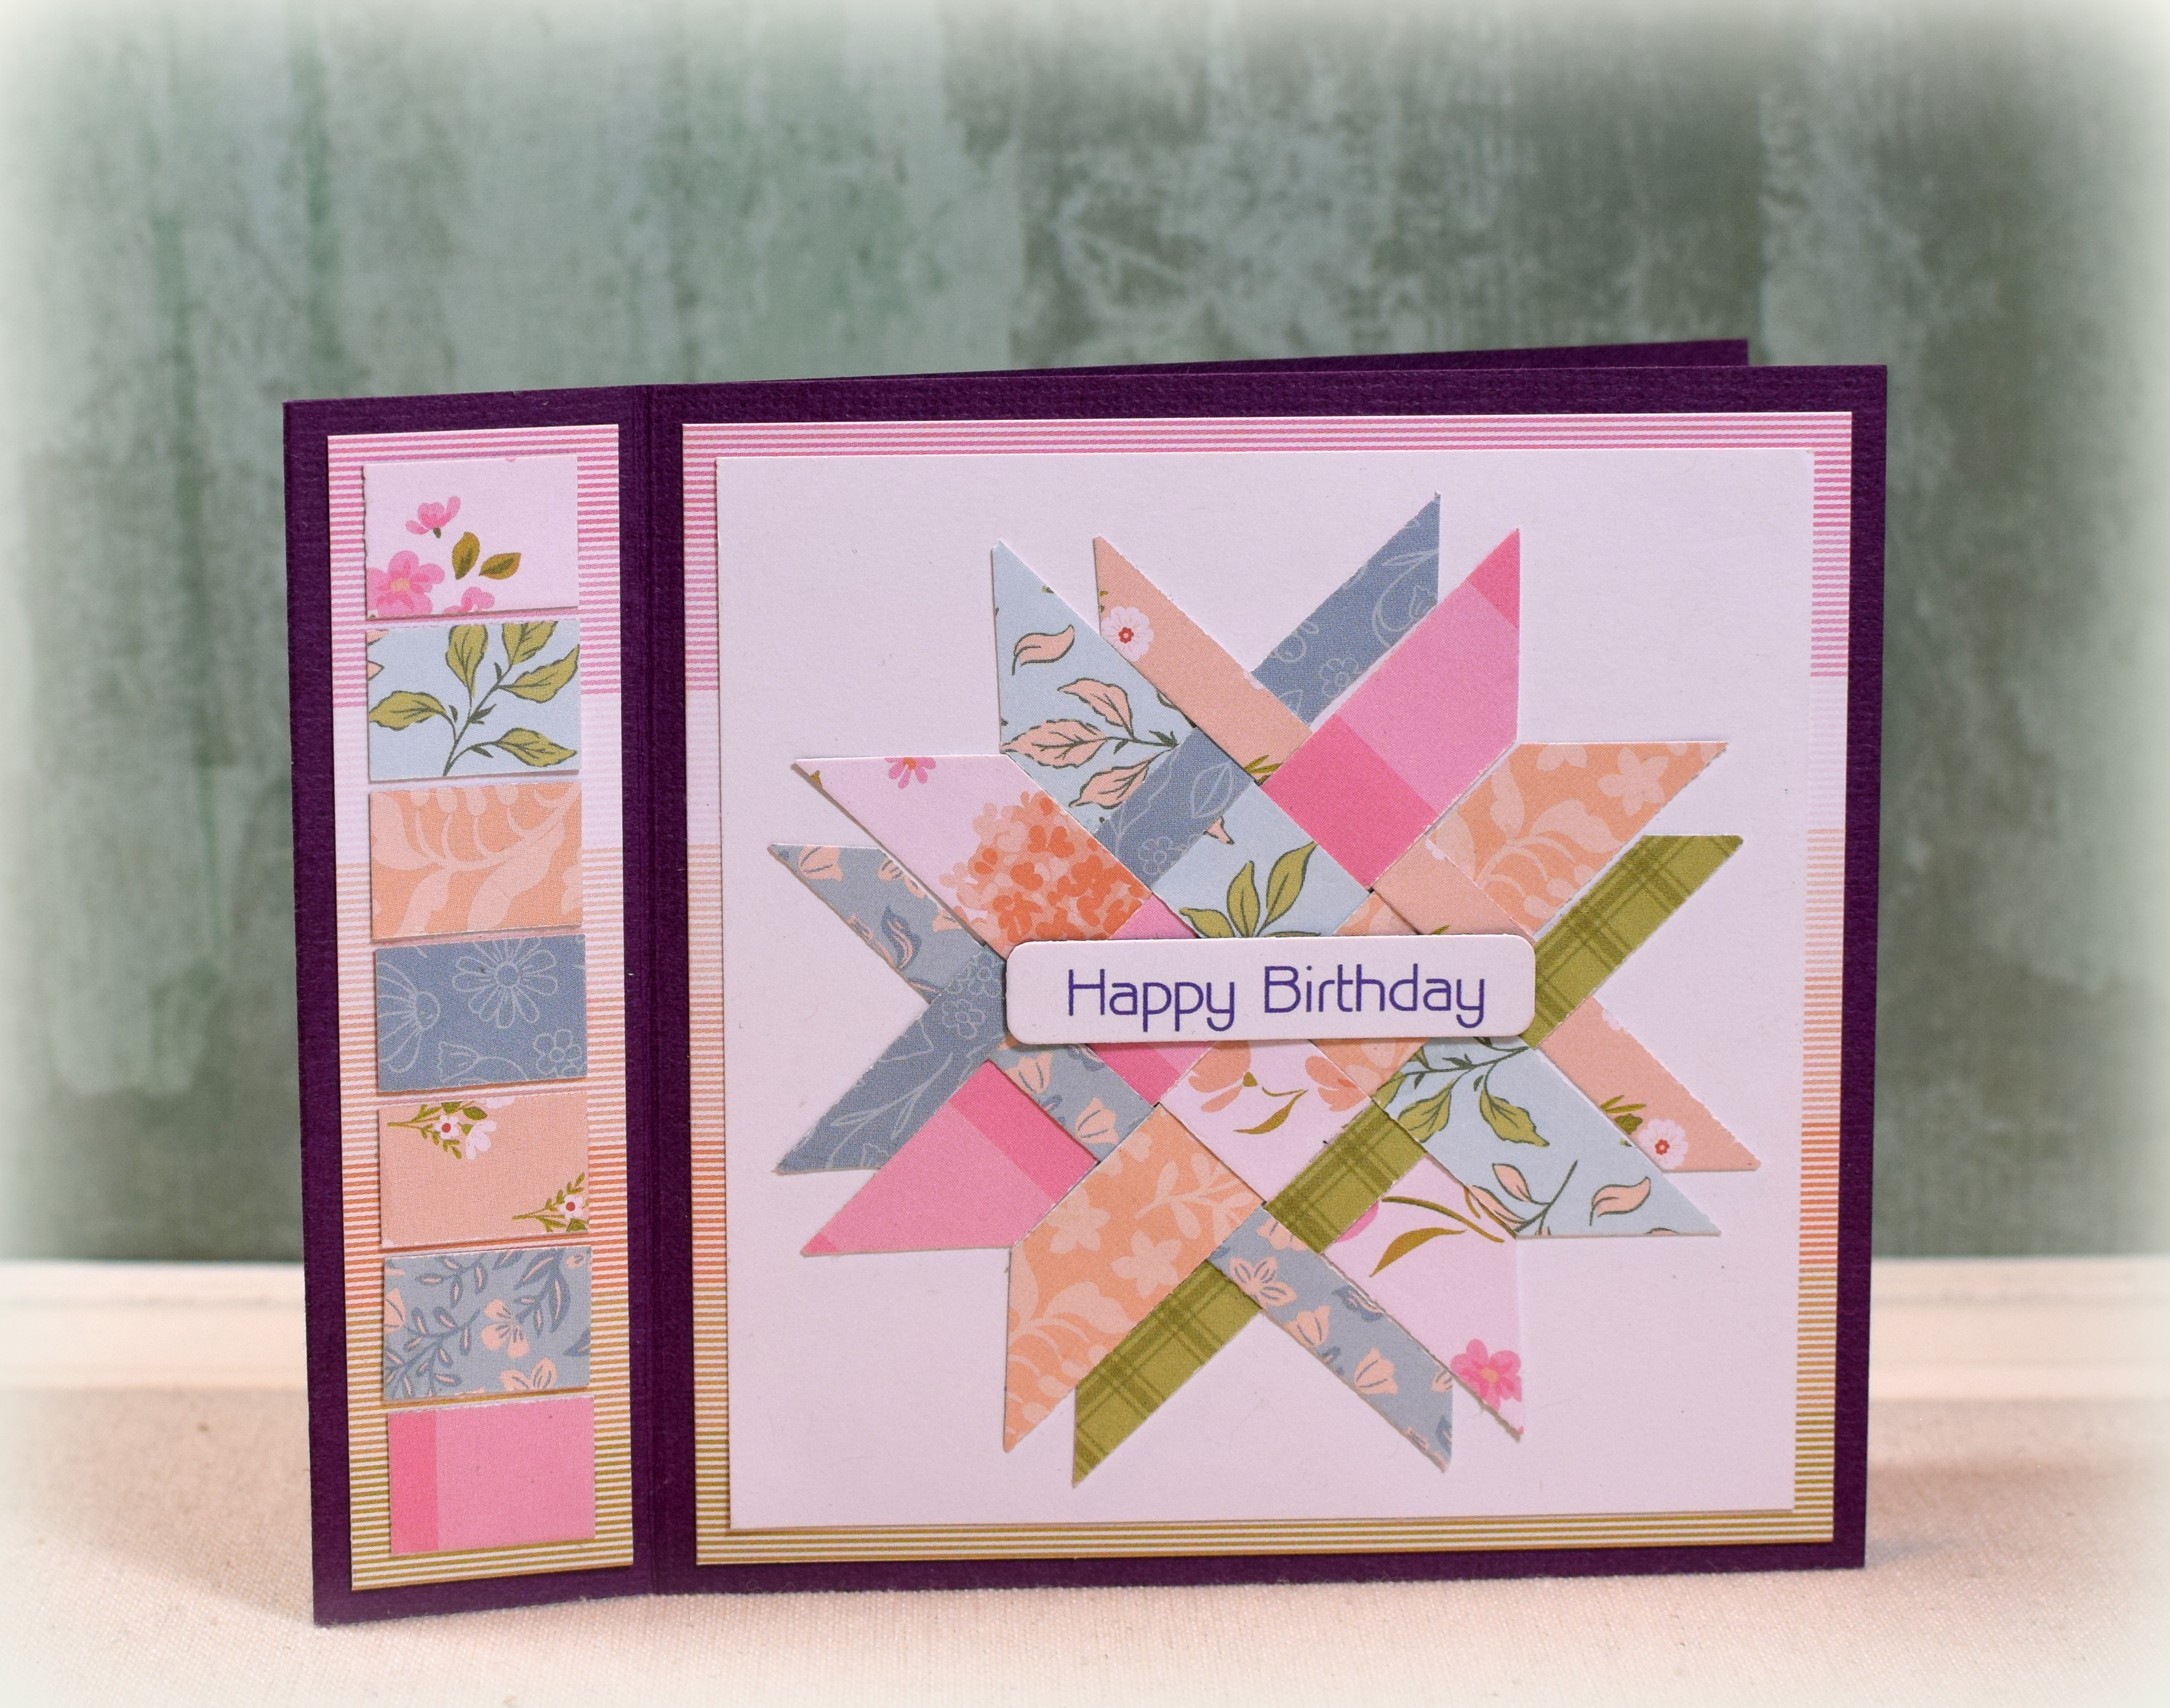
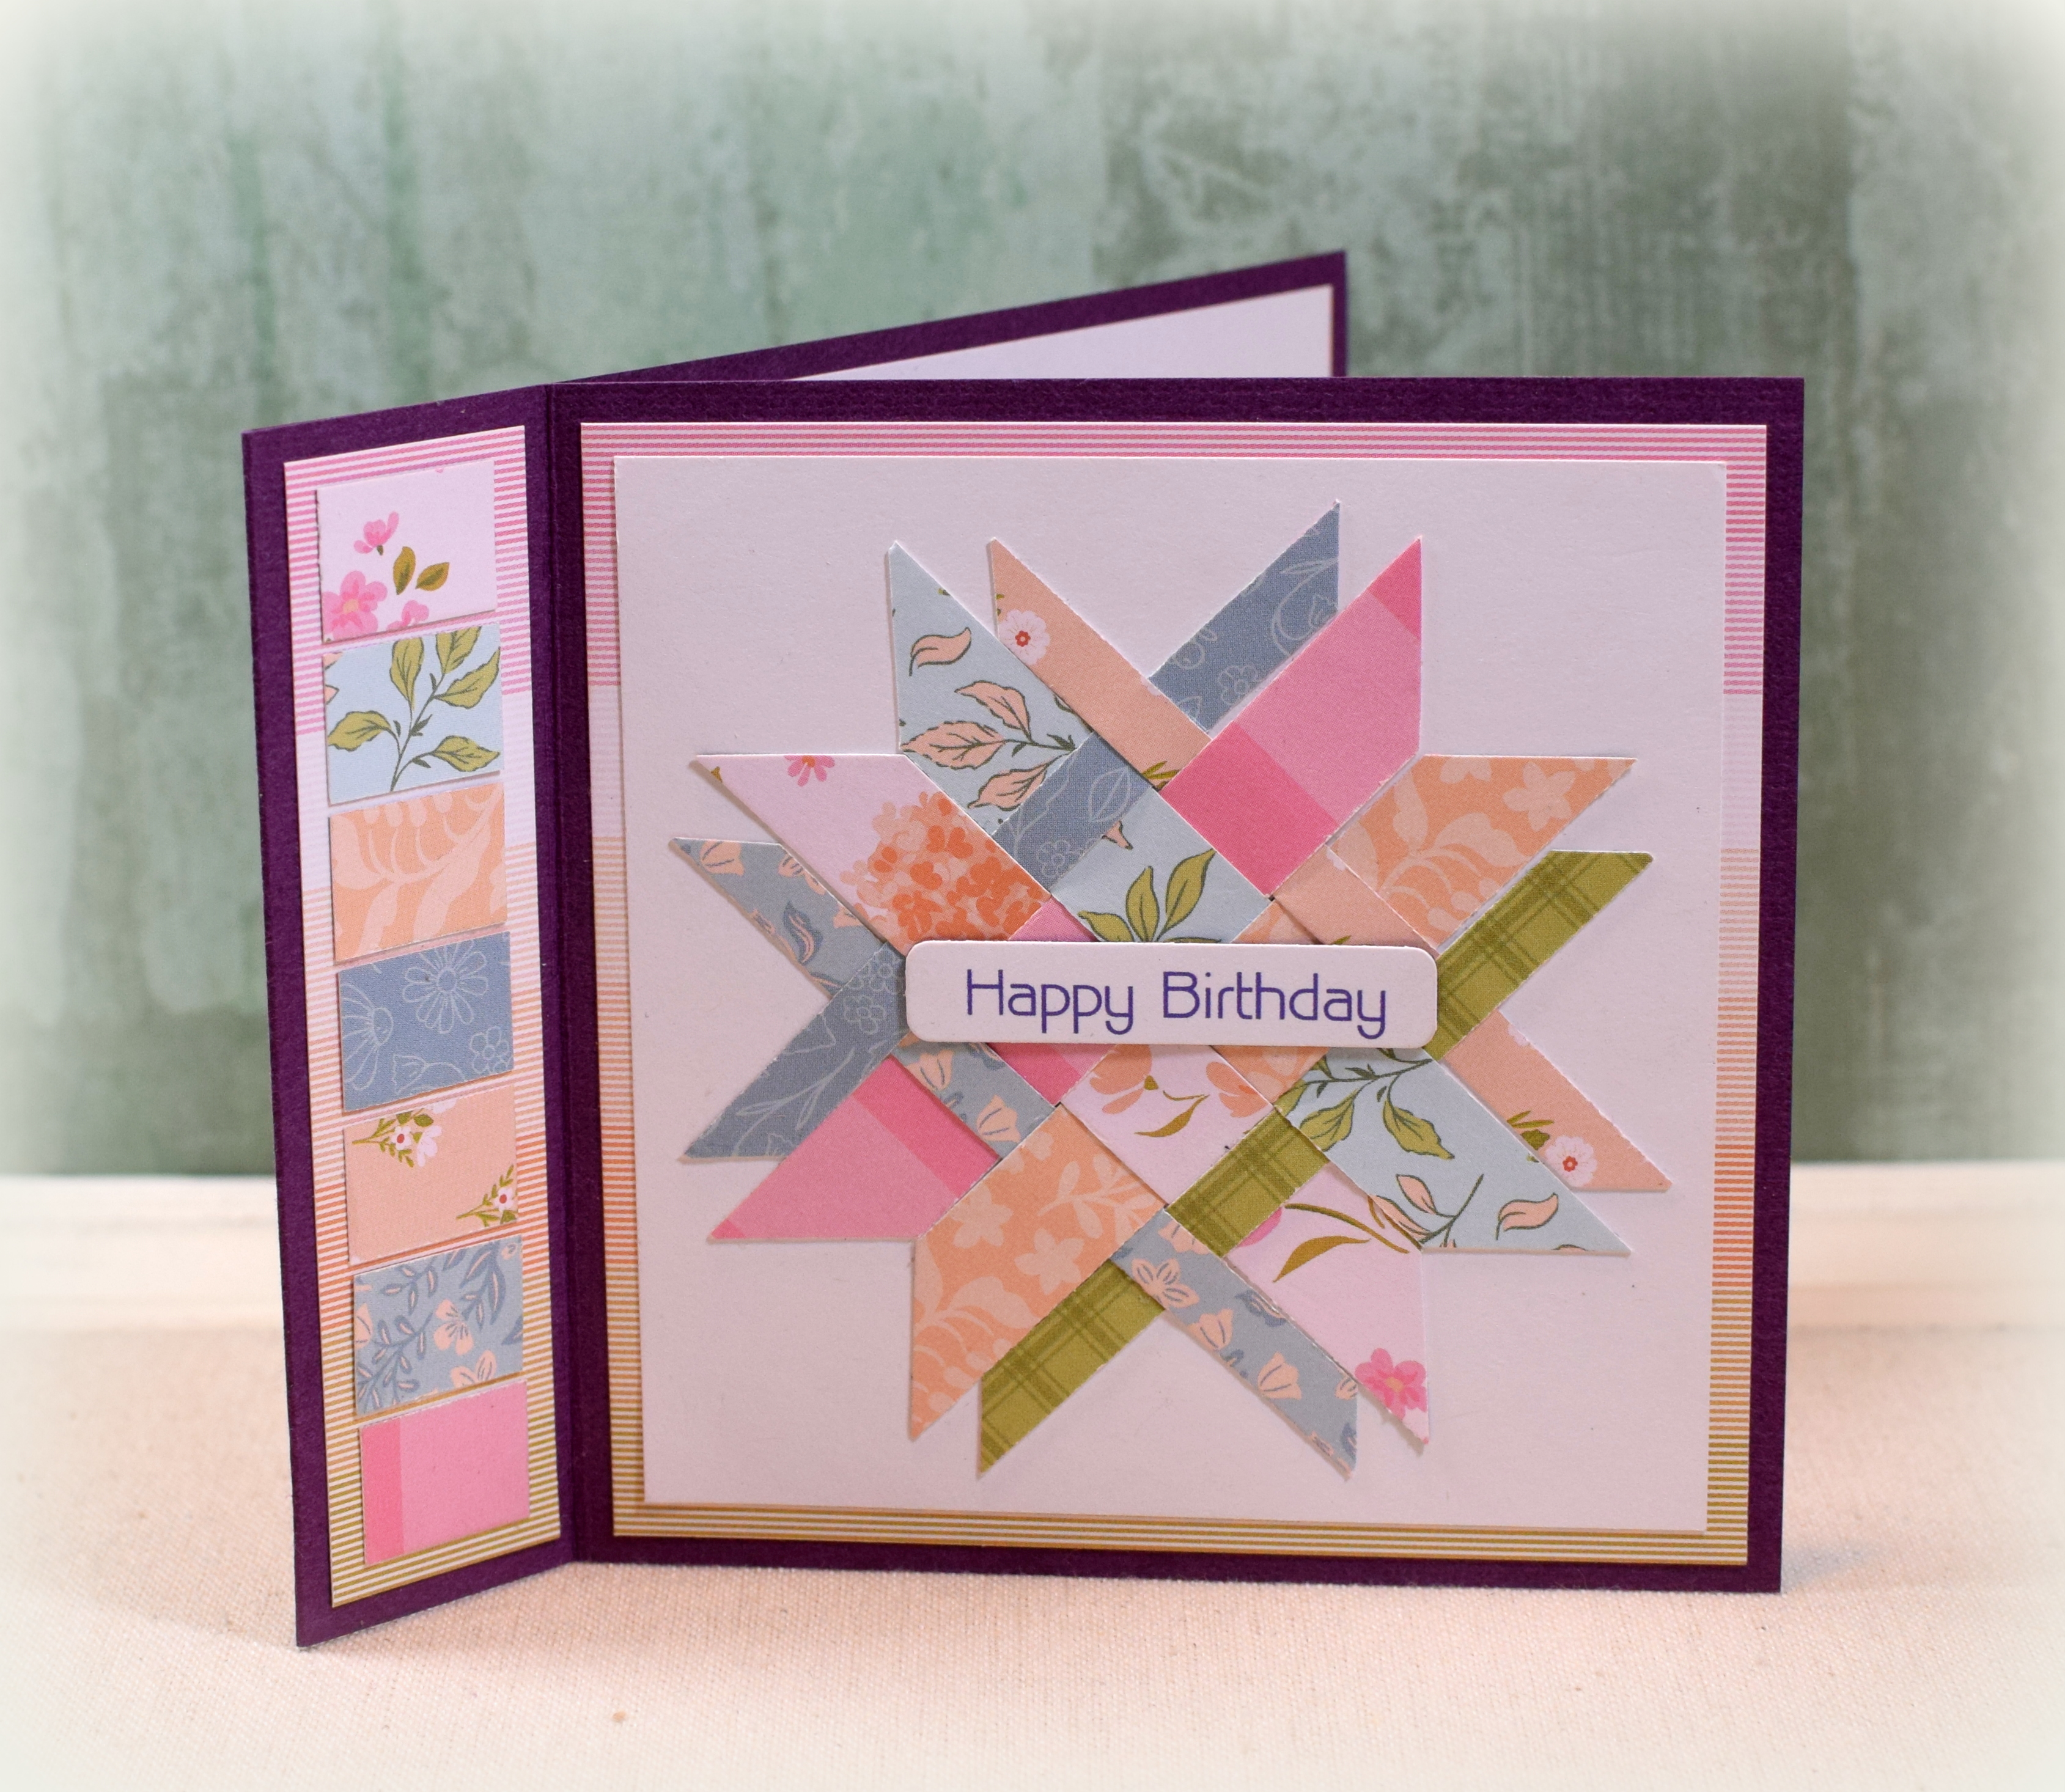
Double Woven Star Birthday Card(s)
I was inspired to try this woven quilting technique by Johanna who shared her version after watching Maymay’s video HERE. I had never made a book card before either, so I learned two new things today! Thanks Johanna!
The patterned card stock I used to create the star, the “piano key” border, and the mats all came in the Crafty Parcel (a mystery box full of great craft supplies) I received when I participated in the Simon Says Stamp HDSA Fundraiser last October. (The pack contained only the card stock and no product information.) I used “Velvet” card stock from American Craft for my base.
When cutting the strips, I cut two sets and was able to create a second card.
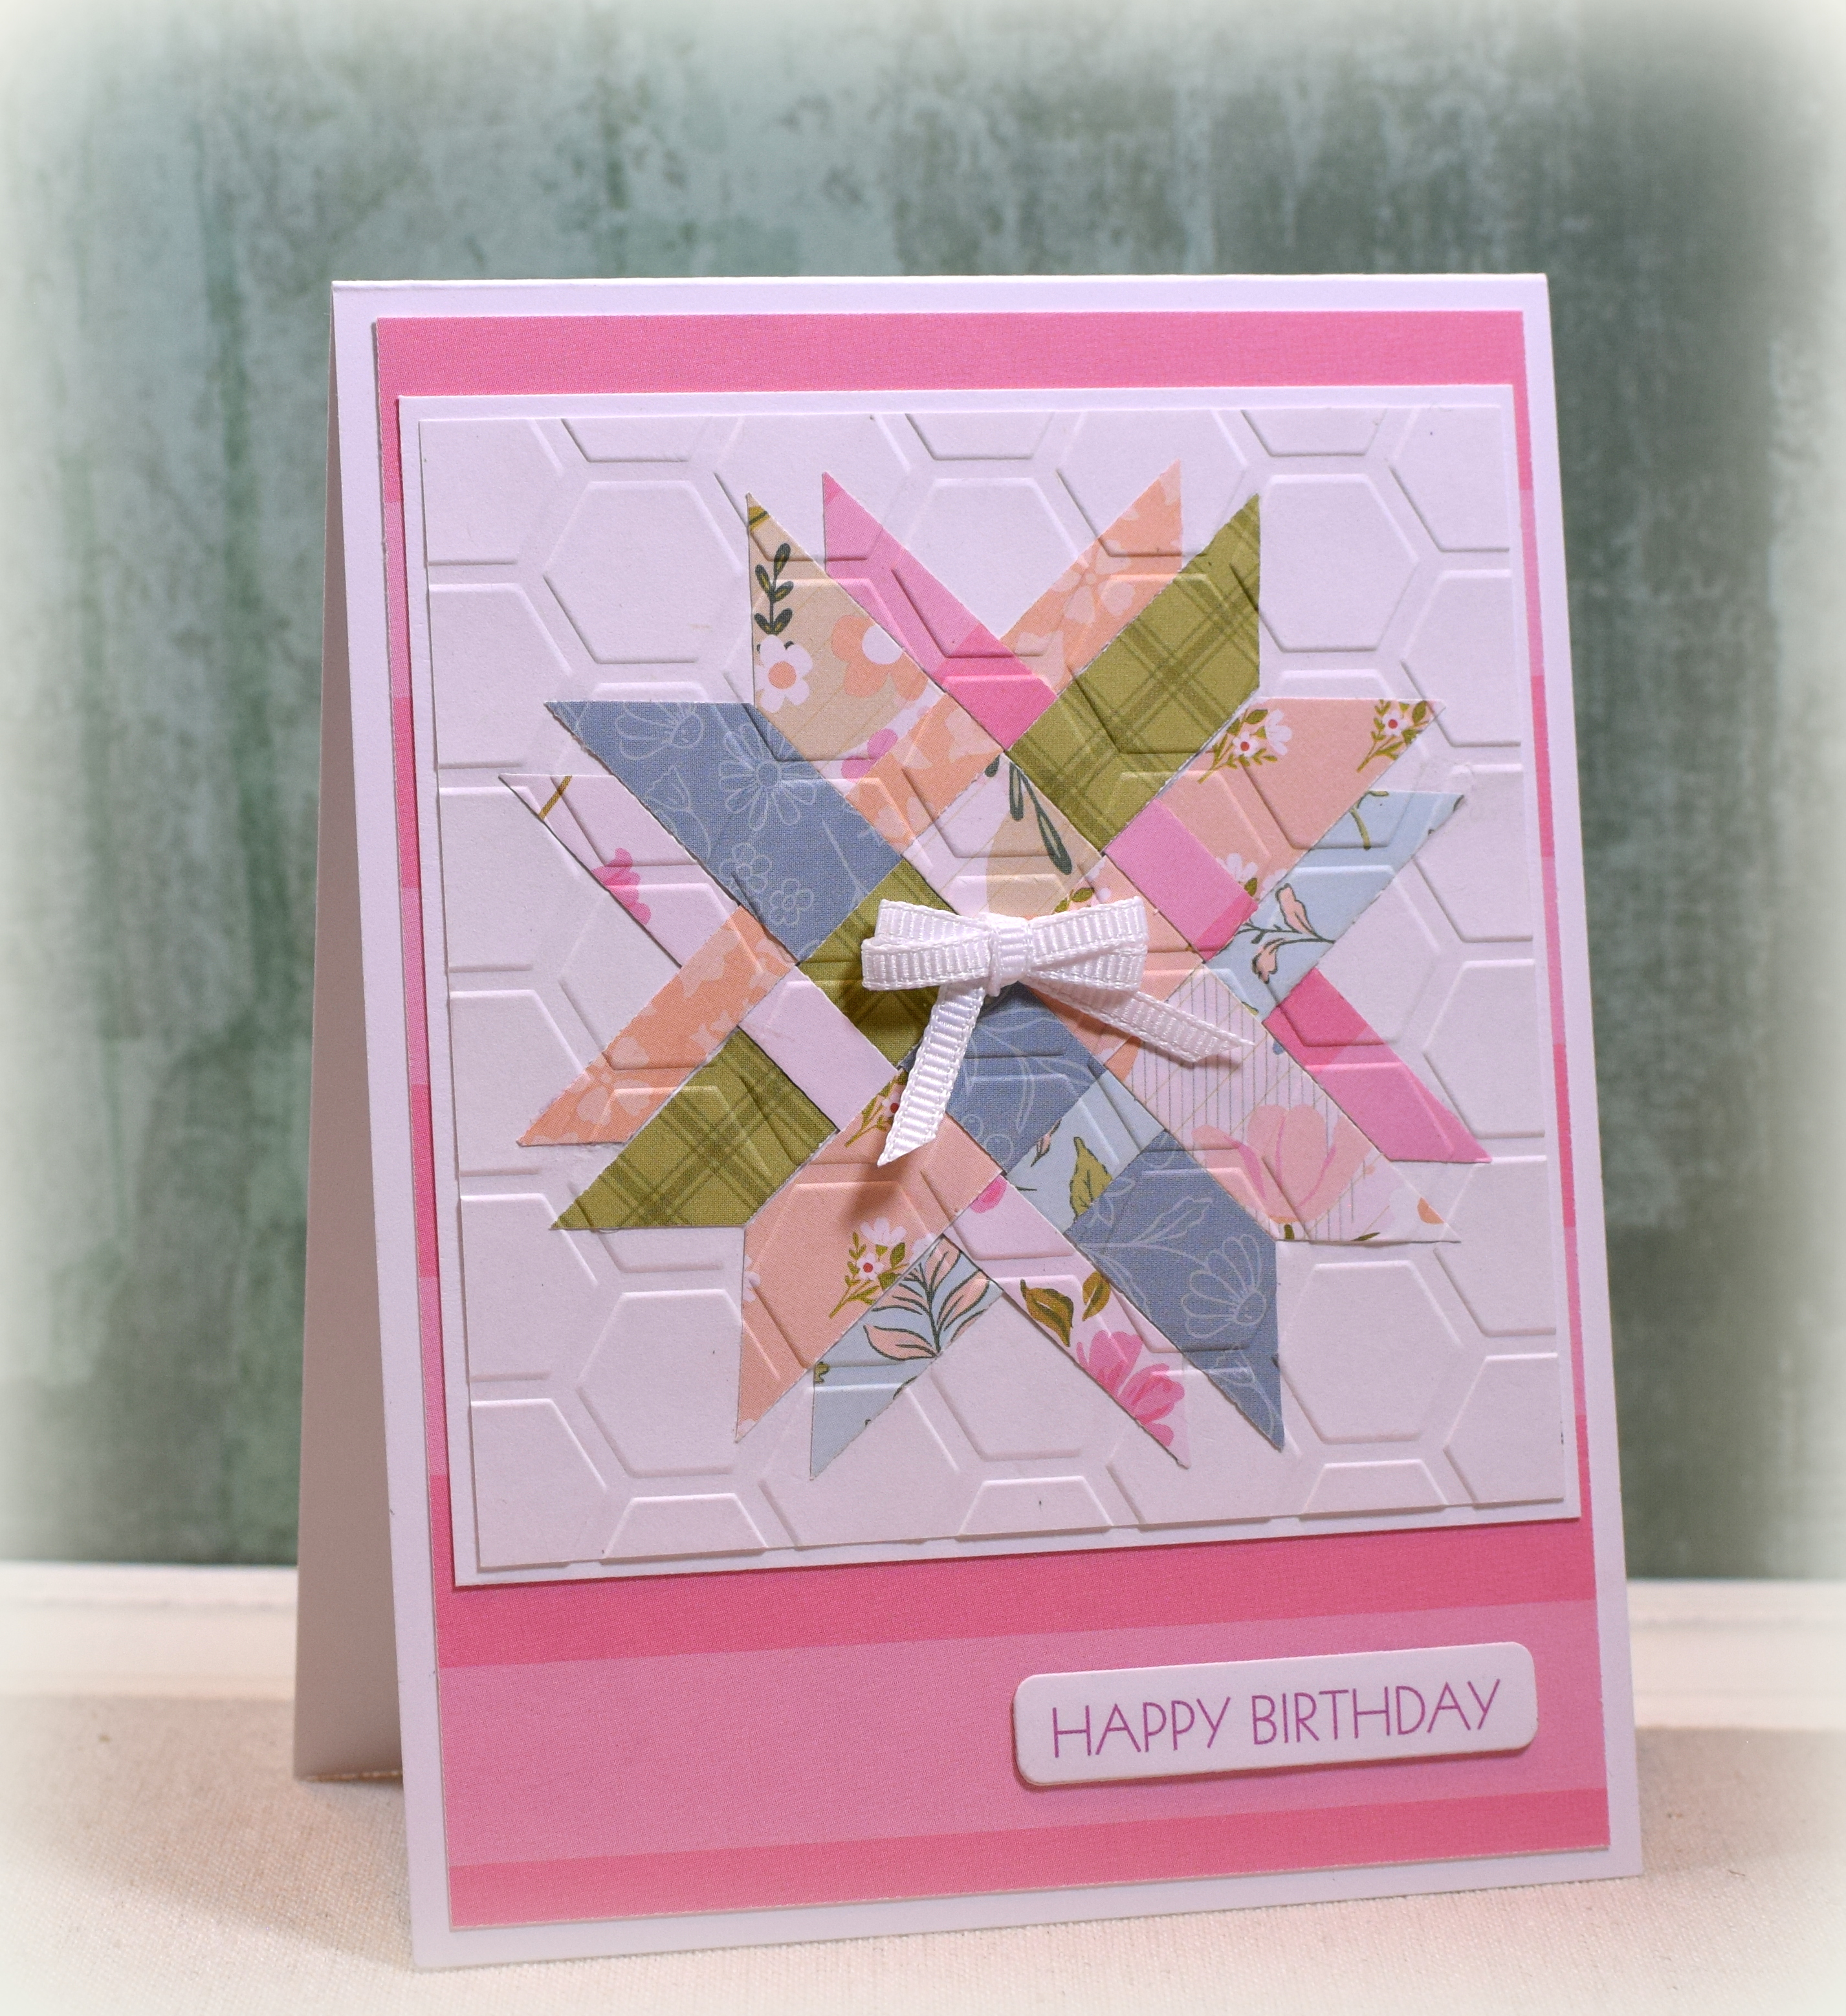
For this one, I embossed the quilt square with the Cuttlebug 5×7 Honeycomb Embossing Folder and created a top fold A2 card. I used my Bow-Easy to create the mini double bow in the center.
The greetings on both were computer generated.
A few notes:
- Maymay’s instructions are always excellent, but this video is a “live” with a lot of silly chit chat while she is explaining the technique. I didn’t want to mess up the patterned card stock before I was sure I understood what to do so I practiced first with scraps of white card stock. The second and third attempts (with the patterned card stock) went more smoothly after that. You can see I kept getting better with more practice as my star strips are much tighter on the embossed/third attempt above.
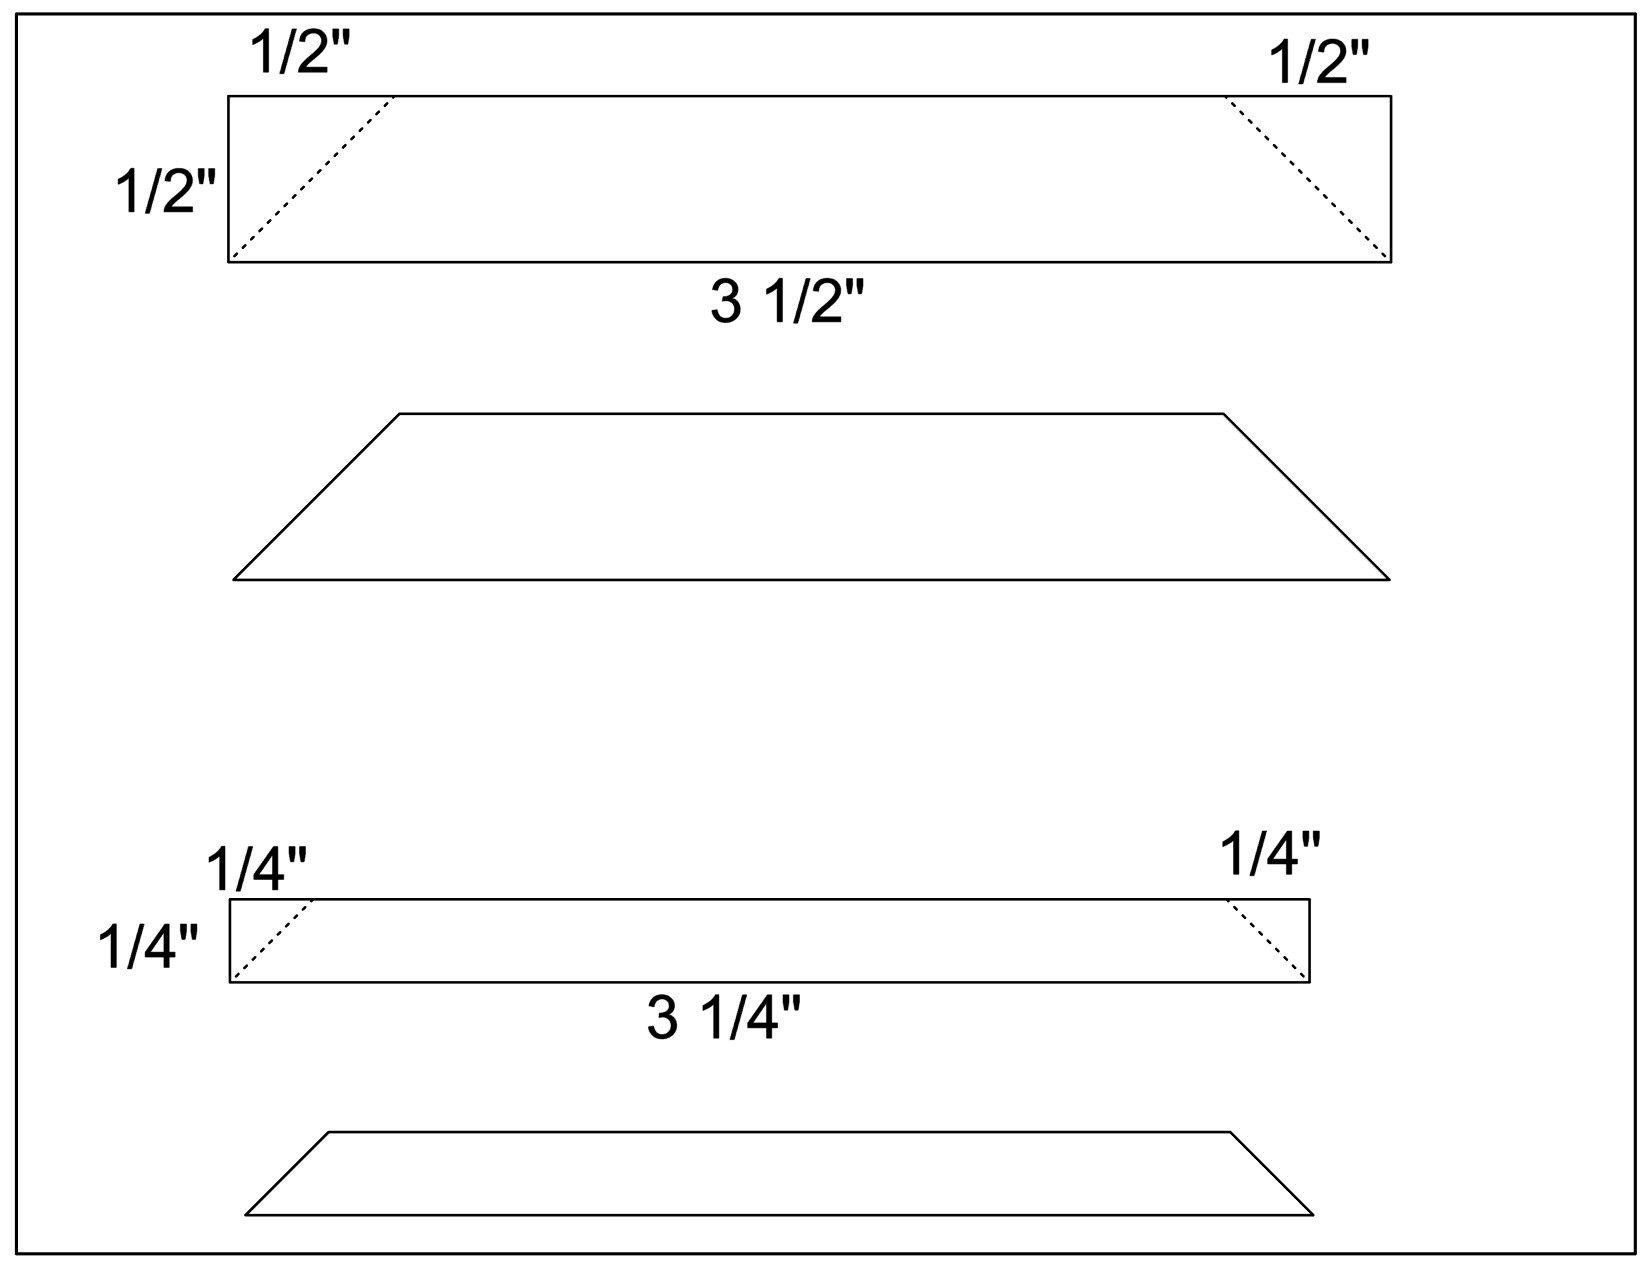
- All the measurements for the strips are in the description under the video, but I included them here for quick reference. You need 4 @ 1/2″ x 3 1/2″ with angles cut 1/2″ down on each end and 4 @ 1/4″ x 3 1/4″ with angles cut 1/4″ down on each end (see below; click to enlarge). I created a “master” strip in each size to help me position/cut the angles without having to measure each one.
- Once the strips are cut, Maymay explains “how to weave” the strips with a lot of unders and overs and overs and unders. Just weave them – lol!
- To create the “book card” base, start with a 4 1/2″ x 11 ” piece of card stock and score it on the long side at 5 1/2″ and 6 3/4″. Glue the 1 1/2″ section on the front to the inside of the card to create the “binding” strip.
- And finally, I modified my piano key border to include a mat panel; my strips are 1/2″ x 3/4″ (instead of 1″ long). As a result of these changes, I could only fit 7 instead of 8 (with a tiny space between each one).
Thanks for checking out my card projects!


Beautiful! Thank you for including the print guide. I like Maymay but am not a fan of her chatter.
LikeLike
I’m so flattered that I inspired something for you and thanks for the shout out. I’m still pondering why I couldn’t cut my paper correctly LOL. Love your cards and the PP you used. Both are beautiful with soft and pretty papers.
LikeLike
| | Hi Lisa, I like your woven cards very much, so much that I might even have a go myself! your second card (ribbon bow) looks okay |
to me, are you sure it’s not the pattern underneath the bow that makes it look bigger? Cheers and Thankyou for sharing your lovely cards, Marilyn. PS. I haven’t made a book card before either! |
LikeLike
You’re right – I looked more closely at the ribbon tail, and it seems to be a shadow on the paper that’s making it look off to me. Aging eyes – lol! (I edited my post so it no longer says “Looks like I need to go back and trim the right tail a bit better.”)
LikeLiked by 1 person
The whole design reminds me of a quilt block. A great mix of pattern papers and I love the texture from the embossing folder. So gorgeous!
LikeLike
Wow Wow Wow. Your eyes remind me of how we met figuring out peach bellin
LikeLike
Fabulous! Love the combination of patterned papers and colors and that you figured out MayMay’s instructions. Love both styles.
LikeLike
That’s just so pretty! Thanks so sharing the measurements – I may well CASE this one. Great way for using up scraps!
LikeLike
Your woven stars are wonderful. Thanks for including all the measurements and all the great details.
LikeLike
WOW!!! Beautiful. the one you embossed is my favorite.
LikeLike
Pingback: Egg Basket Frame Easter Card | I Played With Paper Today!