Framed Fern Birthday Cards

Framed Fern Birthday Cards

xxDSC_3809

(inside: Hope you have a wonderful day!)

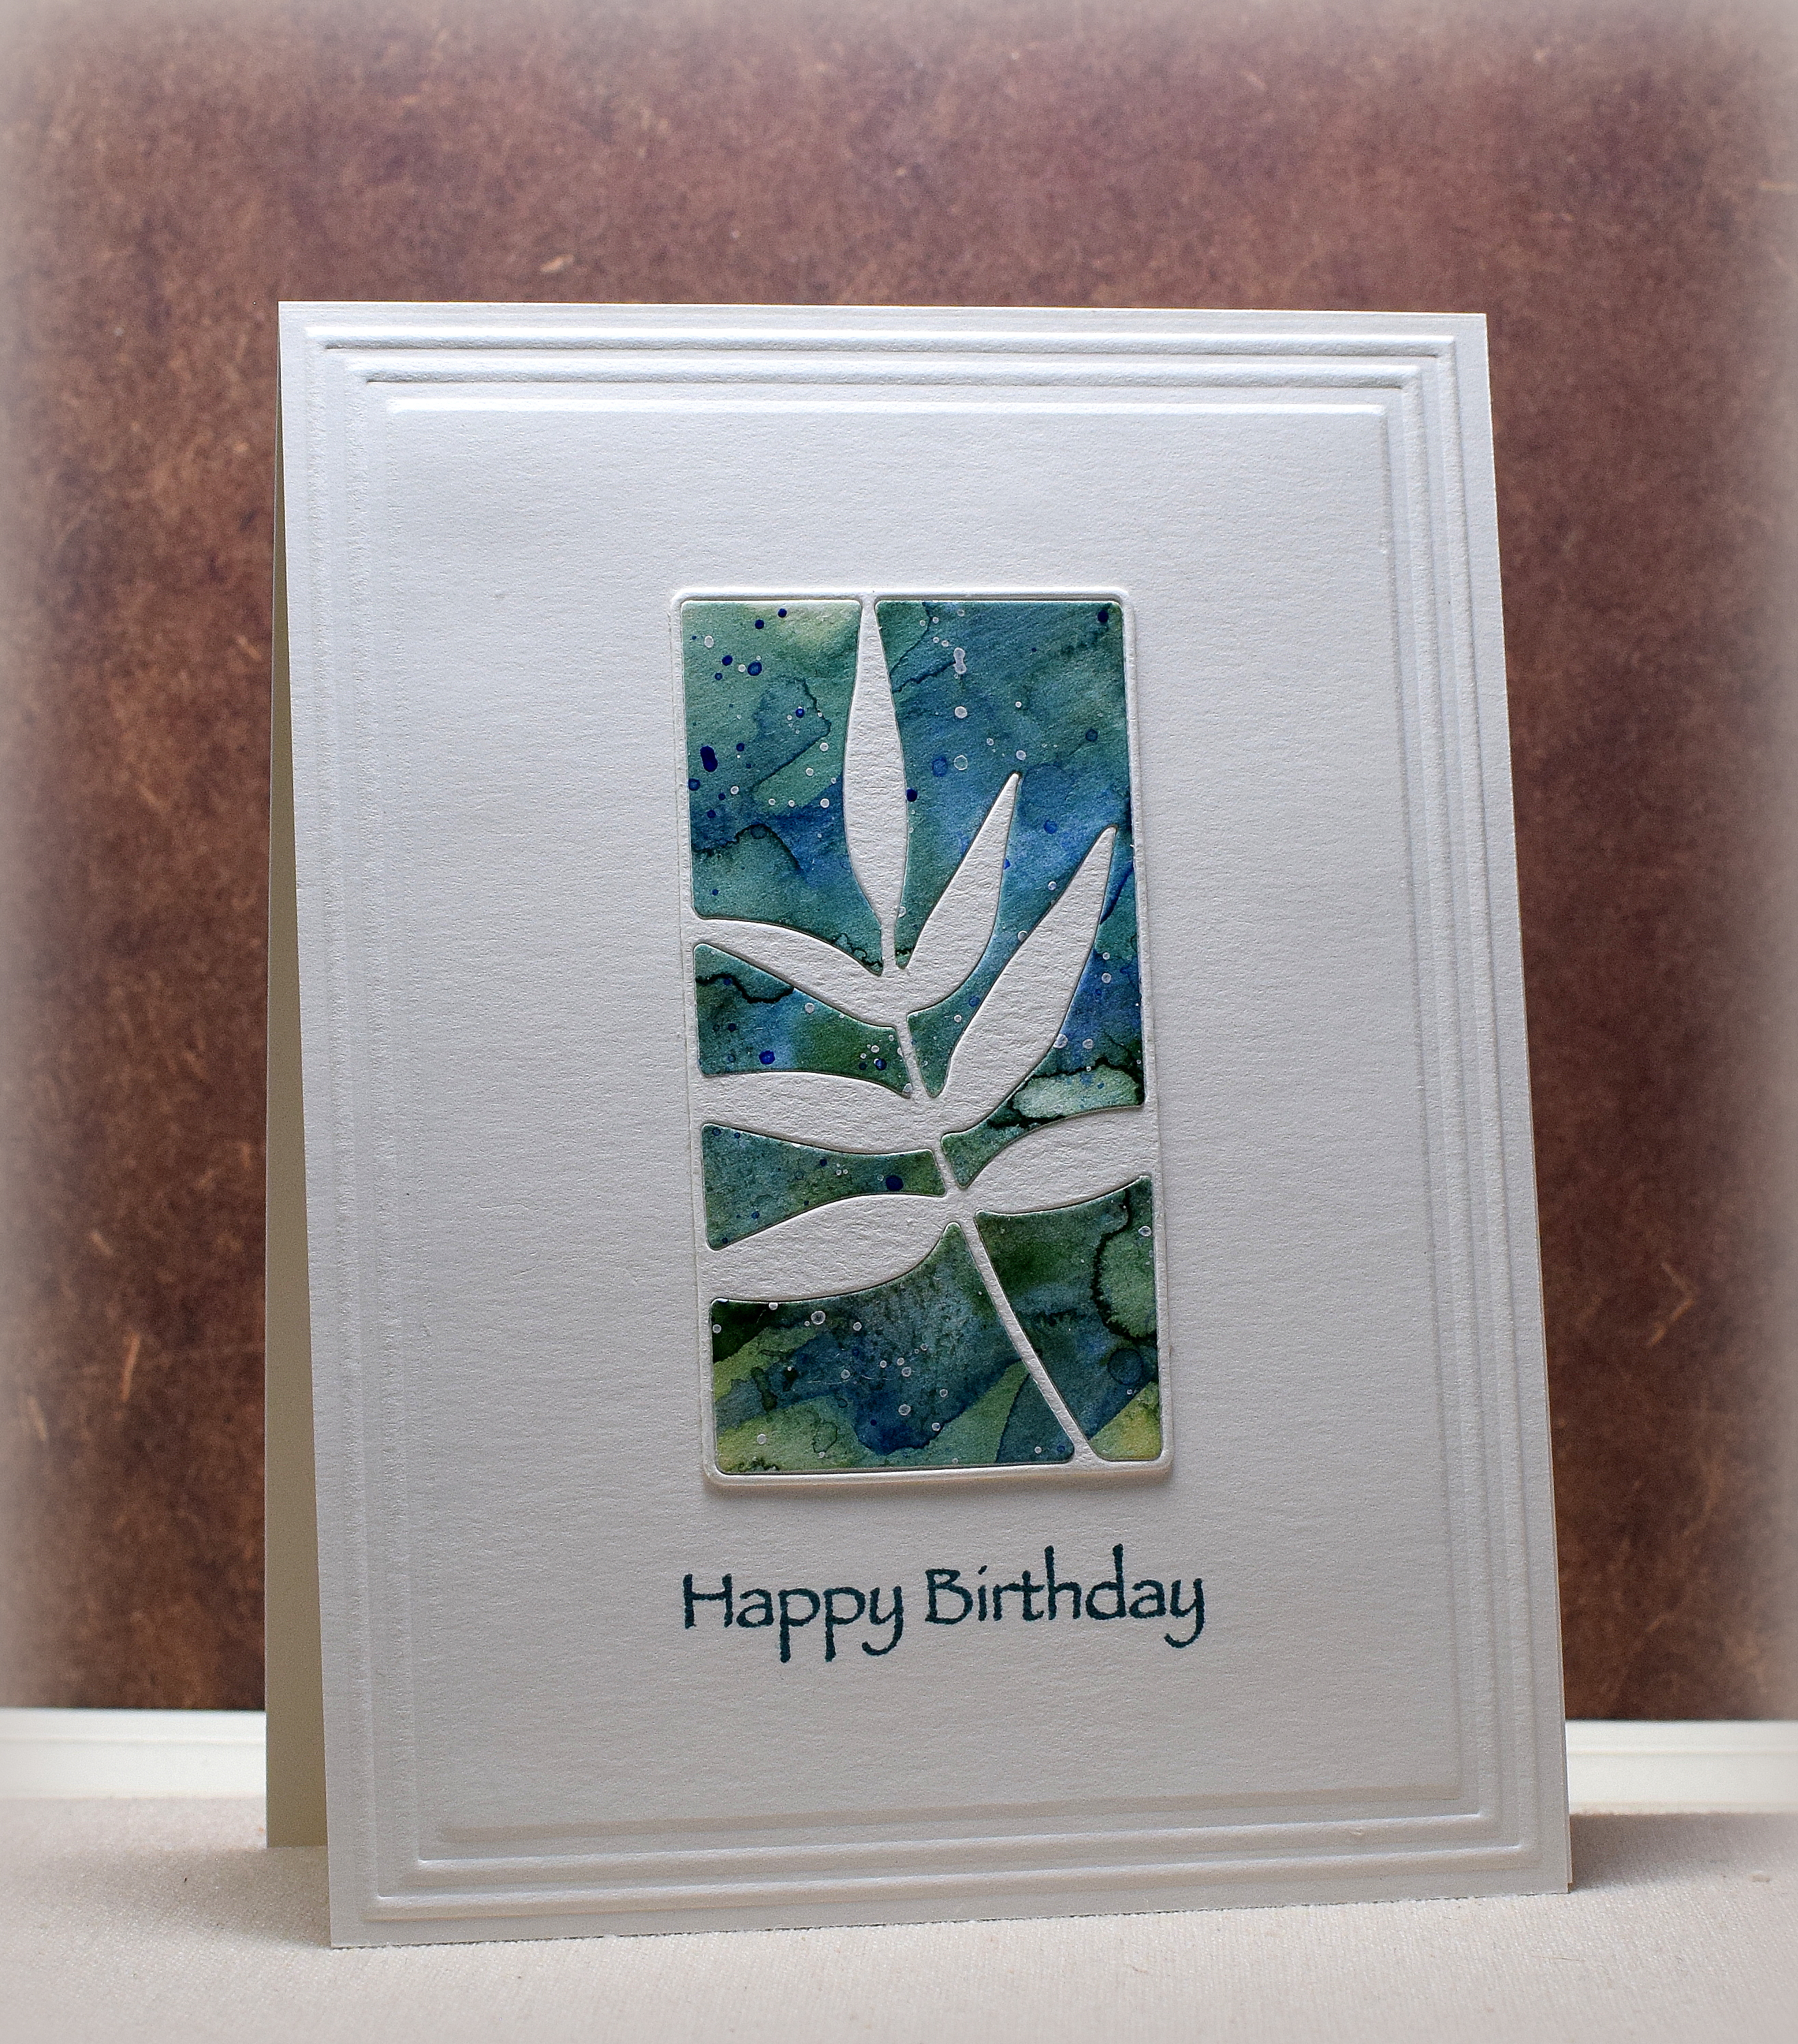
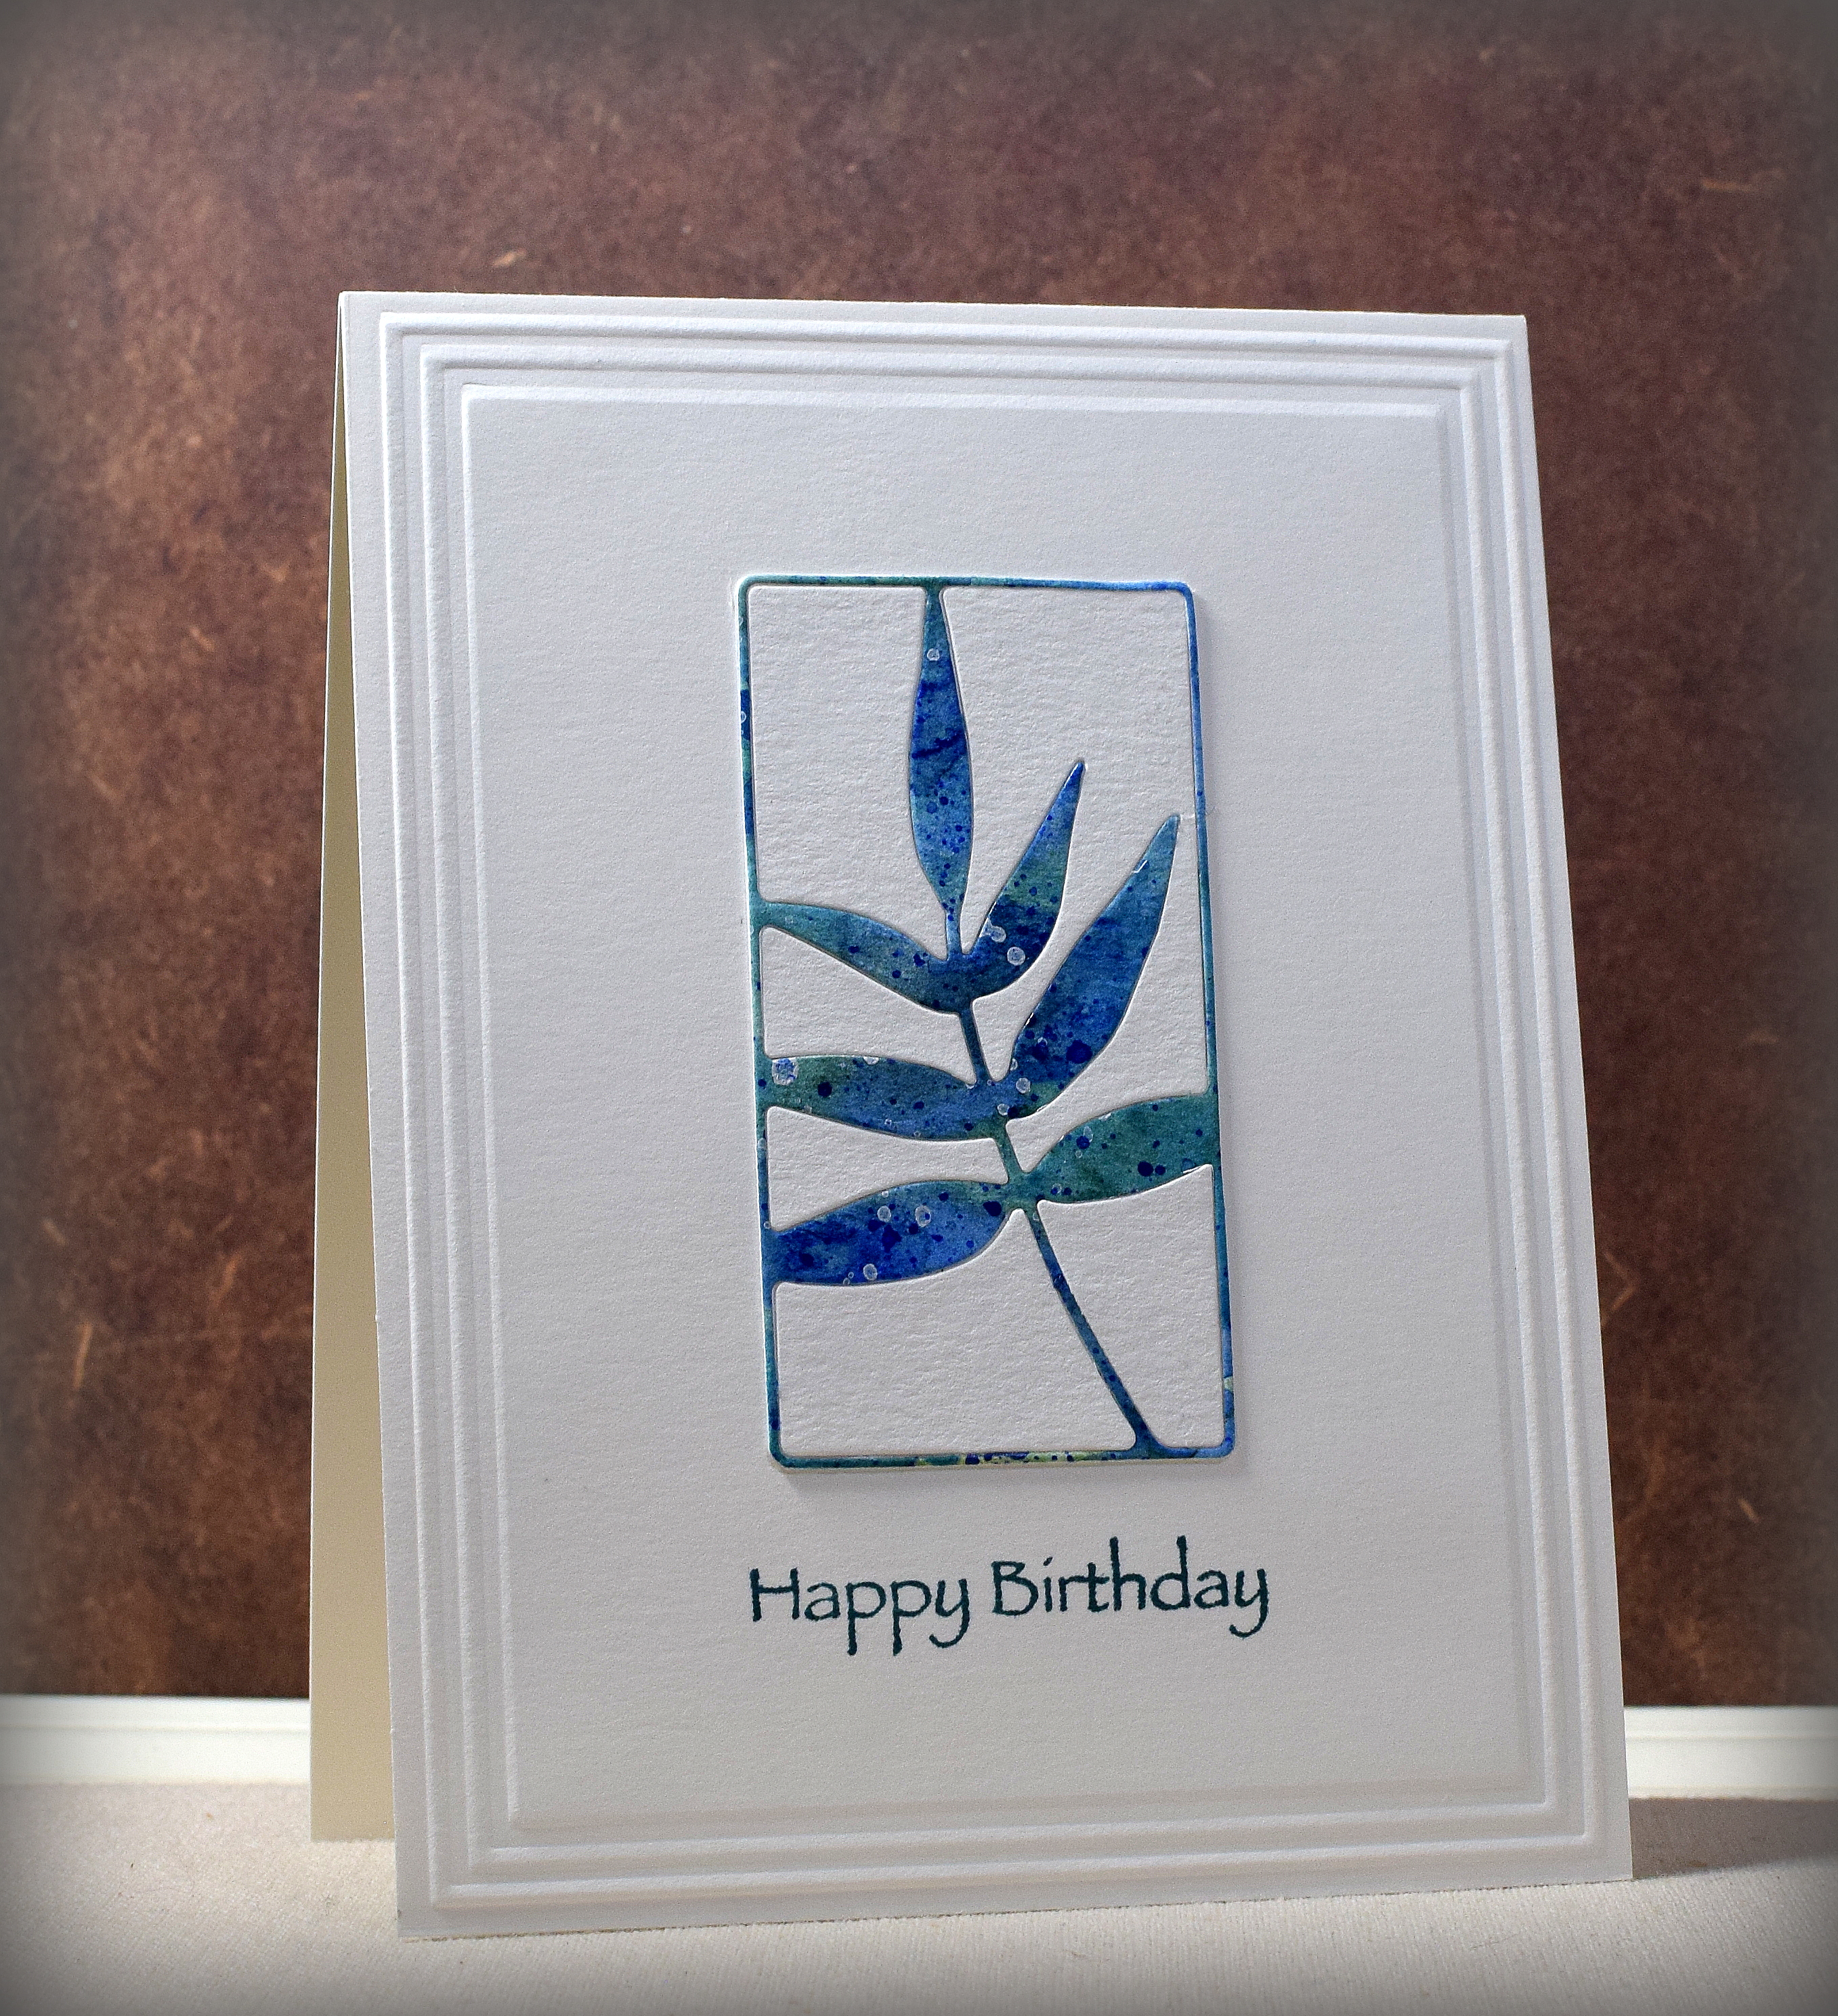
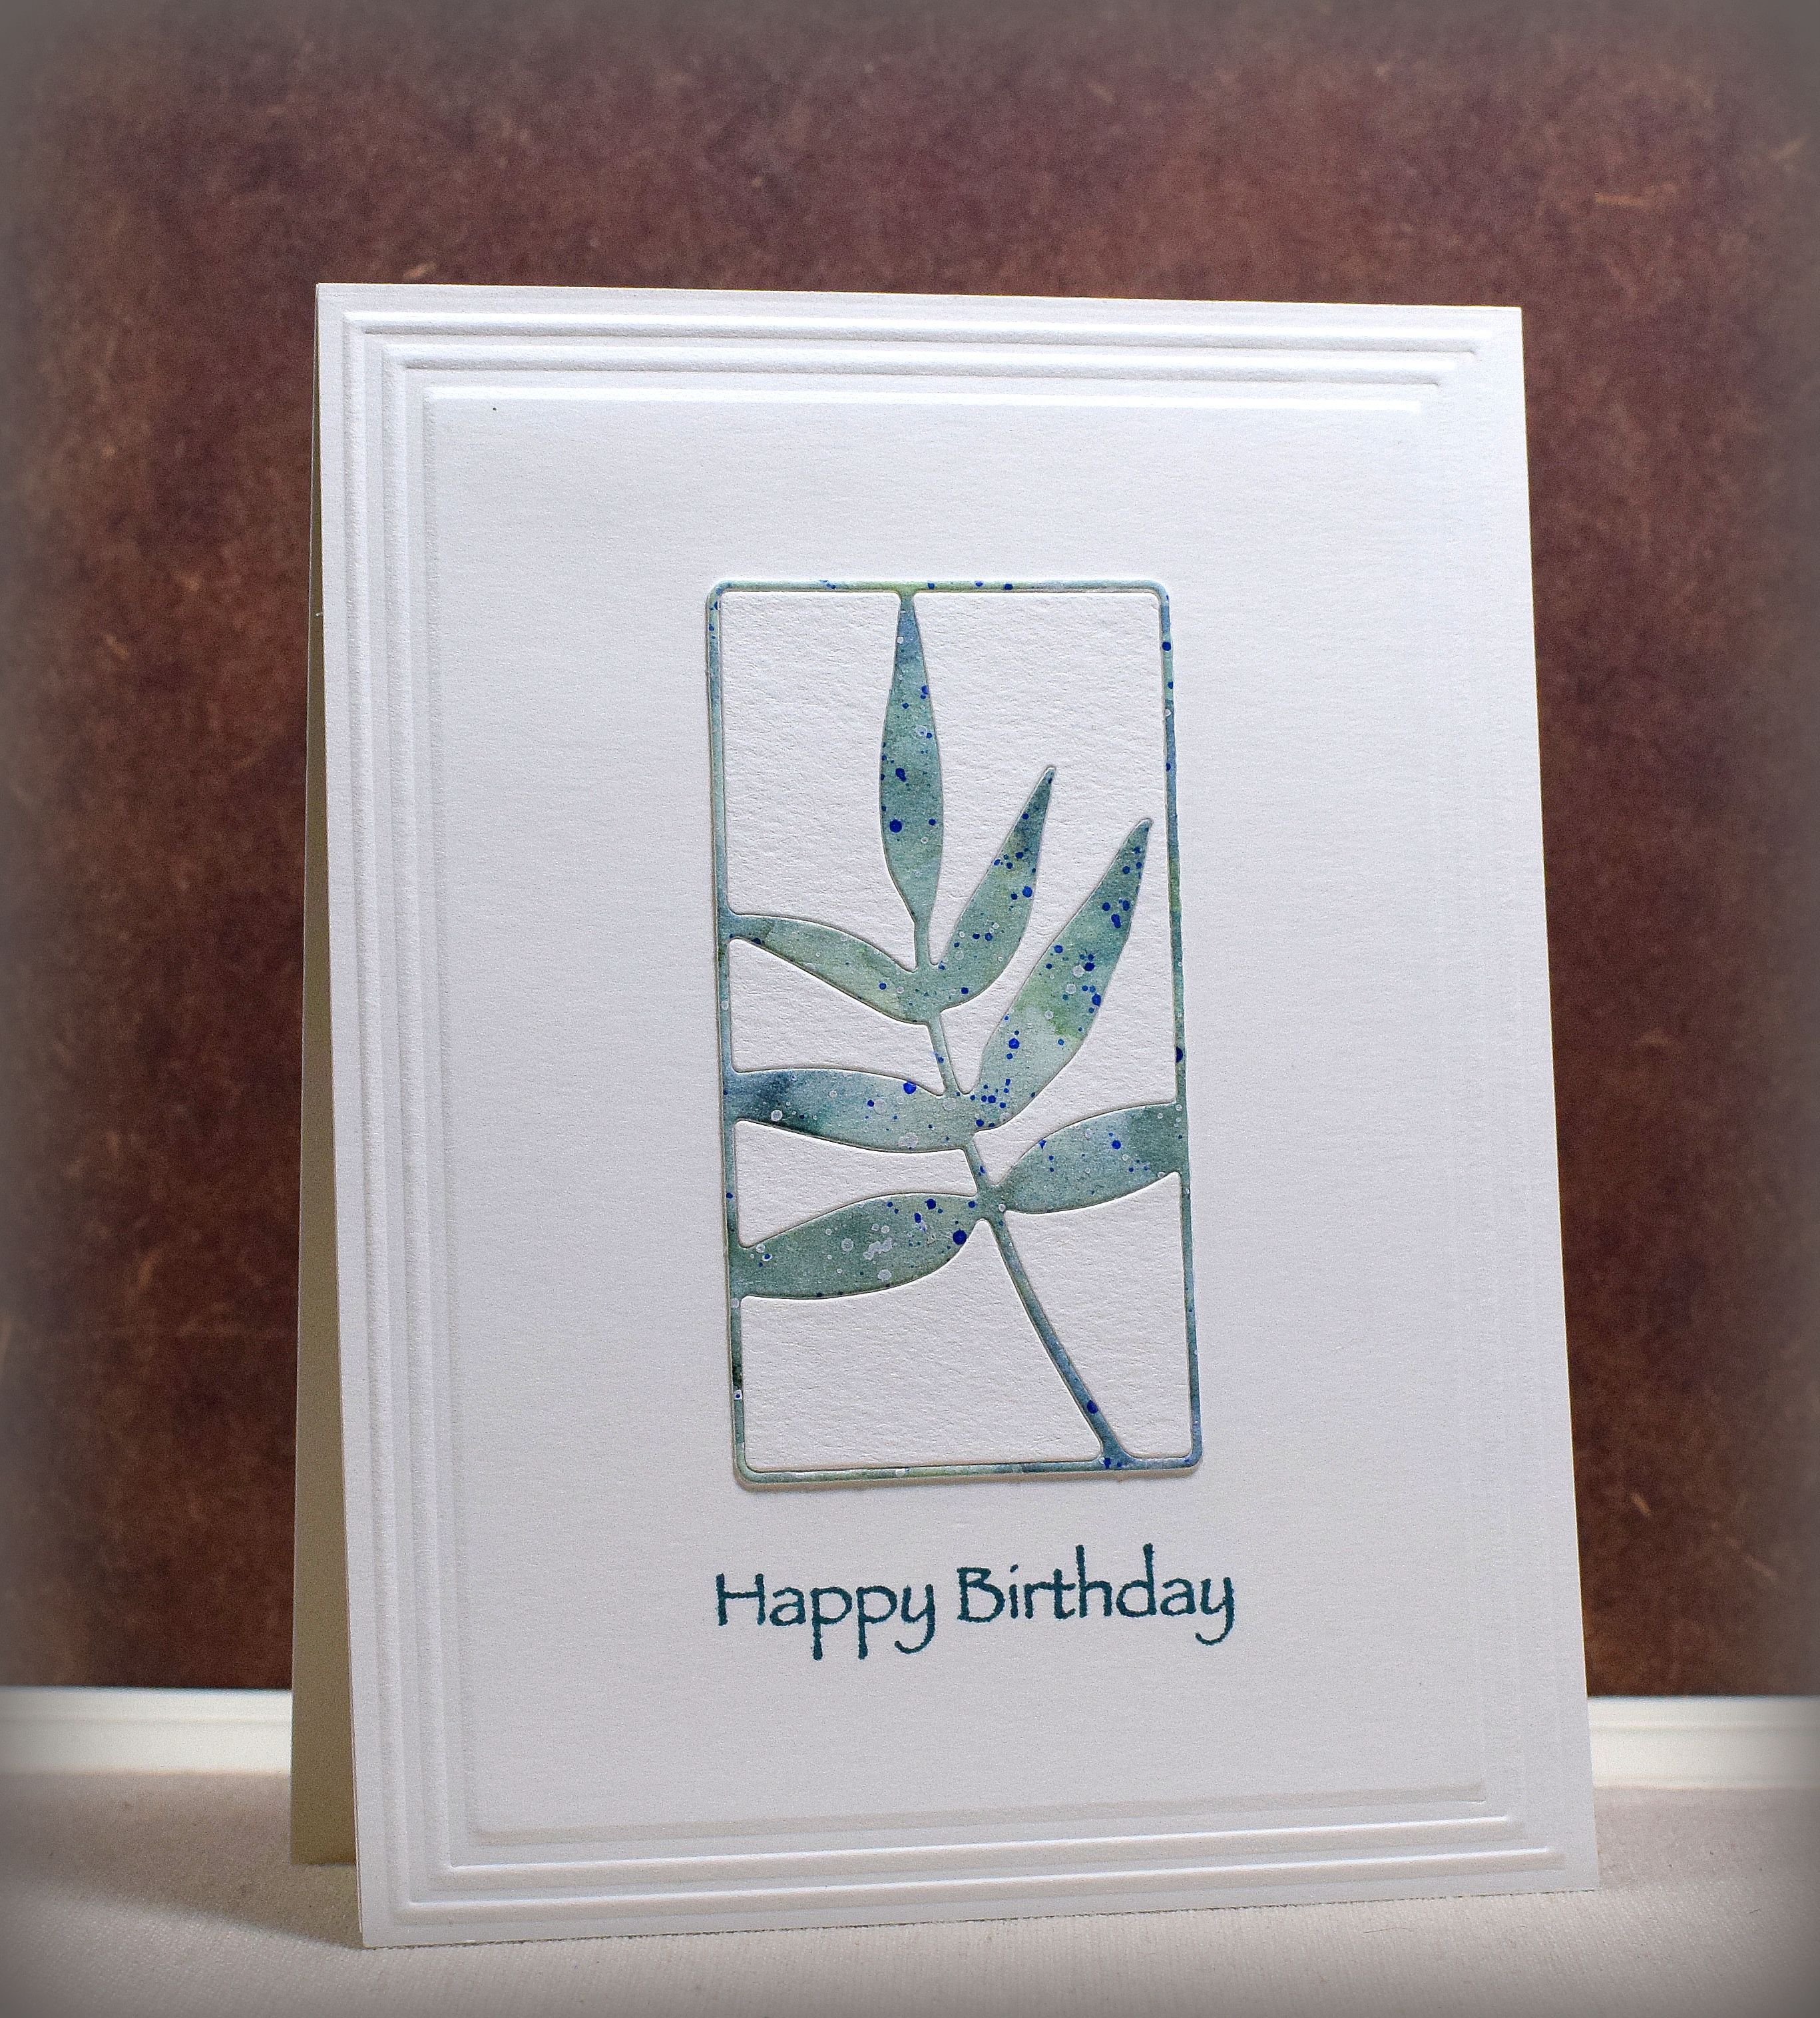
I recently created a bunch of panels with my Kuretake GANSAI TAMBI Water Colors.  These paints are very intense, and I’m still learning to use them.  I was going for a light wash of colors, but some of the panels got pretty dark and didn’t seem usable as intended.  However, when I die cut the “Framed Fern” by Penny Black from them, I ended up with beautiful die cuts and their negative pieces that made great card elements.

wDSC_3831

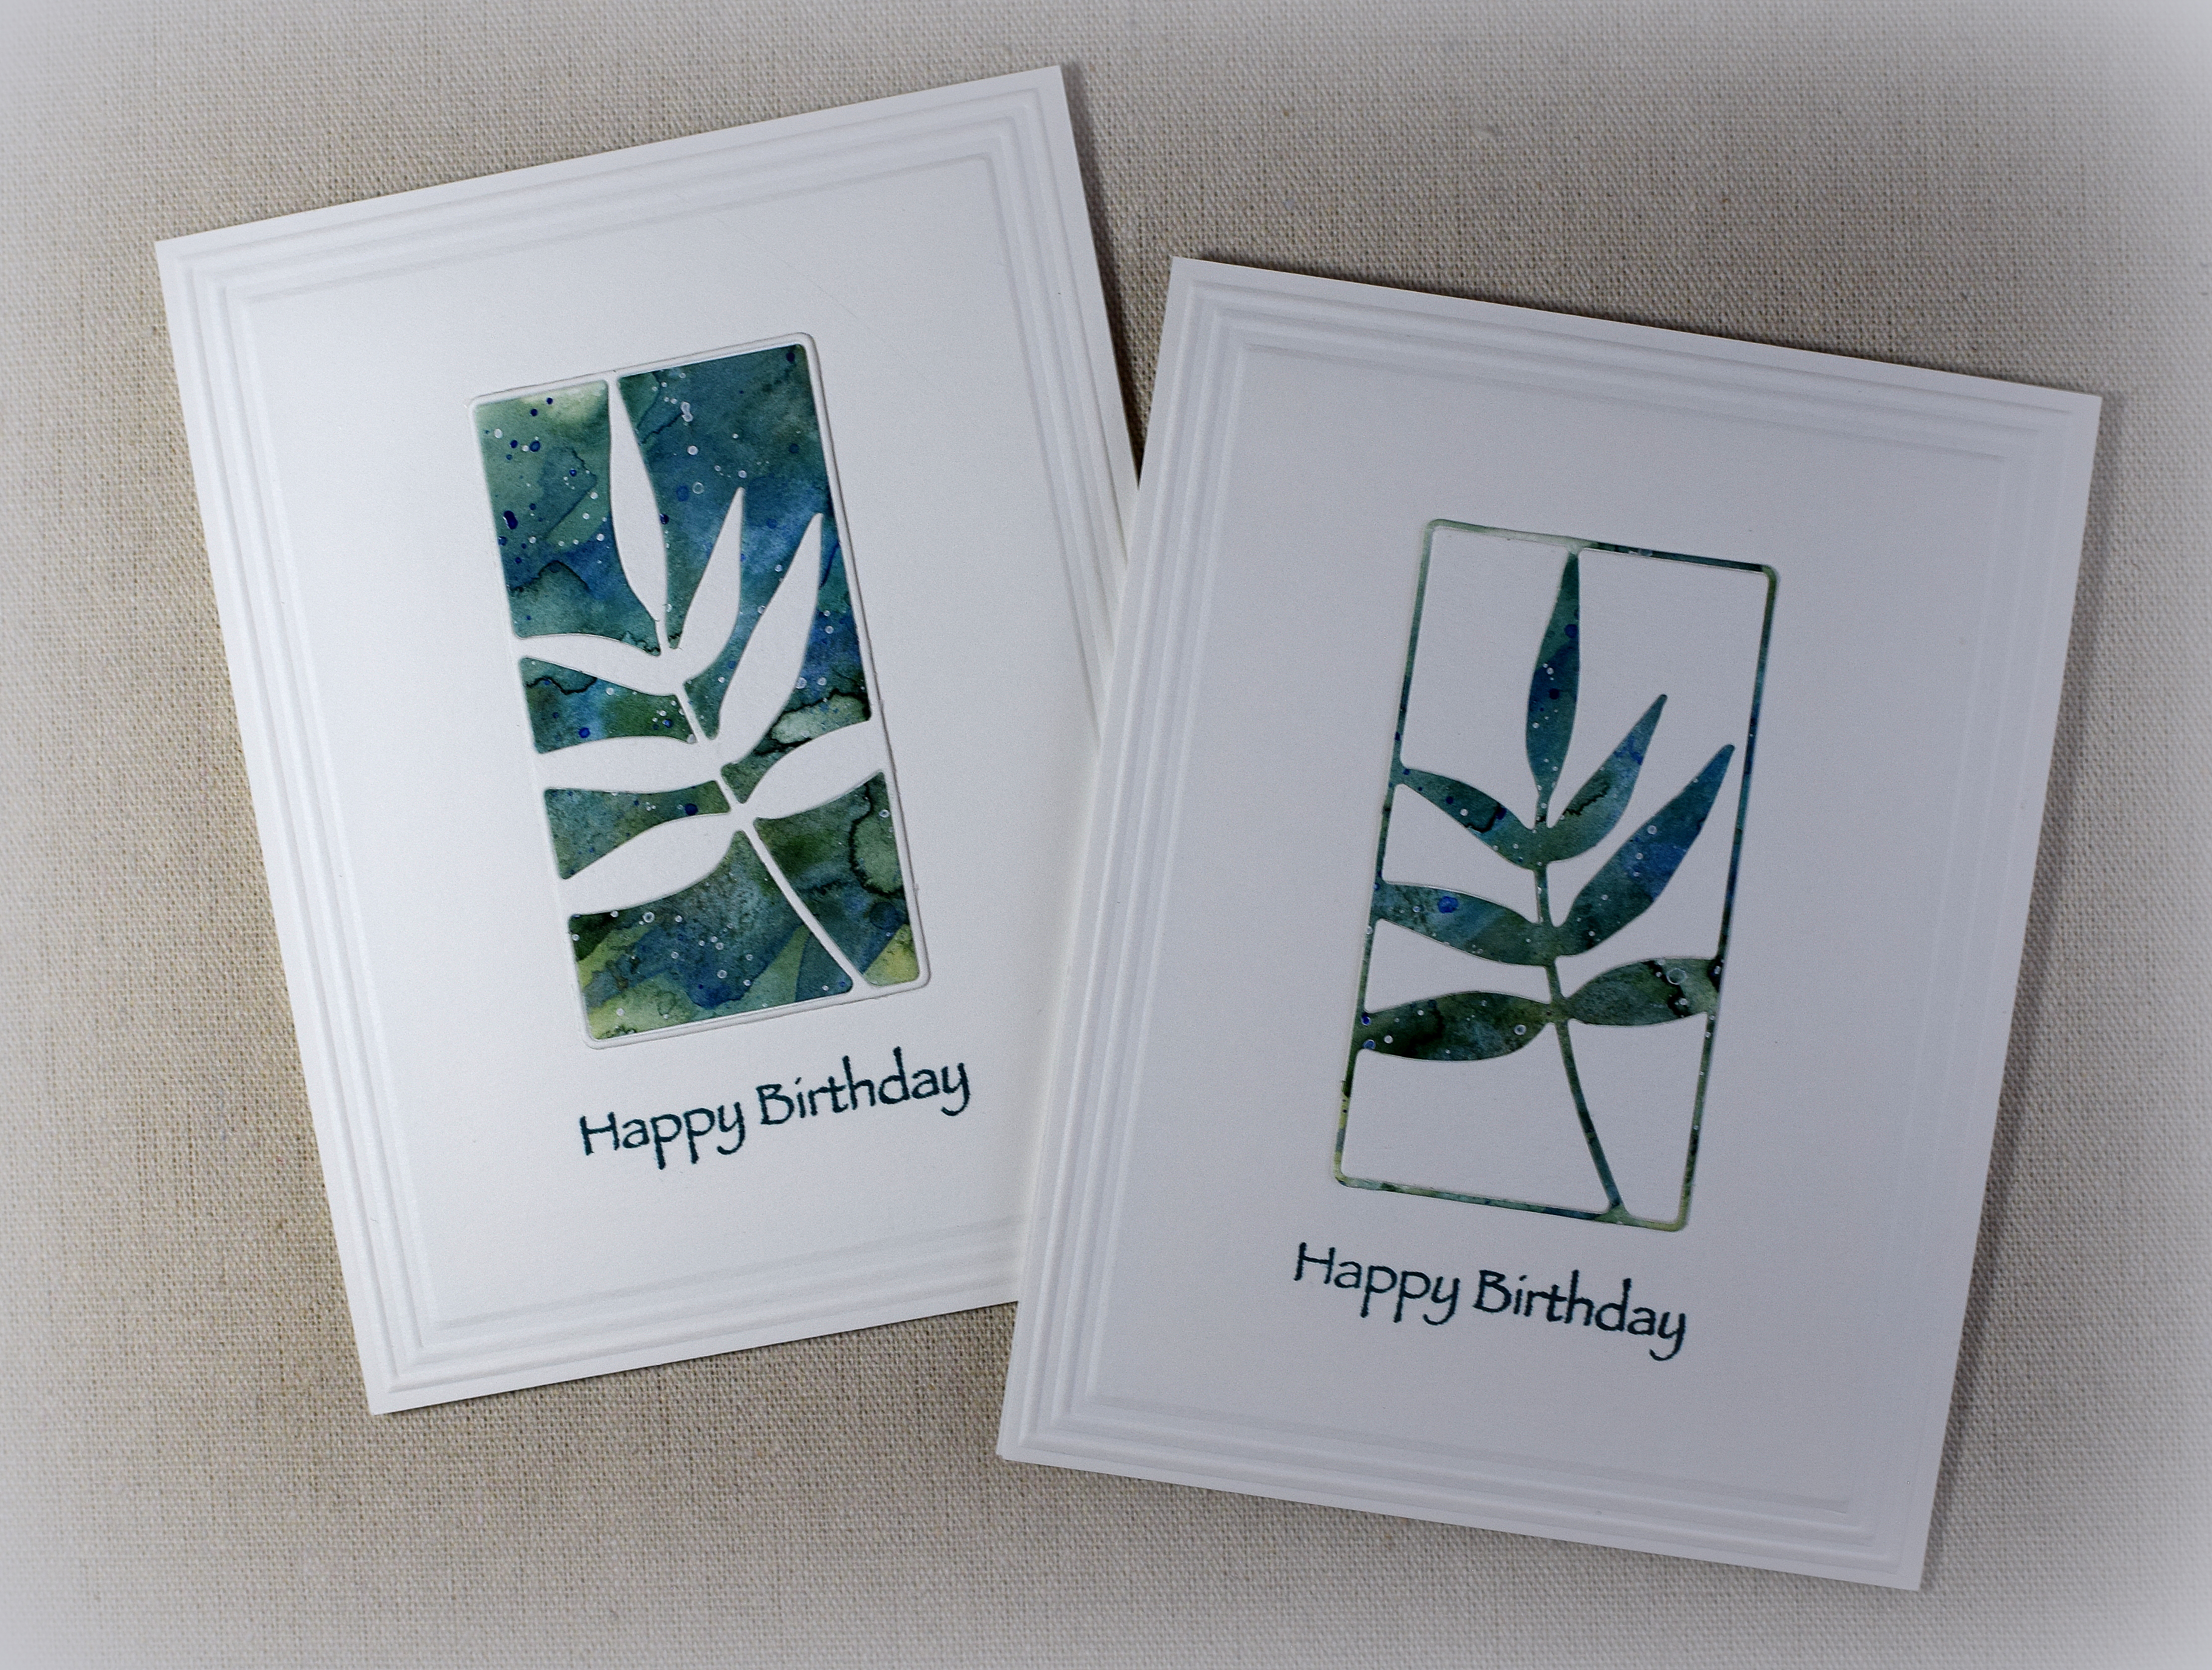
In addition to die cutting the fern from the painted panel, I also die cut the fern from a piece of plain water color paper.  I then “swapped” the negative pieces and inlaid them around the die cuts resulting in two cards from each painted panel.

I had so much fun with this technique and made “a  few” more cards – lol!  Even with the same paint colors, there is so much variation, and each panel is slightly different.

zDSC_3814     zDSC_3817

zDSC_3827     zDSC_3824

Careful placement of the die on the painted panel allows you to use the “trash” for another card panel.

zDSC_3819

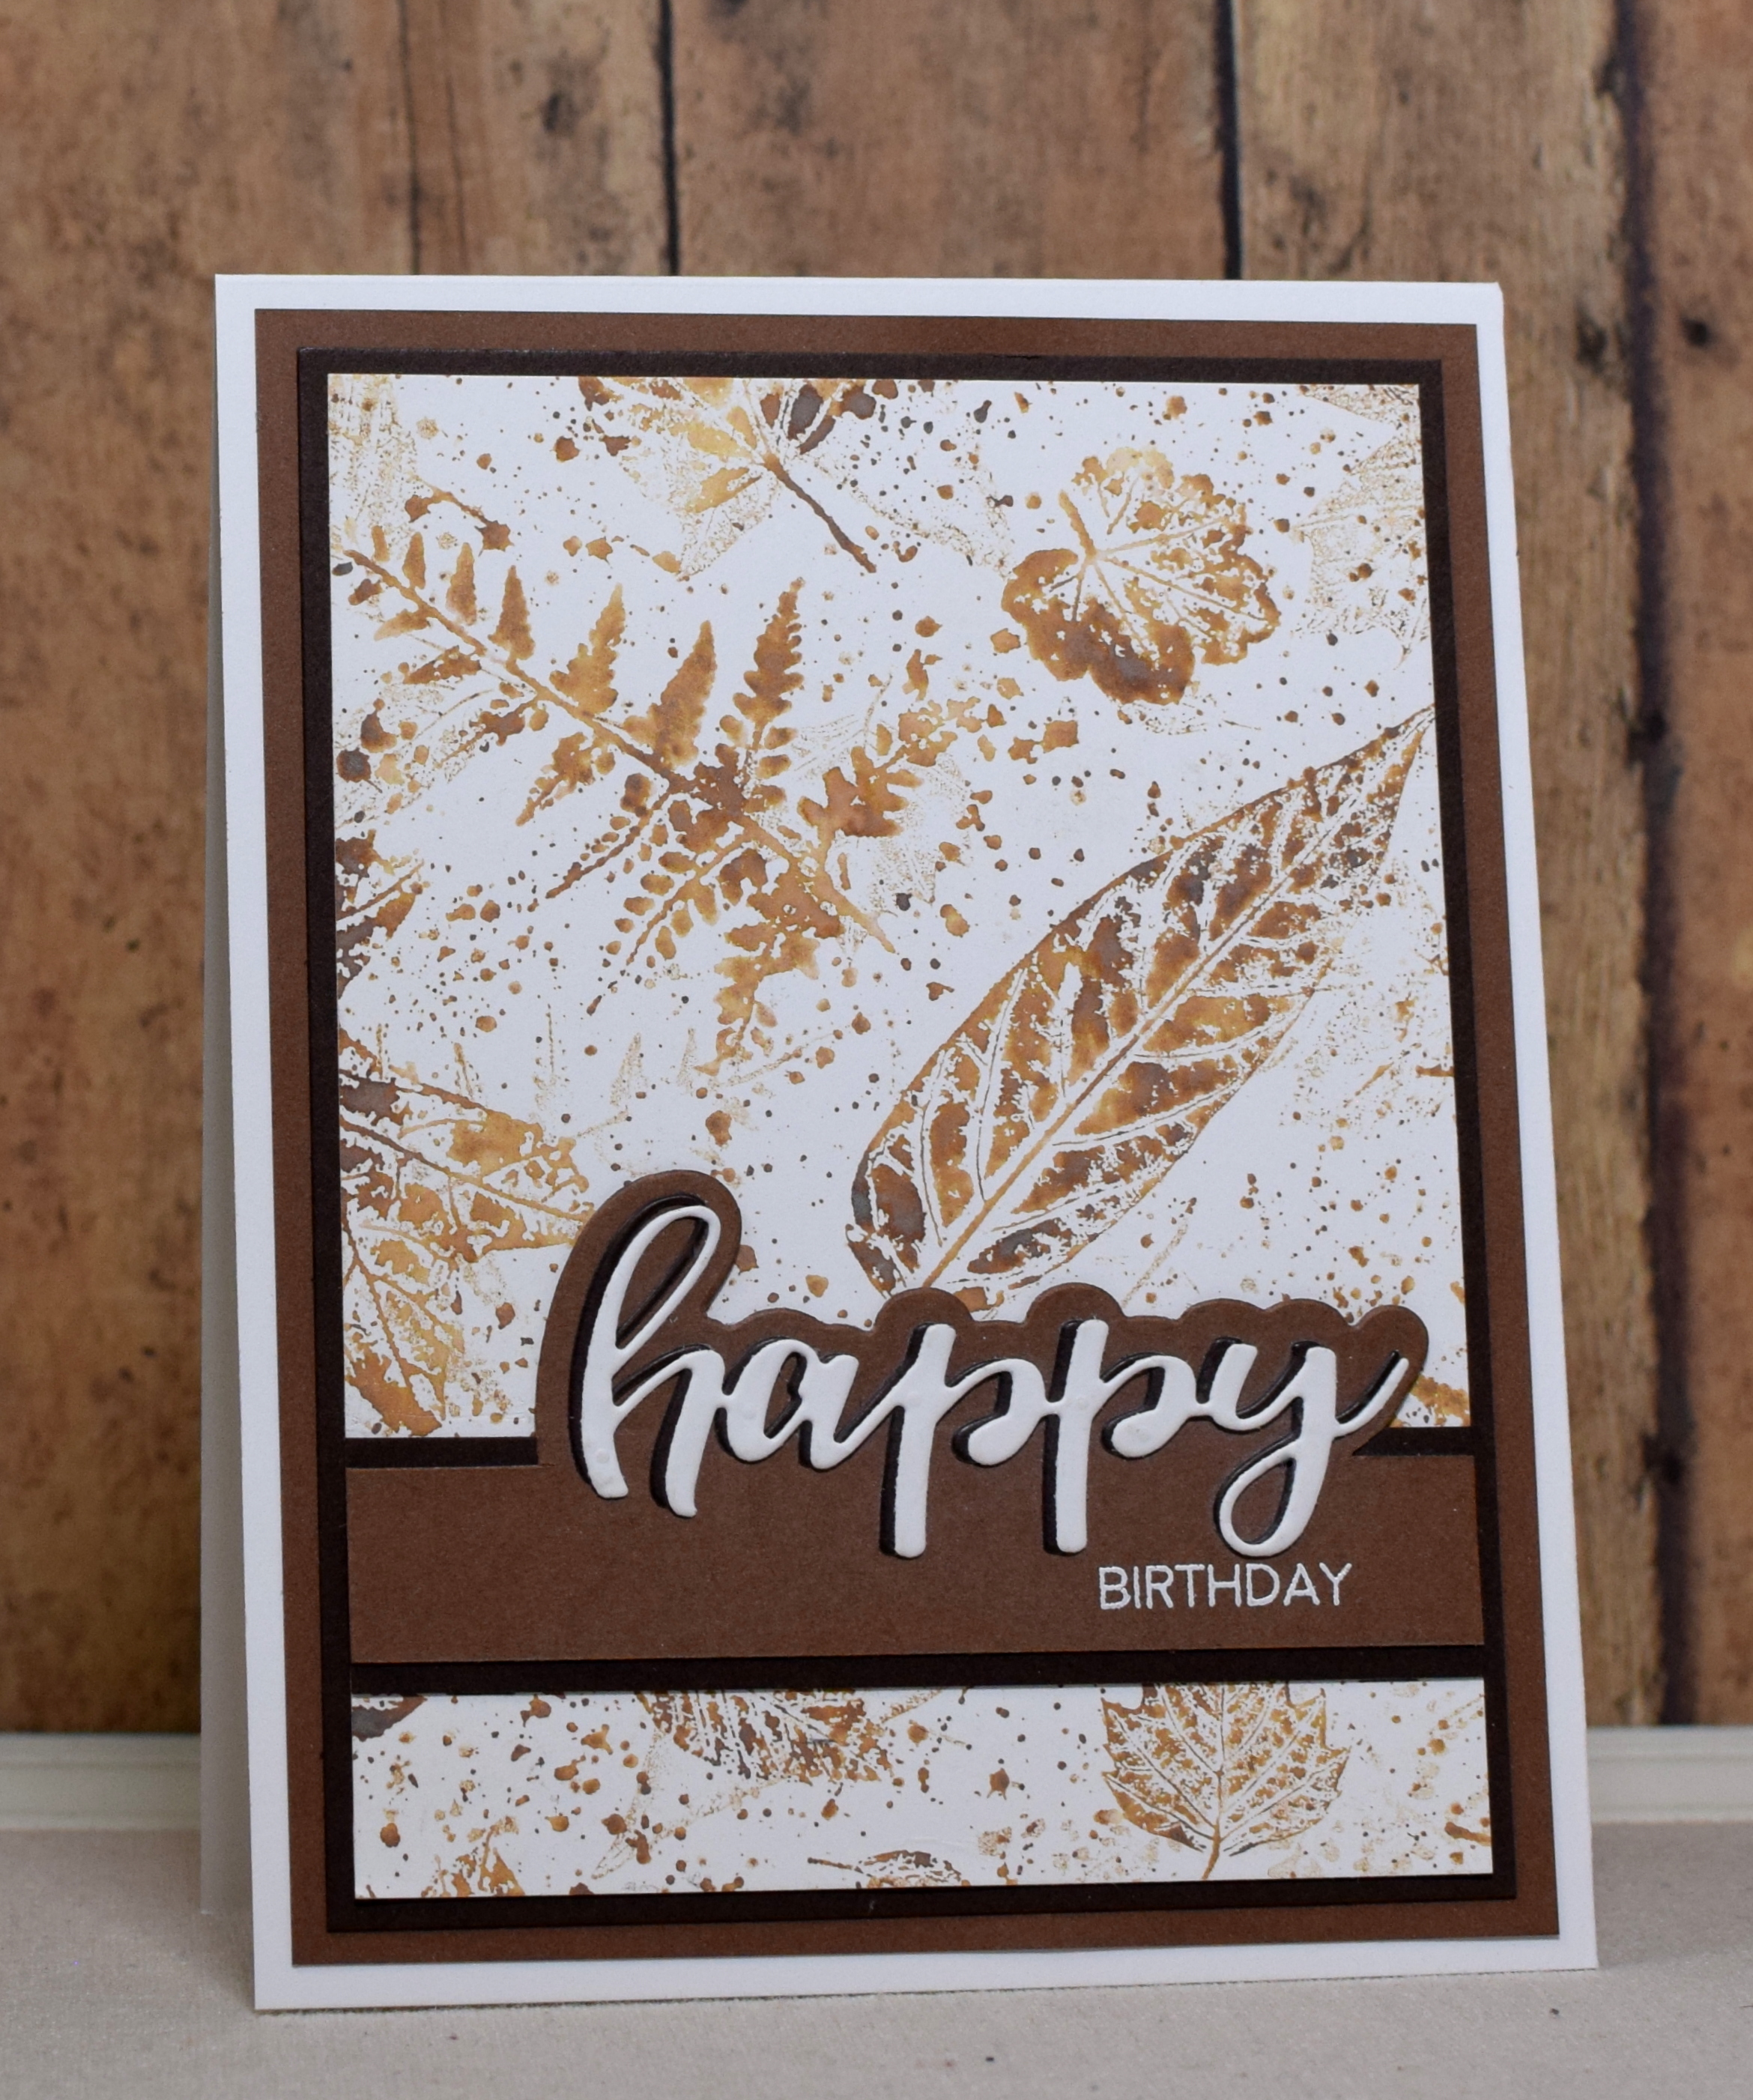
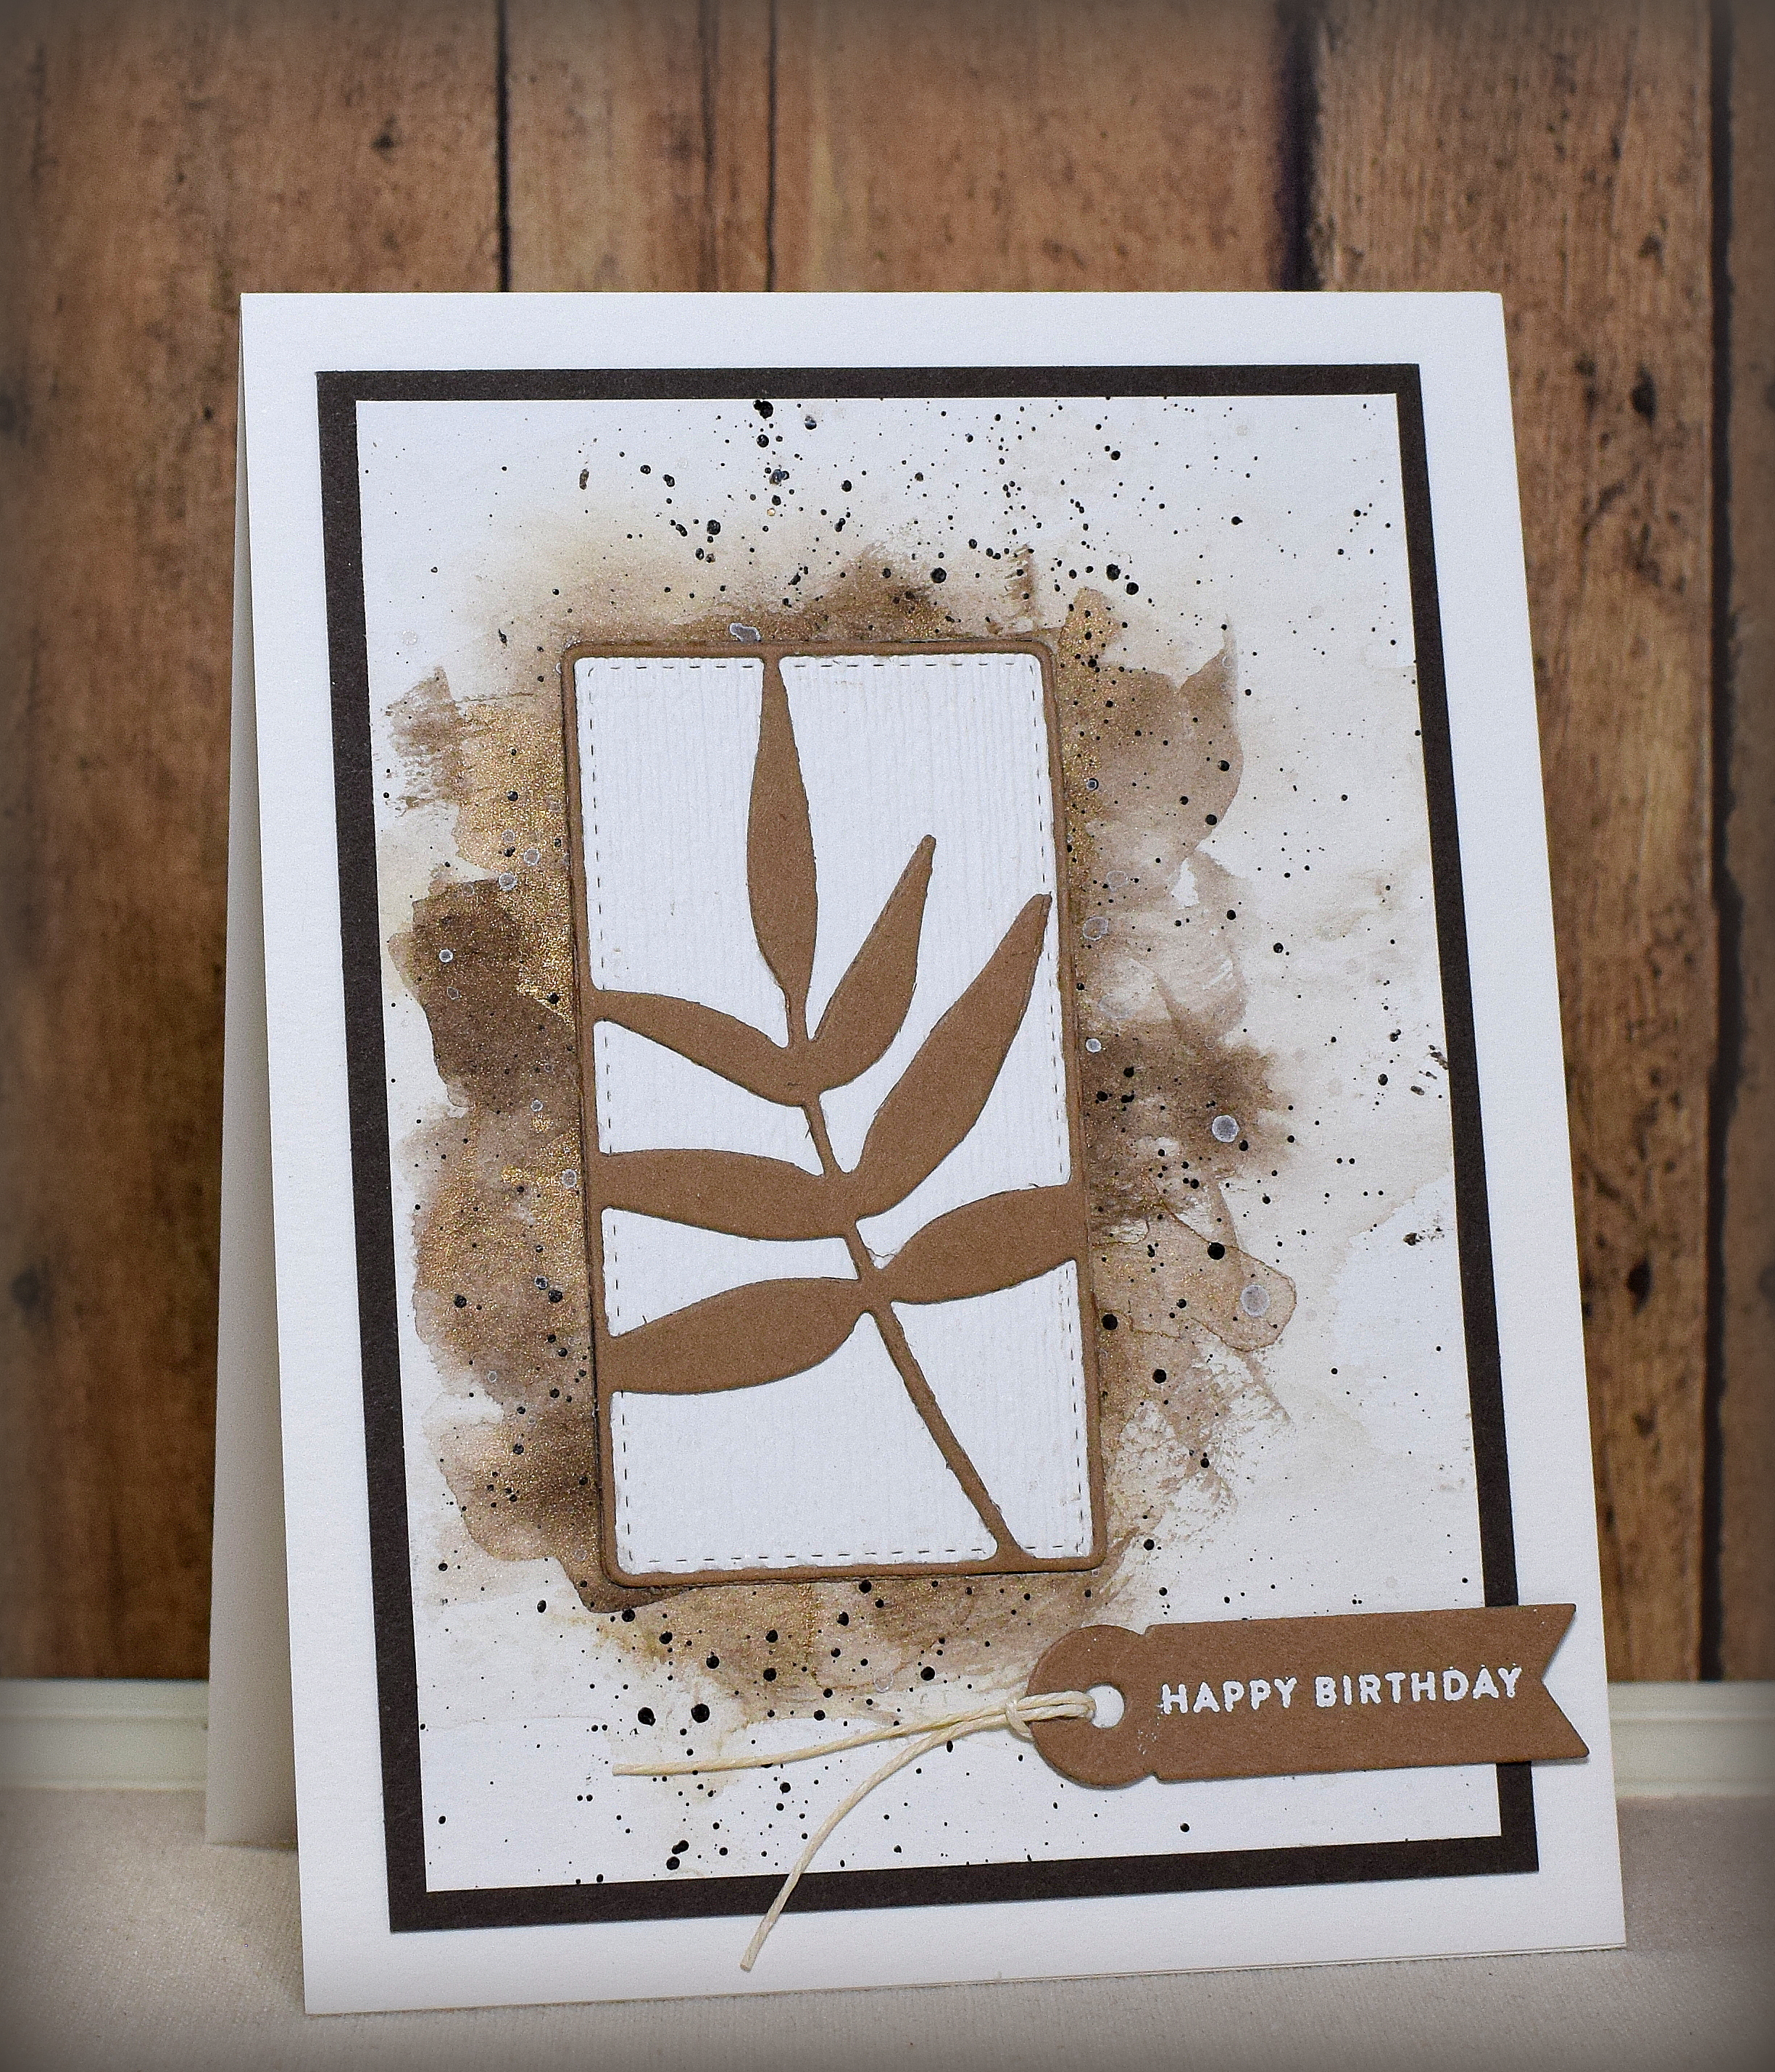
Here is another set in browns and gold.  (You can see the beautiful shimmer if you click on the photos to enlarge them.)

uDSC_3794  wDSC_3796

wDSC_3801

I’m now thinking of other dies I have in my stash that I can use for this inlay technique!

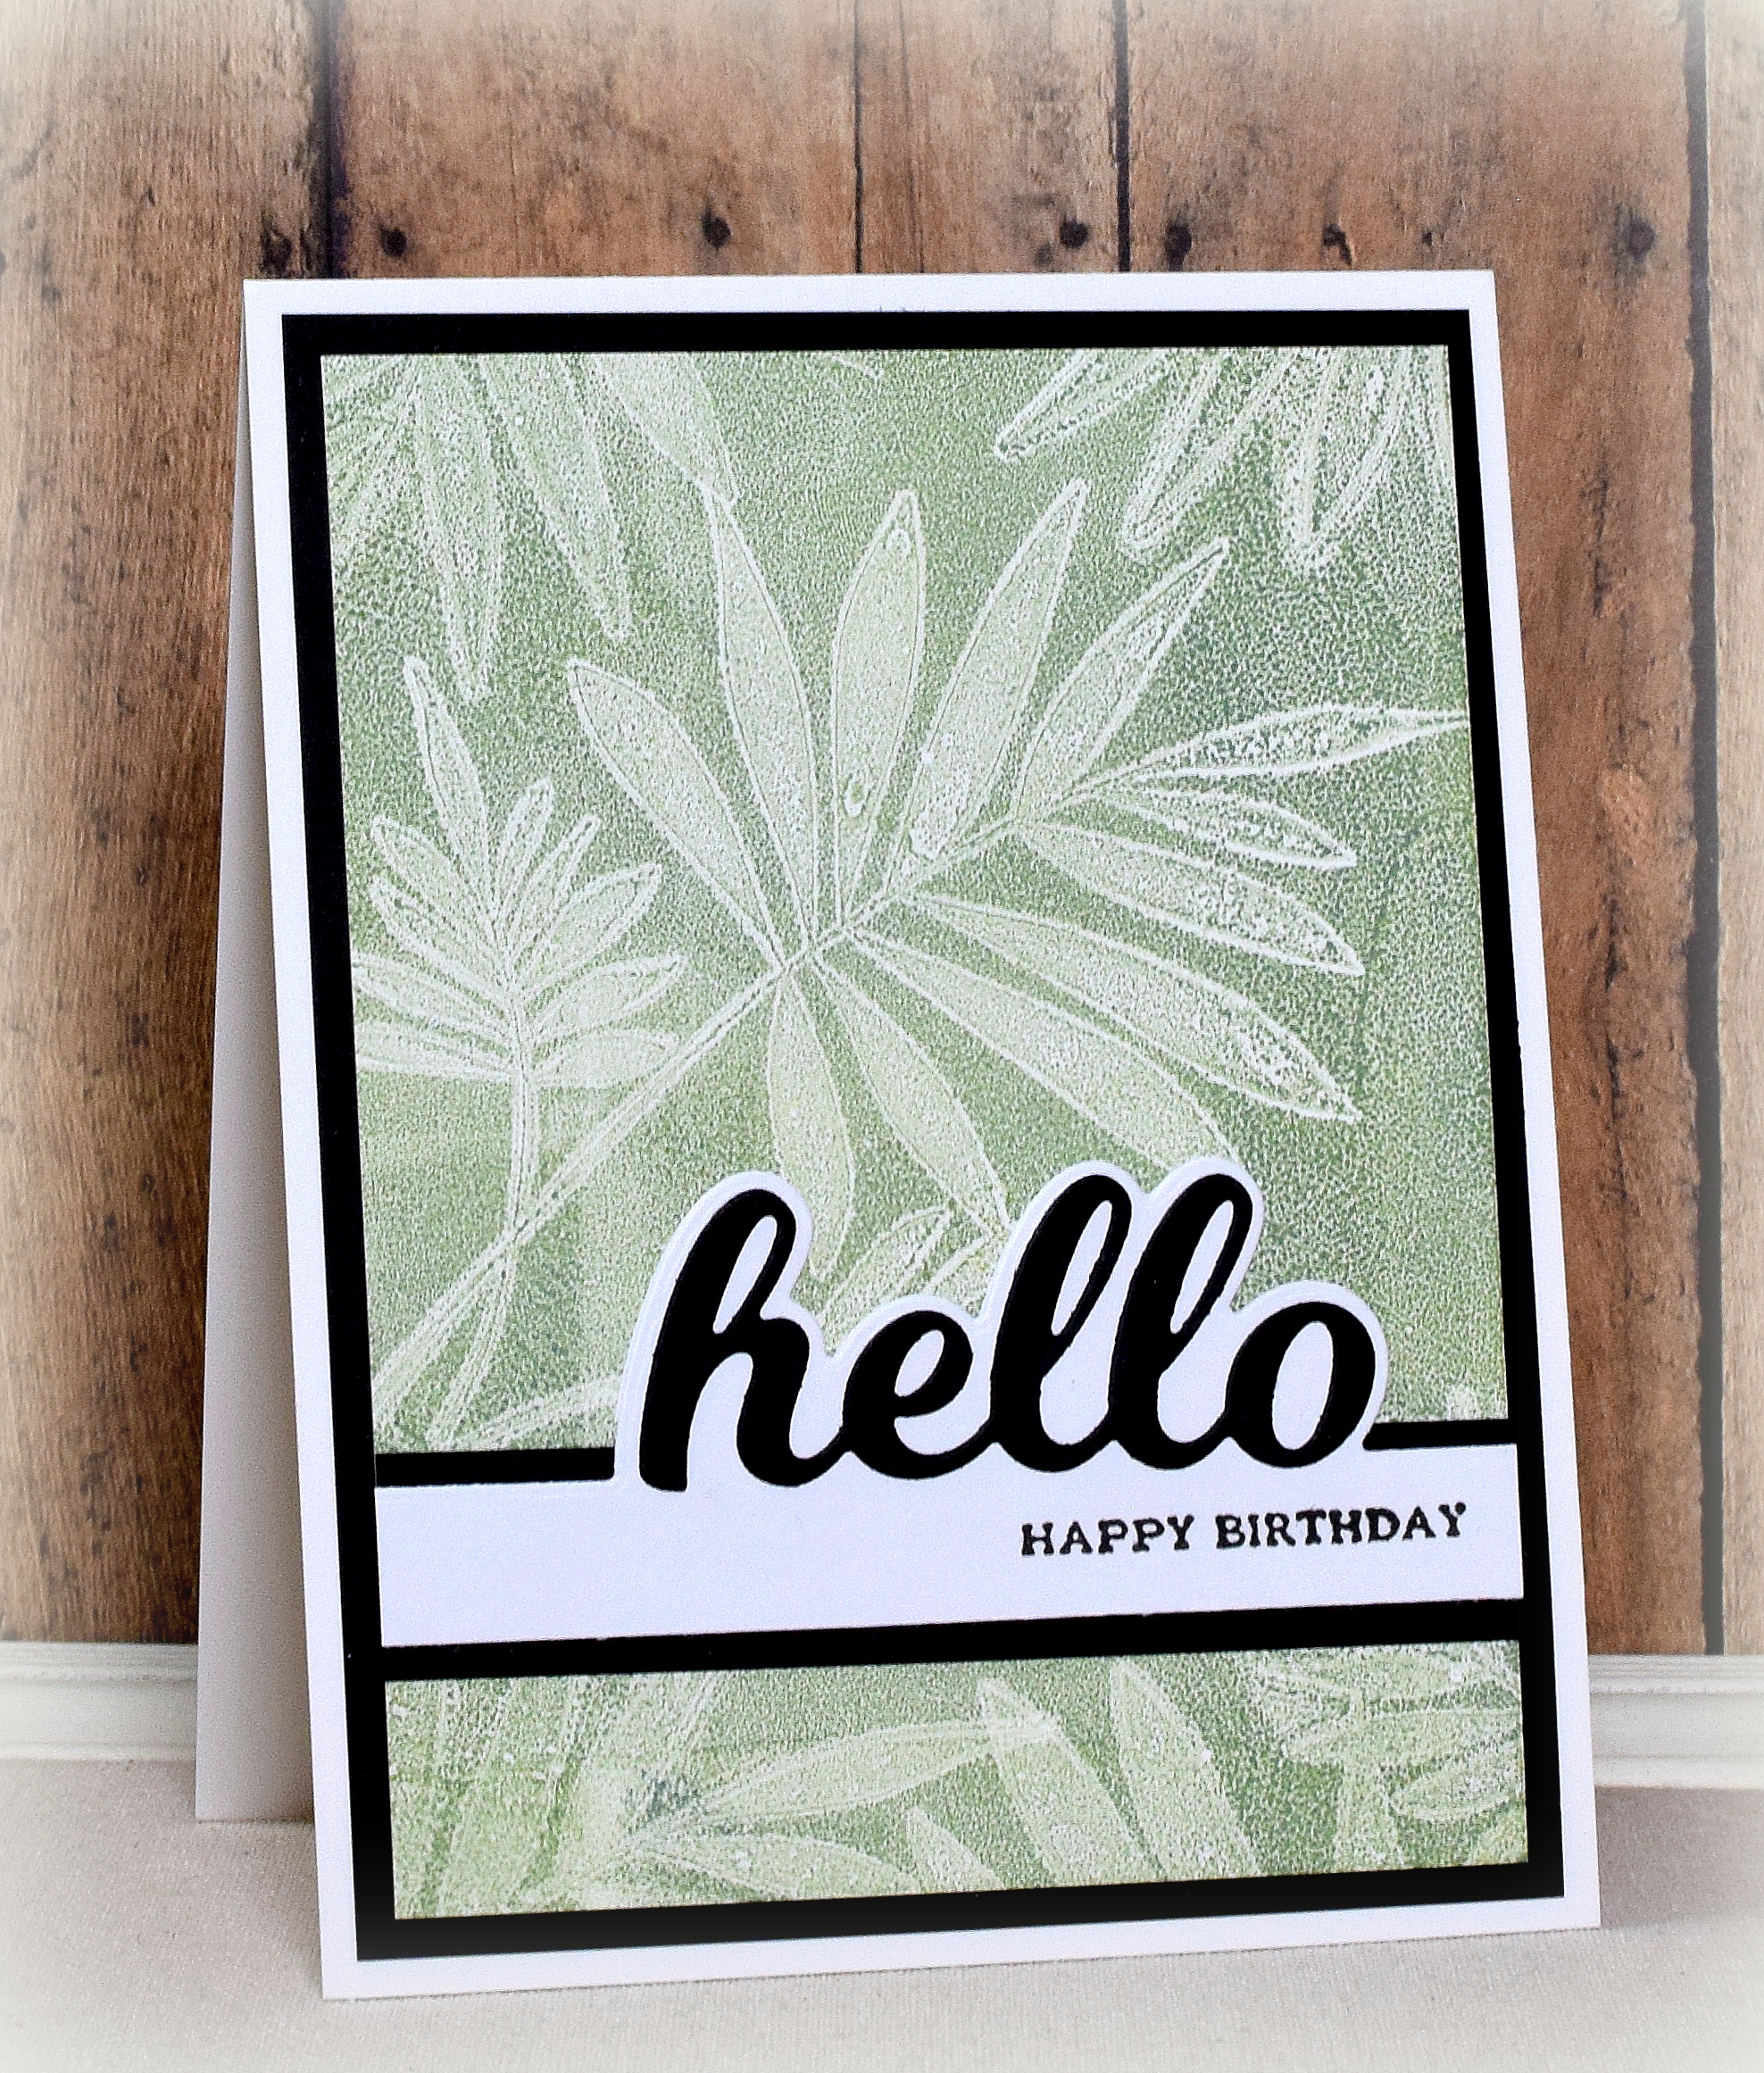
The embossed frame was made with the “Stately” embossing folder from Craft Concepts.  The greeting was from “The Wetlands” set by Gina K Designs.  The inside sentiment is from the “Happy Birthday to You” stamp set by Scrapbook.com (#sbc-ds19-23).  The “Courage is…” stamp is from the “French Memories” set by Tim Holtz.  The paint colors used for the blue/green samples were No 54, 58, 62, 64, and 10; the brown samples were No 47, 44, and 90.  Water color paper was used for the painted panels from which the die cuts came as well as the card front panels.

Thanks for checking out my card projects!

This content uses referral links as described in the disclosure policy on my sidebar.

Autumn Birthday with Partial Die Cutting

Autumn Birthday with Partial Die Cutting

I had been searching for a “happy” die similar to the “Hello Topper” die by Birch Press Designs but had no luck finding one so I did some partial die cutting to create my own “happy topper” panel. I used the background die from the “Happy Sentiment and Mat” die set from Creek Bank Creations and “partially” die cut it on a strip of card stock from the “Nostalgia” pack from Recollections. (HERE is a video showing how to do partial die cutting.)

The “happy” was cut twice from GKD Chocolate Truffle and white card stock and layered (offset) on my topper panel.

I heat embossed the “birthday” part of the greeting in white with a stamp from the Spellbinders “Happy Sentiments” (STP-002) set.

The background panel was made with the Stampendous! Decor Cling Leaves Rubber Stamp – DCR101 (a stamp I’ve used a lot this fall!). It was inked with Walnut Stain and Vintage Photo Distress Oxide inks from a gel plate and spritzed with water before stamping onto heavy weight white card stock.

The greeting panel on the card below was made with the “hello topper” I mentioned above and was what I was going for on today’s card:

Thanks for checking out my card project!

This content uses referral links as described in the disclosure policy on my sidebar.

Over the Edge Birthday Card

Over the Edge Birthday Card

What do you do when your greeting panel is too big for your card? Just spill over the edge – lol!

I partially debossed the upper portion of a piece of Gina K Designs Warm Glow card stock with the “Scroll Background” embossing folder by Darice (#1216-62) and cut the bottom edge with the “English Ivy Edger Punch” from EK Success. I used my score board to add the lines between the two.

The greeting was cut with the “Happy Birthday 2” die (#1161) from Elizabeth Craft Designs. It was die cut 3 times and layered. Originally, I had adhered the greeting directly to the debossed panel, but it seemed too busy so I removed the die cuts (gotta love Un-du!!) and went with the design above. Here’s what it looked like originally:

Still not sure which way I prefer. (Of course, with Un-du, I can keep moving it back and forth without damaging my panel or die cuts until I decide- lol!)

The “smooshed” panel used to die cut the top layer of the greeting and for behind the bottom, punched edge was created with Vintage Photo, Faded Jeans, Peeled Paint, Wild Honey, and Abandoned Coral Distress Oxide inks and water. I wasn’t super thrilled with it as a whole panel, but I really like it in small doses!

With the overhanging panel, the card is now 5 1/2 x 4 1/2 and does not fit in an A2 size envelope so I created a custom envelope with my We R Memory Keepers Envelope Punch Board (paper size: 8 3/8 and punch guide measurement: 3 3/4).

Thanks for checking out my card project!

This content uses referral links as described in the disclosure policy on my sidebar.