Magic Window Card Tutorial
Recently, I posted a card with a window element that opens and closes like the iris of a camera.

I saw several tutorials on YouTube showing how to make this type of card. Each had slightly different measurements and slightly different ways to cut and assemble the pieces for the card. This is what I did to make mine…
***
(Click on the photos to make them larger.)
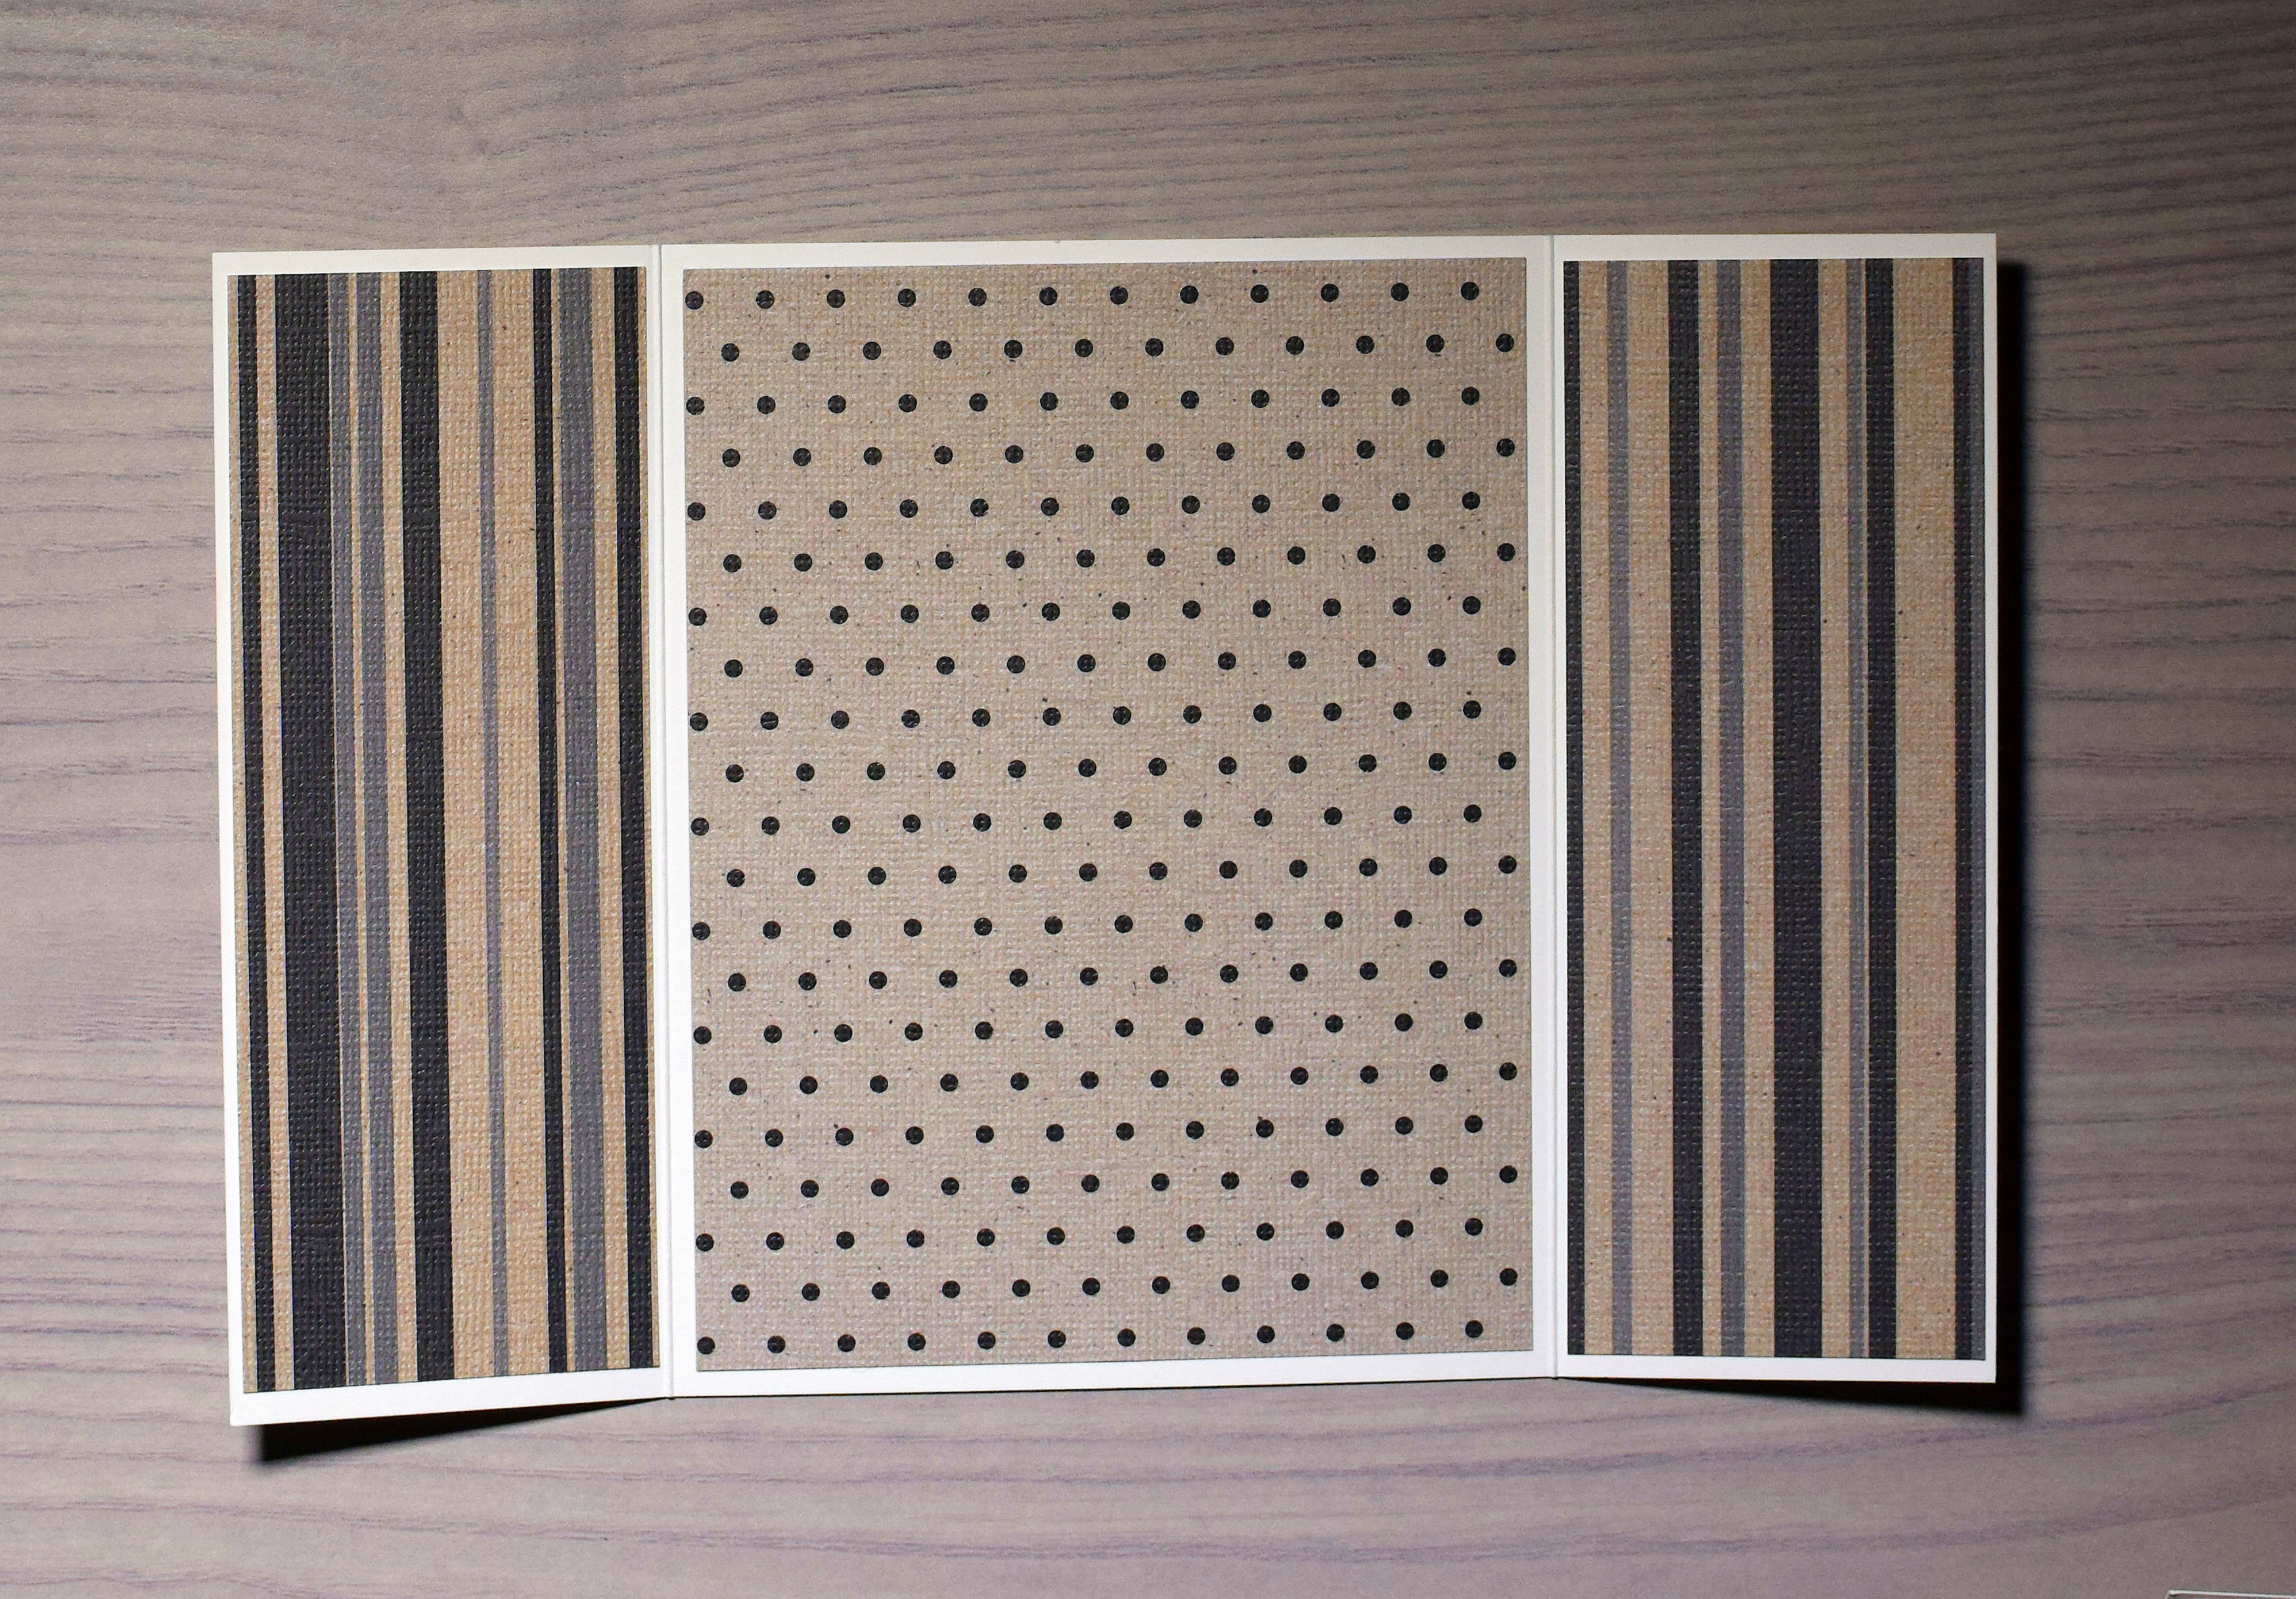
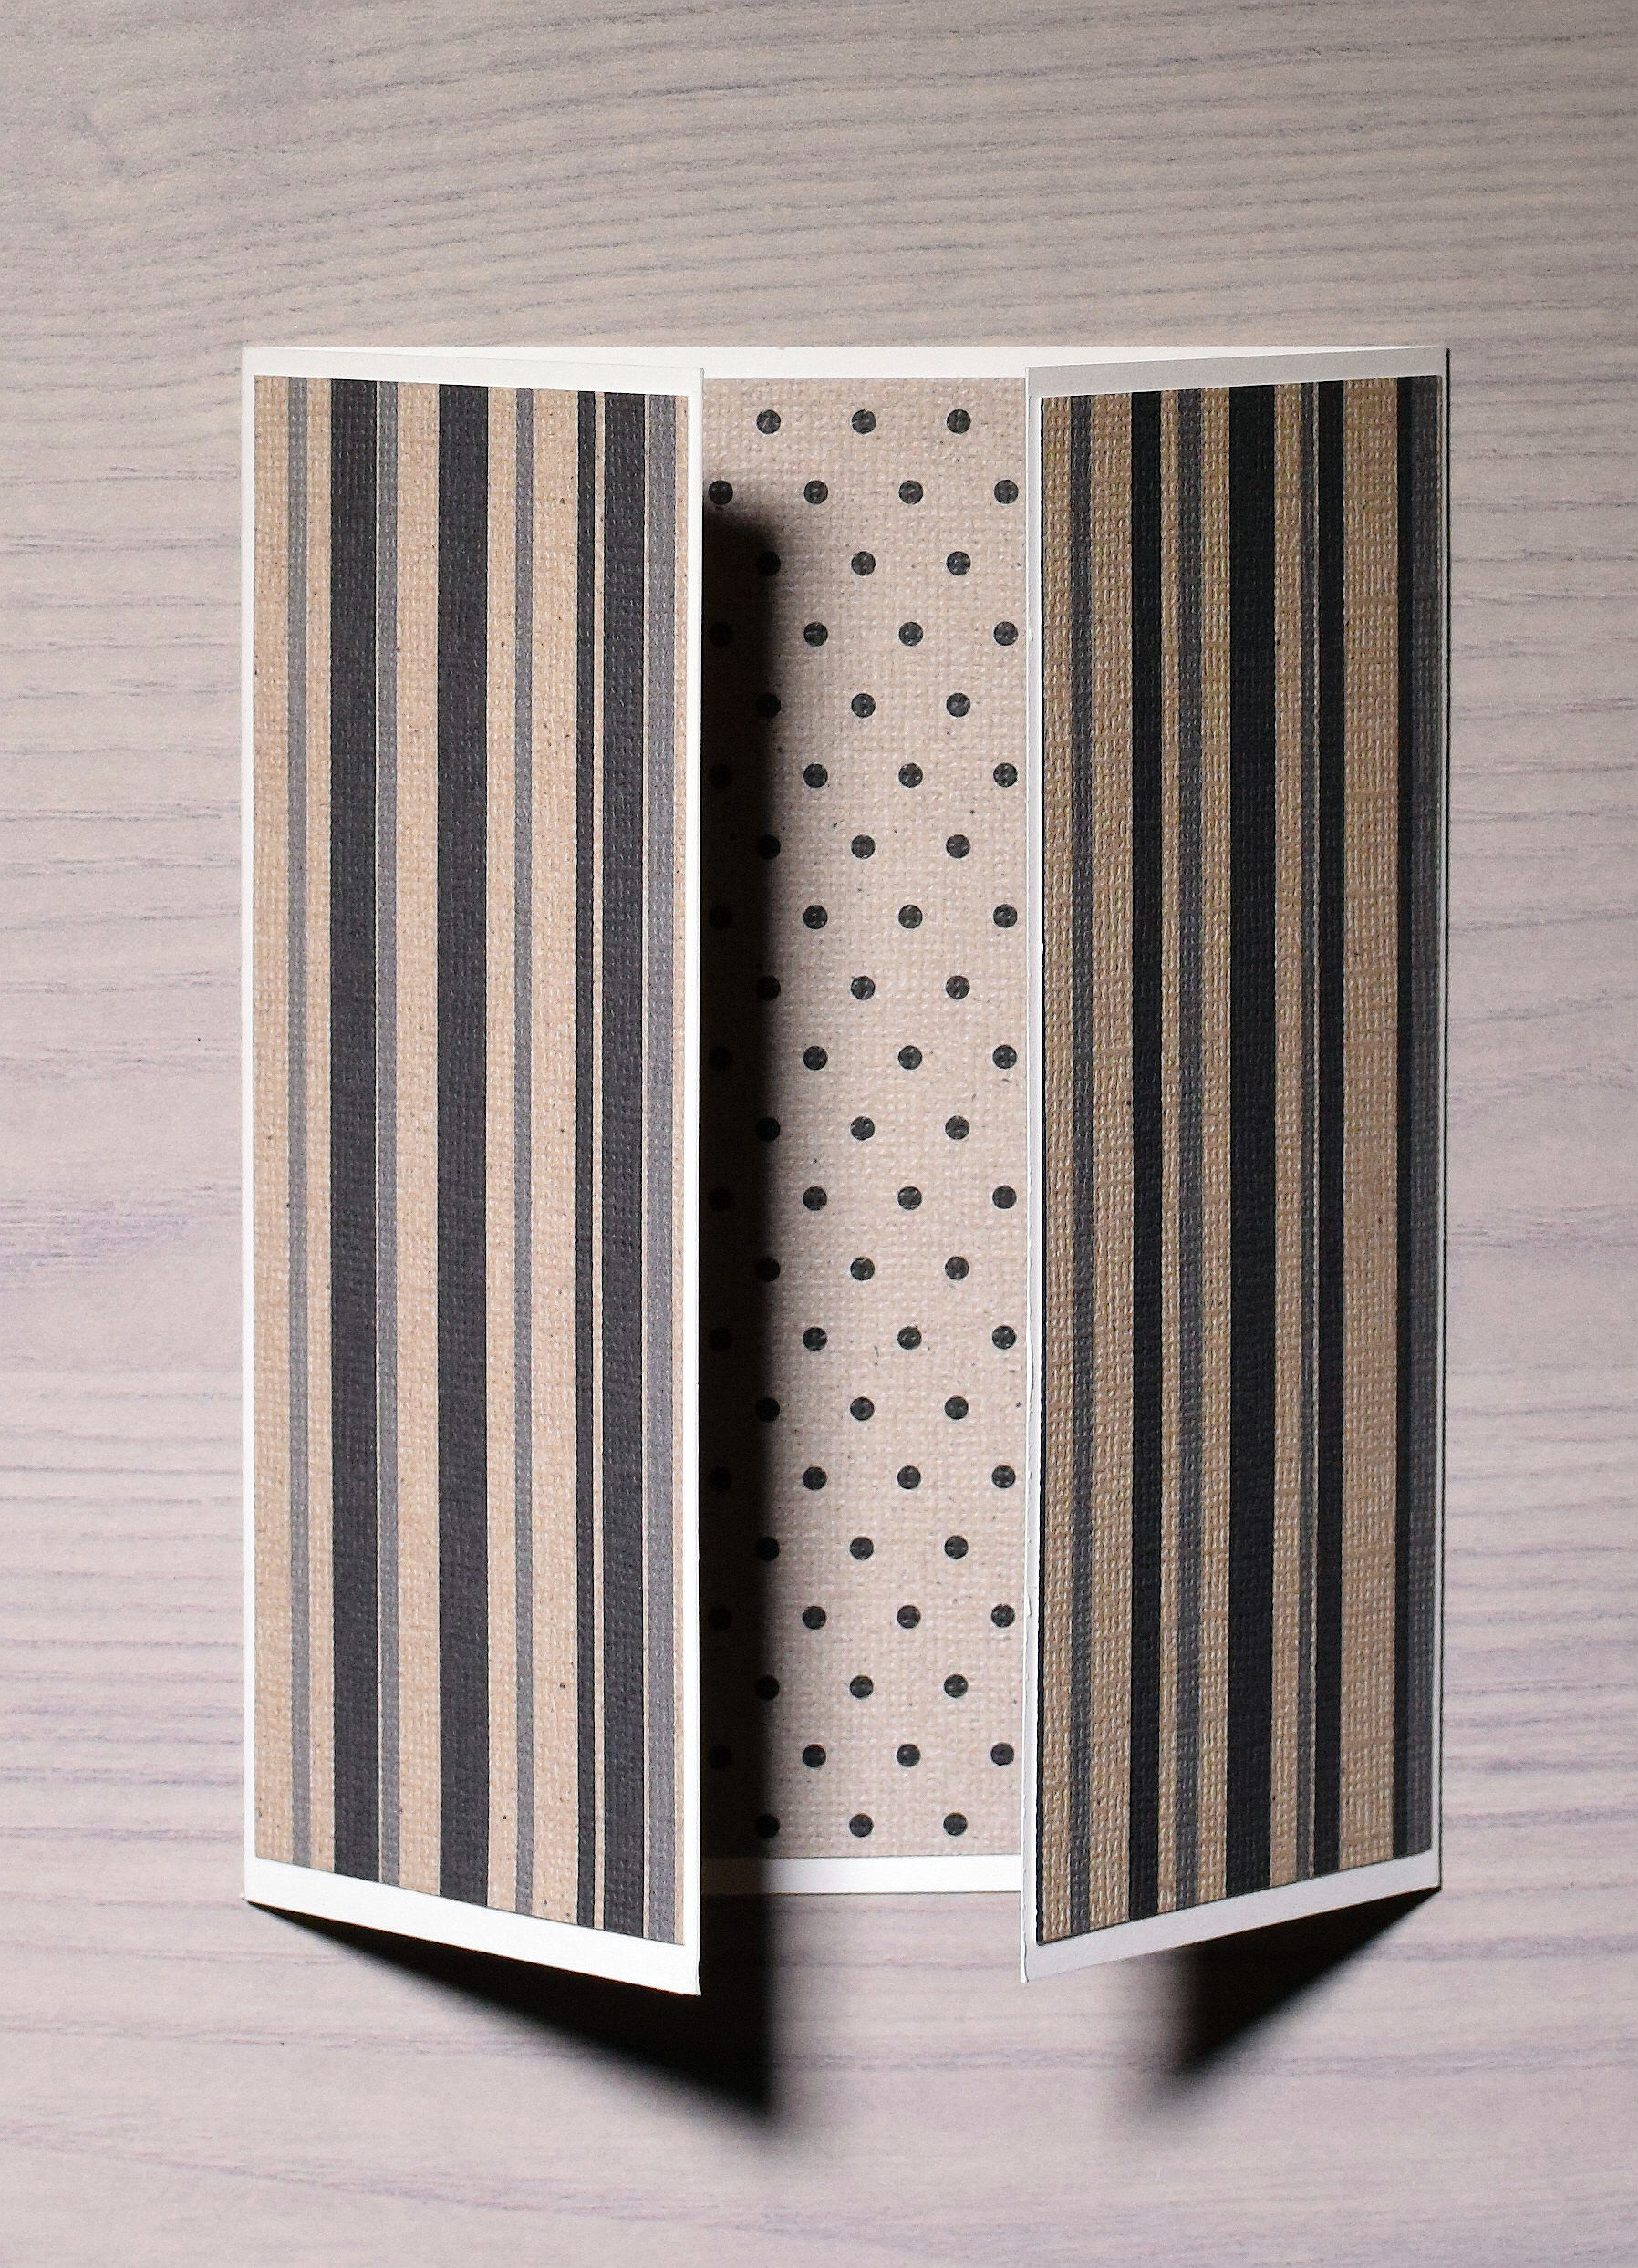
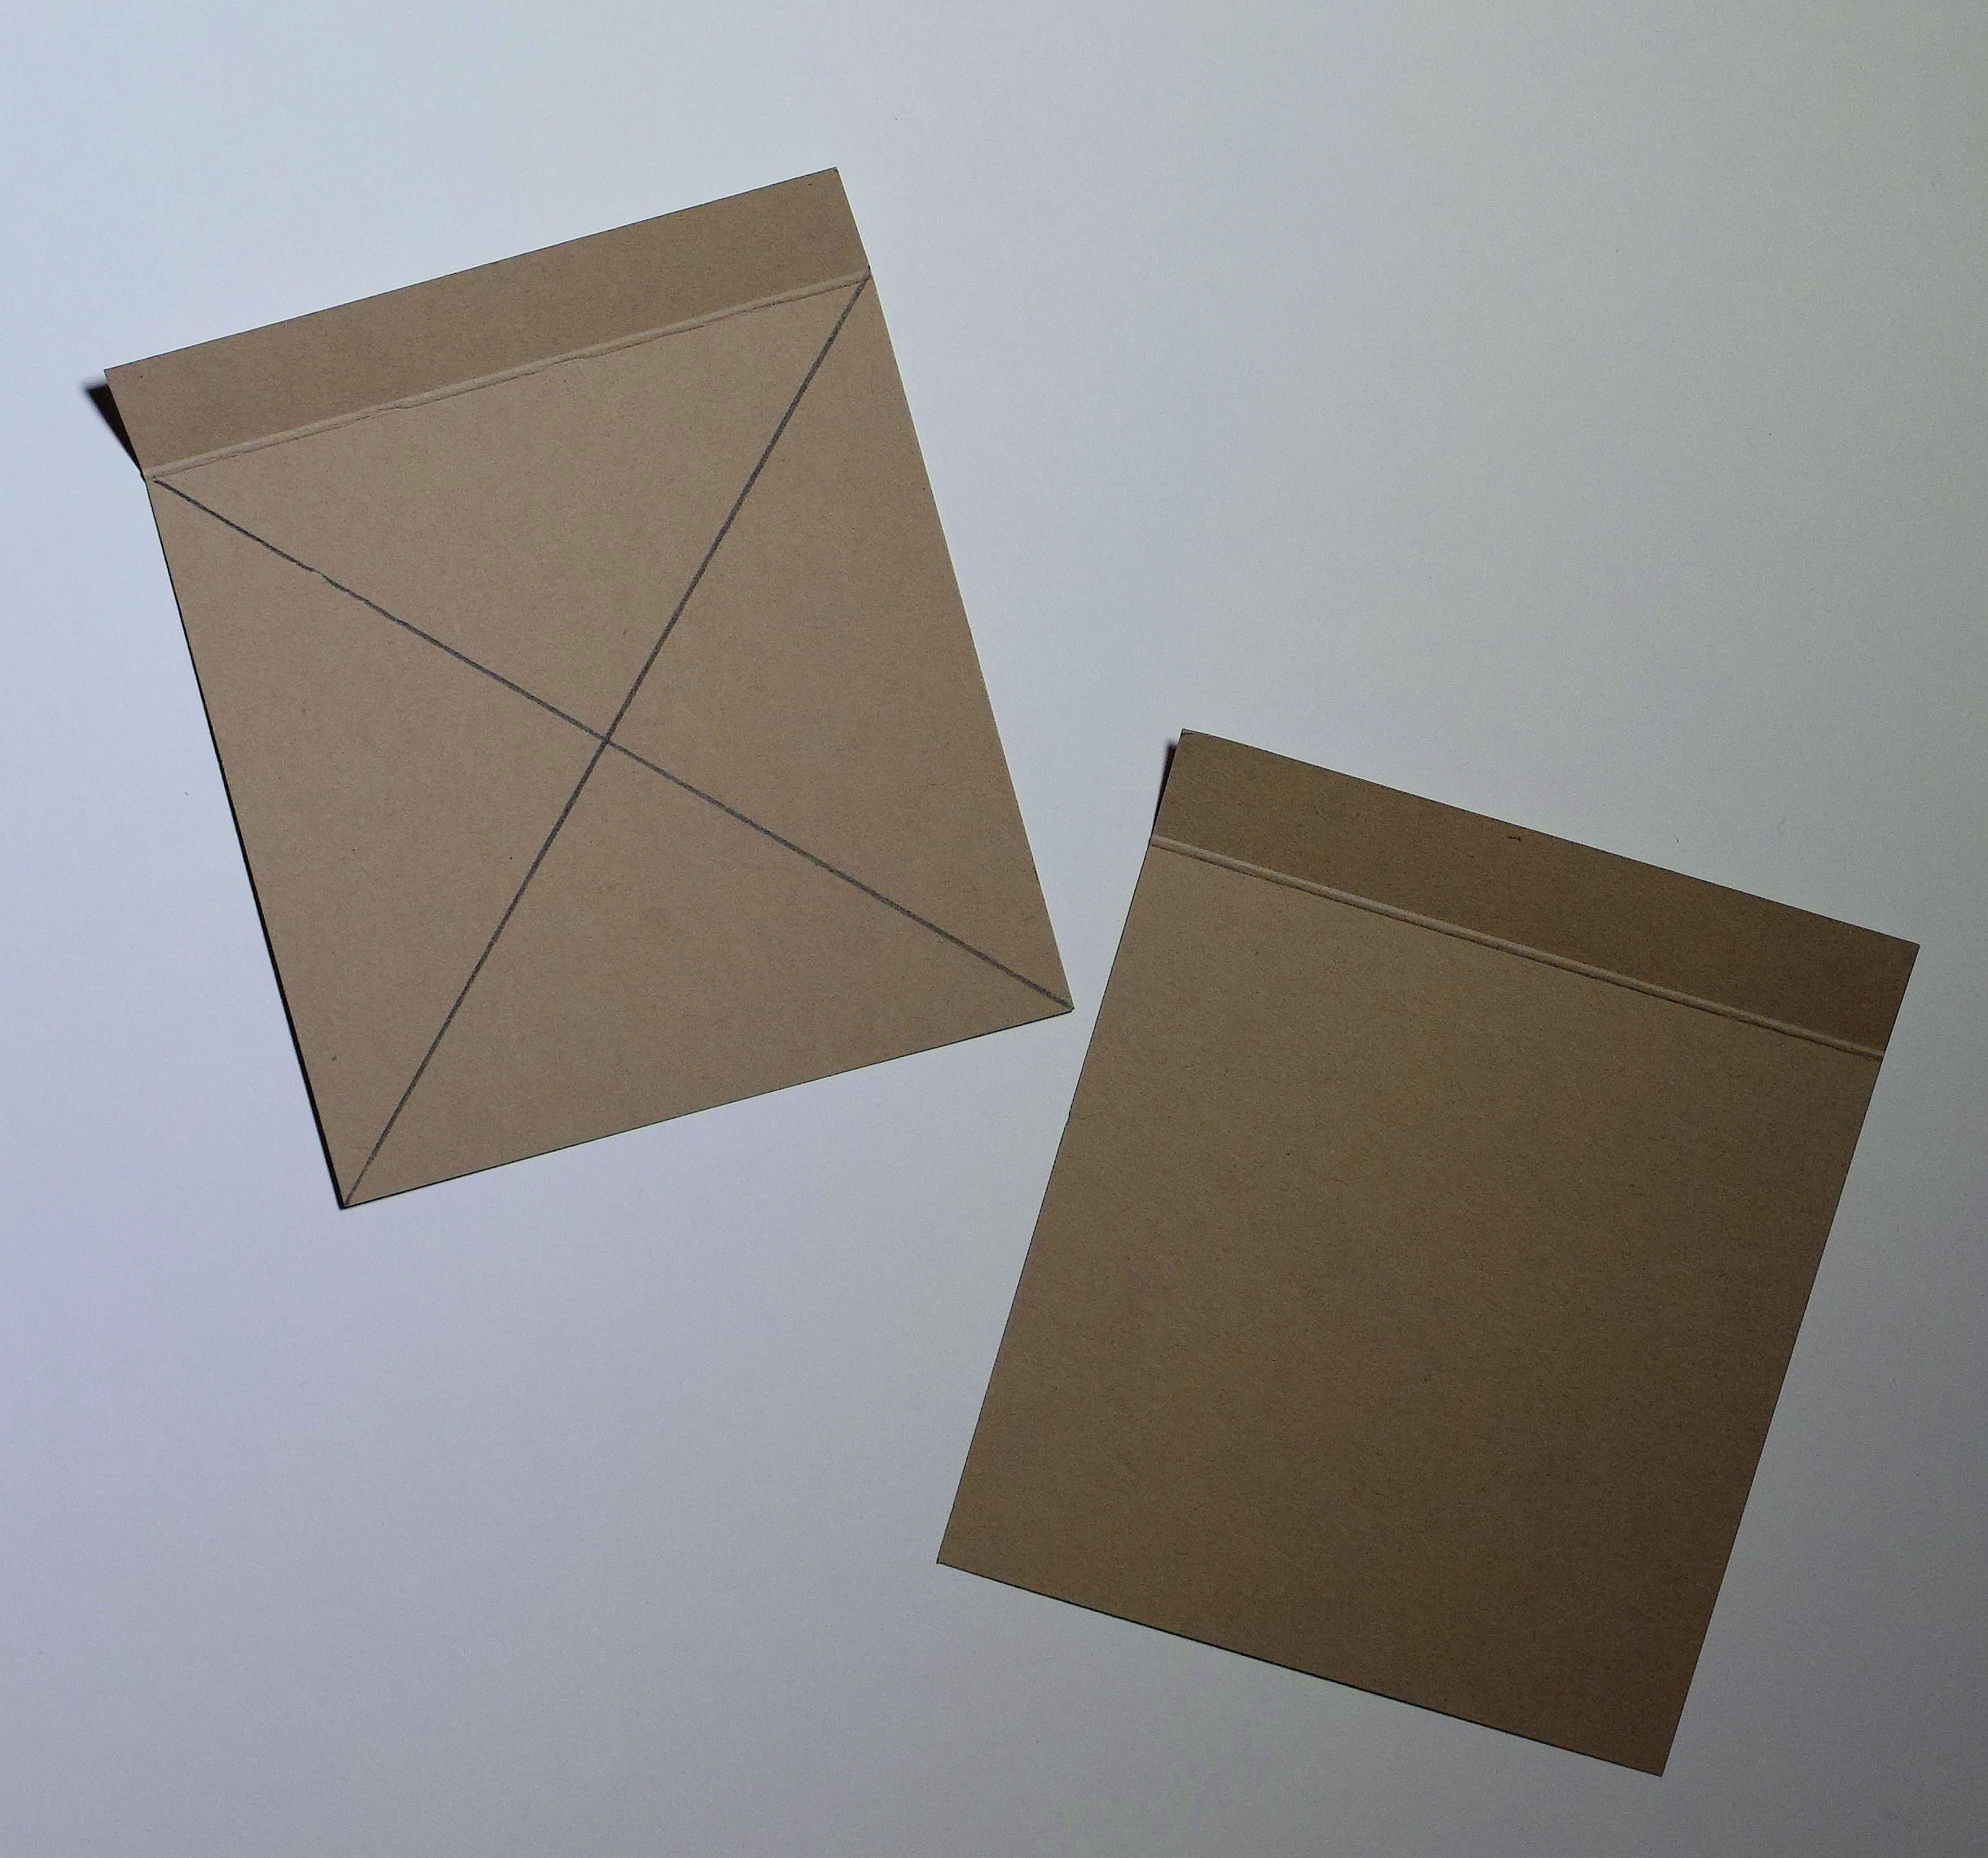
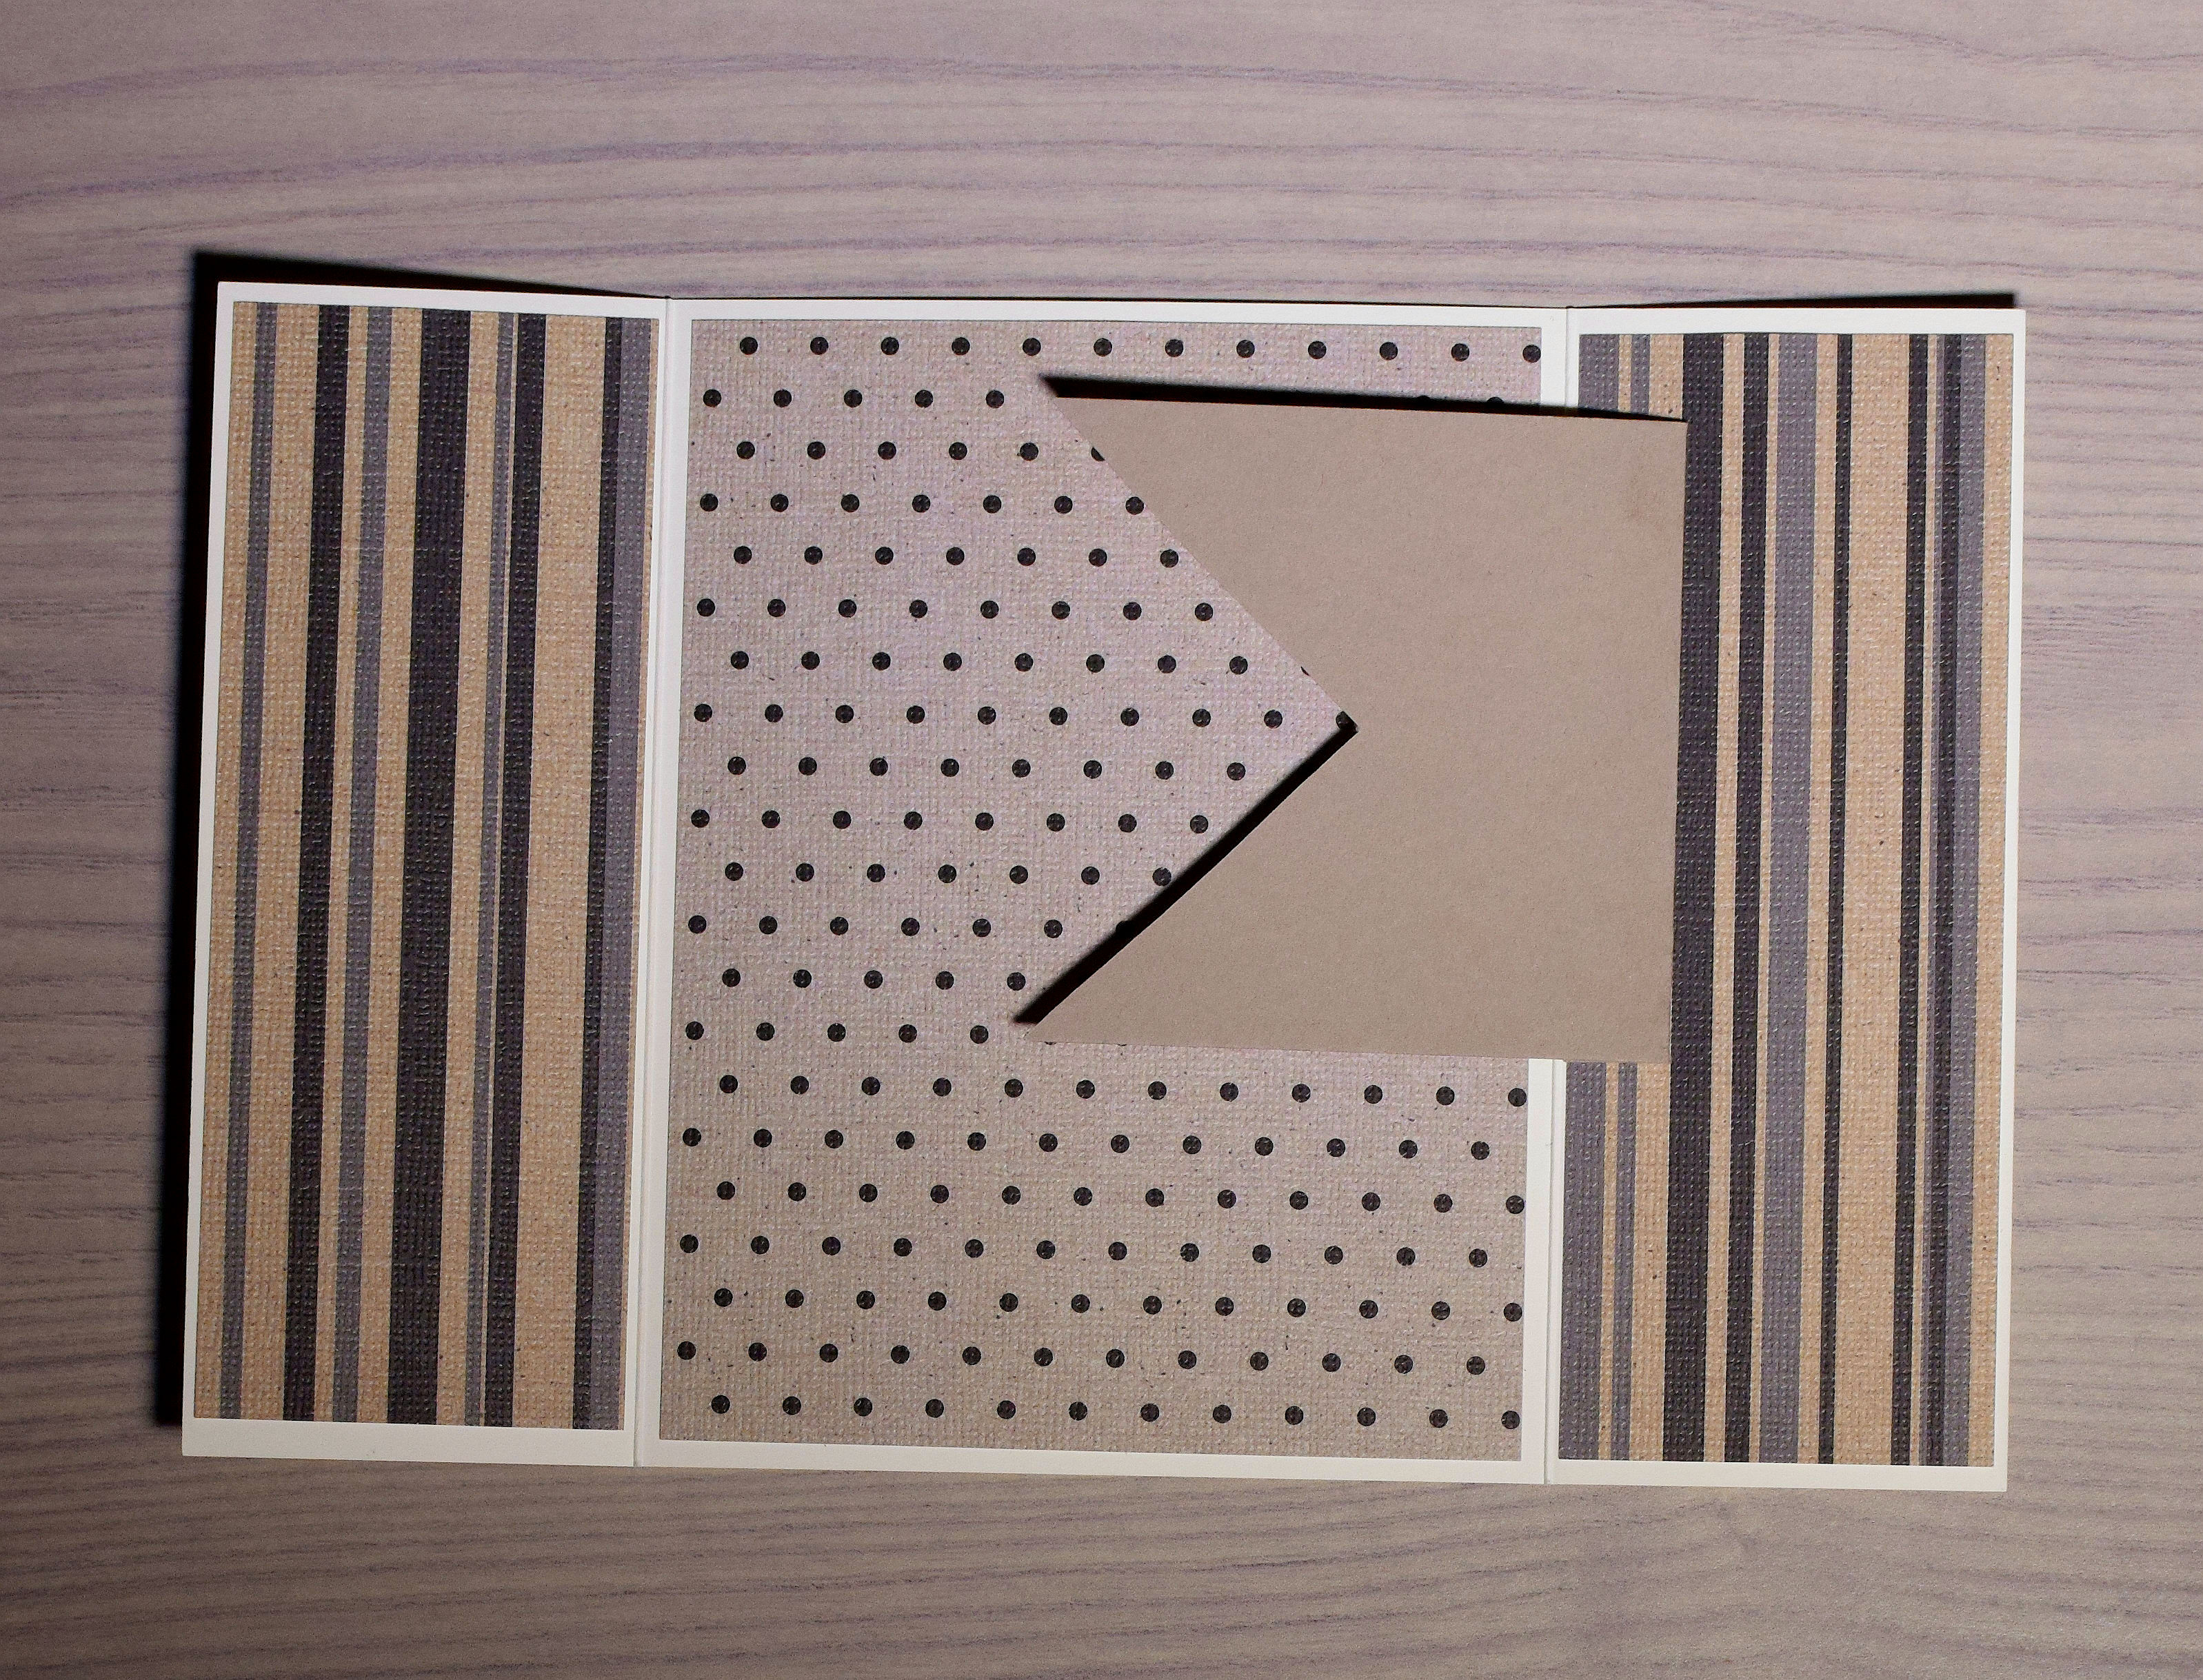
A) Start with a card base that measures 8 1/2 x 5 1/2 and score at 2 1/8 and 6 3/8. This will create a gatefold style card. (All of my measurements are given in inches.)
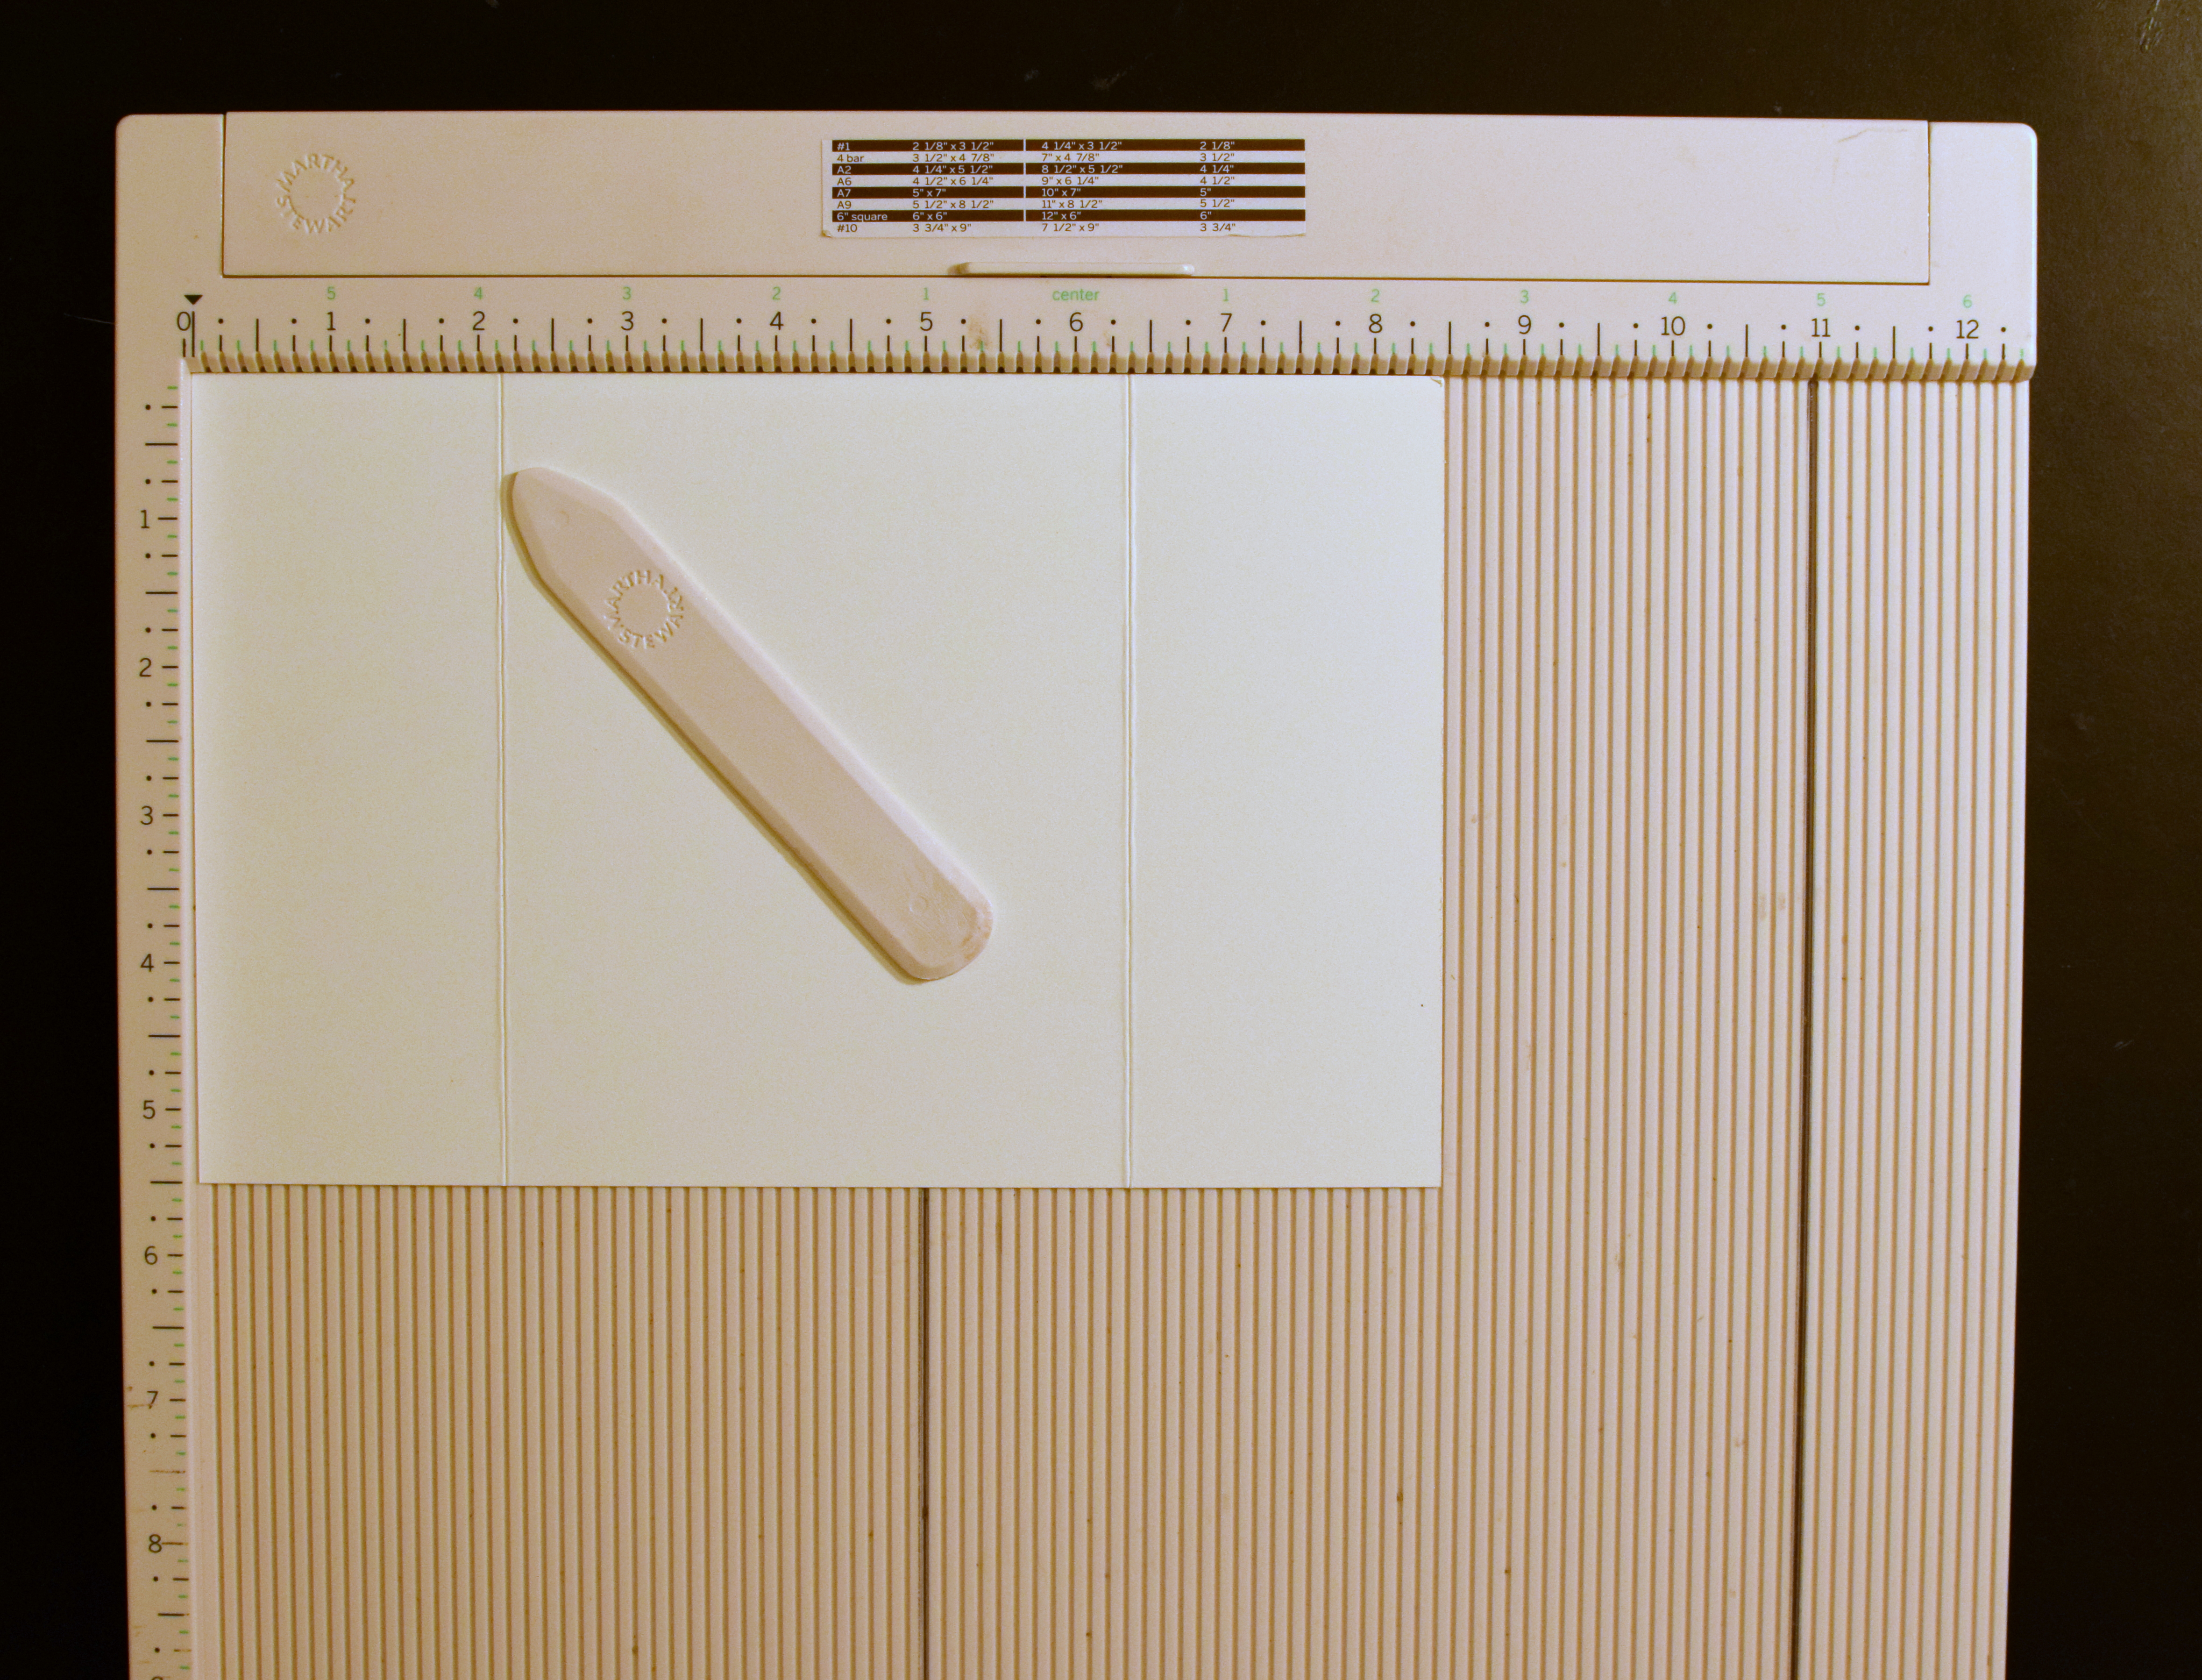
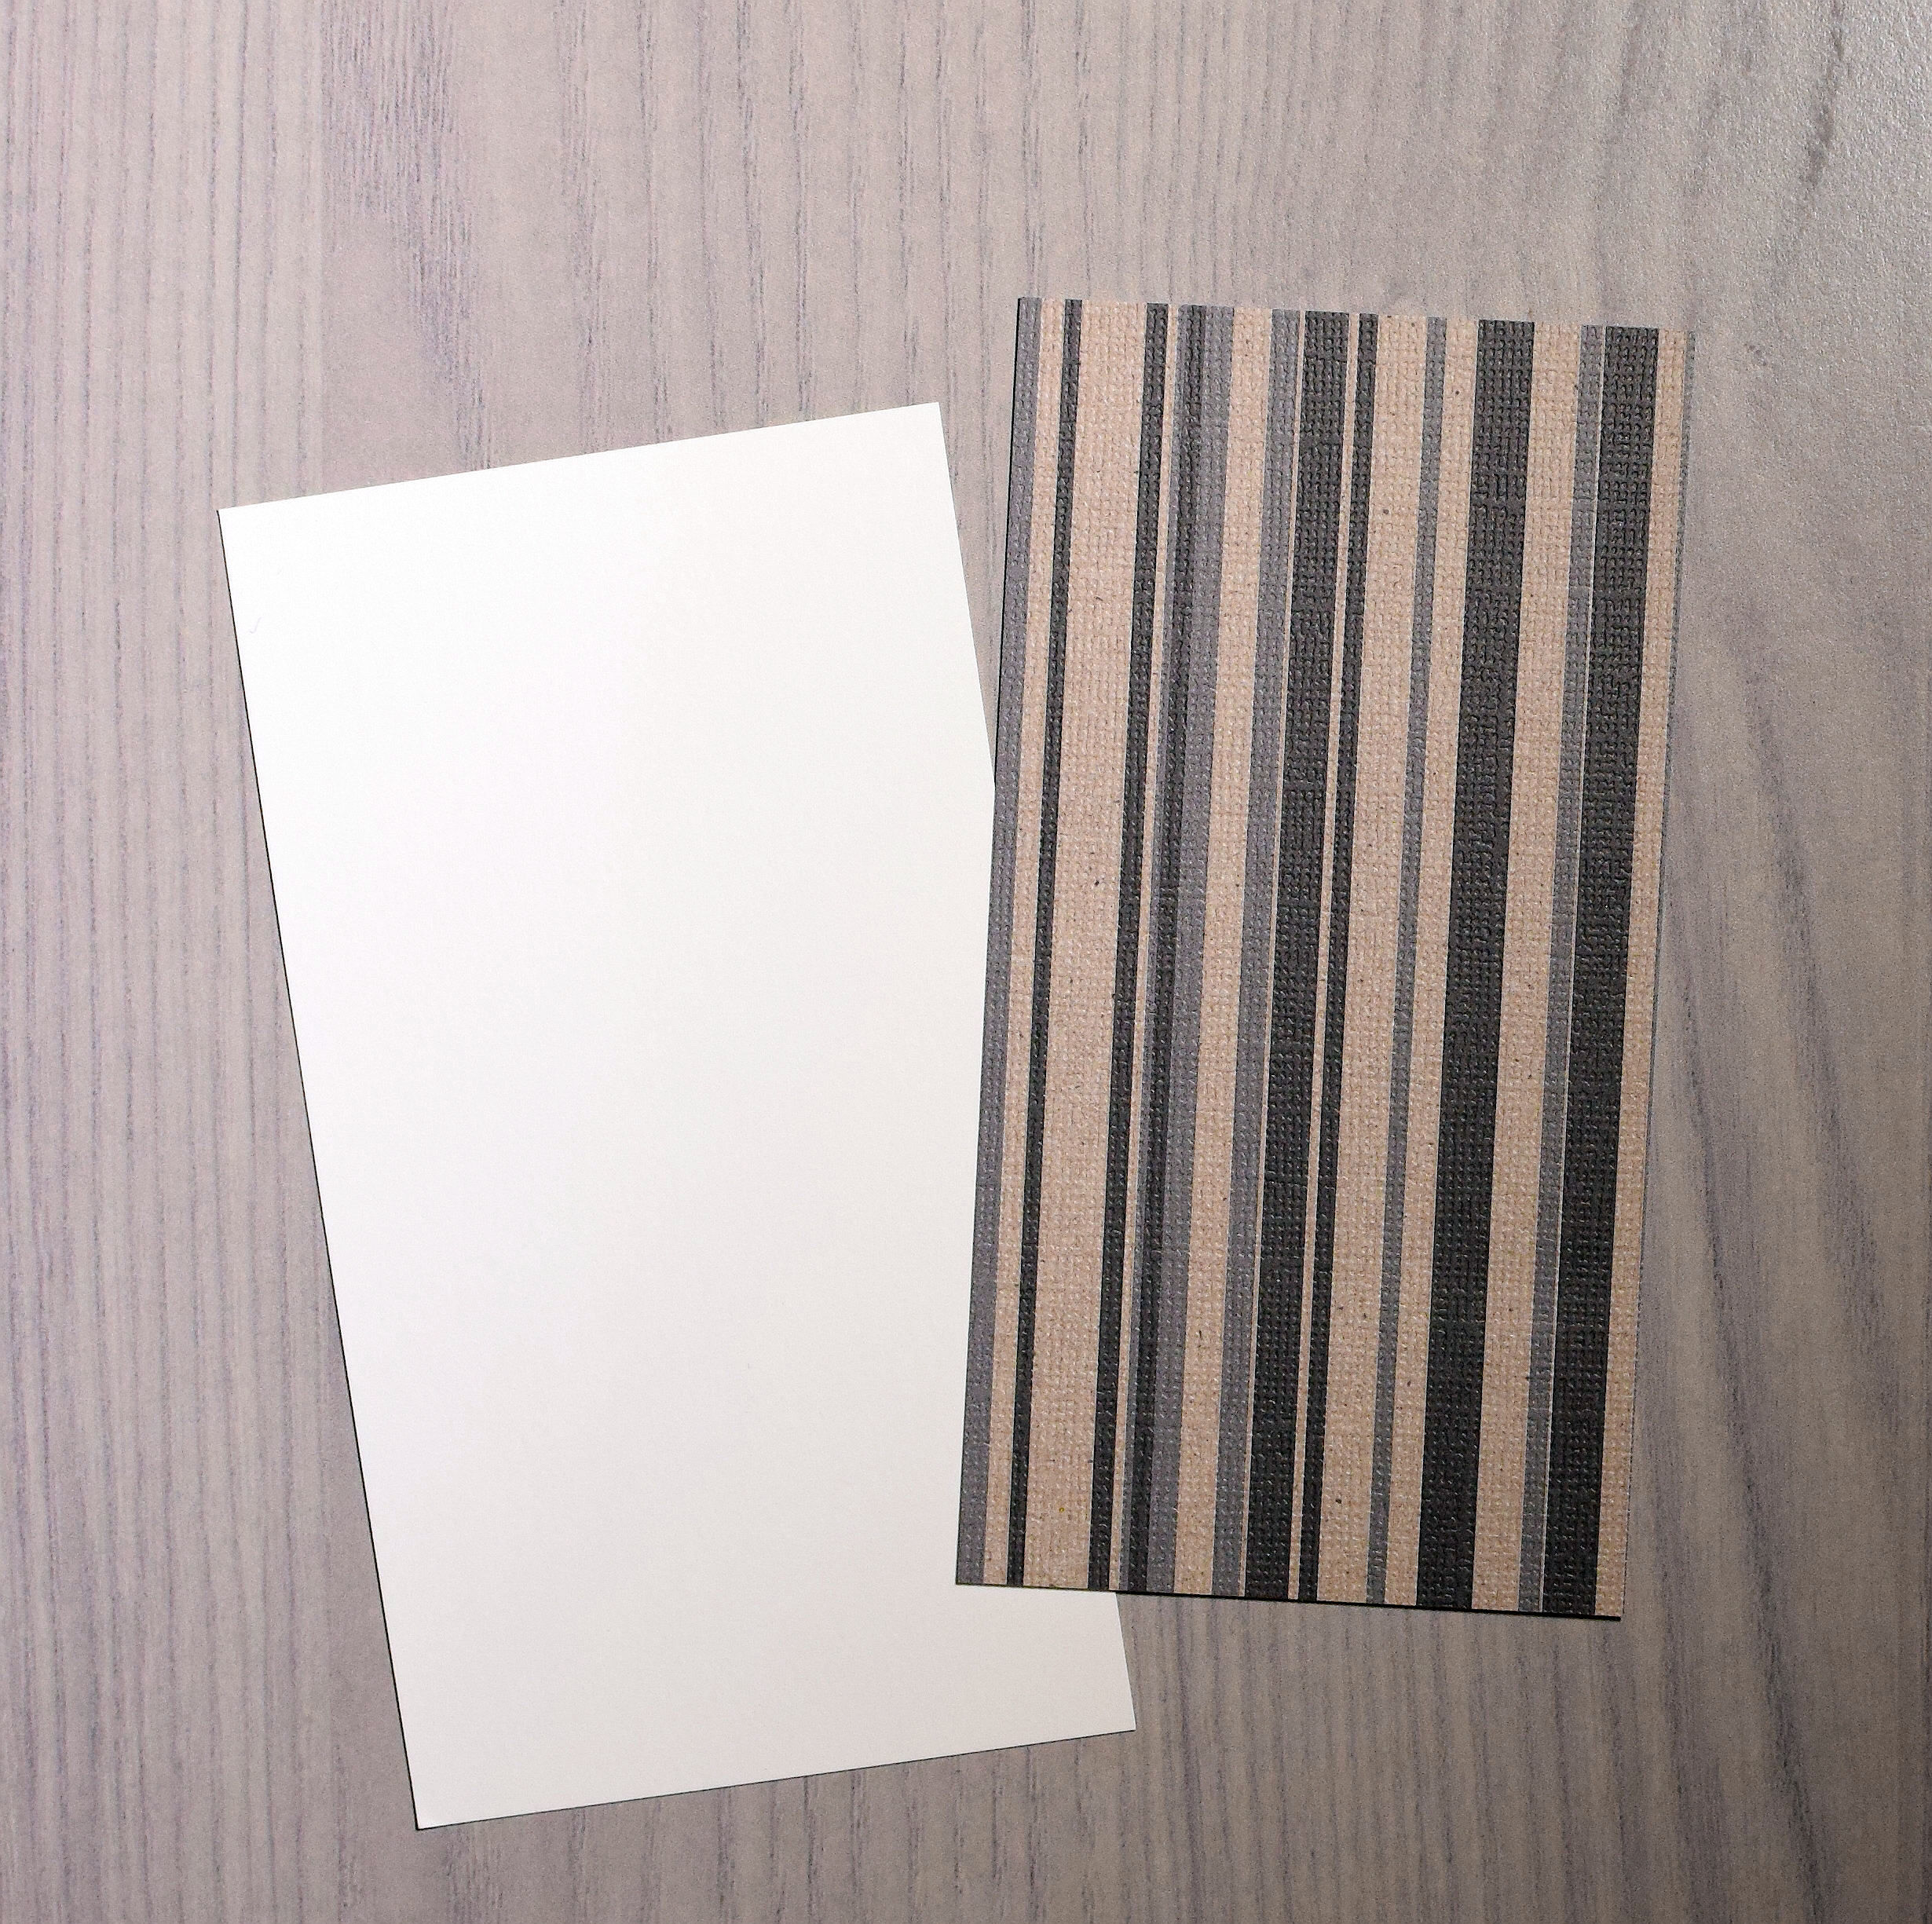
B) Decorate the two outside panels and the three inside panels as desired. I used designer paper panels that measured 2 x 5 1/4 (4 of these) and 4 x 5 1/4.
C) Create the vertical center panel that measures 3 x 5 1/2. (I created a two layer panel on my card so the mat is 3 x 5 1/2 and the designer paper is 2 3/4 x 5. Adhere the two panels together before going on to the next step.)
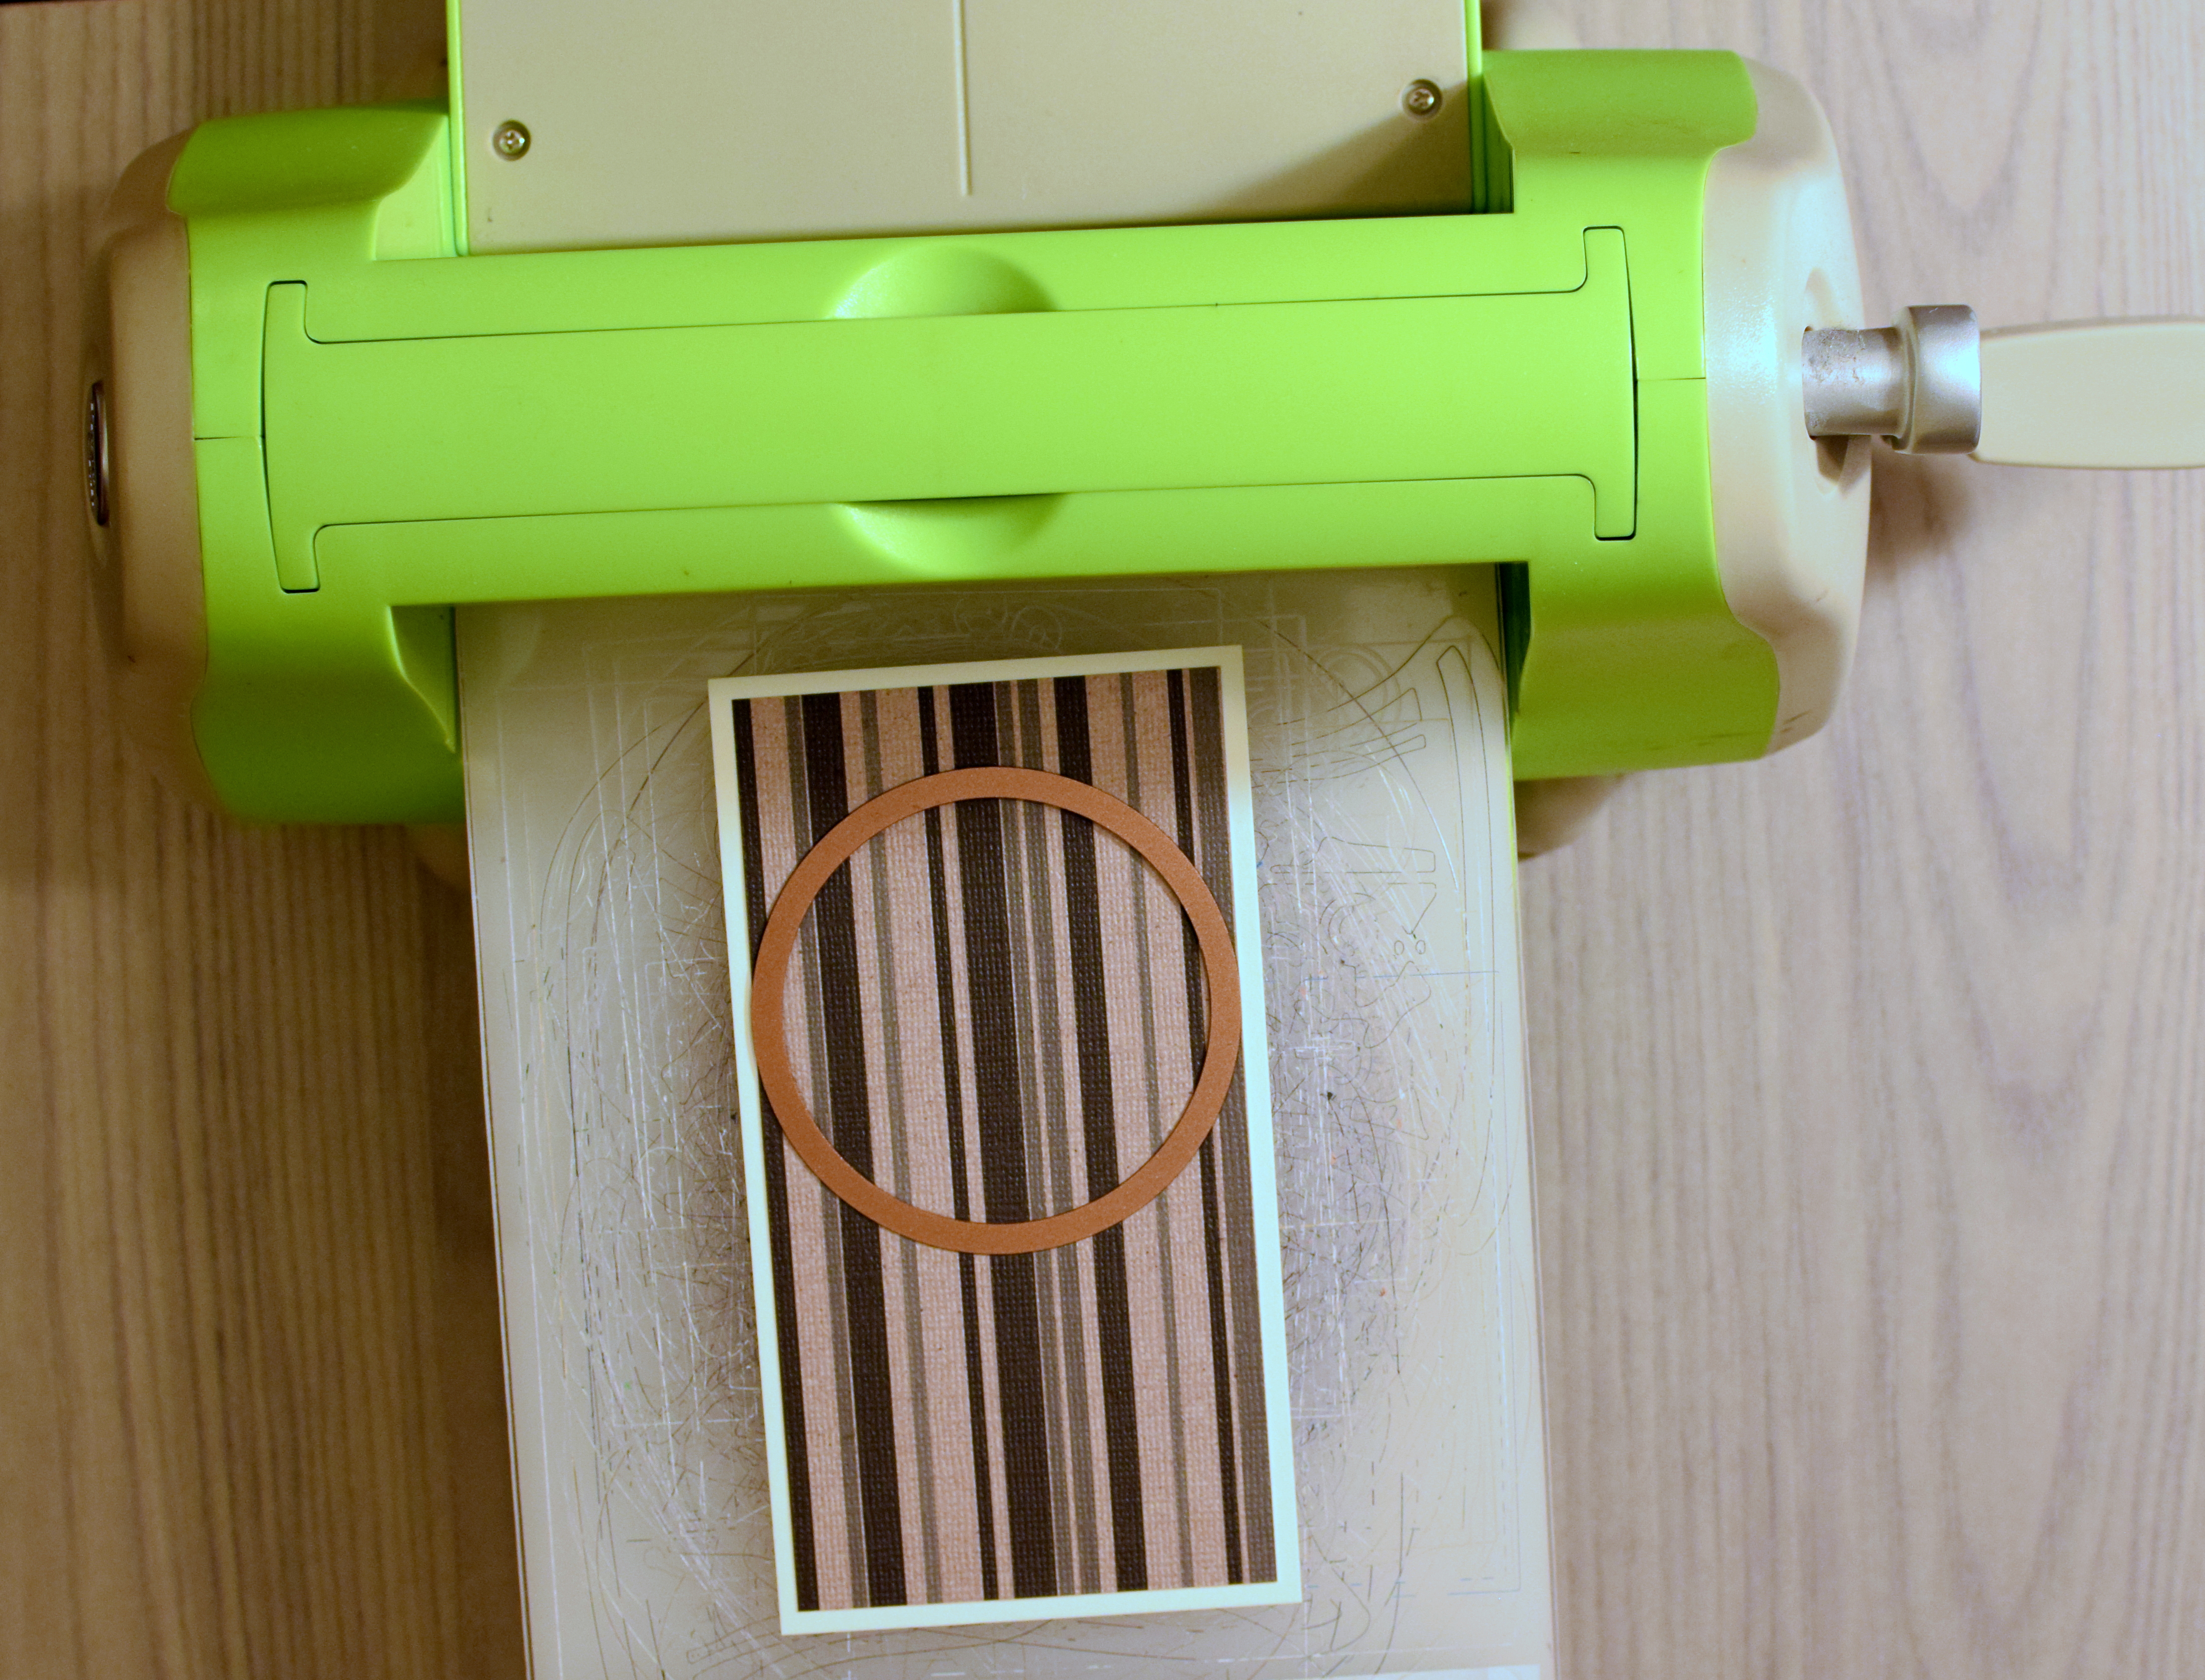
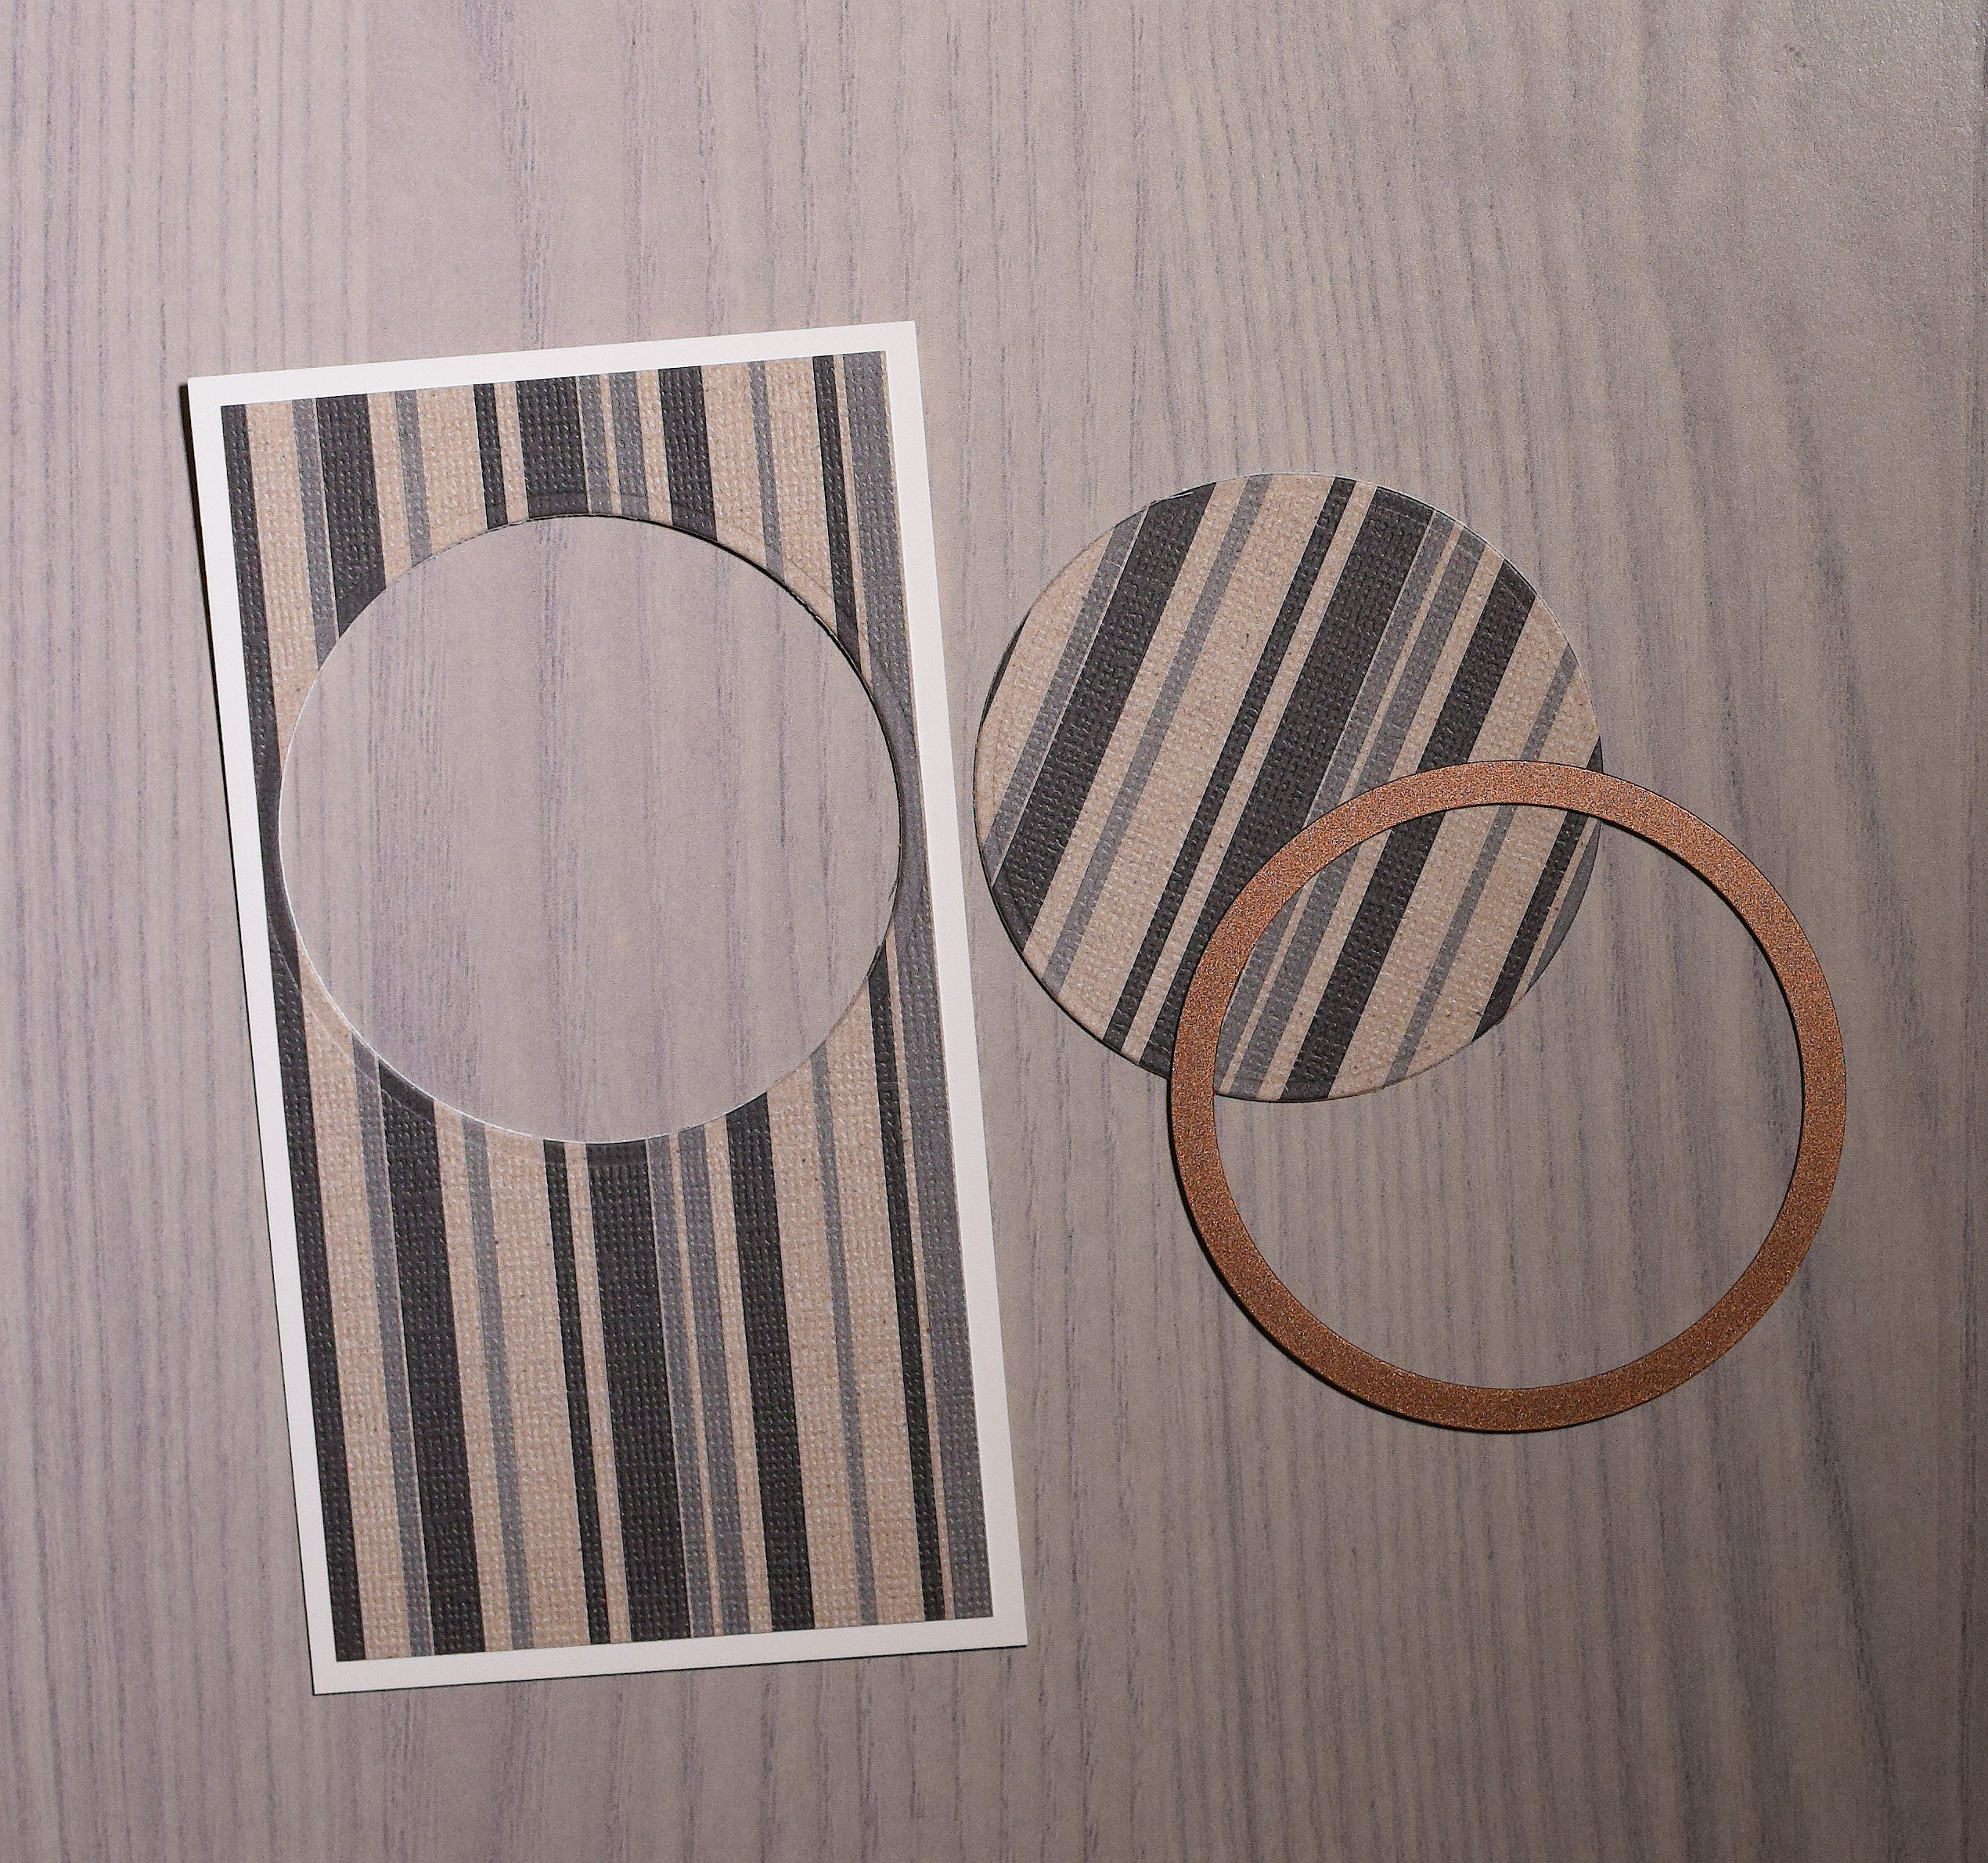
D) Using a punch, die, tracing template, (or any other method for cutting a circle), cut a 2 1/2 inch circle from the vertical panel(s). It needs to be centered from the left and right sides but could be as high or as low on the panel as desired. My circle is about 3/4 of an inch down from the top, but it could be a little lower or even centered if desired. (I probably wouldn’t go much higher than 3/4 of an inch though, because you need room for the sliding mechanism and to be able to glue the panel at the top.)
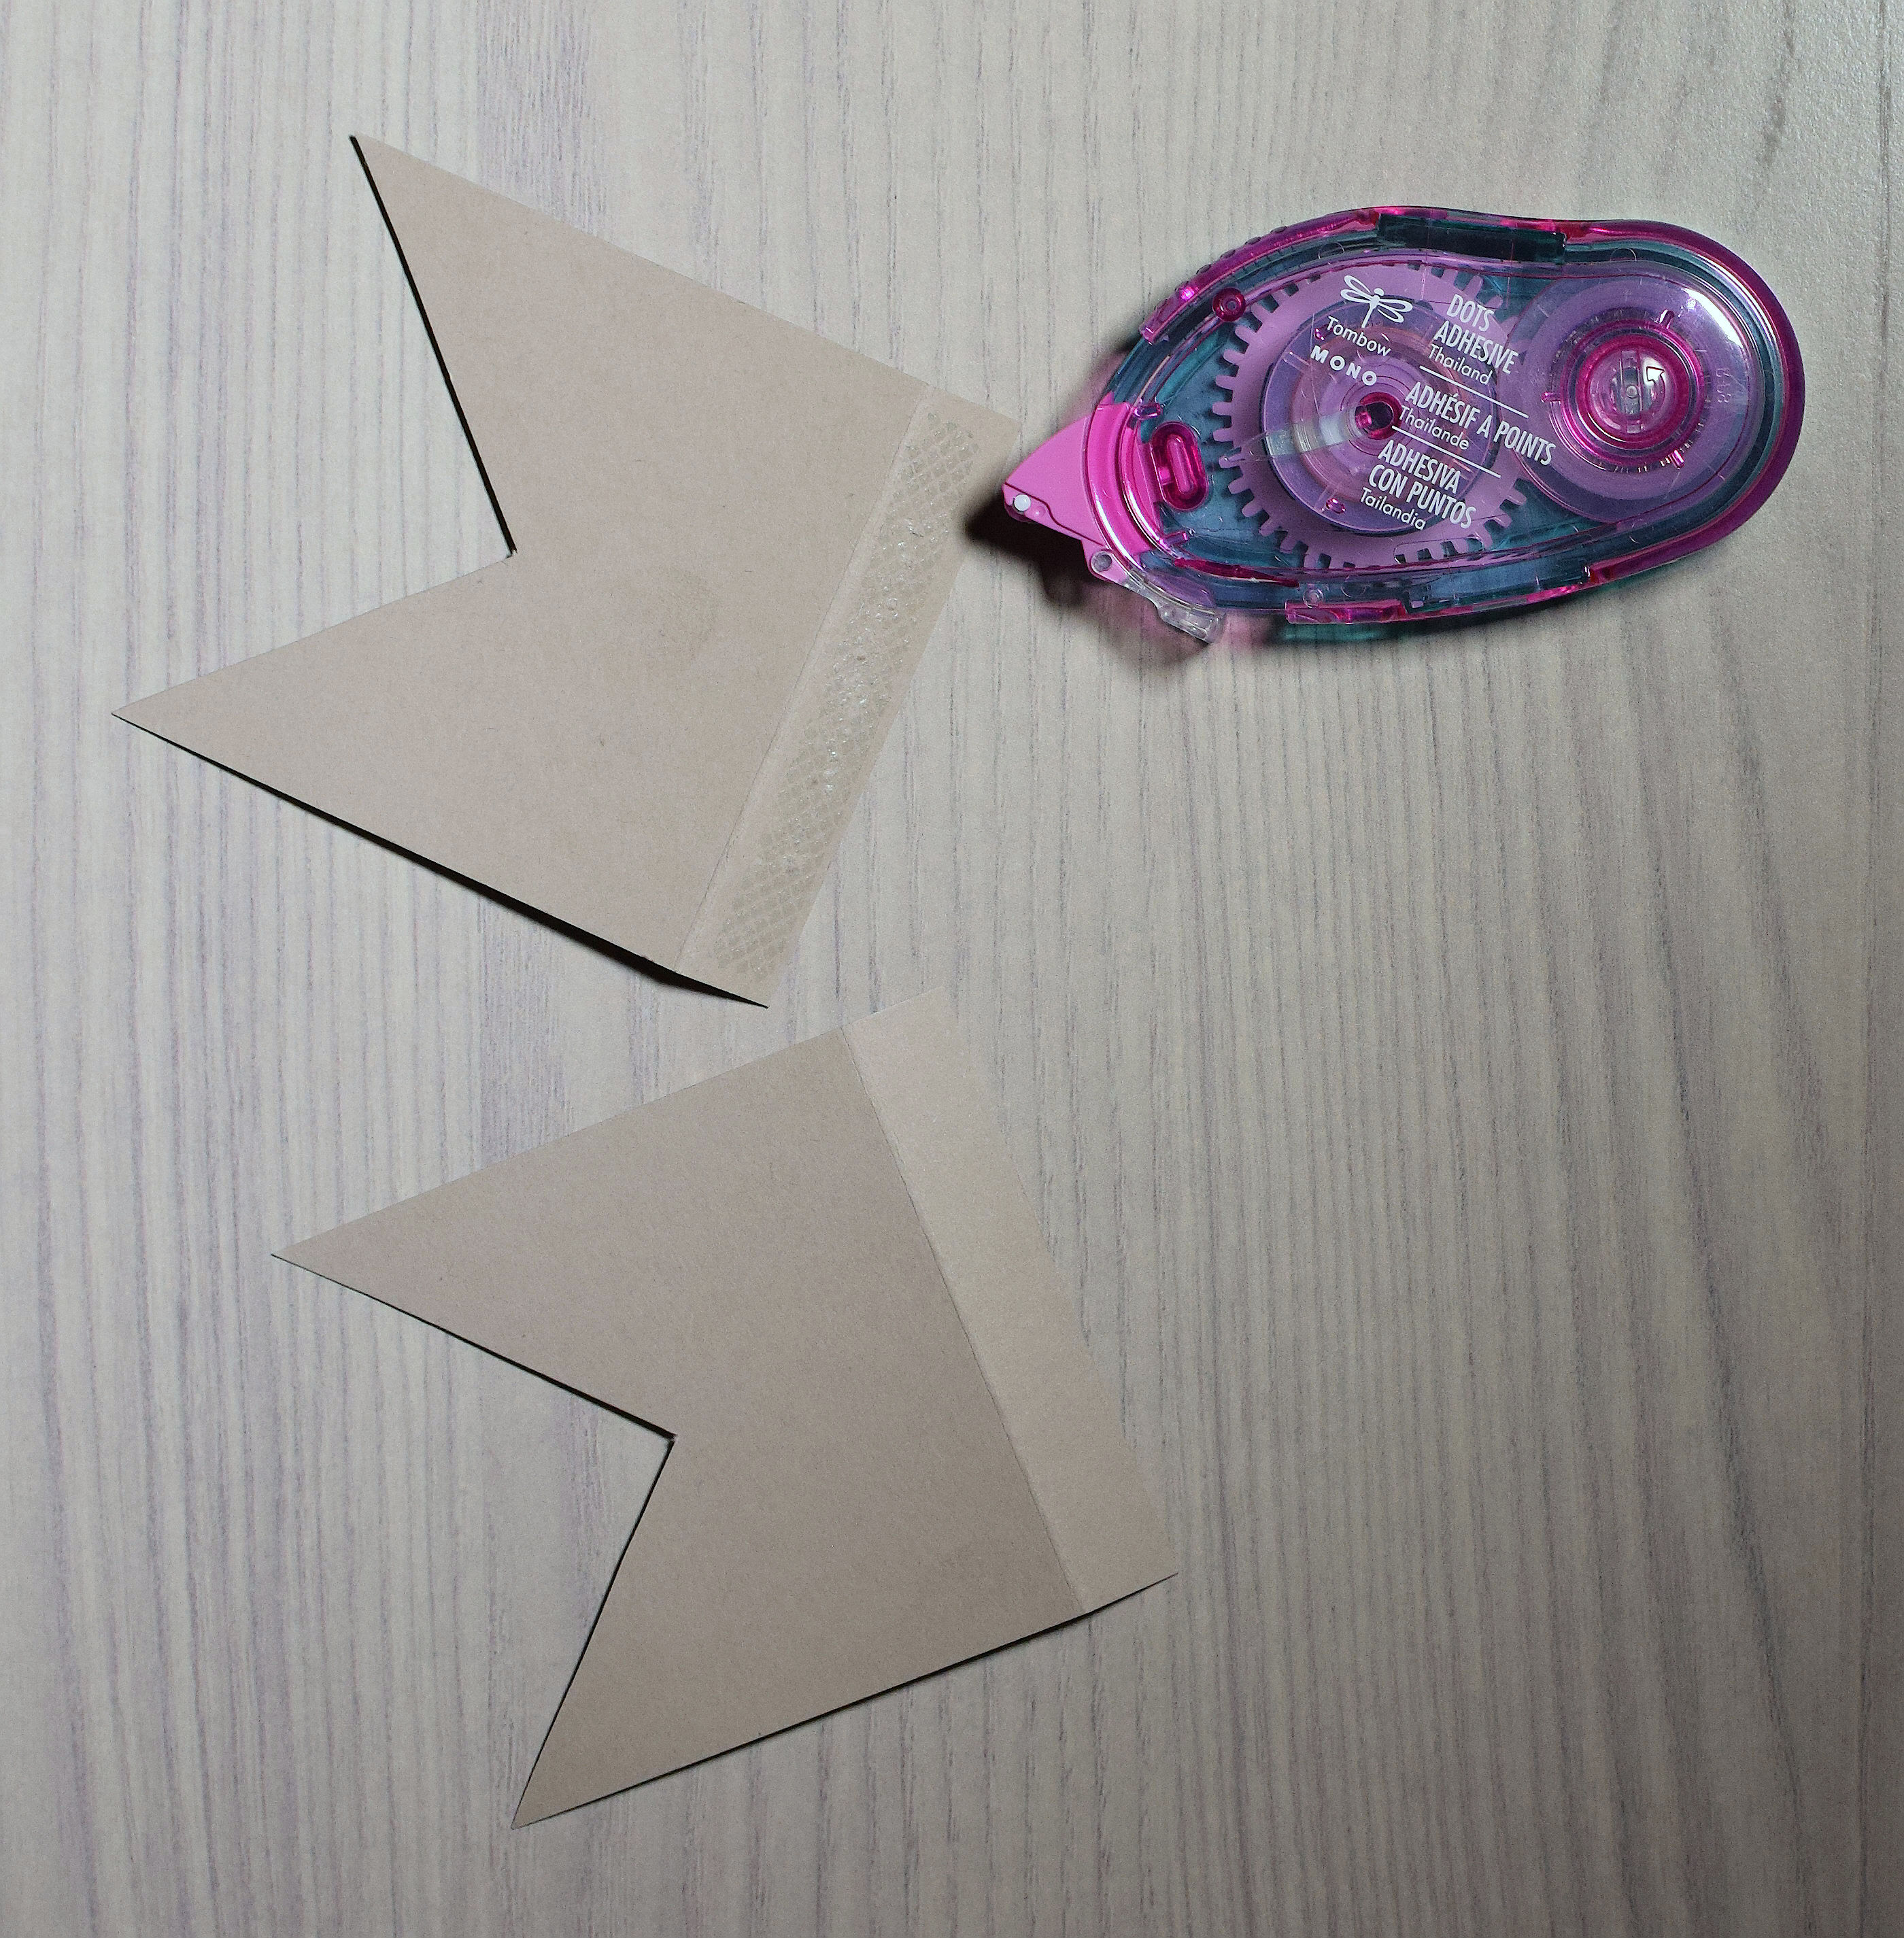
E) To create the sliding elements, you need 2 panels that measure 3 x 3 1/2. Score each of these along the 3 1/2 inch side at 1/2 inch so you have a 3 inch square on the other side of the score line when done.
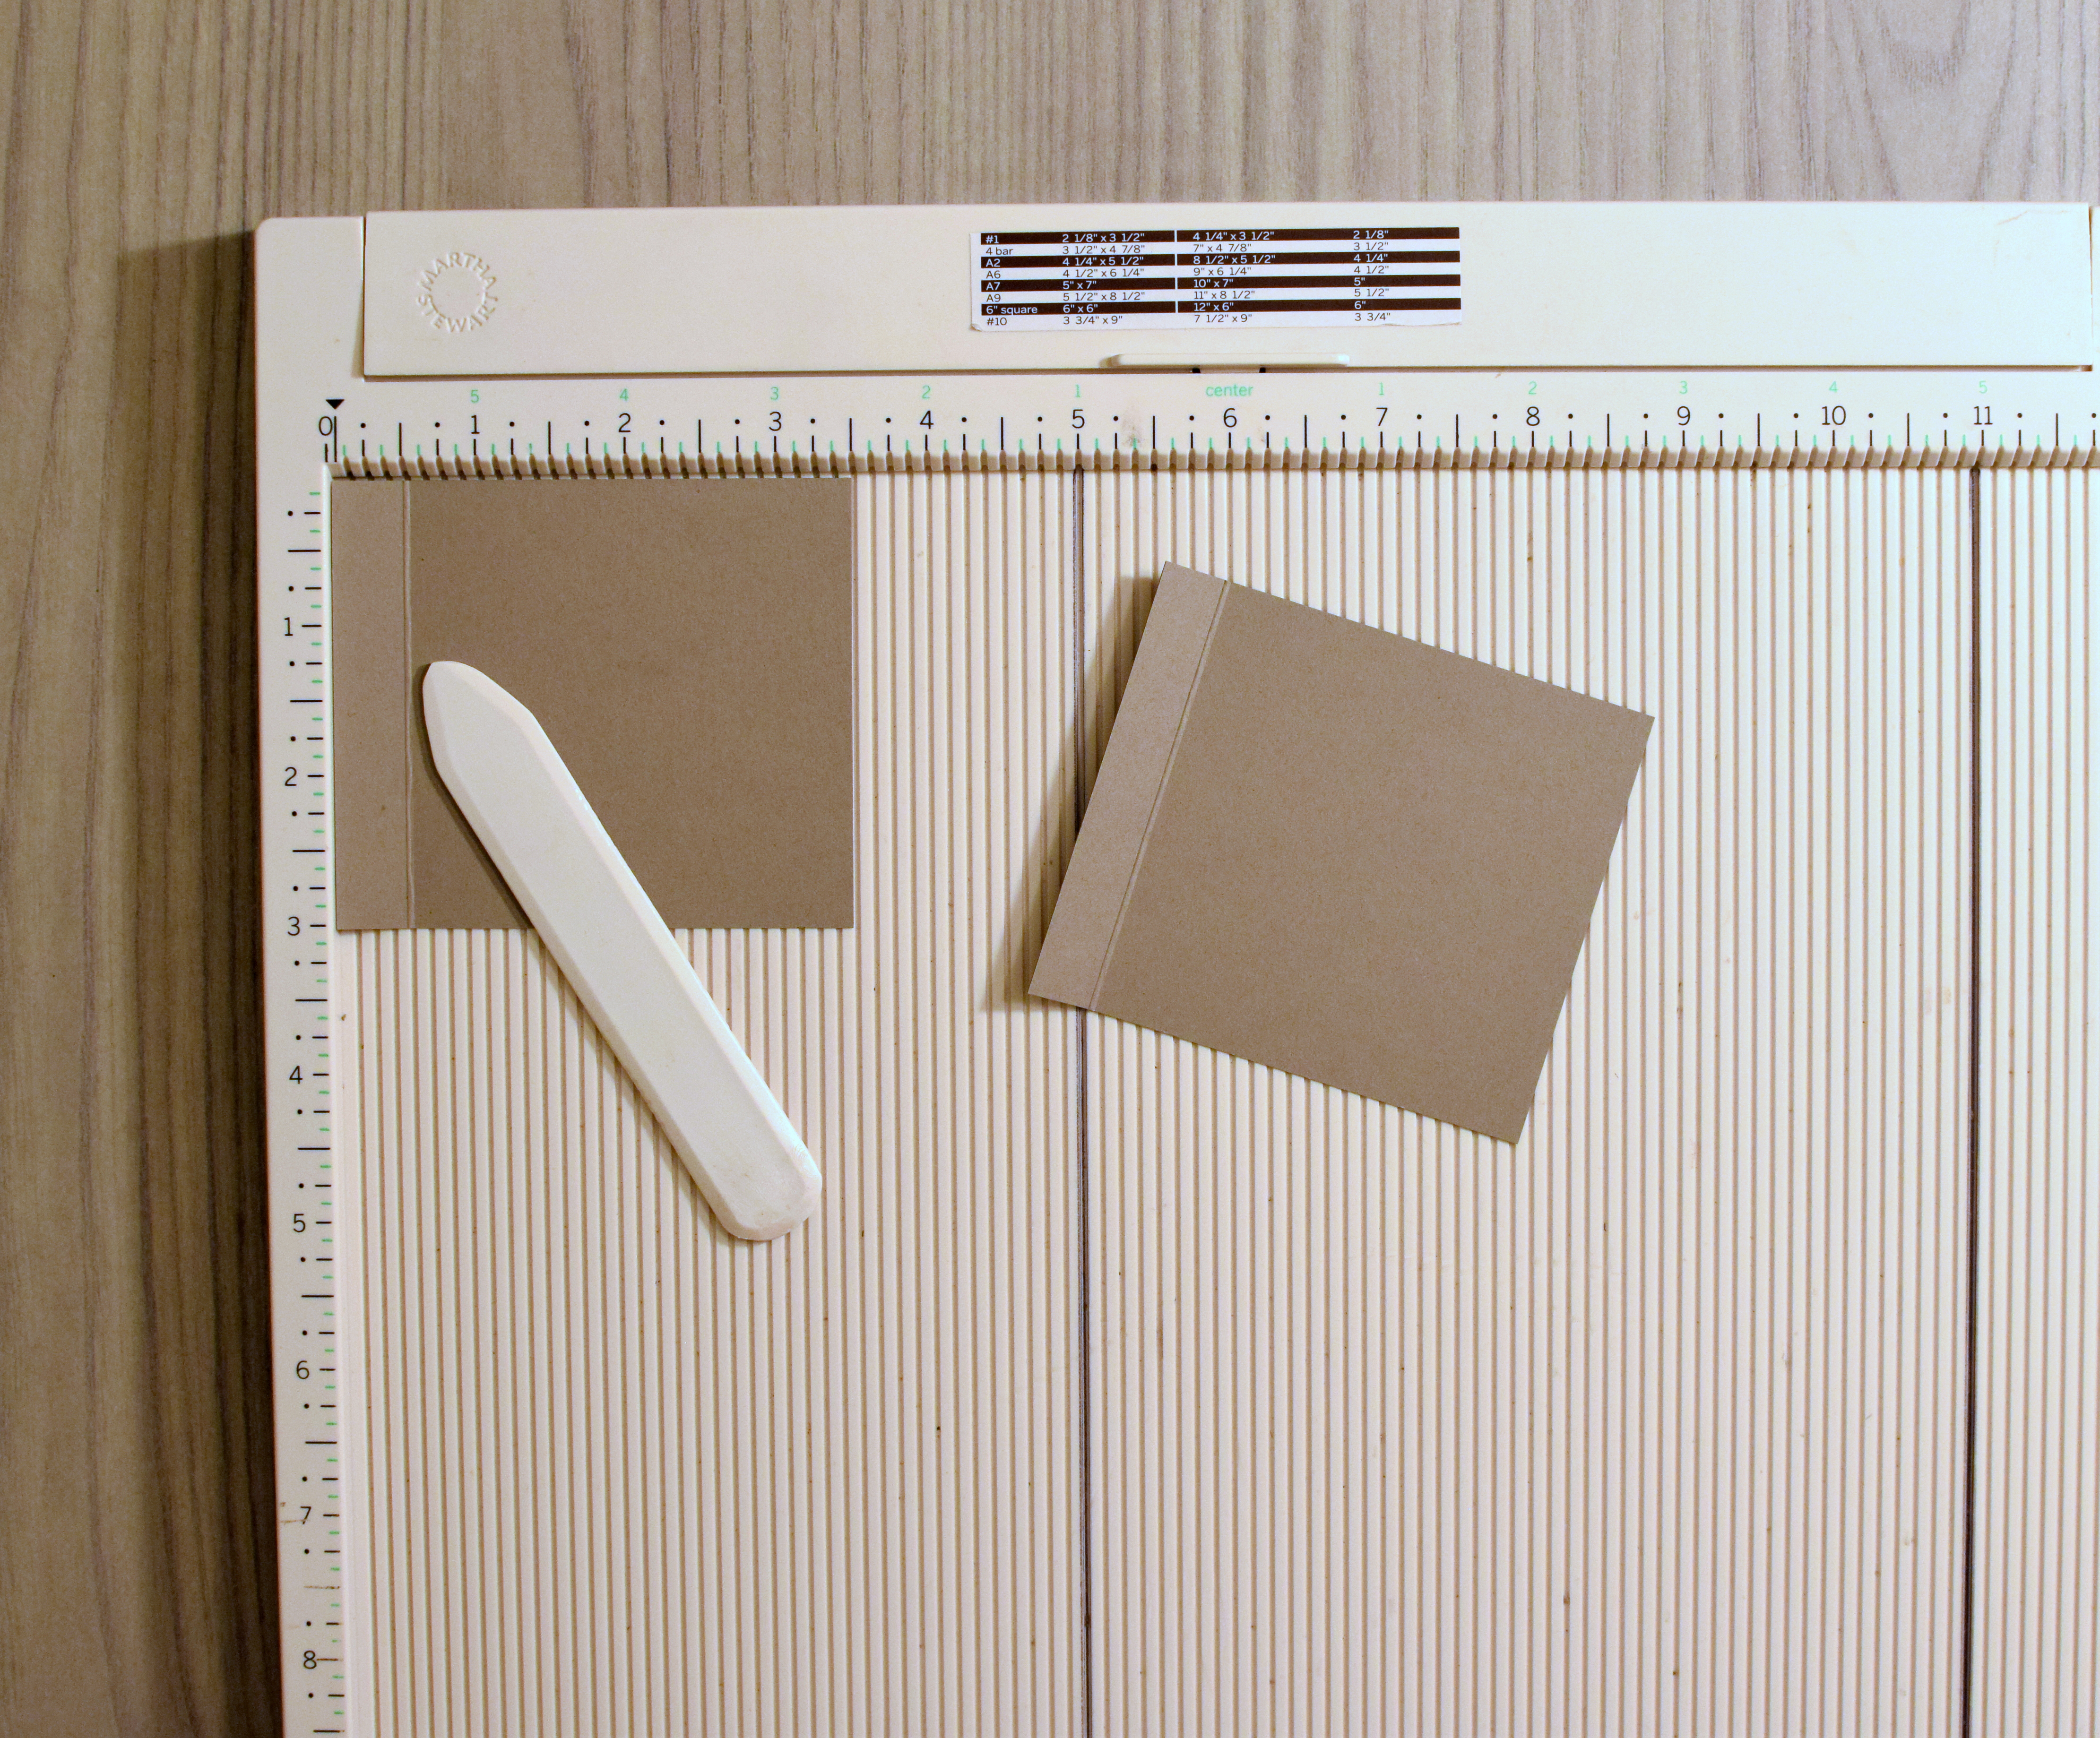
F) Take one of the pieces from the last step. Fold and place this on the table with the 1/2 strip pointing up. Using a ruler or a scrap of card stock, draw lines from corner to opposite corner (of the 3 inch square part) in both directions to form an X.
G) Carefully cut away the triangle opposite the score line. This needs to be done for both panels, but they need to be exactly the same, so hold them together making sure the scored edges and all the sides line up, and cut them together. (If you are not comfortable cutting them together, repeat the above step for making the X on the second panel and then cut it, or use the first one as a template. They just have to be the same when you are done.)

H) Now it’s time to adhere the sliding panels to the card base. Lay the two panels on the table so the 1/2″ scored section points down (mountain fold side) and put glue or adhesive just on the 1/2″ strip(s). (If you are using glue, you may want to do one panel now and wait to do the other panel until you are ready for it.)
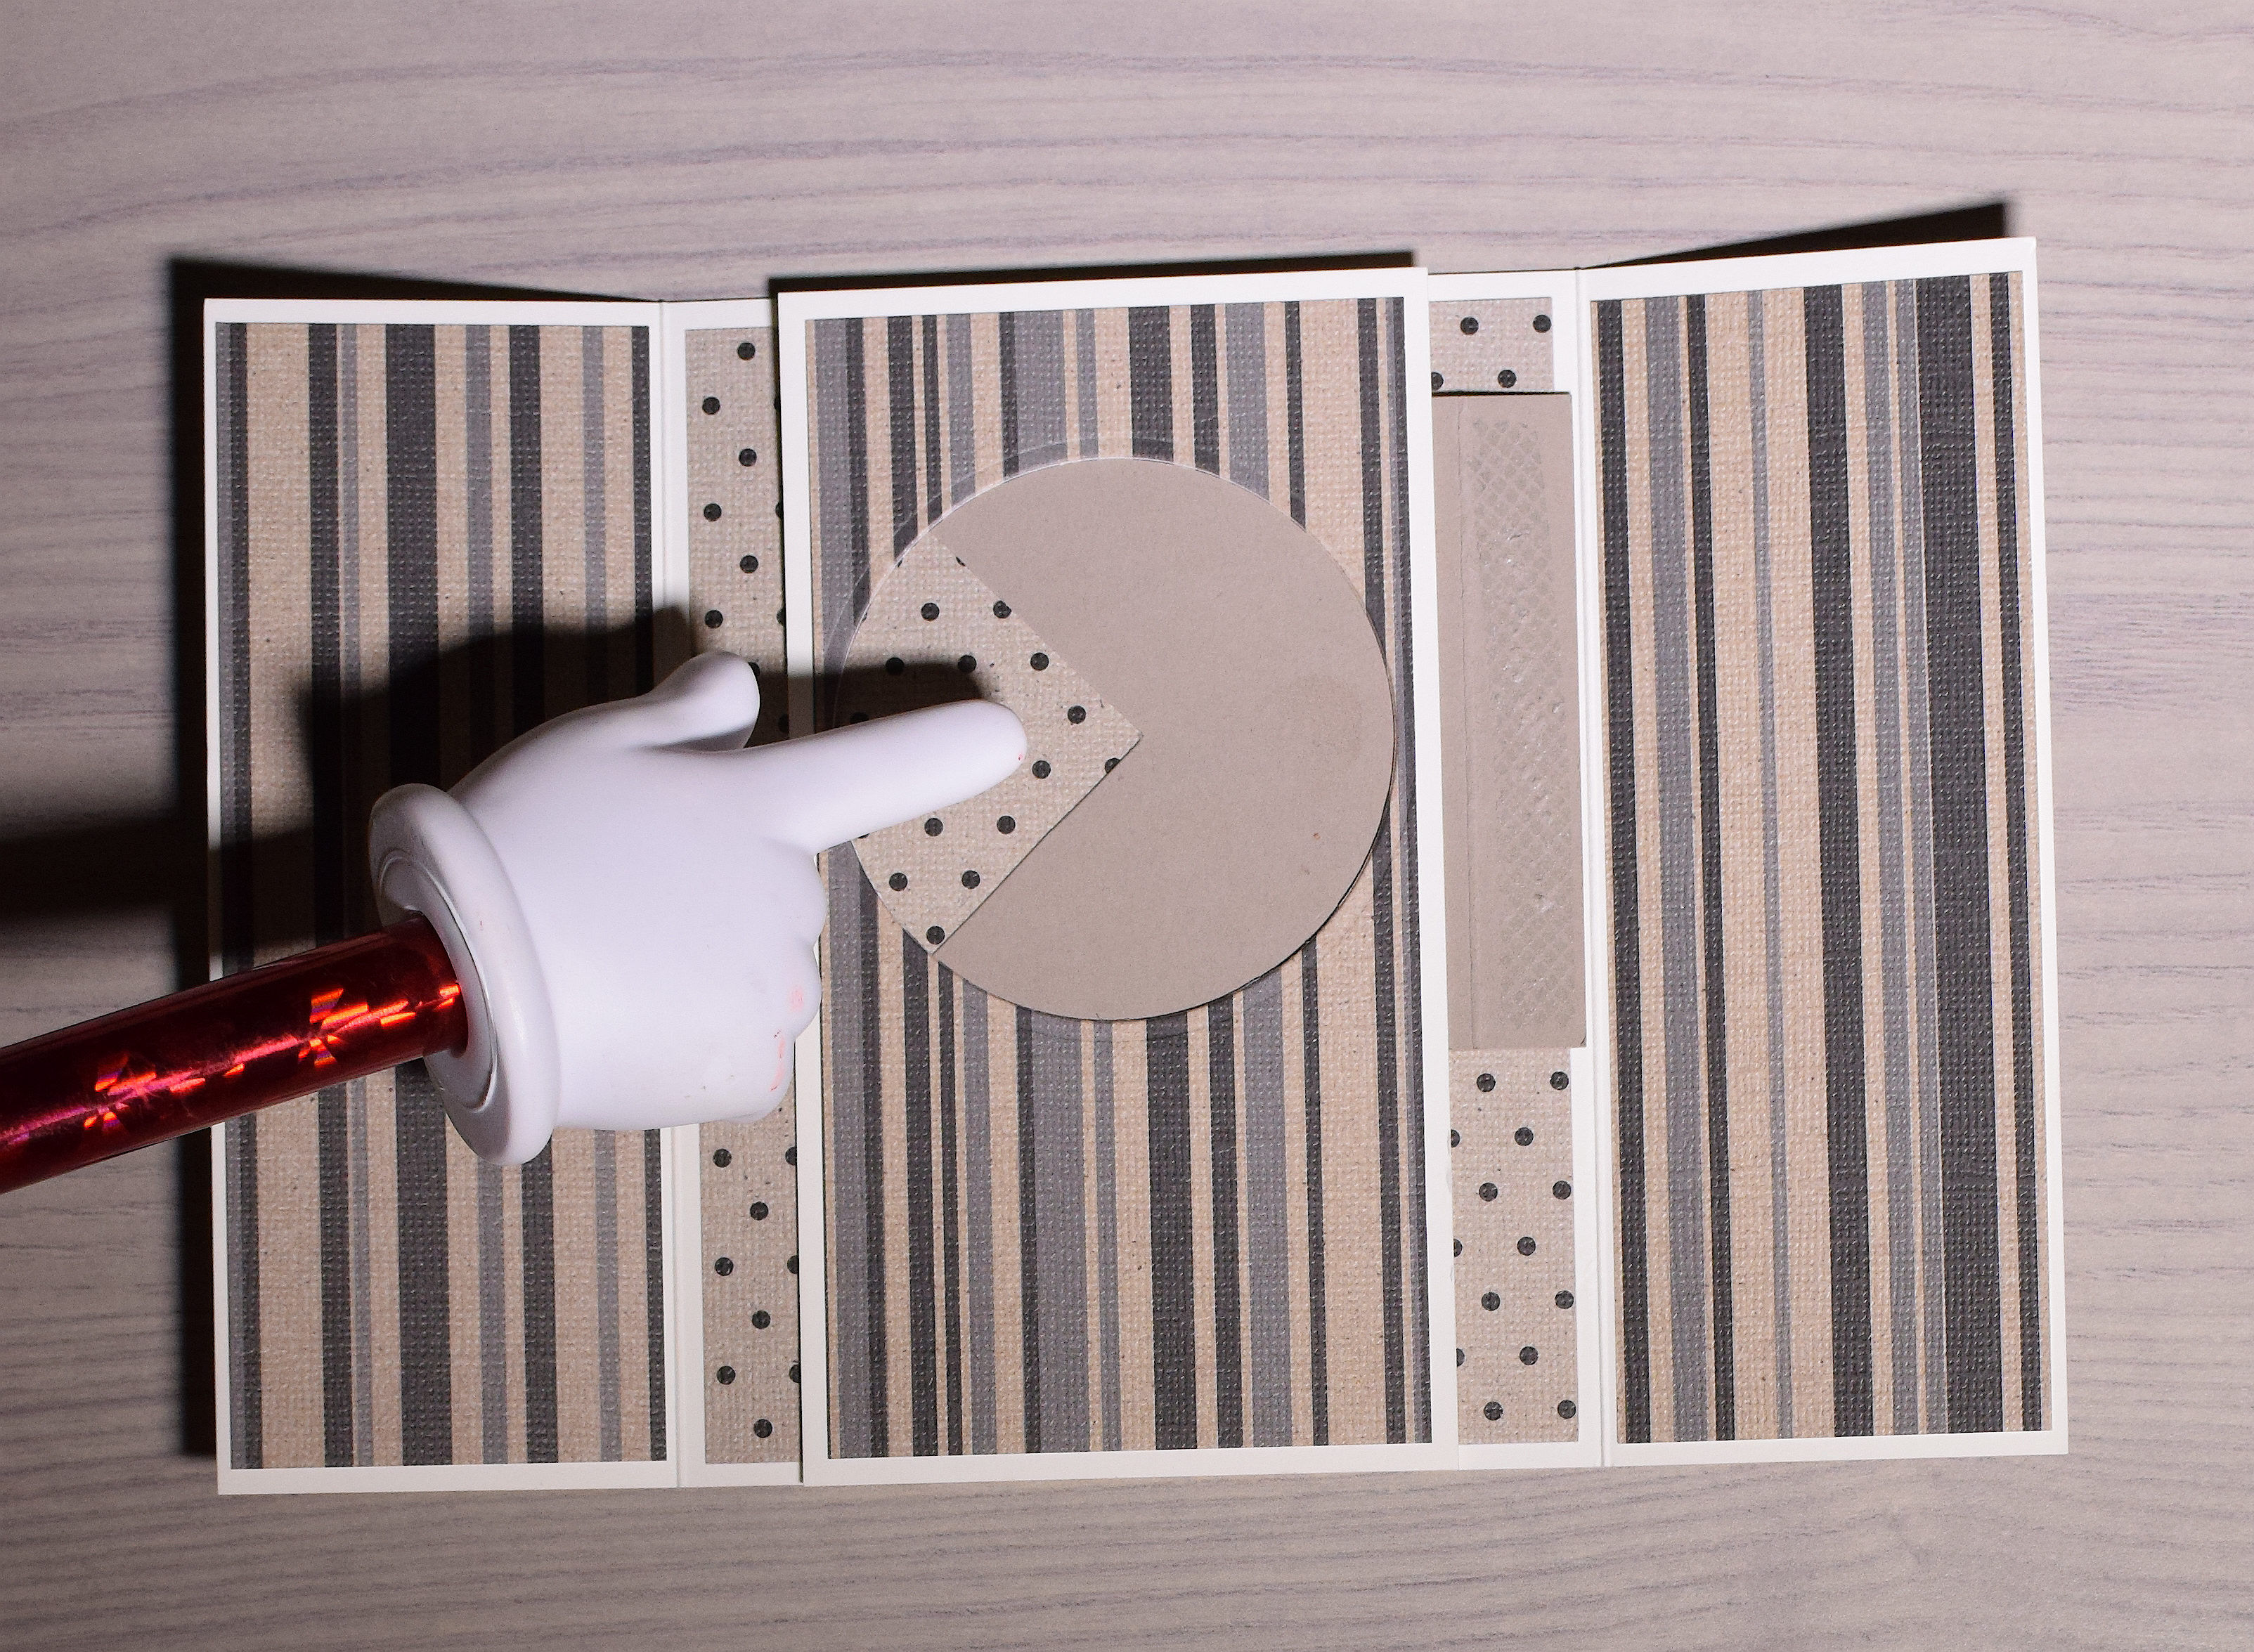
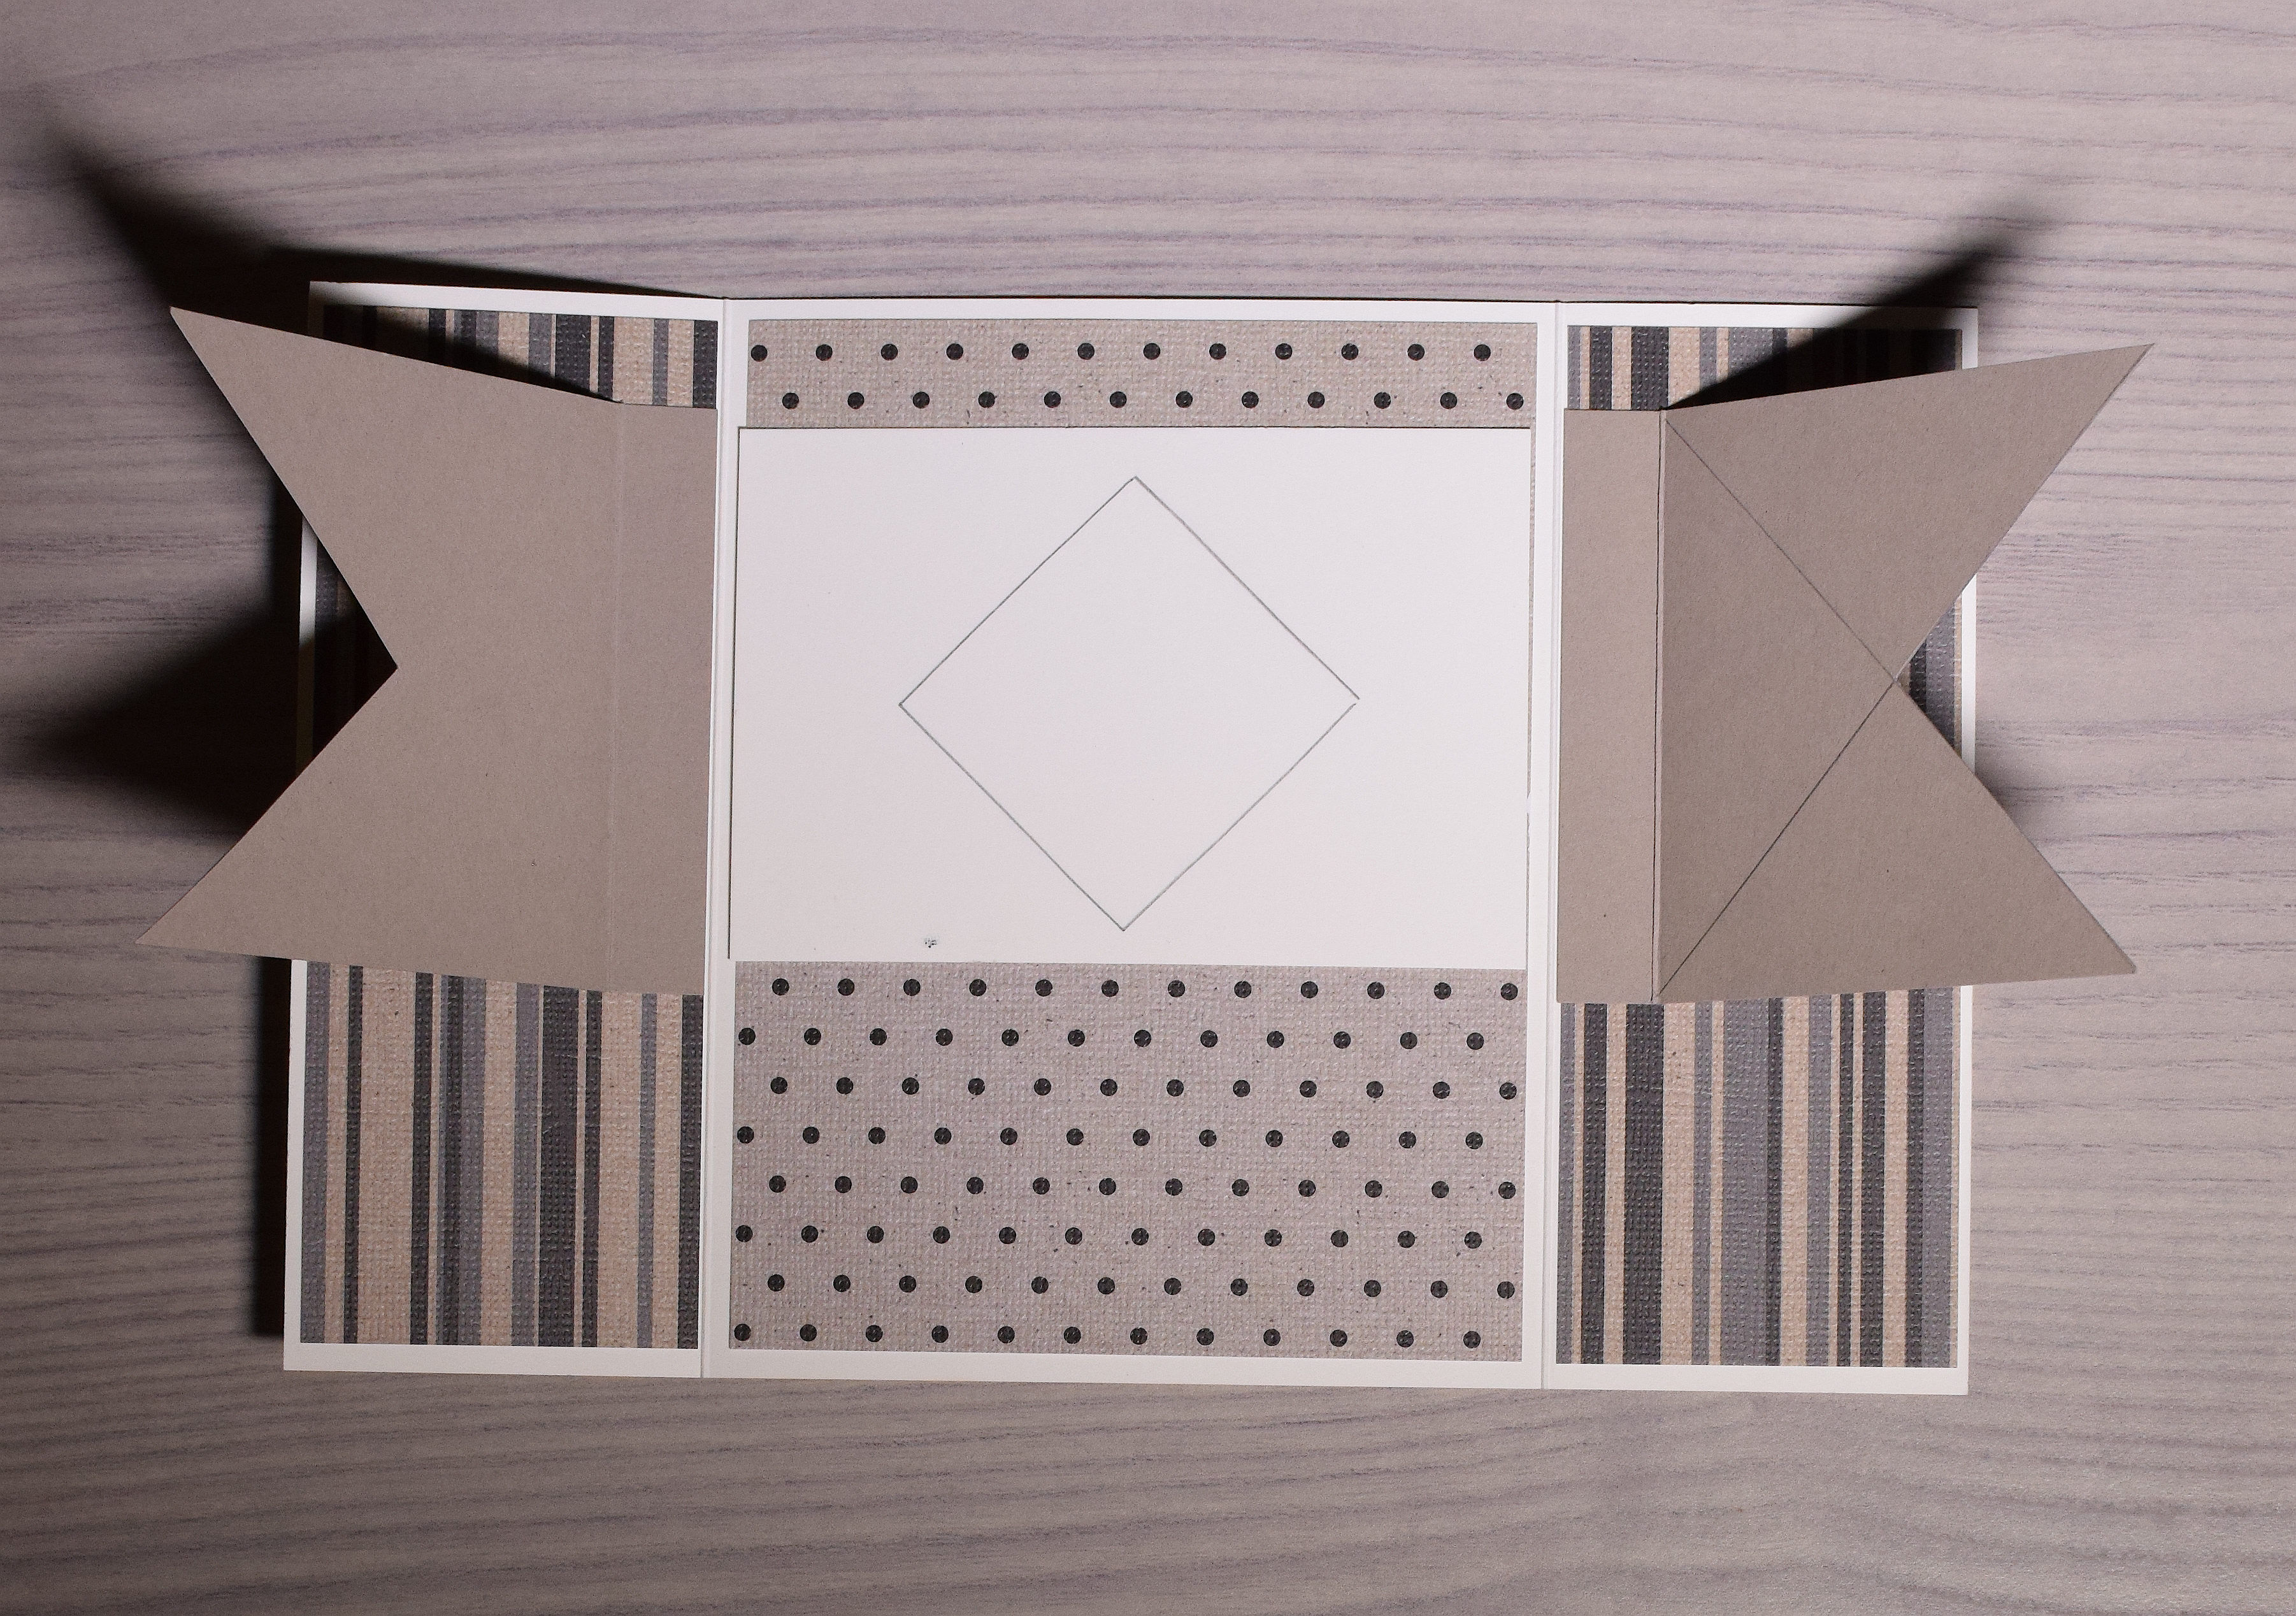
I) Do not put any adhesive on the vertical panel with the circle cut-out yet. Just lay it on the base and center it where it will eventually be stuck.
J) Take one of the slider panels with the adhesive facing up, and slide the points under the center panel so the “V” on the side is centered between the top and bottom of circle (not left to right) AND the straight edge by the adhesive lines up just inside/touching the fold of the card base. (Don’t worry about the edges that go diagonally up and down; they will not be centered and that is ok for now.)

(Double check the “V” and the right edge. Make sure the “V” is centered just between top and bottom of circle. Right edge should not go over the fold of the flap.)
K) Once you are satisfied that it is centered and lined up perfectly, firmly hold it in place, and close the side of the card over it.

(When you open up the card, the panel should now be stuck to the side flap and on the opposite side of the fold. You can remove the center panel at this point.)
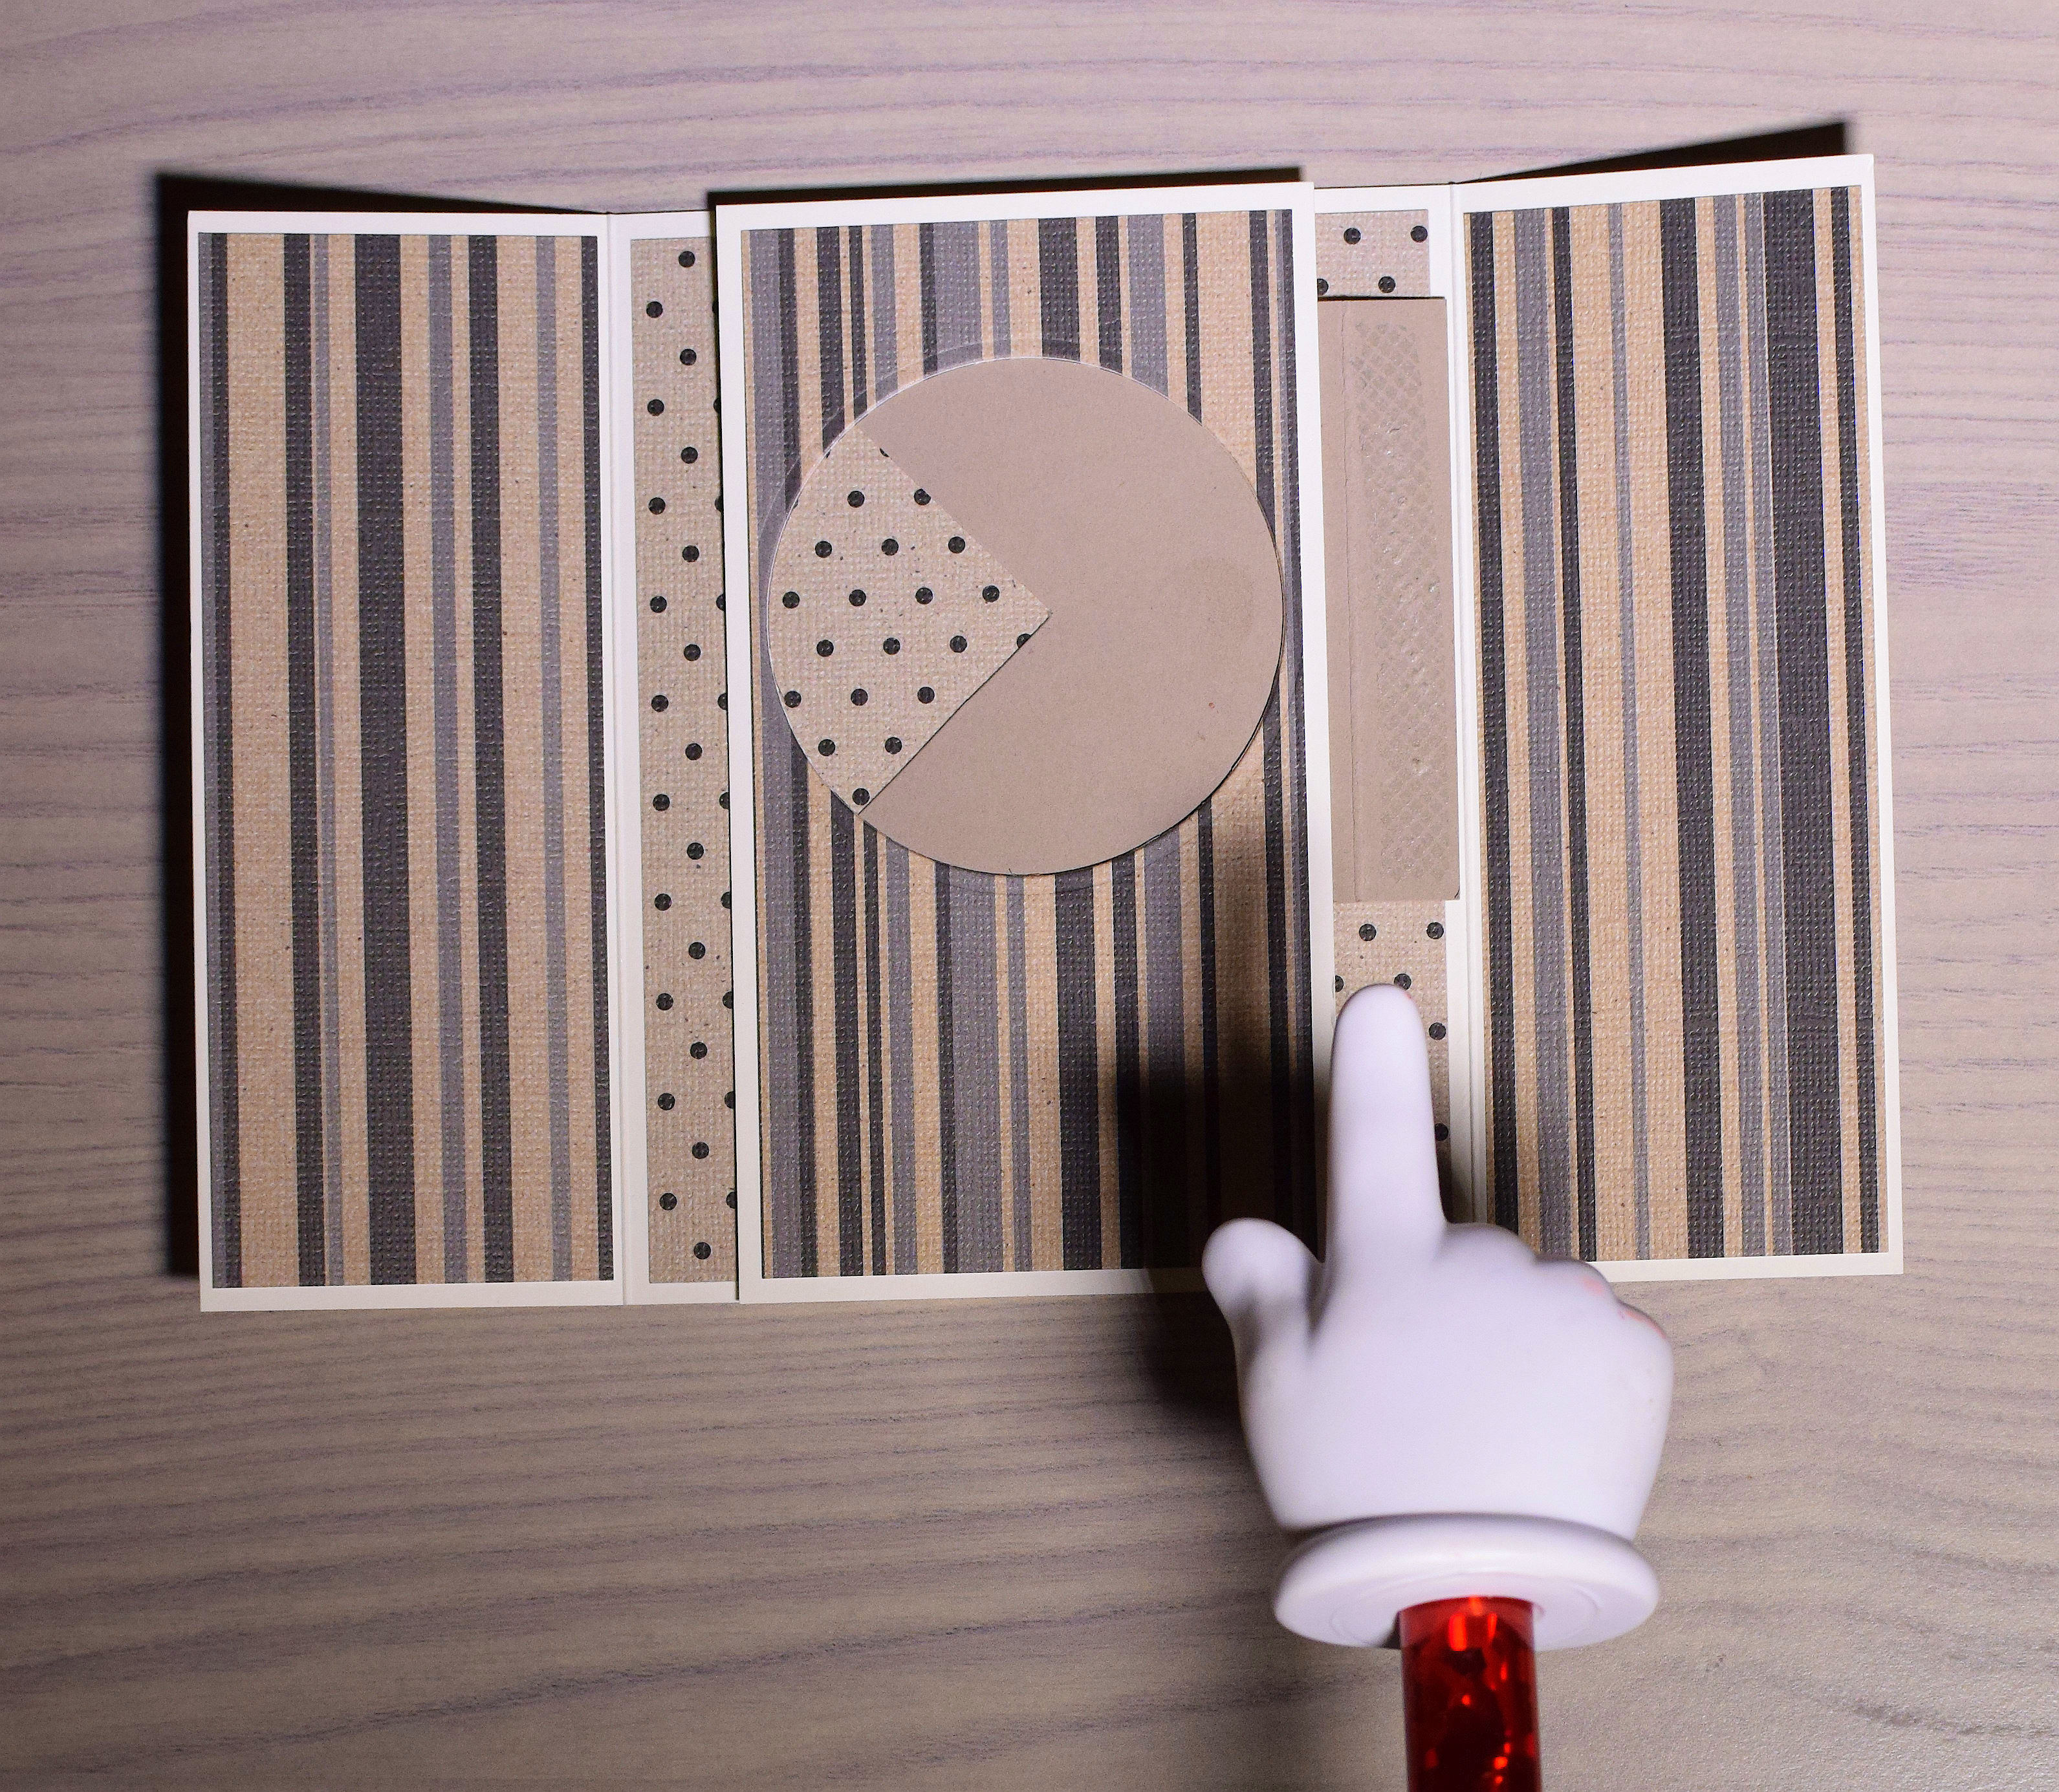
L) Place the second slider panel (adhesive facing up) facing in the opposite direction of the one you attached before, again making sure the straight edge is lined up just inside/touching the fold, the “V’s” line up across the center, and the tops and bottoms of the two panels line up straight/perfectly.
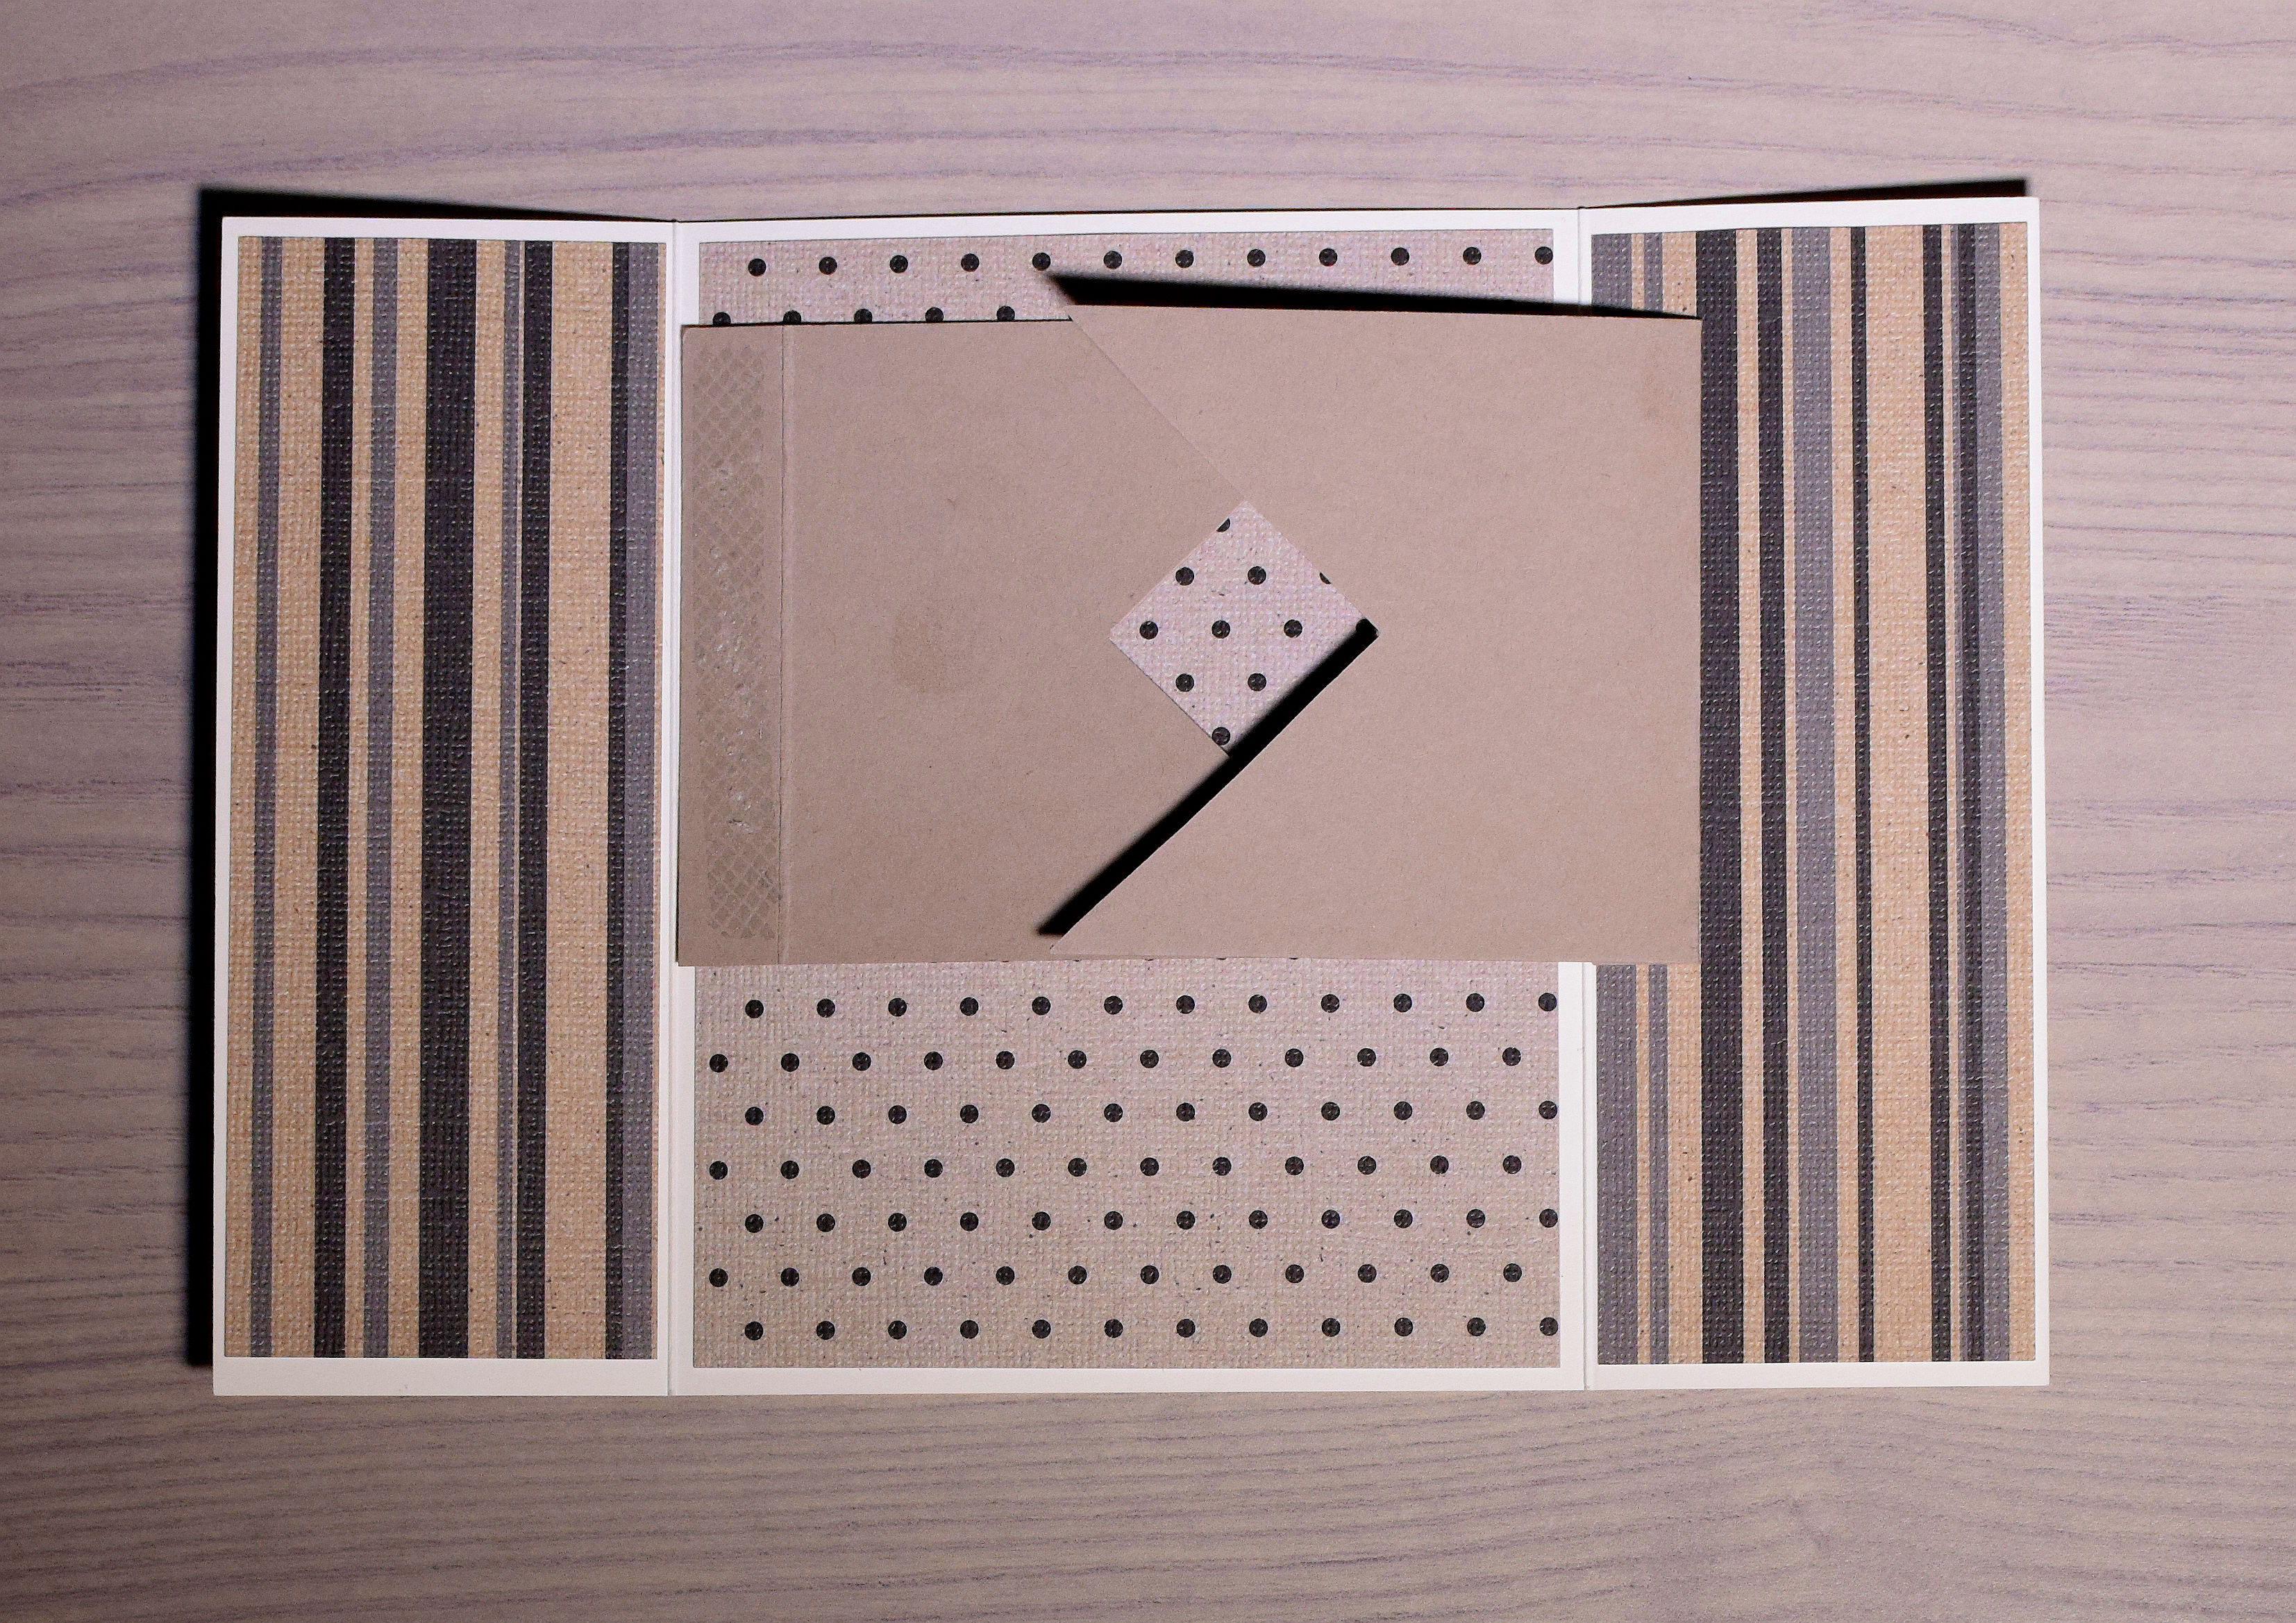
(Double check that the “V’s” line up, that the left edge is straight and not over the fold, and that the top and bottom edges line up.)

M) Once you are happy with the placement of the second panel, close the other side of the card over it as you did with the first one.

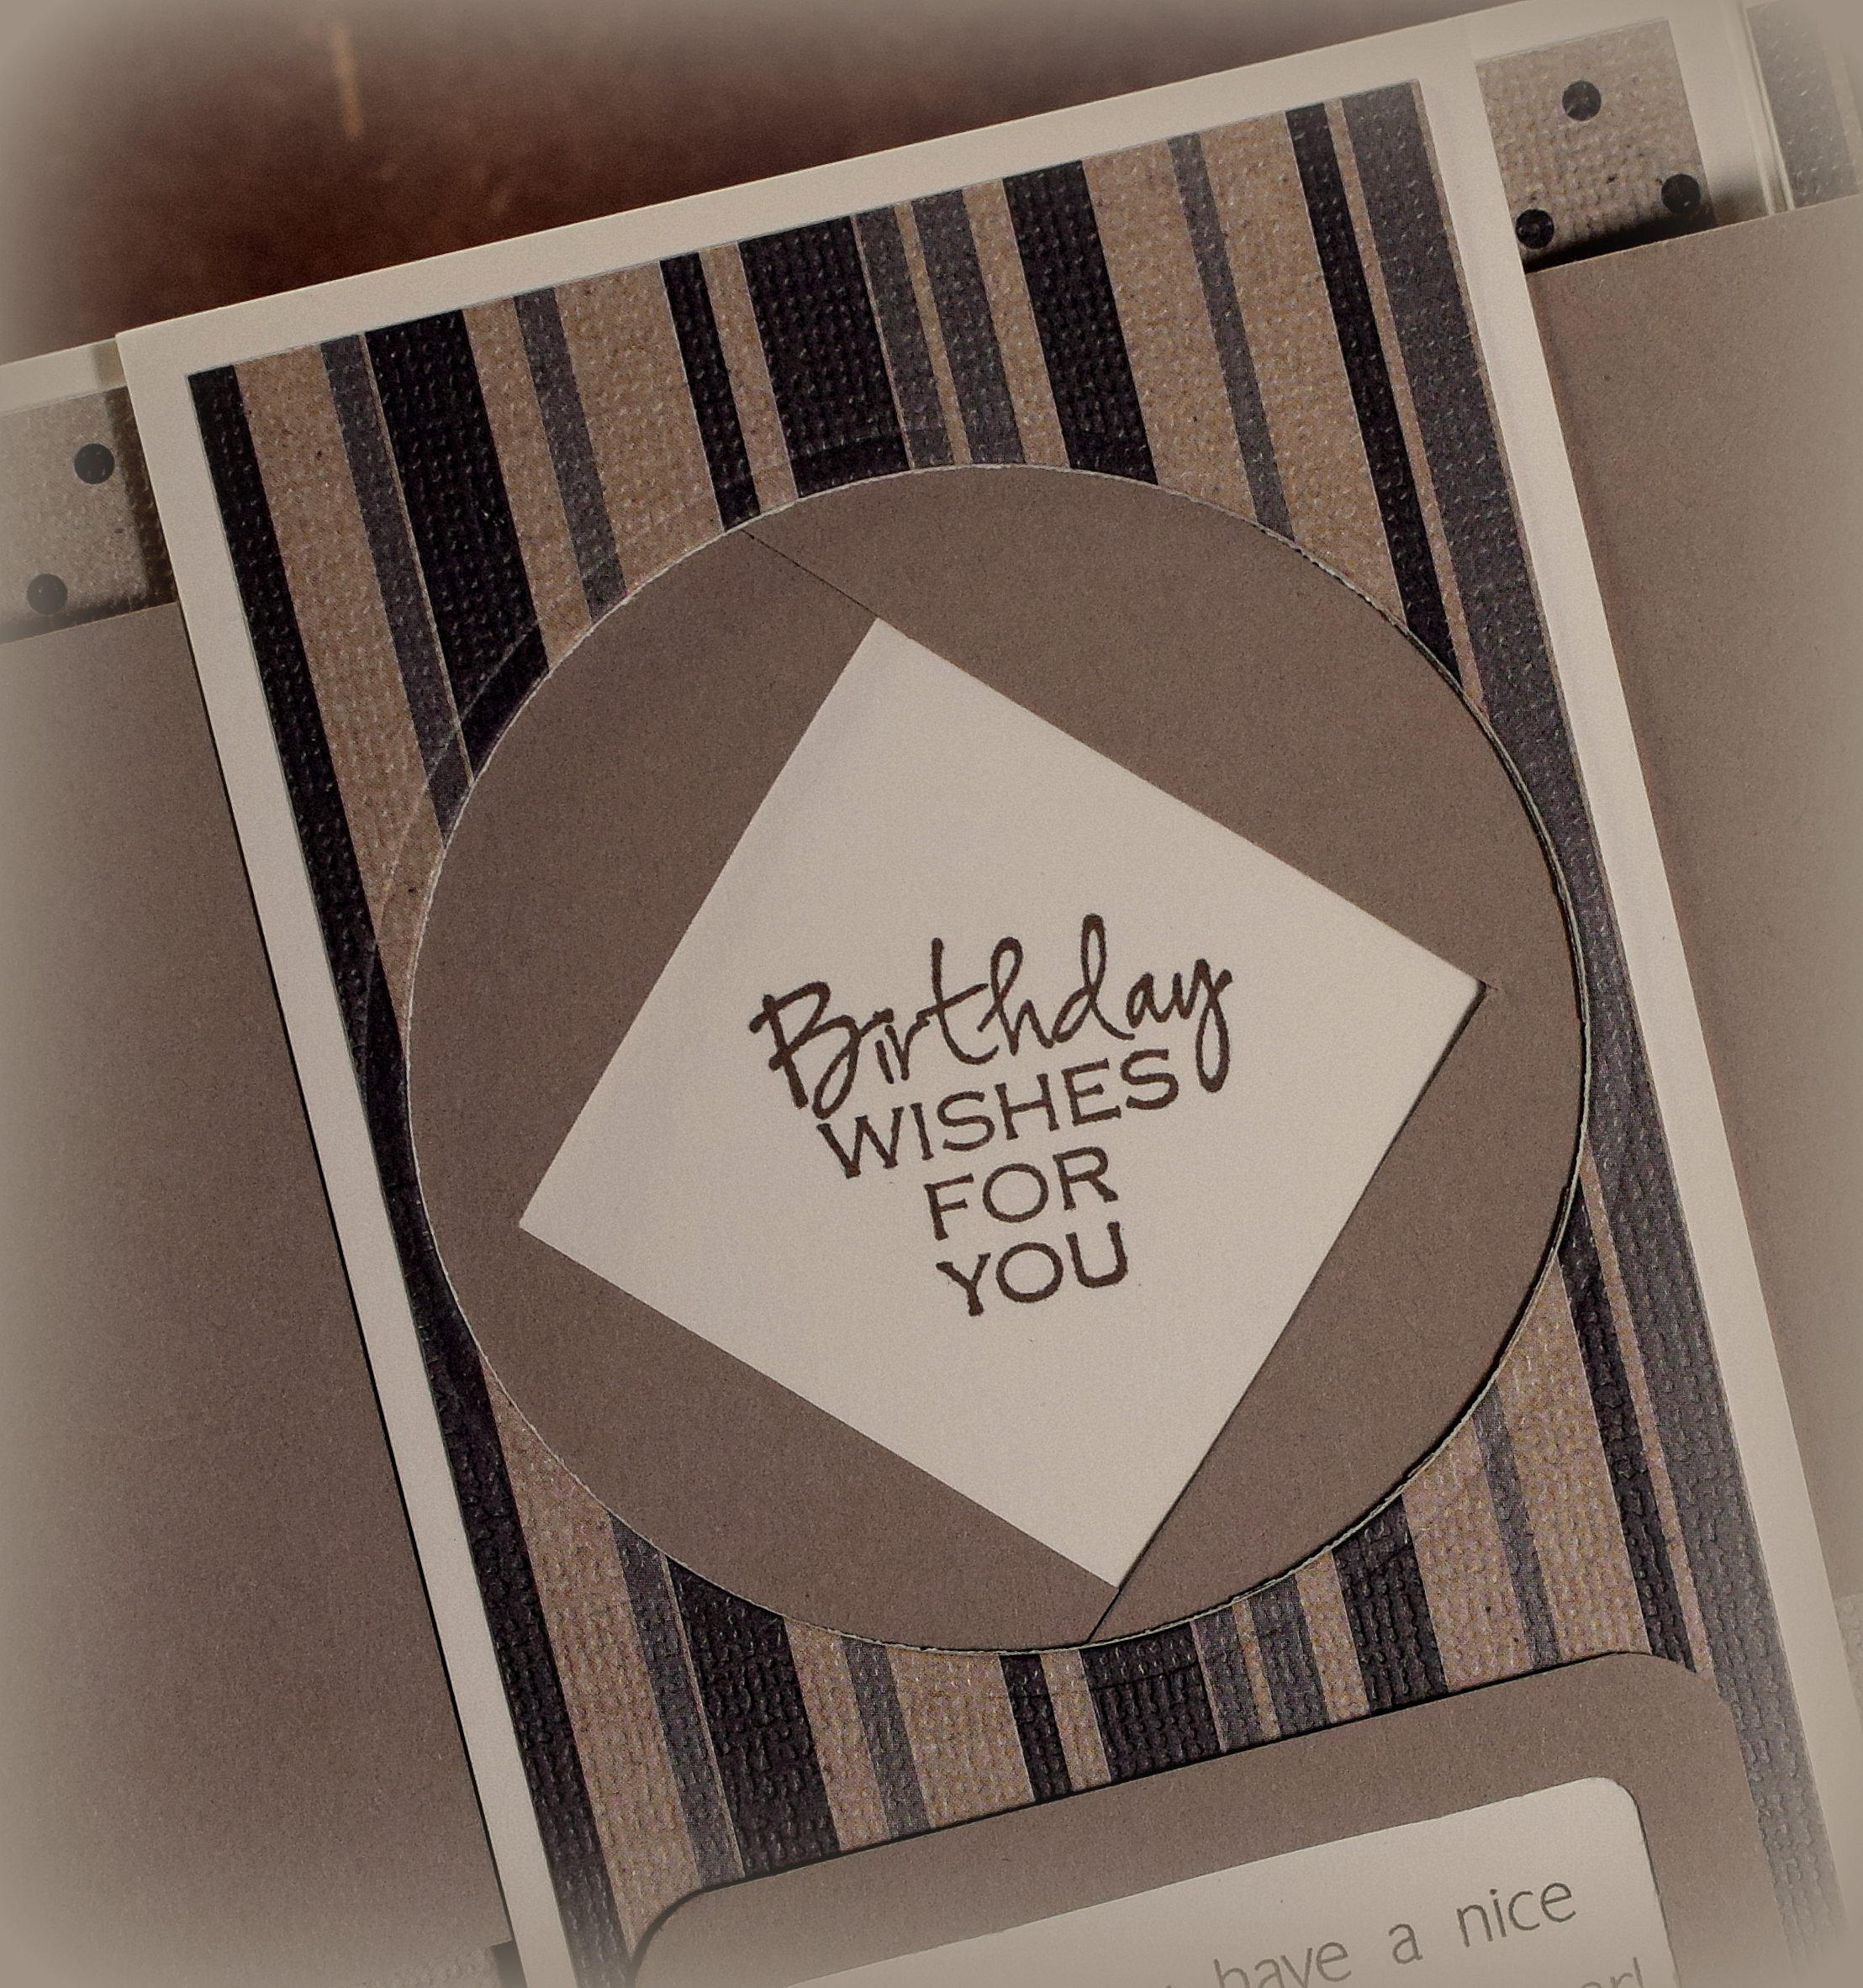
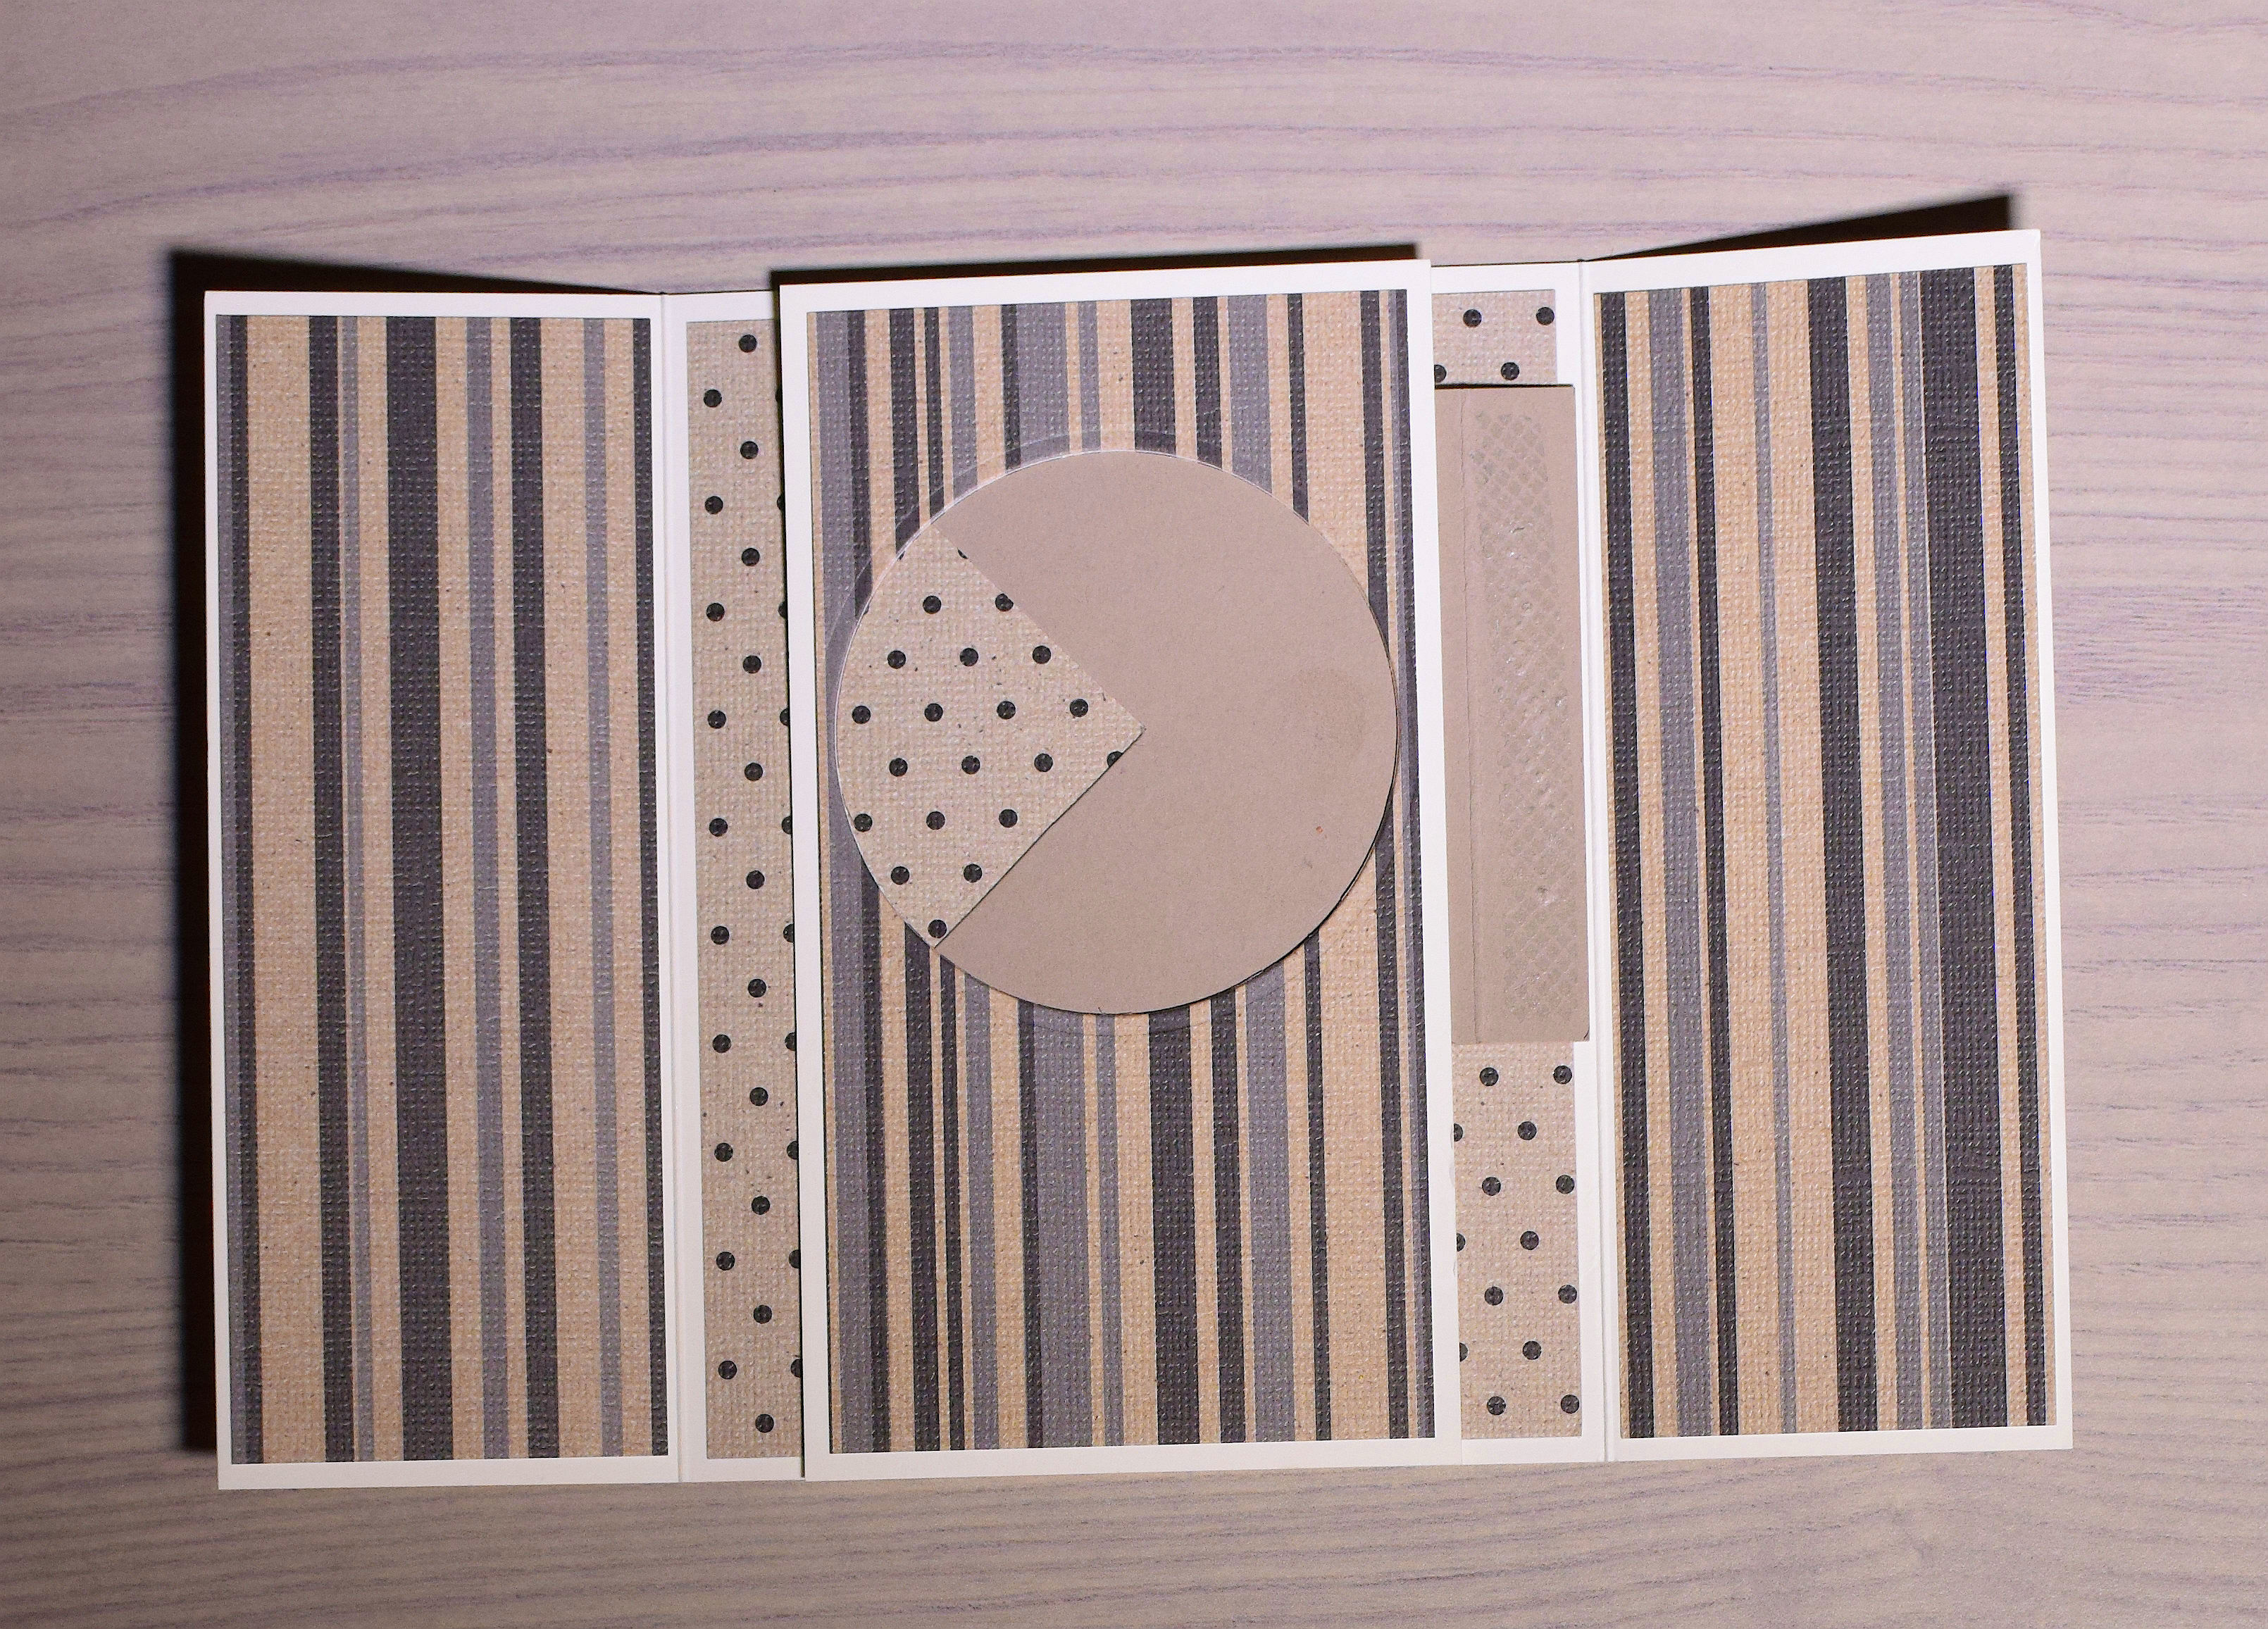
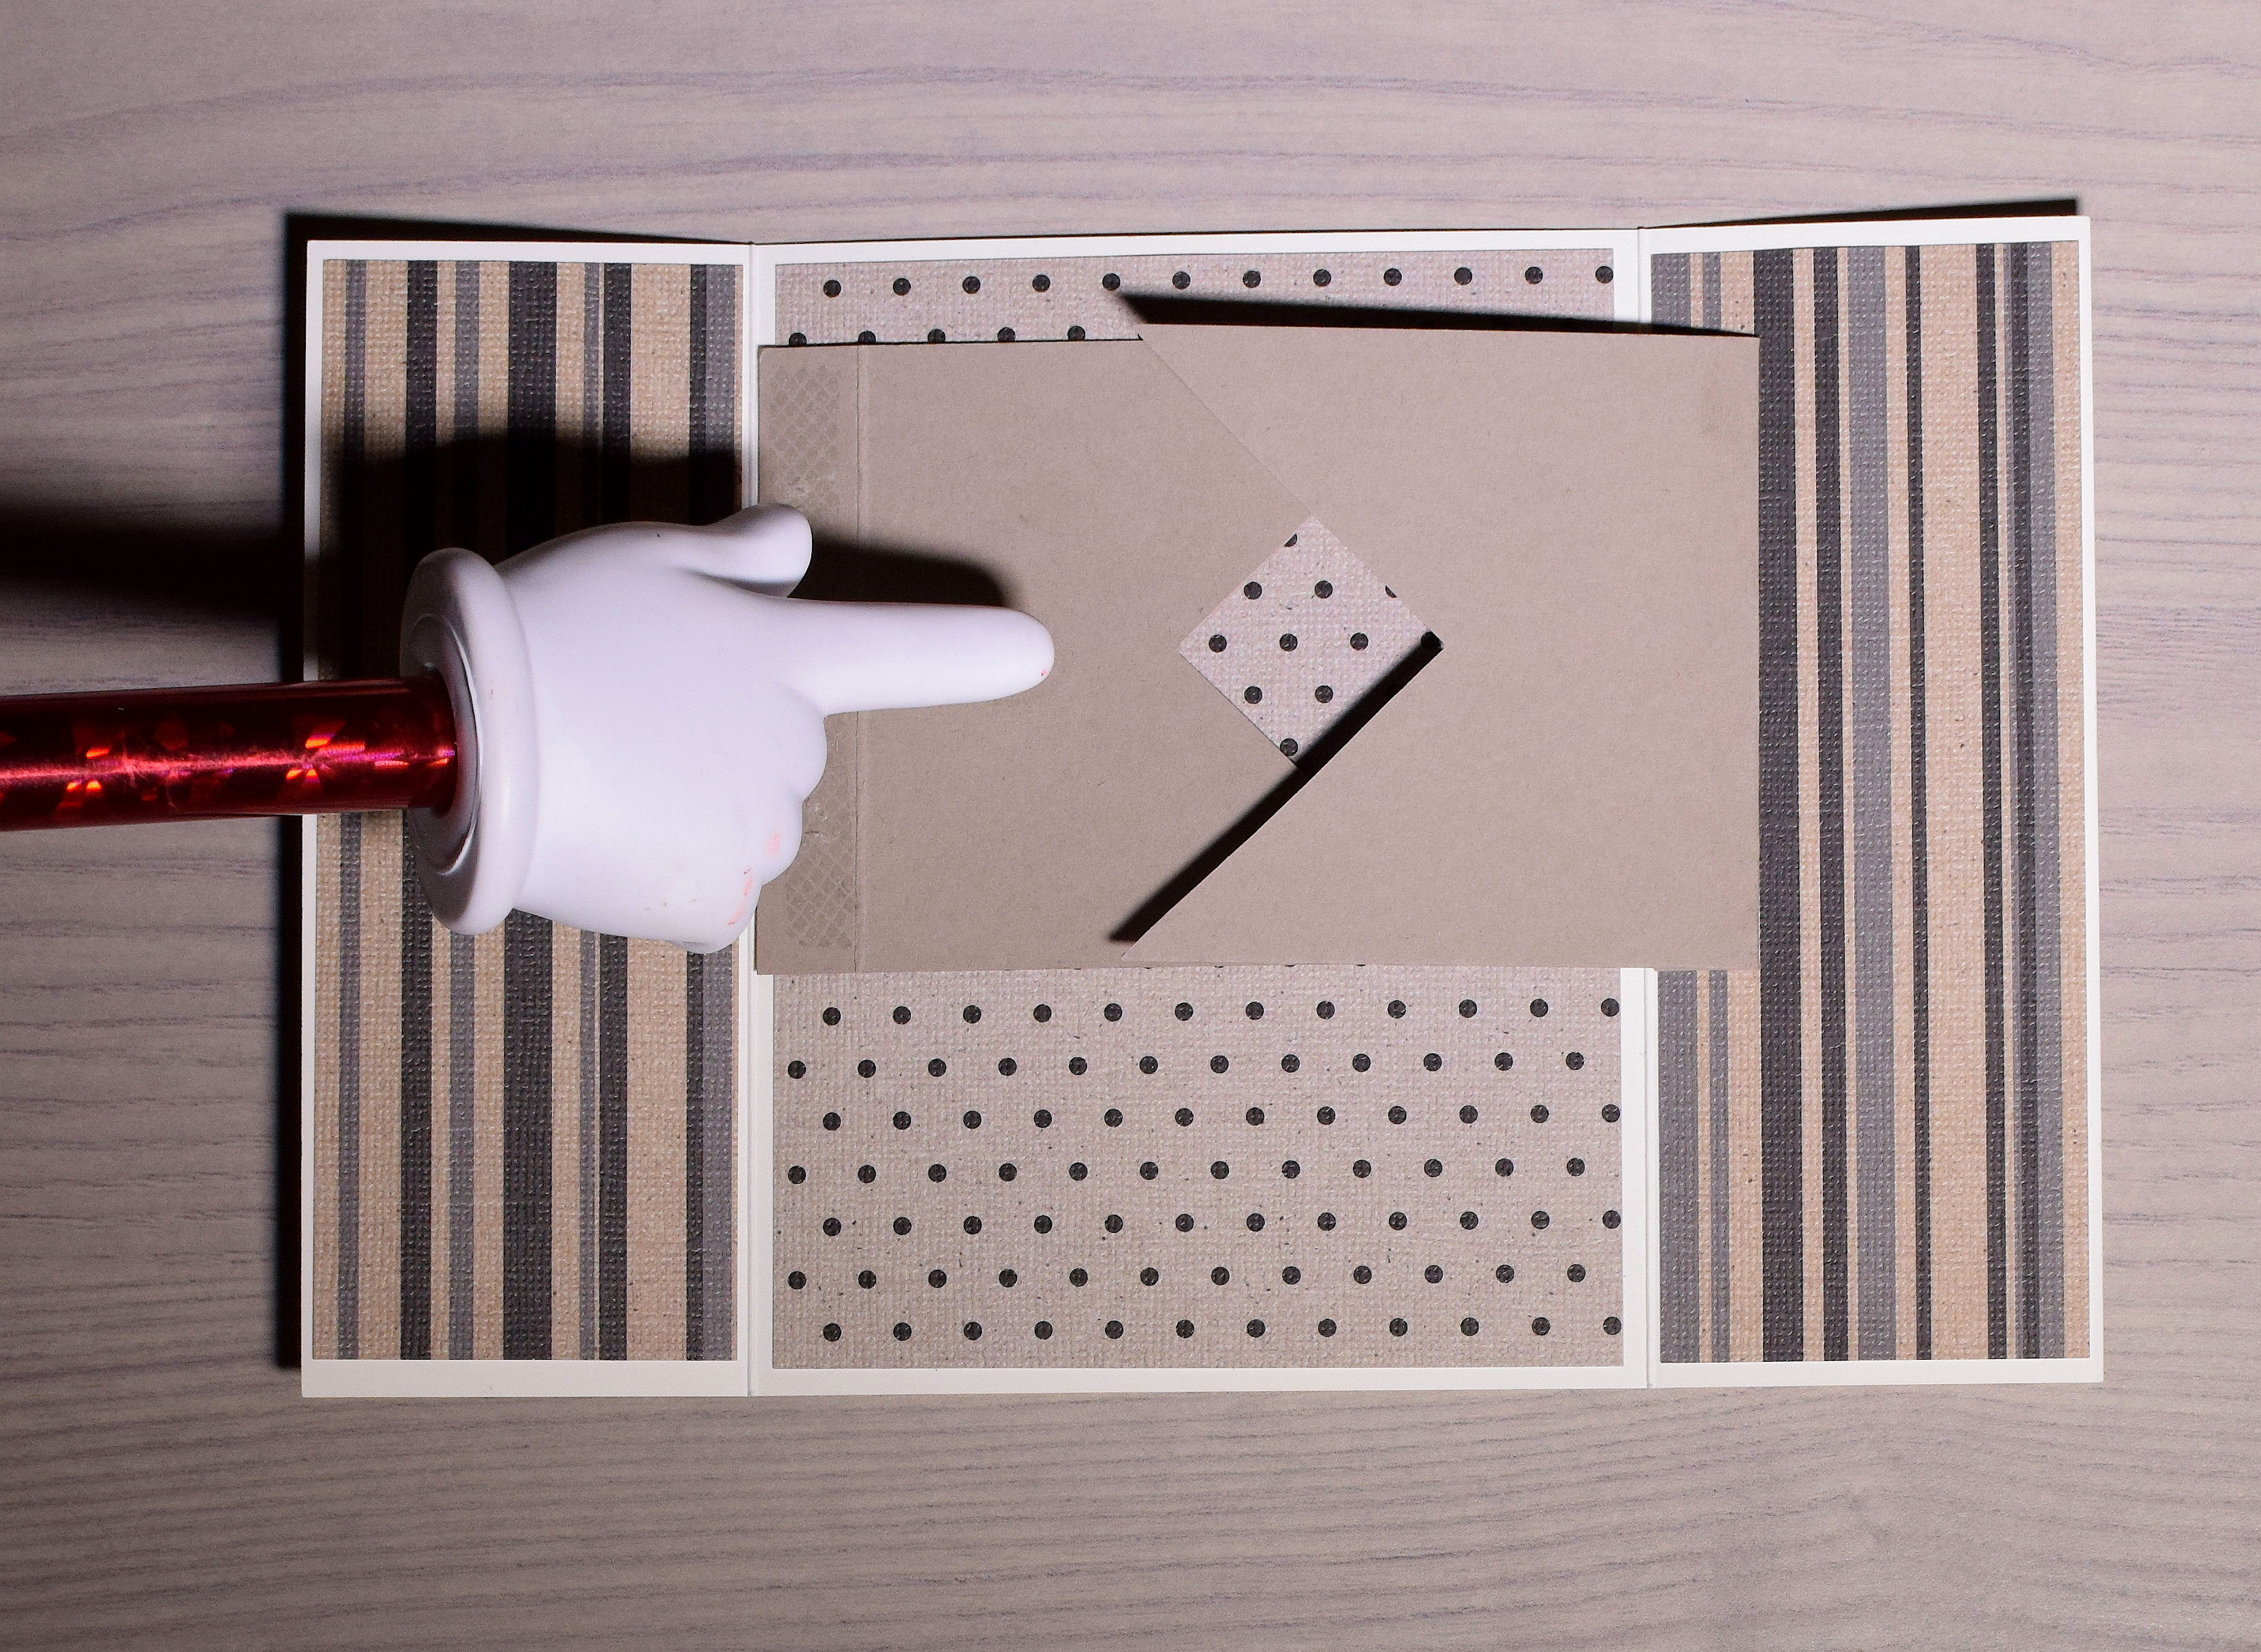
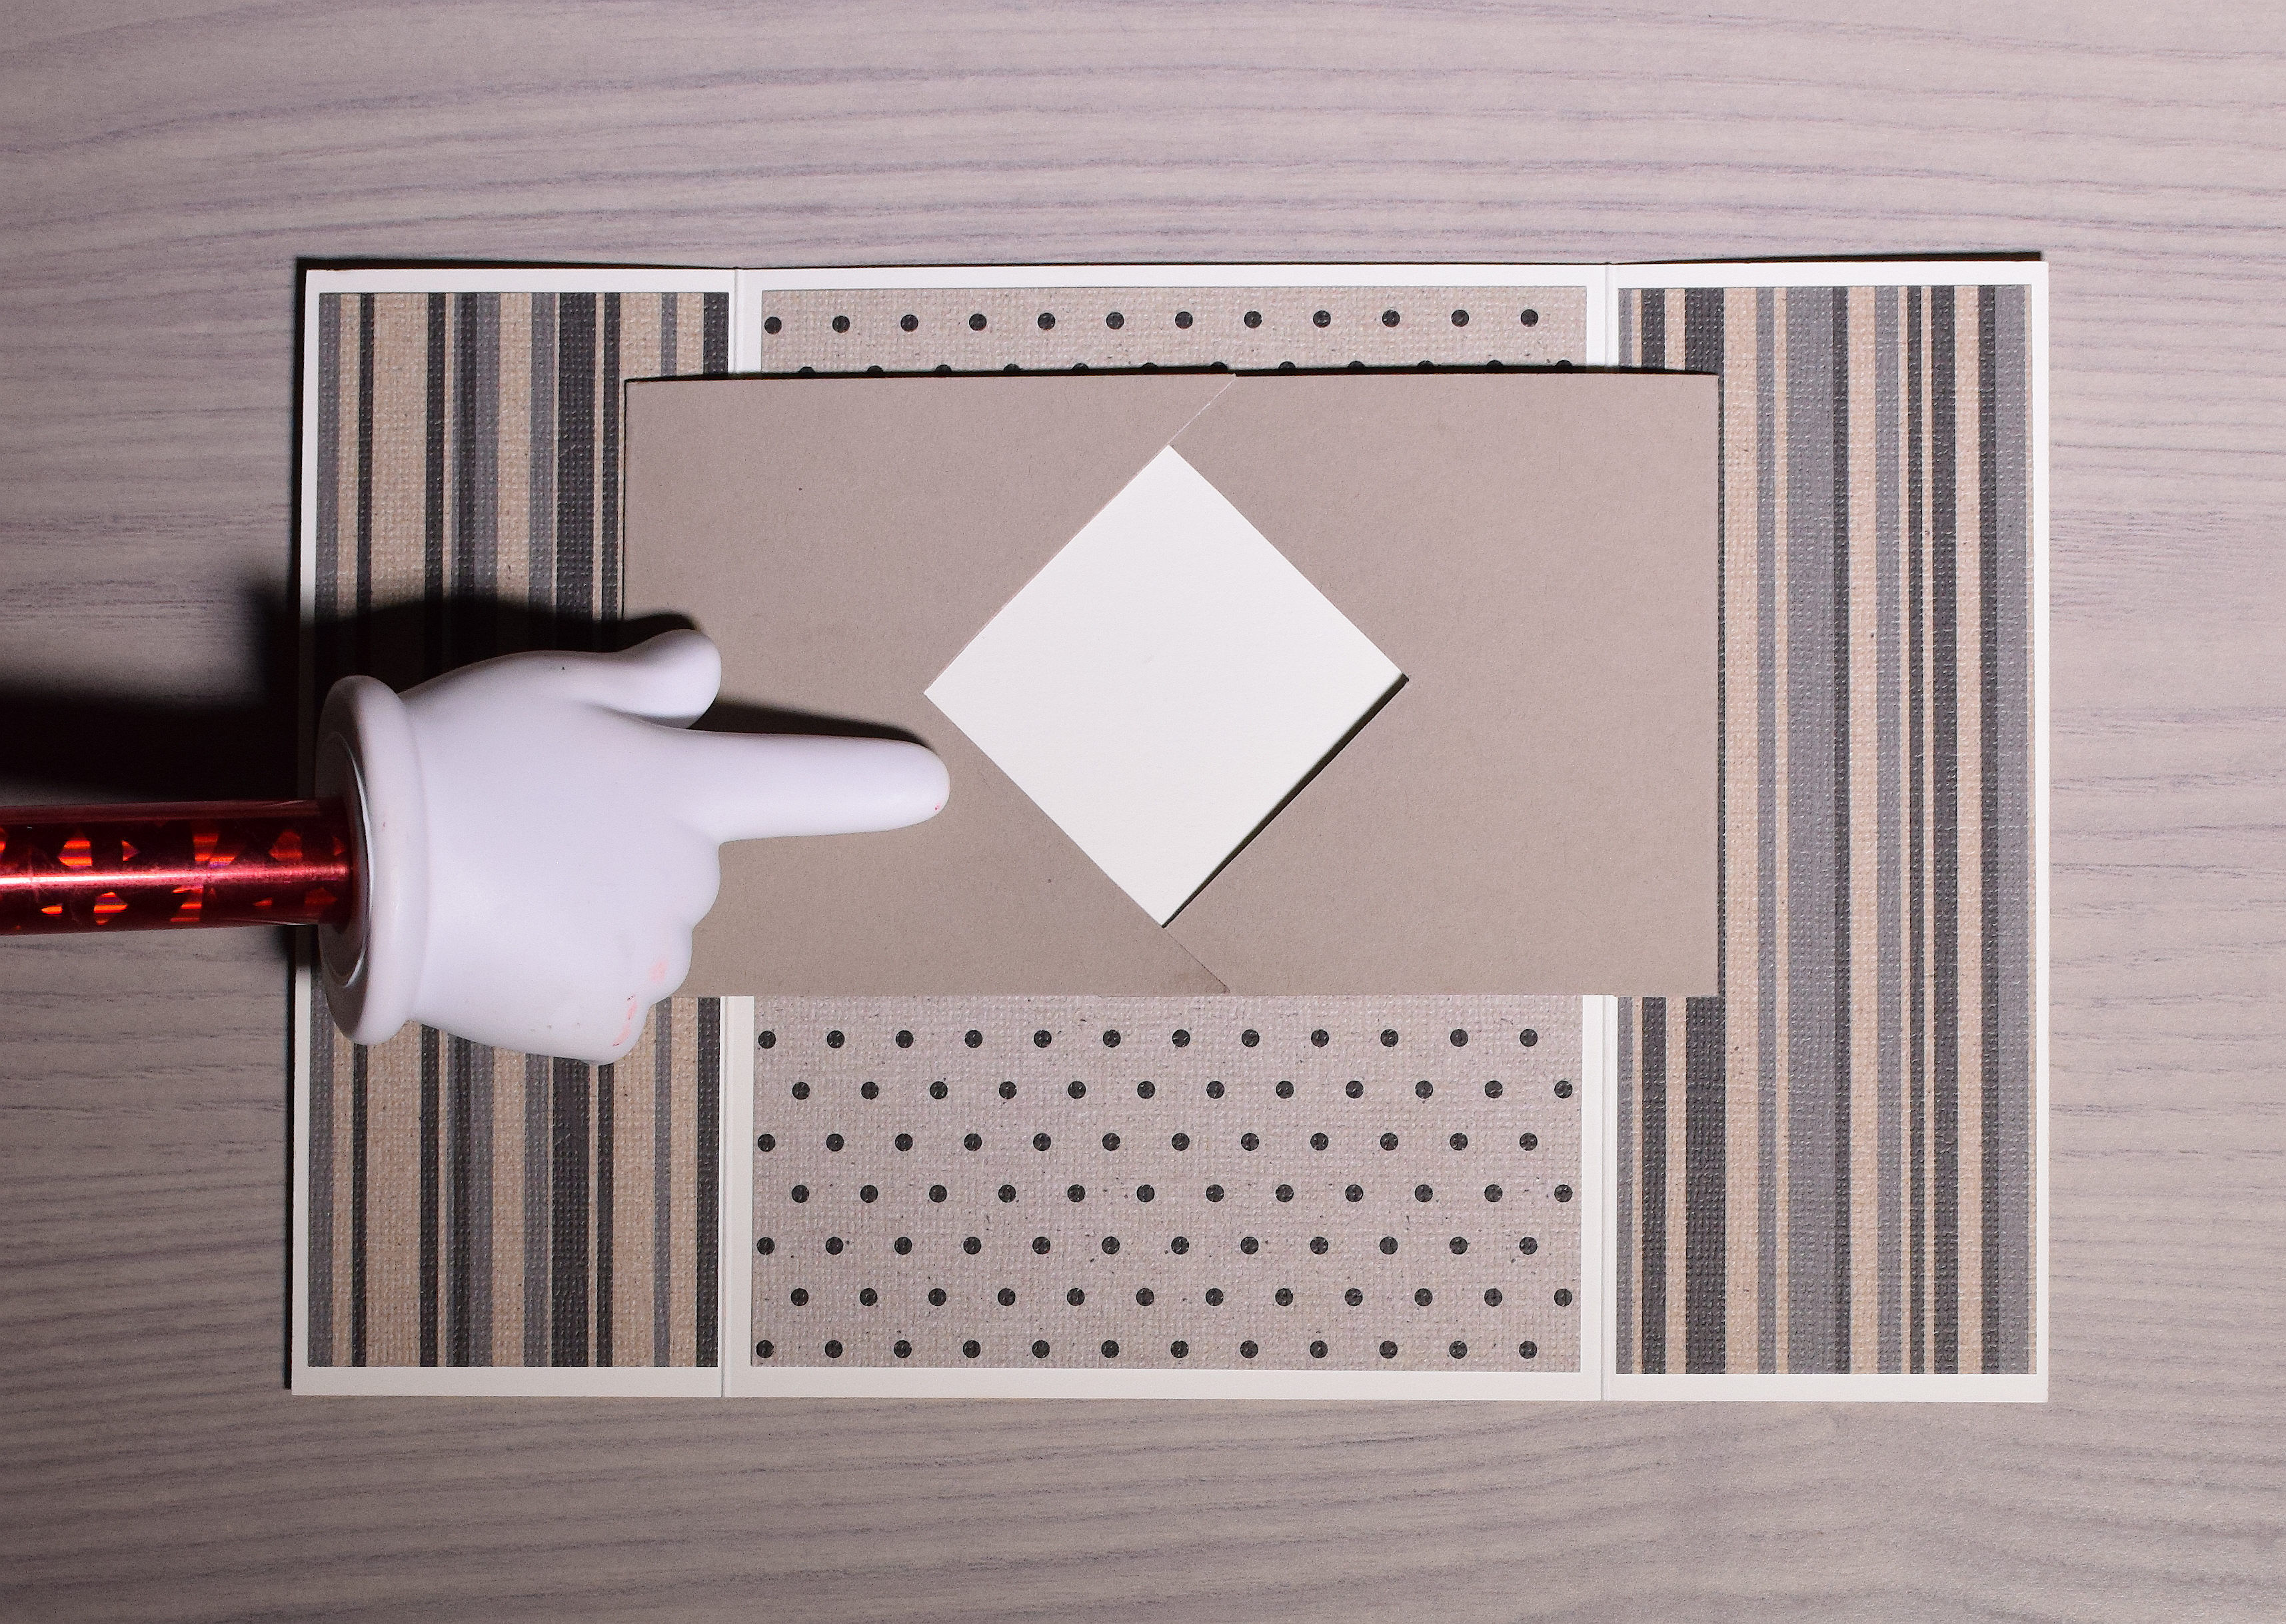
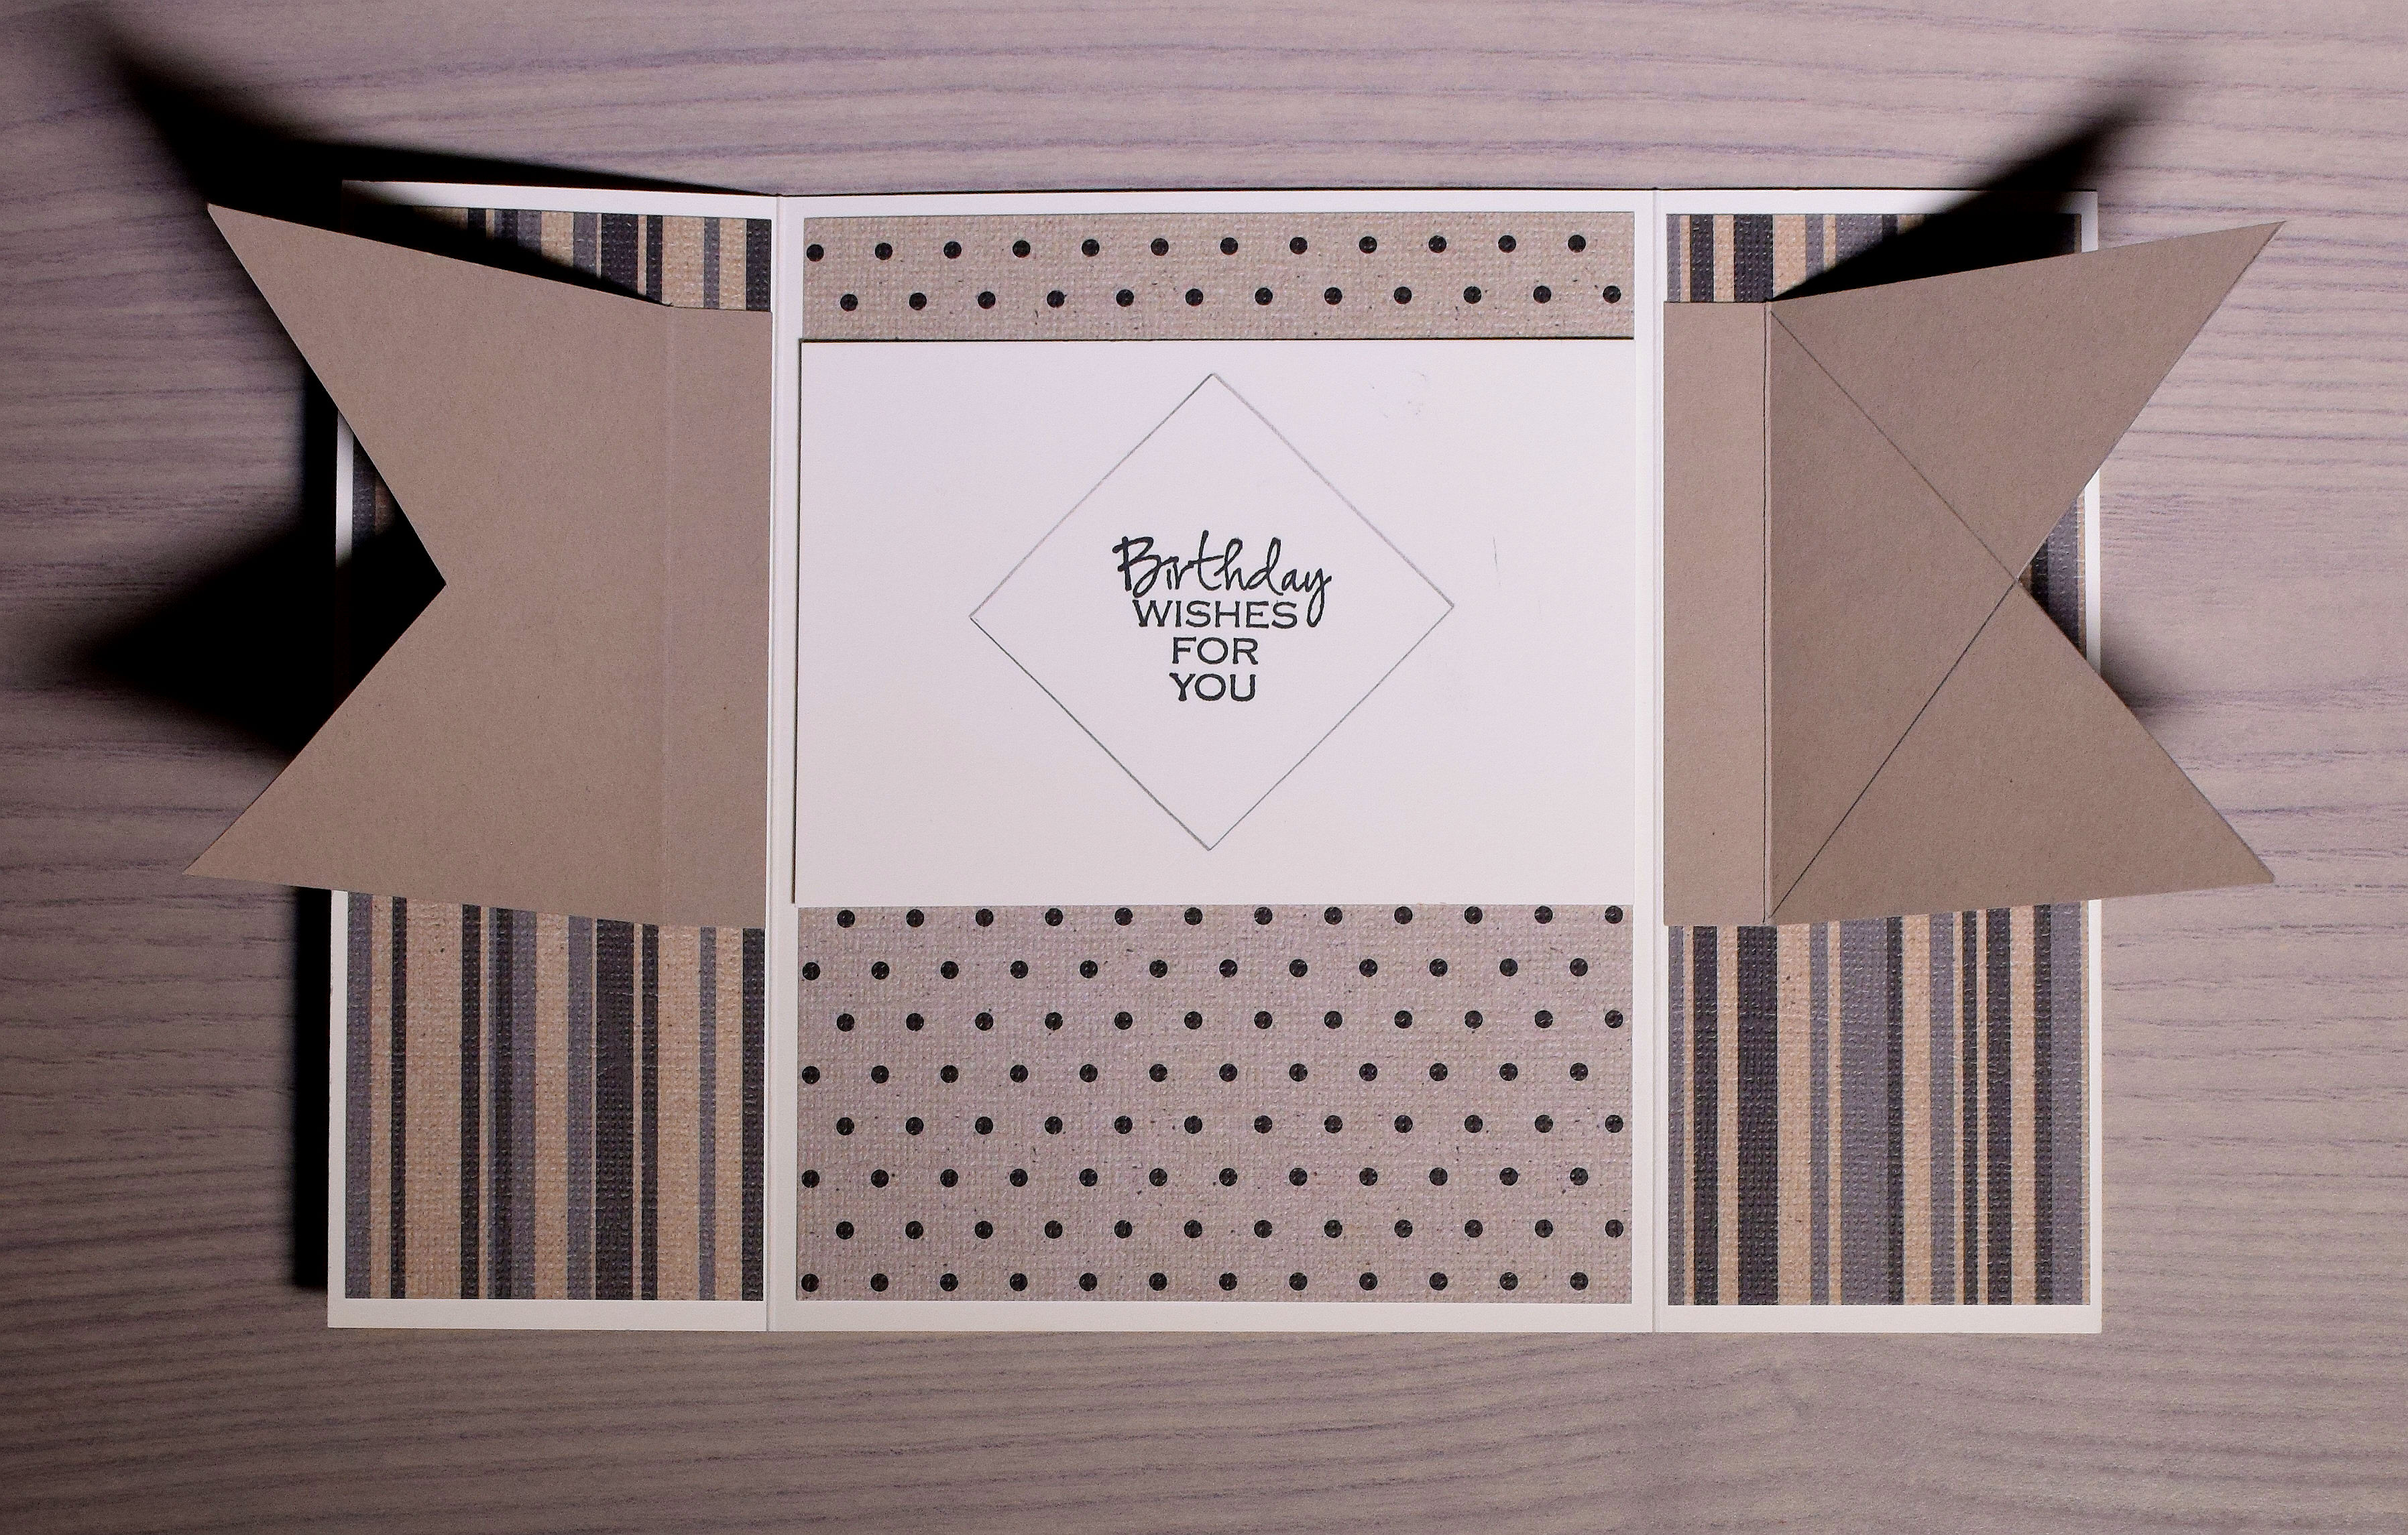
N) If you’d like to add a stamped image image to the inside of the window, you can do that now. Either stamp it directly onto the card base, or stamp it on a separate panel and add it under the slider panels. (Because the panel behind my window was polka dotted, I used a separate panel to do my stamping and just glued it onto the card base behind the sliding panels. I lightly traced the diamond opening with pencil when the flaps were down so I knew how big my stamped image could be and so it was centered. Then I just erased the pencil lines when I was done.)

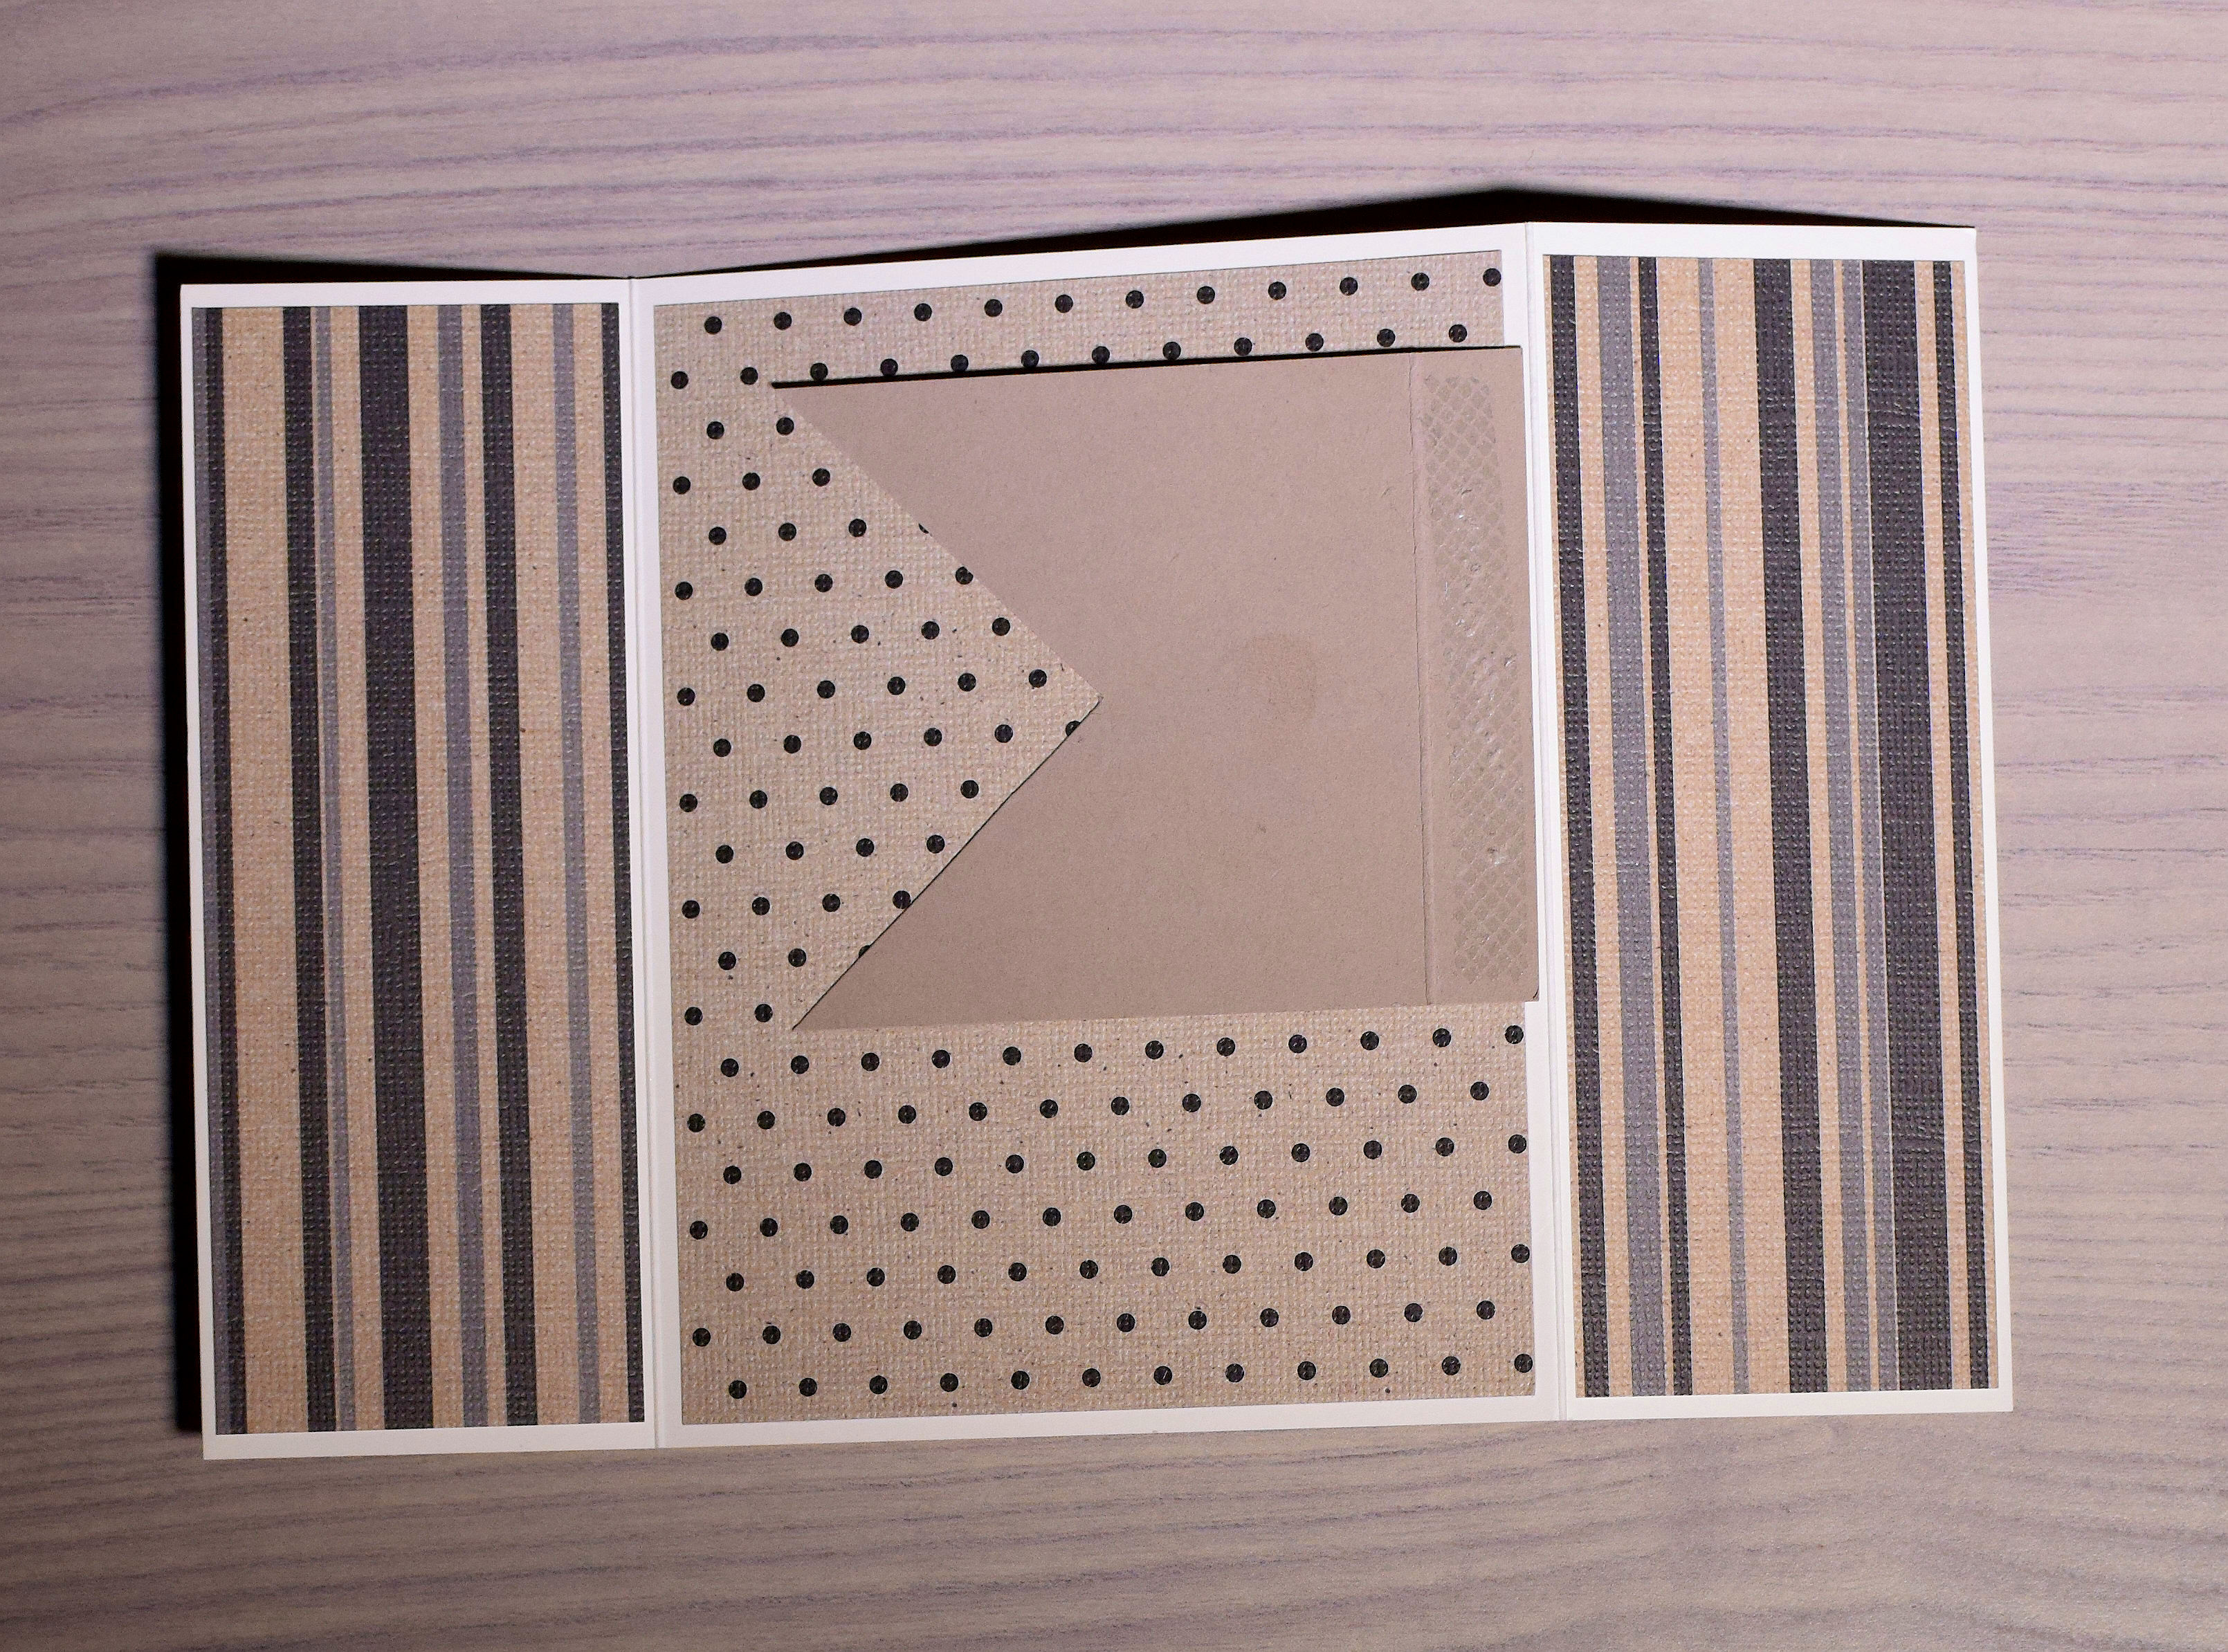
O) Before going on to the last step, make sure your slider panels are closed/positioned properly. First place one side down, and then place the other one over it. Make sure that both points of one panel are either on top or on bottom. They can’t be mixed up.
(Sorry – the right point under the finger is also on top of the left point, as is the bottom point.)
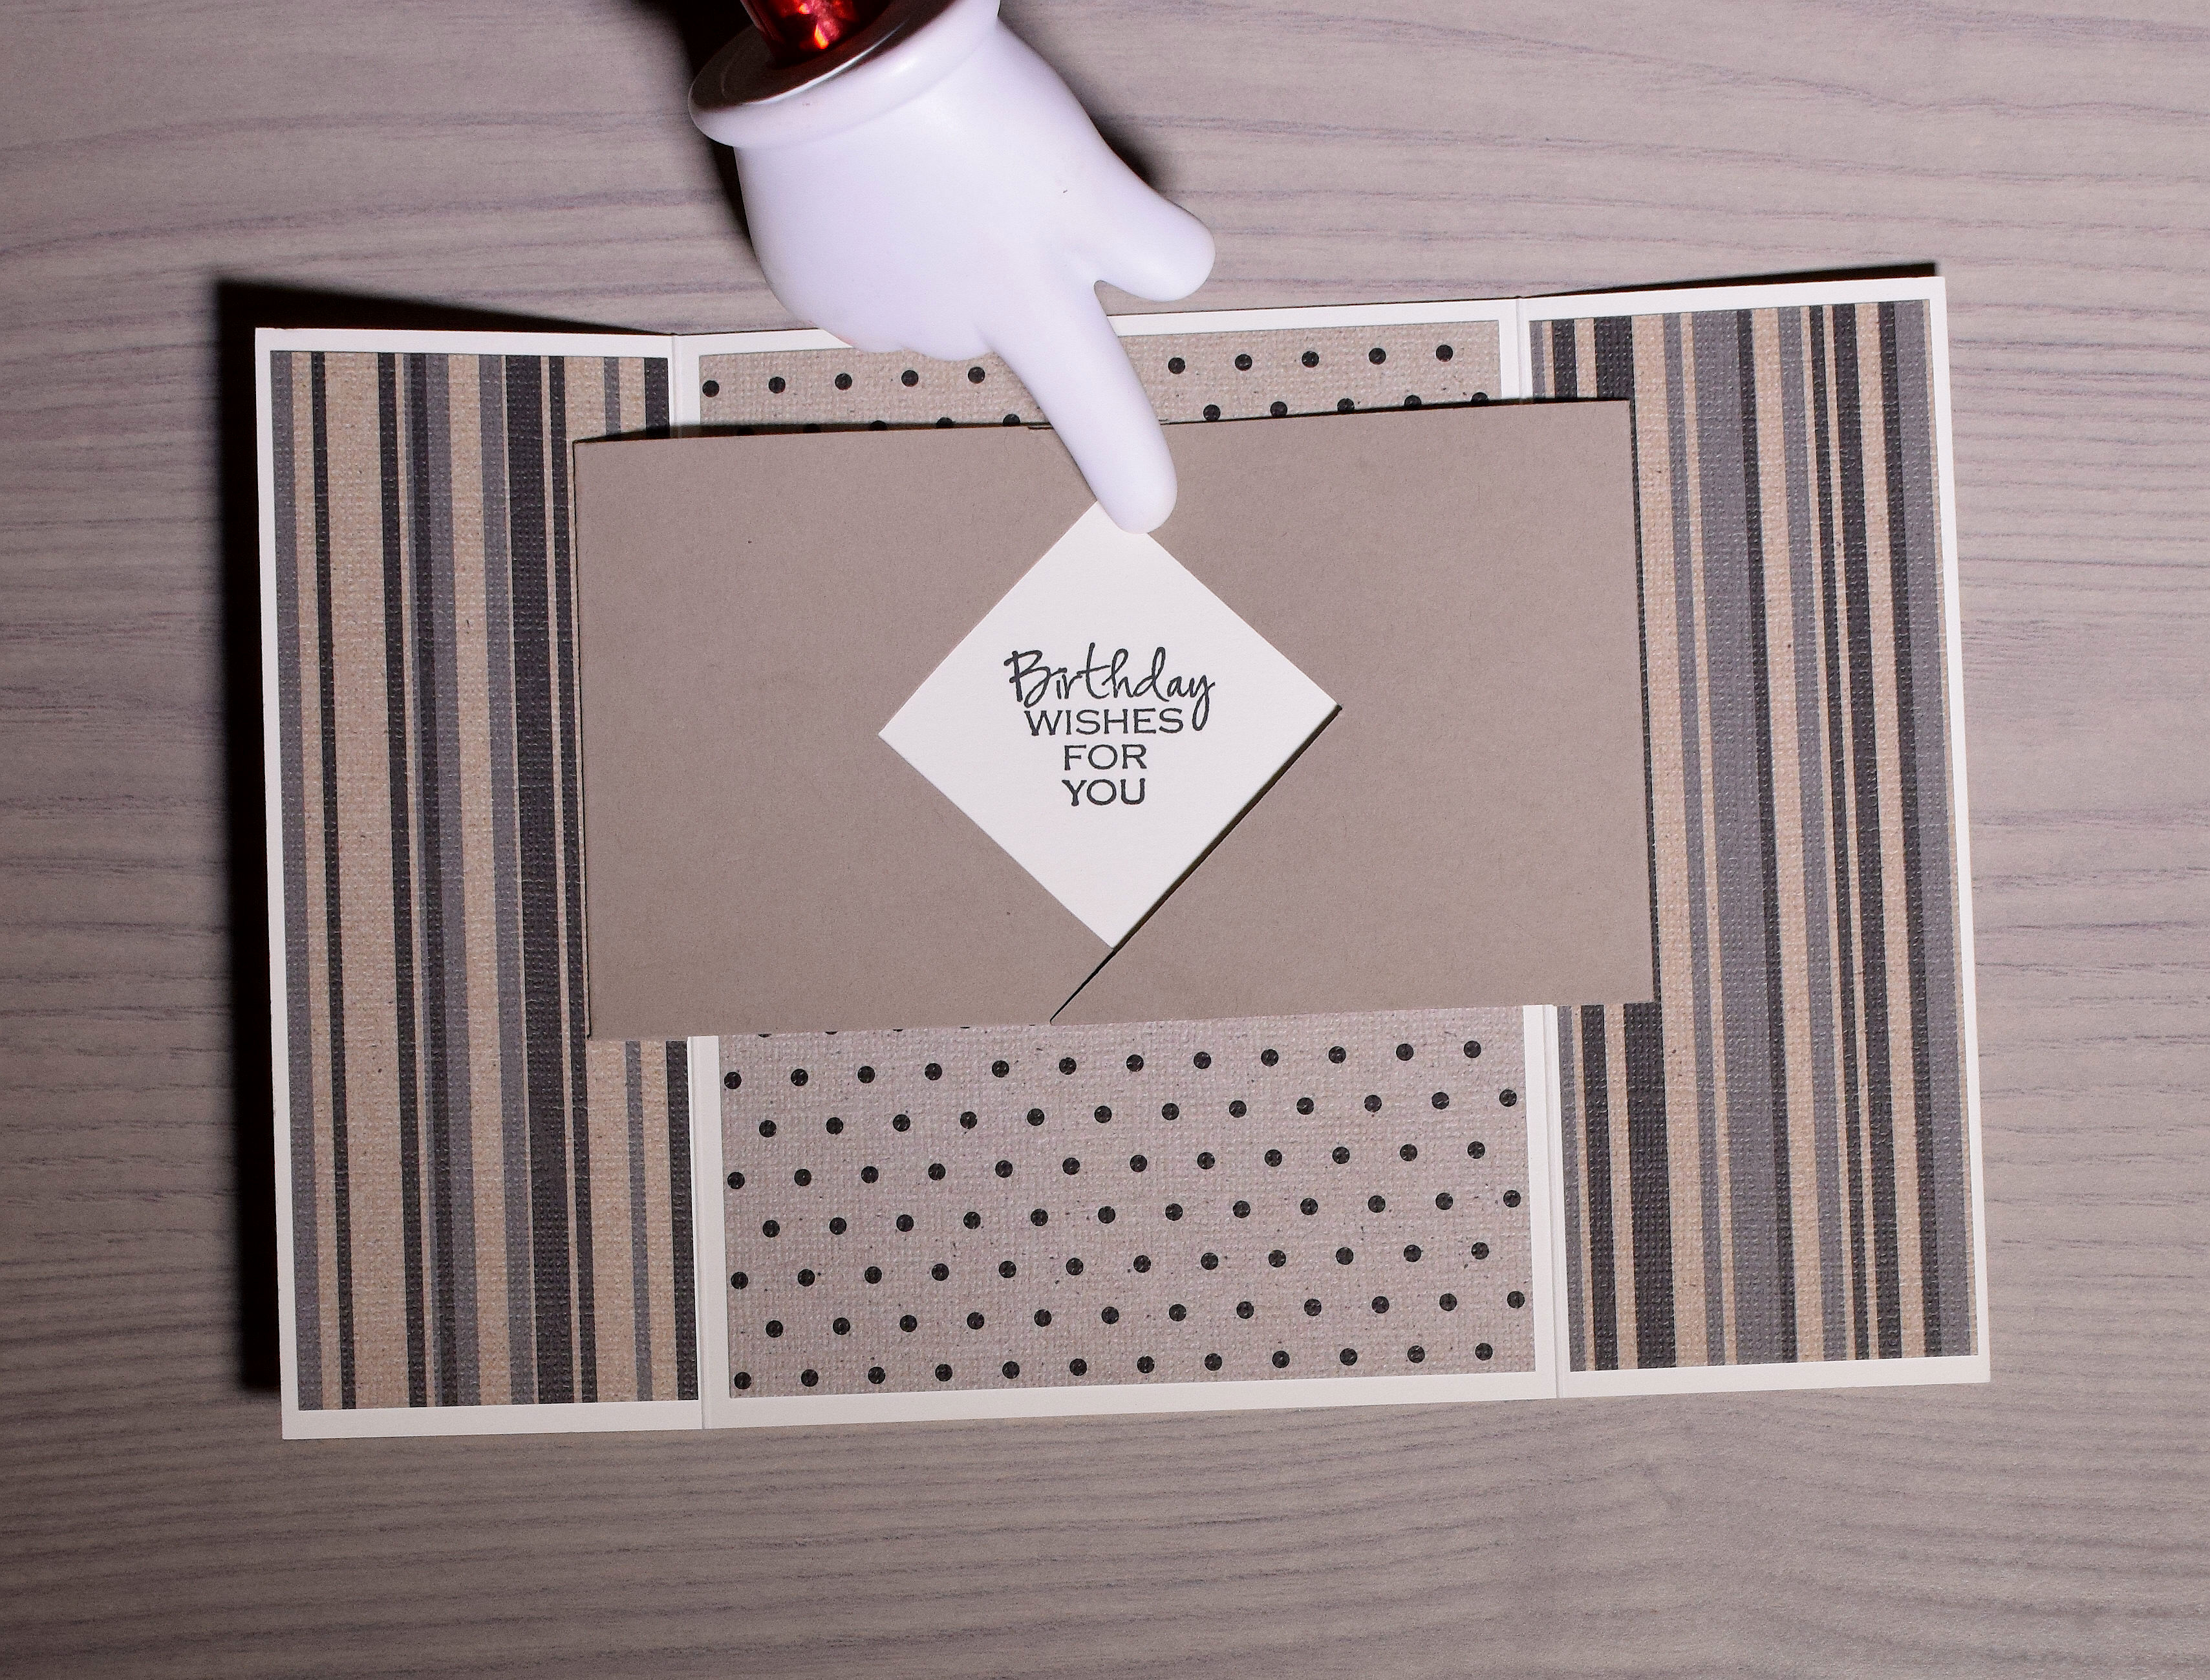
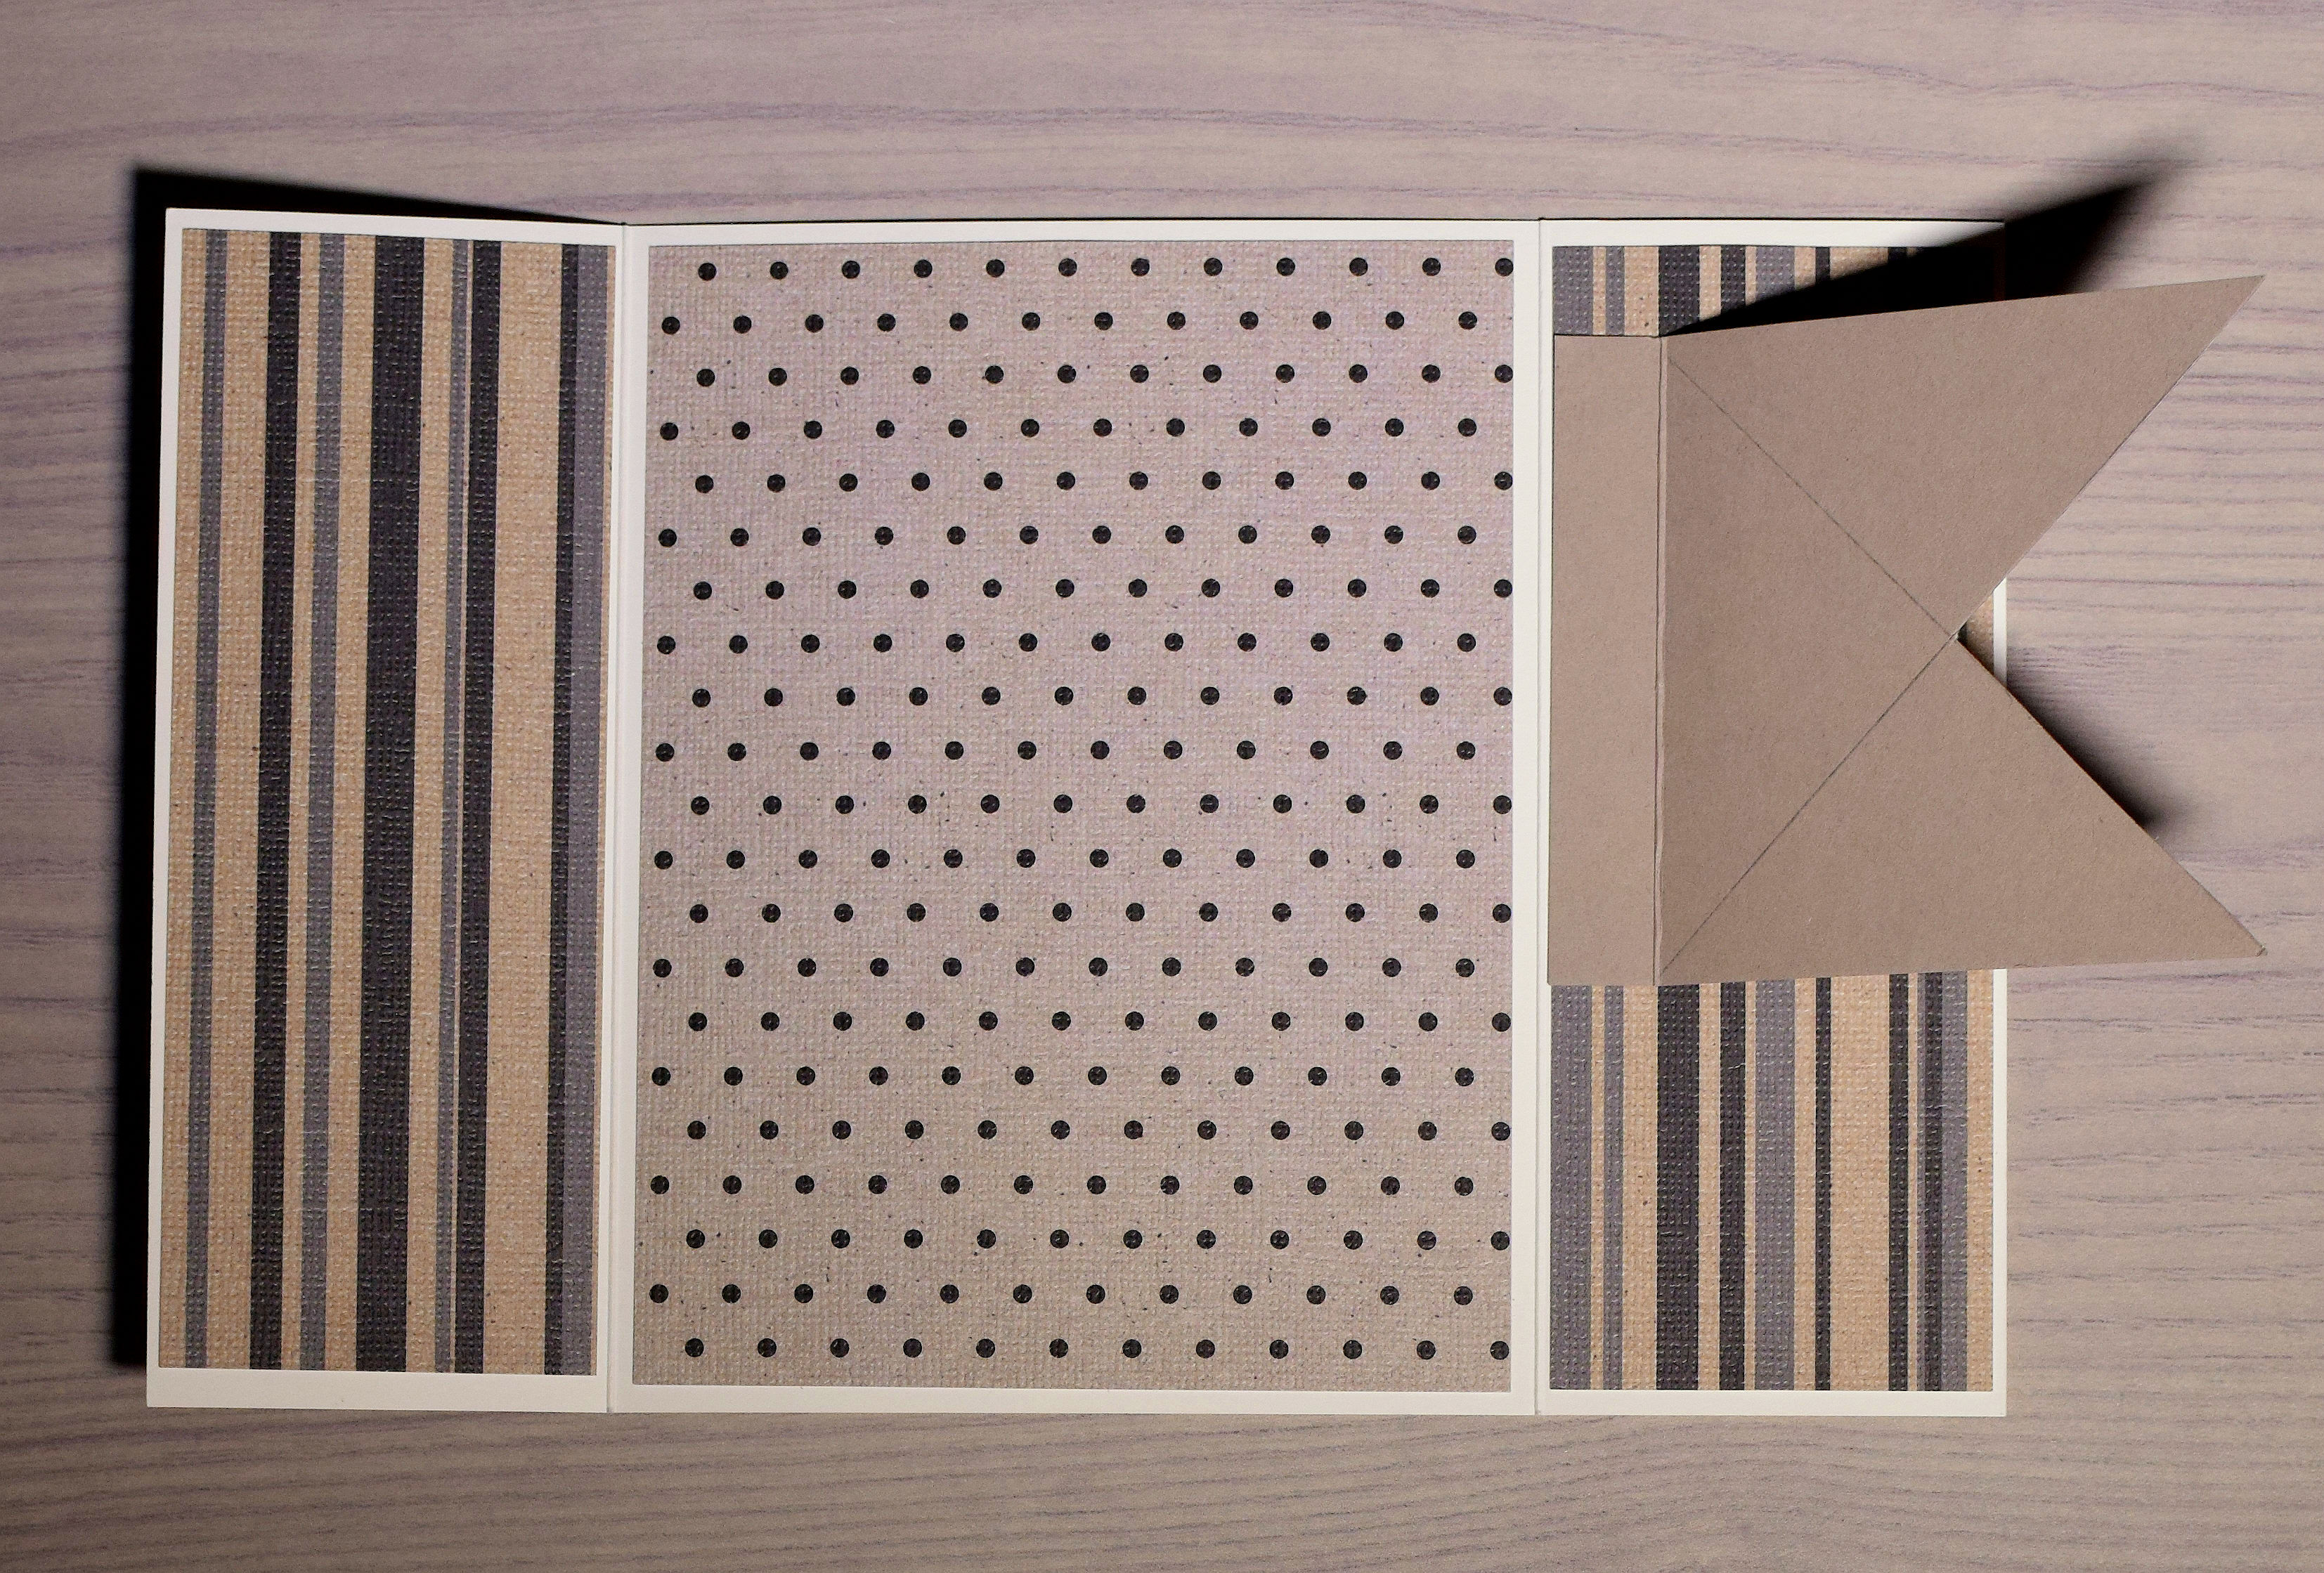
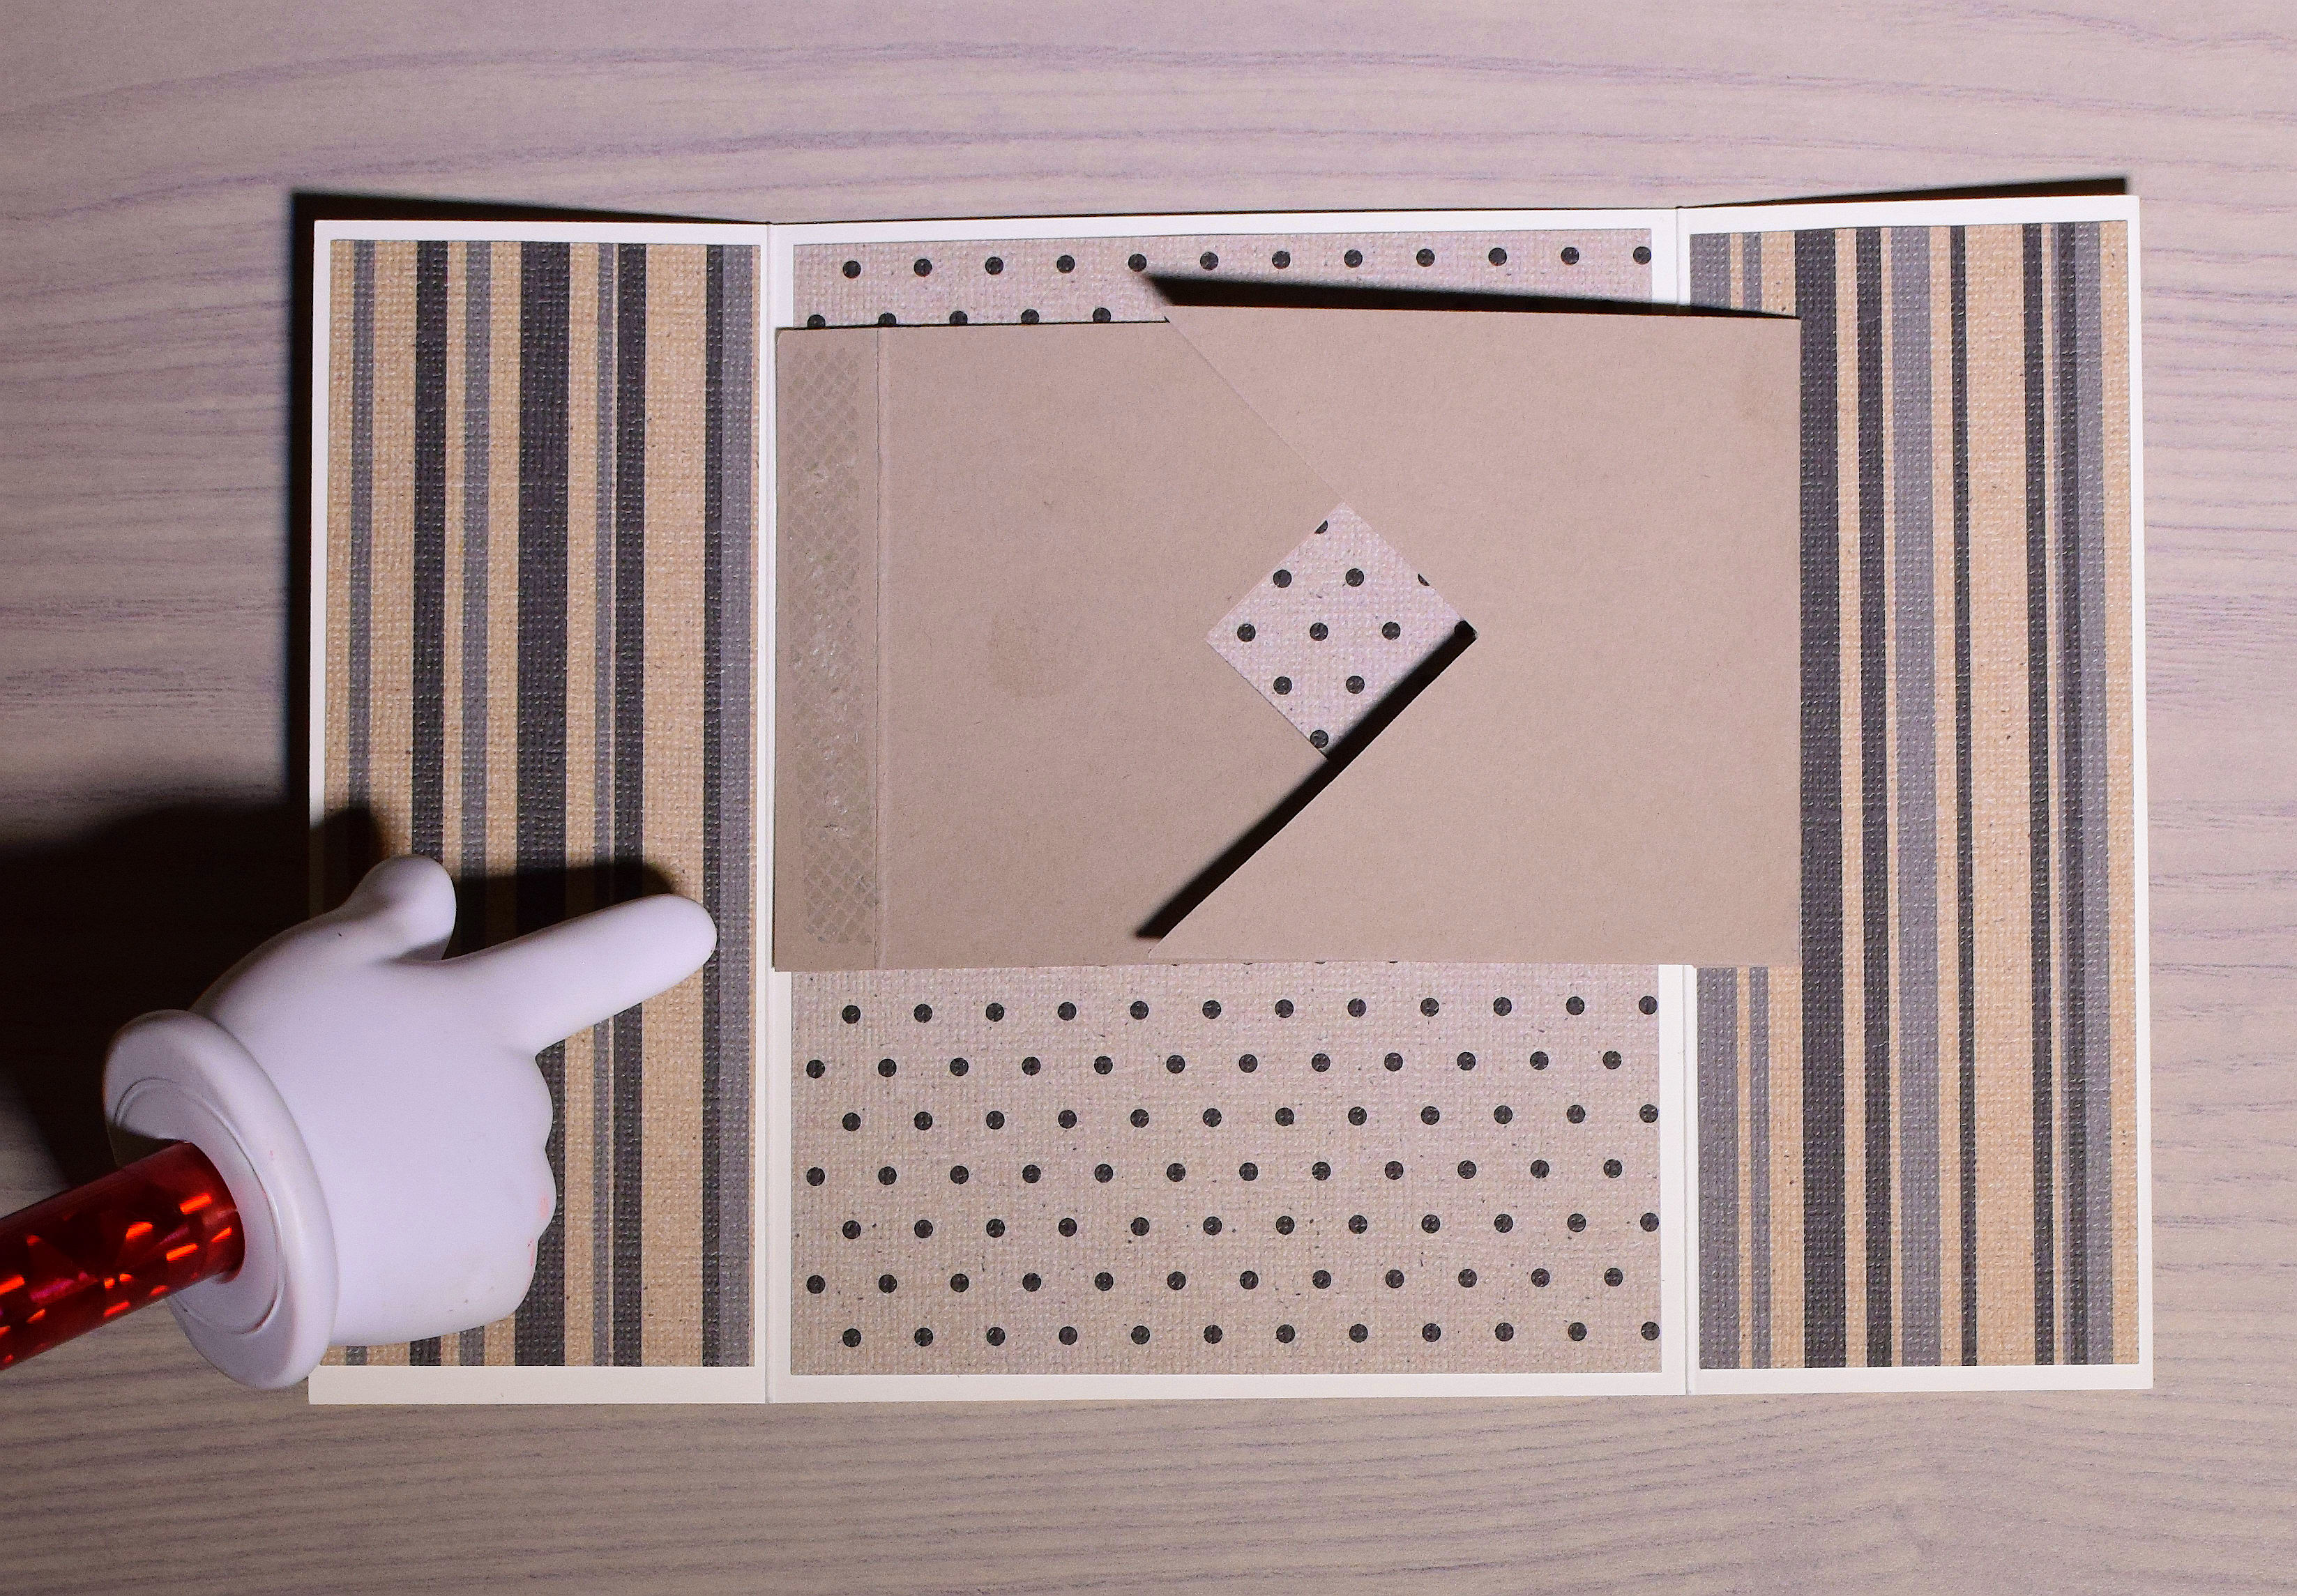
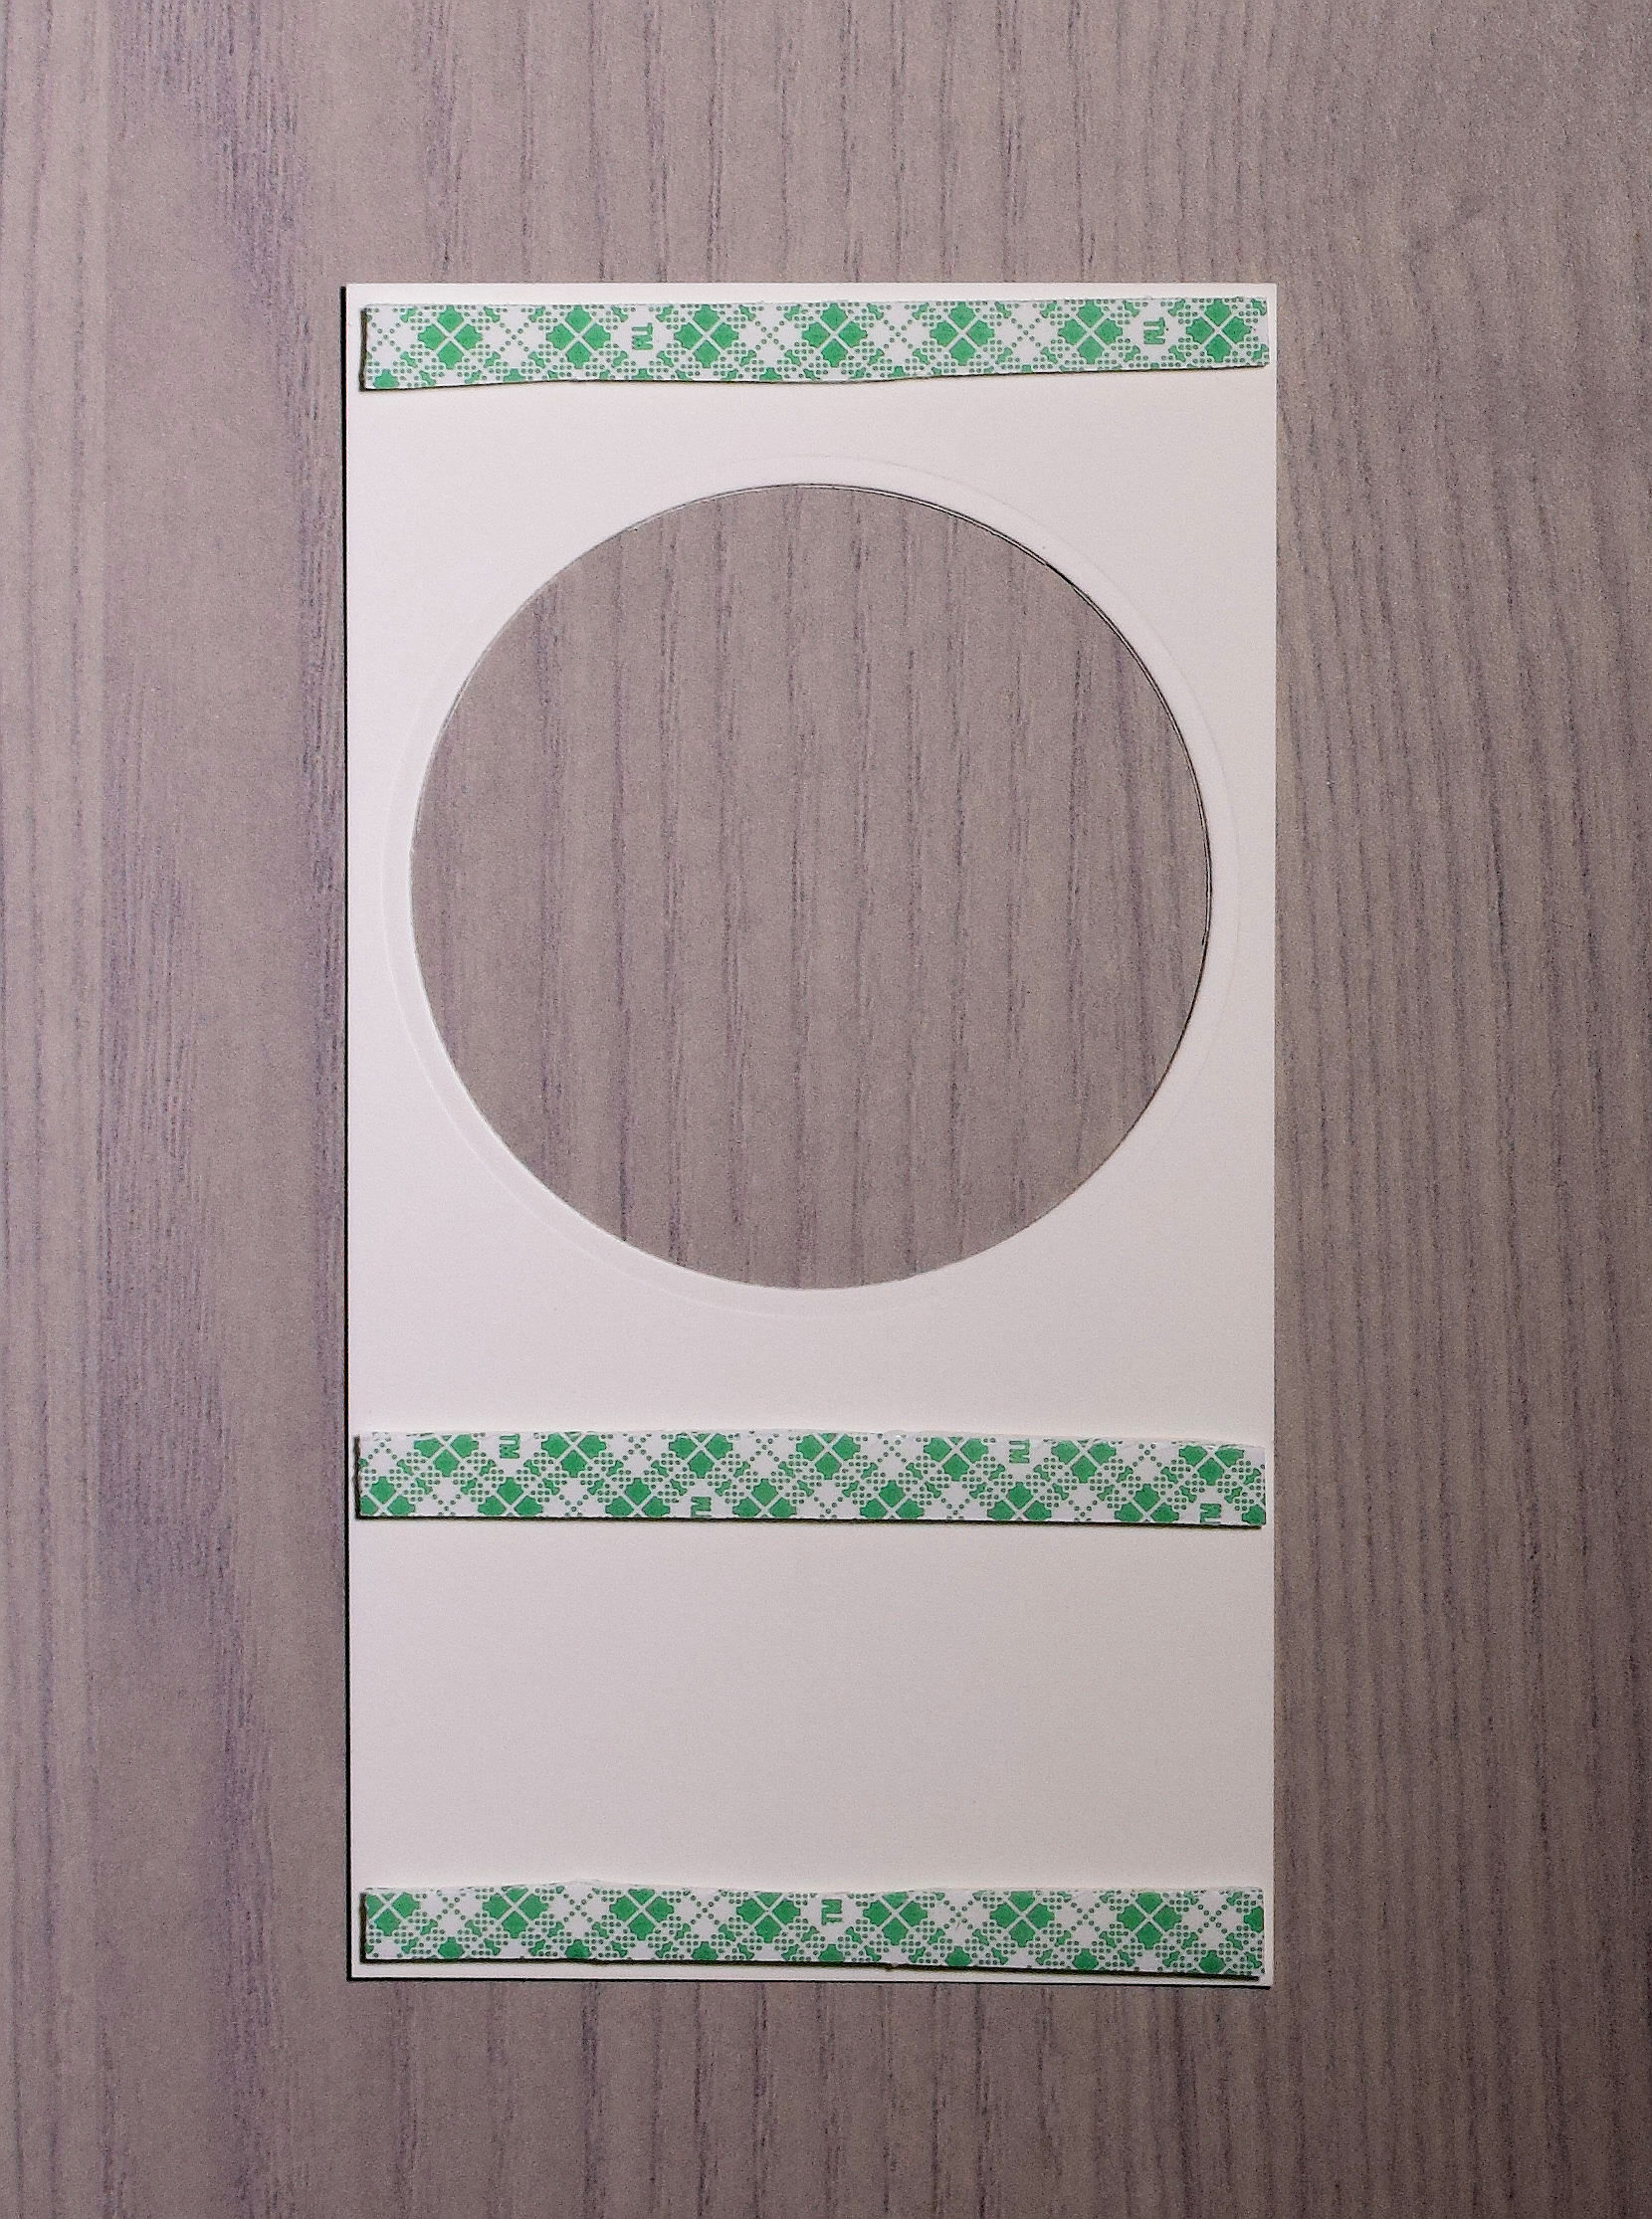
P) The final step is to adhere the center panel with the cut-out circle over the stamped image and sliding panels. Add a strip of foam tape (or pop dots) along the top making sure it will be above the sliding panels, further down making sure it will be below the sliding panels, and along the bottom edge. Make sure you don’t put adhesive over the sliding panels or they will not be able to move. (You can use plain adhesive or glue if you don’t have foam tape, but the sliding panels move easier with the extra space.)
(Notice the green foam backing is above and below the slide panels.)

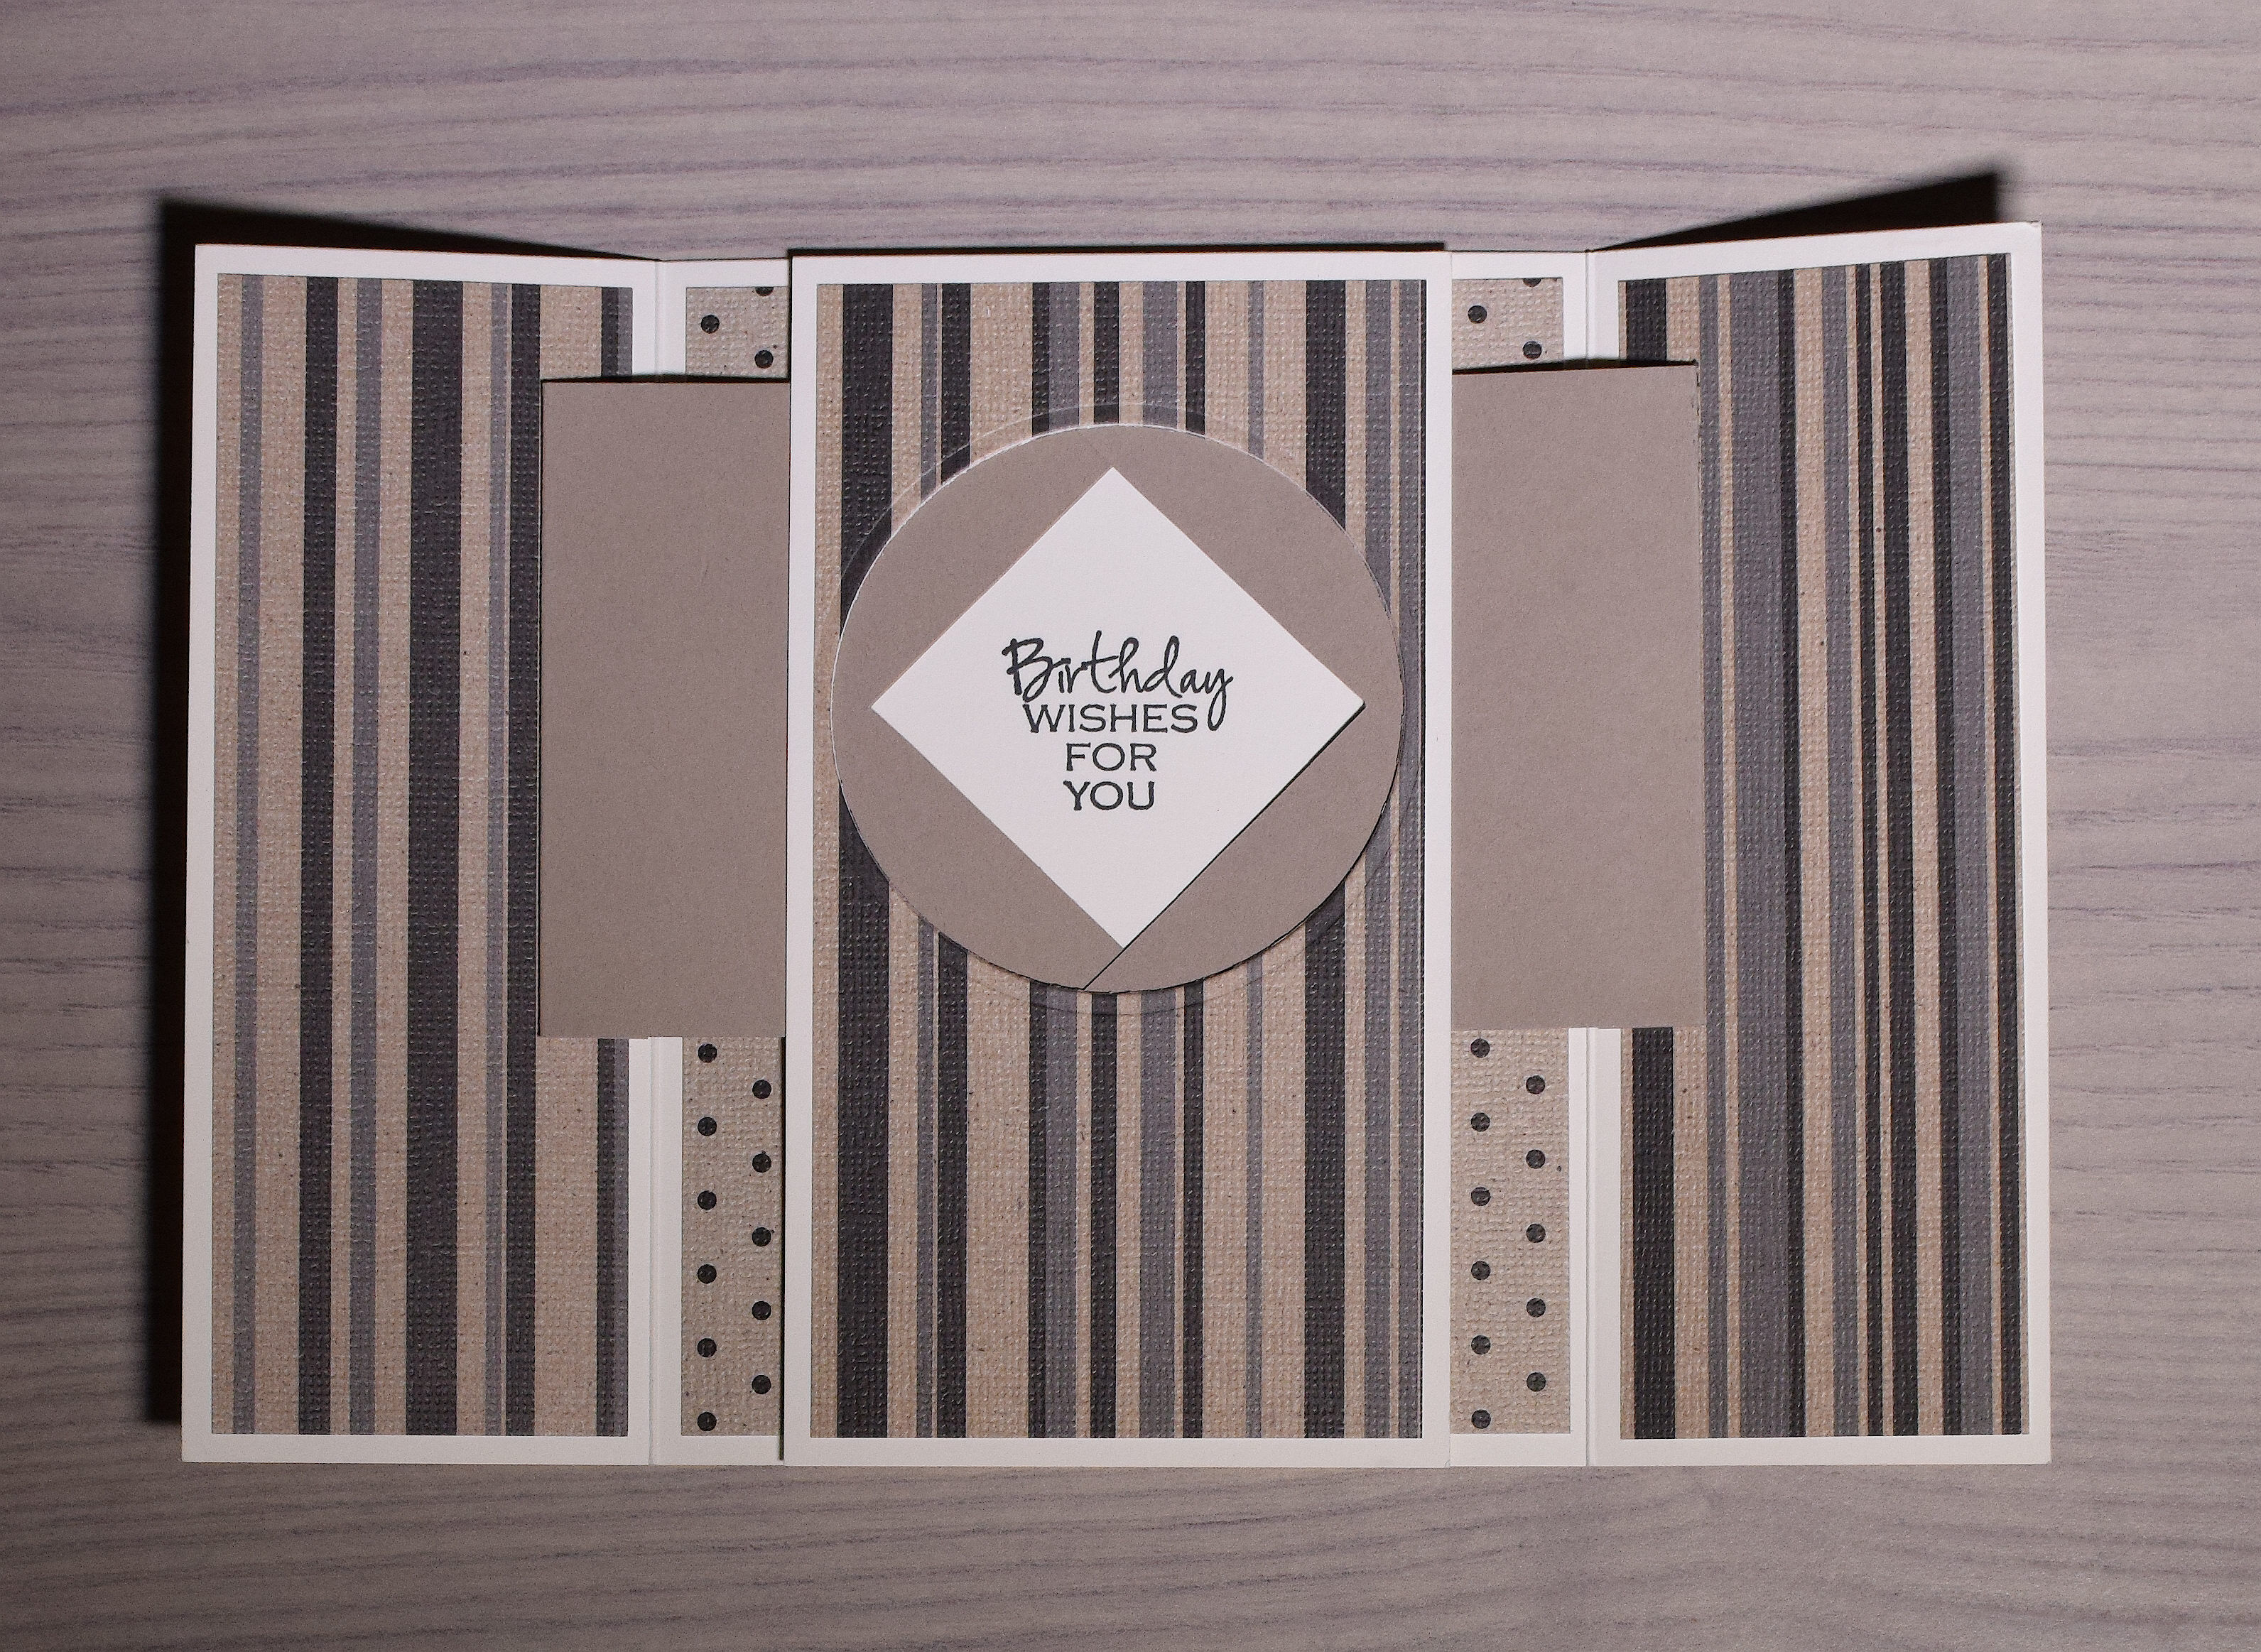
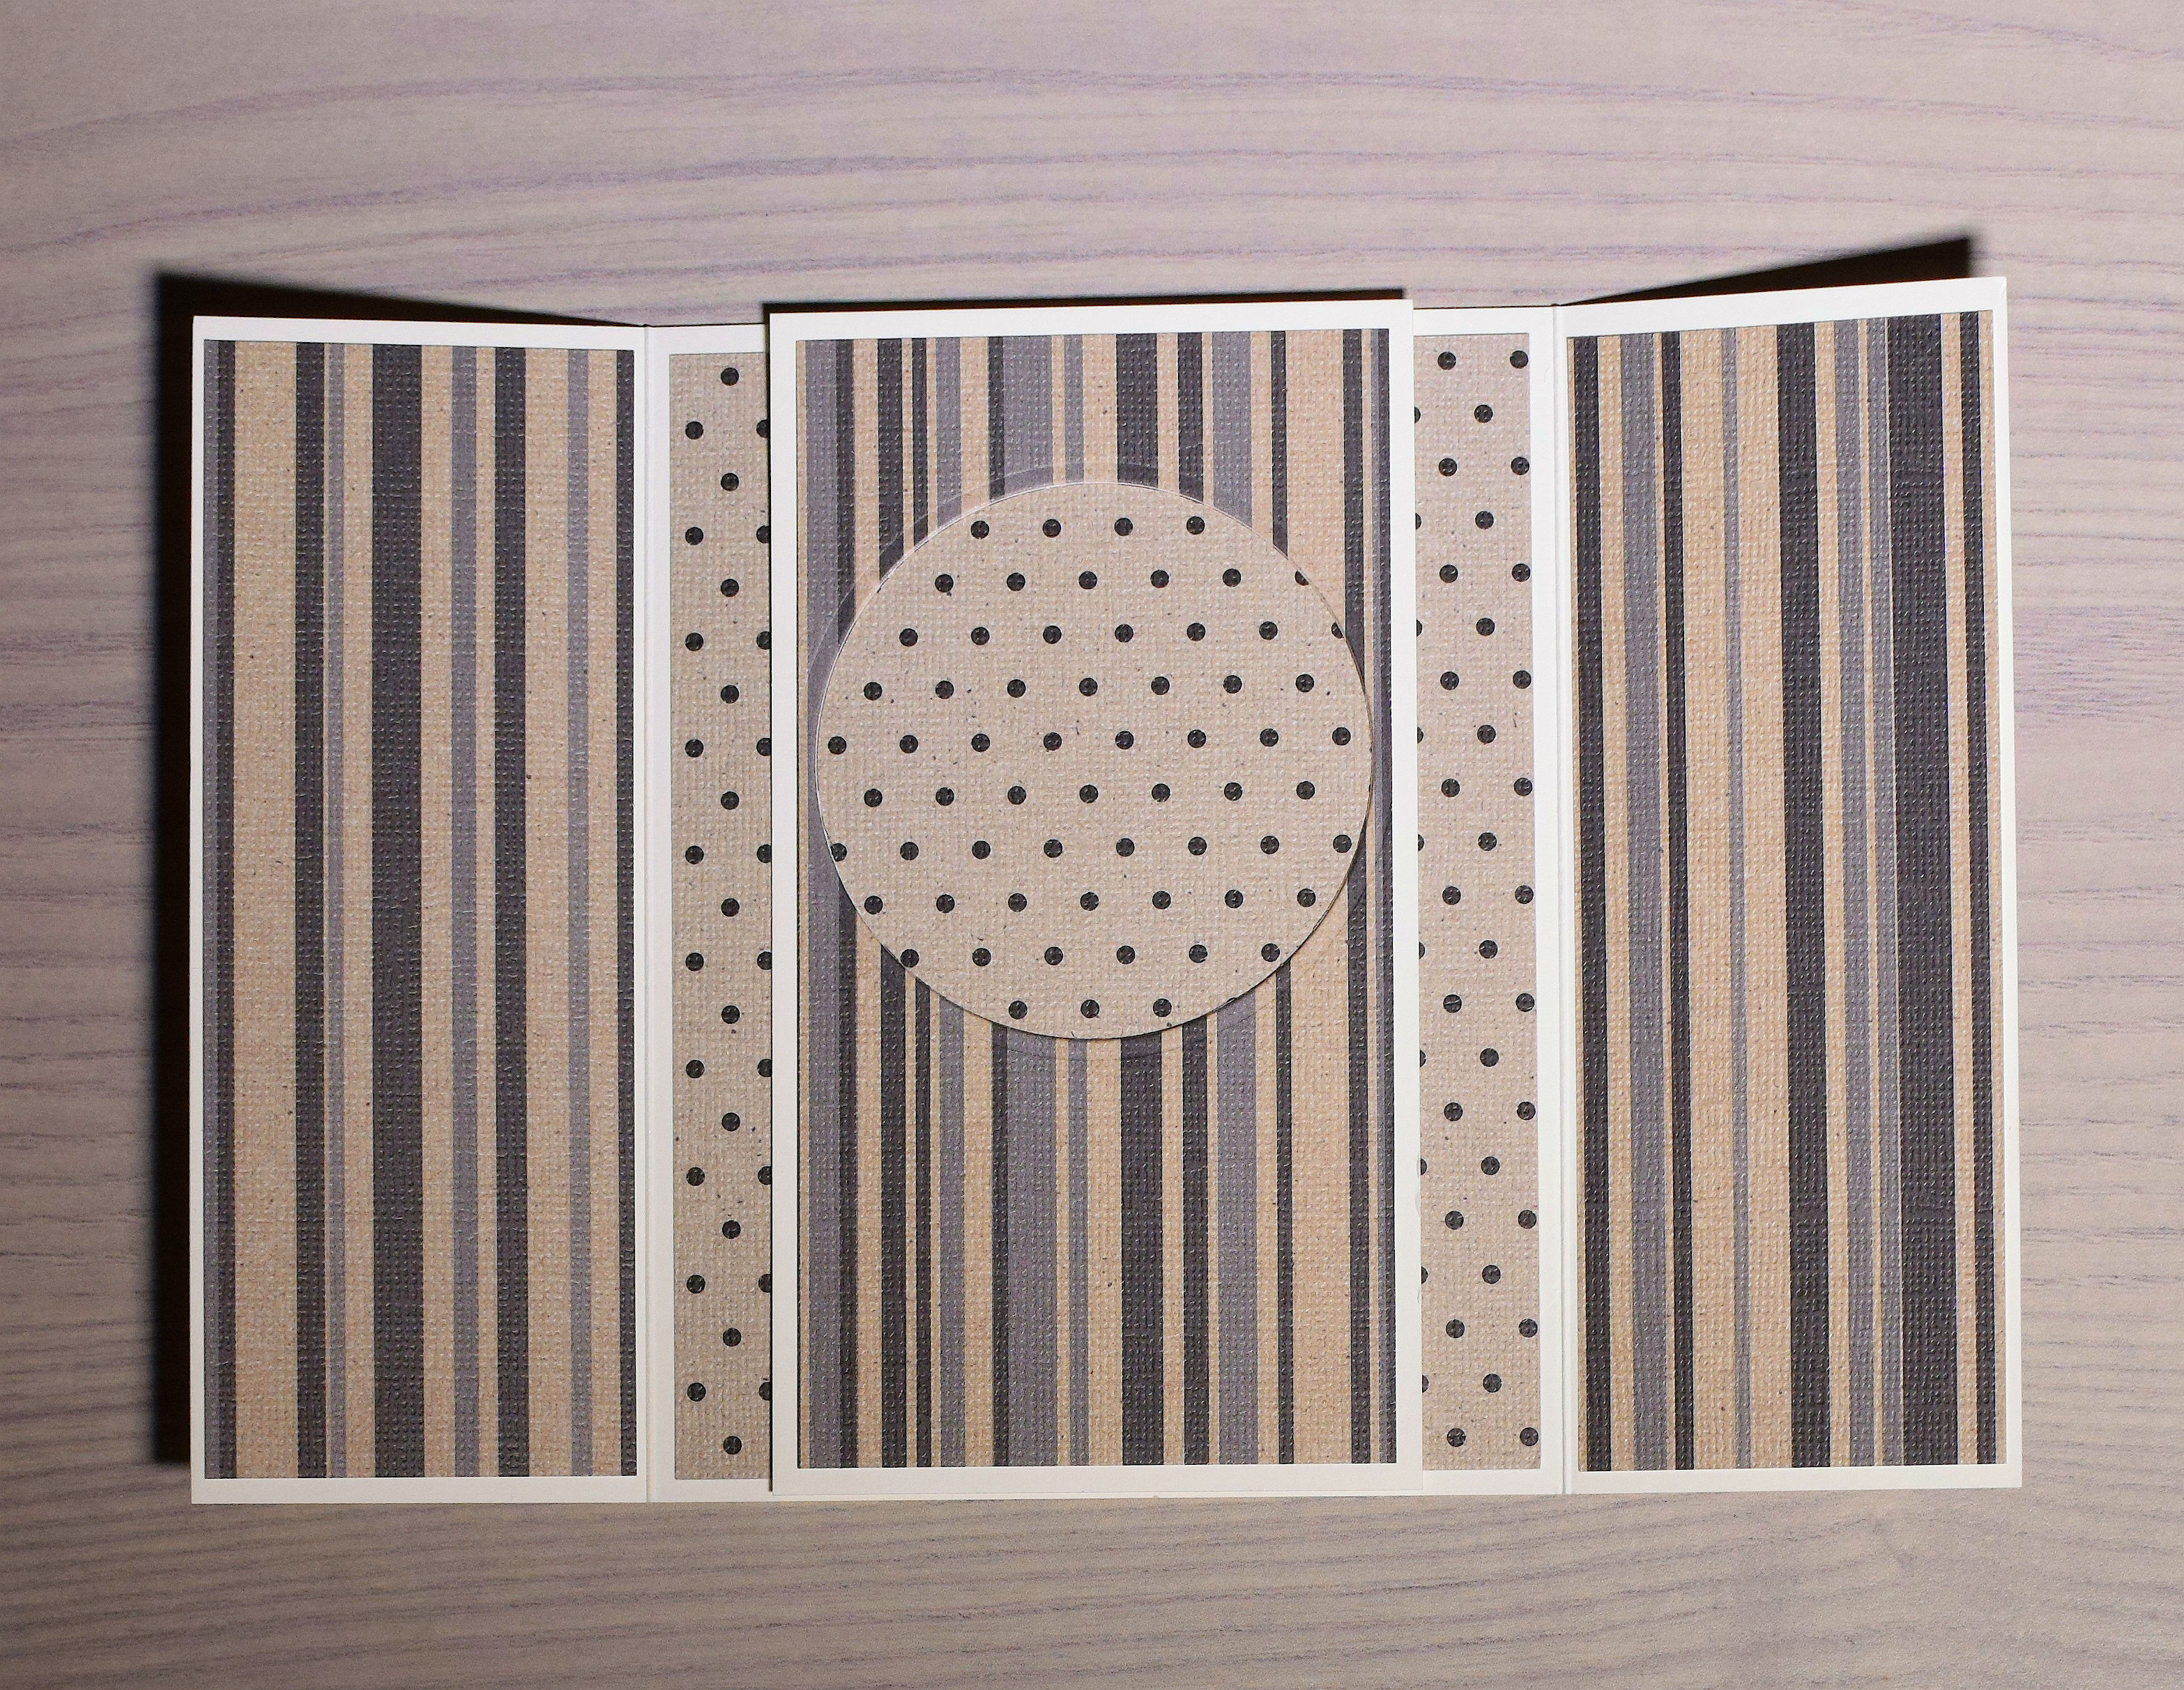
At this point, you can continue to decorate your card as desired.
Depending on the card stock or paper you used, the inside of the card may be kind of bulky, so you may want to come up with something to help keep it closed. One idea is to tie a ribbon around the closed card. You can add brads or buttons and some string to create a “string closure” (like you sometimes see on envelopes). You can use magnetic closures. For my card, I created a belly band that slides on and off the card. I used a 1 1/4 and a 1 inch strip of card stock that I wrapped around the card and glued it together in the back. The circle is from the center panel that was cut out earlier.

Thanks for checking out my post!


Great tutorial. It looks like it would be time consuming but well worth it.
LikeLike