“I Do” Wedding Box Card (take 2…and 3!)

(inside: Wishing you a beautiful life together)
I can be very stubborn and don’t give up easily on an idea that I am not thrilled with, even when it would be so much easier to just start over! I thought I was done with the wedding box card I posted yesterday, but I ended up back in my craft room last night, (still trying to design a card base to hold it) and this morning (trying to improve on the stand-alone box card design – that I show towards the end of this post and have since added to yesterday’s post). Sorry for the long post; it’s been a long few days!
First, the card base design…
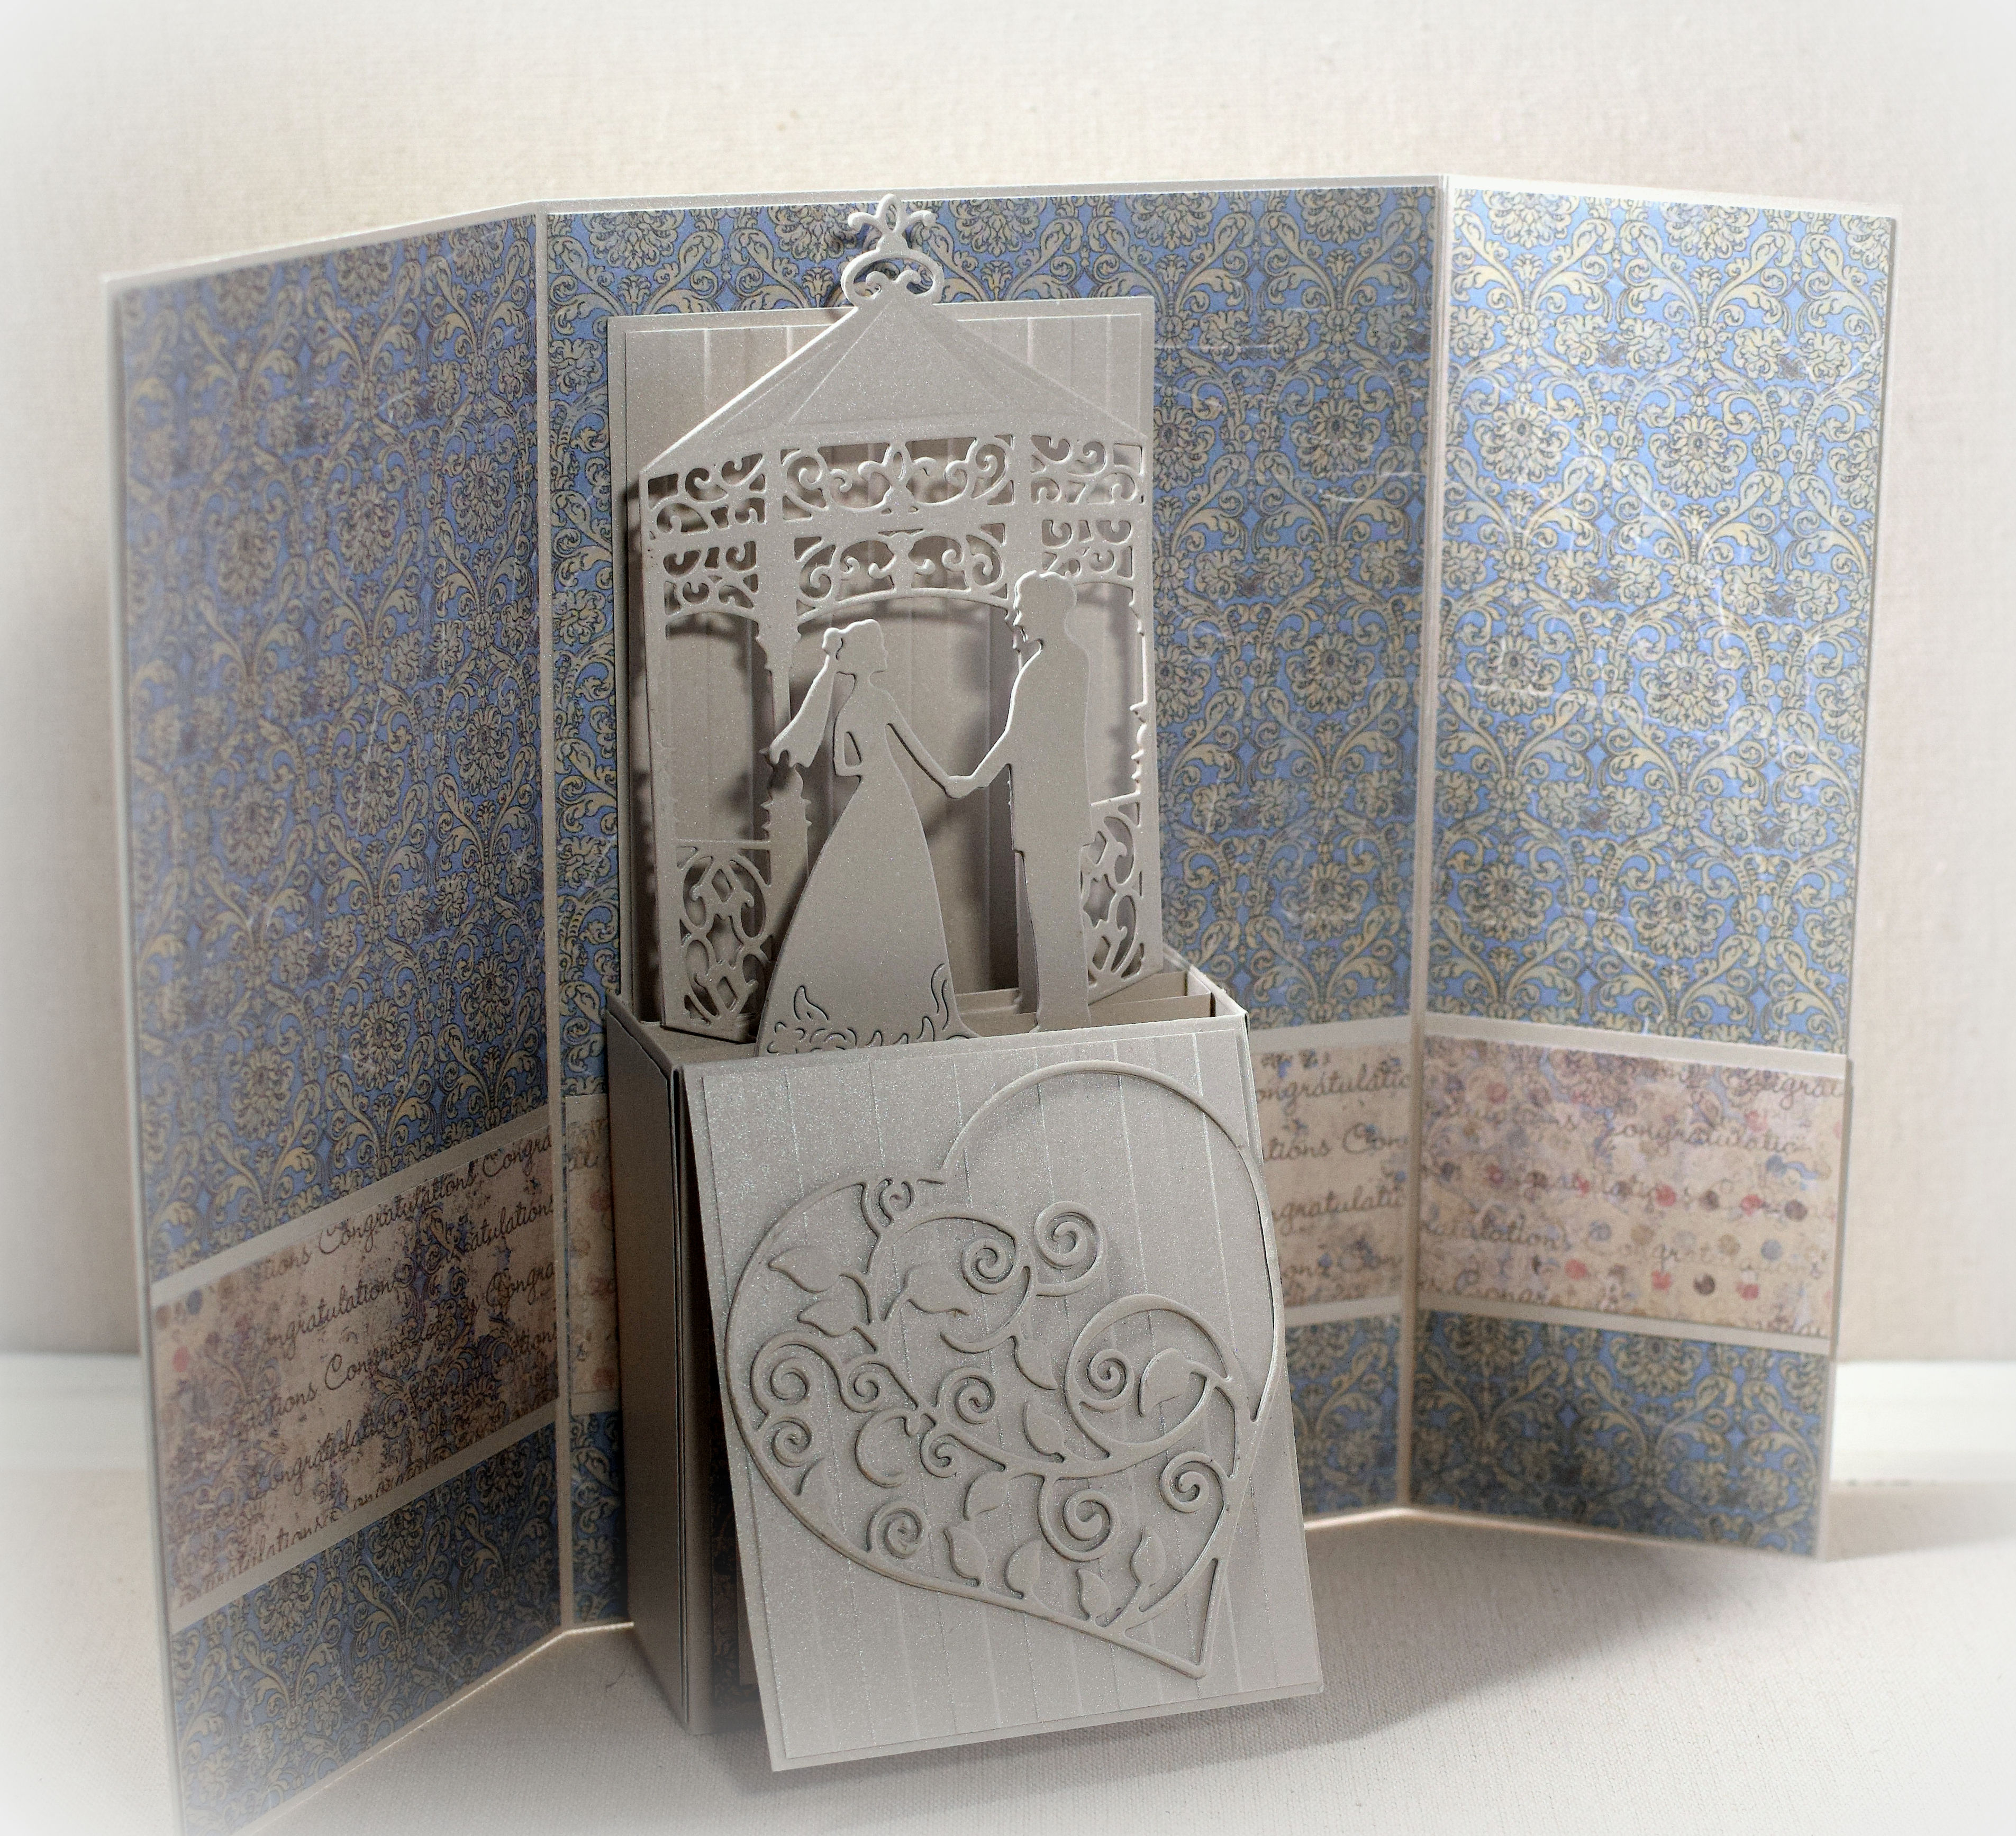
The first challenge was to make my new card base work with the “monochromatic-ness” of the piece I created yesterday. I know I said I was determined to stick with one color, but it just wasn’t working for me with so much card around it. Maybe next time! I ended up using Karen Foster’s two-sided “Congratulations” card stock, more from the Recollections “Shimmer Champagne and Silver” pack, and some Gina K charcoal brown (for the front).
The second issue that needed to be addressed: the whole box card portion shifts to the right when it is folded flat but shifts to the left when it opens which created a problem with making it fit (when closed) but also making it “appear” centered (when opened). After much playing around, I ended up making a gatefold card base with uneven front flaps. The left flap is wider to compensate for the extra space created on the right when the box card portion opens and shifts to the left. (It’s not perfect, but it’s better than when my side flaps were the same size.)


I un-attached the front flap (of the box card) that I had tacked down yesterday, lined the top and bottom with some of the congratulations card stock (it was sticky without it!) and added a panel for my sentiment and signature. The stamp used is from the Gina K Designs “A Beautiful Life” set and was stamped with Stampin’ Up Early Espresso ink.

I originally wanted to center my greeting panel on the card front by attaching it directly to the left panel, but you could see some of the back of it hanging over the left side when the card was opened, and I wasn’t happy with the way that looked. So I ended up adding the greeting panel to a belly band that slides on and off the card which worked out well because the thick card did not want to stay closed without it! The stamp is by Hampton Arts (no name on it) and was stamped with Early Espresso ink.

Just for fun, I decided to try adding a battery operated tealight under the box card portion….

While not exactly what I was going for, I could live with this base design which works with the skinny box structure.
Once I finished with this card, I got to work re-doing the actual box card. I changed the dimensions and added some patterned paper to spruce it up a bit. Here’s my new design:
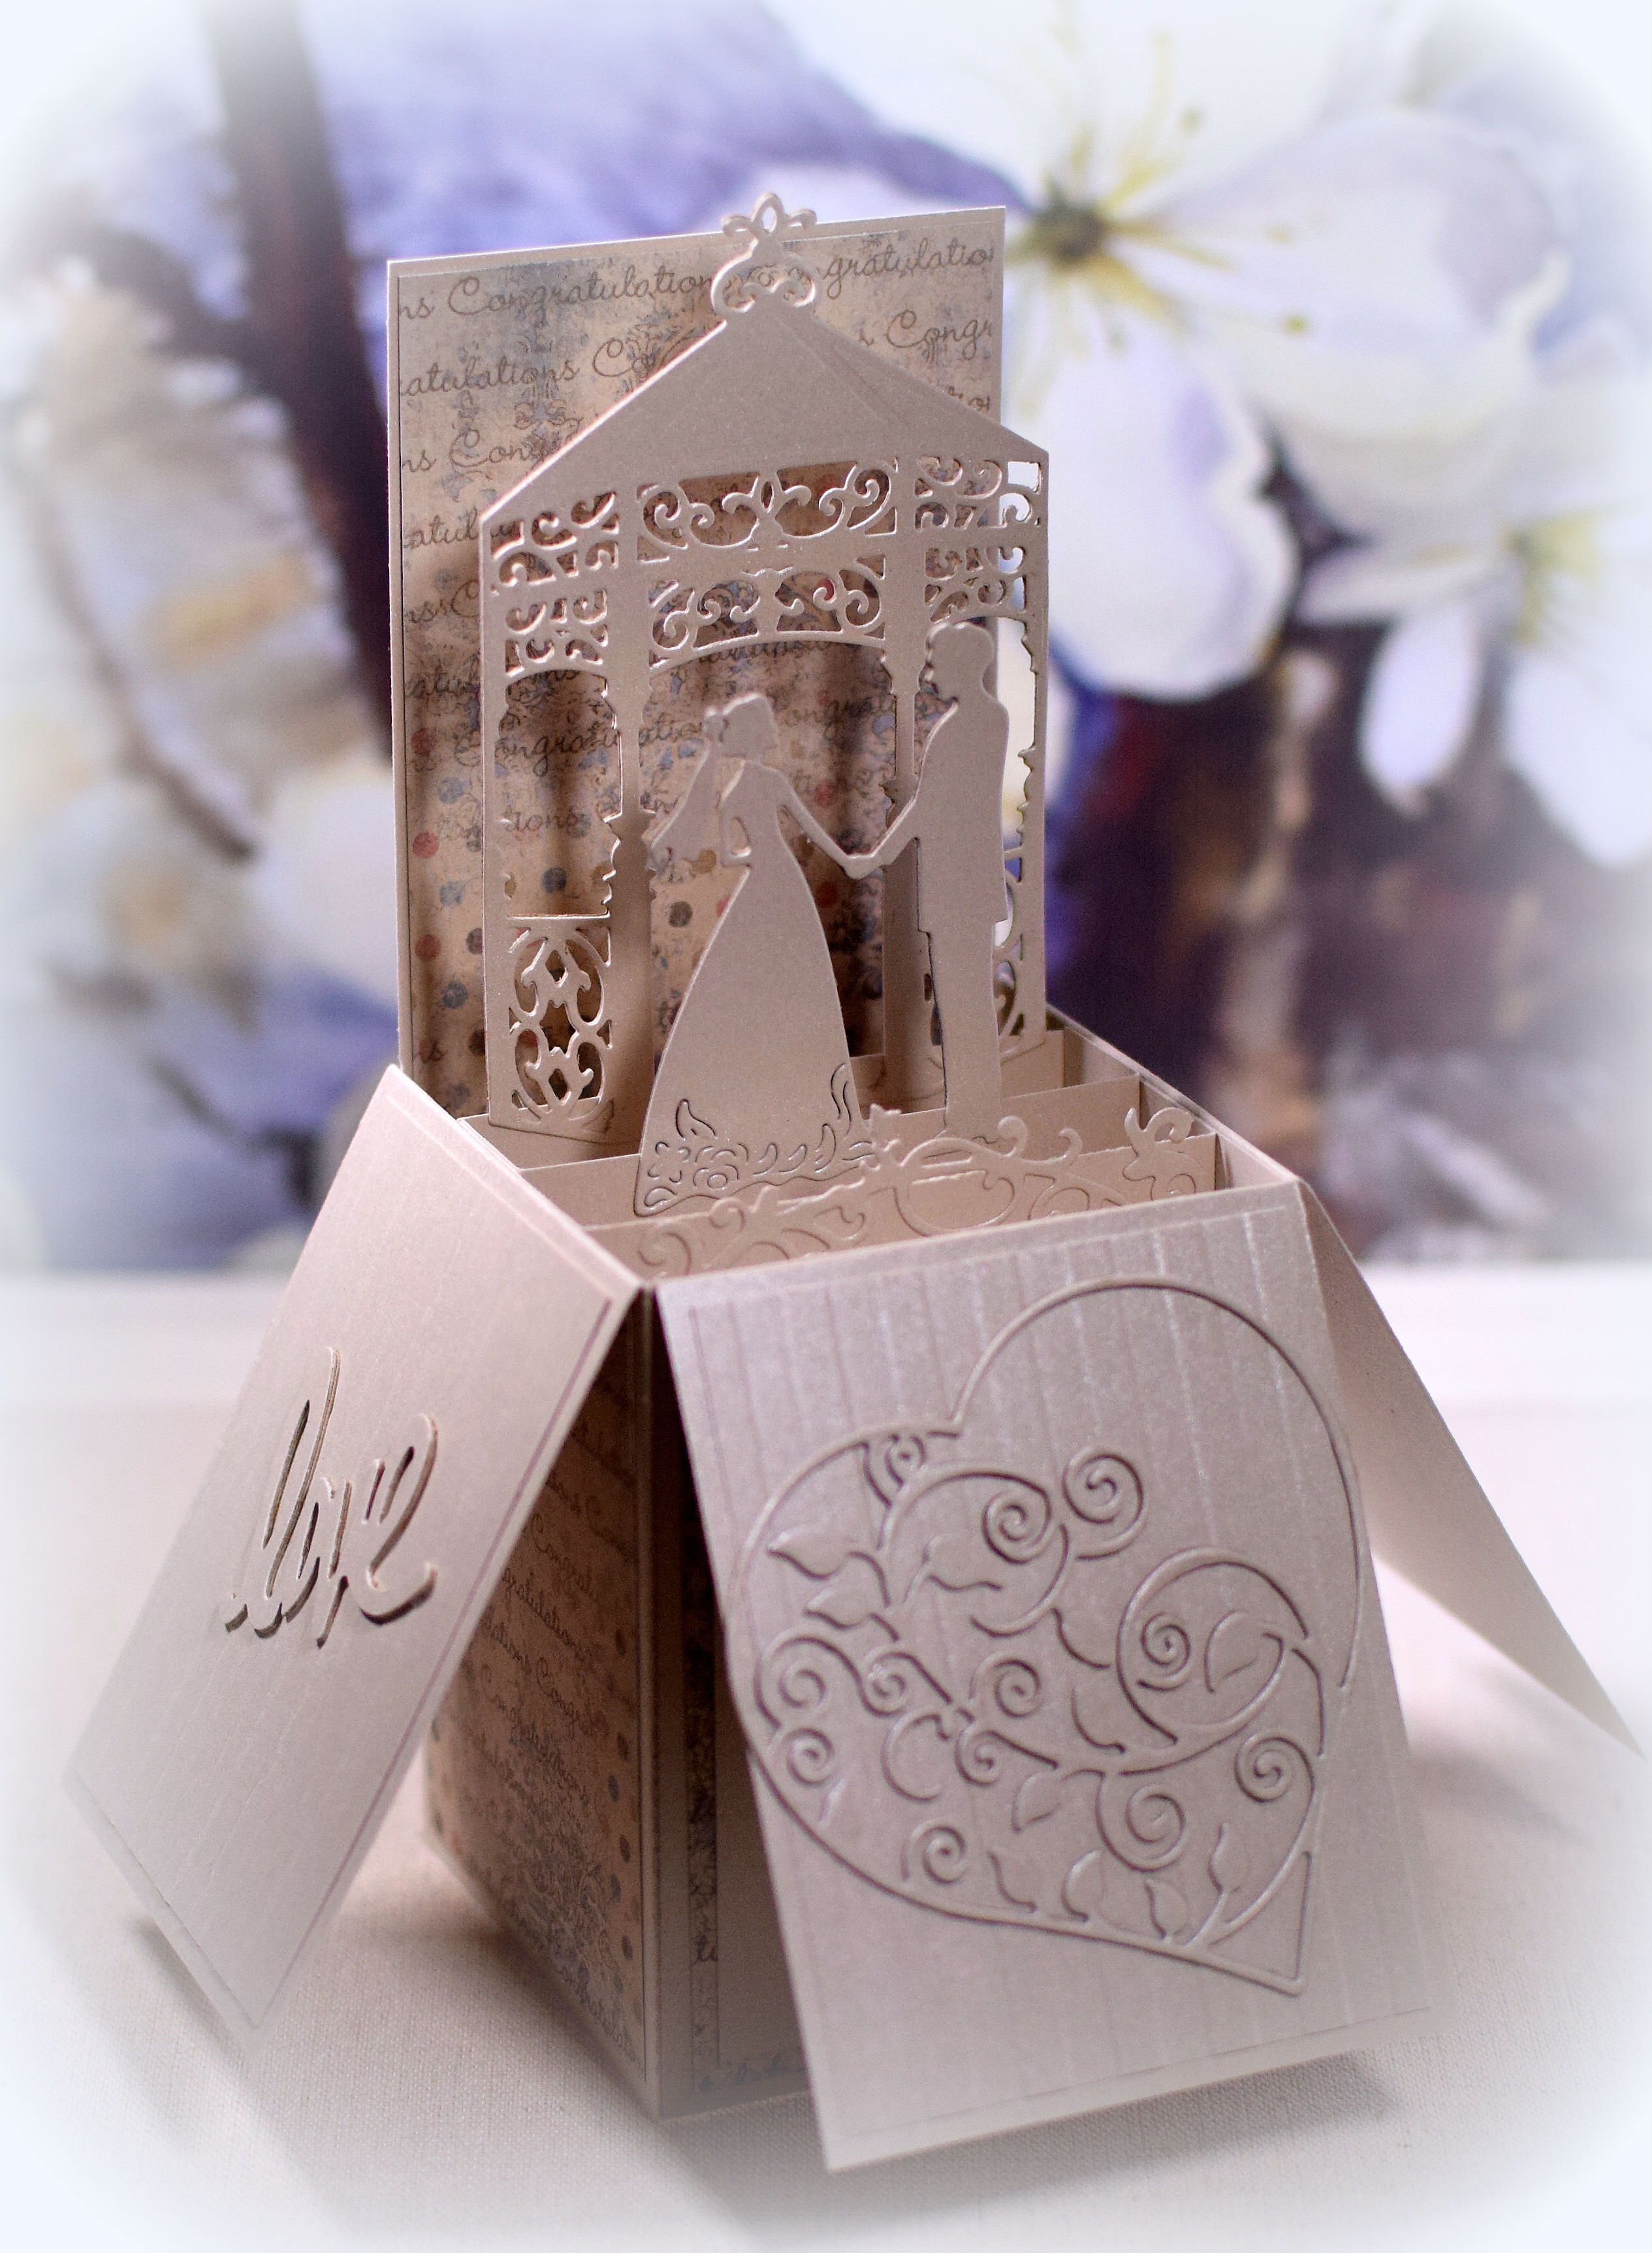
I used all the same materials and elements that I used on yesterday’s card, but I needed to add a few additional things since the box was bigger. I needed an extra “row” inside my box so I added a scrap of a die-cut that looked like it could be flowers, grass, etc. (It is actually part of a tree die cut that I had planned to put behind the gazebo, but it was much too busy.) I also added the love die cuts on both side flaps (made with my Fiskars Teresa Collins Love Punch); they just needed a little something. The Karen Foster’s “Congratulations” card stock added a bit of interest while still keeping the card monochromatic – sort of! (The sentiment is under the front flap as it was on the original card.) I like this soooo much better as a stand-alone design!
Thanks for checking out my card projects…again!


What a wonderful treasure this will be for someone who is getting married. It is so gorgeous!
LikeLike
It is wonderful. Good thing you stuck with it!
LikeLike