How to Make Silhouette Die Cuts for Your Stamped Images
Many stamp companies now offer dies that coordinate with their stamps, but it is also possible to create your own die cuts for your stamps by using your Silhouette electronic die cutting machine and the “trace” and “offset” features in the Silhouette software. (I use the Designer Edition.)
For this tutorial, I will show you how I create a die cut with a small border around the stamped image. (In a future tutorial, I add the steps I use to create a die cut with no border.) This tutorial assumes basic knowledge of the Silhouette software design features and how to use the Silhouette machine for basic cutting. To create a die cut, you need to be able to scan your stamped image, save it as a jpeg, and open this file with your Silhouette software.
*Note: While working on your files throughout this process, DO NOT re-size your scanned image or the trace or the offset. You need these measurements to stay true to size. However, you can change your view on your computer to make it larger and easier to see what you are doing. (Go to the “View” tab, then “Zoom” and then select your preference. Adjusting your view to 100% allows you to see what the actual die cut will look like when done.)
I’ve included photos to illustrate the steps I am describing. If desired, click on the photos to make them larger. I’ve also added a “cheat sheet” with the steps at the end of this post.
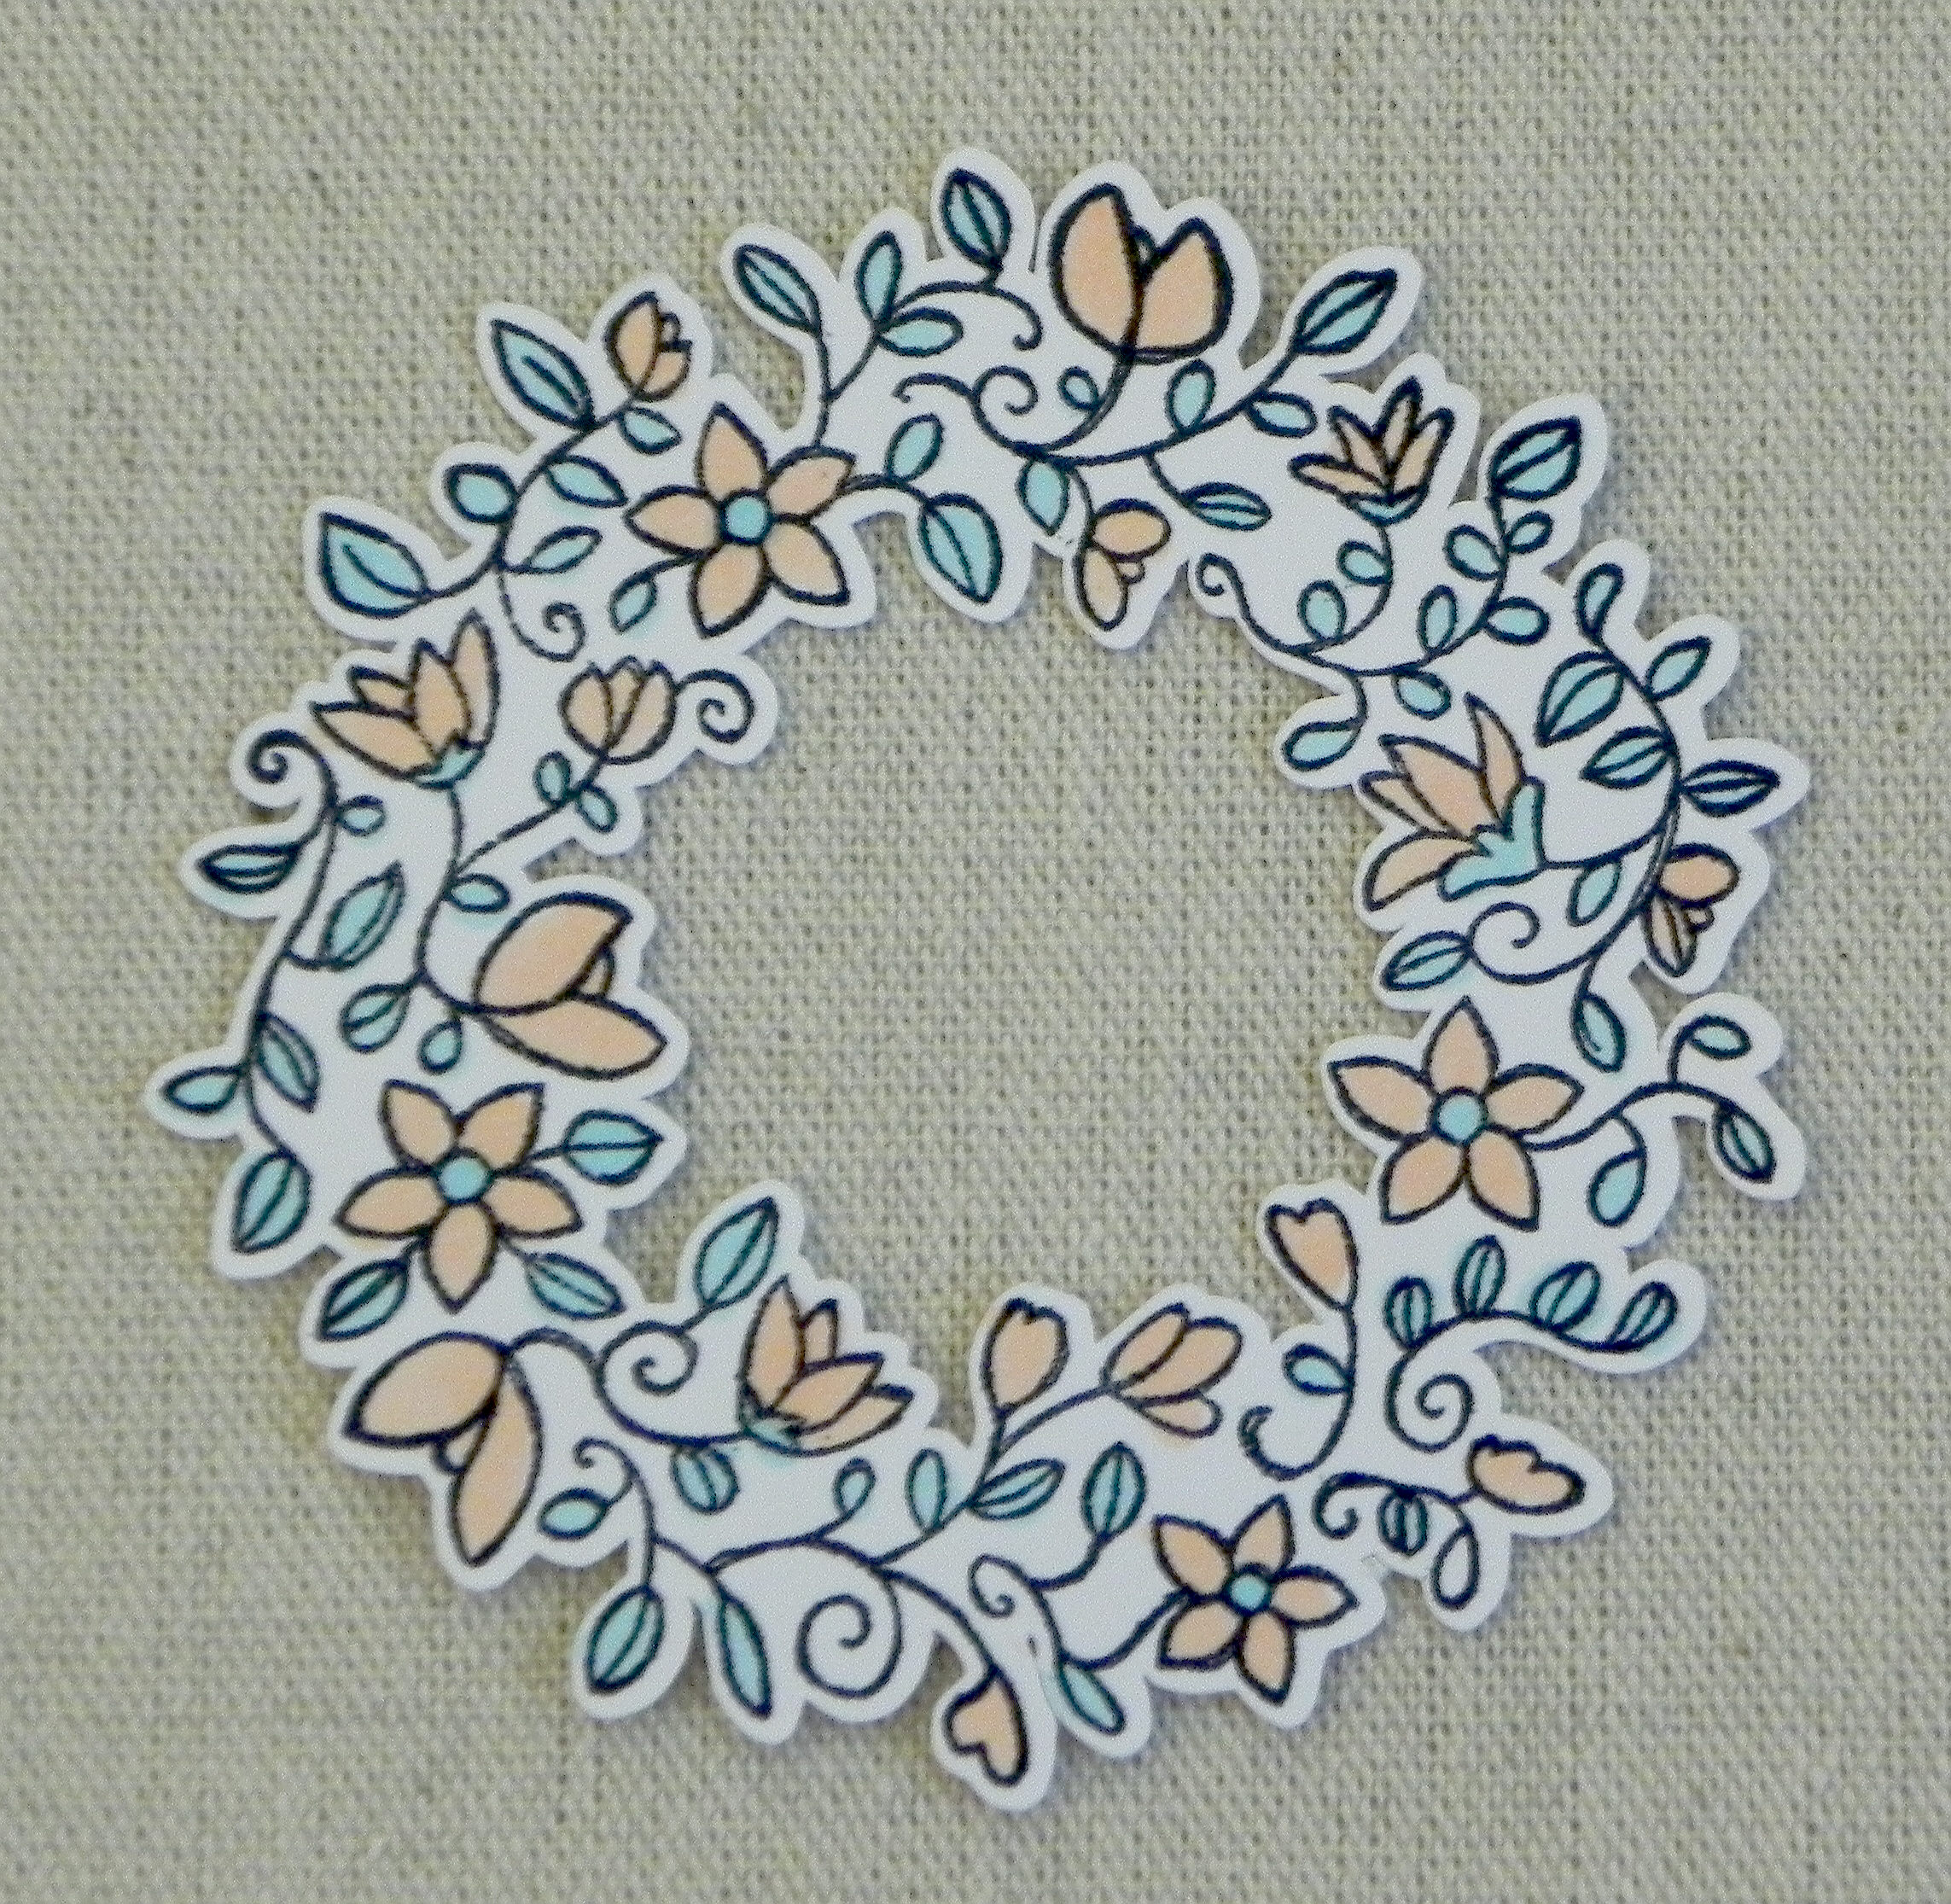
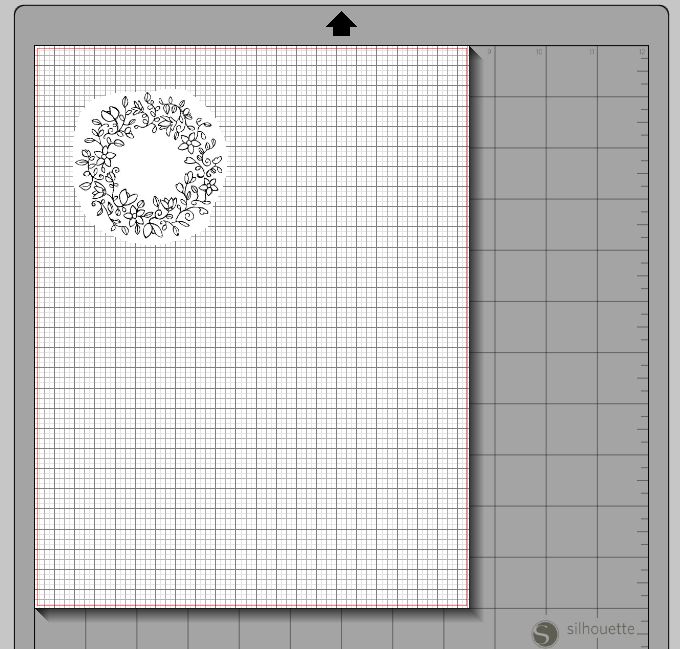
- Stamp your image on a plain piece of white paper with black ink. This image must be the exact size of your stamp. (In other words, don’t use the printed image that comes on the cover sheet of your stamp set unless it is the exact size.) Some sets come with the images on acetate, and as long as these are the same size, these are fine.

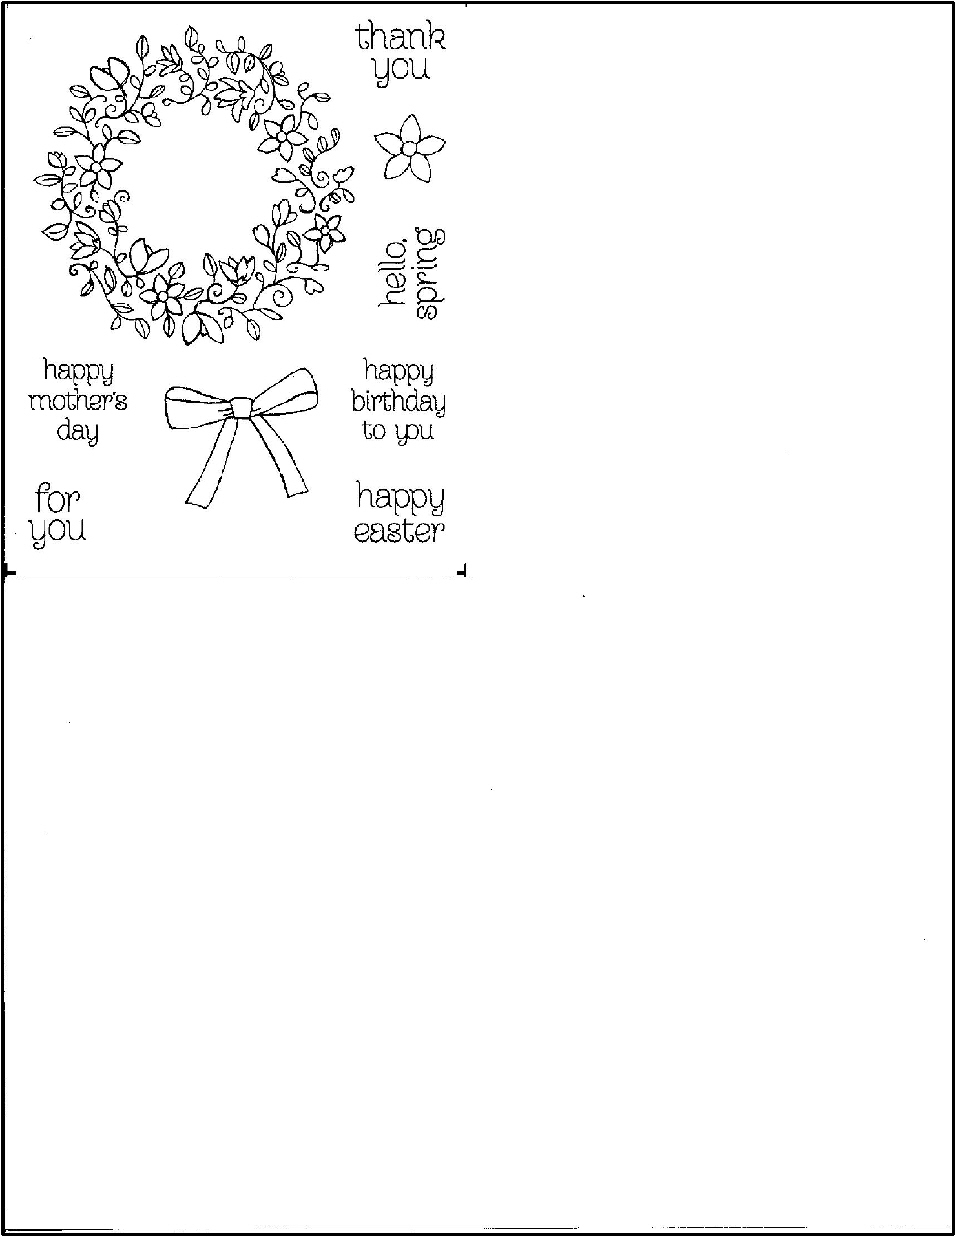
(images from the Stampin’ Up “Circle of Spring” stamp set)
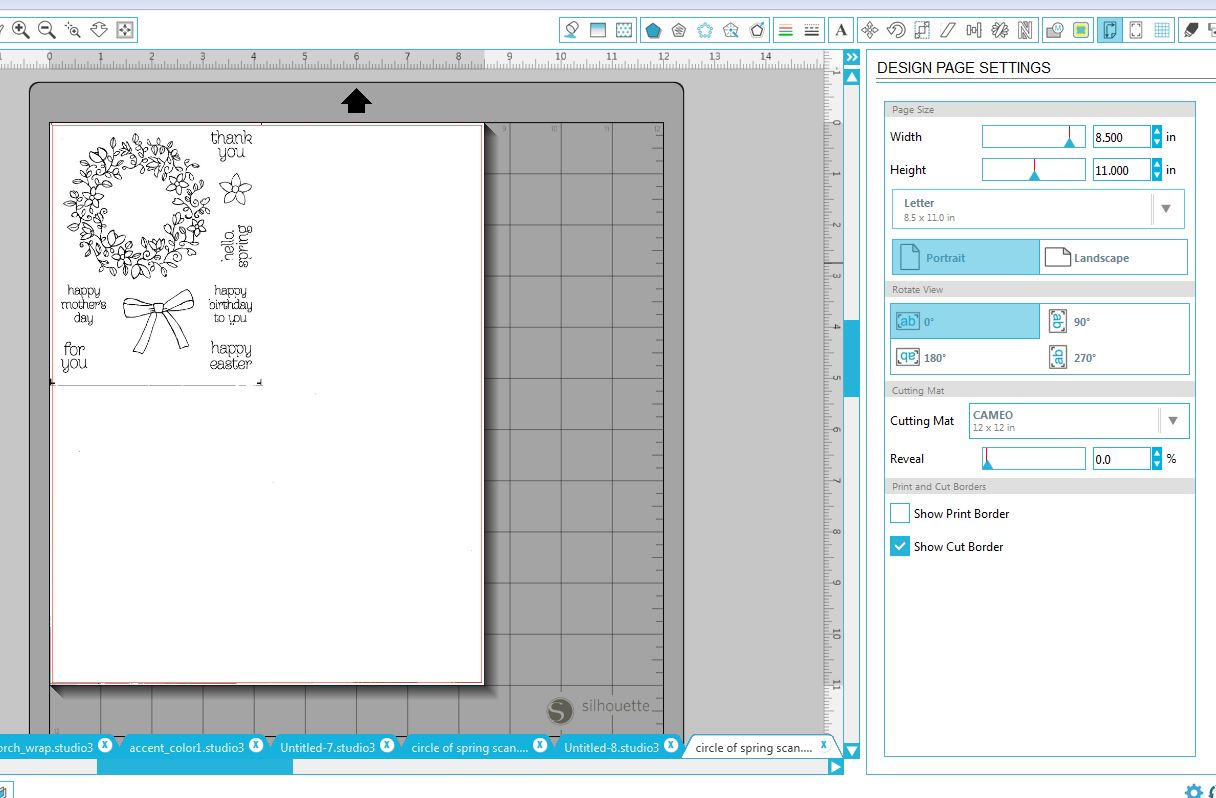
2. Scan your image, and save it as a jpeg. When scanning the image, do not crop it. Save it as is. I usually scan and save it as an 8 1/2 x 11 document.
3. Set page size in the “Design Page Settings” menu on your Silhouette software to “Letter – 8 1/2 x 11” which will keep the stamped image the correct size. Open the jpeg of the scan.
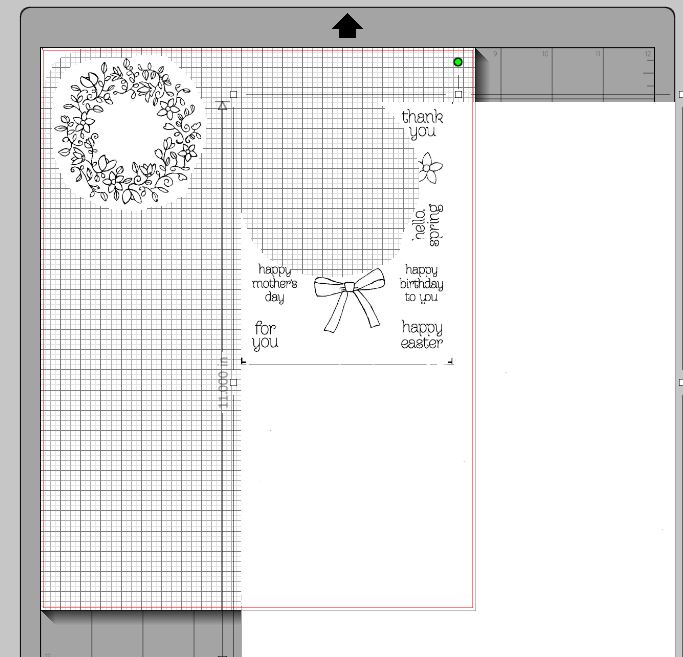
4. Optional: Use the erase tool to loosely go around the image. Creating a square or circle is fine; you don’t need to follow the edge of the image closely. Ungroup the image from the extra background and delete the extra white. This just makes the image you are working with less cumbersome. (If there is more than one image on the scan, and you wish to use them all, use the eraser tool to loosely erase around each image. Then ungroup the images and delete all the extra white. What you are left with is several separate “scraps” of paper with stamped images – all still in the original size.) I will just be working on the wreath for this tutorial.
5. Using the “trace” tool, trace around the stamped image. Select “Trace Outer Edge” if you just want a border around the whole image, or select “Trace” if you want the inner details to cut. (If you start with a clean stamped image, you should get a good trace without much need for manipulating your trace. If not, use filters, threshold and scale options to clean it up. This is beyond the tutorial here. Check out the video series, Tracing Without Tears in Silhouette Studio, for a detailed description on how to do this.)
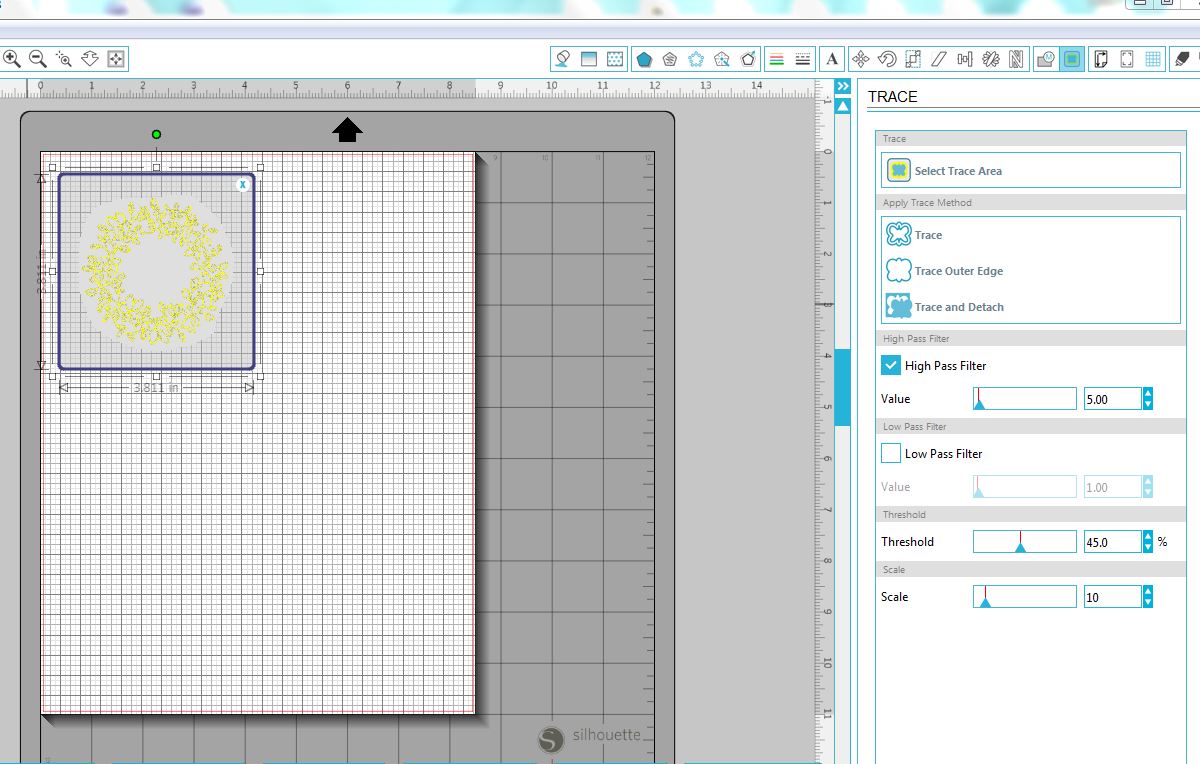
(select trace area)
(trace)
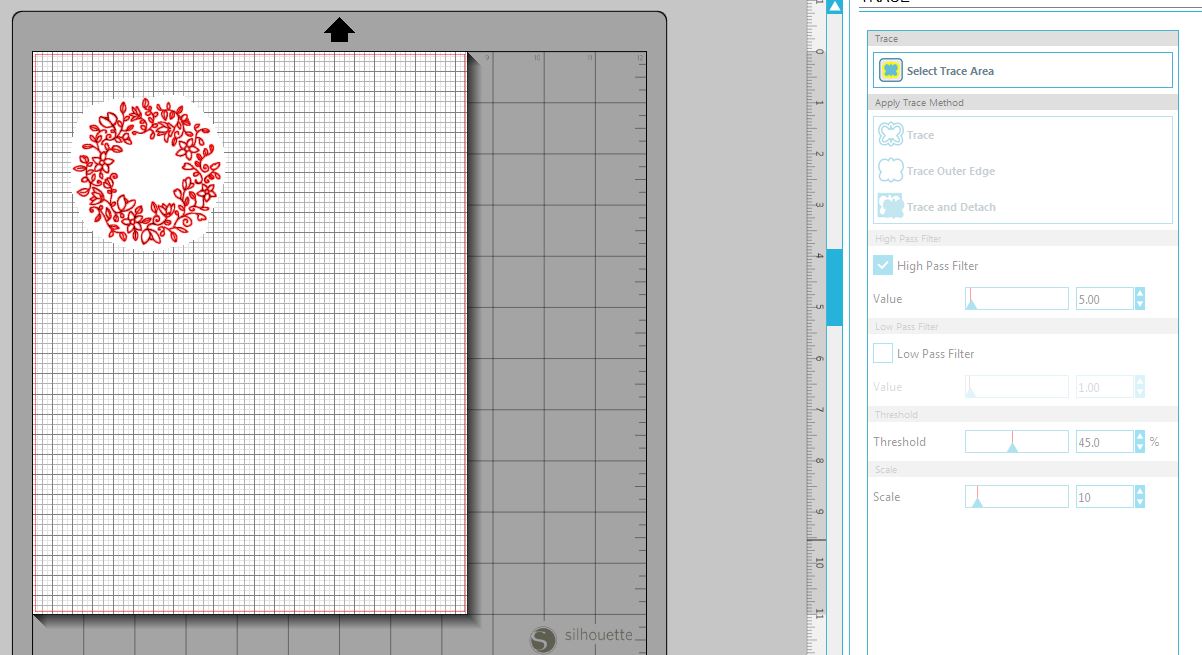
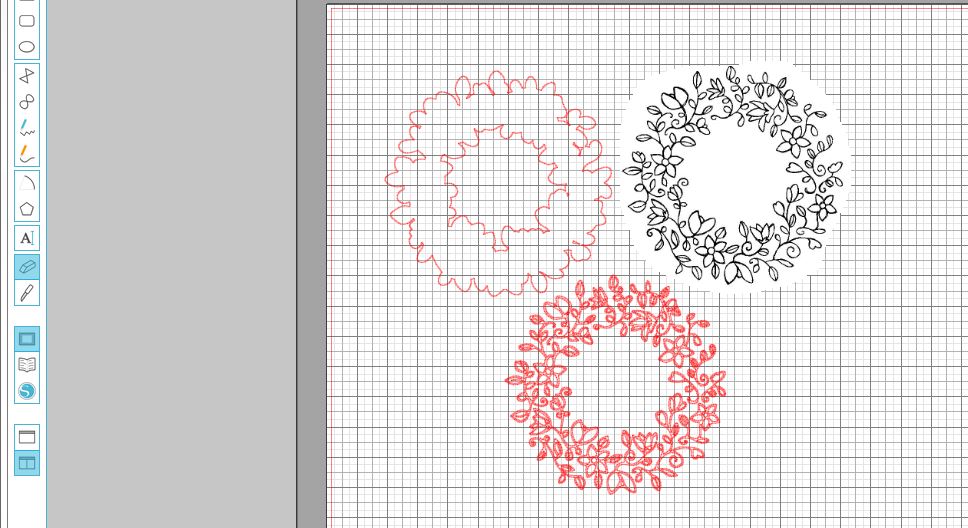
6. Drag the jpeg away from the trace. (Highlight the traced image. Under the “Object” tab, select either “Group” or “Make Compound Path” to keep all the pieces of the trace together.)

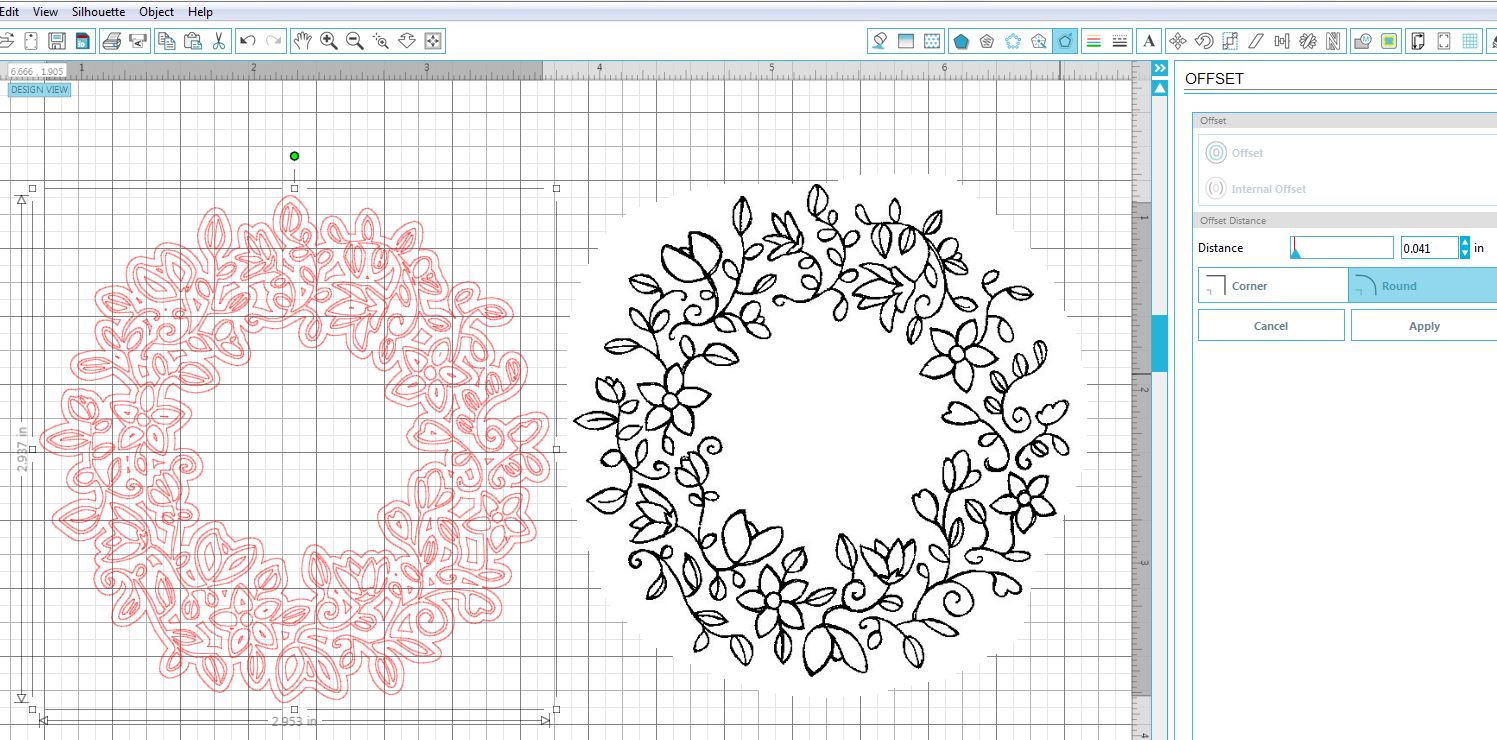
7. Open the “Offset” window and select “offset.” (Notice 0.125 inches is the default distance here.)
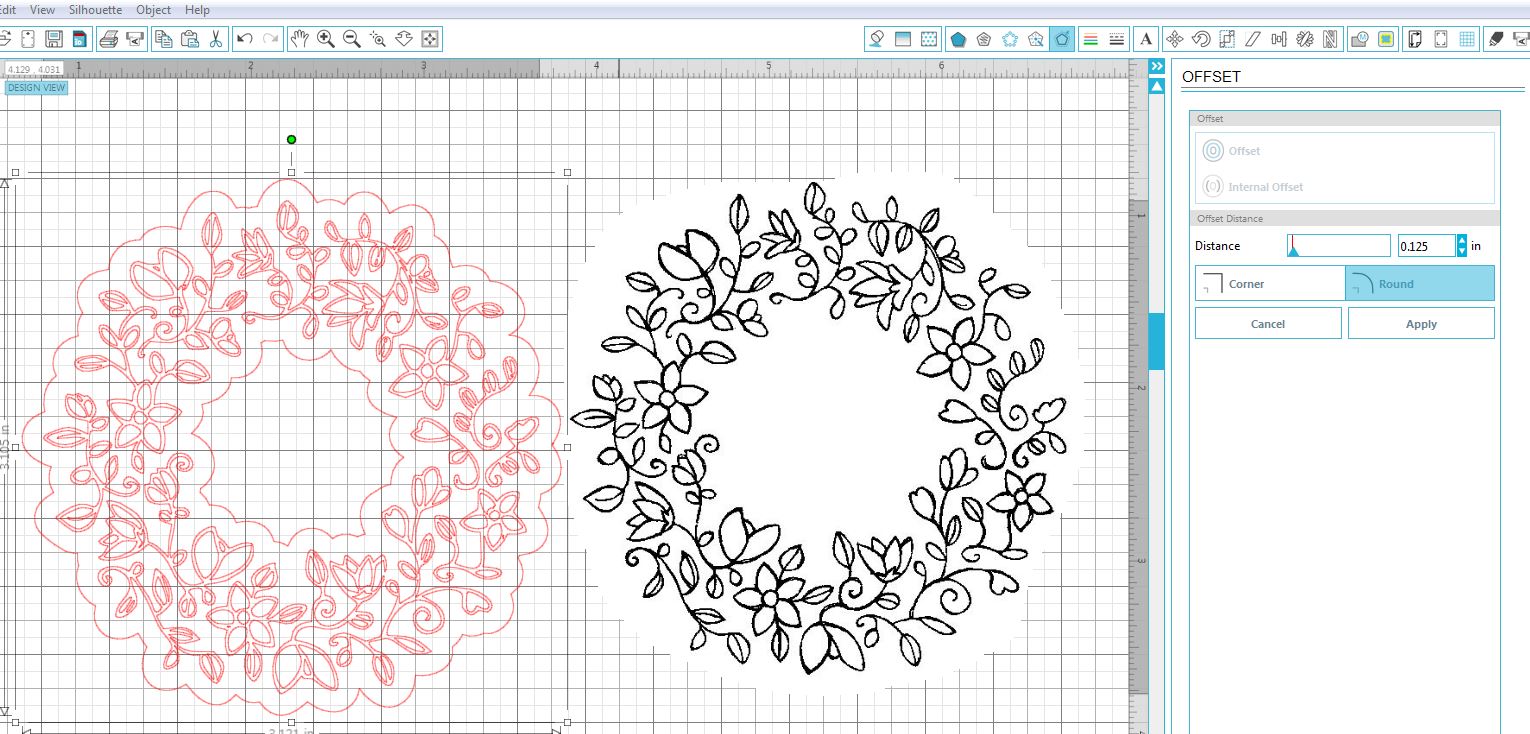
8. Use the Offset Distance slider or arrows/measurements to adjust for how much border you’d like to see around your image. I adjusted mine to 0.041 inches.
9. Once you happy with the size of your border, move the trace away from the offset.

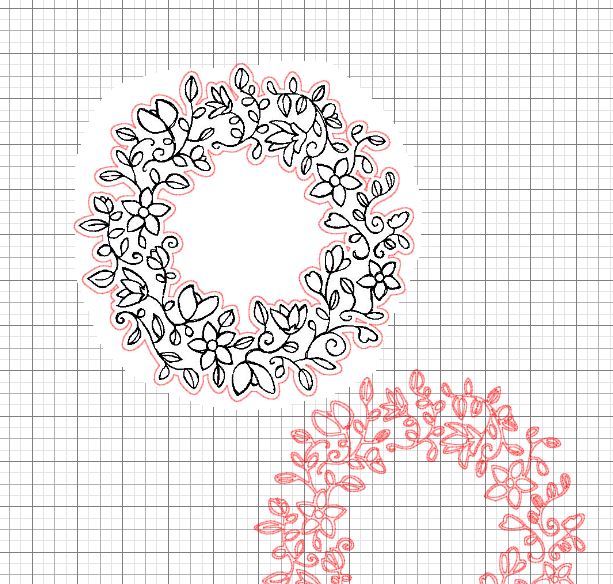
10. Depending on your stamped image, there may be a number of internal cuts in your shape. Highlight the offset and select “Release Compound Path” under “Object” tab. Keep the details you want and delete those you do not want. (You can click on and delete each piece separately, group multiple pieces to delete, or use the erase tool. This can be tedious, but it will keep the pieces there that you wish to keep and get rid of those that you do not.) For this sample, I needed the inner and outer outlines so I needed to erase all the little pieces separately. If I had just wanted the outside without the hole in the center, I could have just dragged aside the outside and deleted everything left all at once.
11. Once you are happy with your shape, highlight the shape and select “Make Compound Path” under object tab. You can drag the original jpeg image onto your die cut to see if it matches up nicely.
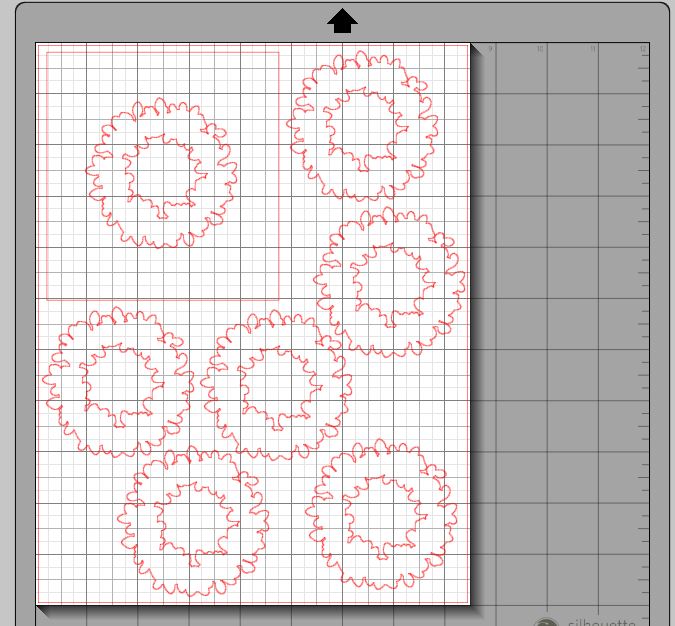
12. Save your die cut cut file, cut it out, and stamp your image on it. If you are using clear stamps, you can just look through the stamp, line it up as best you can, and stamp it.
Unfortunately, I am not really good at eye-balling it, so I create a positioning template, and I use a positioning tool to help me. The positioning template is simply the die cut with a rectangle around it. In my photo below, I needed 7 die cuts (6 plus the one in the template), but you can cut as many or as few as you need.
Check out my tutorial HERE to see how I use this to get perfectly placed stamped images with a positioning tool.
Here’s a “cheat sheet” listing the steps explained above:

(Click HERE to see the card I made with this wreath die cut.)
Thanks for checking out my tutorial!
This content uses referral links as described in the disclosure policy on my sidebar.


I don’t have a silhouette but I can see where this would be very informative for those who do. Great tutorial.
LikeLike
I have to save this and keep it FOREVER! I bought the Pix Scan Mat (super cheap 15 bucks) but I couldn’t figure out how to get a smaller border…..THIS will do the trick. Thanks so much! Great class! 🙂
LikeLike
Lisa, this will really come in handy, as I have not found instructions that are very easy to follow. I have discovered that since installing Windows 10, my designer edition cameo does not respond very well. It is jerky and jumps around, and often I loose patience. I will give this another try.
LikeLike
Pingback: How to Make Silhouette Die Cuts for Your Stamped Images – Part II, Borderless | I Played With Paper Today!