Red and Blue Note Card Collection

Red and Blue Note Card Collection

zDSC_4417 picasa.jpg

My triplets are seniors in high school and have just finished the college application process.  All three of them were just accepted to their first choice – The University of Pennsylvania.  Hooray Kelly, Kevin and Keith!!

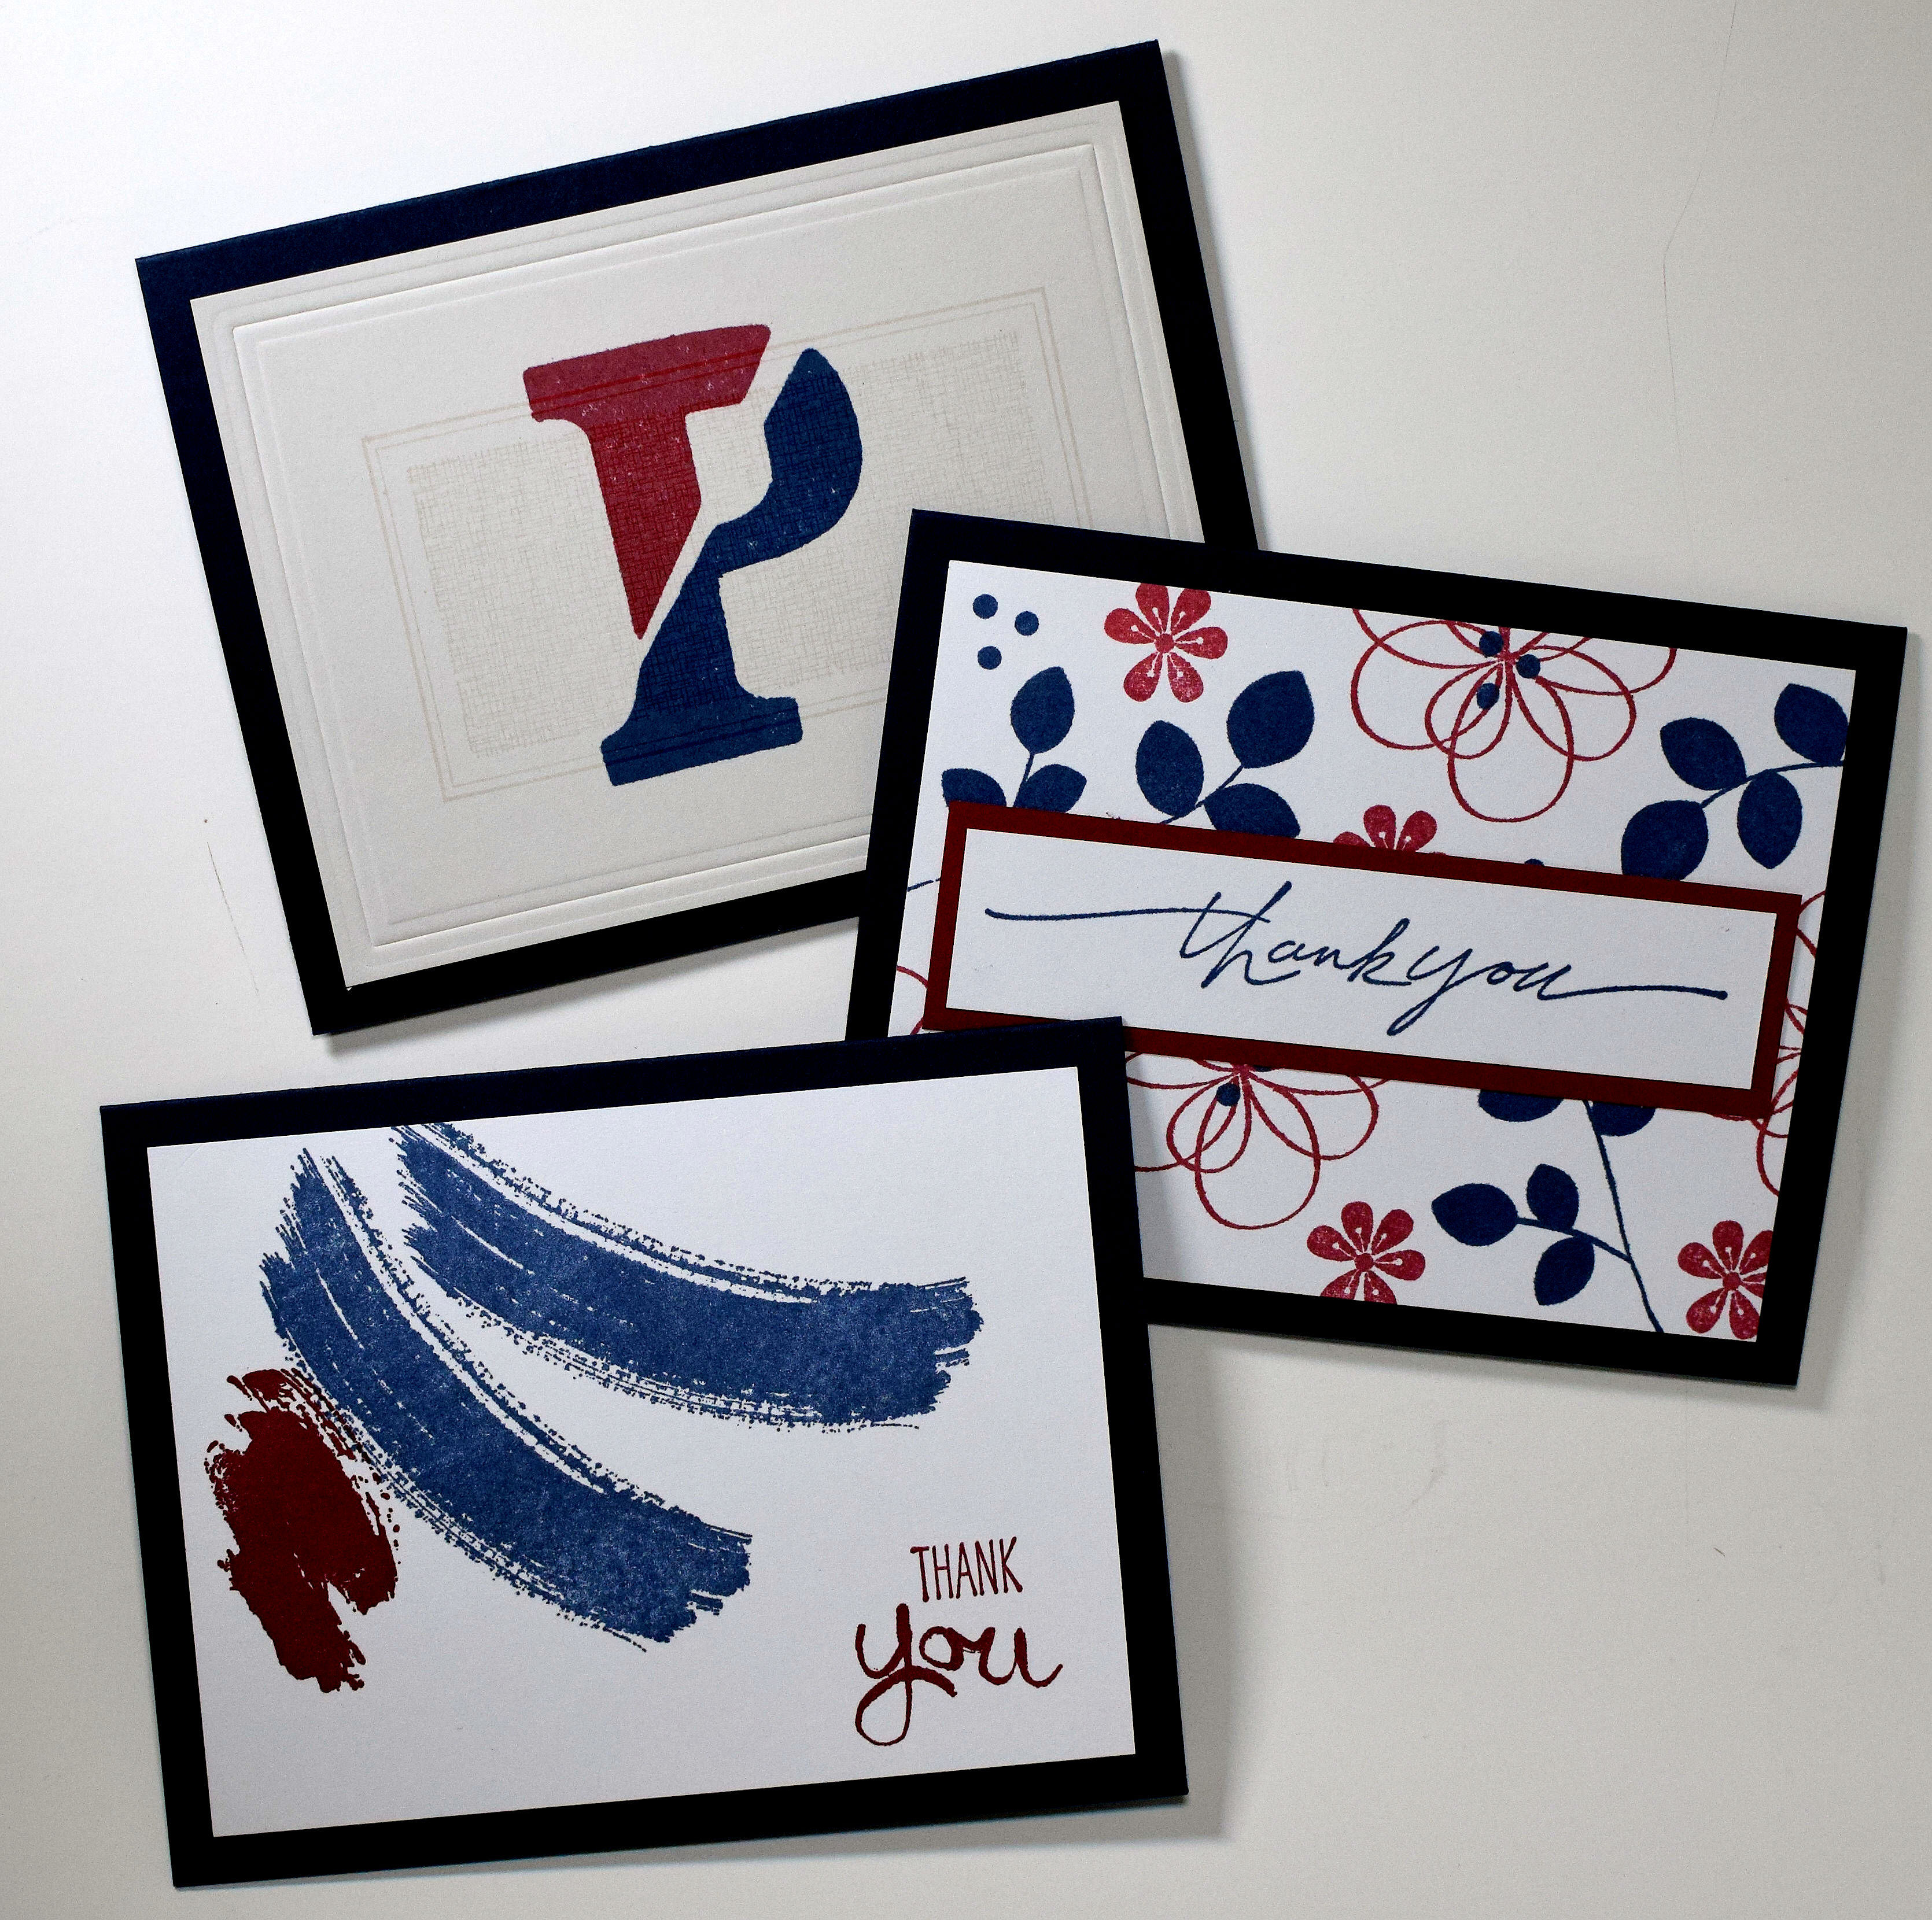
They received letters of recommendation and completed several alumni interviews as part of the application process, and they wanted to send thank you notes.  Since there are three of them, I wanted to come up with three different card designs, and since we needed to send quite a few notes, I wanted to keep the designs simple and easy to recreate.  The MISTI made this easy!  Penn’s colors are red and blue so I stuck with those colors.

(I was having a heck of a time getting good photos of these cards.  The blue card stock and ink are the same – both Gina K “In the Navy” – and are very similar in real life.  The ink always looks lighter and the card stock always looks darker in my photos.)

xdsc_4202

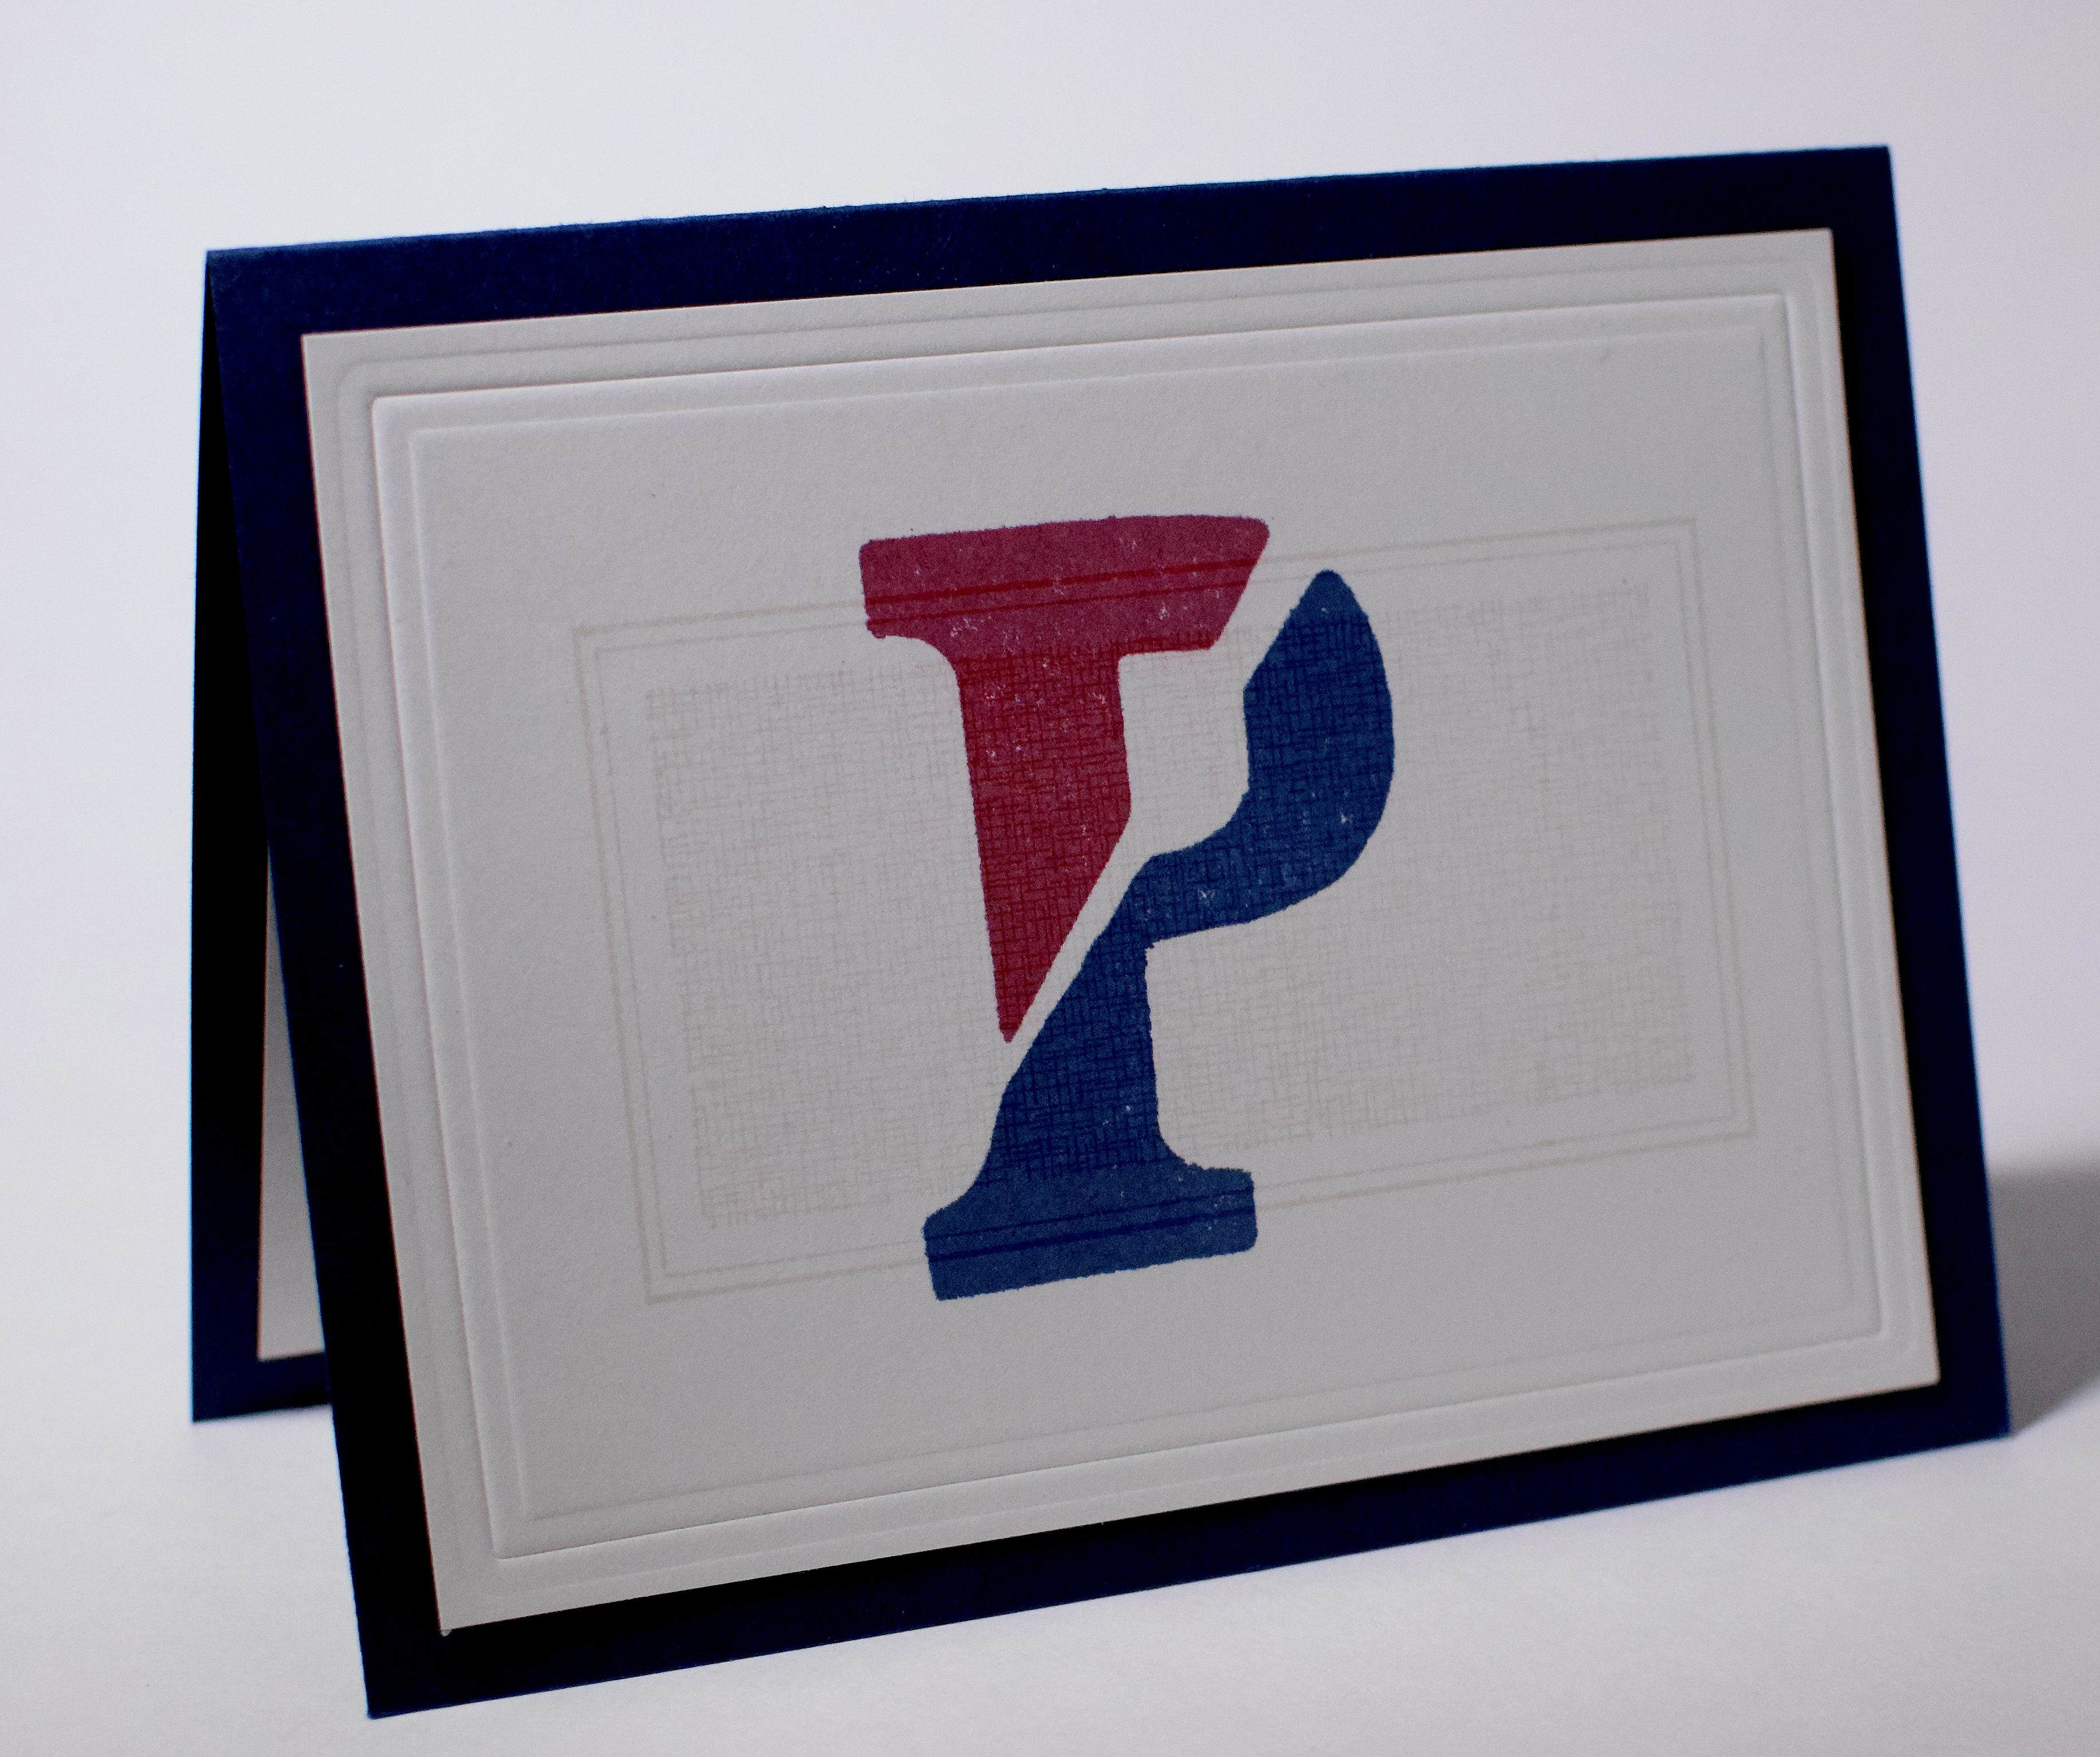
For this first card, I used Papertrey Ink Soft Stone ink and card stock along with the two parts of the “Frame and Filler” stamp (retired?) by Gina K Designs to create a tone-on-tone background.   I googled Penn’s logo and hand-made the two parts of the “P” (from red rubber used to make gaskets which I purchased at Home Depot).  The logo was stamped with Gina K Cranberry Tart and In The Navy ink.  I embossed the border with a Spellbinders Matting Basics B die.

xdsc_4188

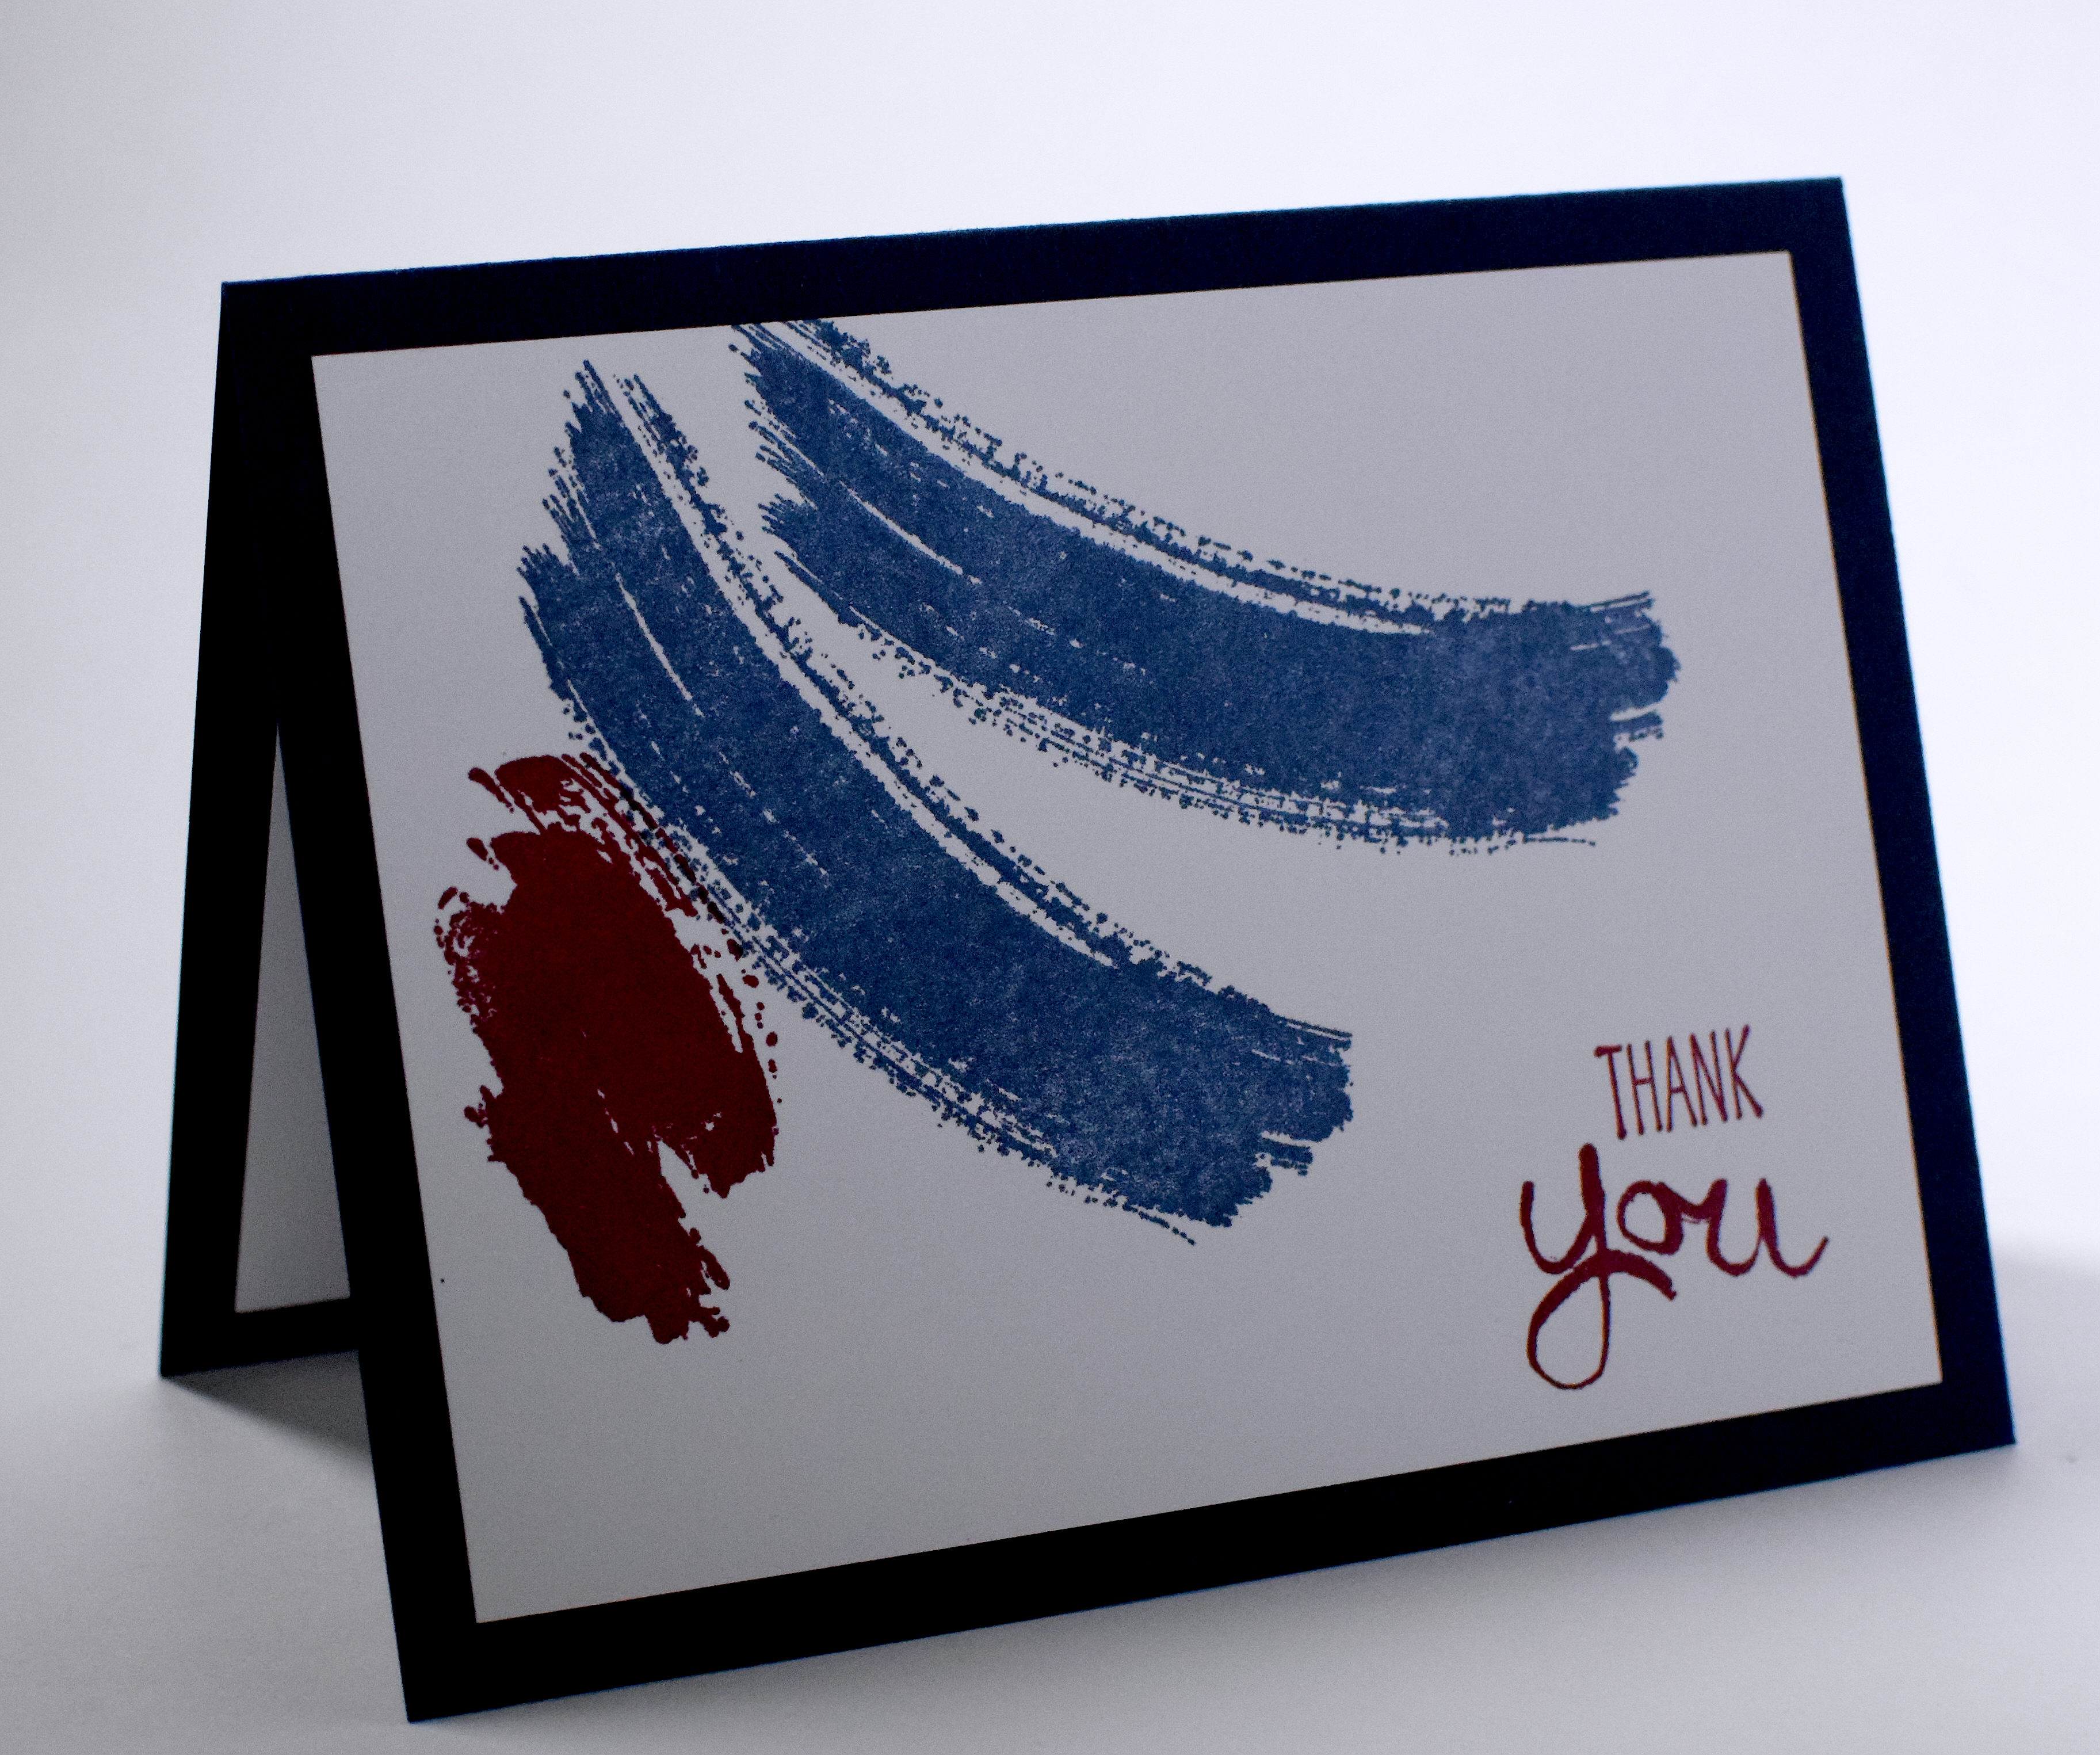
The second card design features stamps from the “Work of Art” set by Stampin’ Up.  The ink used for this one was Papertrey Ink Scarlet Jewel and Gina K In the Navy.

xdsc_4187

For the third card design, I created a background with stamps from the “Flower Builder” set by Gina K Designs.  The greeting is from the “Wonderful Words I” set by Stampin’ Up (retired?). Gina K In the Navy and Cranberry Tart ink and card stock was used.

Each of the stamped panels was mounted on a card base made from Gina K In the Navy card stock.  (It looks black in the photos, but it’s really blue!)  A plain white panel was adhered to the inside for the message.

*

flags-dsc_4257

 Kelly, Kevin, Keith, and their older brother Eric will all be together at Penn next year.  I’m going to have to come up with something to keep me busy when they are away….

Thanks for checking out my card post!

This content uses referral links as described in the disclosure policy on my sidebar.

Nativity Coasters

Nativity Coasters

zDSC_4327 picasa 2

These coasters were made with Premier Decor 4×4 Ivory Travertine tiles I purchased at Home Depot.

The Holy Family image (lower left) is by Inkadinkado (stamp #99629), and the Mother and Child and greeting images (upper right) are from the “Christmas Joy” set (retired?) by Gina K Designs.  Stazon Timber Brown ink was used on both designs to stamp the images and ink the edges.  Each set contains 4 tiles.

I cut squares of cork , ran them through my Xyron sticker machine, and adhered them to the bottoms of the tiles so they would not scratch the table when used.

The box with a clear panel in the lid was adapted from a file called “Square Flat Photo Box” from the “Classic Gift Boxes SVG Kit” by SVGCuts.  The pieces were cut from Recollections Kraft card stock and acetate with my Silhouette electronic die cutting machine.

zdsc_4338-picasa

Thanks for checking out my project post!

This content uses referral links as described in the disclosure policy on my sidebar.

Nativity Ornament Step Card

Nativity Ornament Step Card

Nativity Ornament Step Card wwwDSC_4131.jpg

The Mod Squad Challenge this week is called “Holiday Dimension” where we are encouraged to use dimension such as layers, popped up elements, or mixed media on our projects .   (Sadly, this site is no longer active.)  I purchased the Nativity Bell die by Tutti Designs back in August but hadn’t done anything with it yet, so I decided to use this die to create the dimension on my project.

This is what the flat die cut looks like:

wdsc_4155

I knew I wanted to create a 3D ornament which would somehow hang from the card.  I decided to go with a 5×7 step card design.  The ornament hangs inside the card and is visible through a window cut out of the large panel on the front.

wdsc_4143

To create my ornament, I started by cutting  4 of the die cuts from Recollections Bronze shimmer paper and scored and folded each of them in half.  I then matched up the halves back to back and glued the halves together.  (It’s hard to see the bronze shimmer in the photos.)

I attached a piece of gold cording to the top of the ornament and fed it through a small hole in the fold on the top of the card.  The ornament could either be displayed in the card, or it could be removed to hang on a tree.

wdsc_4149

I created the step card using this template:

5x7-center-step-template

(click on diagram to enlarge)

The card base was made with a heavy weight ivory card stock and was covered with patterned card stock (Nutmeg “History” Medallions Paper by My Mind’s Eye) and paper (A Christmas Story “Christmas Stripe” by Reminisce) along with the Recollections Bronze shimmer paper and some gold cord.

Because the ornament hangs where the inside sentiment would normally be, I created a mini card on the back.

wDSC_4139.jpg

The greeting is from a set called “Holly Jolly” by Gina K Designs and was heat embossed with versamark ink and GKD gold fine detail embossing powder.

The ornament and card fold flat and fit in a regular envelope for mailing.

wdsc_4141

Here’s a better view of the step card base:

nativity-step-card-wwwdsc_4133

Thanks for checking out my card project!

This content uses referral links as described in the disclosure policy on my sidebar.

Patriotic Snowman Ornament

Patriotic Snowman Ornament

Patriotic Snowman Ornament zDSC 4018

Here is one more ornament for the “2016 RubberHedgehog Ornament Challenge” which is going on until November 30, 2016. (HERE is this year’s gallery, and HERE are the 2015 submissions and winners.) Pop on over and check it out!

Any stamps used on the ornaments for the challenge must be by RubberHedgehog, and the stamp I used for this project is “Medium Patriotic American Snowman Rubber Stamp, With Flag” (Item: J-1402).

The 3D star was adapted from a file from the “Happy 4th” svg kit from SVGCuts.  The original file is a star-shaped lantern with an open top.  I closed it up which required creating new side panels.

wdsc_4036

The card stock and paper I used for the star was open stock “Dark Grey (item #991646) and The Paper Studio “Crackled Stars” (665976) from Hobby Lobby, and the red was from the DCWV  Double-Sided Patterns pack (0S-034-00039).

The image was stamped on the plain wood-grained portion of The Paper Studio “Light Bulb Strands” (1284082) printed paper with Gina K Charcoal Brown ink and colored with Copic Markers (R59/E18, B95, B97, E40, E41, E42, E43, E44, E47, Yr27, and the colorless blender).

20 gauge “gun metal” wire by Bead Landing was used as the hanger.

ydsc_4047

Thanks for checking out my project post!

This content uses referral links as described in the disclosure policy on my sidebar.

Window Scene Ornament

Window Scene Ornament

wDSC_4020 polaroid.jpg

Here is another ornament for the “2016 RubberHedgehog Ornament Challenge” which is going on until November 30, 2016. (HERE is this year’s gallery, and HERE are the 2015 submissions and winners.) Pop on over and check it out!

Any stamps used on the ornaments for the challenge must be by RubberHedgehog, and the stamp I used for this project is “Christmas Tree Cat” (item: K-10204).

I created a die cut for this image with my Silhouette electronic die cutting machine.  The image was stamped on the die cut (white card stock) with Memento Tuxedo Black ink and colored with Copic Markers (G28, R59, YR24, YR27, and E44) and a Sakura glitter pen.  The colored die cut image was then adhered to a piece of patterned paper from the “Signature Christmas” 6×6 designer paper pad by My Minds Eye.

The window, shutters and flower box were created with dies by Poppystamps, Inc.  (Small Madison Window, style no. 816; Small Madison Window Shutter, style no. 833; and Small Flower Box, style no. 823) and my Cuttlebug.  A piece of acetate was adhered behind the window and all these pieces were popped up with Scotch foam mounting tape.

The circle panels were cut with two dies from the We R Memory Keepers Nesting Circles die set, and the smaller one was embossed with the Spellbinders M-Bossabilities Bricks and Bark (EL-015) embossing folder (discontinued?).

The Poinsettia was cut with my Silhouette using a file from the “3D Wintergreens” SVG Kit by SVGCuts.

Card stock used was Recollections heavy weight ivory, Gina K Designs Christmas Pine, and a scrap of red I believe came from a value pack from AC Moore.  Gold “Celebrate It” wire edged ribbon (#18634) from Michaels was also used.

wdsc_4027

Thanks for checking out my ornament post!

This content uses referral links as described in the disclosure policy on my sidebar.