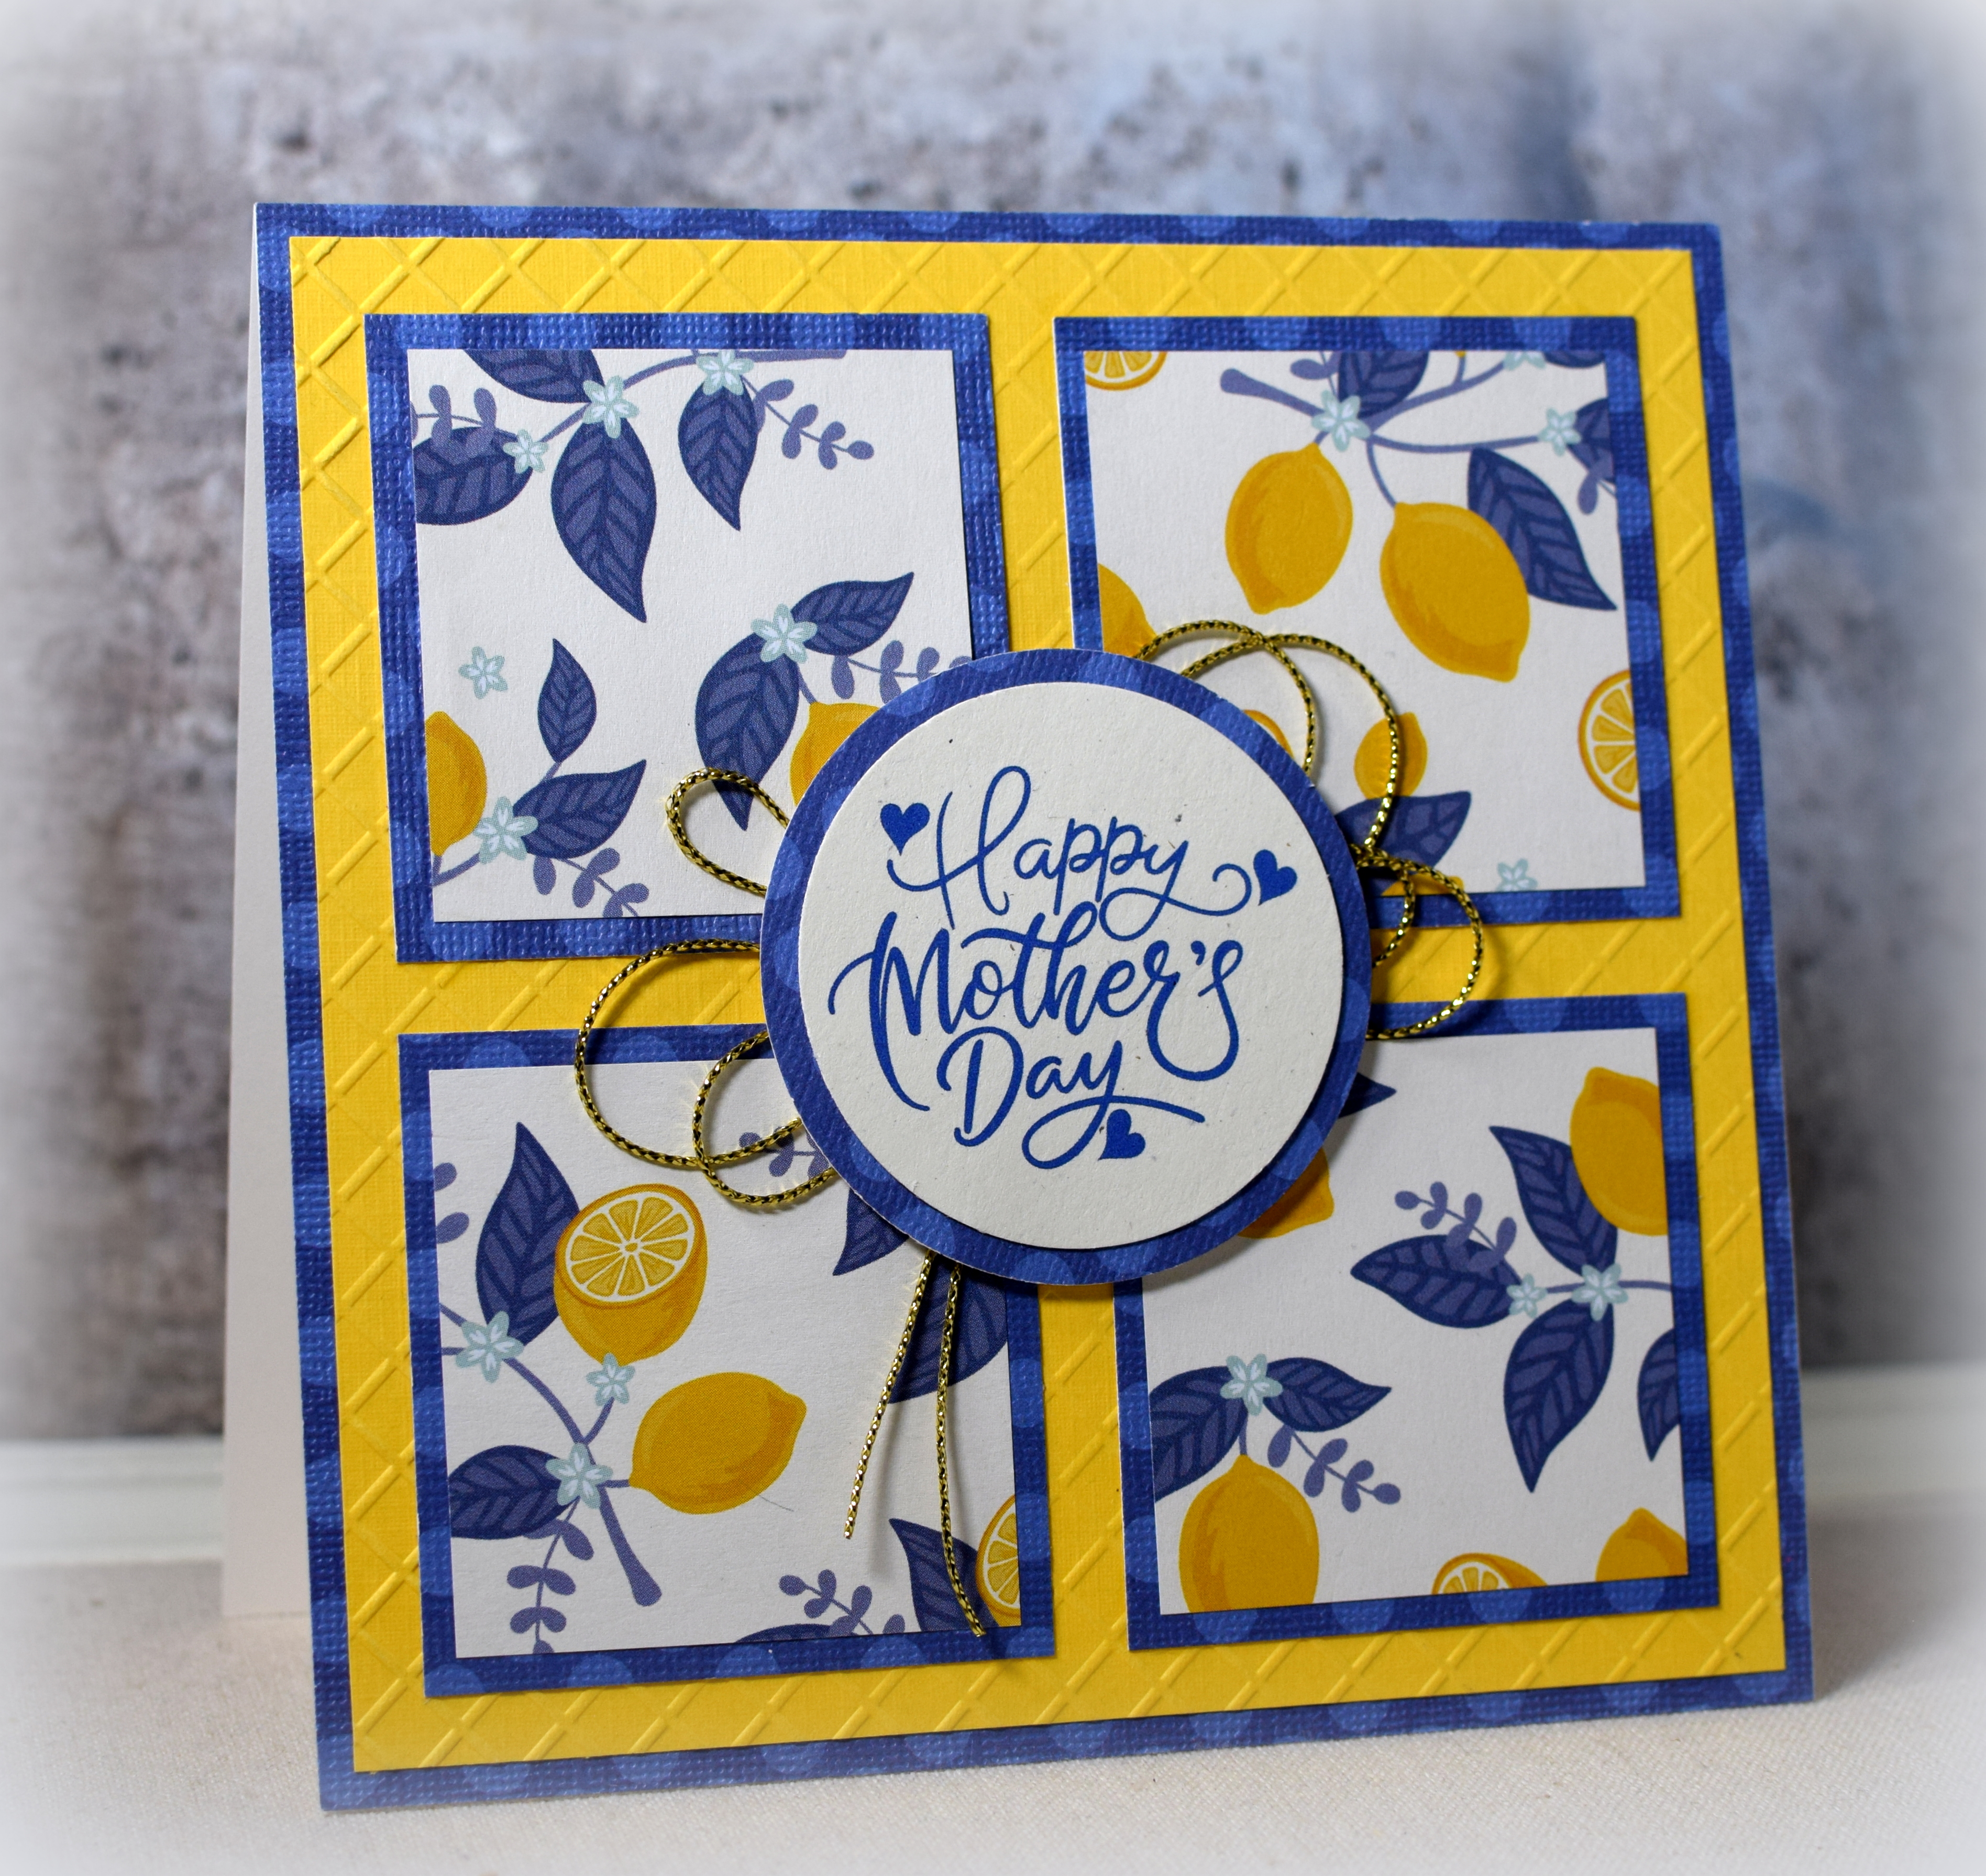
This card features paper from American Crafts (# 320492) and a simple layout that allowed the paper to shine! I used “Dark Blue Large Dot” paper from Core’ dinations and Yellow (#99248) from Recollections for the mats
The greeting was computer generated from a digital file by RedGumPrints that I purchased from Etsy. It was printed on Rustic Cream card stock from Papertrey Ink and cut with a 2 inch punch (and 2 1/4 inch punch for the mat – both from EK Tools). The inside sentiment is from the “Nurturing Blooms” set from Gina K Designs (retired).
I used the “6×6 Grid” embossing folder from Pink & Main to add some texture to the background and some gold cord for a bit of shine.
The squares are 2 inches with 2 1/4 inch mats, centered on a 5 1/2 inch square card. My “Straight and Steady Corner Tool” set from Creek Bank Creations made it easy to line everything up!
Thanks for checking out my card project!
This content uses referral links as described in the disclosure policy on my sidebar.
I love the fine metal tips available for many of the glue bottles on the market today, but I hate that mine always seems to be clogged when I start a project even when a pin is used to seal the bottle when not in use. I even tried using an airtight glass jar in which to store it with no luck. (I use Art Institute Dries Clear Glue in a small refillable squeeze bottle.) I noticed that the glue bottle in the My Sweet Petunia Precision Glue Press is stored uncapped and upside down on a piece of silicone. I also saw Karen Burniston’s video (1:49) where she suggests to store glue bottles with the precision tips upside down in a jar with a damp paper towel on the bottom. The challenge with this (for me) is making sure the paper towel is always wet. But I used the 2 ideas which seems to have solved my clogging (and sealing) problem! My glue bottle now sits in a small glass cup with a piece of silicone on the bottom. It is always ready to use (not clogged), and I don’t have to stick a pin in it when I am not using it. Game changer!!
As long as the metal applicator is sitting directly on the silicone (and not at an angle), my glue is not oozing out and is always ready to go without clogging or waiting for the glue to flow to the tip. I initially tried it in a small flower pot which was too wide for my small glue bottle causing the bottle to lean on an angle when placed inside. Because the tip wasn’t completely resting on the silicone, I had leakage. Then I tried a small paper cup, and while the bottle was upright, the cup was too light and tipped over. So the container needs to be close in size (across) to the glue bottle you are using and heavy enough that it doesn’t tip over when glue bottle is placed inside. I ended up using a small votive candle holder, and it was perfect for the glue bottle I was using. I used a circle die to trim a piece of silicone to fit flat on the bottom, but scissors would have worked also as the silicone is super easy to cut. If die cutting, I found it easiest to place the silicone between a folded scrap of copy paper before cutting as the silicone wanted to squeeze out from under the die. (I actually used 2 circles; not sure if that’s necessary!)
I may never have to clean a clogged tip or put a pin in my glue bottle again!! Woohoo!!
Thanks for checking out my post!
This content uses referral links as described in the disclosure policy on my sidebar.
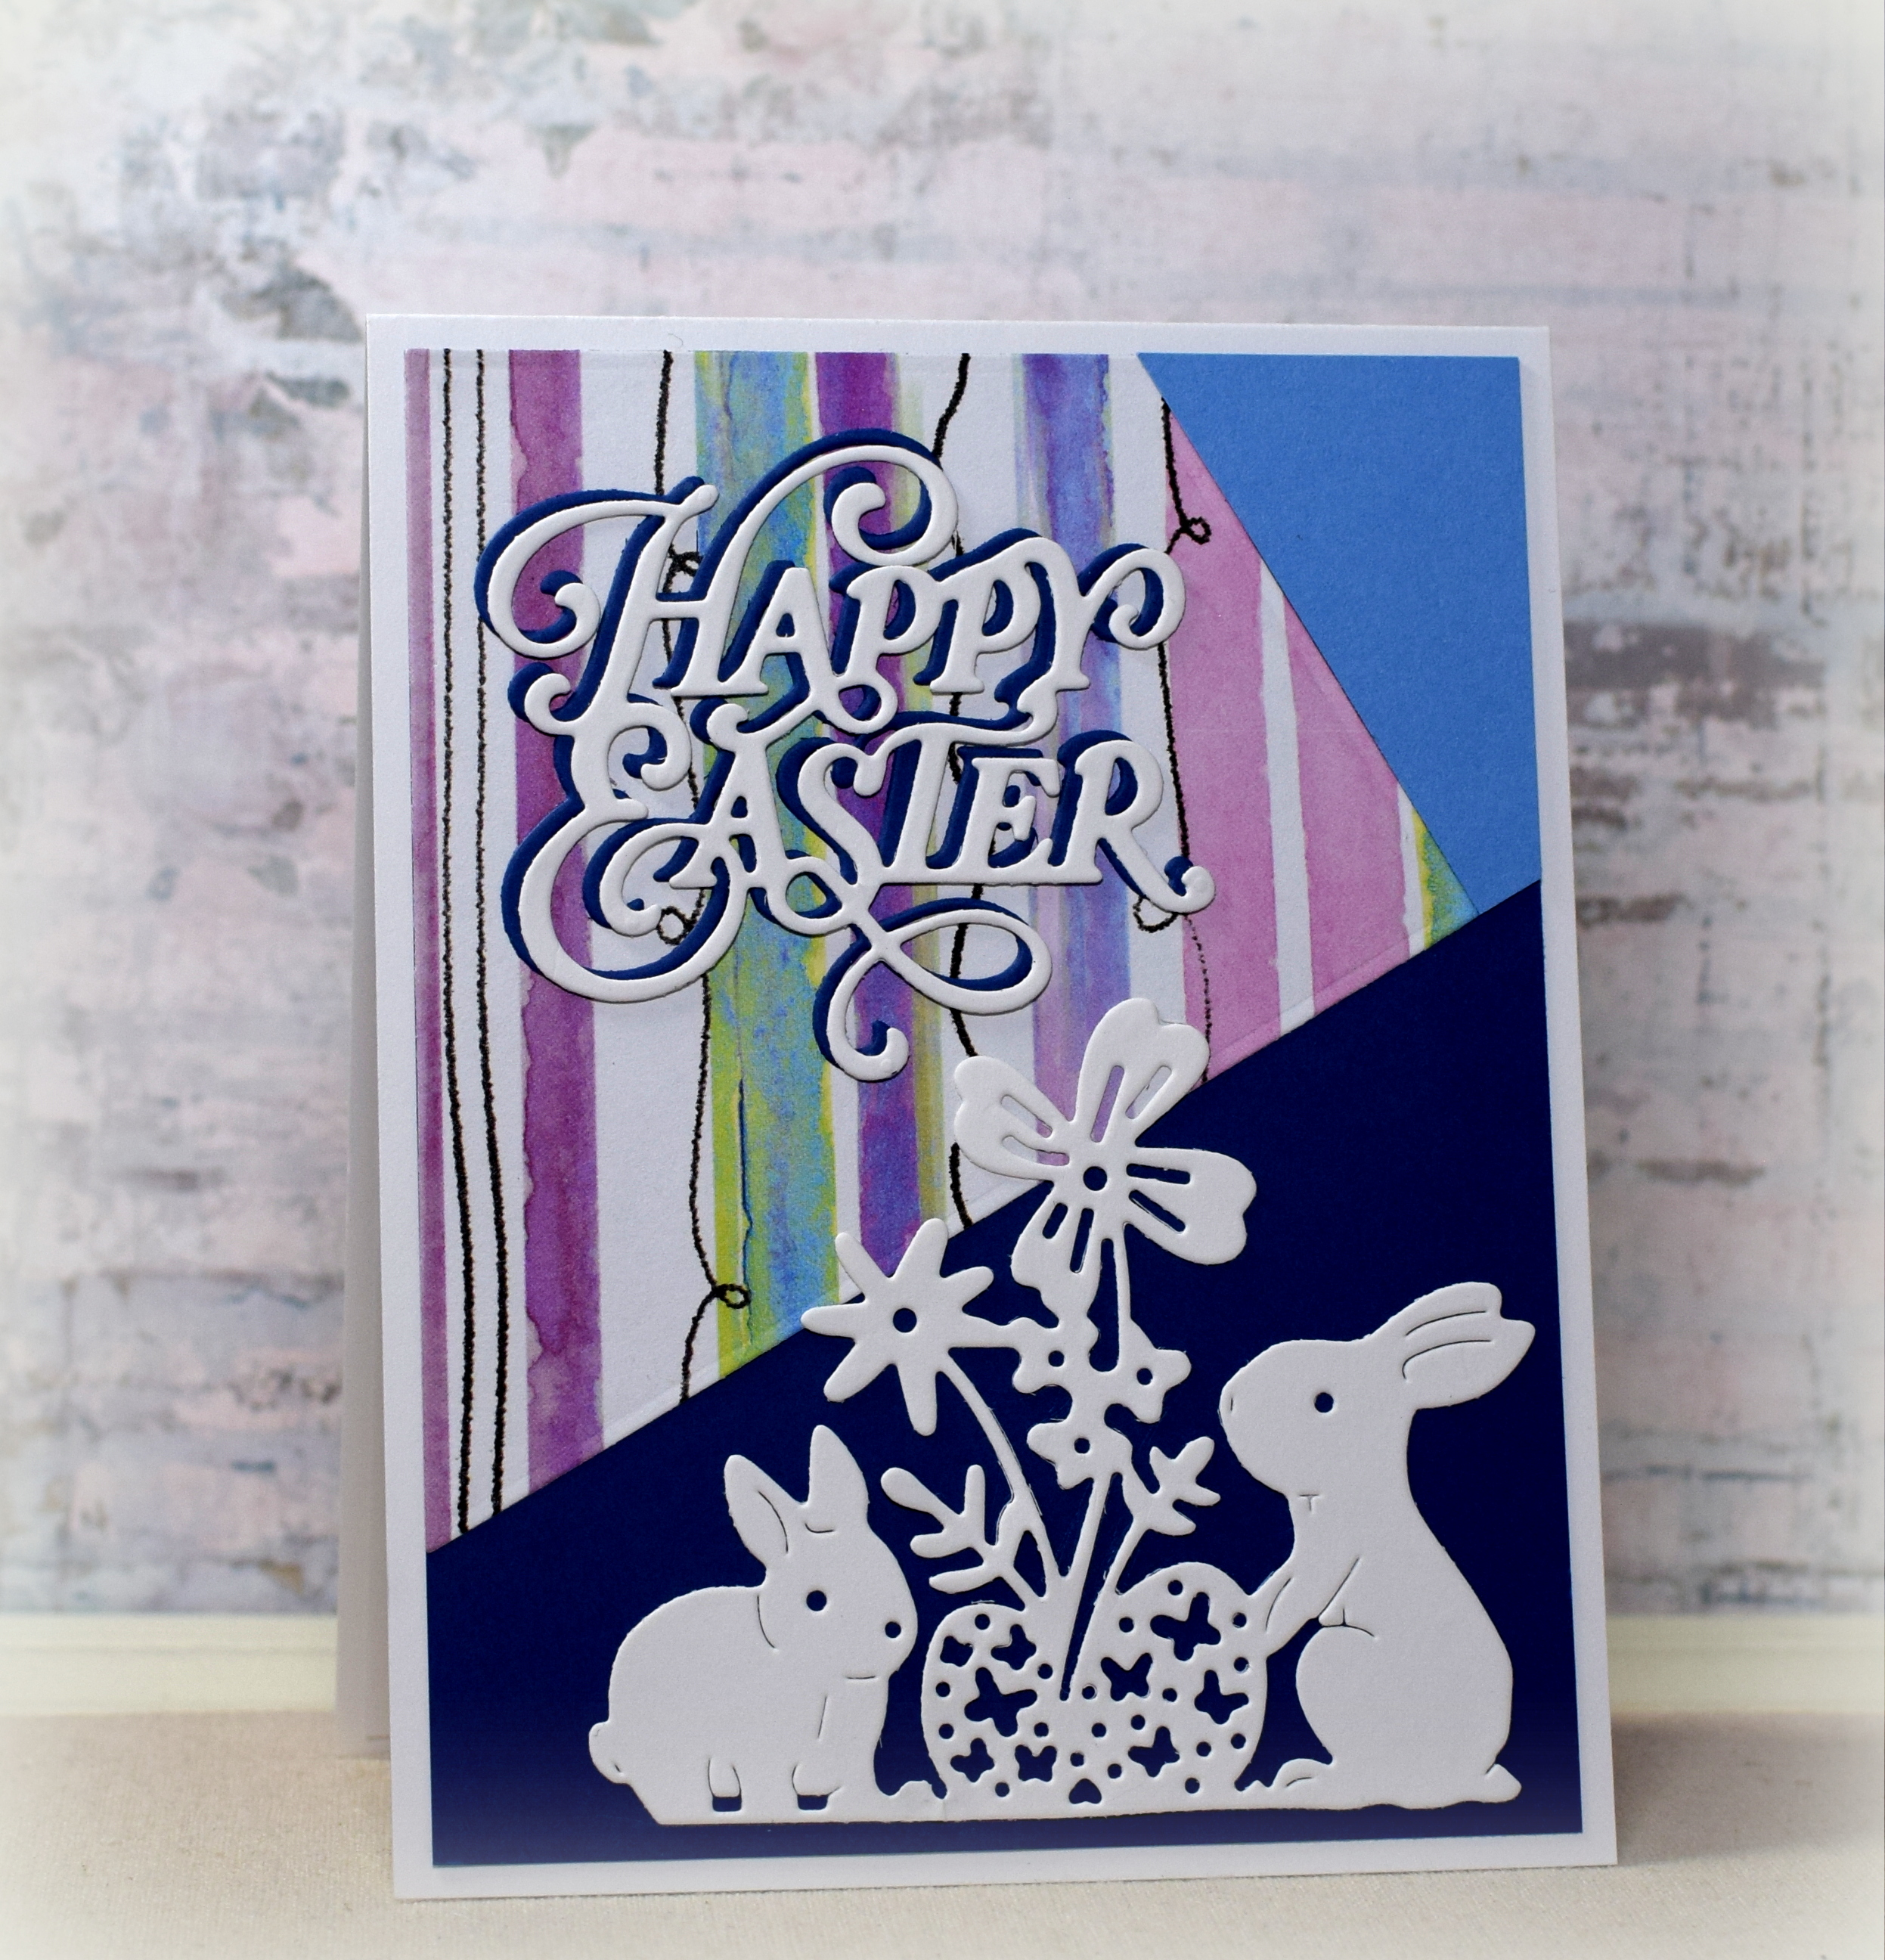
(inside: Wishing you an egg-cellent Easter filled with joy)
This card features “Watercolor Stripe” paper from The Paper Studio, the “Happy Easter” greeting from Purple Daisy Design, and a cute Easter die I found on Amazon.
Recollections Navy and White and Gina K Designs Powder Blue card stock was also used. The inside greeting was computer generated.
This layout was inspired by Lisa Curcio’s video, but my measurements are different. I actually used one of my Mosaic Moments scrapbooking dies from the “30 Degrees” set (not available at this time?) to cut my patterned paper piece, but I included (my) measurements below to cut without the die if interested….
Split Panel Card and Others from a One Sheet Wonder
(inside: May you continue to enjoy days filled with laughter, months filled with joy, & years of happy memories.)
Inspiration for this card came from two places. I found a 12×12 “One Sheet Wonder” template that I used to create 6 different card sketches (10 cards in all), and this was one of them – sort of. In Mary Knabe’s video, one of her sketches had the focal panel (flowers) attached to the flap at the top, but there was nothing attached to the bottom so the card did not stand up/display very well. I had also recently seen her Split Front Card video and thought I could “fix” the card here by adding the bottom panel (as shown in the second video).
The focal paper I used for all the “One Sheet Wonder” cards is called “Floral Clusters & Leaves” by The Paper Studio. This OSW template works best with double sided paper as a few of the sketches call for flipping some of the pieces over after the sheet is all cut up, but this paper is one sided so I had to “cheat” and use a second coordinating pattern I had in my stash. (The peach strip above should have been the back of one of the pieces cut from my patterned paper.)
If you care to see the other cards I created with this One Sheet Wonder Template or a list of the supplies I used, keep reading…
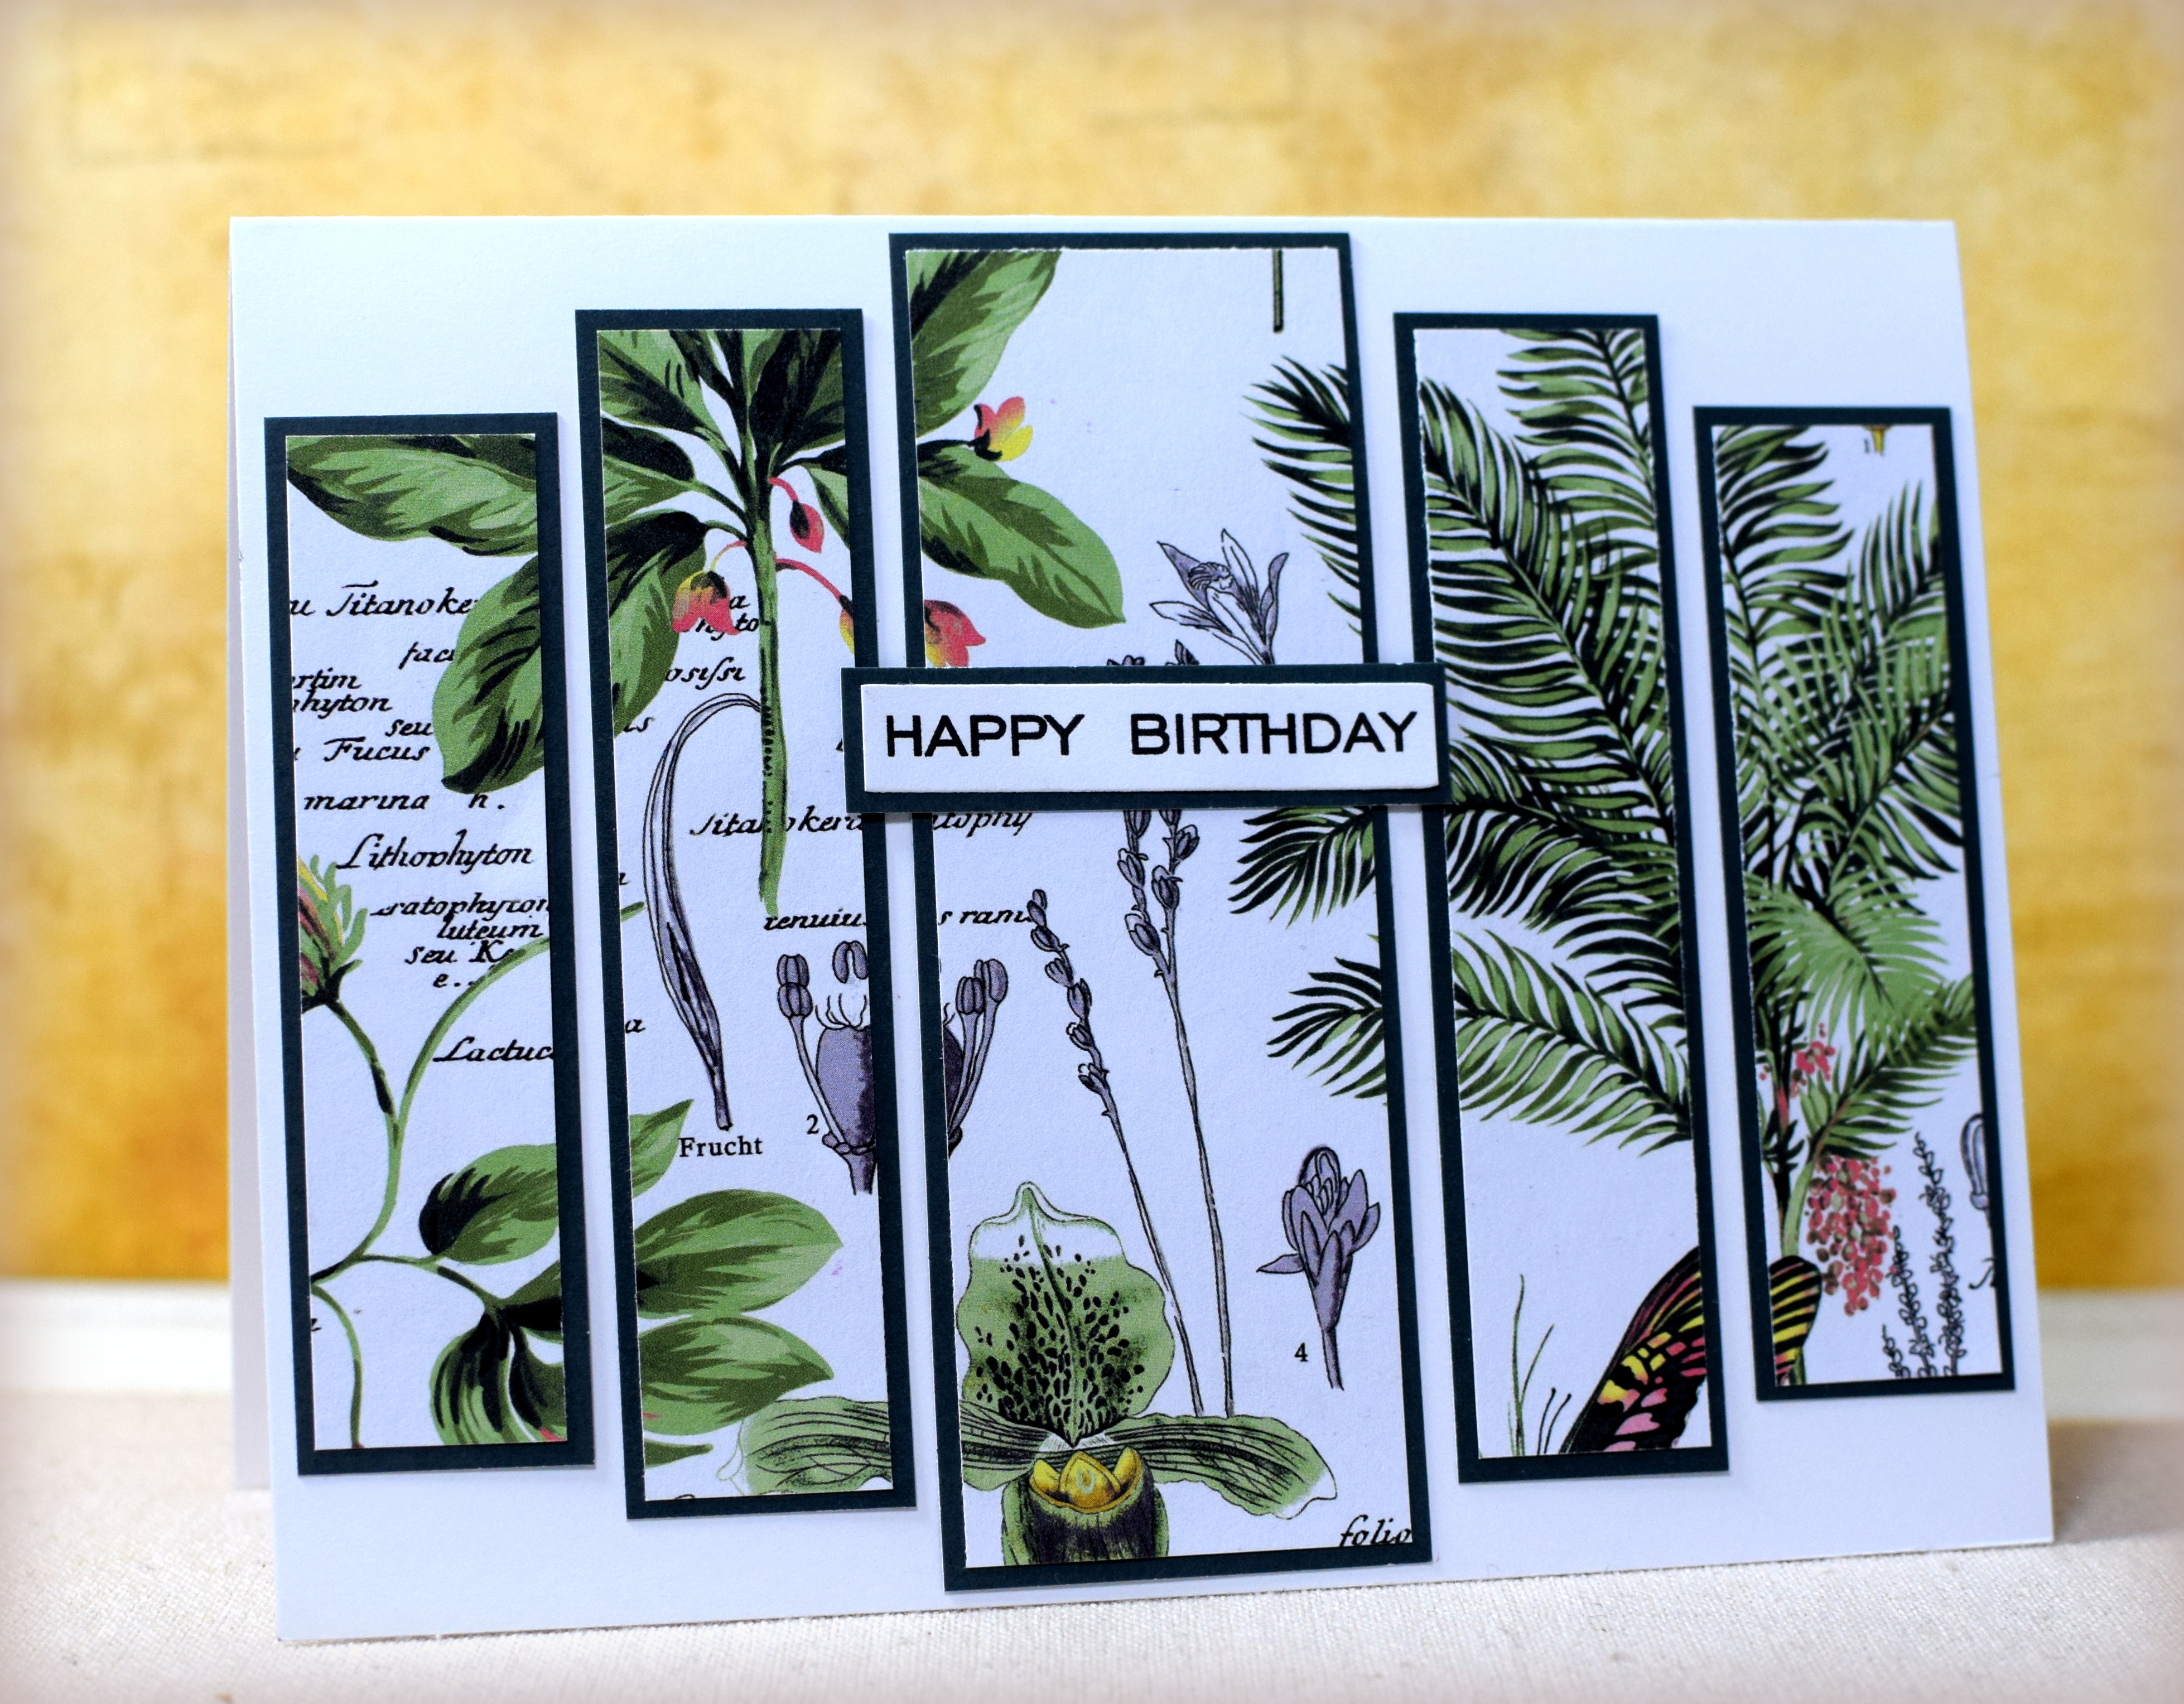
This card features the “Botanicals” paper (#1434406) from The Paper Studio and a technique I saw in this video on creating a Panoramic Panel card.
Lorraine positioned her panels directly on the card base, but I wanted to try it with a thin border around the whole card, so I changed the measurements slightly so mine fit on a 5 3/8 x 4 1/8 inch panel which I embossed with the Stampin’ Up “Subtle” embossing folder.
This is how it looks with no border (using her measurements/instructions):
And here is a version where I cut the patterned paper incorrectly (there wasn’t enough paper to create a wider middle panel) so I left the panels all the same height and created this card. We will call it another variation instead of a mistake – lol!
The mats were from the “Green” card stock pack from The Paper Studio. (Yes, they are dark green and not black as they appear in the photos!) The greetings were computer generated.
Another good layout for using pretty patterned paper that you don’t want to cover up!
If you care to see the measurements for the panels, keep reading.