Love Birds – Napkin Anniversary Card

Love Birds – Napkin Anniversary Card

wDSC_3764

(inside: You’re living proof that dreams come true.)

My husband is an avid birdwatcher so when I saw this napkin design with the pair of birds, I immediately thought it would make a great anniversary card for him.  (He got two cards from me this year – lol!)

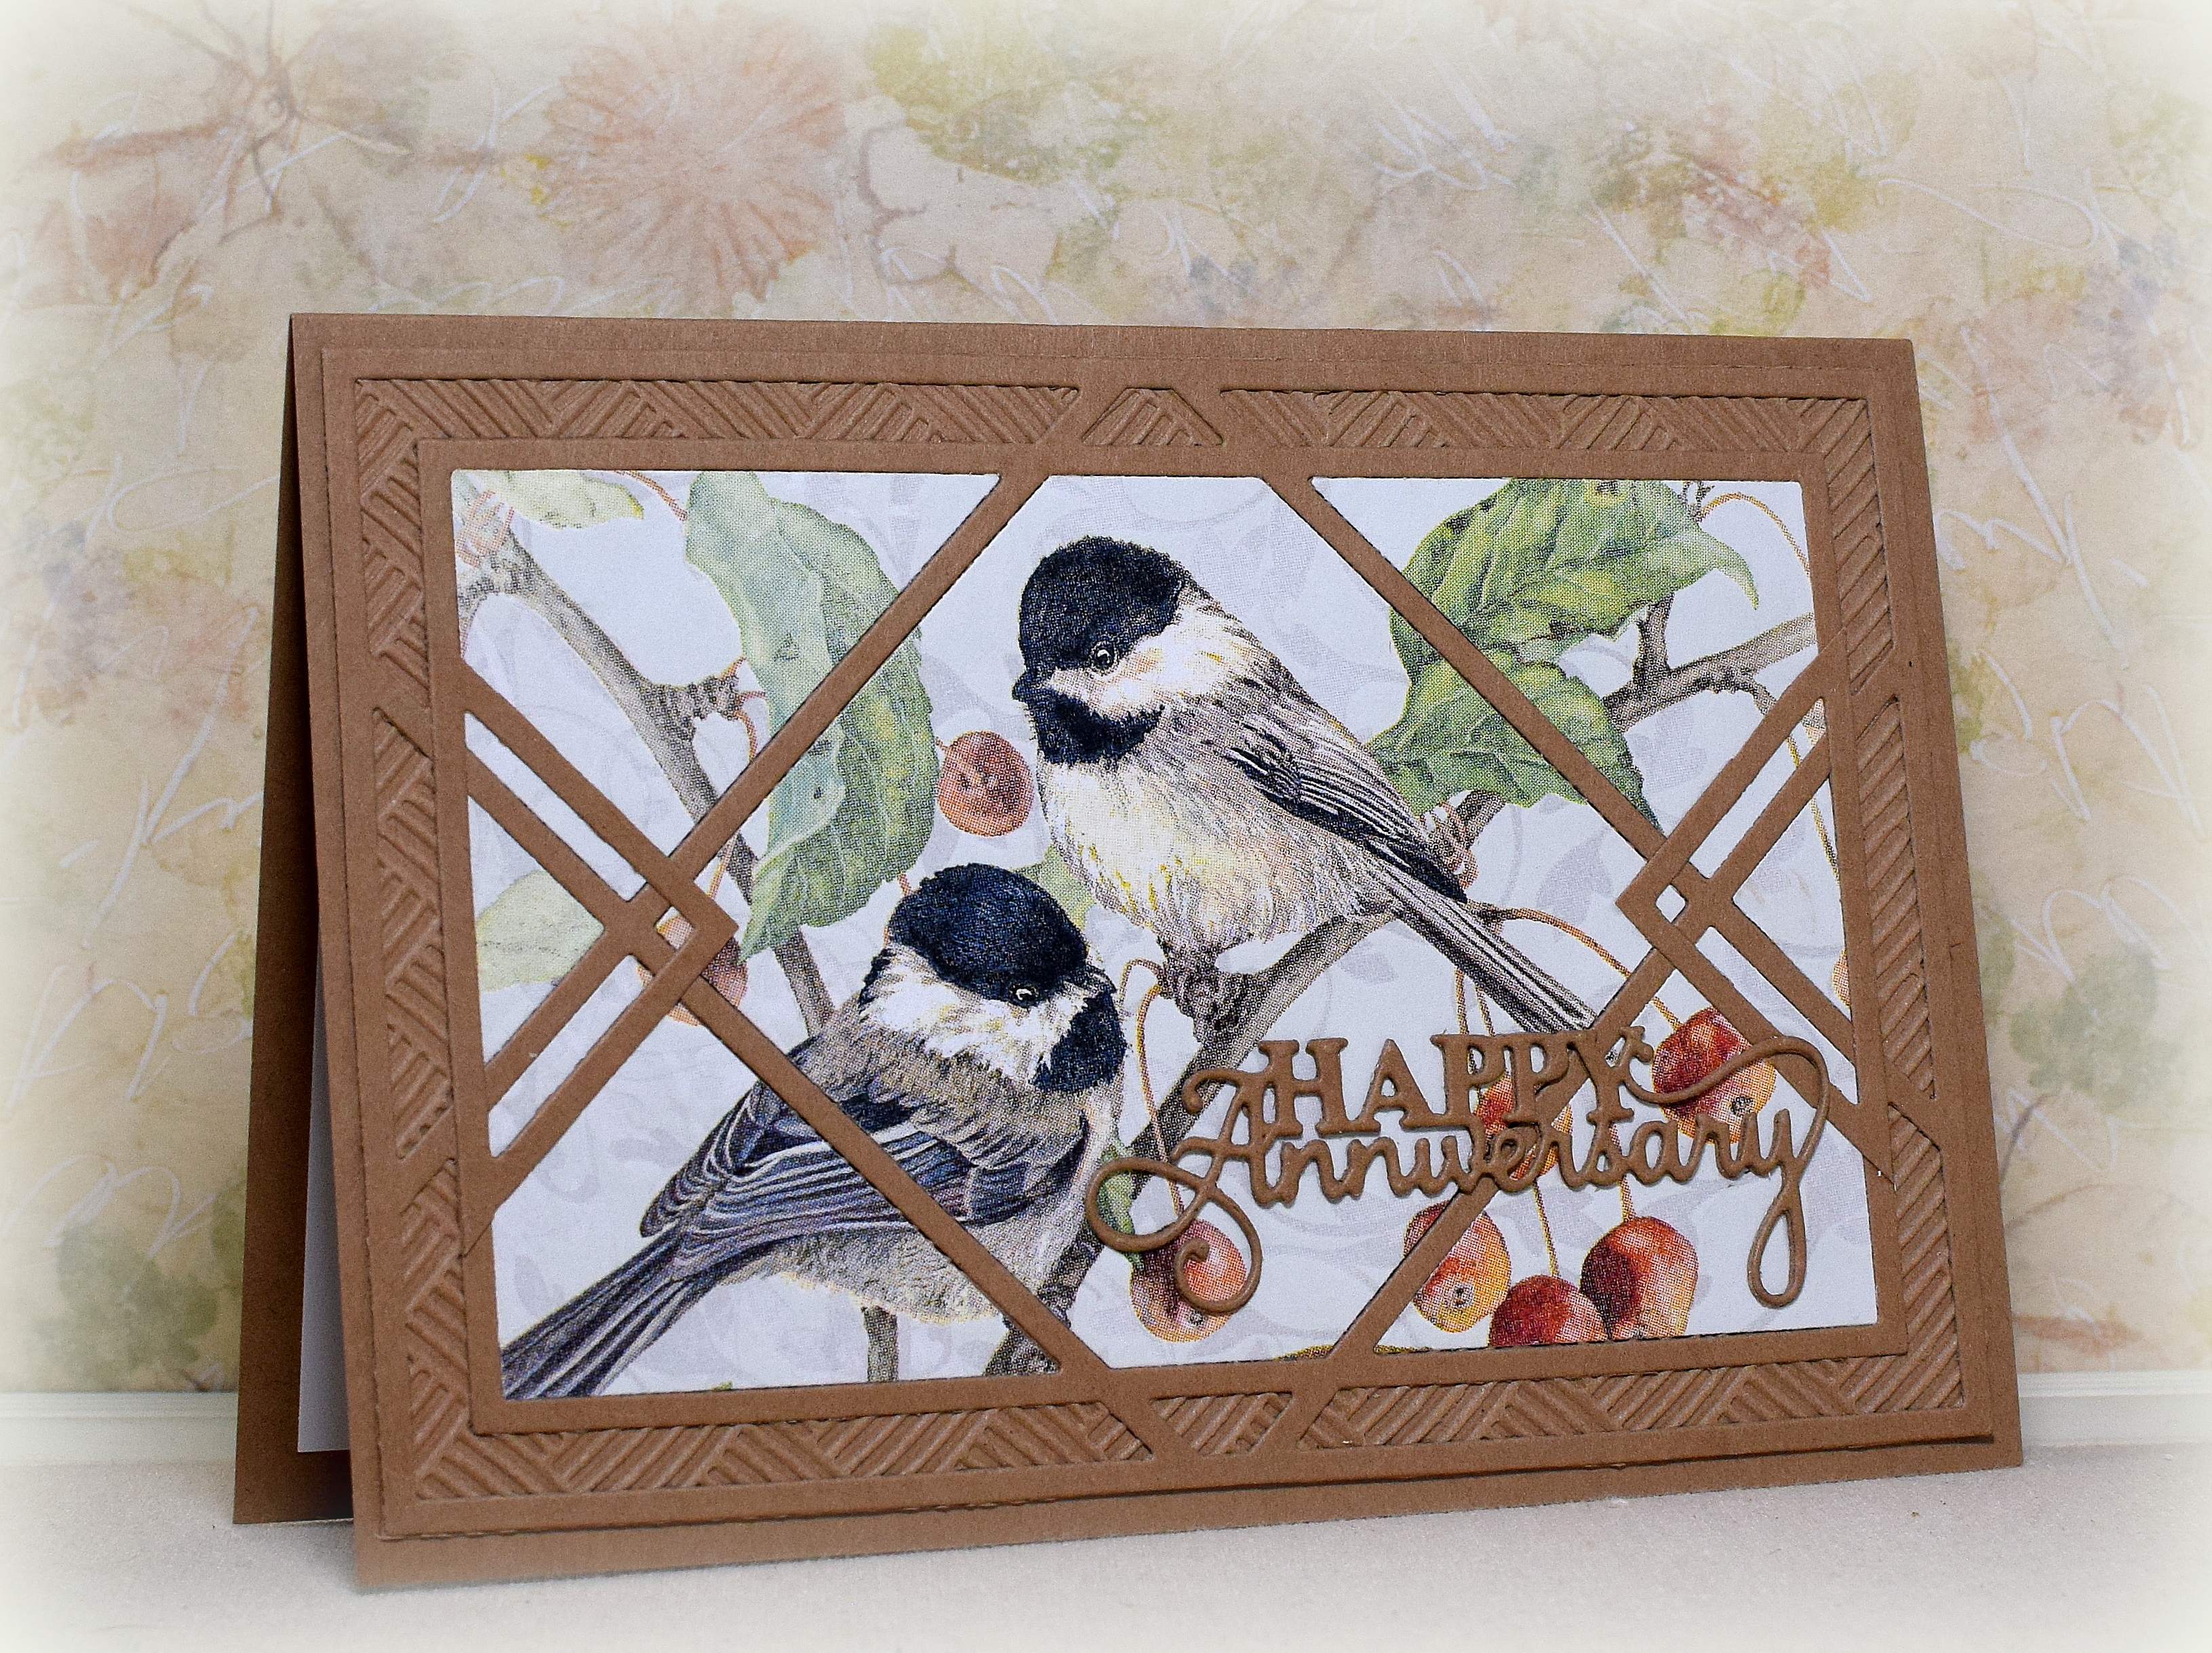
I used my Minc foiling machine, the napkin, and some freezer paper to create the panel for my card front.  (This post includes instructions on how I did this.)

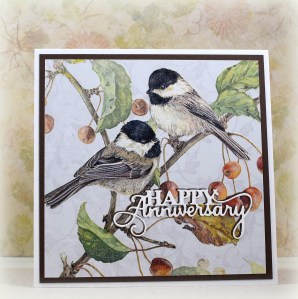
I always struggle with layout ideas when I use a napkin with a scene for a card panel.  Do I cut it apart, add a bunch of stuff to it, or leave it as is?  Here is one version I did where I simply matted the whole napkin panel, layered the die cut greeting, and let the beautiful image do all the work.  (This card is 5 1/2 inches square.)

wDSC_3768

(inside: An anniversary is a time to celebrate the joys of today, the memories of yesterday, and the hopes of tomorrow.)

For the sample at the top of this post, I used the Mosaic Moments 4 x 6 Crisscross die to cut the frame and the napkin panel and pieced them together.  The die is large (made to cut a 4 x 6 or 5 x 7 inch photo), and my napkin was only 5 1/2 inches square, so I added an embossed panel behind the frame (made with the 5 x 7 “Basket Weave” embossing folder by Darice) to fill in the holes.  The greeting was cut (3 times and stacked) with the “Mini Expressions – Happy Anniversary” die by Sue Wilson/Creative Expressions.

The inside sentiments on both cards are from the “Anniversary 2 Celebrate” set by The Stamps of Life.

The first card ended up being 4 5/8 x 6 7/8, and while it would fit in an A7 sized envelope (for 5 x 7 cards), I used my We R Memory Keepers 1-2-3 Punch Board to create a custom envelope that was a better fit.  I needed to create an envelope for the square card as well.

Thanks for checking out my card projects!

This content uses referral links as described in the disclosure policy on my sidebar.

Autumn Leaf Frame

Autumn Leaf Frame

This card features the Poppystamps Autumn Leaves Sidekick Frame and Stencil set over one of the MANY panels I created when making my Autumn Triangle Gatefold Card.

I cut the frame and greeting panel from Gina K Designs Honey Mustard card stock pounced with Honey Mustard ink and added the tiny ink spots with a Walnut Stain distress marker and Spritzer tool.

The greeting was cut with an unbranded Happy Birthday die from Bazzill Butter Mints card stock; I layered two of these to make it thicker and offset it on a third cut from Rich Razzleberry card stock from Stampin’ Up. The greeting panel that was popped up with foam tape over a “tangle” of gold cord.

Here’s another sample with the same frame die:

For this one, I used the Stampendous “Delightful Birthday” stamp #CRH306) with GKD Warm Cocoa ink.

The background panels were made with Walnut Stain, Vintage Photo, and Wild Honey Distress Oxide inks, spritzes of water, the Stampendous! Decor Cling Leaves Rubber Stamp – DCR101, and the French Script background stamp from Stampin’ Up (retired?).

Thanks for checking out my posts!

This content uses referral links as described in the disclosure policy on my sidebar.

Xavier Zebra Spinner Flip Card with Mirror Stamping

Xavier Zebra Spinner Flip Card

My fifth (and final!) card variation made with the Circle Flip Die Set from Creek Bank Creations is a Spinner Flip Card. This card base is basically a flip card, but the inner part of the circle is “removed” so an element has a place to spin.

(If you wind up the spinner element before putting the card in the envelope, it will spin like this when the recipient opens the card for the first time.)

The adorable zebra image is from the “Xavier Zebra” stamp set from Gina K Designs (retired?). The set comes with one zebra stamp, but I needed a second, reversed image so the back of the spinner was not blank. To do this, I did some mirror stamping using my Stampin’ Up Silicone Craft Sheet (as demonstrated HERE), but you could also use a sheet of acetate (as demonstrated HERE) or a flat, solid stamp (as demonstrated HERE). Several companies sell “Mirror Stamping” stamps/tools specifically for this technique as well.

To make the spinner element, I stamped him on two die cuts (front and back) that I made with my Silhouette and sandwiched a long piece of clear thread between the layers before gluing them together. Here is a video (starting at the 2:25 mark) showing how to create this type of card.

I used Versafine Onyx Black ink for all of my stamping. Forgetting that Versafine takes a little longer to dry than dye inks, I got smudges in several spots on the yellow panel. Strategically placed stars solved that problem (for the most part)!

The black frame was cut with a die from the “Stitched Circle Rings Die Set” and the inside greeting is the “Circle Stamp Happy Birthday” stamp which are both from Creek Bank Creations. I didn’t want the center words (from the circle stamp) to be visible when the card is closed so I masked the Happy Birthday portion of the circle stamp and used a smaller greeting from the “Tiny Words #SSS101883” set from Simon Says Stamp instead and positioned it behind the zebra.

The black and white striped panel is digital paper by TheMockupLoft that I purchased on Etsy. The yellow paper is Bold Yellow Stripe by Recollections. Heavy weight black and white card stock was also used.

I have to say, I am excited that I was able to try all of the styles shown in the videos for this set and now have 5 different card base ideas on which to build for future card projects. (I hope you didn’t get tired of looking at so many circles this week!)

Thanks for checking out my card project!

Double Circle Flip Slim Line Card

Double Circle Flip Slim Line Card

Using the dies from the  Circle Flip Die set from Creek Bank Creations on a “slim line” card base is yet another way to use this versatile die set.  You could make a single flip panel or two as I have done here.  (I was bound and determined to “get my money’s worth” with this die set – lol!!) The die set is designed to make A2 size cards, but HERE is the video (starting at 3:17) showing how to create the slim line card.

The birthday images are from the “Sketch a Party” set from Stampin’ Up (retired) and were paper pieced with scraps from the core’dinations Light Green Crosshatch (#GX-2300-24) patterned paper also used for the decorative panel on the card front.  All the circles were cut with dies from the Circle Flip Die set. 

Again, this die set is meant for an A2 size card, and the included decorative panel die is too small for the longer card base.  To fix this, I die cut two of the decorative panels, trimmed them to size (with my paper trimmer), and then used the greeting strip to cover the seam in the center.  (A much easier way to add decorative paper is shown in the video; I had watched the video some time before creating my card and forgot how she did it – lol!!)

The polka dot paper is digital paper by TheMockupLoft that I purchased on Etsy. 

The sentiment stamp on the inside is the “Happy Birthday Round” stamp (#S1740) from Creek Bank Creations.  I added a second, plain circle panel on which to include a handwritten message and/or signature.

My finished card measures 4″ x 9 1/4″ and fits in a regular business envelope, but if you wanted to make a custom envelope with the We R Memory Keepers envelope punch board, start with a 10 5/8″ square and line up at 7 1/8″ for first punch/score line.

Thanks for checking out my card project!

Circle Flip Easel Card

Circle Flip Easel Card

An easel card is another type of card you can make with the Circle Flip Die set from Creek Bank Creations.  Here is the instructional video (starting at the  2:10 mark) showing this technique.

I started with a black A2 size card base and used the “flip” die to create the easel. (It’s the same die used for the traditional flip card but positioned in the opposite direction on the card front.)

I embossed the white decorative panel with a Cuttlebug Swiss Dots folder.  (The die for this panel is included in the set.) I cut red glitter card stock with the “Make A Wish” die from Elizabeth Craft Designs (#1553) and the 1 inch “Thick Materials Star” punch by Fiskars.

The striped panel is digital paper by TheMockupLoft that I purchased on Etsy and was printed on glossy photo paper because I wanted the black to be really bold.

The “inside” sentiment is from the “Flower Builders” set from Gina K Designs (retired?) and was popped up with foam tape to hold the easel in place when opened.  I also included a blank panel for a handwritten message and signature.

This A2 size card folds flat for mailing.

Thanks for checking out my card project!