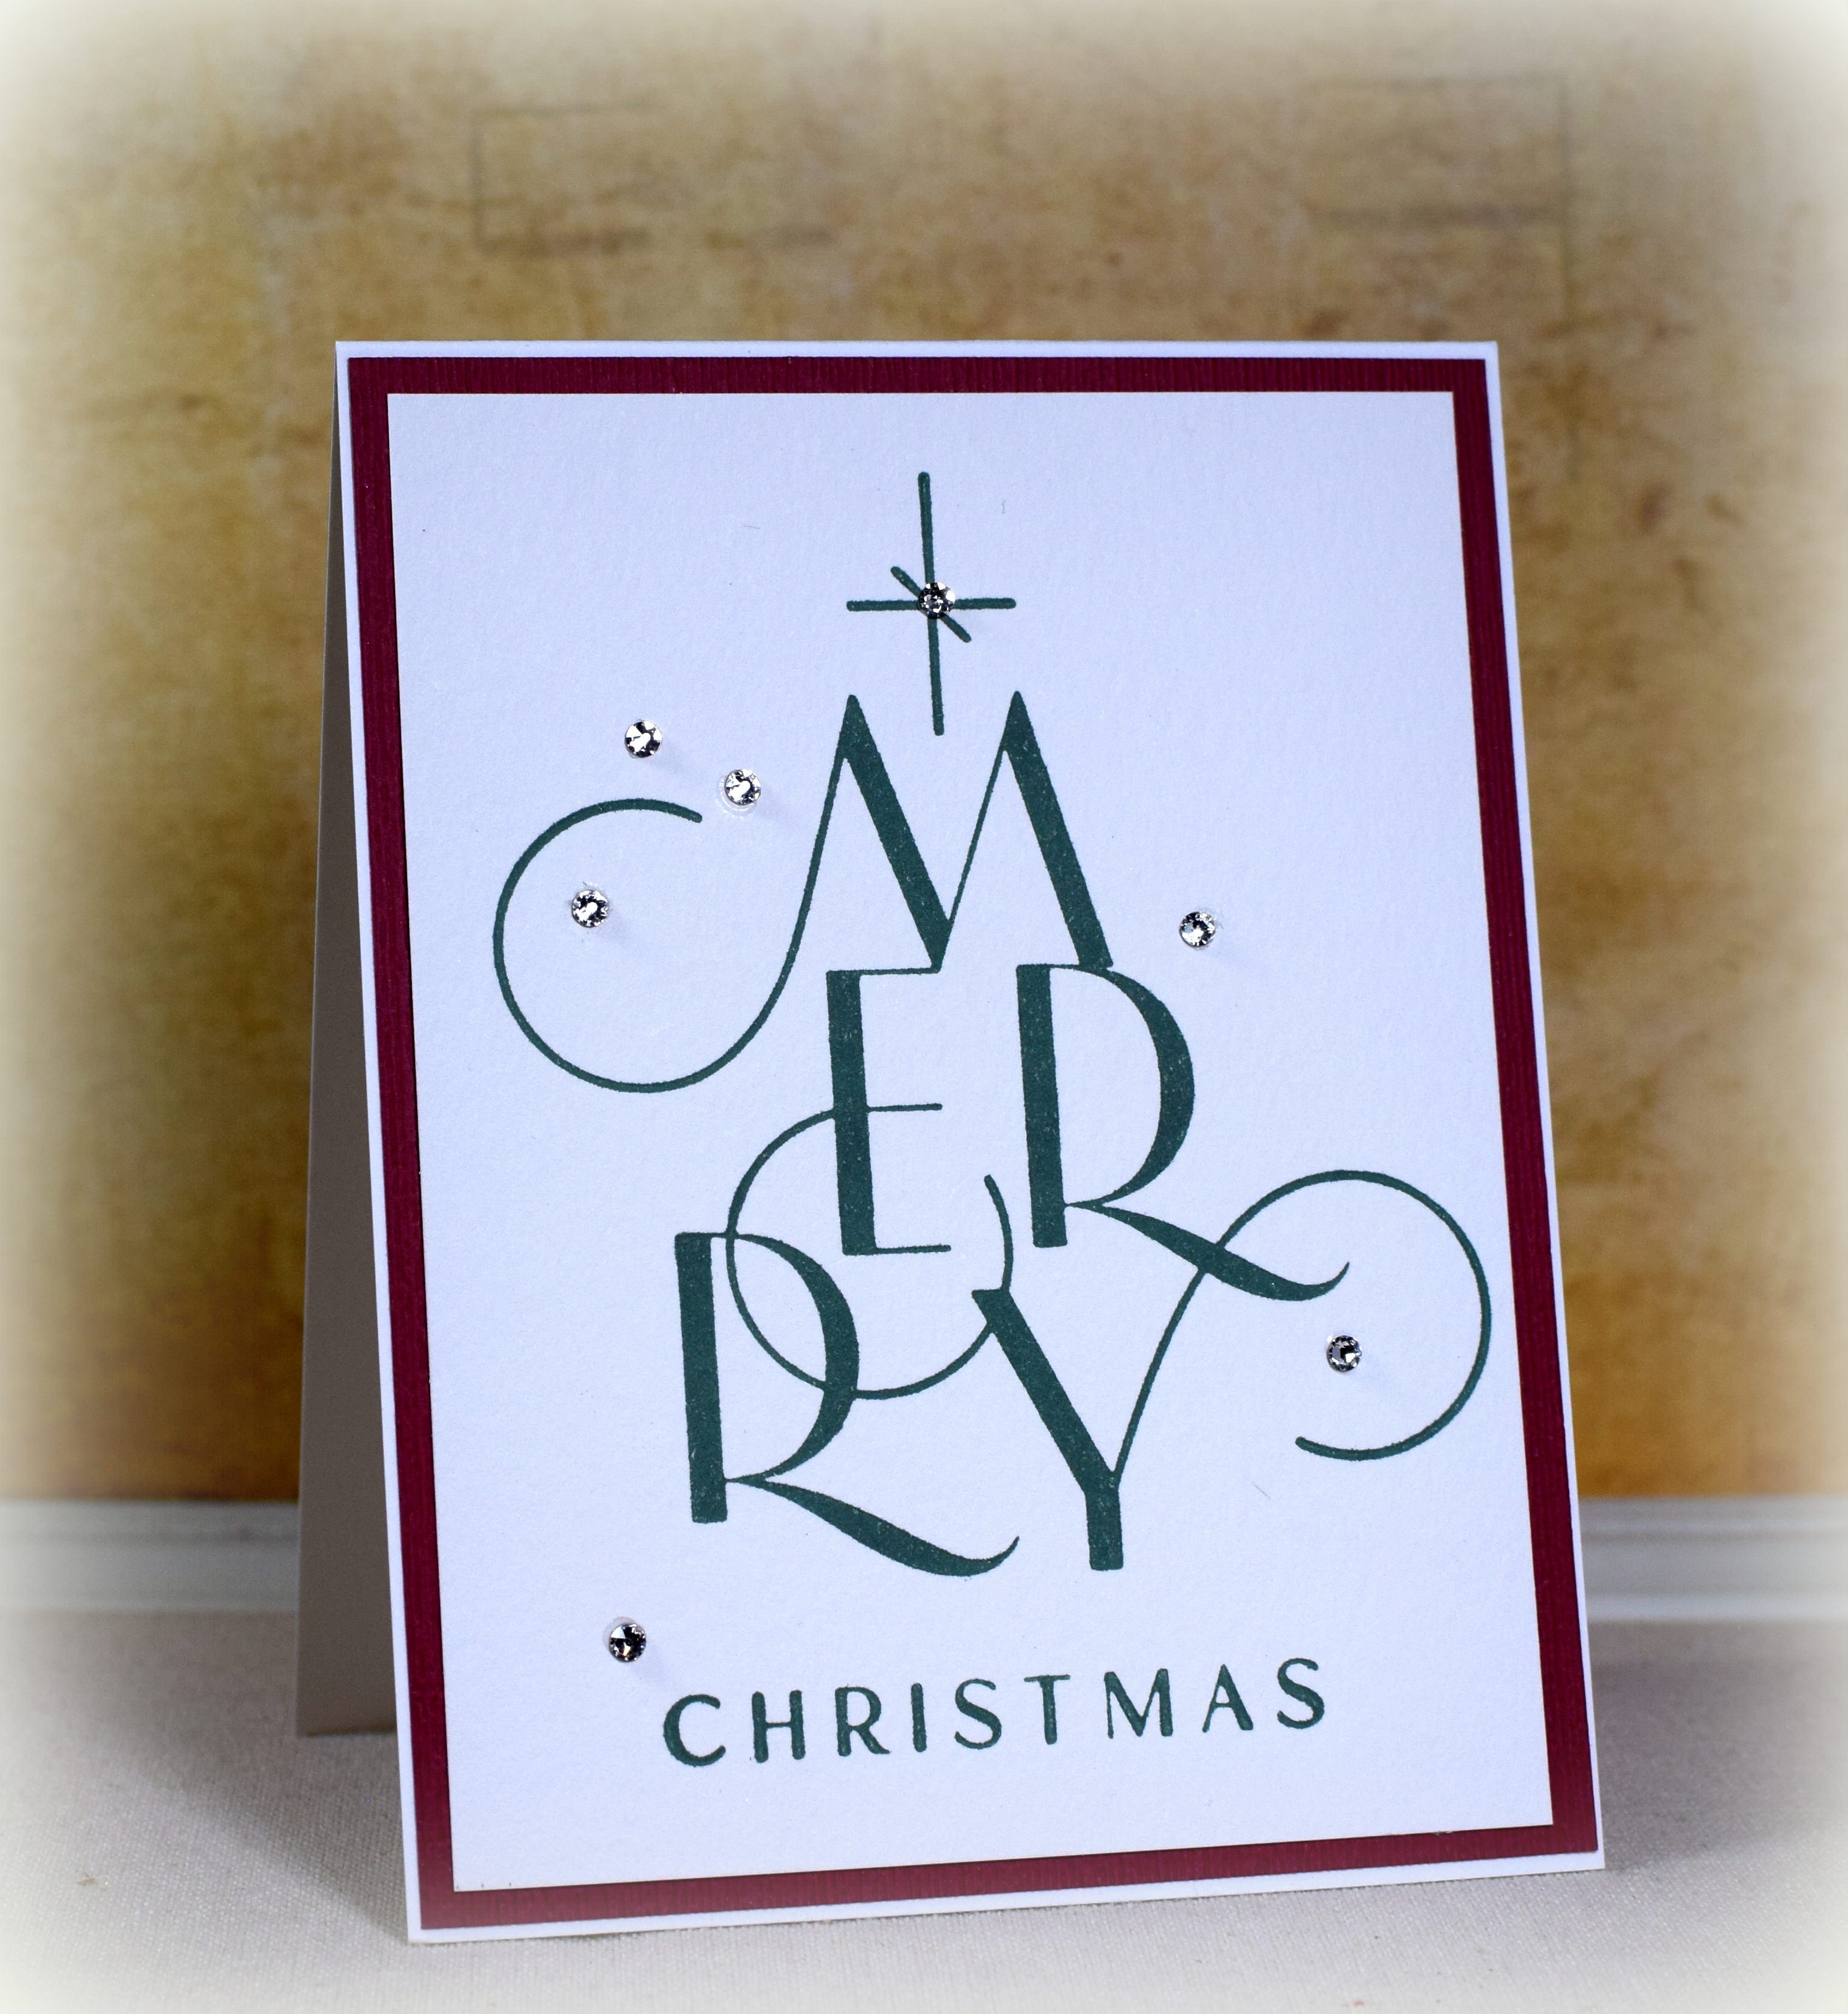
Happy Easter with Plaid Frame (And a Faux Embossed Design)

Happy Easter with Plaid Frame (And a Faux Embossed Design)

Two quick and easy cards that feature some pretty paper and die cuts.

For the first one…

The “frame” was created with one of the dies from the “Grand Ovals” set (LF-110) by Spellbinders cut from a rectangle. (Noticing in the photo here that I need to go back with a little Undo and straighten the frame!)

The paper used was “Easter Plaid” (#2036317) and a piece from the “Watercolor” card stock pack, both by The Paper Studio from Hobby Lobby.

The greeting was cut with the “Splendid Happy Easter” die from Poppy Stamps, and the bunny was from the “Bunny Trio” die set from Fun Stampers Journey.

And for the second one…

In the online holiday card making class I took last November, we created a faux embossed panel by stacking tone-on-tone die cuts, and I thought I’d create another one for Easter.

I used the “Happy Easter Die” (367-5) from Impression Obsession and a die from the “A2 Filigree Delight” set (S5-177) from Spellbinders. Each was cut (from heavy weight white card stock) and stacked 3 times and mounted on white

Thanks for checking out my card project!

This content uses referral links as described in the disclosure policy on my sidebar.

Four in a Row Thank You

Four in a Row Thank You

I’ve admired this simple background technique before but hadn’t tried it until now…

The “Kraft Noir” 12 x 12 paper pad by The Paper Studio has various glossy back prints on kraft card stock, and I used a sheet from the pad to create this thank you note. (Thanks, Carol, for gifting it to me!)

In addition to the printed kraft, I also used Bazzill Butter Cream and Recollections Matte Gold Foil card stock. The greeting is from the “Borders Abound” stamp set from Stampin’ Up (retired) and was stamped with Versafine Onyx Black ink.

Simply cut the patterned paper into four 1 x 3 inch strips and arrange them on a 3 1/4 x 4 5/8 inch panel – 1/8 inch apart. (I used Susan Campfield’s measurements and name for the layout.)

I think this technique makes an interesting background panel and is not difficult to do. And it’s always fun to come up with another way to use my beautiful paper!!

Thanks for checking out my card project!

This content uses referral links as described in the disclosure policy on my sidebar.

Happy Easter Wing Ding Card

Happy Easter Wing Ding Card

What’s a wing ding?! According to the Merriam-Webster dictionary, it’s “a wild, lively, or lavish party.” Creek Bank Creations came out with this fun interactive die set that creates a round card shape that rocks and swings; a wild party of a card – lol!

*

The Wing Ding Die set includes the pieces to create the round card base layers and the swinging mechanism. You also need a slide guide, foam (or pop dots), a small piece of acetate, and whatever else you need to decorate the card as you wish. (They sell various dies and stamp sets that could work with this card, or you can use what you have.)

For my card, I used a bunny (pre-colored) from the “Easter Clipart Set” by JoKavanaghDesigns that I found on Etsy. I sized the bunny to 2 inches and used my Silhouette software to trace, print and cut him out.

The clouds were from the Weather die set from Creek Bank Creations and were cut from label/sticker paper as I needed something super thin to prevent the swinging bunny from getting caught while he did his thing.

The grass was cut using a “Grass Border Punch” by Fiskars. The eggs were cut from the Silhouette file called “Eggs in Grass Border” (#121712) and were “filled” with various patterns I had previously loaded into my Silhouette library.

The greeting die is called “Splendid Happy Easter” (#2462) from Poppy Stamps. I used Gina K Designs Apple Mint and Powder Blue card stock as well as 110lb white.

Thanks for checking out my card project!

This content uses referral links as described in the disclosure policy on my sidebar.

Embossed Arum Lilies Sympathy Card

Embossed Arum Lilies Sympathy Card

I debated whether I should even post this card as I feel I didn’t do very much to make it…

I find sympathy cards so hard to make, but this embossing folder is perfect for creating a simple but beautiful card that could be made quickly when the need arises.

The 3D embossing folder is called “Arums” by Nellie’s Choice and makes a really deep impression. Because it is pretty thick, you may need to play around with the sandwich for your machine. And spritzing a little water on your card stock before embossing helps prevent the paper from cracking.

The embossing folder is 4″ x 5 1/2″ so my card is not exactly an A2 size; my finished card is 4 1/4″ x 5 3/4″. You can get it on a (slightly narrower) A2 base which will fit comfortably in an A2 envelope if you don’t have any of the card base showing as a border. (I made a slightly larger envelope for my card as I liked the look of the border.)

I used a sheet from the Recollections Shimmer Silver and Champagne card stock pack (never sure which one is which; both gorgeous!) and a Kraft card base. The stamp is from the “The Simple Things” set by Gina K Designs (retired) and was stamped with Stampin’ Up Tip Top Taupe ink (retired).

Here’s a view showing more of the shimmer…

Thanks for checking out my card project!

Plaid Bunny and Bow Easter Card

Plaid Bunny and Bow Easter Card

This card features the “Bunny and Bow” die set from Echo Park and one of the dies from the “Floral Ovals” set (S4-356) from Spellbinders.

The bunny was cut from the oval die cut, and then the oval was embossed with the “Subtle” embossing folder from Stampin’ Up (retired). A scrap of “Linen Door Boy Plaid” (468835) by The Paper Studio (retired?) was placed behind the hole left where the bunny was cut. A piece of paper from the “Watercolor” card stock pack by The Paper Studio was used for the front panel and bow.

Thanks for checking out my card project!

This content uses referral links as described in the disclosure policy on my sidebar.