Mirrored Snowflake Thank You Card

Mirrored Snowflake Thank You Card

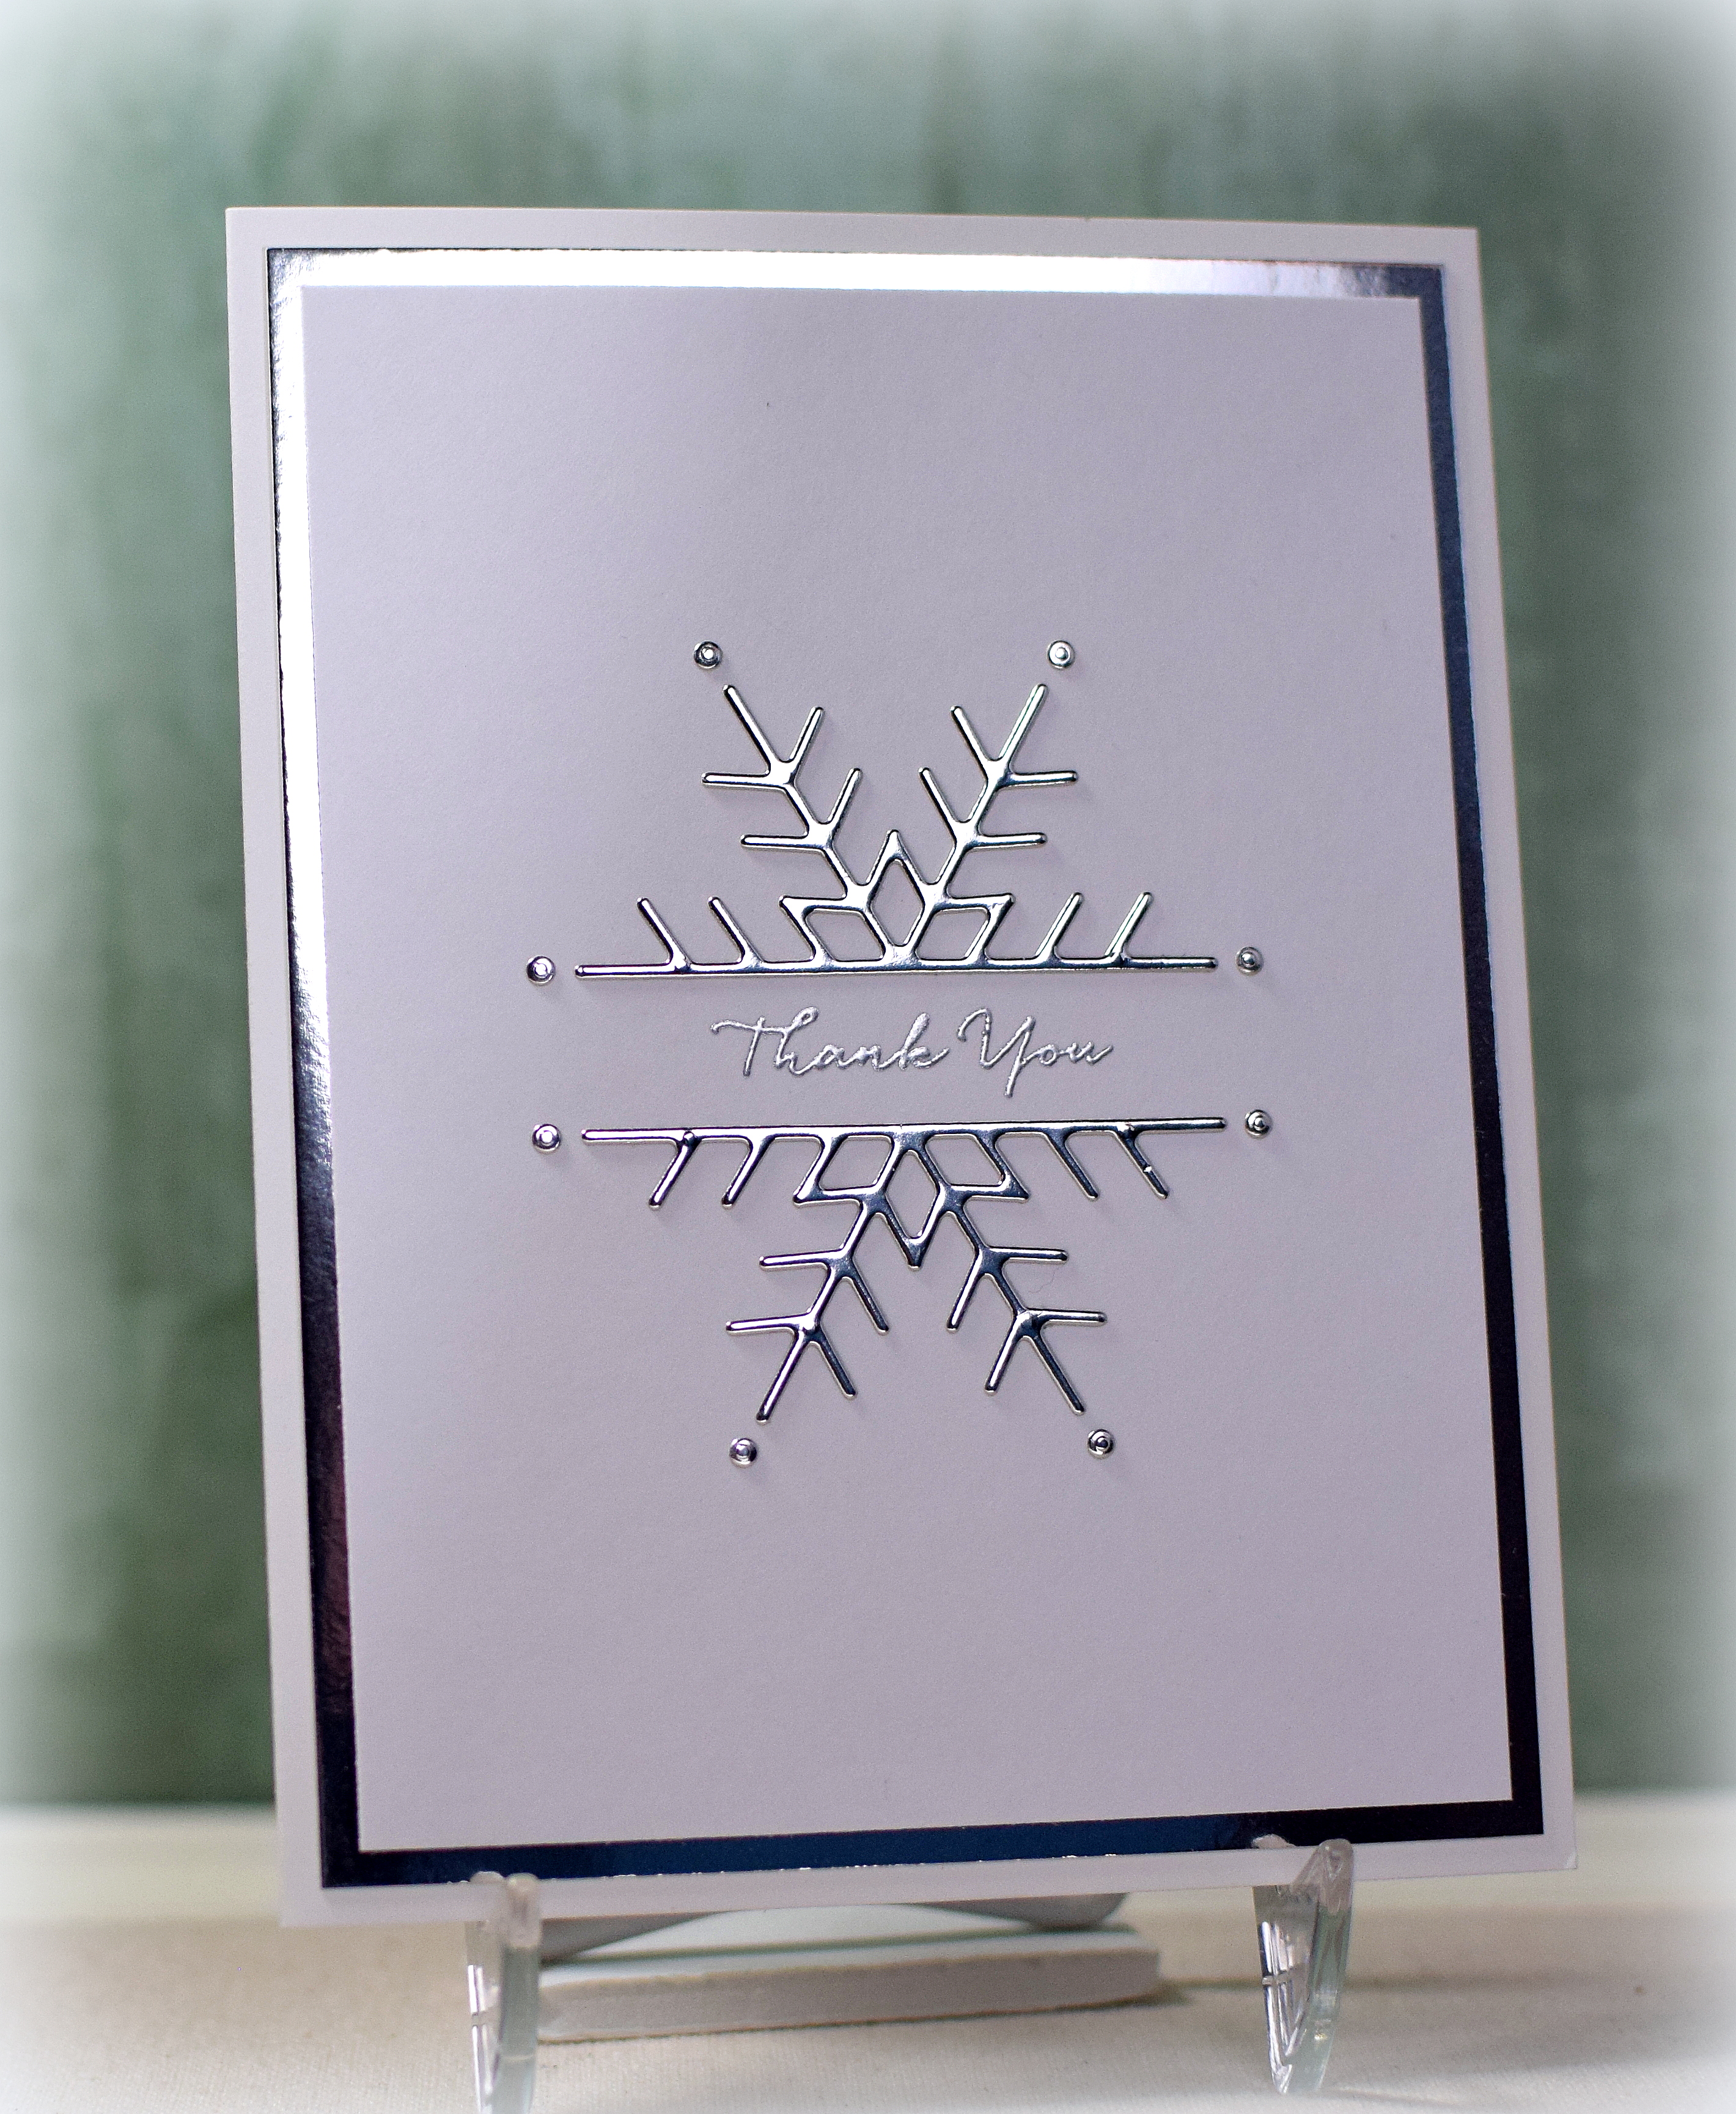
This CAS card features the “Snowflake Marquee” die from Memory Box.

This is one die, but it cuts 10 separate pieces – the two halves of the snowflake and the 8 dots. I needed a bunch of these cards, and positioning and adhering all the pieces posed the biggest challenge, but I came up with a few tricks to make it easier…

First, I added Super Tacky Tape by Creek Bank Creations to the back of a piece of silver mirrored card stock and then die cut the shapes. The Super Tacky Tape made all the pieces stickers which made them easier to adhere to the card fronts. In order to get the placement of the pieces right, I created a template first by positioning and die cutting the image from plain white card stock. I was able to place the template over the actual card panels and just drop the silver pieces into the negative spaces on the template. (I used the spacing of the original die, but you could make the space between the halves of the snowflake larger or smaller if desired.)

The greeting is from the “What I Love” stamp set (retired?) by Stampin’ Up, and was heat embossed with Gina K Designs Fine Detail Silver embossing powder. This panel was mounted on a silver mirrored mat and then a heavy weight white base.

Thanks for checking out my card project!

This content uses referral links as described in the disclosure policy on my sidebar.

Merry Christmas!

Merry Christmas!

I’d like to wish you all a very Merry Christmas and a Happy New Year!

I’d also like to take a moment to thank you all for taking the time to visit my blog and for all your support and encouragement this past year.  I really appreciate it!

(The above image was found on google and is not my own.)

Tall Nativity Christmas Card

Tall Nativity Christmas Card

(inside: Sending love & prayers for a blessed Christmas and a joyous new year!)

The holy family and star die cuts are from a Silhouette cut file called “Tall Nativity” by Lori Whitlock (Design ID 161572) and was cut with my Silhouette electronic die cutting machine. These images are shaped perfectly for a slim line card.

The greeting was cut with the “Joy” die by Impression Obsession (DIE436-D).

The patterned paper is from a digital file called “Snowy Paper” (no longer available?) by SBDigitalDesigns that I purchased on Etsy.

The inside sentiment is from the “Christmas Blessings” stamp set from Divinity Designs (previously Our Daily Bread).

I added a recollections rhinestone gem to the star to finish it off.

My finished card measures 4″ x 9 1/4″ and fits in a regular business envelope, but if you wanted to make a custom envelope with the We R Memory Keepers envelope punch board, start with a 10 5/8″ square and line up at 7 1/8″ for first punch/score line.

Thanks for checking out my card project!

This content uses referral links as described in the disclosure policy on my sidebar.

Scribble Tree Christmas Card

Scribble Tree Christmas Card

This simple card design features stamps from the “Solemn Stillness – Two Step Stamping” set from Stampin’ Up. It’s a retired, red rubber set from 2004, and as I struggled to line up the two layers – with my MISTI and a piece of acetate after remounting the stamps to make them cling stamps – I wondered how people did two step stamping with wood-mounted, red rubber stamps before the hinged stamp positioners. Yes, I used to use my stamp-a-ma-jig, but I’m wondering if there is a way to do it without a positioner…

For the “solid” portion of the tree, I inked up the stamp with Gina K Designs Christmas Pine ink, sprayed the inked stamp with water, and then stamped it on a piece of heavy weight white card stock. I re-spritzed the stamp (without re-inking) and stamped again. As I mentioned above, I used my MISTI for my stamping, and I found that I had less splatter and running if I left the inked stamp on the table and brought the paper to the stamp instead bringing the stamp to the paper as one normally would.

Once that was dry, I heat embossed the top layer with GKD Fine Detail Gold embossing powder and Versamark ink.

The greeting is from the “Merry Tree” mini set (retired?) from Gina K Designs. LOVE that font!!

Thanks for checking out my card project!

This content uses referral links as described in the disclosure policy on my sidebar.

Chanukah Circle Flip Card

Chanukah Circle Flip Card

I needed a bunch of these cards, and they came together pretty quickly once I had all the die cutting and embossing done. My MISTI made short work of the stamped panels on the inside. Good thing too because Chanukah starts on December 10th this year, and it kind of crept up on me!

The base for this flip card was made with the “Circle Flip Die” set from Creek Bank Creations. I added the Star of David from the “Menorah Medley Die Collection” from Papertrey Ink and used the Cuttlebug “Rebecca” embossing folder (discontinued?) to add some texture to the inside panel (that half shows even when the card is closed).

The greeting is from the Papertrey Ink “Menorah Medley Stamp Set” (no longer available?) stamped with Gina K Designs Blue Denim ink. The patterned paper is “Snowflakes” by Reminisce.

Thanks for checking out my card project!