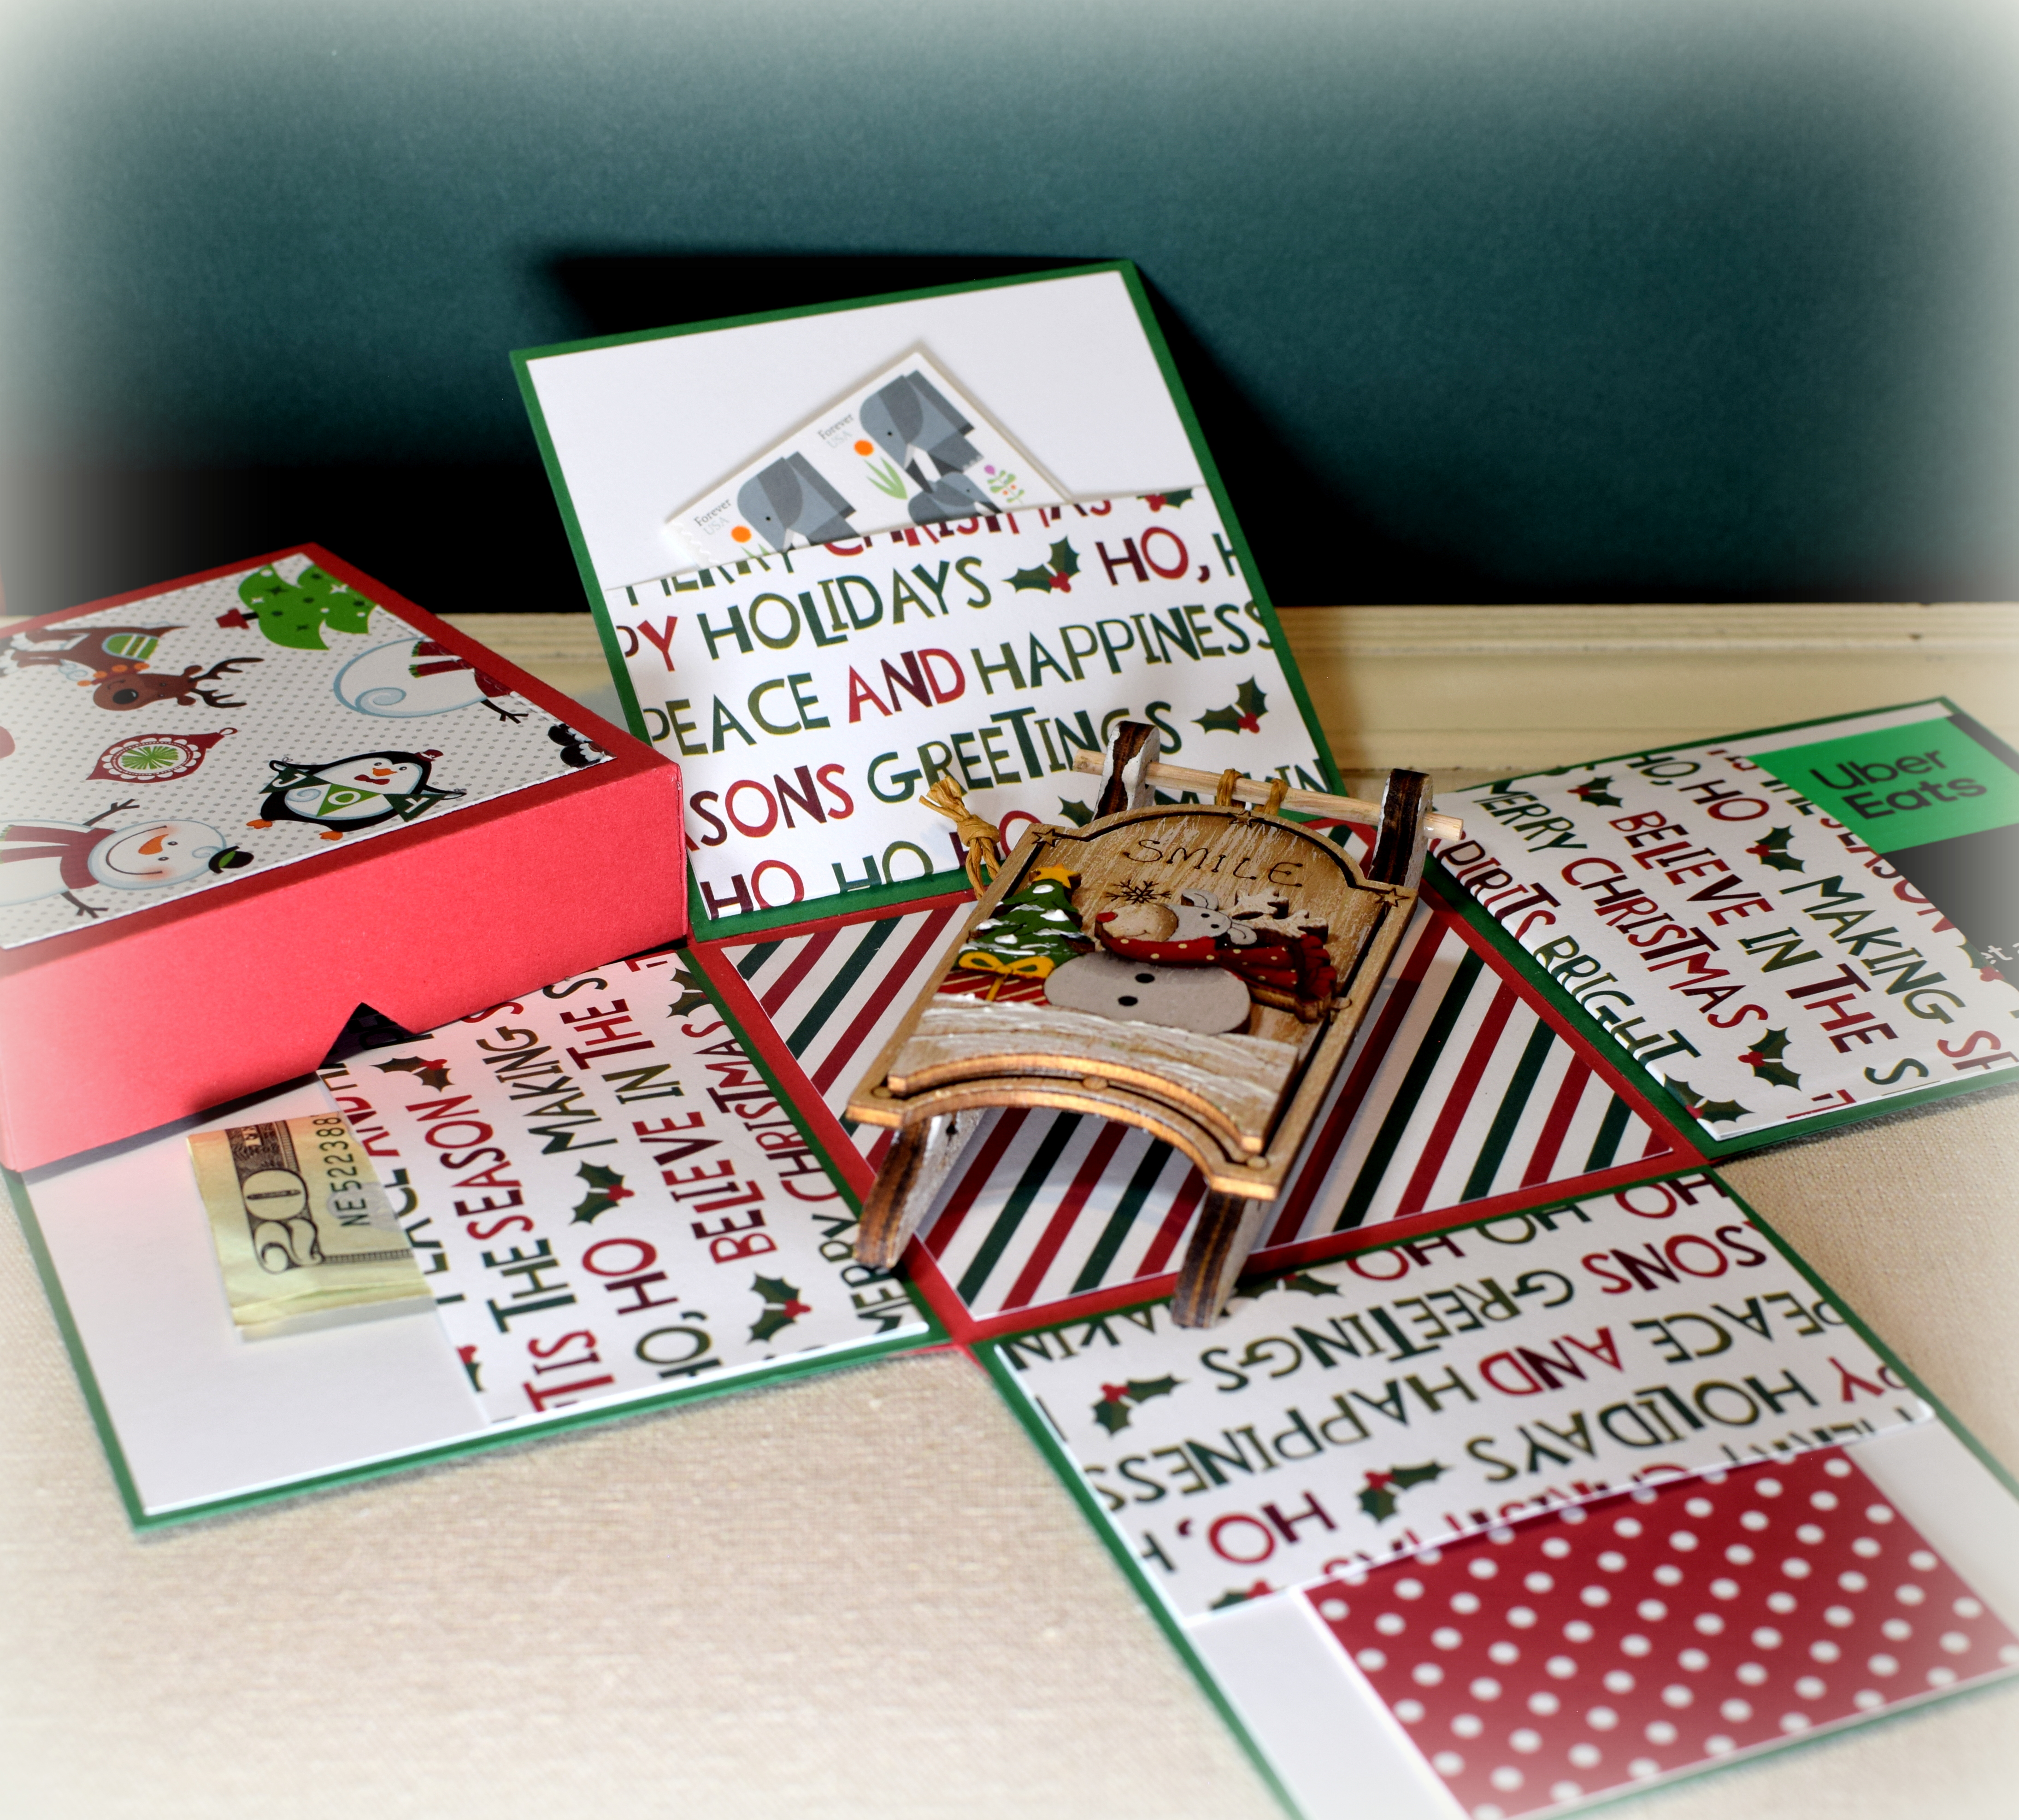
Here’s another explosion box with pockets on the inside for gifting cash or gift cards (or anything small and flat).
I used the CREAlies “Create A Box Large – Explosion (or not) box Large” die set (#CCABL27) to create the 3 3/4″ square box. For this one, I used red and green card stock along with card stock from several retired Recollections Christmas themed packs that I bought years ago.
Instead of the tree in the center (as I did on my previous sample), I left the inside clear of die cuts so I could include a small gift along with the monetary gifts.
Change up the paper, and this box could work for any occasion! And as I mentioned previously, this die set also comes with connectors to create a non-exploding, traditional box if desired.
I made a few of these explosion boxes with pockets on the inside for gifting cash or gift cards. I actually had 4 gift cards, but if I needed fewer pockets, the other flaps could just be decorated.
I used the CREAlies “Create A Box Large – Explosion (or not) box Large” die set (#CCABL27) to create the box. The set includes one die to create the top/bottom, a square to create the side panels and several more dies for the decorative panels. There is also a die to create “connectors” if you want the box to stay together and not “explode” when opened.
In addition to this large box (3 3/4″ square), there is also a medium box and a small box (sold separately).
The 3D Christmas Tree in the center was created with the CREAlies “Varia 3D Christmas Tree” die set (#CLVAR09).
I was inspired to create this box with the tree in the center after watching Karen’s videos (HERE and HERE). She shows a partial exploding box in her video which is another way to use this die set.
Just a note – The top and bottom of the box are created with the same die. Usually, the top of a box is slightly larger than the bottom half. As a result, the lid is very tight and a bit tricky to get on, especially if the sides want to keep falling! I ended up using my trimmer (instead of the included die) to create the panels for the sides, and I made these panels 1/16 inch smaller than the die would have made them. This helped a bit. I still used one of the additional (stitched) dies to create the decorative panels. Also, I created my own pockets as there is no die for that. (Karen cut one of the squares in half on the diagonal to create hers.)
The card stock for the base of my box is “French Roast” by Core’dinations. The patterned card stock for the outside is by American Crafts #368494 (no name given), and the paper used for the inside panels/pockets is “Christmas Joy” by Reminisce. The Christmas tree was made with “Merry, Merry” which is also by Reminisce. All of this paper has been in my stash for years, and it felt good to finally use it!
I had fun this afternoon creating this custom wine glass with permanent vinyl and my Silhouette. (Thanks Carol, for inspiring me to learn how to do this!!)
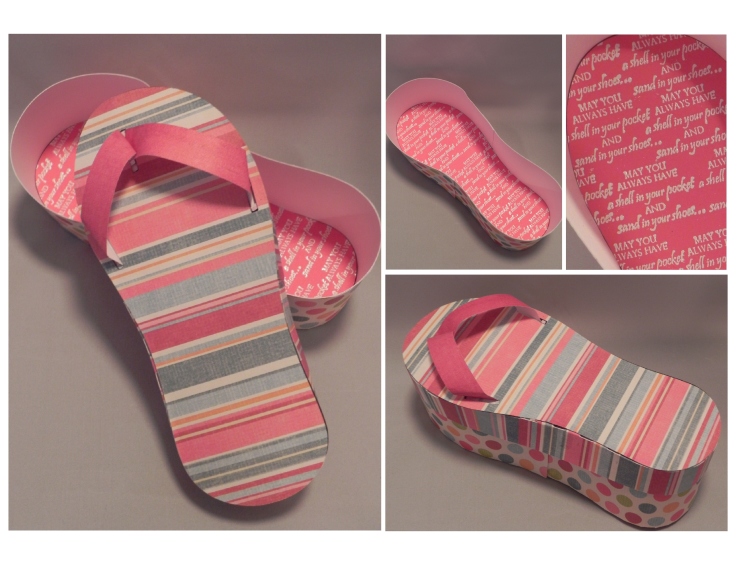
(Inside: May you always have a shell in your pocket and sand in your shoes…)
(a blast from the past…)
The pieces for this flip flop gift box were from an svg file called “Free SVG File 162 – Flip Flop Box” (by Eleanor) that I got back in 2013 from a site called svgshop.com (which no longer appears to be in business), although this file (or something very similar) now appears to be available HERE (called “3D Flip Flop Box” by Lori Whitlock). This file (and several other varieties) are available in the Silhouette Store as well.
The pieces were originally cut with my Cricut electronic die cutting machine and my Sure Cuts A Lot software. This box could be sized as desired. My box is approx. 8 1/2″ x 3 1/2″ and 2 1/2″ high/deep.
I created the base with white card stock and covered it with papers from a 12 x 12 paper pad called “Simply Delightful“( item # HLSD01) by My Mind’s Eye. The greeting inside the shoe came from the Gina K Designs “Gifts from the Sea” stamp set and was heat embossed in white.
This project was originally shared in my StampTV gallery on June 18, 2013. (Sadly, this site is no longer active.)
I was asked to make gift boxes for several nursing students who will be graduating in a few weeks. I saw this svg file called “Nurse Gift Box” from Dreaming Tree and thought it was perfect!. The file includes a caduceus for the front of the “prescription bottle” part of the box (sample below), but I created the fake label for each box instead that could be customized for each graduate who is to receive the gift. (It wasn’t obvious to me at first that the box was supposed to be a prescription bottle, and the label seemed to make it clearer. I also thought it made it more graduation-y!)
This file could be purchased separately or as part of the “First Responders” set which also includes cards, a fire fighter box, and a police officer box. I resized the file to fit on 8 1/2 x 11 inch card stock and used my Silhouette electronic die cutting machine to cut out the pieces. There’s a video tutorial that shows how the pieces go together. (There’s also a video on the Dreaming Tree site that shows how it could be customized with school colors and a “congrats” die cut instead of the caduceus.)
The box, without the lid, is 4 1/2 inches high and 3 1/4 inches wide.
*
I had a little trouble, at first, finding colored card stock that looked like a prescription bottle, so I created a white one as a back-up option. As mentioned above, the file came with the caduceus which I really like in red on the white box.
*
There are quite a few samples of fake prescription labels online, and I used the one I found HERE (and a bit of cutting and pasting in Printshop) to create mine. Here’s a closer look at my sample.
*
The card stock I used for this project is Core’dinations Valentia, white, and Recollections Red.
Thanks for checking out my project!
This content uses referral links as described in the disclosure policy on my sidebar.