Chess Inspiration

Chess Inspiration

Chess Inspiration wwwDSCN9481.jpg

Join us for a new challenge over at Perfectly Rustics!  This fortnight, the challenge is to include the word “remember” or “remembrance” on your project (http://perfectlyrustics.com/2015/04/06/prdc-no-45-remember/).

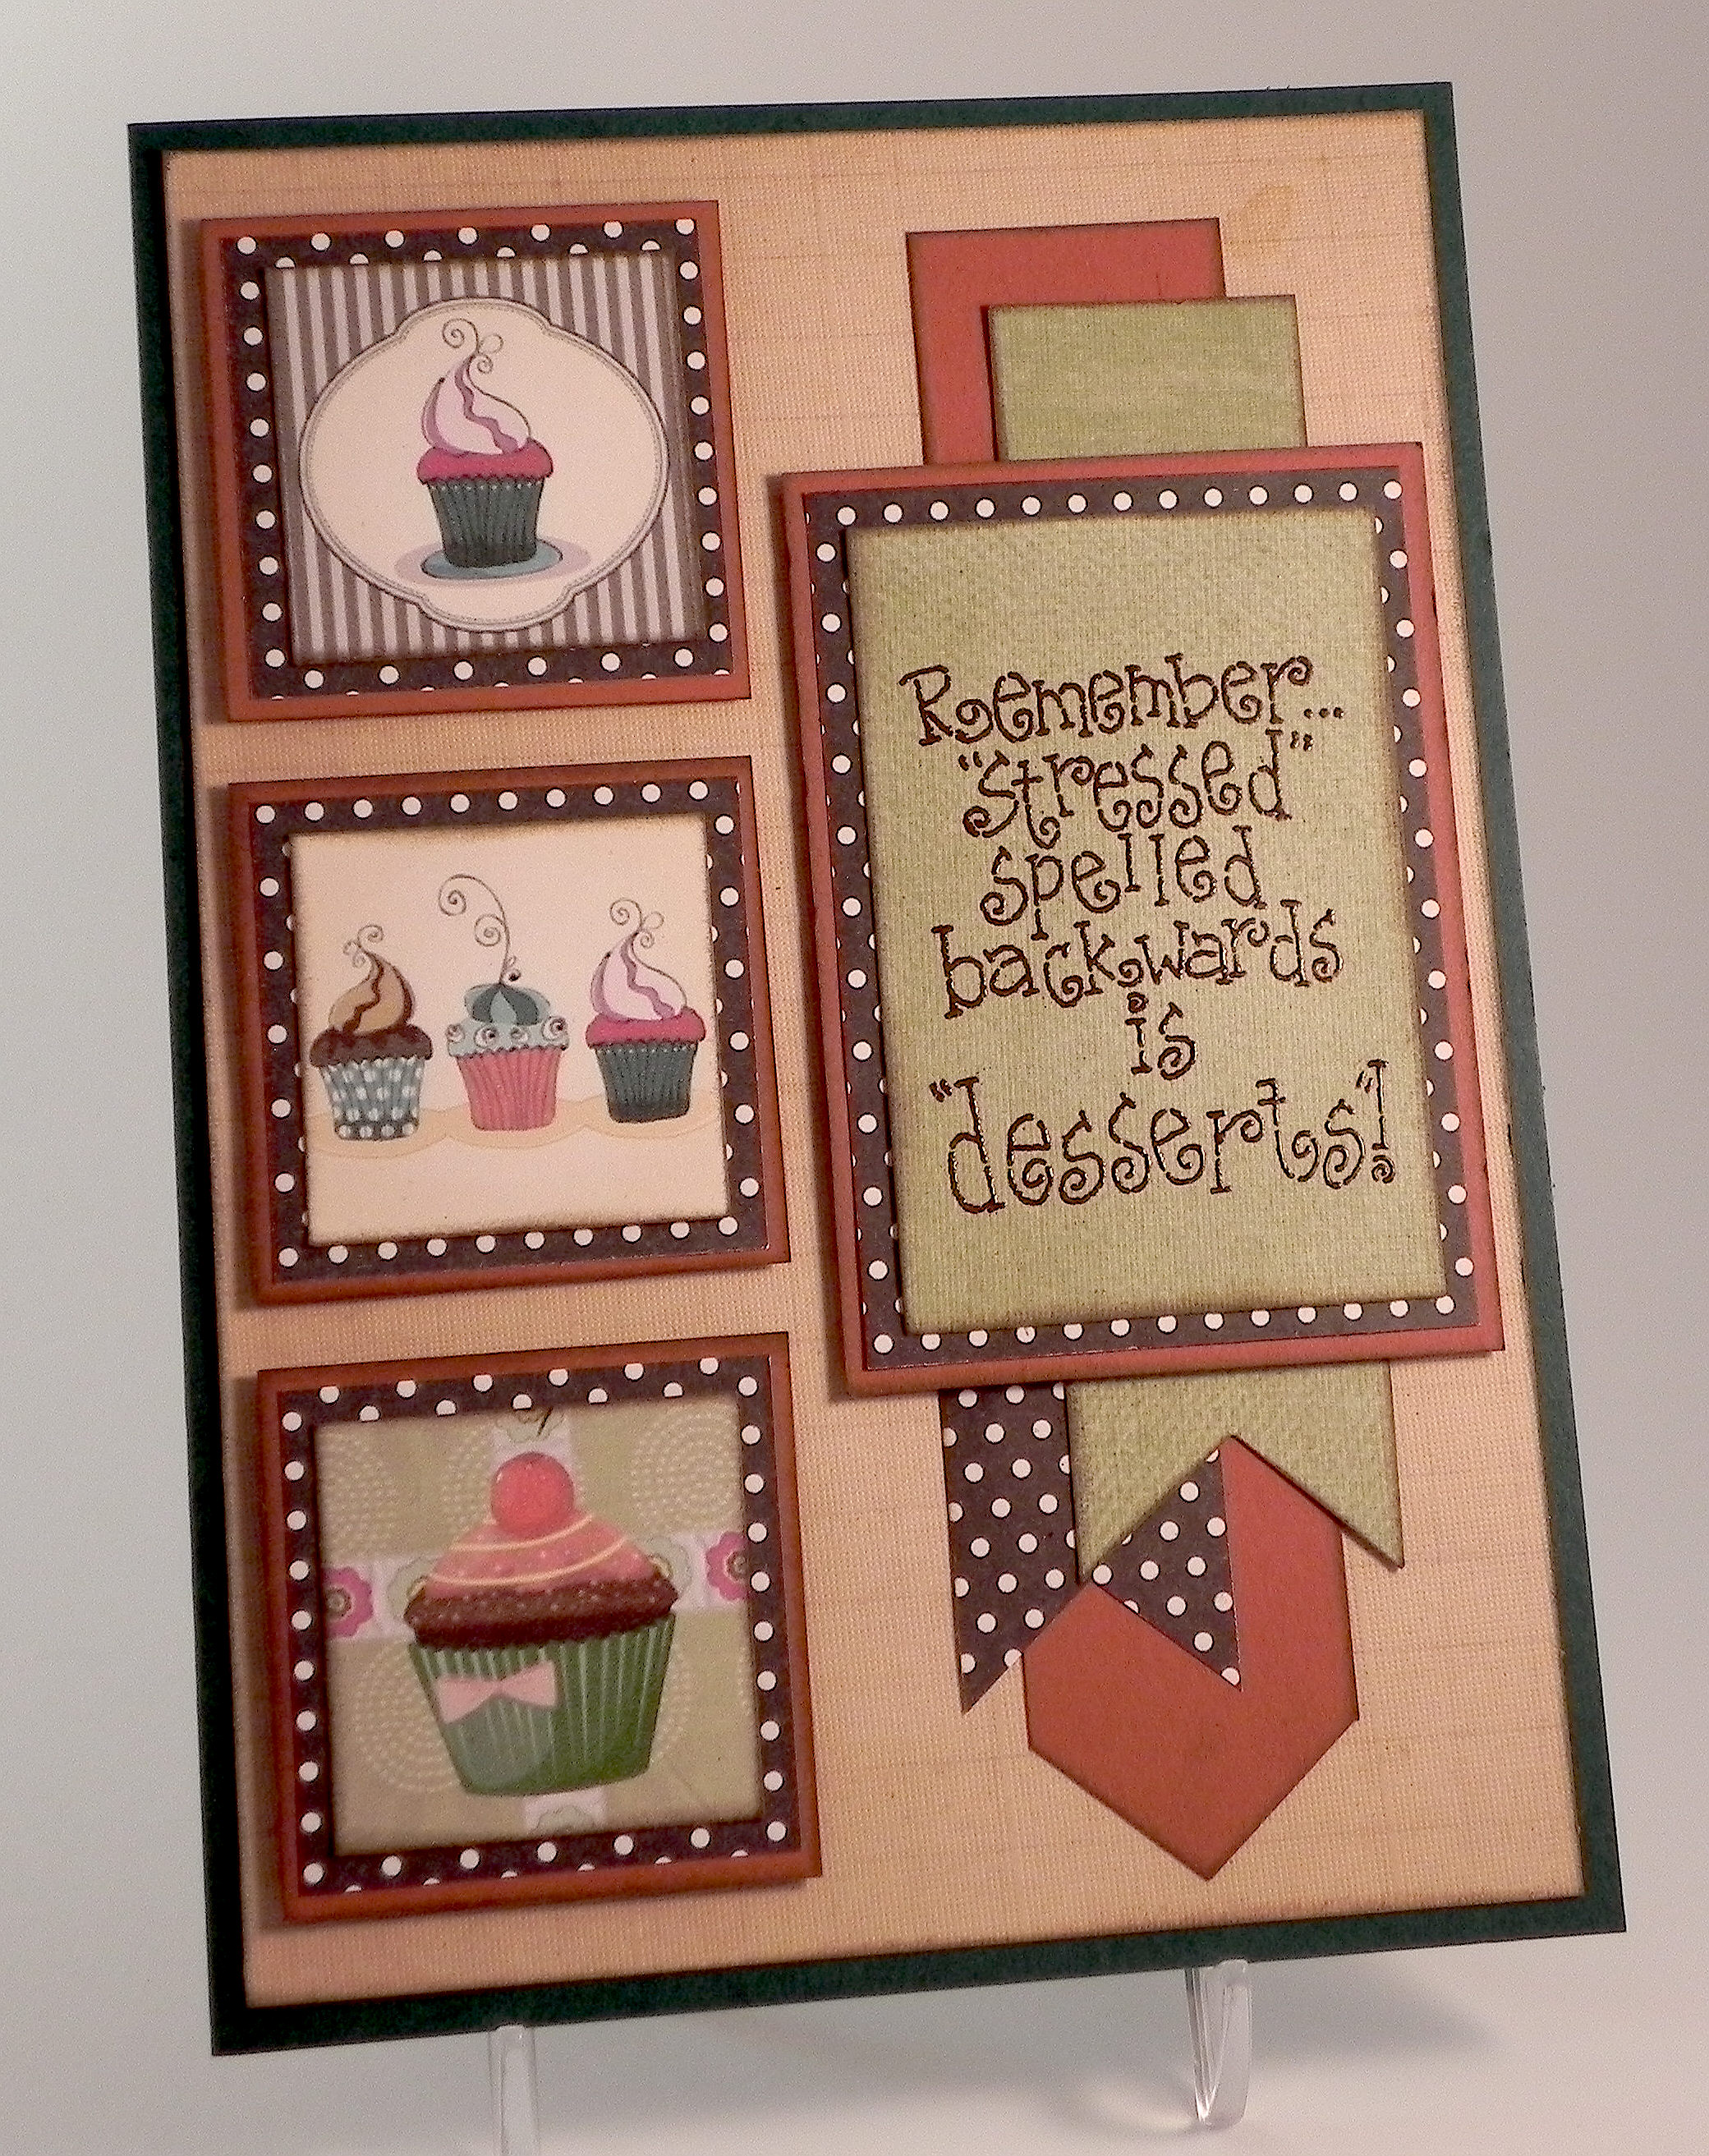
The sentiment I used on my card project is “remember every pawn is a potential queen” and is based on the promotion rule in chess:  if a pawn reaches the other side of the board, it can become any other chess piece (called promotion) and is usually promoted to a queen.  The pawn is the piece that is assigned the lowest point value of all the pieces on the board, but it has the potential to become one of the most valuable.  I think this reference is great to remind us that anything is possible if we work hard and put our minds to it!  I thought this inspirational card would be good for a graduate, someone starting a new job, or for anyone who needs to be reminded that we are all valuable and capable of great things.

This is one of those cards that just kept evolving; it is nothing like my original idea!  The stamps I used are from the Chocolate Baroque “The Art of Chess” set.  I started with a piece of ivory card stock and sponged some Gina K honey mustard and warm cocoa ink on it.  Then I stamped the sentiment repeatedly with Gina K dark chocolate ink to create a background.  Then I stamped the queen and some pawns with versamark ink and heat embossed them with clear embossing powder.  Finally, I sponged some dark chocolate ink over the whole thing.  I was going for an emboss-resist panel – and ended up hating it! There was just too much space between my chess pieces, and it was so dark and dull.  So, I ended up cutting this panel apart and using just the queen and one pawn.

Now I needed a panel for my chess pieces.  I used another piece of ivory card stock and stamped my sentiment again.  The sentiment didn’t have the word “remember” in it, so I used the stamp “Always Remember” by Woodware Craft Collection – Clear Magic Singles and masked everything except the word remember.  I originally had left this panel plain ivory, but I added a piece of a digital paper image called “Antique Game Board Papers” that I purchased on Etsy from a shop called MarysMontage (HERE) which was distressed so I decided to distress the ivory panel a bit by lightly sponging some warm cocoa and honey mustard ink on it.  To distress it a bit more, I sprinkled on a bit of clear embossing powder in random spots, heat set it, and inked a bit more over those areas.  And of course it started getting dark and dull again!!

I thought I’d try to brighten it up a bit by working with the cranberry that was in the checker/chess board.  I used a piece of patterned paper from the Heartfelt Creations Classic Sunflower Collection paper pad, and some Gina K honey mustard card stock.    (Note to self – cranberry and honey mustard are NOT bright!!)  And I couldn’t figure out what to do with these two panels!  I ended up playing around with a bunch of scraps that were piling up on my desk.  A few of the scraps were from card stock that was embossed with the Darice 5×7 damask embossing folder (which was originally the whole card base).  A few of the scraps have parts of the stamped images and sentiment I had been using.  One scrap was from my original emboss-resist panel.  And I tucked some of the cranberry patterned paper scraps in there as well.  Well, now my A2 card is 5×7!

All of the edges were inked with Gina K charcoal brown ink, and a piece of raffia ribbon and three metal sticker embellishments finished it off.

Another card in brown tones.  Hmmmm…..

I don’t usually add so many “scraps”  to my projects; usually I plan out what I need and cut panels. It was kind of fun to just keep throwing these scrap strips on my card!  And then I notice the email I received today from the “Use Your Stuff” blog where their challenge this week is to use paper strips on our project! Thin strips or thick strips, a lot of strips or just a few – it’s up to us.  Because we all have lots of paper scraps laying around just begging to be used, they are challenging us to put those scraps to use on our projects!  Well that worked out well!! (http://useyourstuff.blogspot.com/2015/04/challenge-179-paper-strips.html)

Over at the Mod Squad Challenge blog, the challenge for this week is Tick Tack Toe where we are to select a line of 3 techniques from the tick tack toe board to create a project.  Here is the board:

Mod Squad Challenge Tic Tac Toe

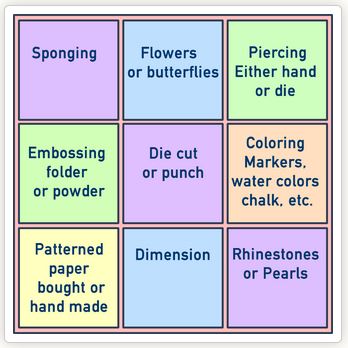
This card used techniques from the first vertical column on the left.   (Sadly, this site is no longer active.)

Thanks for checking out my card project!

This content uses referral links as described in the disclosure policy on my sidebar.

Dessert Therapy

Dessert Therapy

Dessert Therapy in green, brick and brown wwwDSCN9319

Join us for a new challenge over at Perfectly Rustics!  This fortnight, the challenge is to include the word “remember” or “remembrance” on your project (http://perfectlyrustics.com/2015/04/06/prdc-no-45-remember/).

The stamp I used on my card project that contains the word “remember” is from the Stampin’ Up “Hang in There” stamp set.  For my desserts, I used parts of a digital paper called “32 Desserts Digital Collage Sheet” by boxesbybrkr that I purchased on Etsy (see listing HERE). Card stock used was Gina K Faded Brick, Christmas Pine, a piece of brown polka dot scrap from my stash, and a few two-sided sheets from the Momenta “Euro” pad (lot 20472 R4).  I used Gina K dark chocolate ink for all the edges and versamark and Gina K dark chocolate embossing powder to stamp the sentiment.  I used a die from the Spellbinders Artist Trading Cards set to cut out the sentiment panel.  (This card is 5″ x 7″ which allowed me to use many layers without getting too crowded.)

I did three versions of this card before deciding on my “final” one above.  The first one I did is here:

Dessert Therapy in browns wwwwDSCN9456

(It’s an A2 sized card.)  For this version, the desserts I chose were from a digital paper called “32 collage from a set of  “Vintage Old Paper French Patisserie” by Needful Things Shop on Etsy (see listing HERE) which I cut using a Creative Memories circle punch.  Card stock used was Gina K Dark Chocolate and a few two-sided sheets from the Momenta “Euro” pad (lot 20472 R4).  The print is actually vintage postage stamps, but I really liked the colors and pattern, and with most of it covered up, you can’t really see the actual images!  I used Gina K dark chocolate ink for all the edges and versamark and Gina K dark chocolate embossing powder to stamp the sentiment.  I really liked the vintage dessert images and the colors on this one, but I was not so sure the sentiment’s font really went with the rest of the card!  Hmmm…

The problem was that the font was too whimsical for such a vintage look (I thought) so I looked at several more “dessert” choices and found the cartoon-like ones that I ultimately used.  My second attempt is the one is the one pictured above.

In addition to better dessert images, I also thought the polka dots gave it a whimsical feel, but I wasn’t sure if the dark colors were the best choice so I tried making a third version with a completely different color scheme.  (This third card is another A2 sized card.)  Here’s my third version:

Dessert Therapy in pink and blue wwwwDSCN9408

For this card, I used  Tim Holtz Stormy Sky and Spun Sugar distress inks for the edges and Gina K Blue Denim ink for the sentiment.  The blue card stock is from the DCWV Neutrals 12 x 12 stack, and the solid pink is Core’dinations April Lovely.  The striped paper is from the Recollections 6 x 6  All Girl paper pack, and I used Copic Marker R81 to color my pearls pink to match my project.  The desserts are from the same digital sheet by boxesbybrkr mentioned above.

I like this pink and blue version also, but I think I like the larger version with the polka dots the best! What do you think?

Now it’s your turn!  Create a project that includes the word “remember” or “remembrance” and enter it in the Perfectly Rustics “Remember” challenge.  I can’t wait to see your creation!

Over at the Mod Squad Challenge blog, the challenge for this week is Tick Tack Toe where we are to select a line of 3 techniques from the tick tack toe board to create a project.  Here is the board:

Mod Squad Challenge Tic Tac Toe

For my card, I used techniques from the first vertical column on the left.  I sponged the edges of my panels with Gina K dark chocolate ink, I heat embossed the sentiment with Gina K dark chocolate embossing powder, and I used polka dotted patterned paper for my mats and one of the banners.  The sponsor this week is Gina K Designs so I get a bonus entry since I used Gina K ink, card stock and embossing powder.    (Sadly, this site is no longer active.)

Over at Use Your Stuff, the challenge is to use paper strips on our project. Thin strips or thick strips, a lot of strips or just a few – it’s up to us.  Because we all have lots of paper scraps laying around just begging to be used, they are challenging us to put those scraps to use on our projects!  For this challenge, I entered the pink and blue version! (http://useyourstuff.blogspot.com/2015/04/challenge-179-paper-strips.html)

Thanks for checking out my card project!

This content uses referral links as described in the disclosure policy on my sidebar.

Always Remember…

Always Remember…

045 Always Remember  DSCN8444.jpg

Join us for a new challenge over at Perfectly Rustics!  This fortnight, the challenge is to include the word “remember” or “remembrance” on your project (http://perfectlyrustics.com/2015/04/06/prdc-no-45-remember/).

The inspirational stamp I used that includes the word “remember” is called “Always Remember” by Woodware Craft Collection – Clear Magic Singles. I think it is a fantastic message for someone who is going through a tough time or dealing with a loss.

(I believe it is actually a quote from the movie “Pooh’s Grand Adventure: The Search for Christopher Robin” based on A. A. Milne’s stories of Winnie the Pooh where Christopher Robin says to Winnie the Pooh, “If ever there is tomorrow when we’re not together… there is something you must always remember. You are braver than you believe, stronger than you seem, and smarter than you think….”)

Christopher Robin and Pooh

The sentiment was stamped with Gina K warm cocoa ink on Paper Pizazz Tan Floral Tapestry paper and cut with a Spellbinders die from the Labels Eight set.  This paper was also used for the background and to make the flower.  I created the flower with the Heartfelt Creations (Spellbinders) Sunkissed Fleur die and the Sunkissed Fleur Precut Set stamp.  The image details were stamped with warm cocoa ink on the patterned paper and then covered with Viva Decor copper 3D Stamp Paint.  The center of the flower was made with an Epiphany Crafts Shape Studio tool which I describe in my Potted Plant card post.  (This is one of the flowers I originally made for that card!)  The leaf flourish was cut with a die from the Heartfelt Creations (Spellbinders) Flower Pot set.  In addition to the patterned paper by Paper Pizazz, I also used Gina K dusty sage, Core-dinations valentia, and Melissa Frances first class mail.  All of the edges were sponged with the Gina K warm cocoa ink.

Now it’s your turn!  Create a project that includes the word “remember” or “remembrance” and enter it in the Perfectly Rustics “Remember” challenge.  I can’t wait to see your creation!

Thanks for checking out my card project!

This content uses referral links as described in the disclosure policy on my sidebar.

“Smooshed” Background Easter Card

“Smooshed” Background Easter Card

Smooshed Background Easter Card DSCN9110

Over at Perfectly Rustics this fortnight, the challenge is “Eggs” (challenge # 44) where we are to make a creation with an egg or eggs on it.  For this project, I made an Easter card with a “smooshed” background. (http://perfectlyrustics.com/2015/03/23/prdc-no-44-eggs/)

A “smooshed” background is where you put ink down on a non-porous surface (like a craft mat, a piece of acetate, or an acrylic block for example), spritz the ink with water, and “smoosh” your paper onto the wet ink.  It creates a beautiful water colored panel that looks different every time it is done!   I used this technique on my Smooshed Egg card project which you can see HERE.  When I created the panel I needed for that card, I made a bunch of them and decided to use one as the background on this card. As I mentioned in that post, I was inspired to use the “smooshed” background technique from my friend Barb and a video tutorial I had seen.  (You can see the video tutorial HERE on You Tube, and Barb’s post HERE .)

The card stock used on this project was Gina K edible eggplant, wild lilac, sweet corn and white.  The ink used to create the background was Gina K wild lilac, sweet corn, and innocent pink and was topped with Tattered Angels “Pearl” Glimmer Mist.  (The shimmer is hard to see in the photo but is gorgeous in real life!)  The small, lilac panel was embossed with a Sizzix (Stampin’ Up) stripes embossing folder.

The stamp is by Craft Smart from Michaels (no name) and was stamped with Gina K wild lilac ink and then heat embossed with clear embossing powder.  (Gina K did a tutorial, which you can see HERE, on how to emboss in any color using your regular dye based ink pads along with clear versamark ink, clear embossing powder, and a stamp platform like a MISTI.)  After it was embossed, a touch of color was added to the image with Copic Marker Y21.  Then I masked off the center and sponged Gina K wild lilac ink around the edges to create a border.

Recollections twine and a yellow button I had in my stash finished it off.

Now it’s your turn.  Create a project with eggs, and join us over at Perfectly Rustics.  I can’t wait to see what you create!

Thanks for checking out my card project!

This content uses referral links as described in the disclosure policy on my sidebar.

“Smooshed” Egg Easter Card

“Smooshed” Egg Easter Card

Oval Smooshed Egg DSCN9025

Over at Perfectly Rustics this fortnight, the challenge is “Eggs” (challenge # 44) where we are to make a creation with an egg or eggs on it.  For this project, I made an Easter card with an egg-shaped (oval) window and a “smooshed” panel behind it. (http://perfectlyrustics.com/2015/03/23/prdc-no-44-eggs/)

I got my idea for this card from several places:

When I was teaching quite a few years ago, two of my students (twins) gave me a gift for Easter.  I’m guessing that their mother made it, although I suppose the boys could have done it!  Anyway, it was a picture frame with an oval mat, and instead of a photo, there was a collage of scraps of paper.  I’ve always thought this was a clever idea and a beautiful project.  Here it is:

gift DSCN9018

A few weeks ago, I saw a beautiful project posted on a blog I follow where Karen did something similar for her card project.  She created an oval mat for her egg, but instead of using tissue paper, she inked stripes for her back panel.  You can see her post HERE.  Seeing this post reminded me of the frame gift I had received all those years ago, and it got me thinking – what could I use for my background if I were to make a card with an oval mat as an Easter egg…

The final bit of inspiration came from another post I saw this past week by my friend Barb where she made an awesome card with a “smooshed” background.  A “smooshed” background is where you put ink down on a non-porous surface (like a craft mat, a piece of acetate, or an acrylic block for example), spritz the ink with water, and “smoosh” your paper onto the wet ink.  It creates a beautiful water colored panel that looks different every time it is done!    I’ve tried this technique before, but I was never really happy with how mine came out.  Her colors were so vibrant!  So I watched the video tutorial that she posted (by Betsy Veldman from papertrey ink) and decided to give it another try and use it for my egg.  (You can see the video tutorial HERE on You Tube, and HERE is Barb’s post.)

For my “smooshed” panel, I used Gina K wild lilac, sweet corn, and innocent pink inks.  I used those Gina K card stock colors as well, along with grass green.  I cut my oval with a Spellbinders classic oval (large) die.  The grass was made with a Fiskars “grass” contiuous border punch and embossed with the Cuttlebug swiss dots embossing folder.  The lilac panel was embossed with the Cuttlebug d’vine swirls embossing folder.  I didn’t have ribbon to match the lilac, so I used my air brush and Copic Marker V17 to color a piece of white ribbon and added it to the bottom of the grass strip and on top of the egg.  The greeting was Inkadinkadoo (no name) and was stamped with Gina K edible eggplant ink.  The sentiment was too long to fit on my egg so I stamped each word separately while masking the other word.  To make sure the words lined up properly and ended up where I wanted them, I used my stamp-a-ma-jig.  Normally, I would have used my MISTI for a job like this, but this stamp was mounted on wood so the MISTI couldn’t be used.

It’s hard to see in the photo above, but there is a beautiful shimmer on the “smooshed” panel which came from the Tattered Angels “Pearl” Glimmer Mist that I added before I adhered it behind my oval frame. Hopefully, you can see the shine a little better in this photo:

zz DSCN9068

(click on photo to see the shimmer from the glimmer mist)

Now it’s your turn.  Create a project with eggs, and join us over at Perfectly Rustics.  I can’t wait to see what you create!

Thanks for checking out my card project!

This content uses referral links as described in the disclosure policy on my sidebar.