Wine & Cheese Thank You Note – Chalkboard Technique

Wine & Cheese Thank You Note – Chalkboard Technique

Wine and Cheese Chalkboard Technique wwDSCN7310.jpg

I have been having one heck of a time trying to get my creative juices flowing!  I had the same problem last year around and after Christmas, although this dry spell seems to be lasting longer.  Sigh….

Anyway, we recently received a case of wine as a gift, and I needed to make a thank you note.  I saw this Wine and Cheese stamp and loved the sketched look of the image.

inkadinkado wine and cheese

However, once I got it home, I wasn’t quite sure what to do with it!  The image is pretty big which didn’t leave much room for much else on my A2 sized card, and I had trouble deciding on colors and paper.  After MANY attempts…..

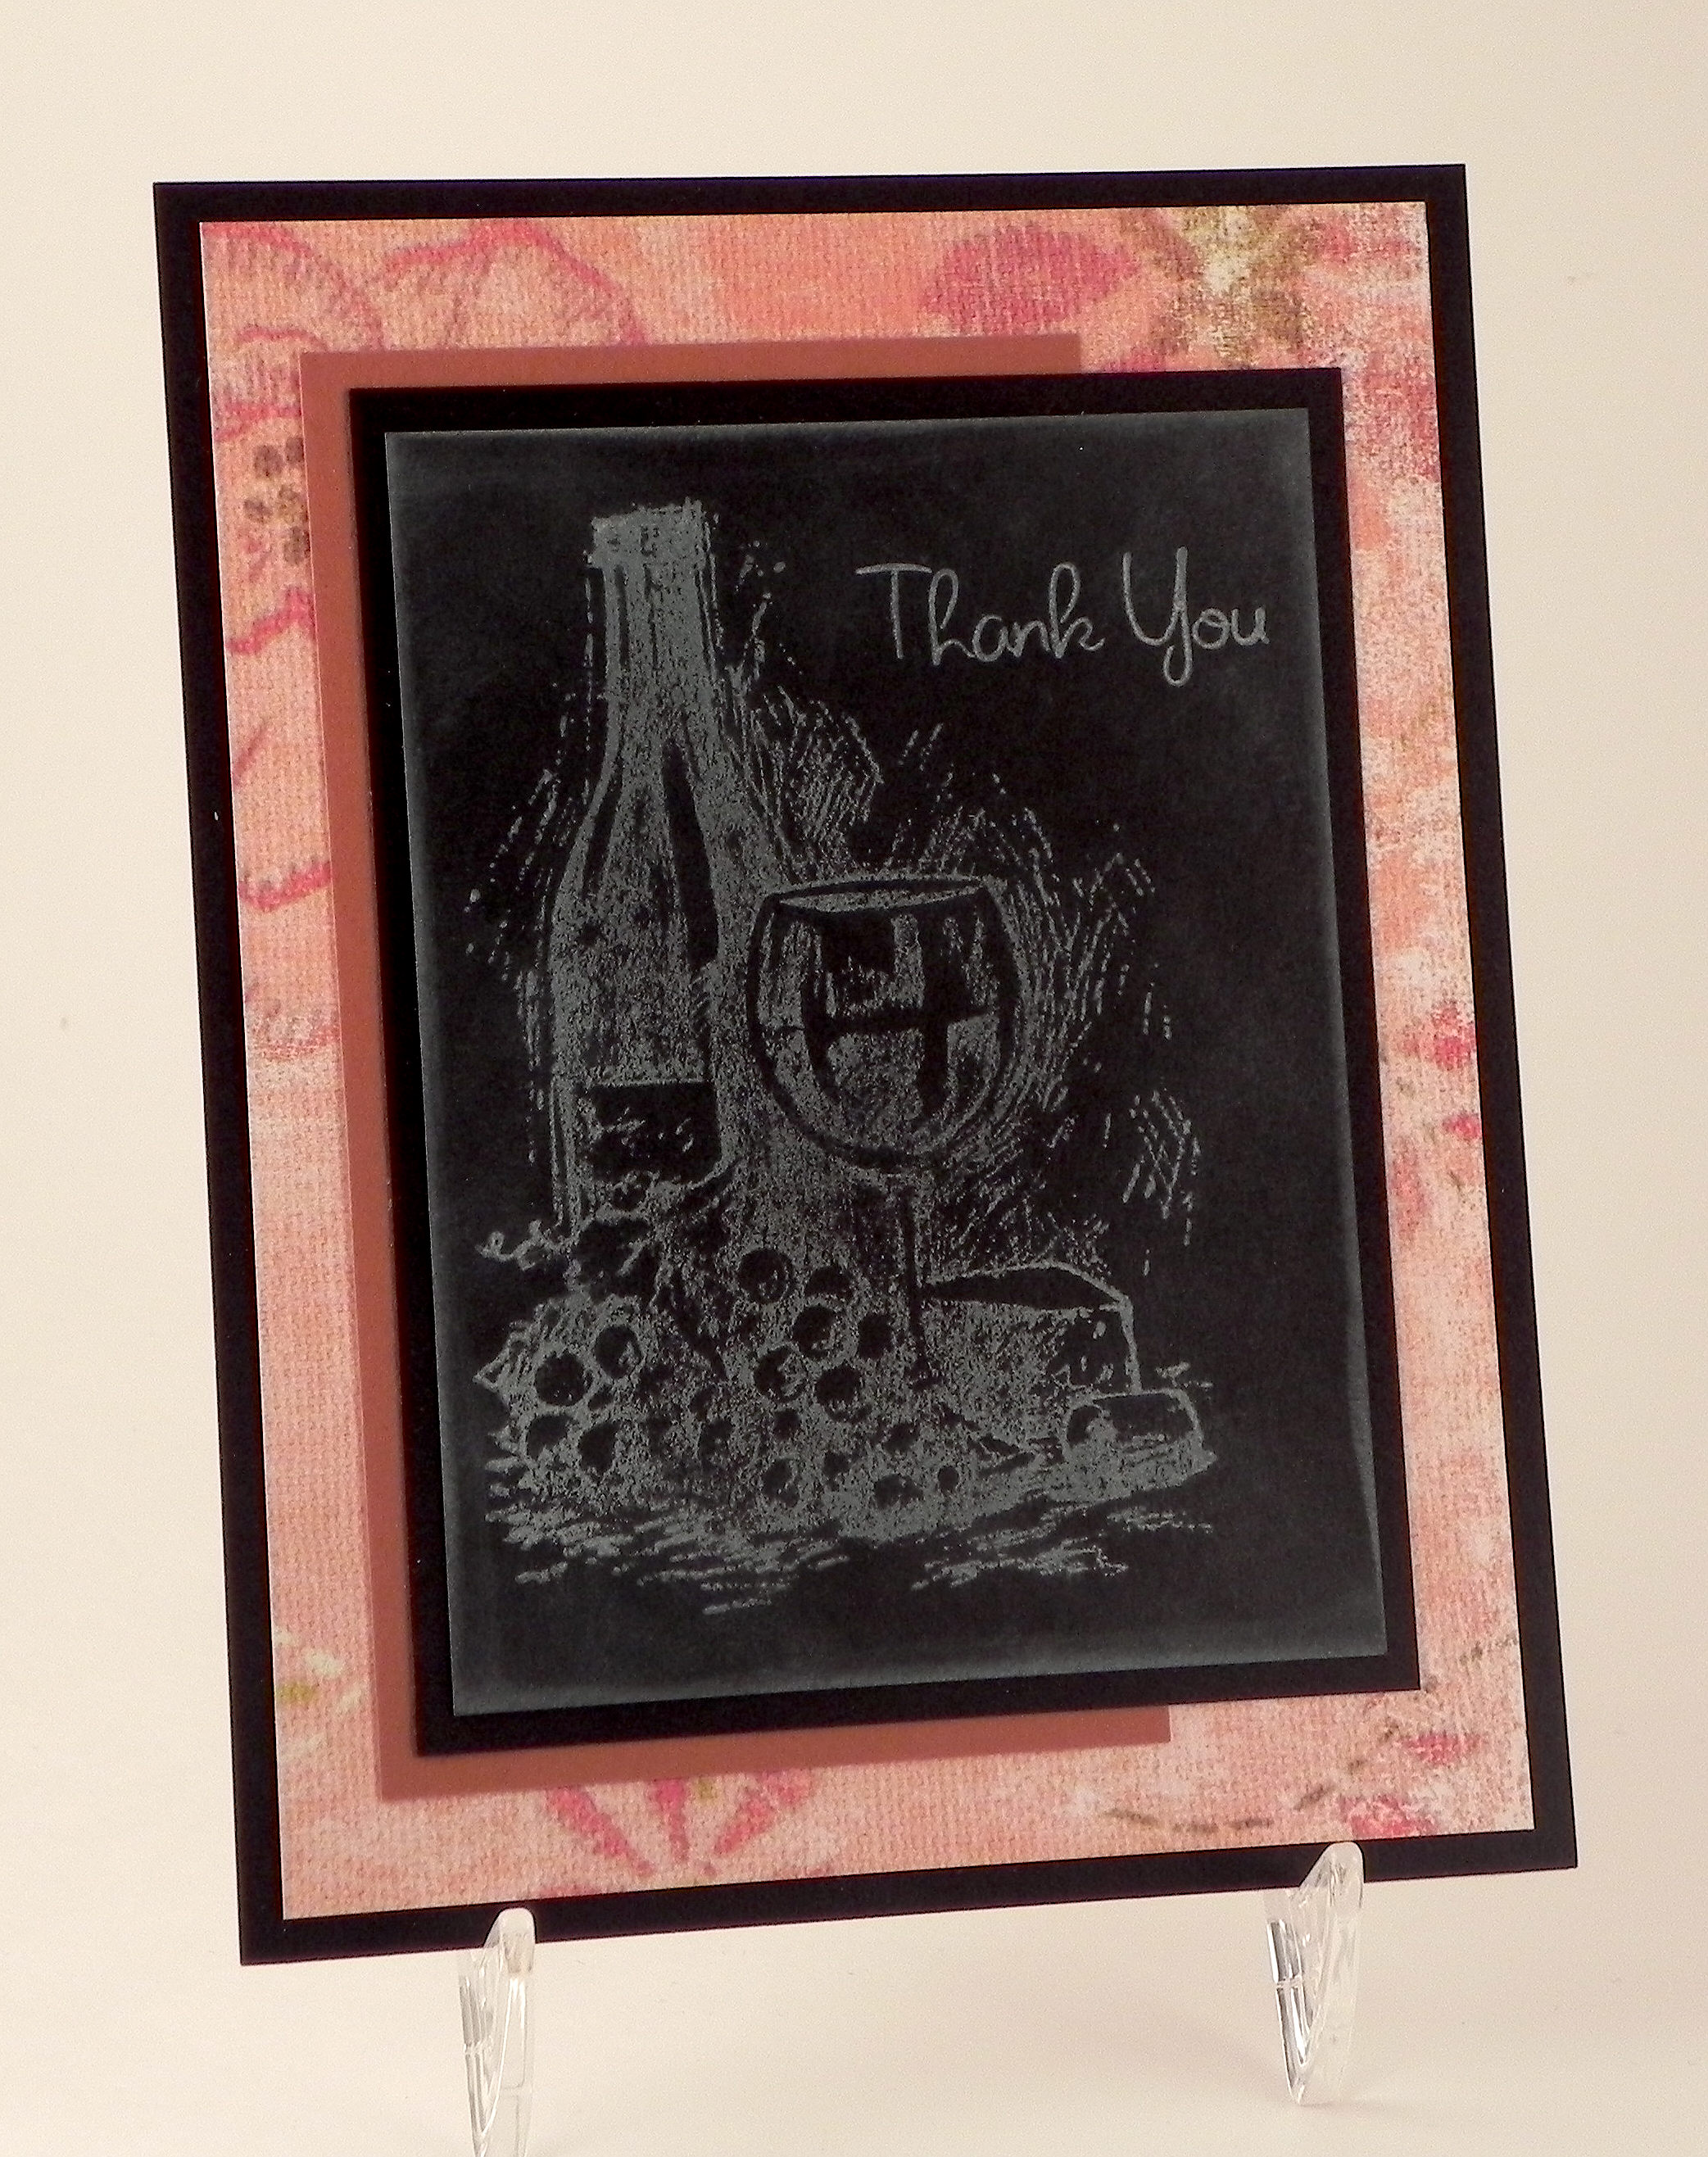
The Wine and Cheese stamp is by Inkadinkado, and the greeting stamp is by Recollections.  I stamped the images on black card stock with Gina K Designs White Pigment ink.  Then I lightly sponged some of the white ink over the panel to create a “dirty” chalkboard look.  I like the idea of this image looking like it was drawn on a chalkboard, but a lot of the detail was lost with the thick, pigment ink.  I stamped 12 panels trying to get a cleaner image.  No luck.  (My original thought was to stamp the image to look like it was drawn with pencil.  Surprisingly, I have so much ink and none in the right shade of gray!  Ugh!!!)

The printed paper is by My Mind’s Eye from the “Wild Asparagus” paper pad.  I used more black card stock for mats and a scrap of Gina K “Faded Brick” to add a bit more color.

It’s not exactly what my brain “saw” when I started this project, but at least I finally got to the end with a finished card!  I have another idea in my head using the same stamps that I am anxious to try. Hopefully, it will work out, and I will be sharing it shortly….

Thanks for checking out my card project!

This content uses referral links as described in the disclosure policy on my sidebar.


Sandy Claws

Sandy Claws

Sandy CLaws zDSCN7072.jpg

(Inside text:  A crab in the sand trap at Christmastime is called “Sandy Claws” – Holiday Greetings and all good wishes for a Happy New Year!)

I created this golf scene from an image I found online at pixabay.com which I “traced” and cut with my Silhouette.  The crab and the Santa hat are from the Stampin’ Up “Crab & Company” stamp set which I stamped on pieces I also “traced” and cut with my Silhouette.  The riddle on the front and the sentiment on the inside were computer generated.

The crab and hat were stamped with Memento Tuxedo Black ink and colored with Copic marker R59.

The card stock I used was Gina K Sandy Beach, the red and green from the Recollections Jewel paper pack, Recollections black, white, and ivory, and a scrap of lighter green I had in my stash. The plaid background mat was from the Recollections “Christmas – Cozy Lodge” paper pack and was adhered to an ivory card base.

Thanks for checking out my card project!

Happy Ho-Ho-Holidays

Happy Ho-Ho-Holidays

Happy Ho-Ho-Holidays wwwDSCN7042.jpg

(Inside text:  May every joy be your this holiday season!)

The stamps for this card are from the Gina K Designs “Funky Christmas” set (retired?) and the Stampin’ Up “Ho Ho Holidays” set.  The inside text was computer generated.

The “feet” image was stamped with Memento Tuxedo Black ink and was colored with Copic Markers (R59 & C7, G29, and Y17).  In order to create the darker sections on the chimney, I added the C7 to the R59. Adding gray is an easy way to create darker shades of colors you already own without needing to purchase additional markers.  The greeting was stamped with Gina K Christmas Pine ink.

I used red and green card stock from the Recollections Jewel Card Stock paper pack and printed paper from the Recollections Christmas – City Sidewalks Card Stock paper pack.  White card stock was used for the card base behind the red panel.

The snow-covered roof parts were cut files from the “Santa on Roof – design #52189” set by Michelle Renee which was purchased in the Silhouette store and cut with my Silhouette.  I used Gina K Christmas Pine and Recollections White Gold Shimmer card stock to create the roof.

This card was one of three designs in a boxed set:

Humorous Card Insert

Thanks for checking out my card project!

Does This Make My Butt Look Big?

Does This Make My Butt Look Big?

Does This Make My Butt Look Big wwDSCN7047.jpg

(Inside Text:  Never mind, don’t answer that!  Merry Christmas!)

The stamps on this card are all from the Beary Christmas stamp set by Sweet ‘n Sassy Stamps.

Beary Christmas Stamp Set

The images were stamped with Memento Tuxedo Black ink and colored with Copic Markers (R59 and G29).

The bear and greeting piece were cut out using cut files I created for my Silhouette and were adhered to my card with pop dots.  I used my MISTI to line up the stamping on the die cuts.  (HERE is a tutorial I previously posted to show how I stamp on die cuts.)

I used the Darice Snowflake Swirls embossing folder on white card stock along with Gina K Cranberry Tart card stock and a white card base.

This card was one of three designs in a boxed set:

Humorous Card Insert

Thanks for checking out my card project!

This content uses referral links as described in the disclosure policy on my sidebar.

Missing Elf

Missing Elf

Missing Elf zDSCN7040

(Inside Text:  Enjoy the time you spend with family and friends this Christmas and in the coming year!)

This card features the amusing stamp called Santa Claus Missing Elf (Item K-28903) from RubberHedgehog Rubber Stamps.

missing elf stamp

I created two custom made stamps from RubberStamps.net for the greeting.  The inside text was computer generated.

The image was stamped with Memento Tuxedo Black Ink and colored with Copic Markers (sign: C1, E31; clothes: G29, R59, C0; elf: G29, YG63, E50).

I wanted Santa’s bottom to stick off the card a bit so I started by masking his bottom and stamping the top portion of the image on plain white card stock.  Then I stamped the image again on heavy weight card stock and cut out his bottom which I adhered with foam tape.  I stamped the image a third time, cut out the elf, and adhered him to Santa’s bottom.  Because I was making multiple copies of this card for boxed sets, I ended up creating cut files for my Silhouette to make the cutting easier, and I used my MISTI to line up the stamping with the pieces.  HERE is a tutorial I previously posted to show how I stamp on die cuts.  (I had originally planned to attach Santa’s bottom to the card with an Action Wobble spring which is why I masked the bottom half of the stamp on the white panel; it looked weird to have the whole image there as the bottom half moved.  But I ended up using the foam tape instead because the spring made his bottom stick out too much, and I was trying to make it easier/less expensive to mail.  If I knew I was going to adhere the bottom with the foam tape from the beginning, I probably would not have needed to do the masking!)

The stamped panel was mounted on red card stock from the Recollections Jewel Card Stock paper pack and then on paper from the Recollections Christmas – Holiday Basics Card Stock paper pack.  White card stock was used for the card base.

This card was one of three designs in a boxed set:

Humorous Card Insert

Thanks for checking out my card project!