Panoramic Botanicals

This card features the “Botanicals” paper (#1434406) from The Paper Studio and a technique I saw in this video on creating a Panoramic Panel card.
Lorraine positioned her panels directly on the card base, but I wanted to try it with a thin border around the whole card, so I changed the measurements slightly so mine fit on a 5 3/8 x 4 1/8 inch panel which I embossed with the Stampin’ Up “Subtle” embossing folder.
This is how it looks with no border (using her measurements/instructions):
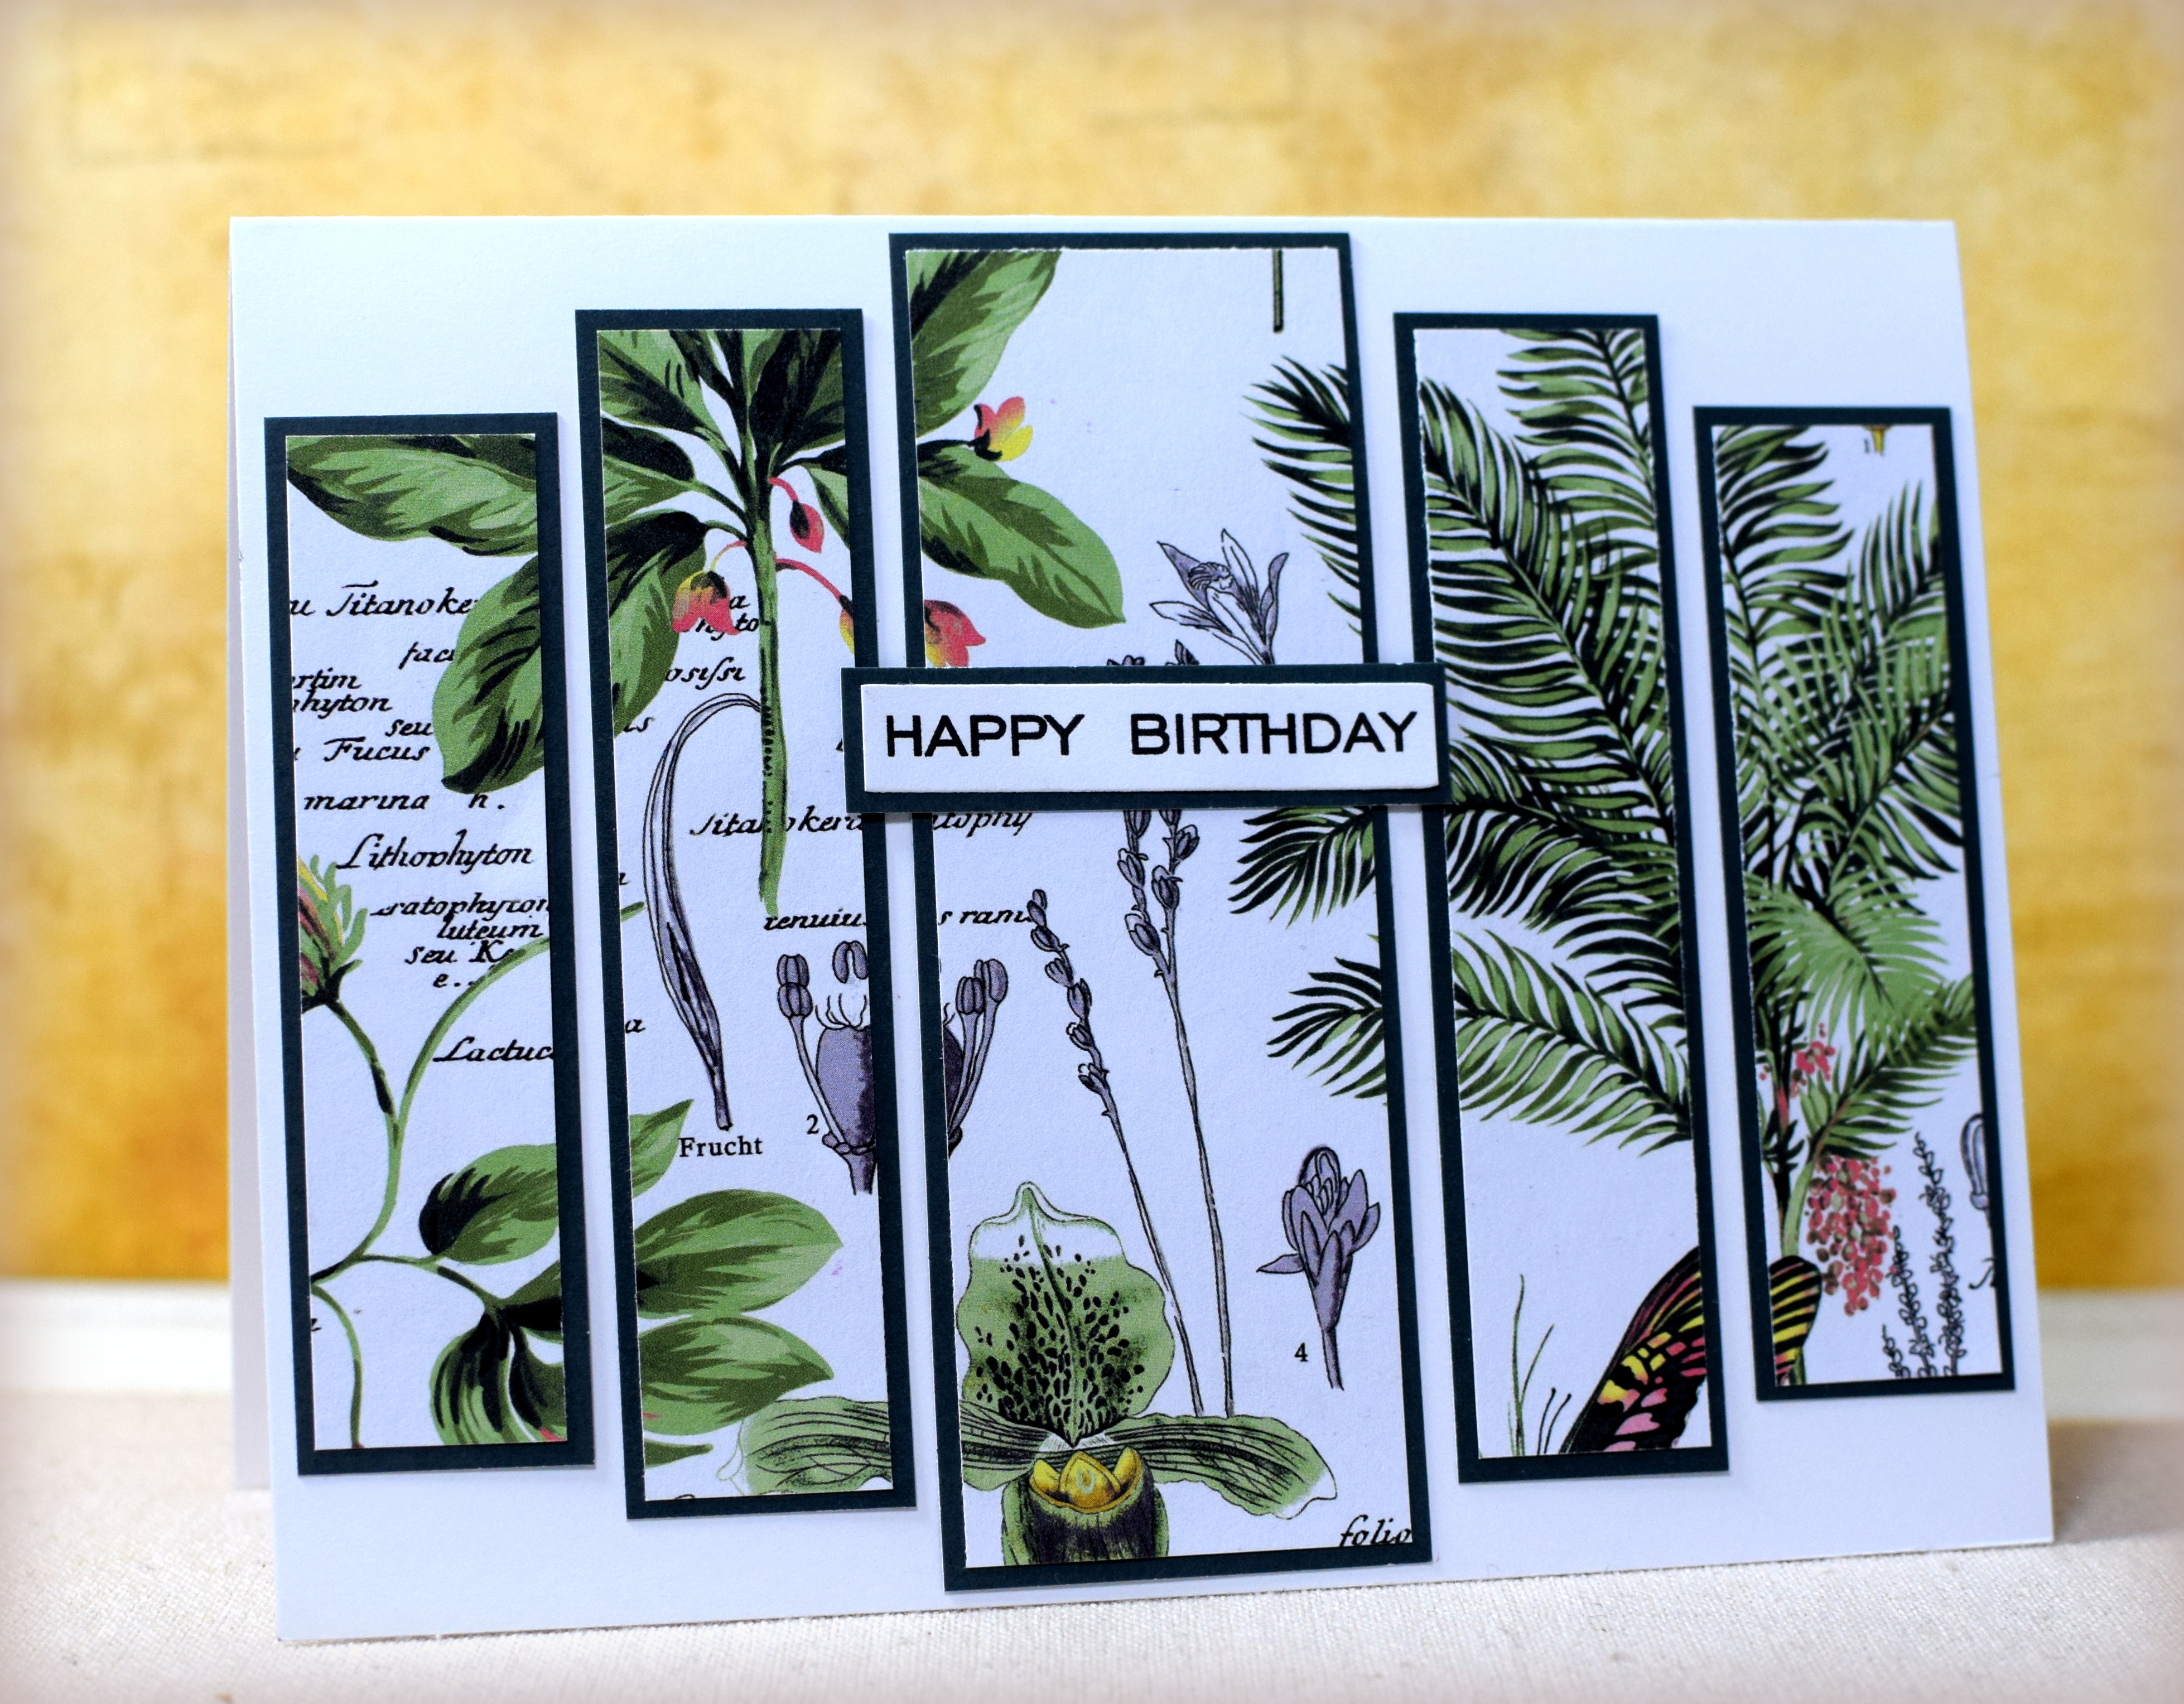
And here is a version where I cut the patterned paper incorrectly (there wasn’t enough paper to create a wider middle panel) so I left the panels all the same height and created this card. We will call it another variation instead of a mistake – lol!

The mats were from the “Green” card stock pack from The Paper Studio. (Yes, they are dark green and not black as they appear in the photos!) The greetings were computer generated.
Another good layout for using pretty patterned paper that you don’t want to cover up!
If you care to see the measurements for the panels, keep reading.
Continue reading