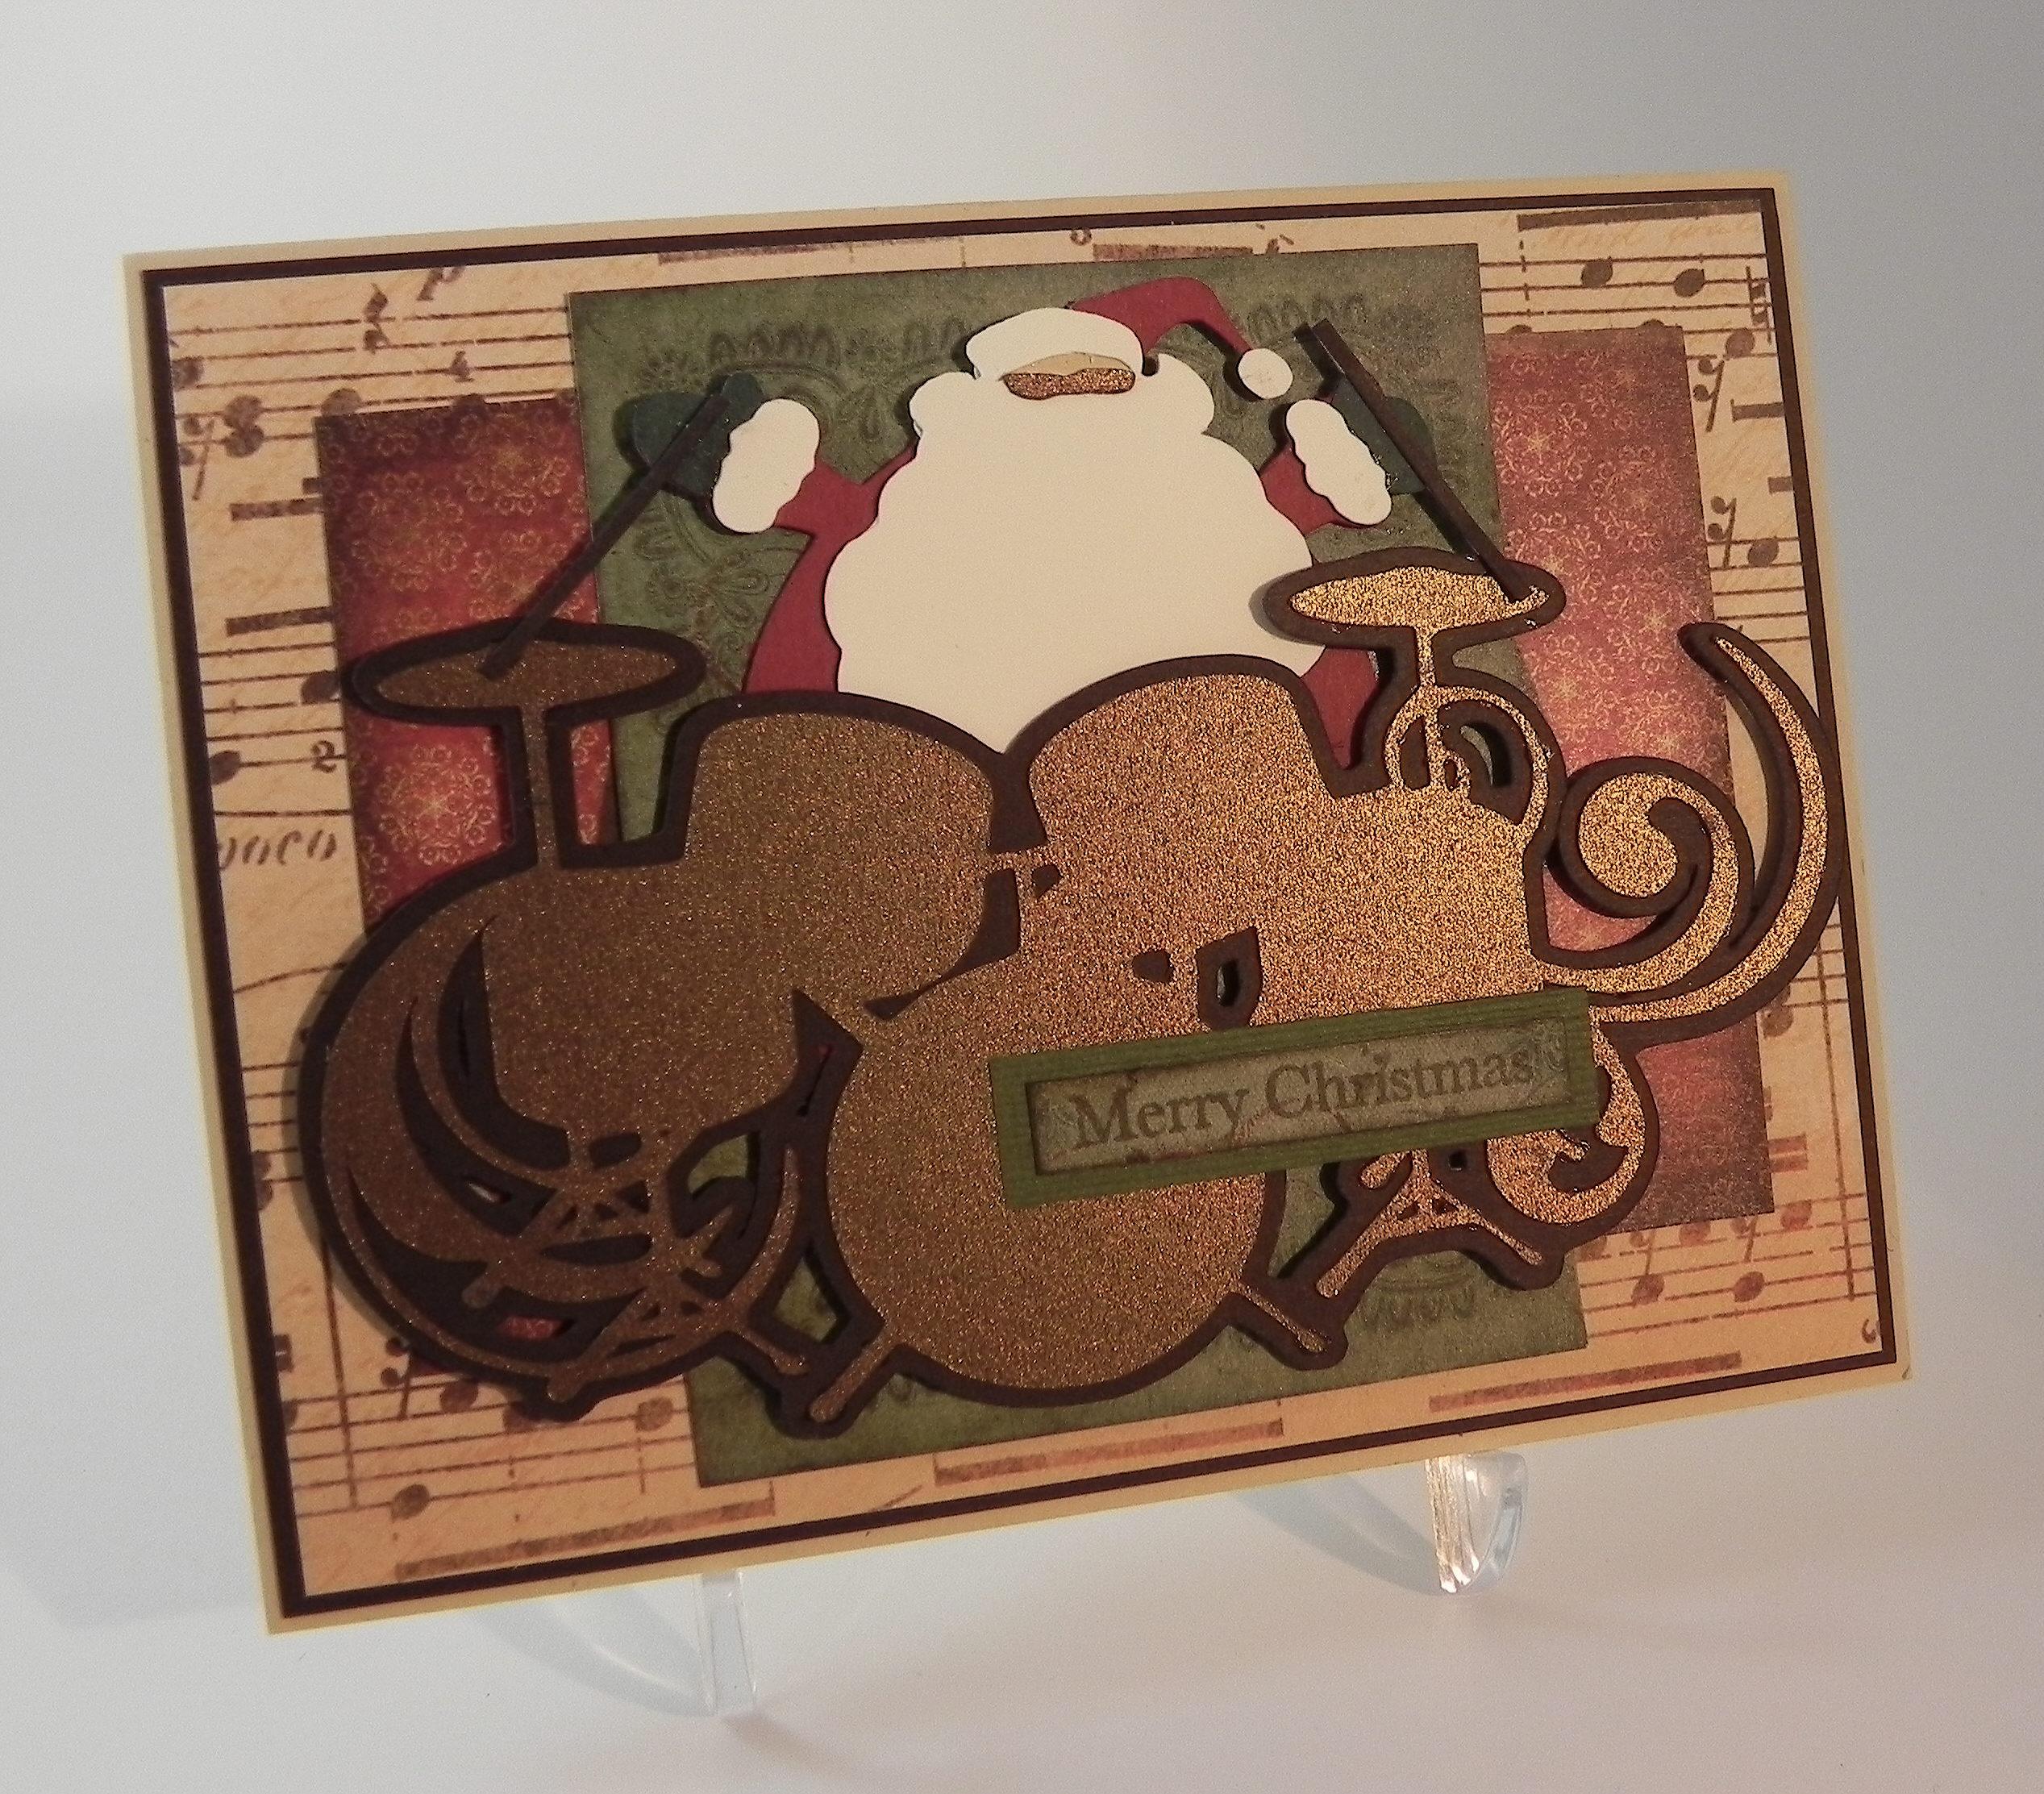
Rockin’ Santa

Rockin’ Santa

Rockin' Santa rDSCN6190.jpg

This card is being entered in this week’s Mod Squad Challenge – The Music of Christmas – where we are to use music on our card.   (Sadly, this site is no longer active.)

It is also being entered in the Simon Says Stamp Monday Challenge – Holiday Cards – where they are encouraging us to show them our homemade holiday goodness this week. While they are focusing on holiday cards, they welcome us to share whatever we may be making and giving this holiday season! (http://www.simonsaysstampblog.com/mondaychallenge/?p=2246)

This card is also being entered in the Perfectly Rustics Design Challenge No. 37 – Sentiment (Not Birthday). The focus of this challenge is the sentiment on the card, but NO HAPPY BIRTHDAY sentiments are to be used in this challenge!  They want us to think outside of the standard (most commonly used sentiment) and come up with something different.  My card has “Merry Christmas” as the sentiment. (http://perfectlyrustics.com/2014/12/01/prdc-37-sentiment-not-birthday/)s made for my daughter’s drum teacher.

The Santa was cut using my Cricut and the “Jolly Holidays” cartridge.  The drum set is from the “Quarter Note” cartridge.  I used Gina K sandy beach and dark chocolate card stock for the card base and mats.  The music notes printed paper is from the Recollections “Union Square” paper pad.  The red and green printed paper is from my scrap box and I don’t remember who made it.  (I got it at AC Moore a few years ago.)  The metalic paper for the drum set is Recollections (bronze) shimmer card stock, and Santa was made with Gina K cranberry tart, ivory, sandy beach, and a hunter green from my scrap box.  I stamped the Merry Christmas greeting on a scrap of the background green paper using a stamp from the Gina K Designs “Peace and Joy” set and charcoal brown ink.

I was pretty excited to make this card because I used a few Cricut cartridges that I haven’t used in a long time, and I also made use of some of the scraps that I keep and usually forget about!

Thanks for checking out my card project!

This content uses referral links as described in the disclosure policy on my sidebar.

Musical Wreath

Musical Wreath

xxxxxDSCN6289

This card is being entered in this week’s Mod Squad Challenge – The Music of Christmas – where we are to use music on our card.   (Sadly, this site is no longer active.)

It is also being entered in the Simon Says Stamp Monday Challenge – Holiday Cards – where they are encouraging us to show them our homemade holiday goodness this week. While they are focusing on holiday cards, they welcome us to share whatever we may be making and giving this holiday season! (http://www.simonsaysstampblog.com/mondaychallenge/?p=2246)

The stamps for this card came from the Gina K Designs “Winter Cheer” and “Just A Note” (retired?)stamp sets. I also used the ivy leaves from the “Winter Foliage” set, but it is really hard to see them in person and even harder in the photo!  The pine branches and circle of treble clefs were stamped with gina k black onyx ink (and my stamp-a-ma-jig).  Then color was added to the branches using Copic Markers (R89, G29, G24, and E47).  Card stock used was Gina K pure ivory and black along with a piece of merlot I got at AC Moore (no brand on it, just a bar code).  A piece of burgundy ribbon tied in a double bow finished it off.

I wanted to stick to the music theme on the inside as well so I used the “Deck the Halls…” stamp followed by the “Have yourself a Merry Little Christmas” stamp from the Gina K Designs “Merry Little Christmas” stamp set for my sentiment.

I have a lot of trouble photographing ivory cards in general and really struggled with this card in particular.  I was trying to reduce the shine/glare of the ribbon while also keeping the ribbon’s color (and the ivory background) looking accurate which kept resulting in dark photos.  There are two tones of green and brown on all of the branches along with red dots/berries throughout the wreath which are kind of hard to see.  (I took 92 pics in my light tent with different backgrounds, camera settings, lighting configurations, and exposure adjustments with my photo editing software, and this was the best of the bunch!)  I’m running out of time to get this finished and entered in the challenge, so I am done!!!

Thanks for checking out my card project!

This content uses referral links as described in the disclosure policy on my sidebar.

Recycled Ornament Card

Recycled Ornament Card

aaDSCN6131

This card was made for the StampTV MIUM Challenge- Something Old, Something New – where we were to have an old store bought card…or a brand new one we might have lying around, and use elements off of that card to create a new one.  And we MUST have a Gina K Design stamped image or sentiment somewhere on the card; my stamped image is on the inside.  (Sadly, this site is no longer active.)

Here is the original Hallmark card:

aDSCN6102

I started with a piece of Gina K Edible Eggplant card stock and cut out an ornament shape using one of the Spellbinders Holiday Tags dies.  Then, I embossed the panel with the Sizzix (Stampin’ UP) Stripes embossing folder.  The “J” and “Y” squares and the ornament “O” were adhered to the original card with pop dots, so I removed them and added them to the bottom of the new card panel.  The original card panel was attached to the card base, and then the embossed panel with the ornament cut-out was adhered on top with pop dots making the ornament a recessed frame.  I attached some ribbon and a few mini pine cones and “berries” that I had in my stash.

For the inside, I stamped the sentiment from the Gina K Designs “Sentimental Holiday” stamp set in Gina K Edible Eggplant ink on ivory card stock.  I embossed the two sides with double lines using my score board.

aDSCN6133

Thanks for checking out my card project!

This content uses referral links as described in the disclosure policy on my sidebar.

Embossed Birds ‘n’ Trees Card

Embossed Birds ‘n’ Trees Card

aDSCN5963.jpg

This card was made for the Perfectly Rustics Challenge No. 36 – Embossing – where we are to use wet or dry embossing on our project. (http://perfectlyrustics.com/2014/11/17/prdc-36-embossing/).

For the background panel on this card, I used the Sizzix “Stamp & Emboss – Birds ‘n’ Trees” set which includes both the embossing folder and coordinating large background stamp.  I stamped the background on My Mind’s Eye Nutmeg “Boy” Southwest Paper from the Indie Chic collection using Gina K Warm Cocoa ink first.  Then the images were lined up in the embossing folder and run through my Cuttlebug.  The Greeting was from the Gina K Designs “Winter Cheer” stamp set and was stamped using Gina K Dark Chocolate ink.  The My Mind’s Eye card stock is heavily textured which made it difficult to get clean, stamped images so I used my MISTI to stamp the background and greeting because I needed to stamp them each multiple times.  (For more information on the MISTI, check out my earlier post HERE.)  Gina K Warm Cocoa card stock was used for the mats and card base.  I added some ribbon, twine and a mini wooden snowflake ornament I got at Michaels (this is the smaller of the two sizes that came in the pack of 20) to finish off this simple card.

Thanks for checking out my card project!

This content uses referral links as described in the disclosure policy on my sidebar.

Flowers in Vase Sympathy Card – Original Post

Flowers in Vase Sympathy Card – Original Post

Flowers in Vase Sympathy Card DSCN6075.jpg

I have a lot of trouble coming up with ideas for sympathy cards in general, and my mind basically shuts down when I actually need one.  I probably should make a few (when I don’t actually need them) just to have on hand.  I really struggled with this one for our neice whose father recently passed away.  But I finally finished it.

A mask was made using the Spellbinders Deckled Rectangles.  The background panel was then stamped (using the mask) with the Rubbernecker Stamps “French Script BKG” stamp and Tim Holtz Frayed Burlap Distress Ink on Gina K Pure Ivory card stock.  Then, a second mask was used to create the two squares over the script to add a bit of color.  The inks used were Memento Elderberry and Stampin’ Up Pistachio Pudding.  Using the deckled rectangle mask again, the area over the script and squares was lightly inked using Memento Elderberry.  The sentiment stamp was from the Gina K Designs “With Love and Prayers” stamp set and was stamped with the frayed burlap ink.

The flowers were made using the Heartfelt Creations “Sun Kissed Fleur” die and the “Sun Kissed Fleur PreCut Stamp” for detail.  They were stamped and sponged with Stampin’ Up Soft Suede ink on Stampin’ Up Pistachio Pudding card stock.  Buttons and jute were added to the centers.  I made several of these flowers when I made my Thinking of You Card back in October and had saved the extras to use later.  (Originally, I had stamped flowers directly onto this card base over the inked squares but decided to use these 3D flowers and the vase instead.  I may have positioned the squares differently had I thought of this earlier.)

The two layers of the vase were cut with the Spellbinders Filigree Vase dies from Gina K Edible Eggplant card stock.  The vase and the flowers were adhered to the ivory panel using pop dots.

I hand-embossed the lines around the edges of the ivory panel using a score board.  The card base was made from Gina K Edible Eggplant card stock.

Thanks for checking out my card project.

This content uses referral links as described in the disclosure policy on my sidebar.