Birds of a Feather Center Step Card (and a few more scenic cards)

Birds of a Feather Center Step Card (and a few more scenic cards)

wDSC_7336.jpg

Over the years, I have purchased quite a few 12″ x 12″ paper pads and packs.  Usually, I buy them for a sheet or two that I need for a particular project, and then the rest of it gets filed away and forgotten about.  I recently pulled a bunch of them out and found some great pieces that made nice card panels.

The above 5″ x 7″ center step card was made with paper called “Birds of a Feather” by 7 Gypsies.  The printed panels were matted on Gina K Faded Brick card stock and a heavy weight ivory card base.  I love the pattern and rich colors on this paper!

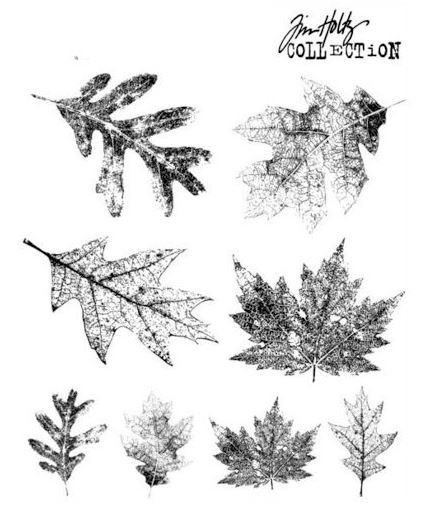
To create the greeting, I used the “Thank You 2” die by Cheery Lynn Designs and black card stock.  The background paper was so busy which made it difficult to see the die cut by itself so I created a banner for behind it from Gina K Faded Brick card stock and ink, a leaf stamp from the Stampers Anonymous “Falling Leaves” set by Tim Holtz, and the Banner Triple Punch from Stampin’ Up.  (As you can probably tell from a few of my recent posts, I am loving the “texture” created when you stamp a tone-on-tone image randomly to cover the card stock panel!)

Here is the template for a 5×7 inch center step card:

5x7-center-step-template

I had several sheets of this paper so I made a few more without a greeting so they would be suitable for a variety of occasions and ready to go as needed.

wDSC_6859

*

Here are a few more step cards I came up with using paper from a pad called “Lake Life Is Best” by Paper House.  (The Father’s Day stamp is from a set called “Father’s Day Innies & Outies” by My Sentiments Exactly.)

   wDSC_6863    wDSC_6862

These cards practically make themselves; the scenic paper does all the work!  I kind of feel like I’m cheating, but I have SO MUCH paper like this (with a large pattern or scene), and using it on this step card design is a great way to put it to good use.  And you can add as much or as little to the scene; I think it always looks “finished” and awesome.

Thanks for checking out my card projects!

This content uses referral links as described in the disclosure policy on my sidebar.

Autumn Leaves Note Card

Autumn Leaves Note Card

wDSC_7330

In my last post, I shared a subtle, tone on tone pattern using a leaf stamp and ink that matched the card stock.  For this project, I used the same technique but stamped a different color ink on the card stock.

This time, I used Gina K Faded Brick card stock, Gina K Dark Chocolate ink, and the same leaf stamp from the Stampers Anonymous “Falling Leaves” set by Tim Holtz (shown below).  As on the last card, I randomly and repeatedly stamped the image (overlapping) until the whole panel was covered.  (If you overlap a lot, the card stock will get darker and the leaves will be less defined.  Overlapping less allows more of the card stock color to show and allows you do see the leaf images better.)

Fall Leaves Set

(I used the stamp on the bottom right corner.)

I used Gina K Dark Chocolate and Color Mates Light Caribbean Coral card stock for the mats and card base.  A Strip of Recollections Shimmer Card Stock (bronze) was embossed with the Darice “Fall Leaves Background” embossing folder.

The leaves were cut from the stamped Faded Brick card stock (same as background panel) with a die from the “Oak Leaves” die set by Gina Marie Designs.  I used glue dots just up the centers of the leaves so the edges could be curled up a touch.

Brown hemp was the finishing touch.

Thanks for checking out my card project!

This content uses referral links as described in the disclosure policy on my sidebar.

Surprise! Graduation Thank You Card

Surprise! Graduation Thank You Card

wDSC_7251

Here is the third of the three designs I came up with for graduation thank you notes for my kids.  For this one, the front is deceivingly simple, but when the card is opened, a decorated cube jumps right out of the card!

Surprise_Graduation_Thank_You_Card .5 speed GIF.gif

How fun is that?!

There is a panel inside for a handwritten message that is seen after the cube pops out.

wwDSC_7254

The greeting was downloaded and printed from a file called “Free Wedding Text Digital Stamps” I found online at Digital Doodling.  This same “thank you” was on the front and on two of the sides of the cube.  The “class of 2017” on the other two sides of the cube was a digital image I found at Geographics.com (although I am no longer seeing it there).  I found the same image on etsy (for 2018) HERE by createsvg4you.

Black and white card stock was used, along with a rubberband inside the cube that allows it to fold flat and pop open.

The cube is from a Silhouette cut file called “Insta-Cube Card Graduation” (design id #198862) which was designed by Lori Whitlock.  In addition to the cube base (and a box that holds the cube which I did not use here), the file contains graduation elements with which to decorate the cube, but I did not use them for this project.  I think the cube is meant to be the card, but I needed mine to have more space for writing, so I just put the cube inside another card.  Here is a video showing how to assemble the cube along with other themed sets that are available.

wDSC_7252

Thanks for checking out my card post!

Pop-Up Graduation Thank You Card

Pop-Up Graduation Thank You Card

xDSC_7229


Here is the second of the three designs I came up with for graduation thank you notes for my kids.  For this one, I used the Sizzix “Platform, Spinning 3-D” Bigz Die (#656029) designed by Karen Burniston which caused the hand-written message to pop out at the recipient when the card was opened.

wDSC_7218     wDSC_7216

Because my pop-up element was kind of big, my overall card needed to be big to accommodate it.  My card, when closed, is 5 1/2 x 5 inches.  (When the card is closed, the edges of the pop-up note line up pretty closely with the decorative panels on each side.)  If the pop-up element were smaller, the card could probably fit into an A2 sized envelope.  Instead of creating a custom envelope, I ended up using envelopes meant for cards measuring 5 x 7 which allowed room to the left to carefully position the tassel so it didn’t get all wonky when mailed.

Kraft card stock was used for the card base and tag.  This tag with the greeting was downloaded and printed from a file called “Printable Thank You Gift Tags” that I purchased from Concertina Press.

I purchased the tassels (ready-made) on amazon.  The black panel across the middle was debossed with a Darice Circle Background embossing folder.

The foiled background panel was from a file from the “Graduation Digital Paper Pack” by DeerCustomDesigns that I purchased on Etsy.  It was printed on laser printer paper with a laser printer  and foiled using  Gina K Red Velvet Fancy Foils and my mini Heidi Swapp MINC foiling machine.  (A laminator can also be used.)

wDSC_7233

The inside panels were matted on Gina K Red Velvet card stock.  The side panels are from a digital paper pack called “Thank You Papers” by AMB Illustrations that I also purchased on Etsy.

Thanks for checking out my card project!

This content uses referral links as described in the disclosure policy on my sidebar.

Graduation Cap Thank You Card

Graduation Cap Thank You Card

xDSC_7205.jpg

(I’m sorry I keep sharing “out of season” projects, but I’m still trying to catch up…)

In addition to all the graduation cards my kids needed to give, they also needed a few thank you notes as well.  I decided to make 3 different designs so if they all received a gift from the same person, the gift-giver wouldn’t receive 3 of the same thank you card design.

This first one was popping up all over Pinterest so I thought I’d give it a try.  The cap opens to reveal the handwritten note.  (It’s kind of a small area, so Kelly needed to write small.  She was actually able to fit more on there than I did on my sample!)

wDSC_7210     wDSC_7209


Gina K Red Velvet, black and white card stock was used.  The stamps are from the Fiskars “Monumental Moments” set and the Hampton Art set #SC0752.  Glittery Recollections brads were used as the tassel buttons on the tops of the caps.

I made the tassels from red embroidery thread and brush fringe.  (This fringe was very difficult to work with because there is one thread holding it all together, and I kept losing pieces as I tried to separate it to tie the embroidery thread around the tops.  I had pieces of red fringe everywhere!!  I felt like I was all thumbs!  Maybe if my fingers were daintier…)

HERE is the tutorial video I used to create this card.

wDSC_7206

Thanks for checking out my card post!