Always Remember…

Always Remember…

045 Always Remember  DSCN8444.jpg

Join us for a new challenge over at Perfectly Rustics!  This fortnight, the challenge is to include the word “remember” or “remembrance” on your project (http://perfectlyrustics.com/2015/04/06/prdc-no-45-remember/).

The inspirational stamp I used that includes the word “remember” is called “Always Remember” by Woodware Craft Collection – Clear Magic Singles. I think it is a fantastic message for someone who is going through a tough time or dealing with a loss.

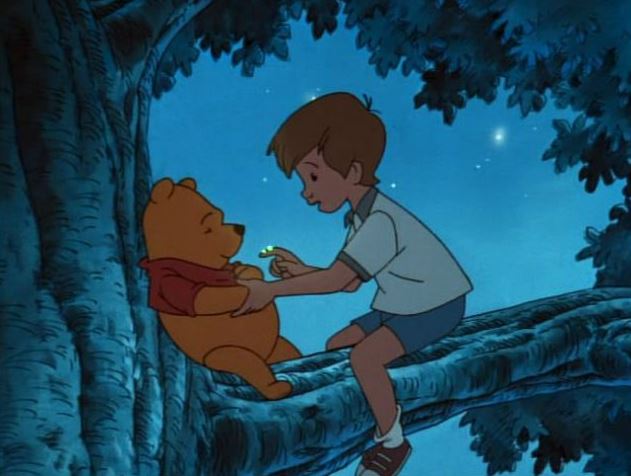
(I believe it is actually a quote from the movie “Pooh’s Grand Adventure: The Search for Christopher Robin” based on A. A. Milne’s stories of Winnie the Pooh where Christopher Robin says to Winnie the Pooh, “If ever there is tomorrow when we’re not together… there is something you must always remember. You are braver than you believe, stronger than you seem, and smarter than you think….”)

Christopher Robin and Pooh

The sentiment was stamped with Gina K warm cocoa ink on Paper Pizazz Tan Floral Tapestry paper and cut with a Spellbinders die from the Labels Eight set.  This paper was also used for the background and to make the flower.  I created the flower with the Heartfelt Creations (Spellbinders) Sunkissed Fleur die and the Sunkissed Fleur Precut Set stamp.  The image details were stamped with warm cocoa ink on the patterned paper and then covered with Viva Decor copper 3D Stamp Paint.  The center of the flower was made with an Epiphany Crafts Shape Studio tool which I describe in my Potted Plant card post.  (This is one of the flowers I originally made for that card!)  The leaf flourish was cut with a die from the Heartfelt Creations (Spellbinders) Flower Pot set.  In addition to the patterned paper by Paper Pizazz, I also used Gina K dusty sage, Core-dinations valentia, and Melissa Frances first class mail.  All of the edges were sponged with the Gina K warm cocoa ink.

Now it’s your turn!  Create a project that includes the word “remember” or “remembrance” and enter it in the Perfectly Rustics “Remember” challenge.  I can’t wait to see your creation!

Thanks for checking out my card project!

This content uses referral links as described in the disclosure policy on my sidebar.

“Save The Date” Card

“Save The Date” Card

Save The Date Card DSCN9286

The Mod Squad Challenge this week is “Magazine Madness” where we are encouraged to use something on our card project from a magazine, gift catalog, or any other periodical we may have lying around. We can use it as a background, we can do a little fussy cutting, or we can get really creative and fussy cut a whole bunch of different shapes and make a collage or scene. We can do anything as long as something from a magazine is somewhere on our card.  (Sadly, this site is no longer active.)

This is my second card for this challenge, and if you saw my last post, you know that I had only one magazine in my house (SJ Magazine March 2013) so this card is from there as well!  Here is the page:

dancing on the stars

This card practically made itself!  The panel and greeting were matted on black card stock and then purple glitter paper from Michaels. The greeting was from the Gina K Designs “Folk Filigree” set (retired?) and was stamped with Memento tuxedo black ink on Gina K sweet corn card stock.  The sweet corn was also used for the card base.  A piece of gold cording was tucked behind the greeting to add a little more sparkle since you can never have too much sparkle on a “fancy party” card!

DSCN9273

Thanks for checking out my card post!

This content uses referral links as described in the disclosure policy on my sidebar.

Fine Wine and Friendship

Fine Wine and Friendship

Fine Wine and Friendship Card final DSCN9316.jpg

The Mod Squad Challenge this week is “Magazine Madness” where we are encouraged to use something on our card project from a magazine, gift catalog, or any other periodical we may have lying around.  We can use it as a background, we can do a little fussy cutting,  or we can get really creative and fussy cut a whole bunch of different shapes and make a collage or scene.  We can do anything as long as something from a magazine is somewhere on our card.  (Sadly, this site is no longer active.)

The magazine I used for this card was SJ Magazine (March 2015) which happened to be the only magazine I had lying around here when I saw the challenge!  (I don’t read magazines, and I no longer get the number of catalogs that I used to.)  This is a free magazine that usually goes right into the recylcle bucket when it arrives, but I realized I needed it before I pitched it.  Phew!!  Here is the page I used for my card.

mag page for Fine Wine and Friendship Card 4

I really liked the two image groupings in the bottom corners, but the words got in the way, so I layered the panels to strategically hide the words.

The image panels were matted on Gina K Dark Chocolate card stock.  The patterned card stock I used for the background was from a pad by Momenta which didn’t seem to have a name on the pad itself, but the price tag said “Songbird” and the Momenta label said Lot 20468 R4.  These background panels were also matted on the dark chocolate.  The sentiment along the bottom of the card (“Like a fine wine, our friendship gets better with age.”) is from the Gina K Designs “Better With Age” duo (retired?) and was stamped with the Gina K dark chocolate ink.  Because the printed card stock was textured and a bit dark, I used my MISTI and was able to stamp the greeting multiple times to get it dark enough to see it better.  A bit of raffia finished off my card.

I had a hard time photographing this card because of the glare off the glossy paper from the magazine. When I positioned the lights to prevent the glare, the photo came out darker than I would have liked. Hopefully, you get the idea, though!

Thanks for checking out my card project!

This content uses referral links as described in the disclosure policy on my sidebar.

Quilled Iris

Quilled Iris

w Quilled Iris DSCN8105

It had been a while since I had done any quilling, so I thought I’d make a quilled card to enter in this week’s Mod Squad Challenge called “Spring Forward” where we are encouraged to use flowers, birds, butterflies, hummingbirds, etc. and bright, beautiful colors to make a Spring themed card.  (Sadly, this site is no longer active.)

I sponged Gina K Wild Lilac ink on white card stock and glued my quilled iris and decorative swirls on this panel.  Then, I created a recessed frame with thick fun foam and Spellbinders oval dies.

zDSCN8176

The printed paper is from a digital set I bought from a store on Etsy called The Pixel Posy. The set is called “Vintage William Morris digital paper designs//Art Nouveau background paper pack//Blue and purple flower digital paper.”   HERE is the link.

This card used a number of quilled shapes:  teardrops, half circles, marquises and wheatears (leaves).  I used instructions by “Quilled Creations” to create the iris.


I had made a few other quilled cards in the past that I had posted in my StampTV Gallery.  (Sadly, this site is no longer active.)  I’m including them here as well.

Quilled Sympathy Card DSCN5557

This sympathy card was the first one I did back in May 2013.  I used a basic marquise shape for the flowers and leaves.  The sentiment was from the Gina K Designs “All Occasion Tags” Stamp set.  The tag was cut with a die from the Spellbinders Grommet Tag set, and the embossing folder is Darice Corner Scroll.

I used the same embossing folder and marquise shapes to create two more – a wedding card and a confirmation card.

Quilled Wedding Card DSCN5602.jpg

DSCN5609

The sentiment on the wedding card is from the Gina K Designs “Always and Forever” duo stamp set.  I purchased the stamp for the confirmation card on Ebay, and it is unmarked so I have no idea what company made it.

The next card I made was for a bridal shower.  I used teardrops to make the umbrella.

Quilled Bridal Shower Card DSCN5666.jpg

The bride and groom stamp is called “Happy Couple” by Stampendous!  The greeting was done on the computer.  I used the Darice Stripe embossing folder on this card.


Quilled Creations makes a great tool called “Circle Template Board” that makes it easy to create consistent and perfectly proportioned quilled shapes. I also use their slotted quilling tool to roll the circles; the slot makes it easy to get the paper rolls started.

circle template board  slotted tool

I forgot how much I LOVE quilled designs; I will definitely need to do this more often!!

Thanks for checking out my card projects!

This content uses referral links as described in the disclosure policy on my sidebar.

Pop-Up Hearts

Pop-Up Hearts

POP UP HEARTS 2

This card is being entered in the Mod Squad Challenge “Pop-Up Card” where we are to make a pop-up card of any kind.   (Sadly, this site is no longer active.)

I made this as a Valentine’s Day Card, although with no greeting on the front, it could also be used for an anniversary, a wedding, or a “just because” card for someone special.

The inside pop-up element was made with the Sizzix “Hearts-a-Plenty 3D (Pop-Up)” die.  Card stock used on the inside was Gina K heavy base weight white and cherry red along with Recollections silver glitter paper.  The stamp is from the Gina K Designs “Bundle of Love” stamp set and was stamped with Memento tuxedo black ink.  In addition to the sizzix die, a Creative Memories double heart punch was used as well.  I used score tape to make sure the pop-up element was adhered well to the base.  I didn’t have any “Happy Valentine’s Day” stamps that fit in the white space or on the white heart; I need to fix that!!!  The card pictured is my sample; on the cards I actually sent, I hand-wrote that along with a short message in the upper left and lower right corners (before adhering my pop-up element – learned that the hard way!!!).

Here are a few close-up shots of the inside of the card:

qDSCN7576

qDSCN7572    qDSCN7559

qDSCN7589    qDSCN7585

Here is the front of the card:

qDSCN7547

For the front, I used patterned paper from the Gina K Fight Like A Girl paper pack.  Gina K cherry red, black, and white card stock was used along with Recollections silver glitter paper.  The embossing folders I used were Darice Heart, Darice Stripe, and Cuttlebug Swiss Dots.  The giant crystal heart-shaped gem sticker is by Mark Richards.  Spellbinders classic circle dies (large and small) were used for the focal panel, and a piece of ribbon was tucked behind.

qqDSCN7544

This card, with the pop-up center and the big gem sticker on the front was so thick, it needed to be sent as a package!  Ugh!!!

This card is a variation of a card I made for the StampTV MIUM “Put Your Heart Into It!” Challenge where we are to use a heart somewhere on our project, but it cannot be a Valentine’s Day card.   (Sadly, this site is no longer active.)  While my card pictured above could be used for a variety of occasions, I decided to change up the front so it was clearly NOT a Valentine’s Day Card!  Here is the variation I entered instead:

uuDSCN7505

Again, the patterned paper is from the Gina K Fight Like A Girl paper pack. Gina K cherry red and white was also used. The Stamp is from the GKD Sweet Tweets stamp set and was stamped in Memento tuxedo black and colored with Copic Marker R46 and a clear Wink of Stella glitter pen. A few silver heart spangles were added to the frosting. The greeting is a Momenta metal sticker. The embossing folder is Darice Heart.  Spellbinders classic circle dies (large and small) were used for the focal panel. You can see the shine a little better in this close-up.

tDSCN7508

I used two tools to place and adhere those tiny heart spangles to my project.  The first is the glue. Since I needed such a small amount for each heart, I used my Zig 2 Way Glue pen.  It looks like a pen and has a fine ball point.  You can squeeze or roll just the right amount of glue that you need with perfect placement.  This glue can be used two ways. Use it when it’s blue and wet for a permanent bond or let it dry clear for a few moments to get a temporary bond.

azig 2 way glue pen

The second tool I used is the Silhouette Pick-Me-Up tool.  One end has a tacky substance on it that allows you to pick things up.  The other end has a removable tool that has two ends that allows you to push the item off the tacky end and onto the adhesive on your project or to push the item in place.  I found a “review” with instructions on how to use this tool online HERE that you may find helpful.

aSilhouette Pick Me Up Tool 1    Silhouette Pick Me Up Tool 2

Thanks for checking out my card projects!

This content uses referral links as described in the disclosure policy on my sidebar.