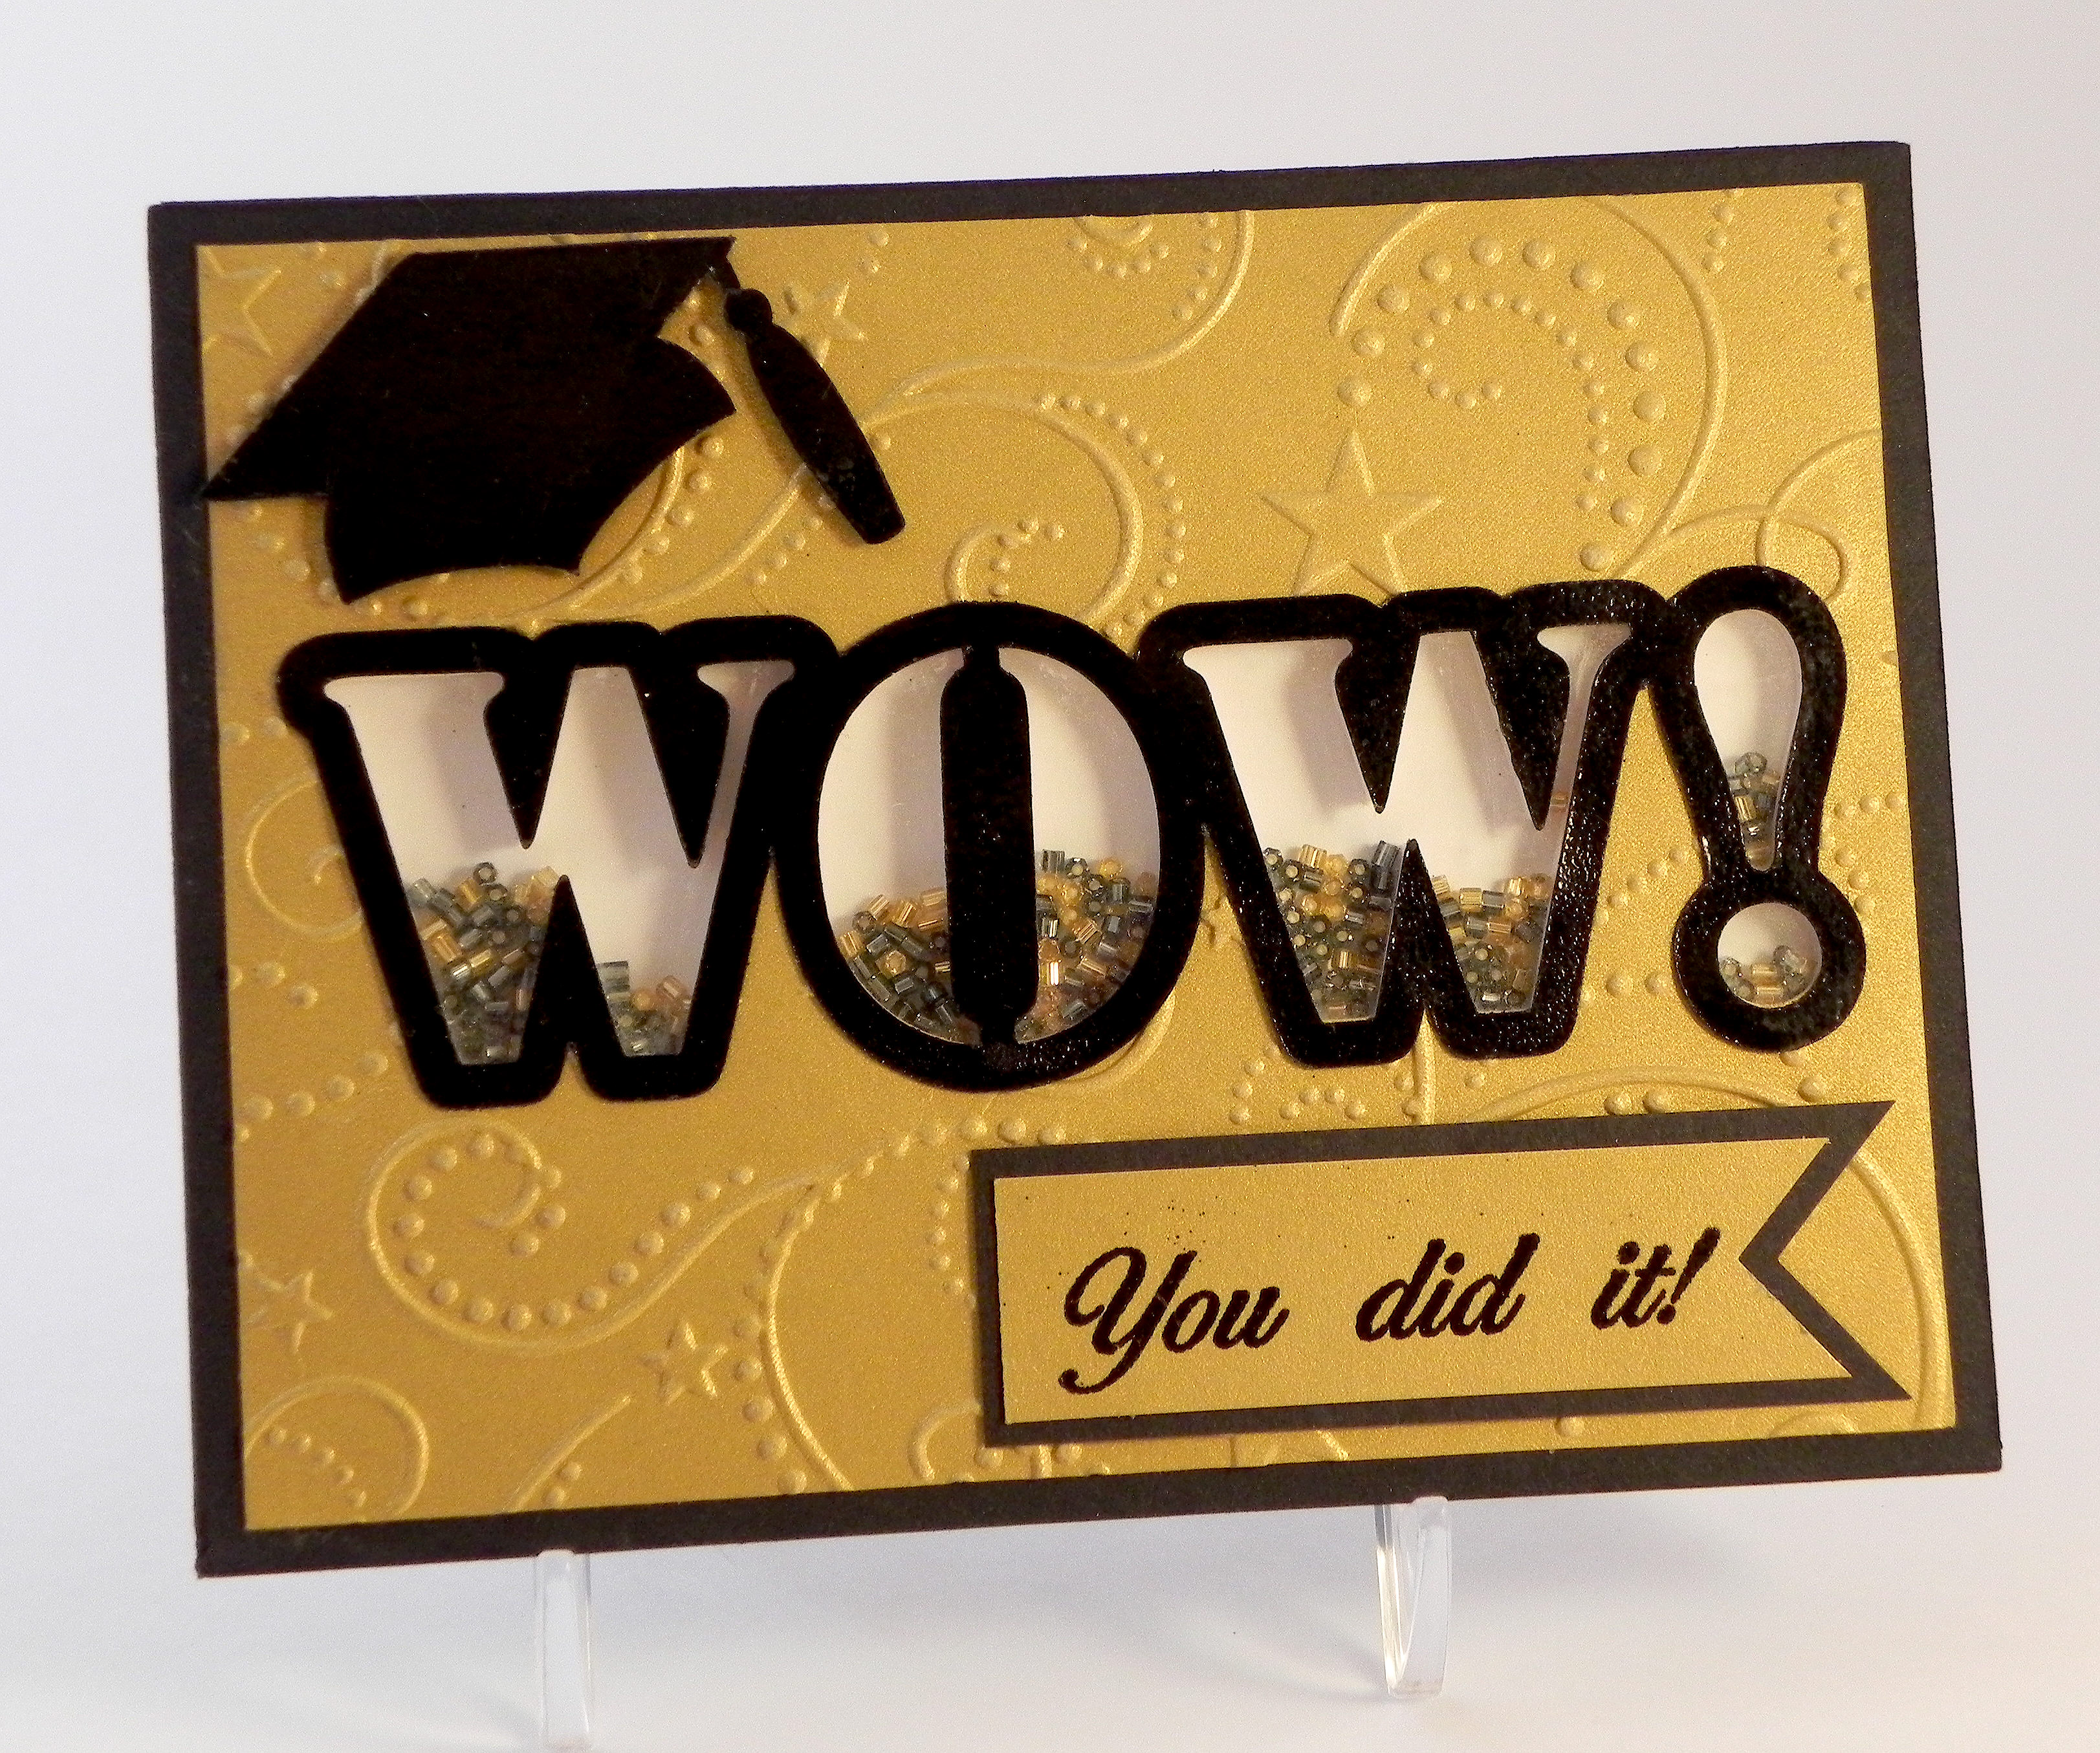
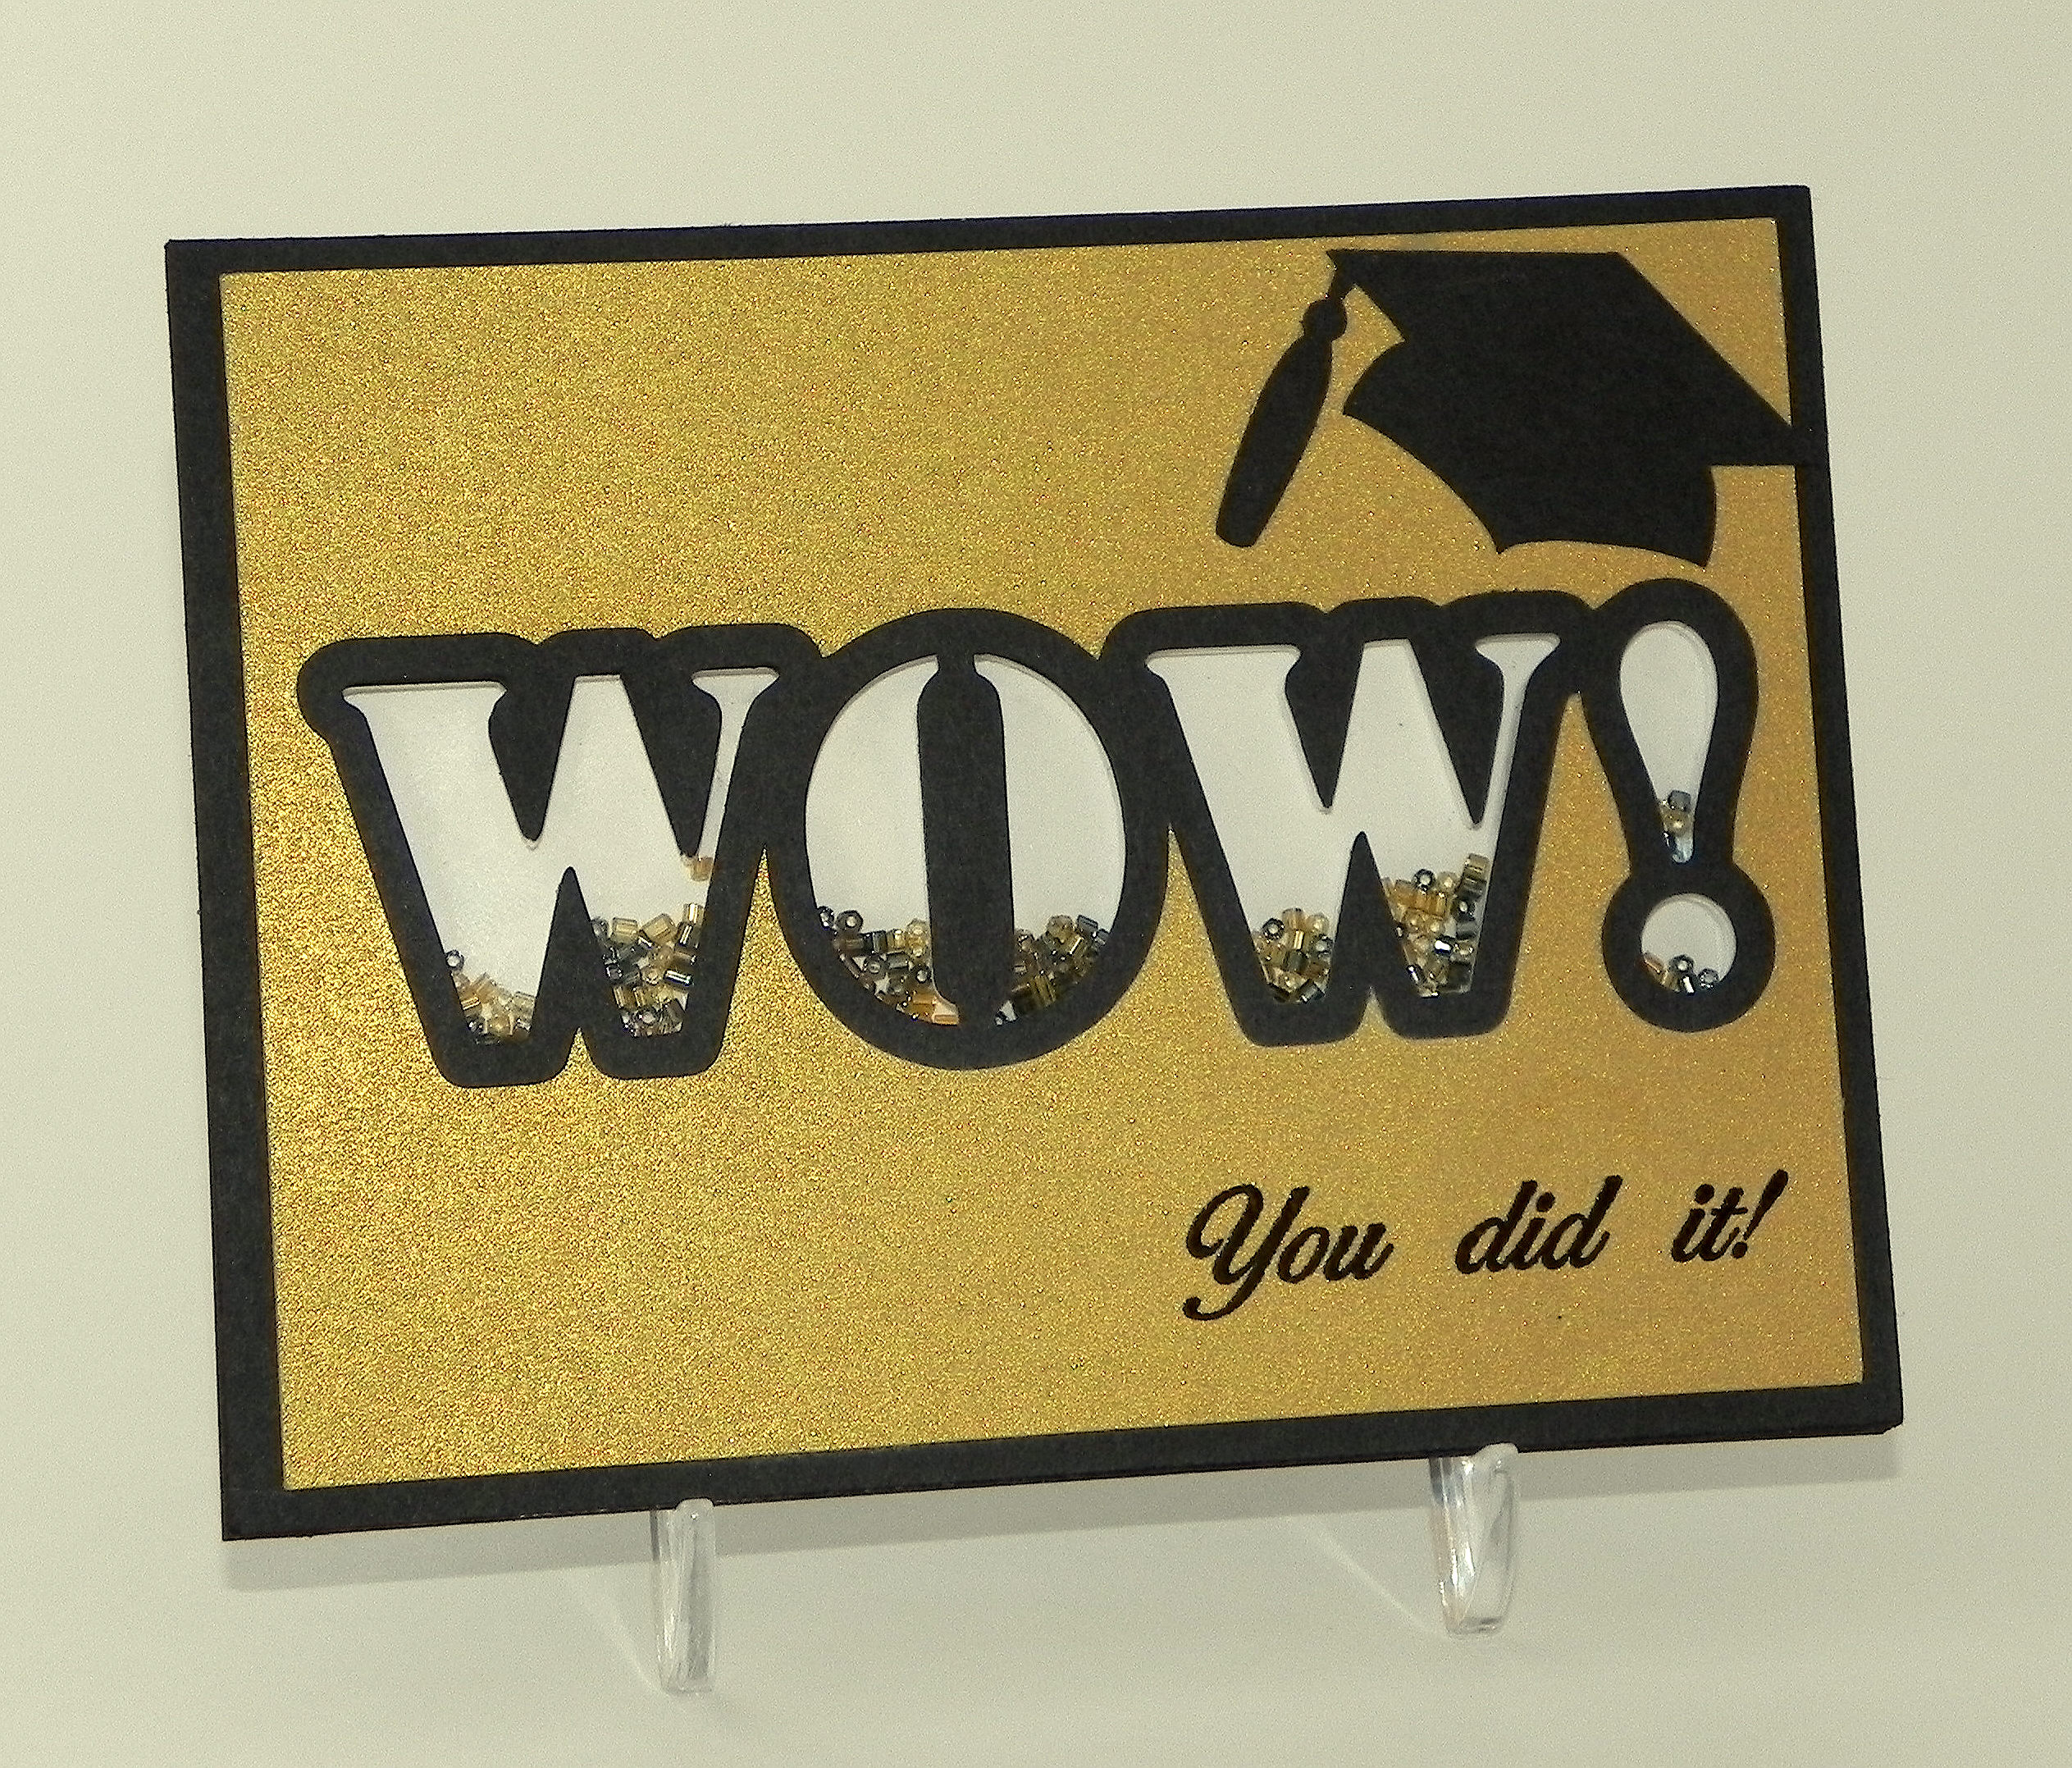
WOW Graduation Shaker Card

Join us this fortnight for a new challenge over at Perfectly Rustics. The challenge is “Letters or Symbols” where you are to make a letter or symbol the hero of your project. For example, if you were making a card with the word love on it, make the letters big, emboss them, have them in patterned paper etc. (http://perfectlyrustics.com/2015/06/01/prdc-no-49-letters-or-symbols/)
I created a graduation card featuring the word WOW. Each of the letters is its own shaker window filled with small, glass beads. I added a small graduation cap and sentiment to show it is a graduation card, but the main focus of the card is the word WOW.
The first version I did was a clean and simple design with a plain gold front.

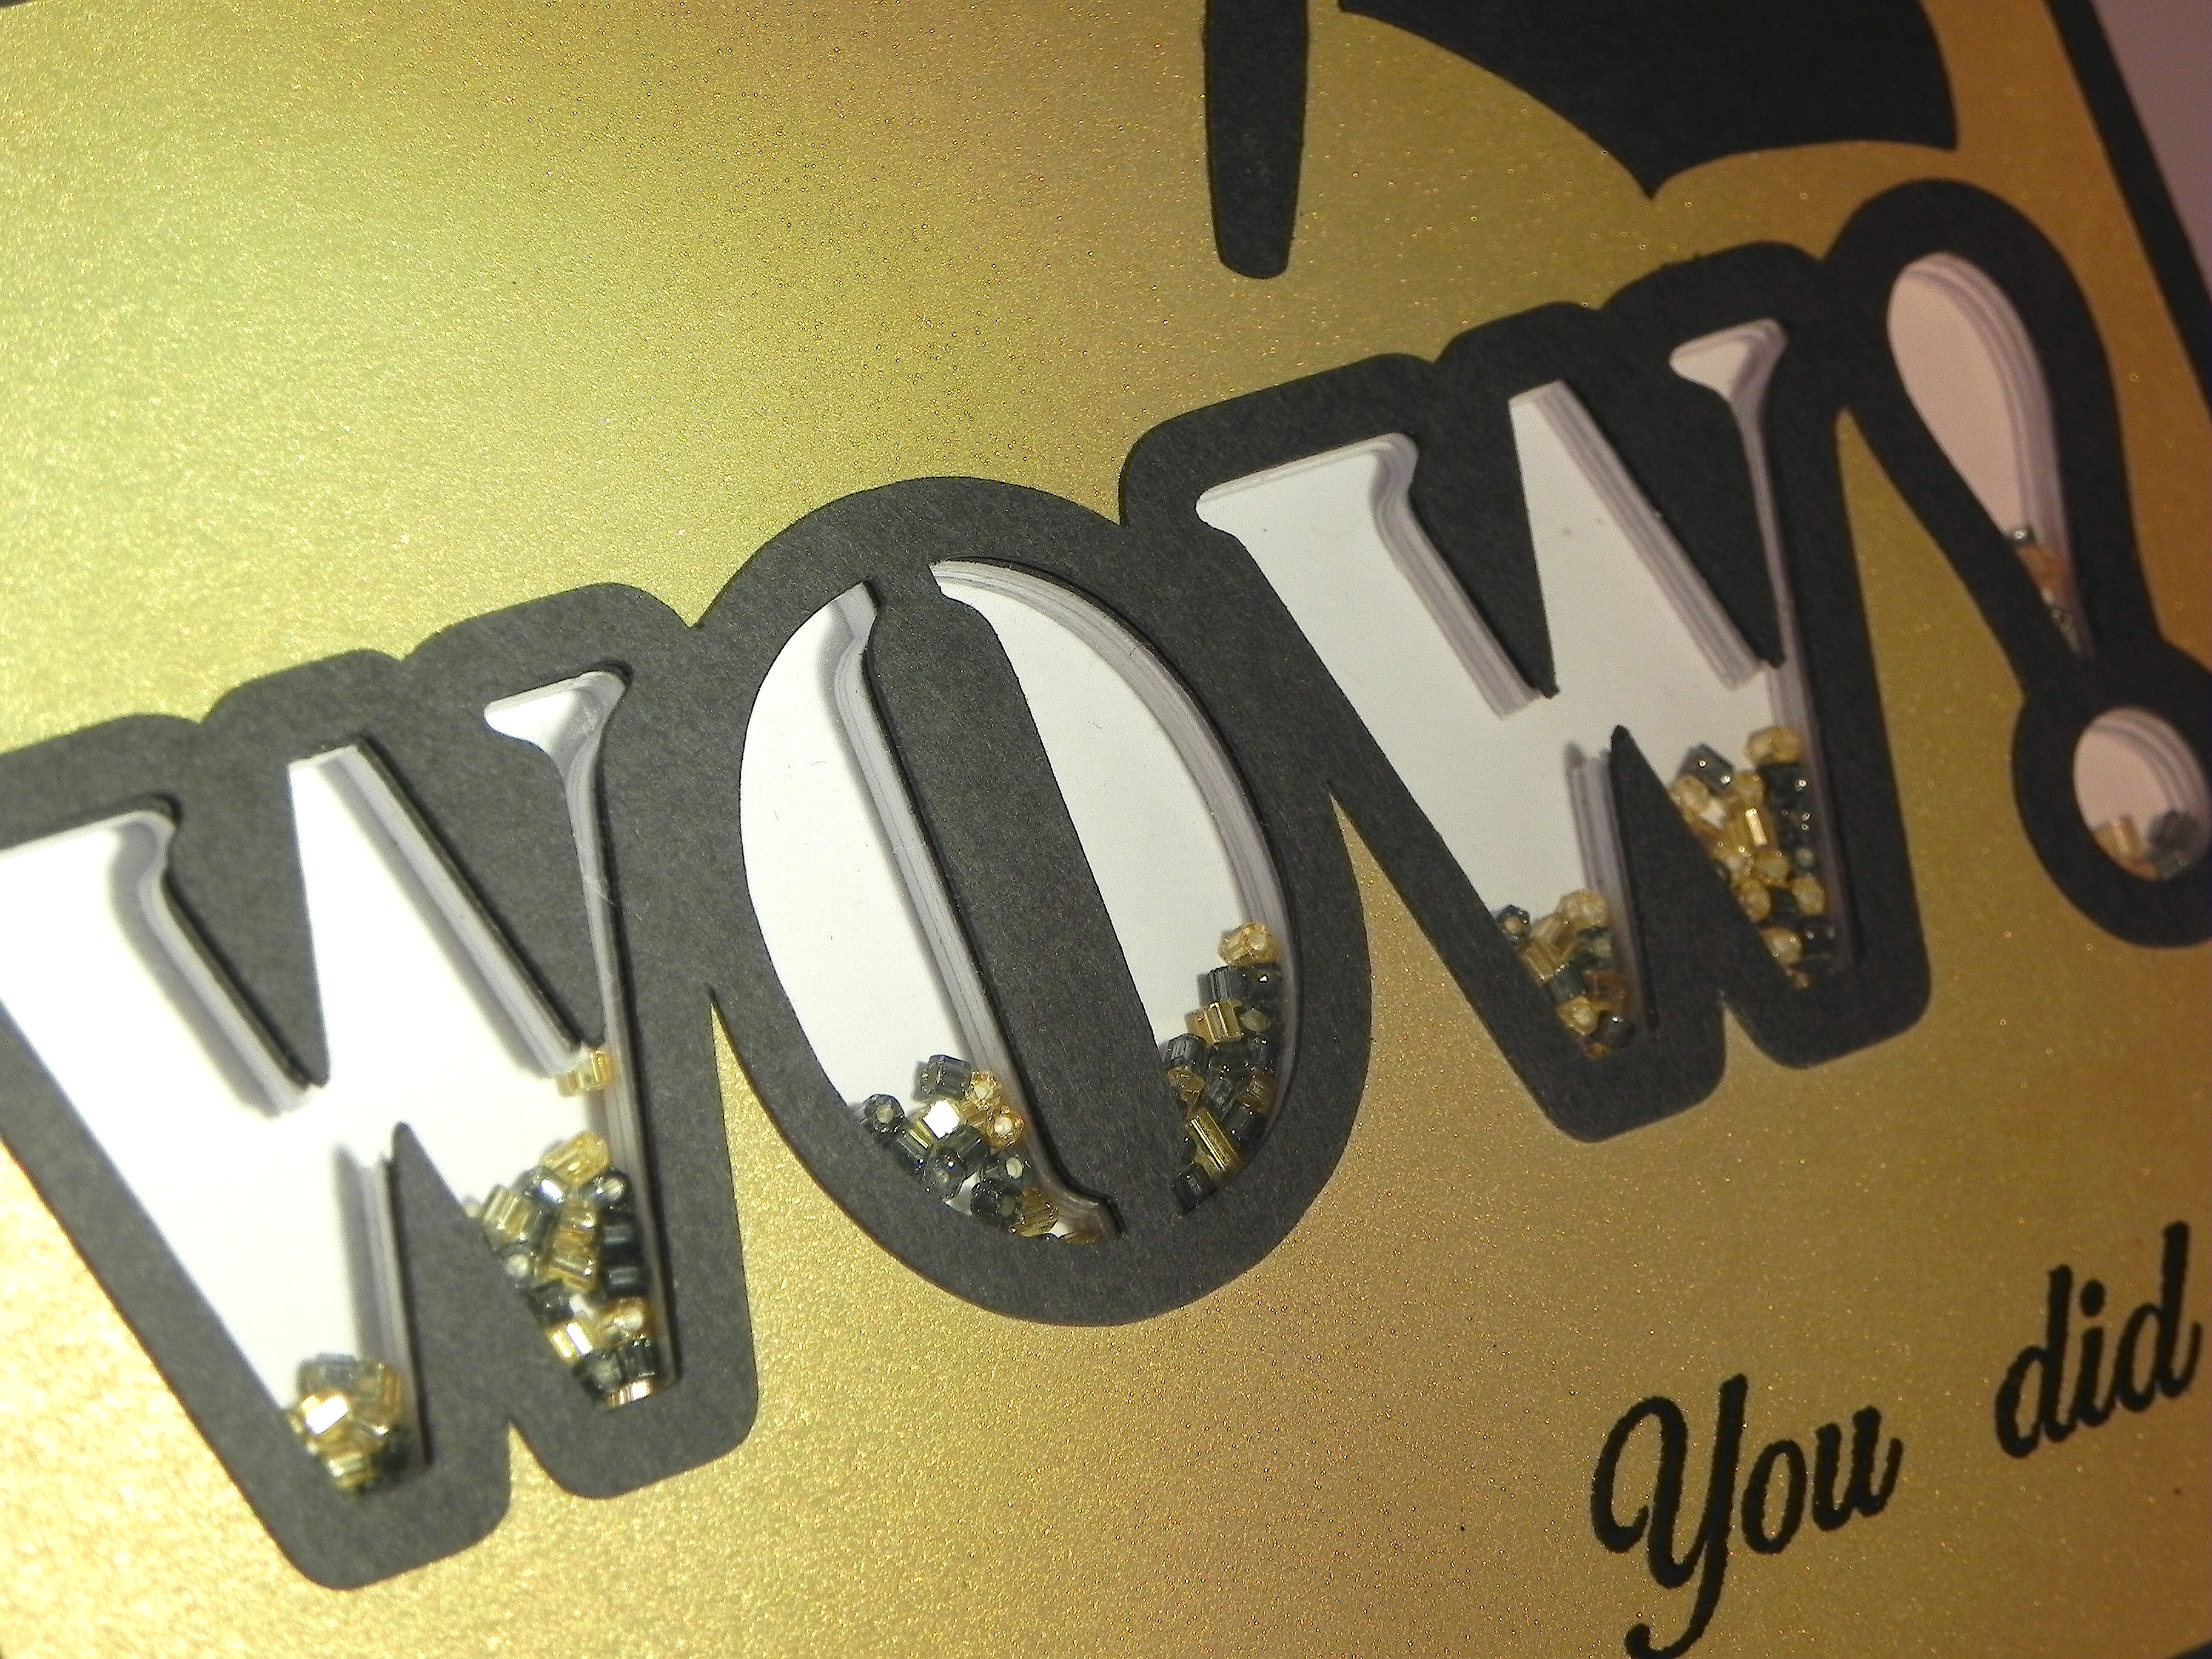
Here is another view of the individual shaker window letters:

I used a Silhouette file called “wow! word art cog wheel, star tail, stencil” (Design ID #53295), and used just the letters from the stencil image. I closed up the w’s so they would only have one part for their shaker windows.
To create my shaker windows, I cut the letters out of white card stock (centered on a rectangular panel) with my Silhouette – 10 times. I stacked (and glued) these 10 panels on top of each other, lining them up perfectly. This created a very thick panel. I glued a solid panel on the back, added the beads, and glued a piece of acetate over the letters. I cut one more panel with the letters cut out from a piece of black card stock and another (slightly smaller) from gold paper to create my card front and mat. Since the cardstock I stacked was white, I used a black Copic marker to color the edges black to match the black mat and the black card base I used.
Then I created the outline letters (using the Silhouette software and the same file) to place on the card front to further highlight the letters.
The graduation cap is from an svg file called Graduation Cards and Tags from svgcuts.com (HERE).
I purchased the stamp from Ebay; it is unmarked so I have no idea what company makes it. The stamp actually says, “Congratulations, You did it!” but I masked the “congratulations” part and just stamped the rest using versamark ink and black embossing powder.
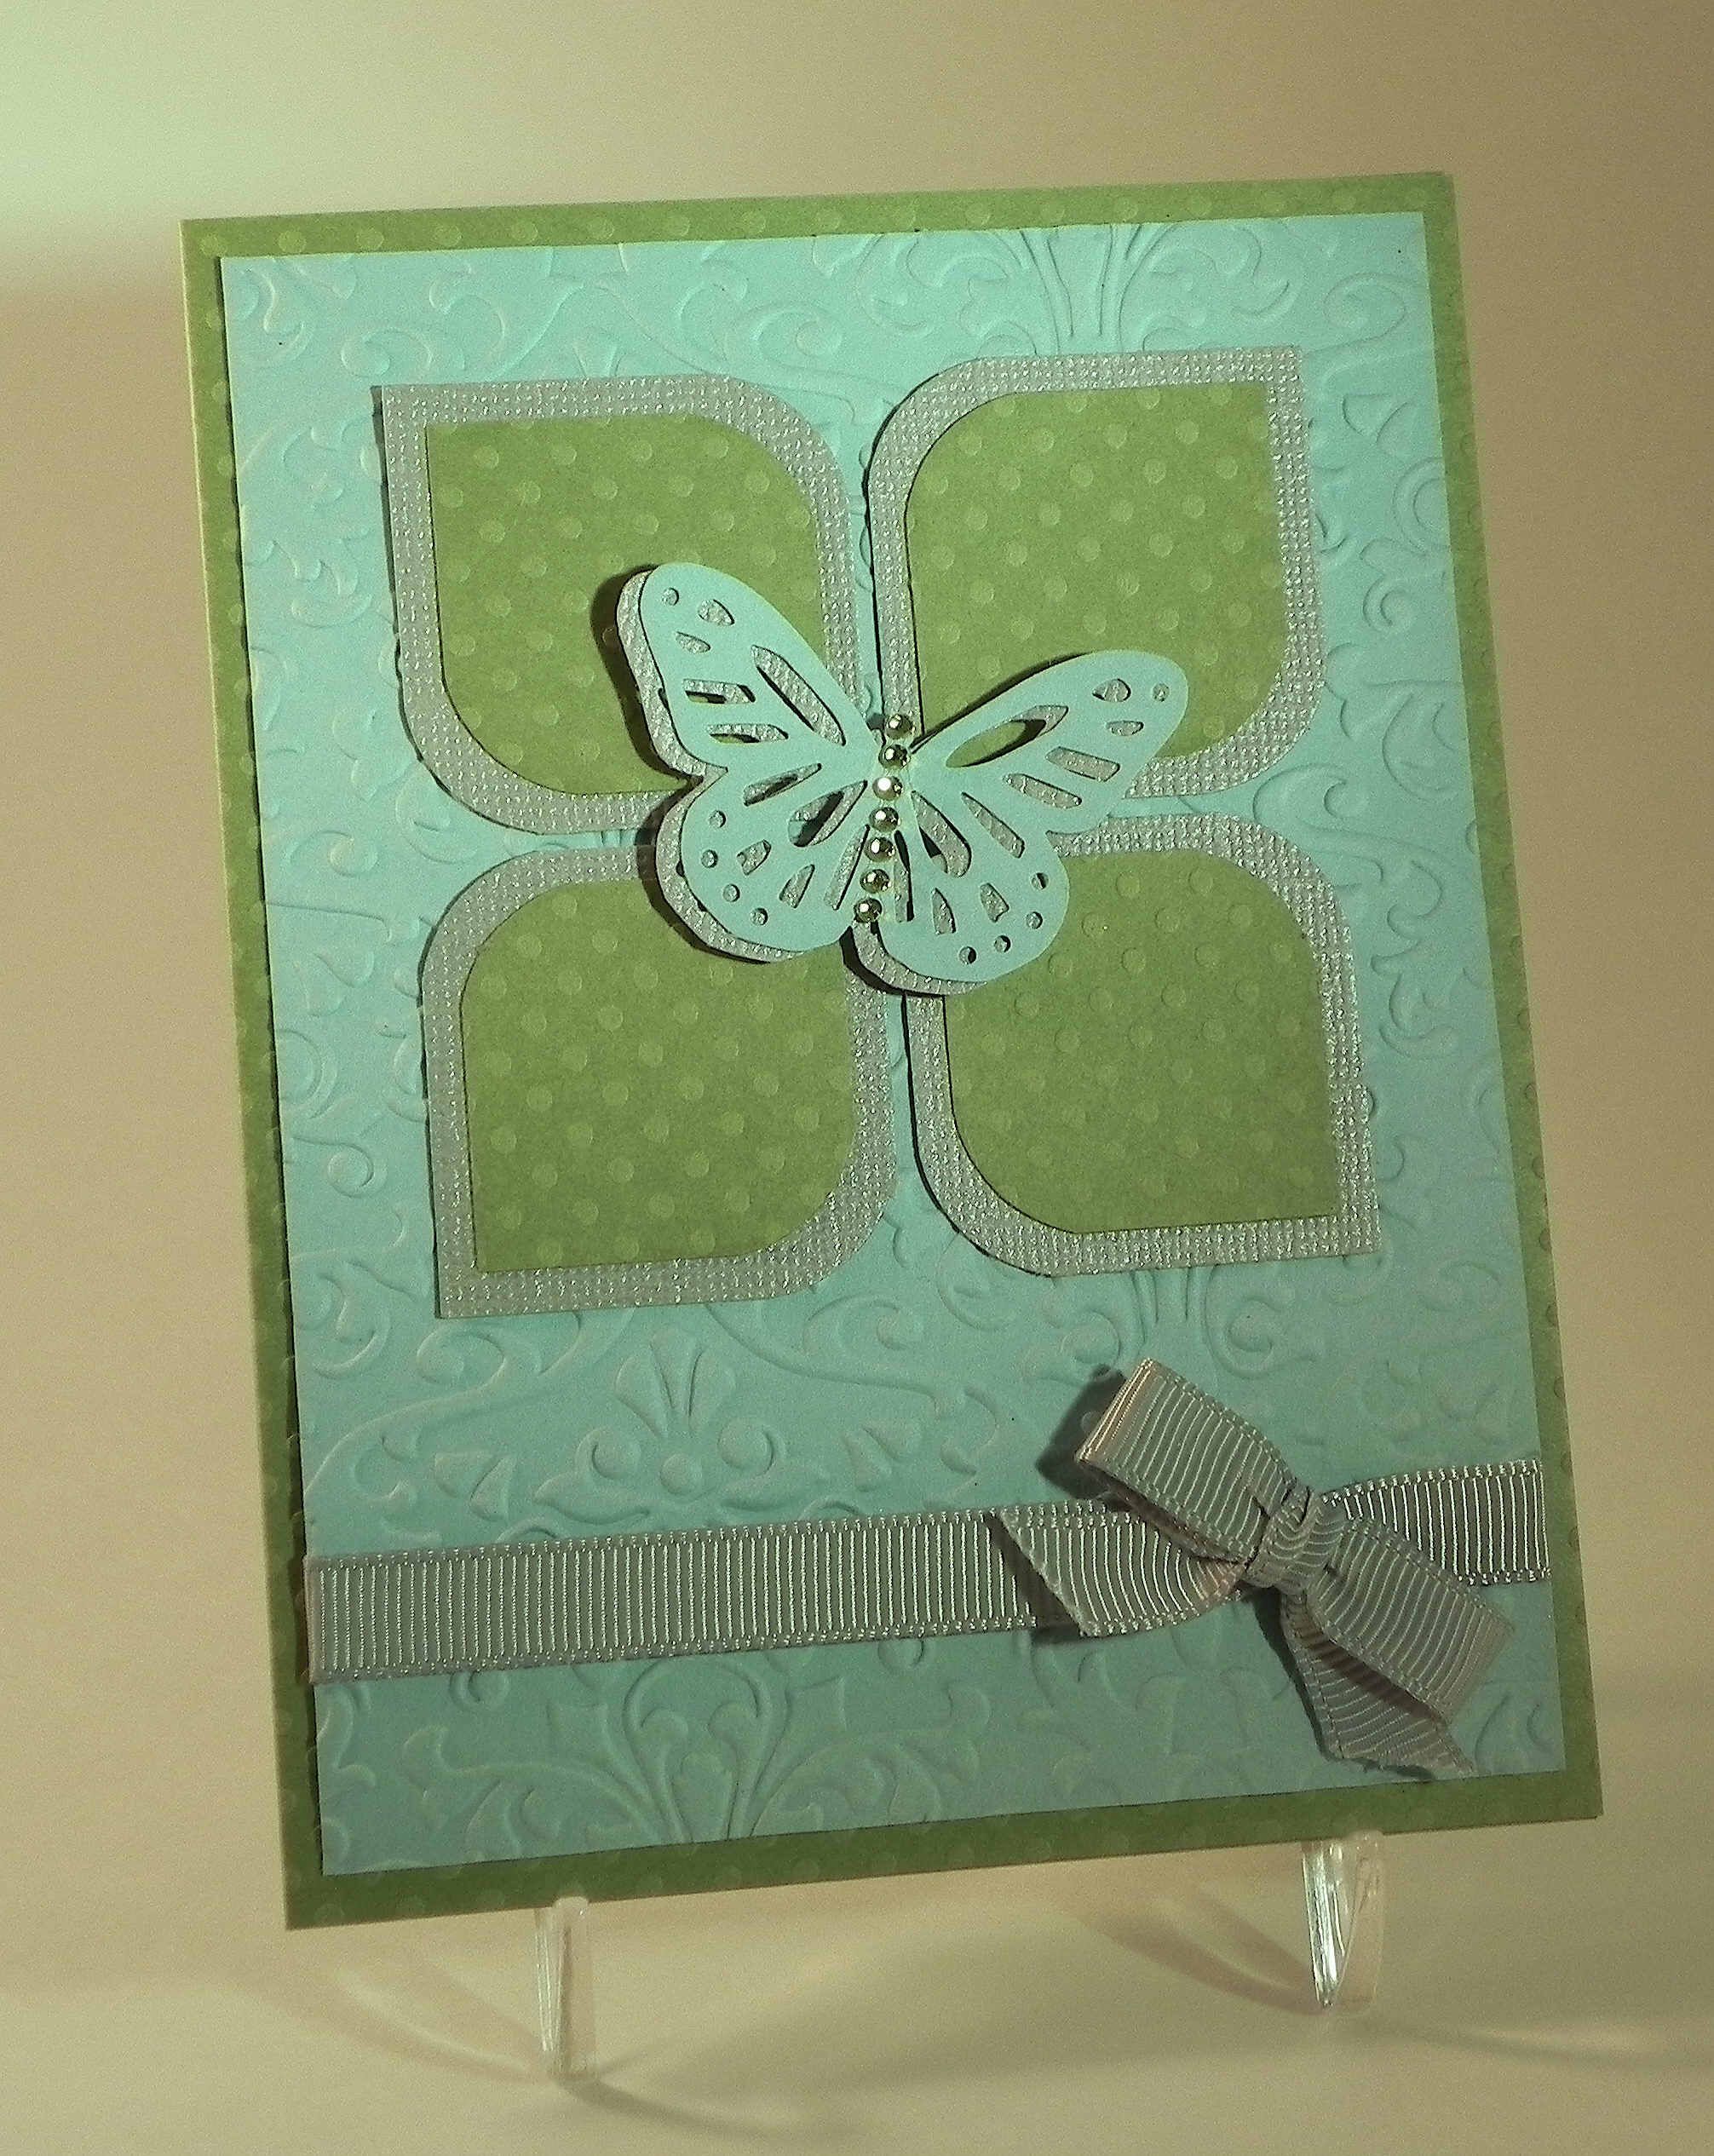
I really like the clean and simple design of the first card, but I was curious to see how it would look if I embossed the front panel so I made this second version (pictured at the top of this post also).

The embossing folder I used is the Sizzix Stars & Swirls. I covered the WOW outline and graduation cap with black embossing powder to make them more vivid on this version. Since I embossed the panel before I added the stamped greeting (I was waiting for the stamp to arrive in the mail!), I needed to stamp it on a separate panel so I created the matted banner. I’m wondering how it would have looked if I had stamped it first directly on the card front and then embossed it since I am not crazy about the banner (I REALLY like the stamped image directly on the card on my first version!), but I like the stars and swirls.
Now it’s your turn! Create a project making the letters or symbols the star of your card and share it over at Perfectly Rustics. I can’t wait to see what you create!
Over at the Mod Squad Challenge Blog, the challenge this week is “Masculine” where we are encouraged to make a Masculine card/project. This card was made for my (male) neighbor who is graduating this year, so I decided to enter. (Sadly, this site is no longer active.)
Thanks for checking out my card project!
This content uses referral links as described in the disclosure policy on my sidebar.