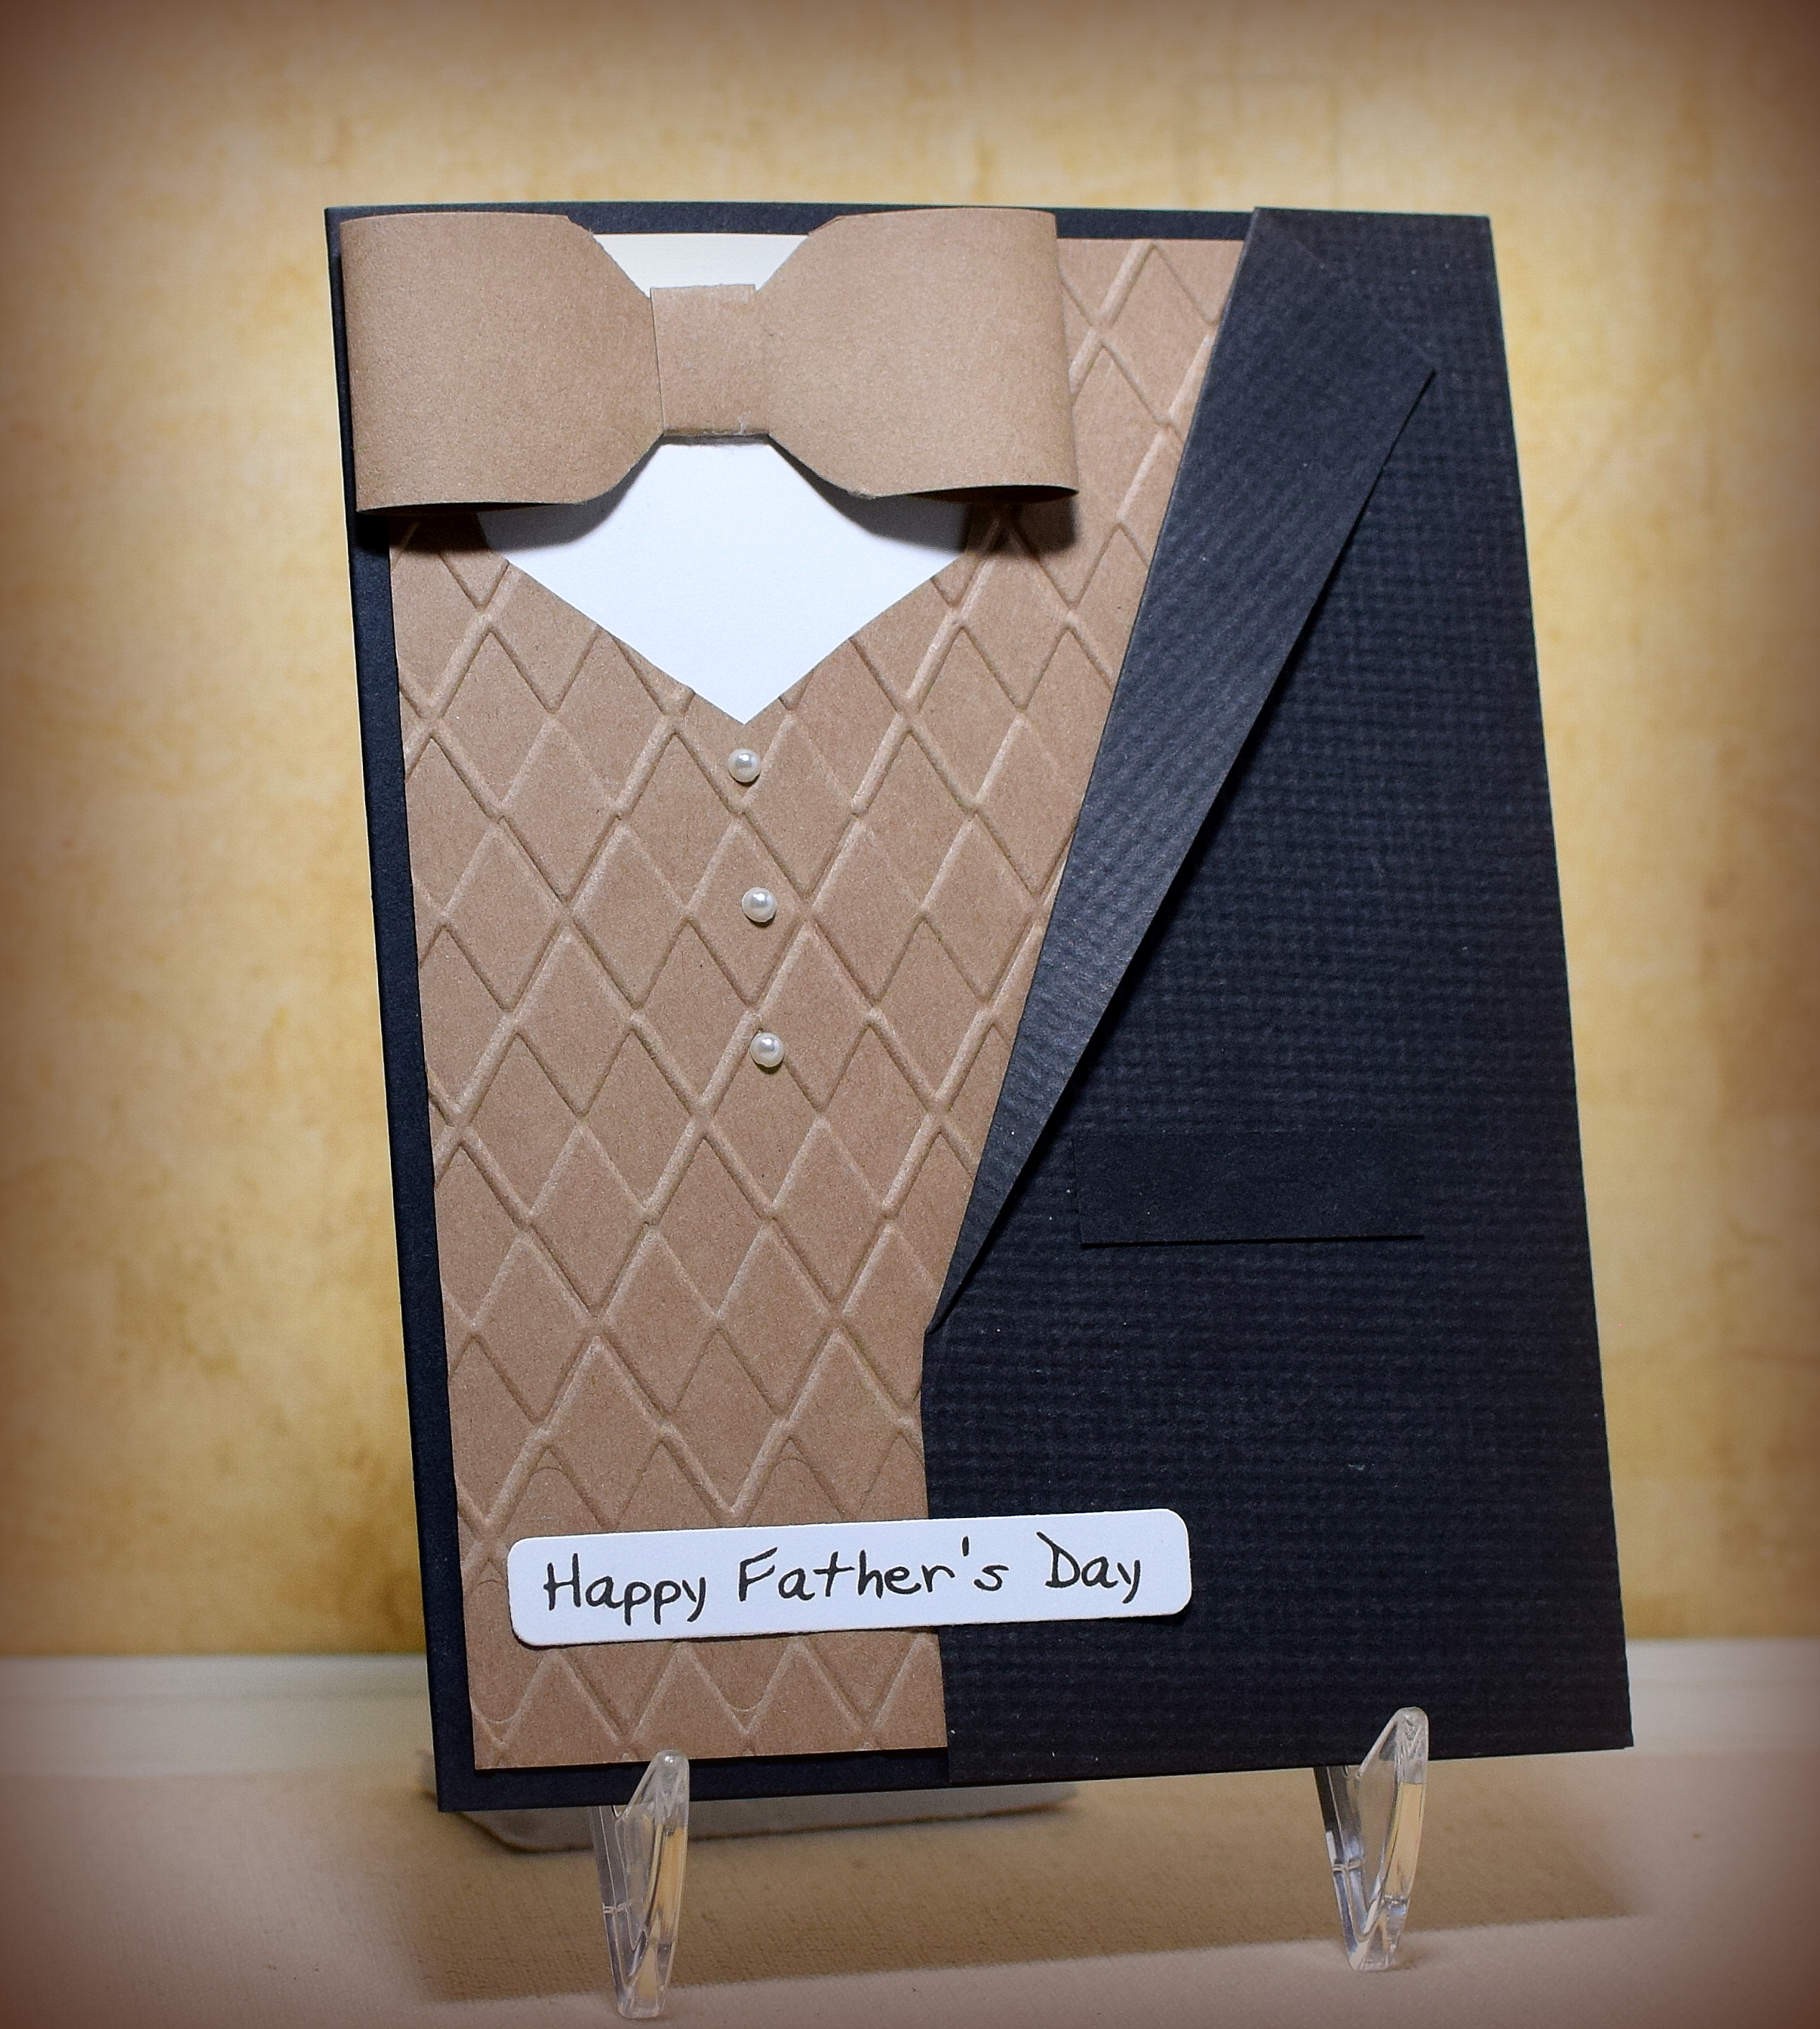
Father’s Day Tuxedo Card with More Printable Sentiment Strips
(inside: Celebrate in style Have a wonderful day)
I am soooo thankful for all the talented card makers out there in blogland who share their creations for inspiration. I had a BUNCH of cards I needed to make with limited time to do it, and my mojo has taken an extended vacation! My card today is a CASE (almost exact!) of this card I had seen and admired a bit ago and saved for just this situation. Thanks Karen!
I used my We R Memory Keepers 1-2-3 Punch Board to create the bowtie. All the other parts of the tuxedo were cut with my trimmer or scissors (no dies or patterns).
I added texture to the jacket by embossing the panel with a scrap of wallpaper (thanks Bonnie!) and my die cutting machine. I was able to get a nice, deep impression by using an embossing mat along with the plates normally used to emboss. The Darice 5×7 Argyle embossing folder was used on the vest.
The card stock (black, white, and kraft) and the adhesive faux pearls were all by Recollections.
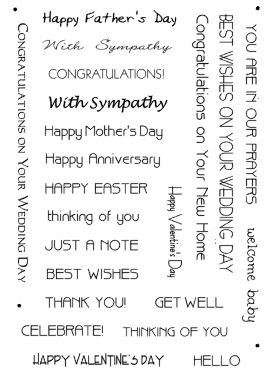
In a recent post, I shared a birthday sentiment sheet I created for use with a sentiment strip die by Alina Craft. The greeting on this card was from another sheet (mixed greetings) that I created.
Click HERE for PDF; feel free to download and use if desired. Contact me if you’d like a copy of this PDF. (Someone altered my doc when I included the link here.)
The sentiment on the inside was made with stamps from the “Celebrate with Style” set by Gina K Designs (retired) and from the “Birthday” set from Photoplay.
Thanks for checking out my card project!
This content uses referral links as described in the disclosure policy on my sidebar.