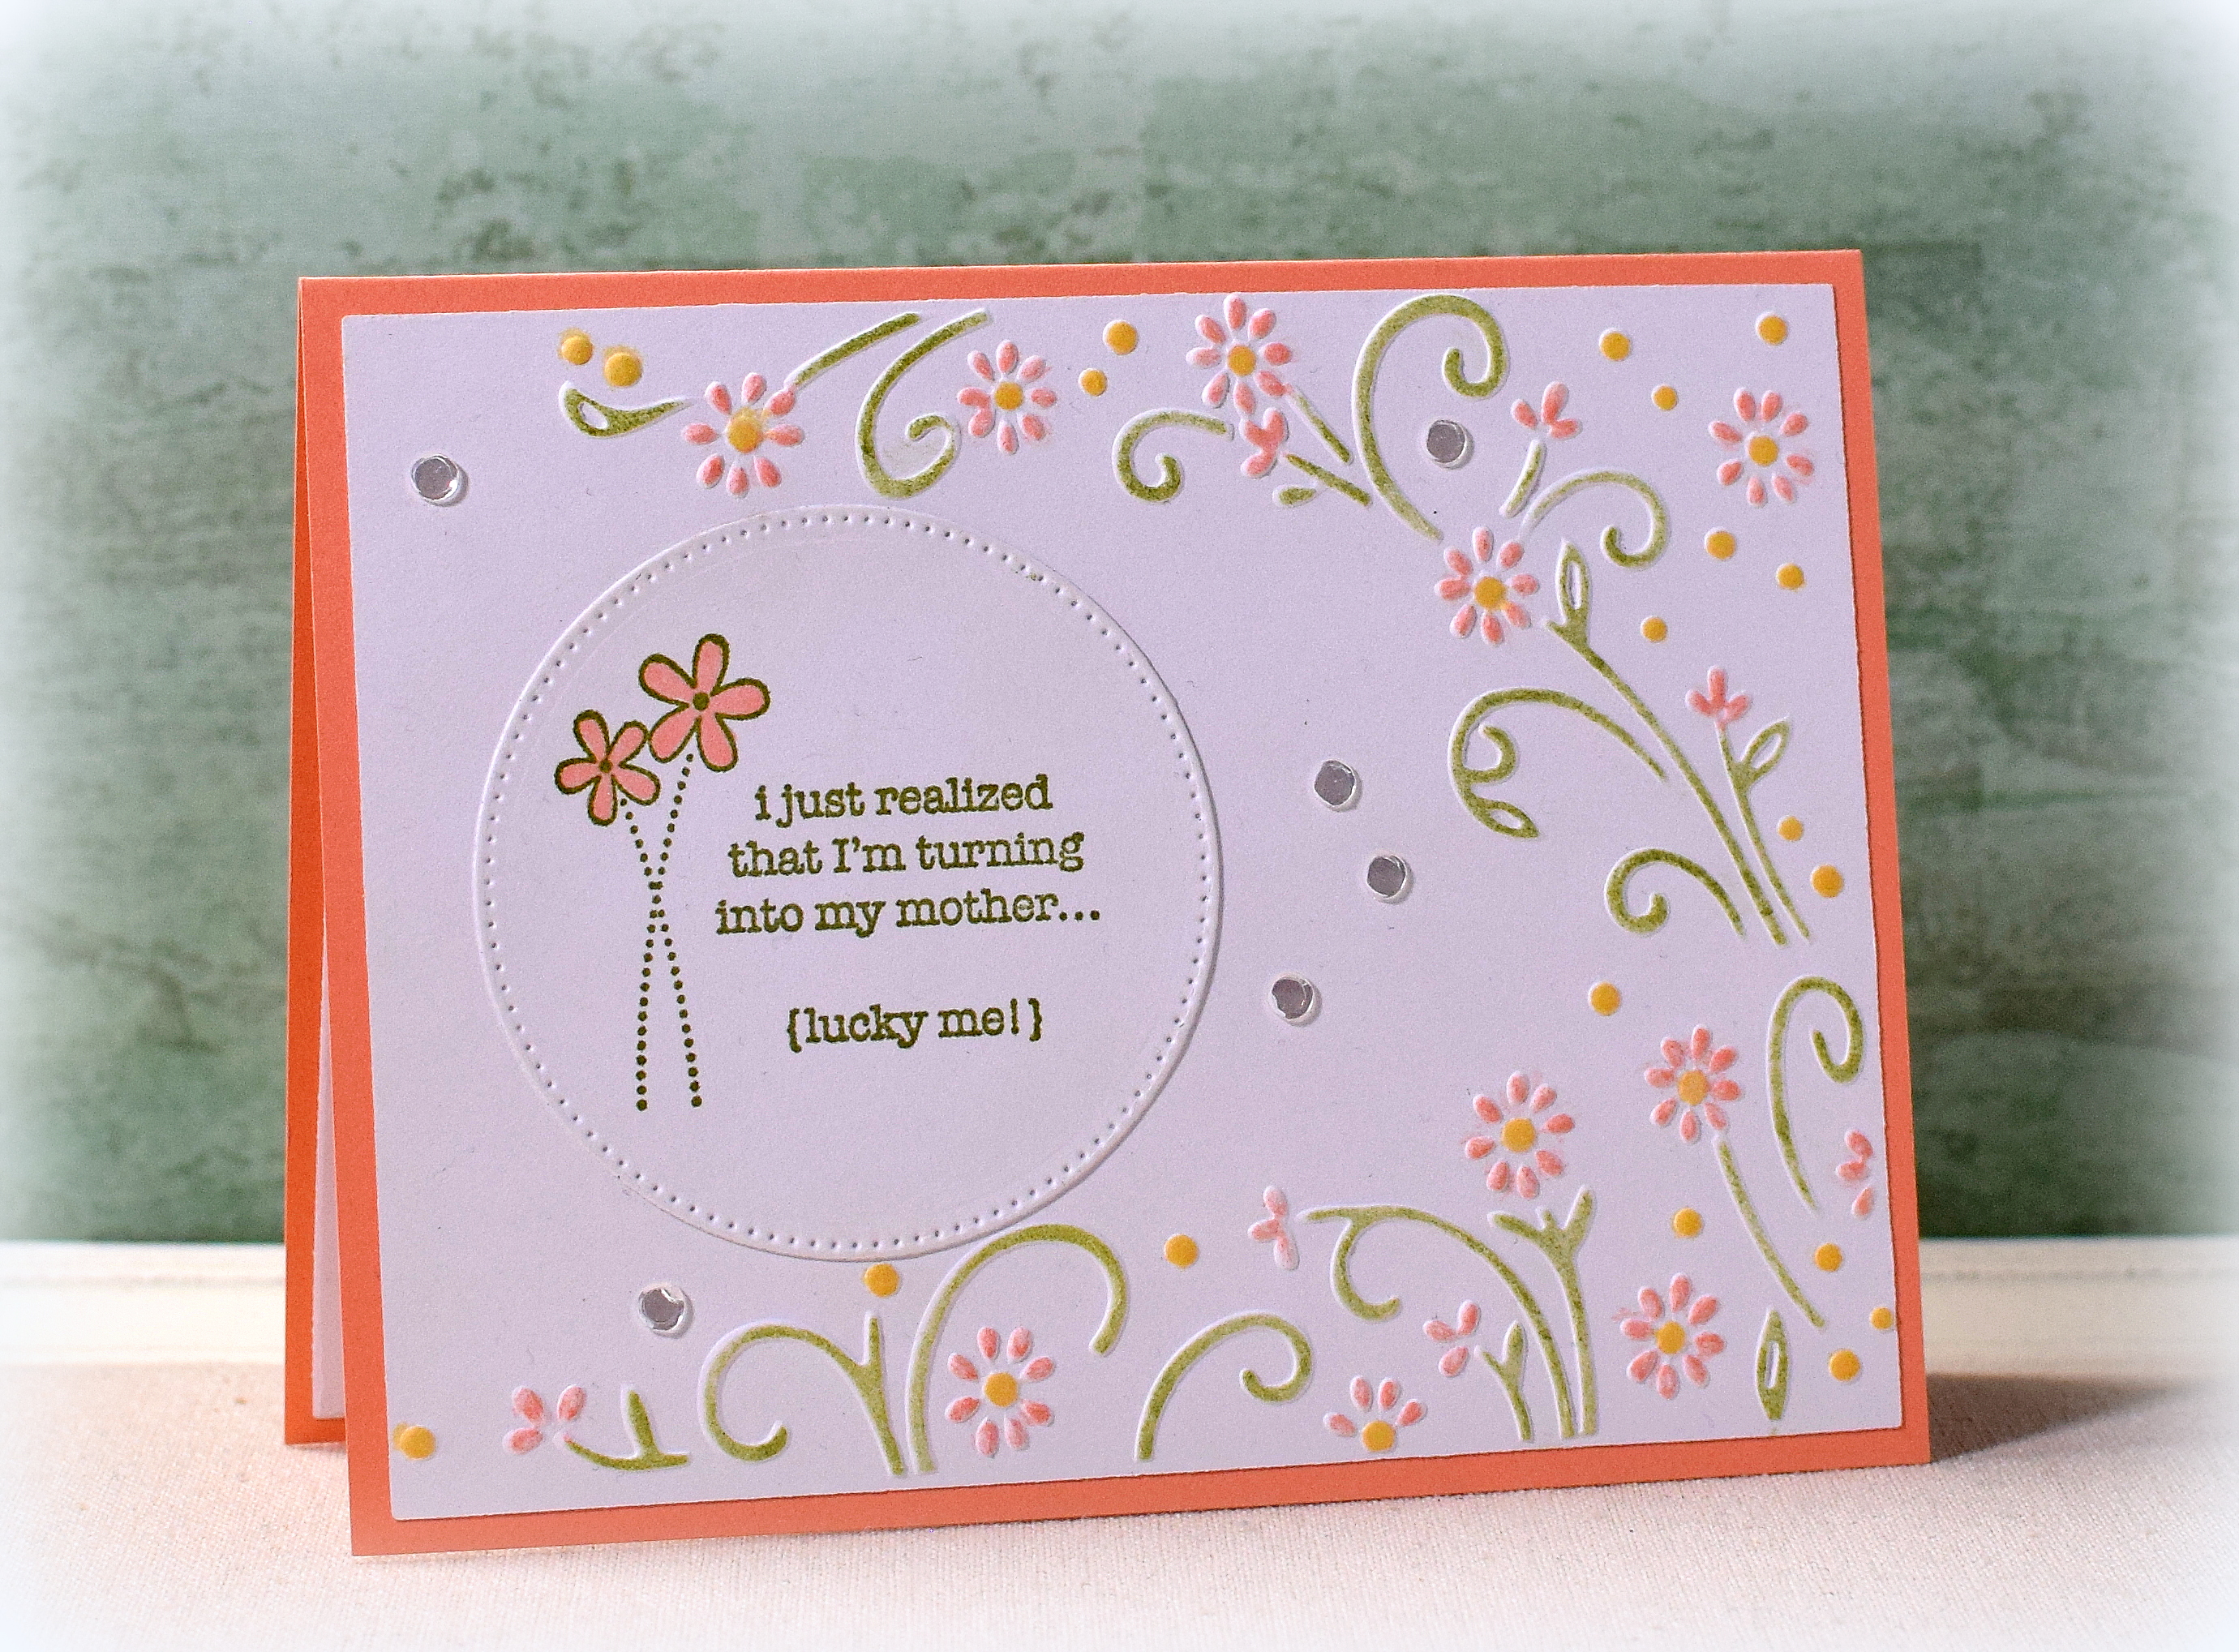
Faux Framed Floral Card

Faux Framed Floral Card

xDSC_3359

(inside: Happy Mother’s Day)

I have been finding (and falling in love with!) some great older stamp sets on ebay.  The stamps on this card are from the “In Full Bloom” set from Stampin’ Up (retired).  I love the sketchy style of the images and the random dots on each of the stamps.

Gina K Designs Jet Black Amalgam ink was used for all the stamping.  The greeting is from the “Twig Wreath” set from Papertrey Ink.  I “scribbled” on my color to match the illustration style of the stamps using Copic Markers (TR15, E08, YG99, and W5). Black card stock was used to mat the focal panel.

The “frame” was created with the debossed side of the “Stately” embossing folder from Craft Concepts.  (I originally saw this folder used HERE where you can see what the embossed side looks like – thanks for the inspiration, Darnell!)  I think this folder (front or back) creates such a nice “finish” to CAS card designs!

The inside sentiment is from the “Lovely Little Wreath” set which was part of the Stampin’ Up Paper Pumpkin April 2016 kit (another “fun find” on ebay!).

wwDSC_3362

Thanks for checking out my card project!

This content uses referral links as described in the disclosure policy on my sidebar.

Floral Palette Screen Divider and Shutter Cards

Floral Palette Screen Divider Cards and Shutter Cards

wwwDSC_8534.jpg

(back:  Wishing you a very happy birthday”

In my last post, I shared a few cards I made with the beautiful patterned paper called “Floral Palette” by Recollections.

10505805

Here are a few more cards I made using this same paper.

The pattern on the top of this paper is quite different from that on the bottom, and these patterns flow from left to right beautifully so I decided to keep the two patterns “as-is” for my screen divider cards.  I had made a screen divider card last year and decided to “warm up” with the same punches.  (Instructions on how I made these are included in that post.)

You can get 5 panels across the 12×12 inch page, and choosing two different groups of 4 gave me two variations.

This card is from the top (left) half:

wDSC_8526

Here’s another card from the top (right) half:

wDSC_8537

After I completed those, I played around with the bottom half of the paper and with a few different punches and dies for a different look.  Here’s my third card (also shown at the top of this post):

wwwDSC_8534

*

Floral Palette Shutter Cards

In addition to screen divider cards, flowing patterns also make great panels on shutter cards.  (HERE is a video tutorial on making this type of card.)  I left the “inside” blank and could add a stamped or hand-written message when the card is needed.

wDSC_6867.jpg

To see the supplies used, click here…

Continue reading

Jar of Blooms for Mother’s Day

Jar of Blooms for Mother’s Day

wDSC_9947

(My card is a CASE inspired by the card shown below.)

(This card is one I made back in the spring and am just getting around to posting now…)

As I mentioned in my “Fun Daisies” post, a friend of mine wanted to give card making a try and found a few cards online that she thought she’d like to CASE.  (This was the second sample she found.)  Since I was able to find supplies that closely matched the ones used, I copied the original design pretty closely to make my “class” sample.

Here is the original card :

P1040346_by_Mrs_Noofy

(This card was created by Mrs. Noofy and was posted on Splitcoaststampers, March 18. 2016)

Like in the original, I stamped the mason jar on vellum with and cut it out with scissors.  The jar is from the “Mason Jars” set by Inkadinkado, was stamped with Memento Tuxedo Black ink, and adhered with mini glue dots.

Score lines and faux stitching were made with my mini scoring board, a bone folder, and a dressmaker’s tracing wheel.

The flower pieces were made with a punch, and before the layers were glued together, I sprayed them with water, shaped them with my Heartfelt Creations Flower Shaping Tool Set, scrunched them up, and let them dry.  The punch I used for the larger flowers was the EK Success Hydrangea Confetti Punch.  The smaller flowers were made with the Fiskars Flower Lever Punch (small).  A sprinkle of Redland Elements was added to the centers.

I loved the leaves used on the original card but was unable to get the punch set in time for our lesson, so I used the leaves from the Spellbinders D-Lites Flowers and Stem die set instead.

The stems were from the “Tranquil Tulips” stamp set by Stampin’ Up (retired?) and were stamped with Gina K Grass Green ink before the vellum jar was added.

The greeting is from the “Happy Mother’s Day” stamp set by Studio G and Papertrey Ink Scarlet Jewel ink.

I used Gina K Innocent Pink, White, and Grass Green card stock and Papertrey Ink Scarlet Jewel for the mat.

Here is another sample (5 x 7 inch) with flowers made from the  Spellbinder D-Lites Blooms Three  set.  (I shaped the petals but did not scrunch them up on this card.)  I also stamped the larger jar image directly onto the card panel using  Papertrey Ink Soft Stone ink.  Water color paper was used for the focal panel and card base.

wDSC_9950

Thanks for checking out my card projects!

This content uses referral links as described in the disclosure policy on my sidebar.


Roses for Mother’s Day

Roses for Mother’s Day

zzzDSC_8414.jpg

This box card, designed to look like a dozen roses in a tall vase, was made with a cut file designed by Snapdragon Snippets called “Rose Bouquet Tall Valentine Box Card” (Design ID# 73758) that I purchased in the Silhouette Store and cut with my Silhouette electronic die cutting machine.  An assembly tutorial is provided HERE.  The file contains Valentine’s Day elements for the front of the vase, but I decided to create this project as a Mother’s Day card instead.  I had to laugh – after receiving this card, my mother called to thank me and to tell me she loved the flowers (not card) I sent!  🙂

I created a few additional elements that were not included with the file I purchased (a solid piece to go behind all the leaf panels because the veins were open and you could see through the “holes” in each of the leaves and the white and light gray mats on the vase).

The bow was created with my We R Memory Keepers 123 Punch Board and my paper crimper.  (It was much easier to “roll” the card stock after it had been crimped; it kept bending and creasing on me when it was flat.)

The card stock and paper used was Gina K Cherry Red, Christmas Pine, white, gray from the Recollections “Coffee and Cream” heavy weight pack, green from the Recollections Christmas pack, American Crafts #368312 (polka dots), and The Paper Studio Silver Wedding Texture (#352070).

There is room on the back for a stamped or handwritten message.

Often, box cards fold flat and fit in regular envelopes making them easy to mail.  However, this card is quite tall (about 11.25 inches) and is about 7 inches wide when folded flat.  And it was suggested in the tutorial that foam tape or pop dots be used to separate the leaf layers from the bud layers to add a bit more dimension.  As a result, the size and thickness of this card necessitated a larger envelope (I used a padded mailer) and a trip to the post office for mailing.

Thanks for checking out my card project!

This content uses referral links as described in the disclosure policy on my sidebar.


Fun Daisies

Fun Daisies

xDSC_8567.jpg

Recently, a friend of mine wanted to give card making a try. She found a few cards online that she liked and asked if I could show her how to make something like them.  This is my version of one of those cards.

Here’s the card I CASED:

100471123.jpg.rendition.largest

(from: Better Homes and Gardens, March 10, 2016)

The original sample was adorable the way it was laid out, but if you are at all familiar with my style, you know I wouldn’t be able to glue my pieces down so randomly or crookedly … LOL!!  Also, the flowers on the sample were real daisies that were dried and pressed.  I used die cut flowers instead.

I played around with different stems, grass and the yellow central florets.  Here are two more versions.

xDSC_8571     xDSC_8582

I couldn’t find the paper or ribbon used on the sample so I improvised.  The paper is from the “Pinks & Corals” pad by Craft Smith.  The paper has a white core so I was able to sand and scrape it up a bit.  I also rubbed white Gesso on the surface with a paper towel.  I was afraid to use too much, and now I feel like there is not enough white.  Next time…

For the stems, I used Recollections Jute Twine or white Darice Paper Rope.  The leaves are Celebrate It Swiss Dot ribbon from Michaels.  For the central florets, I used buttons from a mixed bag I purchased online or “You Had Me At Yellow” mini prills.

The daisies were cut with dies by Whitelotous.  The grass is Gina K Grass Green card stock or a scrap of printed paper from my stash (not sure which paper pad it came from).  Whaline Green and Celebrate It White raffia were also used.

The greeting is from the “Nurturing Blooms” set by Gina K Designs and was heat embossed with Ranger White embossing powder and versamark ink.  (You can see the shine a little better on the second sample.)

Thanks for checking out my card projects!

This content uses referral links as described in the disclosure policy on my sidebar.