“Smooshed” Background Easter Card
Over at Perfectly Rustics this fortnight, the challenge is “Eggs” (challenge # 44) where we are to make a creation with an egg or eggs on it. For this project, I made an Easter card with a “smooshed” background. (http://perfectlyrustics.com/2015/03/23/prdc-no-44-eggs/)
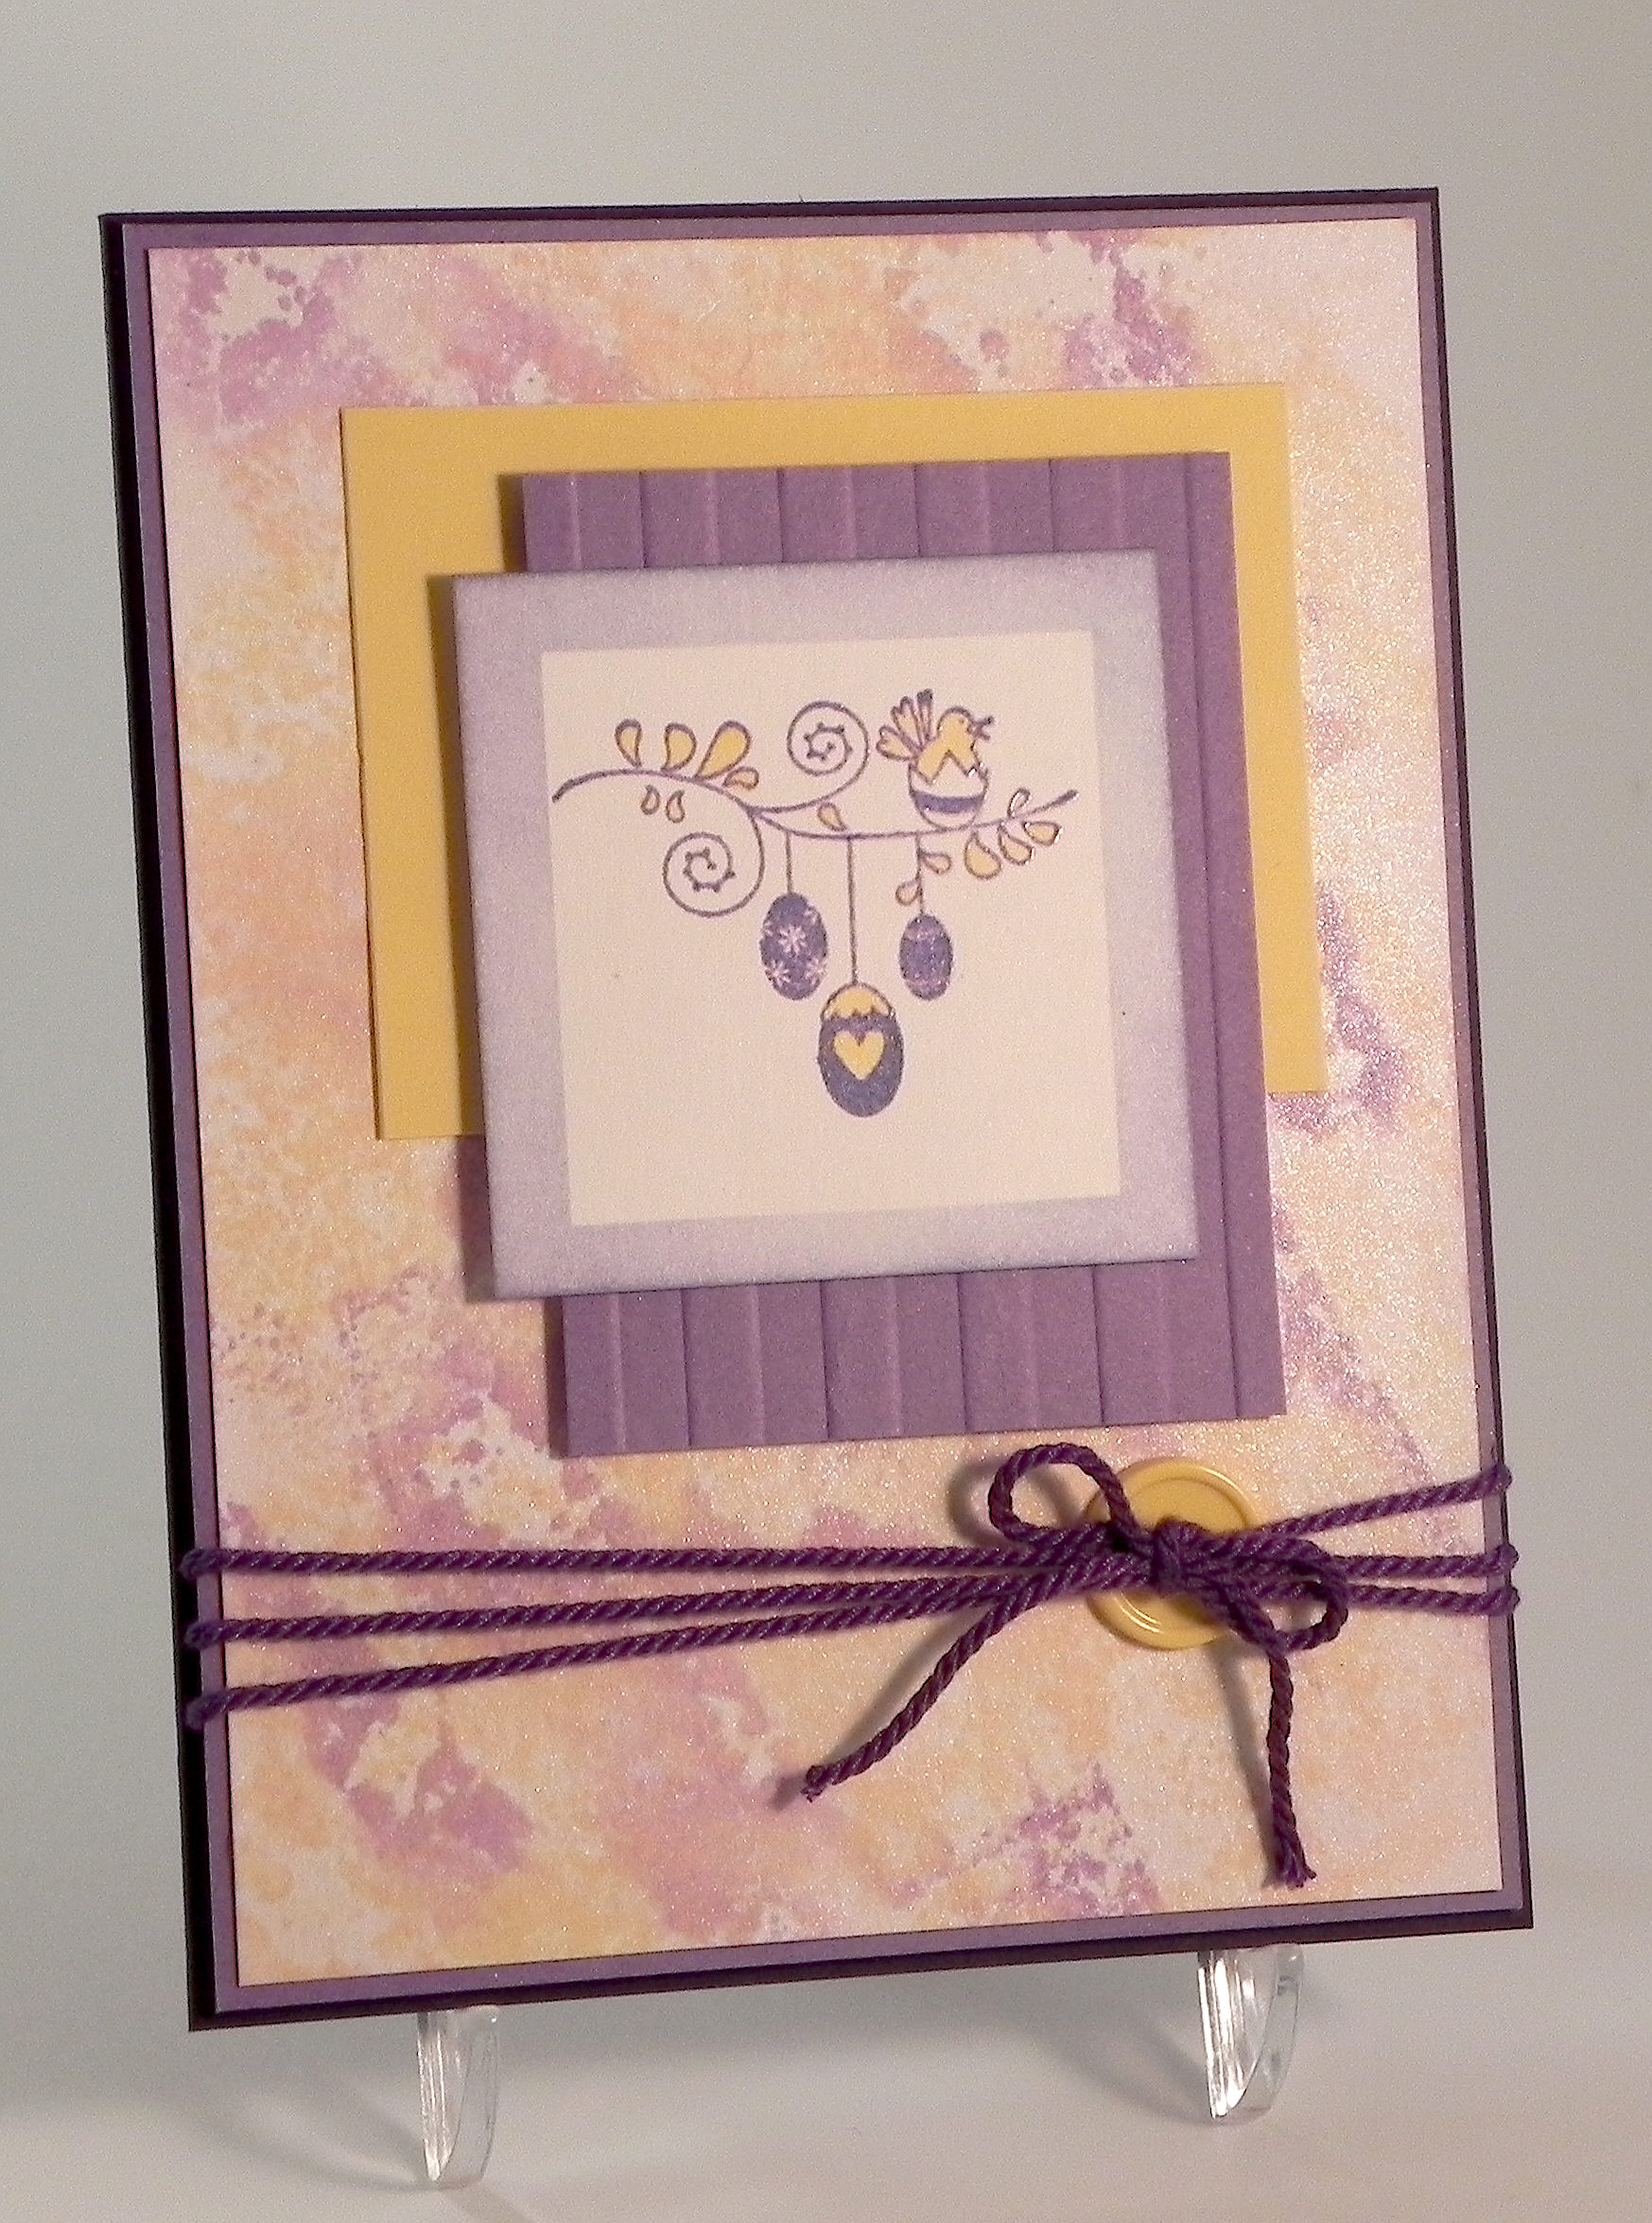
A “smooshed” background is where you put ink down on a non-porous surface (like a craft mat, a piece of acetate, or an acrylic block for example), spritz the ink with water, and “smoosh” your paper onto the wet ink. It creates a beautiful water colored panel that looks different every time it is done! I used this technique on my Smooshed Egg card project which you can see HERE. When I created the panel I needed for that card, I made a bunch of them and decided to use one as the background on this card. As I mentioned in that post, I was inspired to use the “smooshed” background technique from my friend Barb and a video tutorial I had seen. (You can see the video tutorial HERE on You Tube, and Barb’s post HERE .)
The card stock used on this project was Gina K edible eggplant, wild lilac, sweet corn and white. The ink used to create the background was Gina K wild lilac, sweet corn, and innocent pink and was topped with Tattered Angels “Pearl” Glimmer Mist. (The shimmer is hard to see in the photo but is gorgeous in real life!) The small, lilac panel was embossed with a Sizzix (Stampin’ Up) stripes embossing folder.
The stamp is by Craft Smart from Michaels (no name) and was stamped with Gina K wild lilac ink and then heat embossed with clear embossing powder. (Gina K did a tutorial, which you can see HERE, on how to emboss in any color using your regular dye based ink pads along with clear versamark ink, clear embossing powder, and a stamp platform like a MISTI.) After it was embossed, a touch of color was added to the image with Copic Marker Y21. Then I masked off the center and sponged Gina K wild lilac ink around the edges to create a border.
Recollections twine and a yellow button I had in my stash finished it off.
Now it’s your turn. Create a project with eggs, and join us over at Perfectly Rustics. I can’t wait to see what you create!
Thanks for checking out my card project!
This content uses referral links as described in the disclosure policy on my sidebar.