Split Diagonal Easter Card

Split Diagonal Easter Card

(inside: Wishing you an egg-cellent Easter filled with joy)

This card features “Watercolor Stripe” paper from The Paper Studio, the “Happy Easter” greeting from Purple Daisy Design, and a cute Easter die I found on Amazon.

Recollections Navy and White and Gina K Designs Powder Blue card stock was also used. The inside greeting was computer generated.

This layout was inspired by Lisa Curcio’s video, but my measurements are different. I actually used one of my Mosaic Moments scrapbooking dies from the “30 Degrees” set (not available at this time?) to cut my patterned paper piece, but I included (my) measurements below to cut without the die if interested….

Continue reading

Egg Basket Frame Easter Card

Egg Basket Frame Easter Card

(Inside: Warm wishes for a bright and joyous Easter)

As I mentioned in a recent post, last October I participated in the Simon Says Stamp HDSA Fundraiser by purchasing a Crafty Parcel (a mystery box full of great craft supplies) which also included the Memory Box Egg Basket Frame die set (#94235) that I used on this card.

When I first saw this die set in the box, I thought it was one piece and immediately thought of Easter. But what is great about this set is that there are 3 different dies that can be used separately.  There are so many possibilities for the floral frame, and the basket would be super cute for a baby card…with flowers… Looking forward to playing with this set some more!

One quick comment on the basket die – When you run this die through your machine, the basket comes out flat. You can leave it like that, but if you want the embossed basket weave texture, you will need to leave the die cut in the die (or reinsert it back into the die) and run it through a second time with a rubber embossing mat. (This is what I did.) I also saw someone online say she embossed the basket by using a stylus to trace all the rectangles while the die cut was still in the die which is an option if you don’t have a rubber embossing mat. And a final option is to use the die as a stencil and ink on the basket weave design.

In addition to the set, I also used one of the bunnies from the “Bunny Trio Set” (D1-0545) from Fun Stampers Journey/Spellbinders (no longer available?) and the “Splendid Happy Easter Die” (#2462) from Poppy Stamps.

The patterned paper is “Antique Brocade” from the Paper Studio. The card stock is “Lemon Drop” from Gina K Designs, “Elegance” by Core’dinations, “Velvet” (deep purple) by American Craft, and white.

The inside sentiment is a stamp called “Warm Wishes” (F2619) by Printworks (no longer available?).

My finished card is 4 1/2 inch square.

Thanks for checking out my card project!

This content uses referral links as described in the disclosure policy on my sidebar.

Happy Easter Free Standing Tunnel Card (and another card sample)

Happy Easter Free Standing Tunnel Card (and another card sample)

Happy Easter!

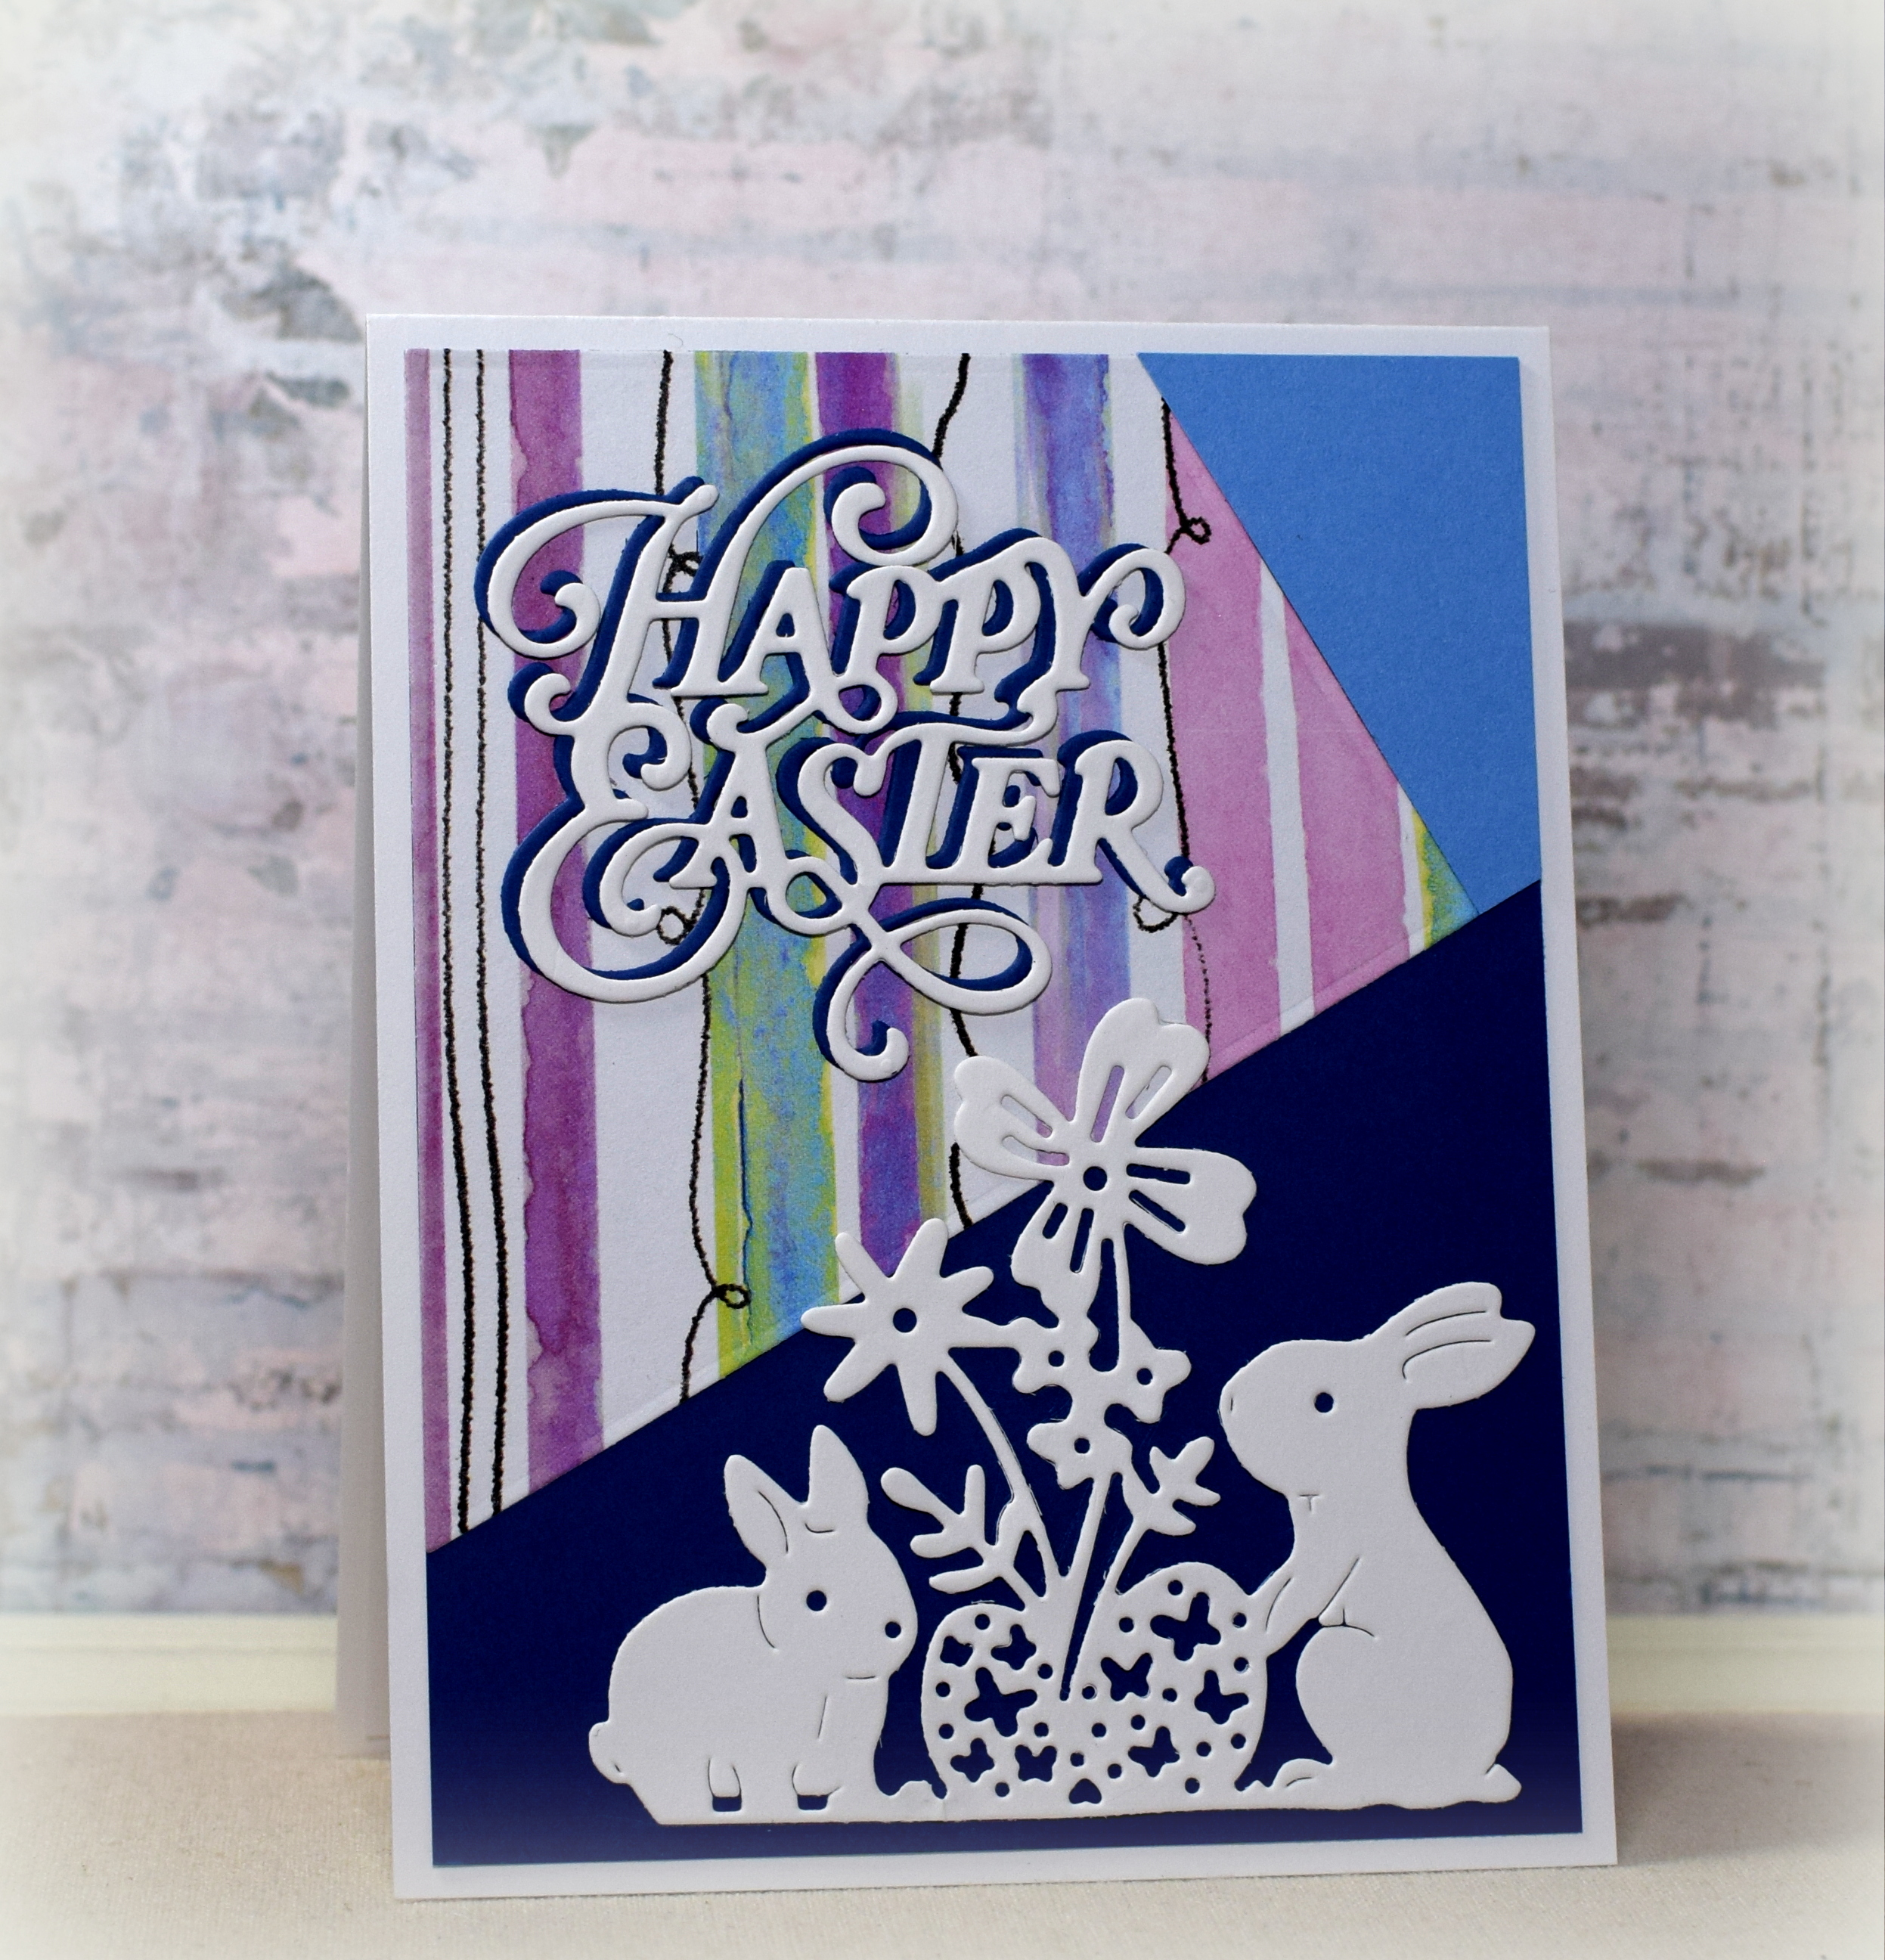
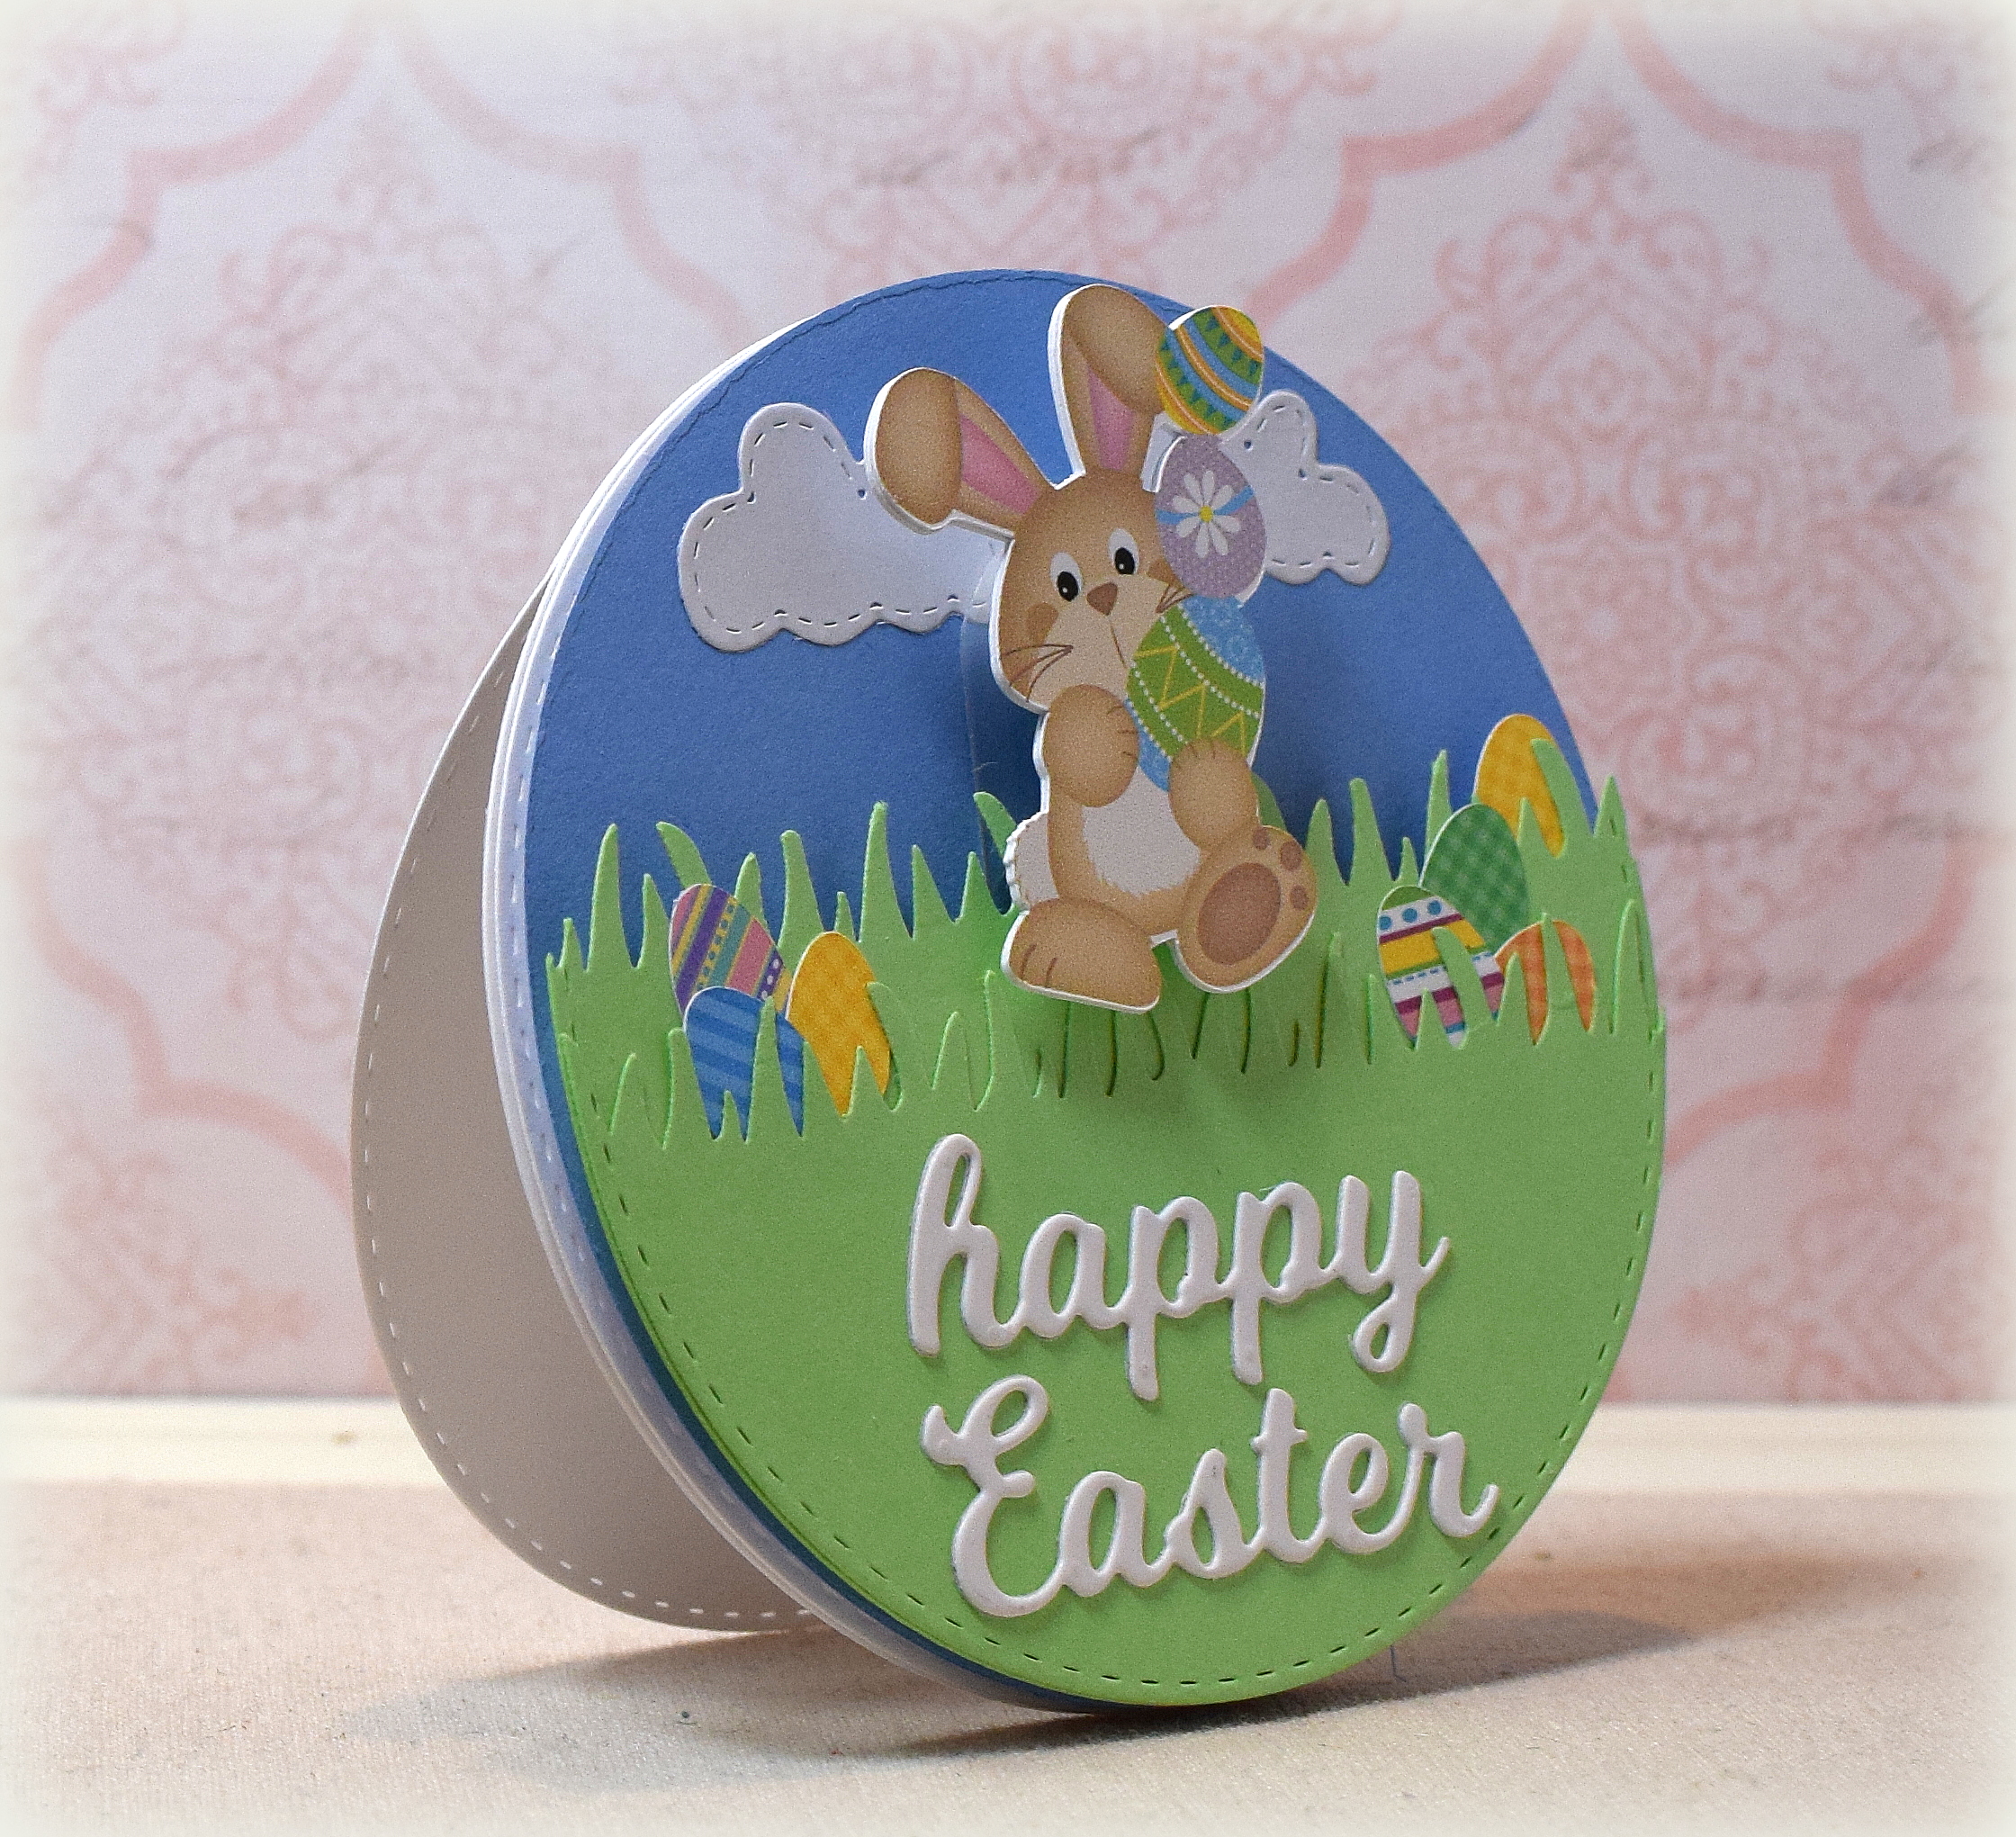
This “box card” features the “Happy Easter” die (#367-J) from Impression Obsession and the crosses from the “Easter Edges” die set (D21024) from Creek bank Creations.

The white heavy weight “base” for this card was cut from the “Free Standing Tunnel Die Set” from Creek Bank Creations. HERE is a video showing how to use this die set. There is also an oval die set (available for purchase separately) to use instead of the rectangle openings.

The greeting and crosses were cut from Recollections holographic foil card stock and mounted on a piece of acetate before adding to the center layer of the card. The tutorial does not demonstrate using the acetate, but my greeting was not wide enough to attach directly to the edges of the opening. (CBC recommends that you use edge/border dies in this type of card.) With the acetate, any dies can be used on the front or middle panel.

The background paper is “Blue Agate” by The Paper Studio (Hobby Lobby).

I attached a panel on the back for my sentiment and signature.

This card folds flat and fits in an A2 size envelope for mailing.

Here’s a head-on view where you can see the holographic effect a bit better…

The holographic foil looks silver when light is not shining directly on it…

This card was very difficult to photograph! Acetate, holographic foil, and layers creating shadows caused issues with glare, reflections, lighting, focus… Ugh!! I think it looks quite elegant in real life.

*

While I had the papers out…

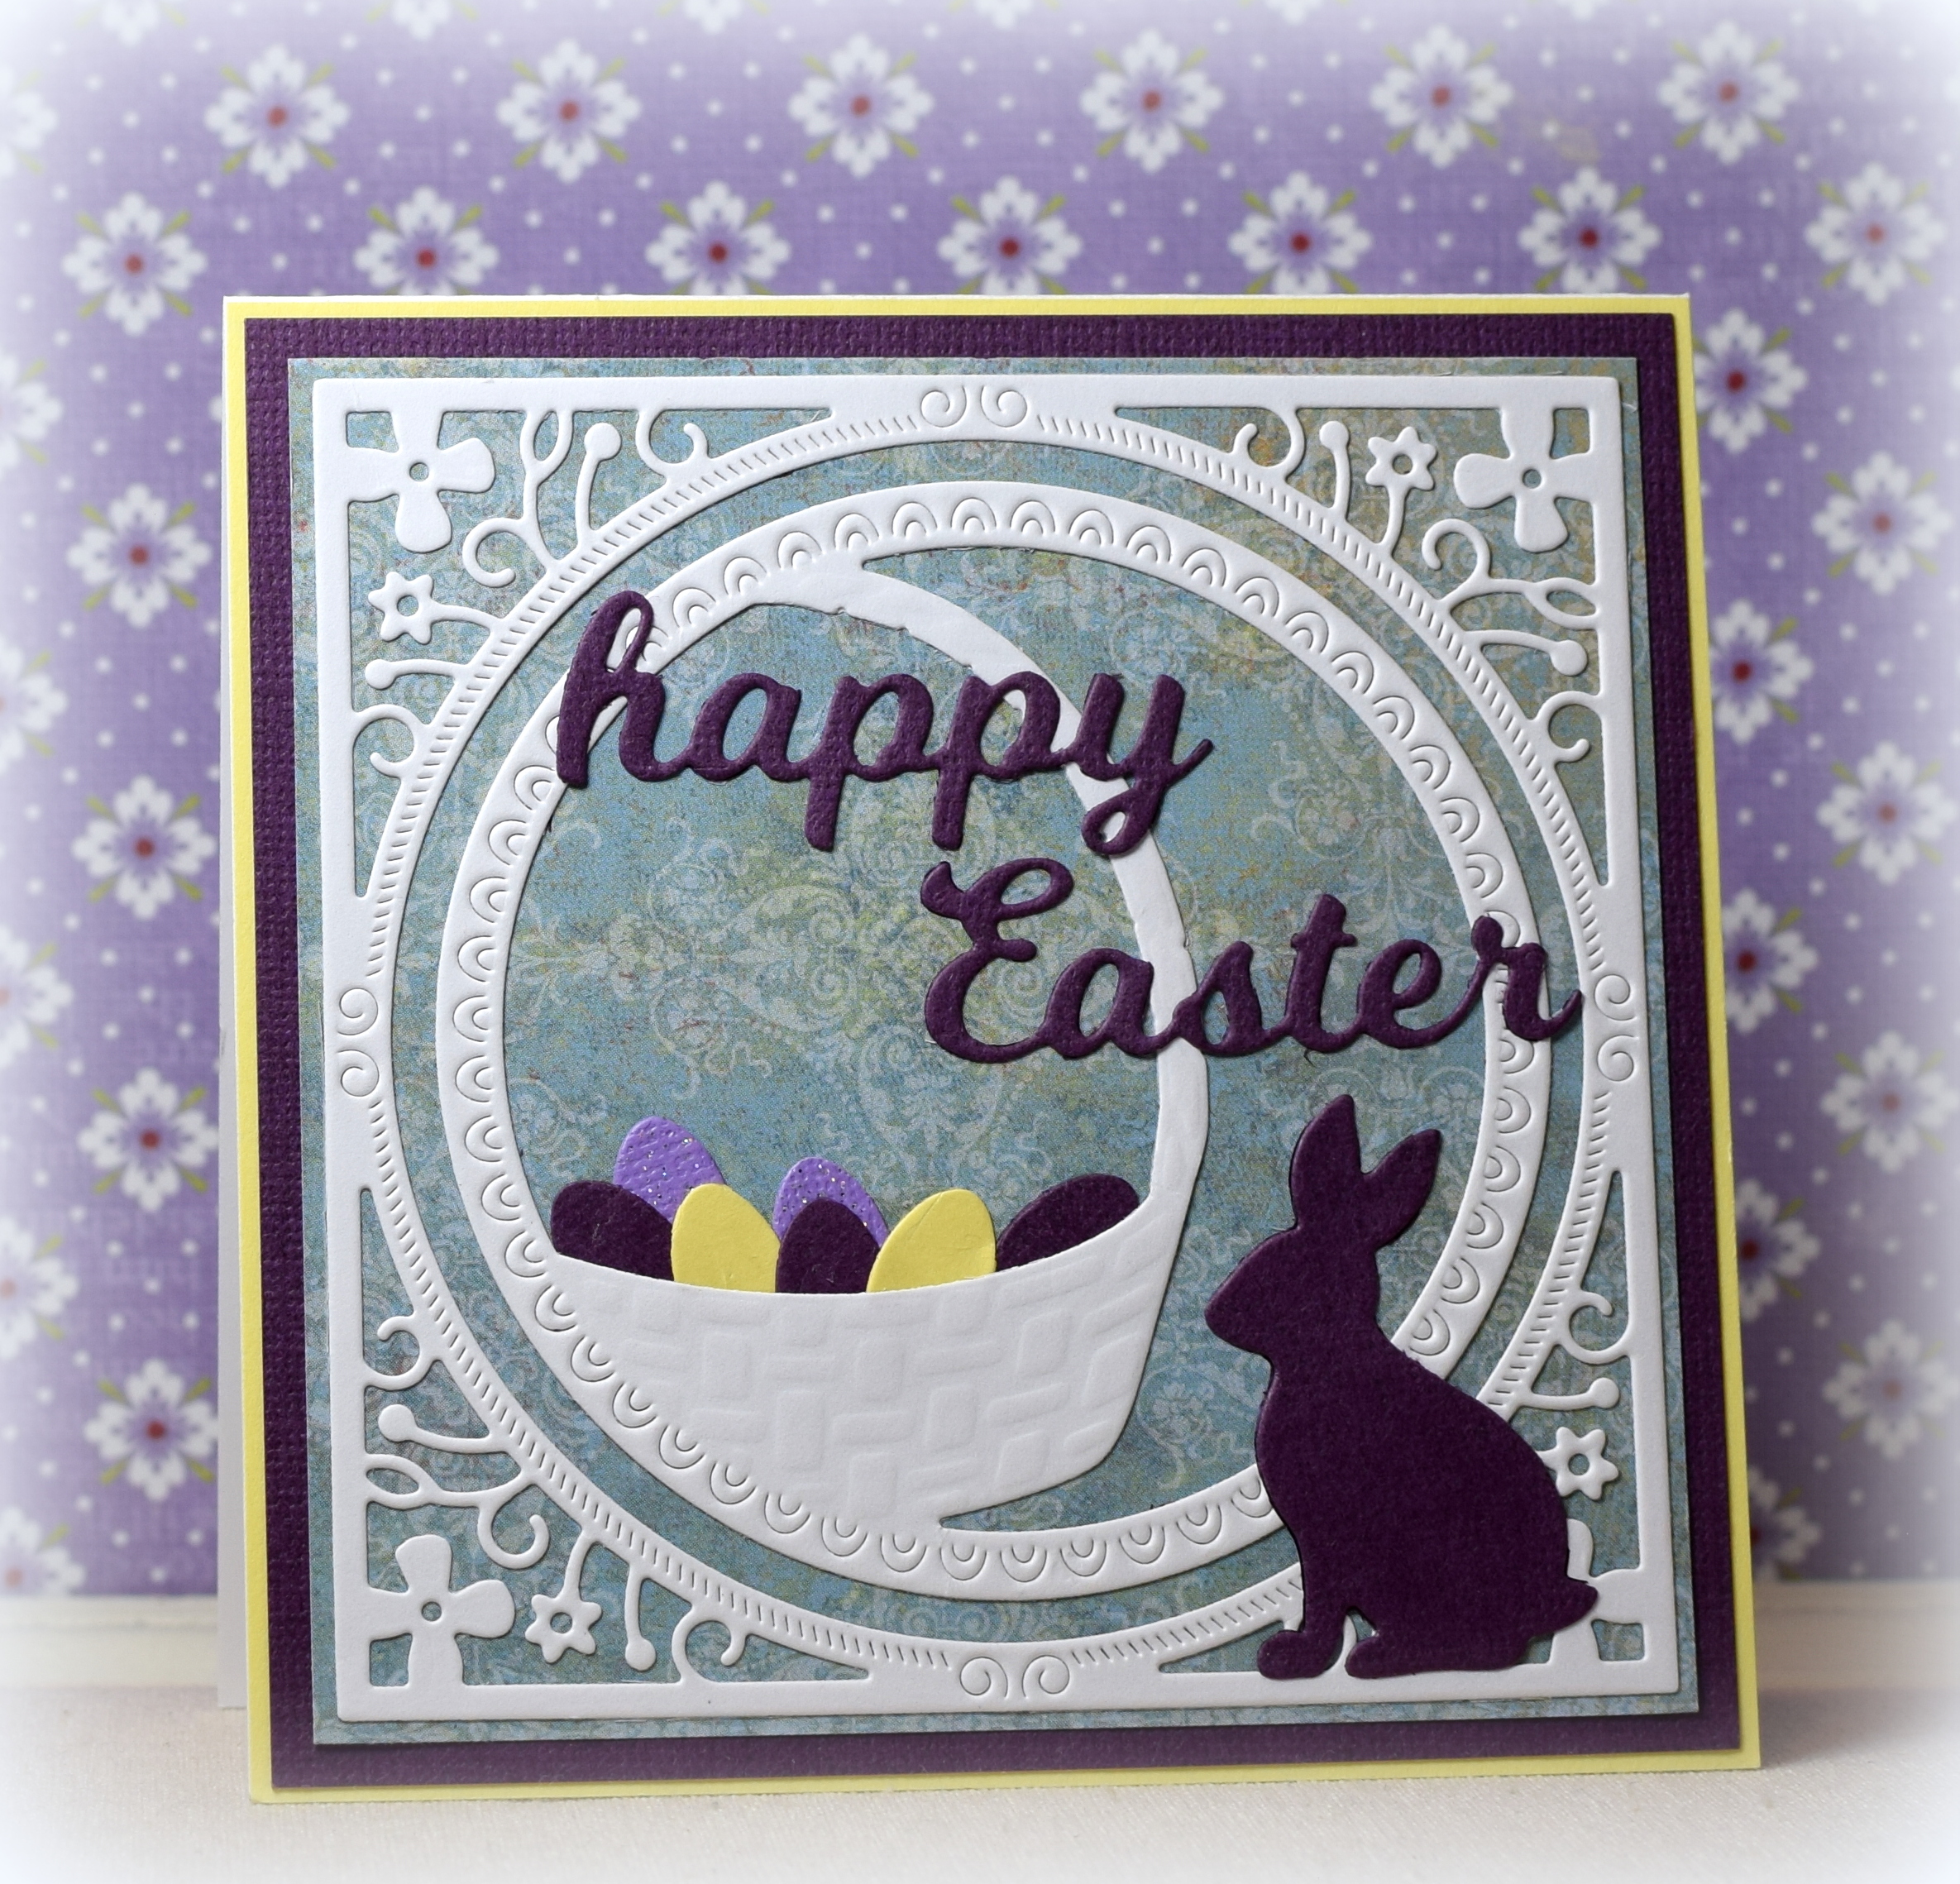
This simple card features the beautiful “Outline Floral Cross” wafer die from Simon Says Stamp (and an unbranded frame die). You may be able to see that the cross die cuts in two pieces, and the center cross can be removed so you can use each of the die cuts on its own or paired as I have done here. With no greeting on the front, it could be used for a variety of occasions (Easter, baptism, first communion, sympathy, etc.).

Thanks for checking out my card projects!

Happy Easter with Plaid Frame (And a Faux Embossed Design)

Happy Easter with Plaid Frame (And a Faux Embossed Design)

Two quick and easy cards that feature some pretty paper and die cuts.

For the first one…

The “frame” was created with one of the dies from the “Grand Ovals” set (LF-110) by Spellbinders cut from a rectangle. (Noticing in the photo here that I need to go back with a little Undo and straighten the frame!)

The paper used was “Easter Plaid” (#2036317) and a piece from the “Watercolor” card stock pack, both by The Paper Studio from Hobby Lobby.

The greeting was cut with the “Splendid Happy Easter” die from Poppy Stamps, and the bunny was from the “Bunny Trio” die set from Fun Stampers Journey.

And for the second one…

In the online holiday card making class I took last November, we created a faux embossed panel by stacking tone-on-tone die cuts, and I thought I’d create another one for Easter.

I used the “Happy Easter Die” (367-5) from Impression Obsession and a die from the “A2 Filigree Delight” set (S5-177) from Spellbinders. Each was cut (from heavy weight white card stock) and stacked 3 times and mounted on white

Thanks for checking out my card project!

This content uses referral links as described in the disclosure policy on my sidebar.

Happy Easter Wing Ding Card

Happy Easter Wing Ding Card

What’s a wing ding?! According to the Merriam-Webster dictionary, it’s “a wild, lively, or lavish party.” Creek Bank Creations came out with this fun interactive die set that creates a round card shape that rocks and swings; a wild party of a card – lol!

*

The Wing Ding Die set includes the pieces to create the round card base layers and the swinging mechanism. You also need a slide guide, foam (or pop dots), a small piece of acetate, and whatever else you need to decorate the card as you wish. (They sell various dies and stamp sets that could work with this card, or you can use what you have.)

For my card, I used a bunny (pre-colored) from the “Easter Clipart Set” by JoKavanaghDesigns that I found on Etsy. I sized the bunny to 2 inches and used my Silhouette software to trace, print and cut him out.

The clouds were from the Weather die set from Creek Bank Creations and were cut from label/sticker paper as I needed something super thin to prevent the swinging bunny from getting caught while he did his thing.

The grass was cut using a “Grass Border Punch” by Fiskars. The eggs were cut from the Silhouette file called “Eggs in Grass Border” (#121712) and were “filled” with various patterns I had previously loaded into my Silhouette library.

The greeting die is called “Splendid Happy Easter” (#2462) from Poppy Stamps. I used Gina K Designs Apple Mint and Powder Blue card stock as well as 110lb white.

Thanks for checking out my card project!

This content uses referral links as described in the disclosure policy on my sidebar.