Spinning Santa

Spinning Santa

Spinning Santa wDSCN7952.jpg

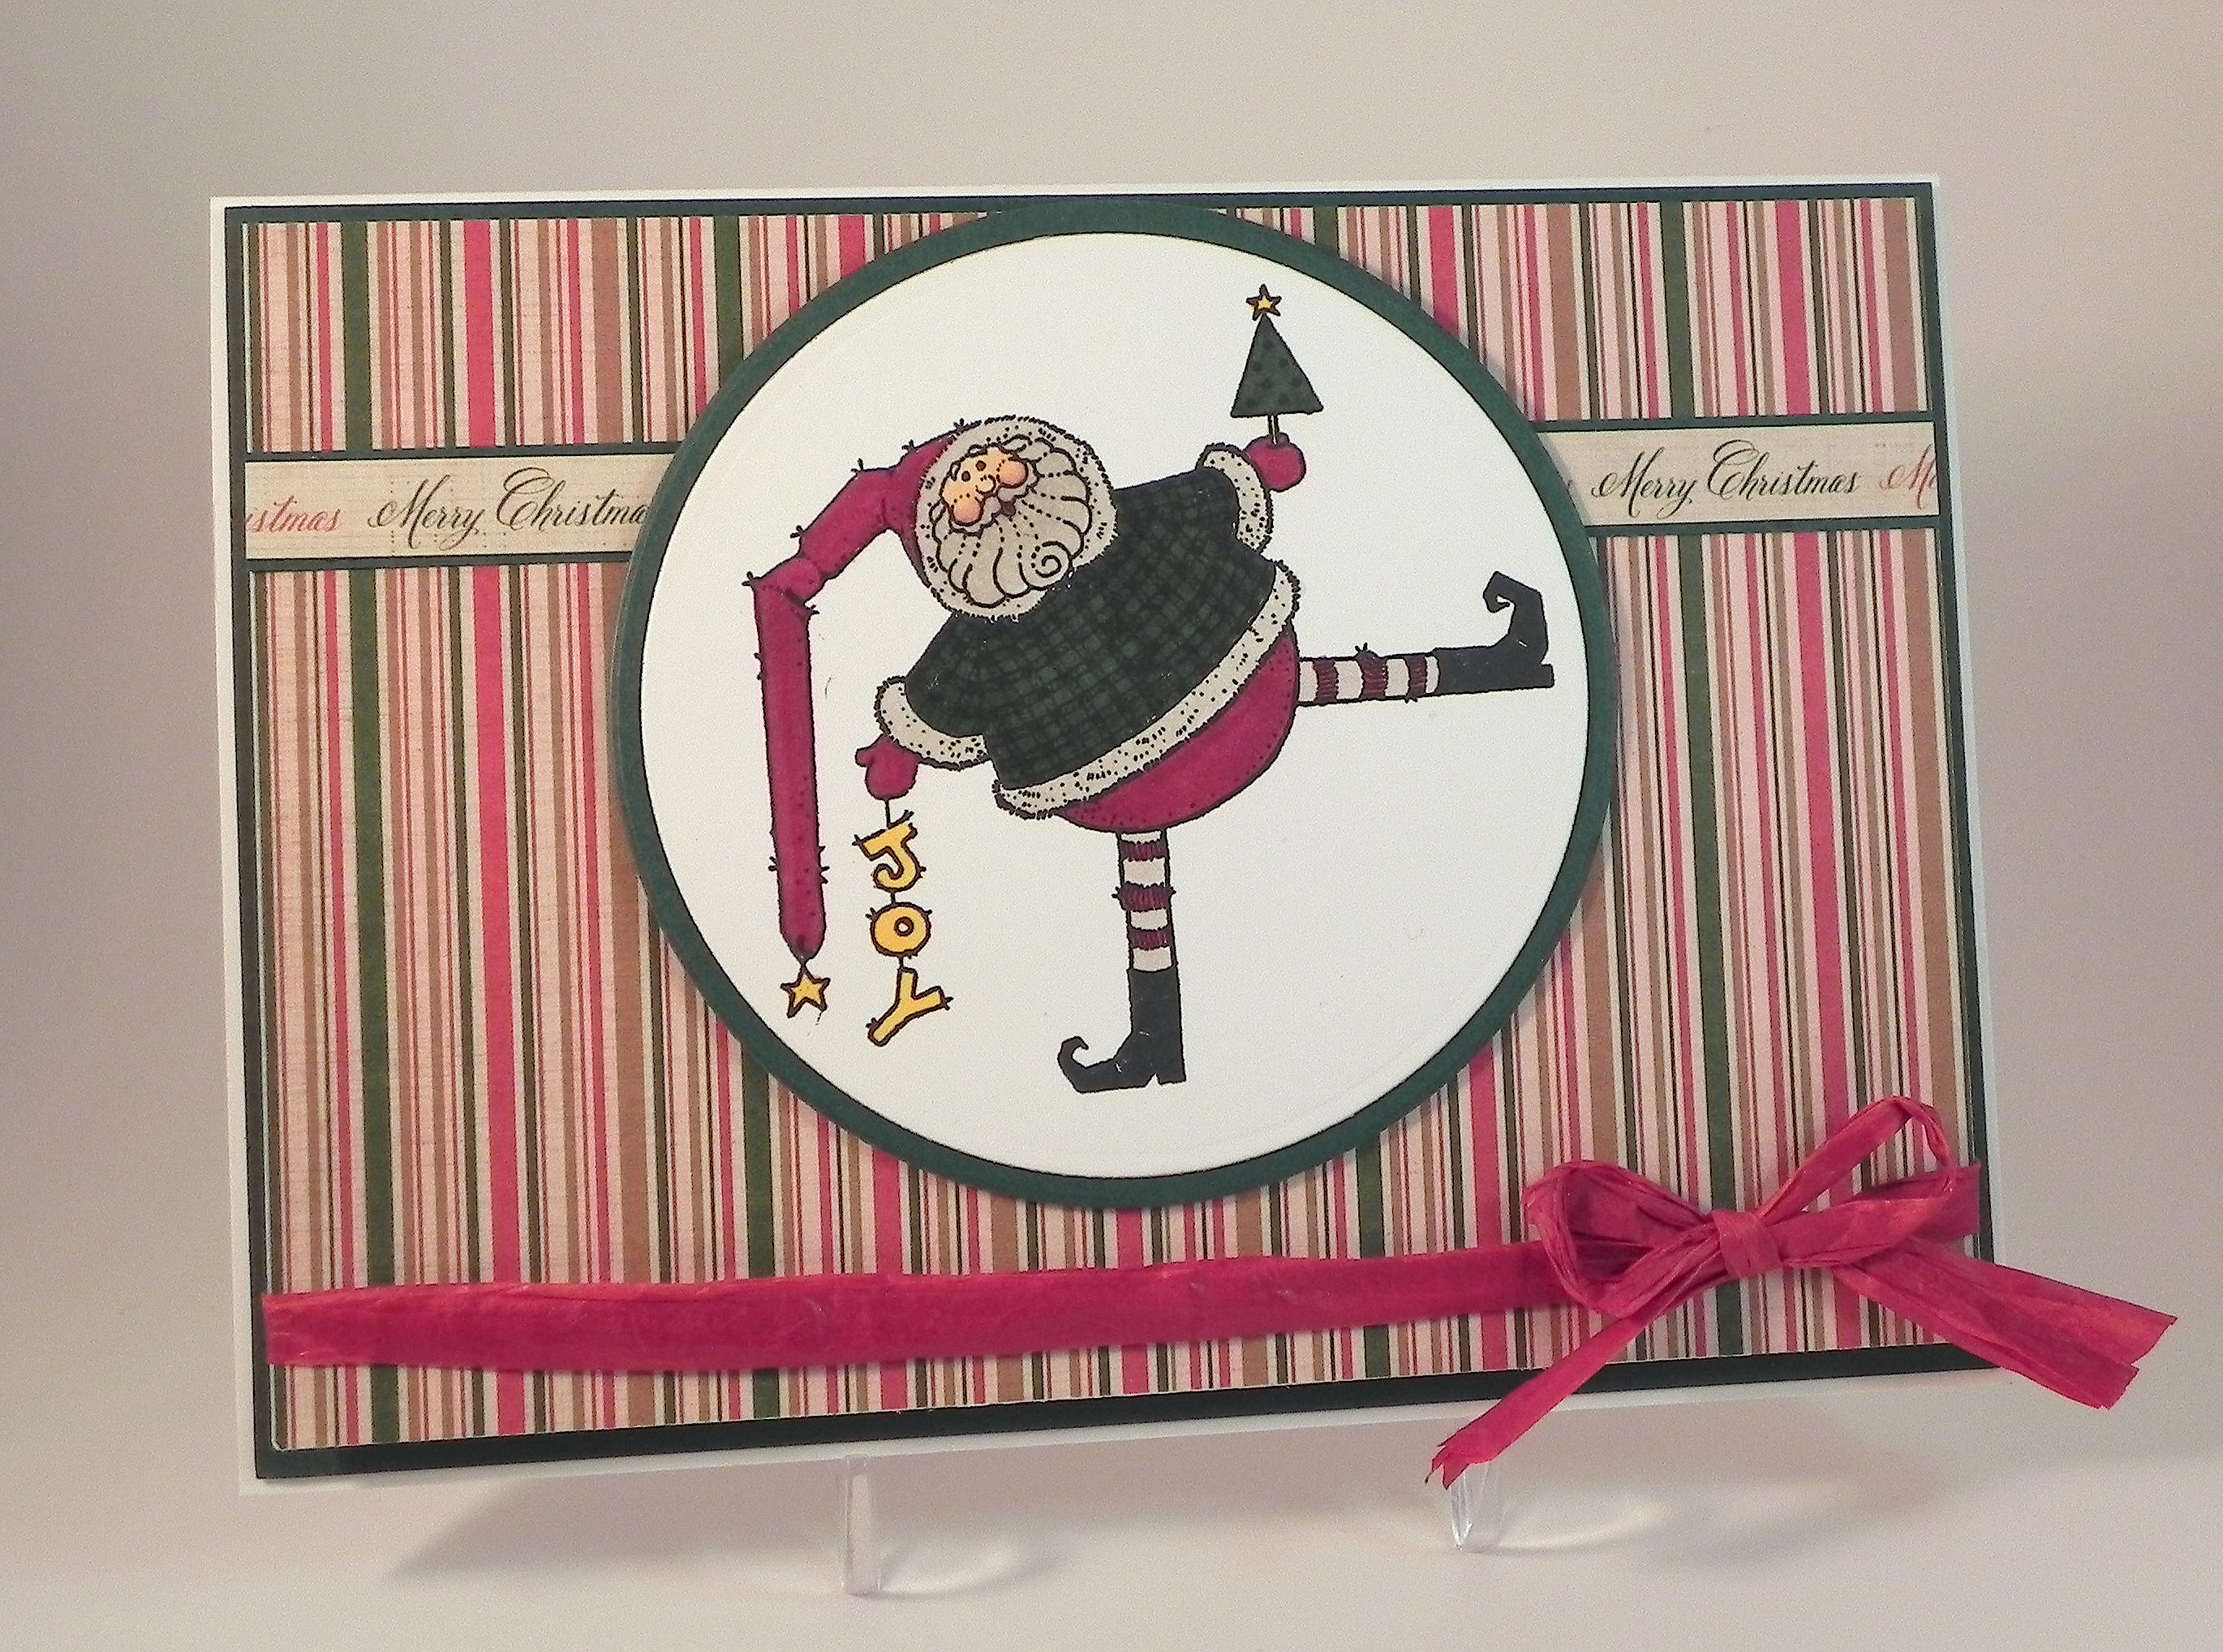
This adorable Santa stamp called “Santa Falling Off Roof” is by Uptown Rubber Stamps.  It just seemed to me like he needed to be “tumbling” so I created a penny slider/spinner card to allow him to “tumble” freely!

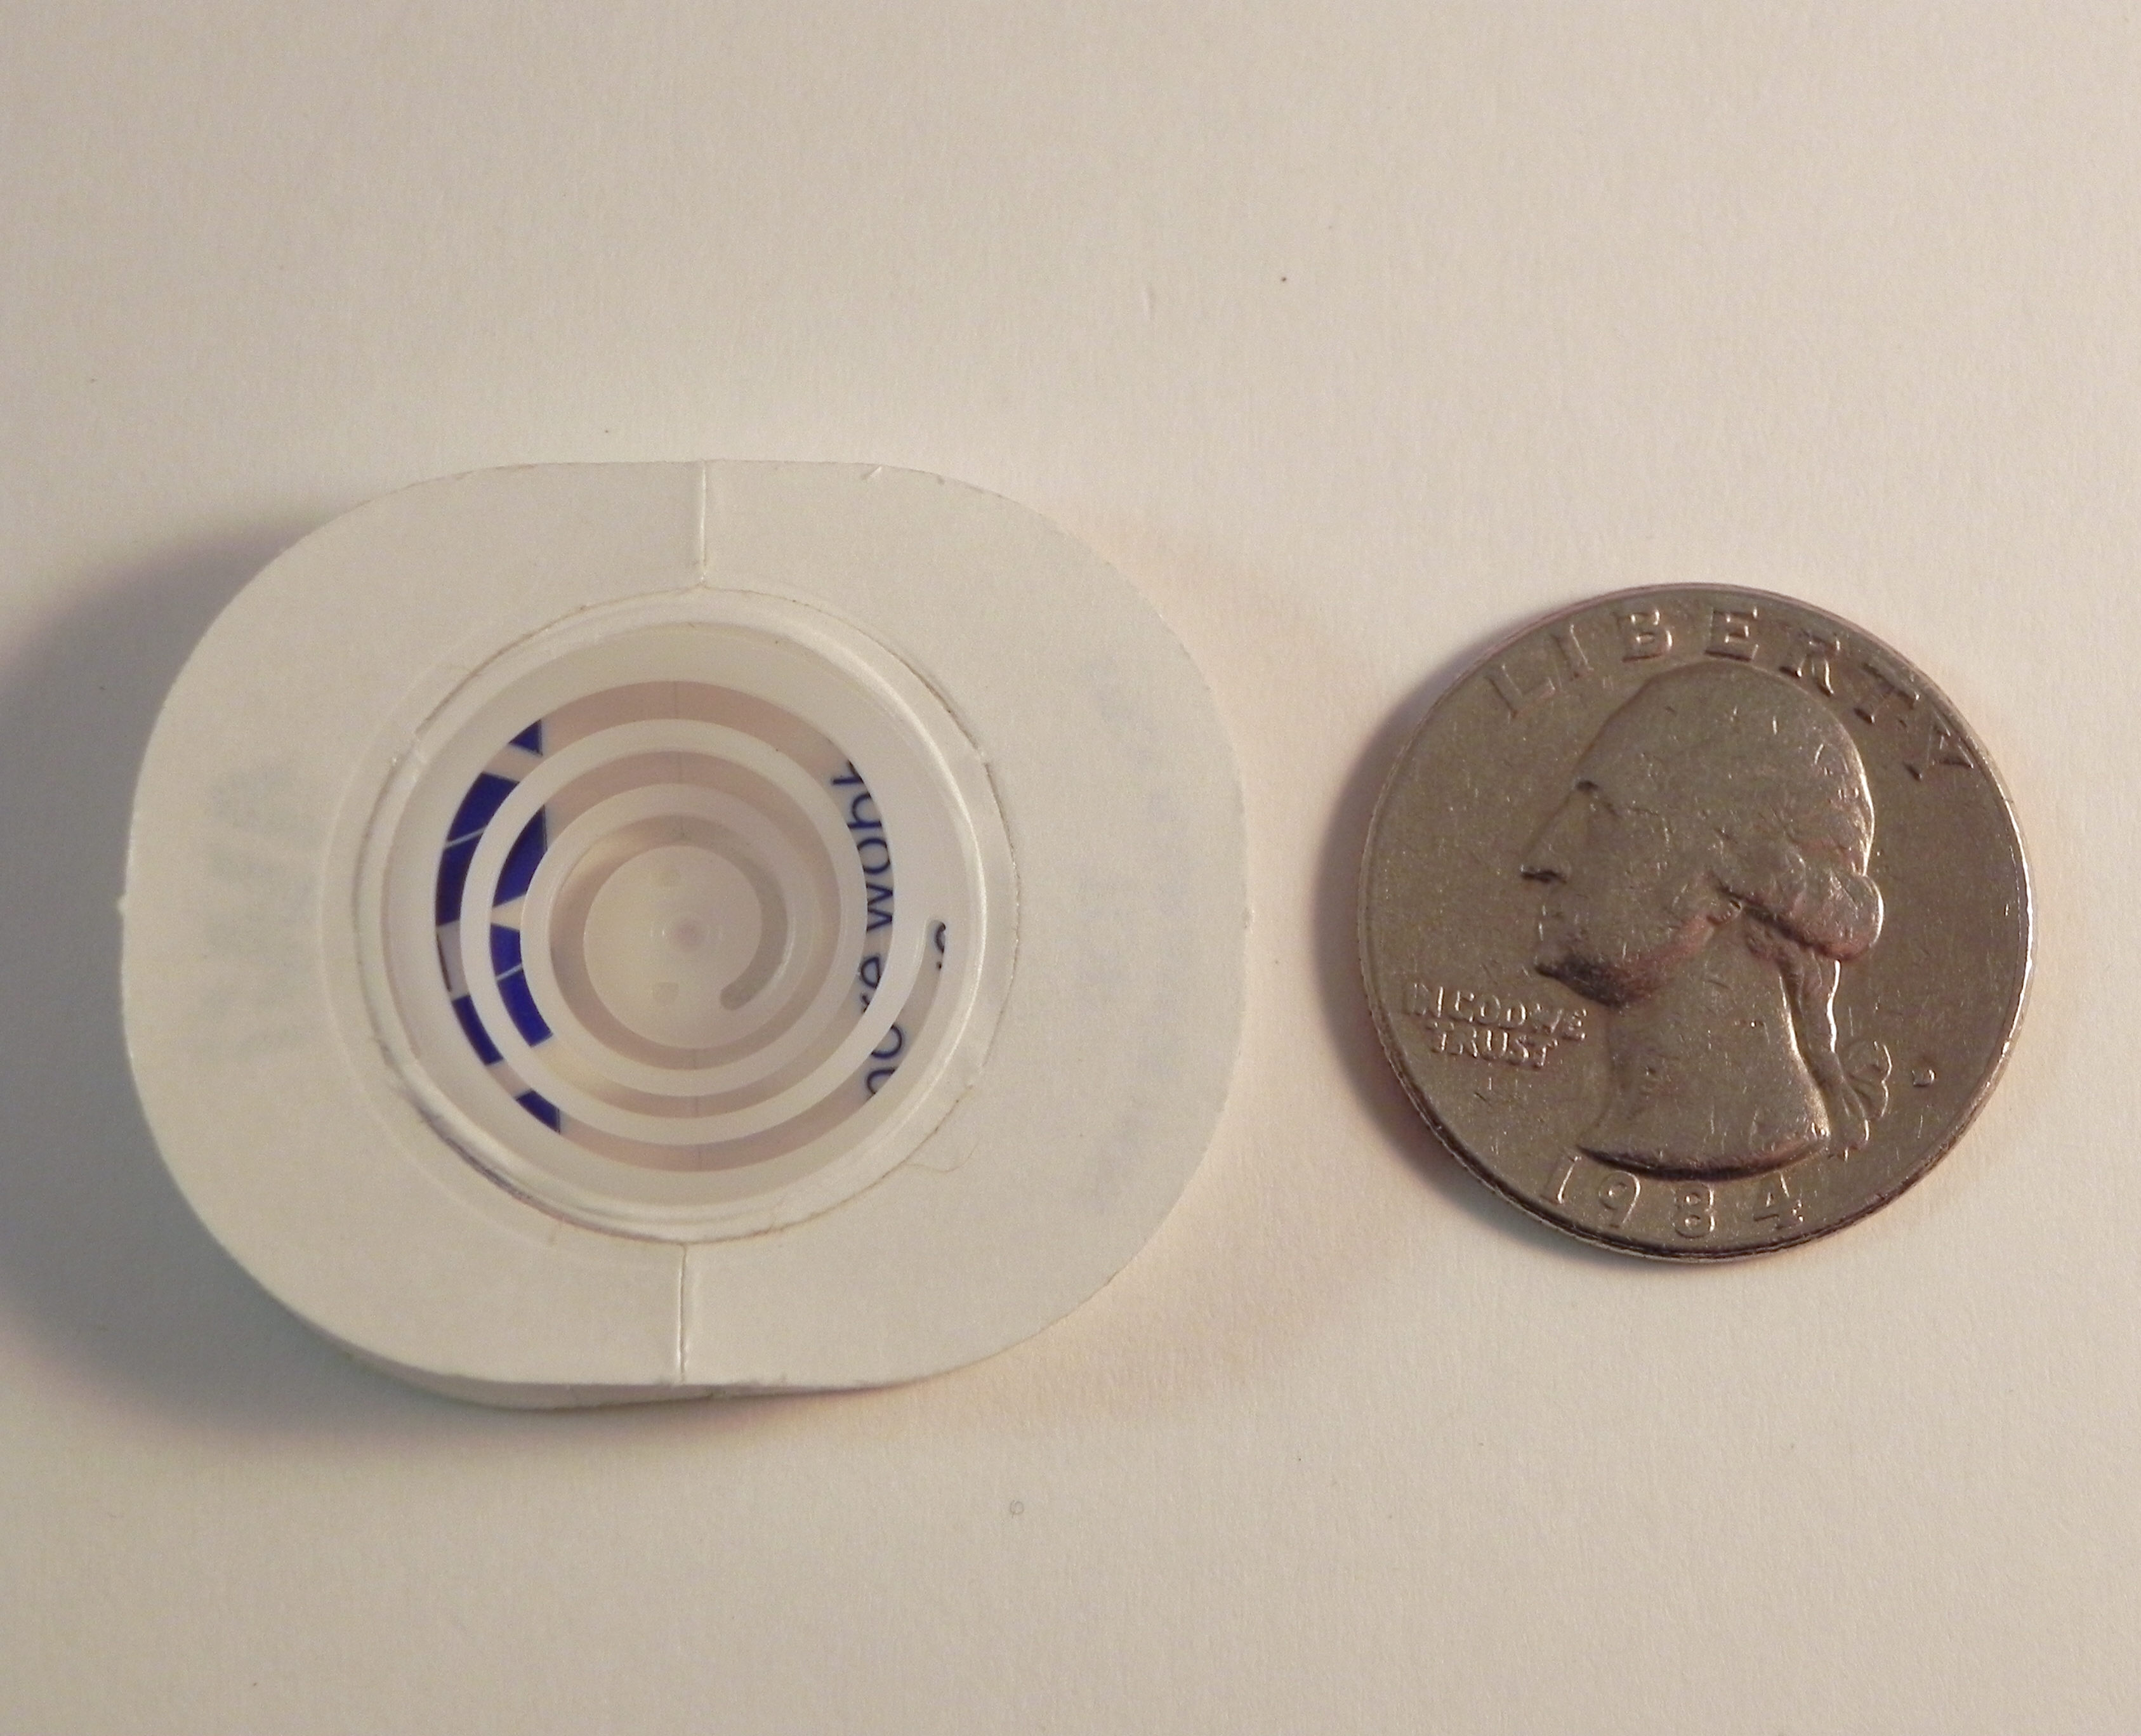
A penny slider or spinner card (I’ve seen them called both) has an element on the card that spins as it travels across the card.  It’s called a penny slider or spinner card because the spinning element is mounted on a “sandwich” of two pennies with a pop dot in the center which rolls across the card in a slot or channel that you create on the front of your card.

Spinning Santa

Click HERE to see a tutorial on how to create a penny slider or spinner card.

After I stamped and colored my image, I used two dies (the 7th and 8th from the outside) from the We R Memory Keepers Nesting Dies “Circles” set to cut out the image and the mat.  I used the smaller of the two long, skinny dies from the Spellbinders “A2 Matting Basics B”  set to cut the channel or slot across the middle of my card.  (It made a beautiful, clean looking cut, but it was slightly wider than I would have liked so I ended up using quarters instead of pennies to insure that the spinning element didn’t fall out.  I discovered later that using larger pop dots would also have fixed the problem.)  What I really like about this design is that with such a large spinning element, it is possible to display the card with the channel completely hidden from view when you are not “playing” with it.  (I created another penny slider card HERE where the channel is always visible.)

I colored the image with Copic Markers (R59, G29, E21, E04, W1, and Y17) .  The striped designer paper is called “Christmas Stripe” from the “A Christmas Story” line by Reminisce.  I mounted this panel on a piece of heavy weight card stock (before cutting the channel) to make it sturdier.  The strip of patterned paper that says “Merry Christmas” is actually the back of the bar code/label strip of a piece of paper called “Christmas Holly” from the same Reminisce line.  The mats are Gina K Christmas Pine.   Recollections heavy weight white was used for the card base.  I adhered the striped piece (that was removed to create the channel) to the card base directly behind the channel to make the channel less noticeable.   A piece of red raffia ribbon was added to finish it off.

This card is one of the cards being featured over at Die Cut Divas this month where I was invited to be a guest designer.  They have monthly challenges where all cards/projects must be made using at least one die cut or embossing folder, and this month’s challenge is Your Favourite Holiday.  (Click HERE to see all the challenge rules.)  Pop on over to Die Cut Divas and share your holiday projects.  I can’t wait to see what you create!

Thanks for checking out my card project!

This content uses referral links as described in the disclosure policy on my sidebar.

Embossed Snowman

Embossed Snowman

Embossed Snowman DSCN6057

This card (previously posted) is one of the cards being featured over at Die Cut Divas this month where I was invited to be a guest designer.  They have monthly challenges where all cards/projects must be made using at least one die cut or embossing folder.  This month’s challenge is Your Favourite Holiday. (Click HERE to see all the challenge rules.)

The snowman on this card was made with the Sizzix Snowman & Hat Bigz die which also came with a bonus embossing folder that fits the die.    The snowman was cut from Gina K Pure Ivory card stock, and the hat was cut from a scrap of textured black DCWV card stock.  The arms were cut freehand from a scrap of black.  Ribbon and gems were added to finish him off.

The background panel is Gina K Kraft card stock embossed with the Darice Snowflake Swirl folder.  The frame was cut using my trimmer from a piece of Pebbles “Mary” card stock from the Walnut Grove collection.  The Card base is Gina K Pure Ivory.

The greeting stamp is from the Gina K Designs “Winter Cheer” set and was stamped with versamark and heat embossed with gina k black embossing powder on kraft card stock and matted on pure ivory. A scrap of ribbon, jute and a glittered, wooden mini snowflake ornament from Michaels were added to the greeting banner.

This card was originally made for the Perfectly Rustics Challenge No. 36 – Embossing – where we were to use wet or dry embossing on our project. I used both.  (http://perfectlyrustics.com/2014/11/17/prdc-36-embossing/)

Pop on over  to Die Cut Divas and check out their current challenge – Your Favourite Holiday.

Thanks for checking out my card project!

This content uses referral links as described in the disclosure policy on my sidebar.

Wobble Head Santa

Wobble Head Santa

Wobble Head Santa zDSCN7362

An earlier version of this card was originally posted in my StampTV Gallery.  (Sadly, this site is no longer active.)

The Santa I used is from an svg set called “Mr. and Mrs. Country Claus” which I have had in my file for a while. My records show it was purchased and downloaded from “Treasure Box Designs” although it was either discontinued or I am mistaken in the artist/company since it is no longer there on their site. (If I am giving credit to the wrong artist/company, I am sorry.)

I cut the pieces with my Silhouette, inked all the edges with Tim Holtz Walnut Stain distress ink, and pieced him together.  To create a bobble-head effect, I mounted Santa’s head on a spring.  (Excuse the poor quality of the GIF file below.  I cannot include videos here in my blog post but wanted to show the movement.)

Wobble Head Santa

The spring is called an “Action Wobble Spring” and is a plastic spring with adhesive on both sides so it sticks to your card project and to the element you want to wobble.  (I got these on Amazon.com HERE.) I really love using these springs, but as you can see in the photo below, the adhesive panels are fairly large so your element needs to be big enough to cover the spring.  (They now have mini ones for smaller elements.)

wDSCN7839  wDSCN7842

The background paper is Pine Green Plaid by Paper Pizazz mounted on a Gina K Cranberry Tart card base.  The red for Santa’s clothes is Burgundy & Gold Crackle Paper by Colorbok.  His sack was made with Recollections burlap scrapbook paper.  Recollections gold paper was used for the gold elements.  (My original card had gold glitter paper, but I it was difficult to cut, so I switched to a flat gold paper for this card.)  The other pieces were cut from a piece of a manilla file folder and scraps of green, black and white from my scrap box.

Thanks for checking out my card project!

This content uses referral links as described in the disclosure policy on my sidebar.

Decorating the Tree

Decorating the Tree

Decorating the Tree DSCN6521

This card is being entered in the Mod Squad Challenge – Frosty the Snowman – where the theme is snowmen. (Sadly, this site is no longer active.)

This card is also being entered in the Perfectly Rustics Design Challenge No. 37 – Sentiment (Not Birthday). The focus of this challenge is the sentiment on the card, but NO HAPPY BIRTHDAY sentiments are to be used in this challenge!  They want us to think outside of the standard (most commonly used sentiment) and come up with something different than Happy Birthday. The “Merry and Bright” sentiment was chosen to go with the festive lights for the tree. (http://perfectlyrustics.com/2014/12/01/prdc-37-sentiment-not-birthday/)

This card is also being entered in the Simon Says Stamp Wednesday Challenge – Christmas/Holidays – where we are to create a holiday themed project.  (http://www.simonsaysstampblog.com/wednesdaychallenge/simon-says-christmas/)

The stamps used for this project were from the Gina K Designs “Winter Cheer” and “Christmas Joy” stamp sets.  The card base is Gina K kraft, and the green is from the My Mind’s Eye “Signature Christmas” 6×6 designer paper pad.  The printed card stock was from the DCWV “Storybook Christmas” 6×6 paper stack.  I stamped the snowmen images on the printed background panel with Memento tuxedo black ink.  I also stamped the snowmen onto white card stock , colored them with Copic Markers R89, Y17, YR18, C1 and T2 and went over their bodies with a clear Wink of Stella glitter pen (which you can’t really see in the photo).  I then cut them out and adhered them to the background paper directly over the other stamped images.  (Since I had stamped the snowmen directly on the background panel, I didn’t need to worry about cutting around their thin arms.)  The tree is a Silhouette element called “Echo Park Christmas Tree” by Echo Park (design id # 17363).  The string of mini “lights” was from AC Moore, with the decorations for the mini Christmas trees.  The greeting was stamped with versamark ink and heat embossed with white embossing powder.  The edges of the brown and green card stock were all inked with Gina K dark chocolate ink.

Thanks for checking out my card project!

This content uses referral links as described in the disclosure policy on my sidebar.

Pleated Snowman

Pleated Snowman

Pleated Snowman DSCN6588

This card is being entered in the Mod Squad Challenge – Frosty the Snowman – where the theme is snowmen.   (Sadly, this site is no longer active.)

All the printed paper for this card came from the My Mind’s Eys “Signature Christmas” 6×6 designer paper pad, and the card base was Gina K moonlit fog.  The greeting stamp was from the Gina K Designs “Peace and Joy” set and was stamped with Gina K moonlit fog ink.

To make the pleated panel for his head, I scored (and scored and scored!) a long strip of card stock and then folded it back and forth like a fan.  Once the strip was folded, I glued the ends together (which looked like a tube or cylinder at this point).  Then I gently flattened it which formed the shape you see on the card.  I glued that onto the card base behind the top panel with the circle cut-out.  (The strip I started with had a width that was a little more than 1/2 the size of my circle cut-out or a little more than the radius of the circle.  For example, if the circle is 2 inches across, you want the strip to be a little more than 1 inch wide.  My strip was 12 inches long which I made by gluing two 6 inch strips together.  The longer the strip’s length, the tighter your pleats will be when it is flattened.)  I adhered the top panel to the card base with several layers of foam tape around the all the edges  (enough so the top panel could lie flat over the pleated panel).

The hat, scarf and frame around the circle were cut with my Silhouette.  The piece containing the greeting was stamped on the circle scrap that was cut out of the card front.  Originally, I intended to cut a rectangular panel, got the top and bottom trimmed, and realized it looked like it could be the top of his body, so I hand-cut a mat and used it that way.

Thanks for checking out my card project!

This content uses referral links as described in the disclosure policy on my sidebar.